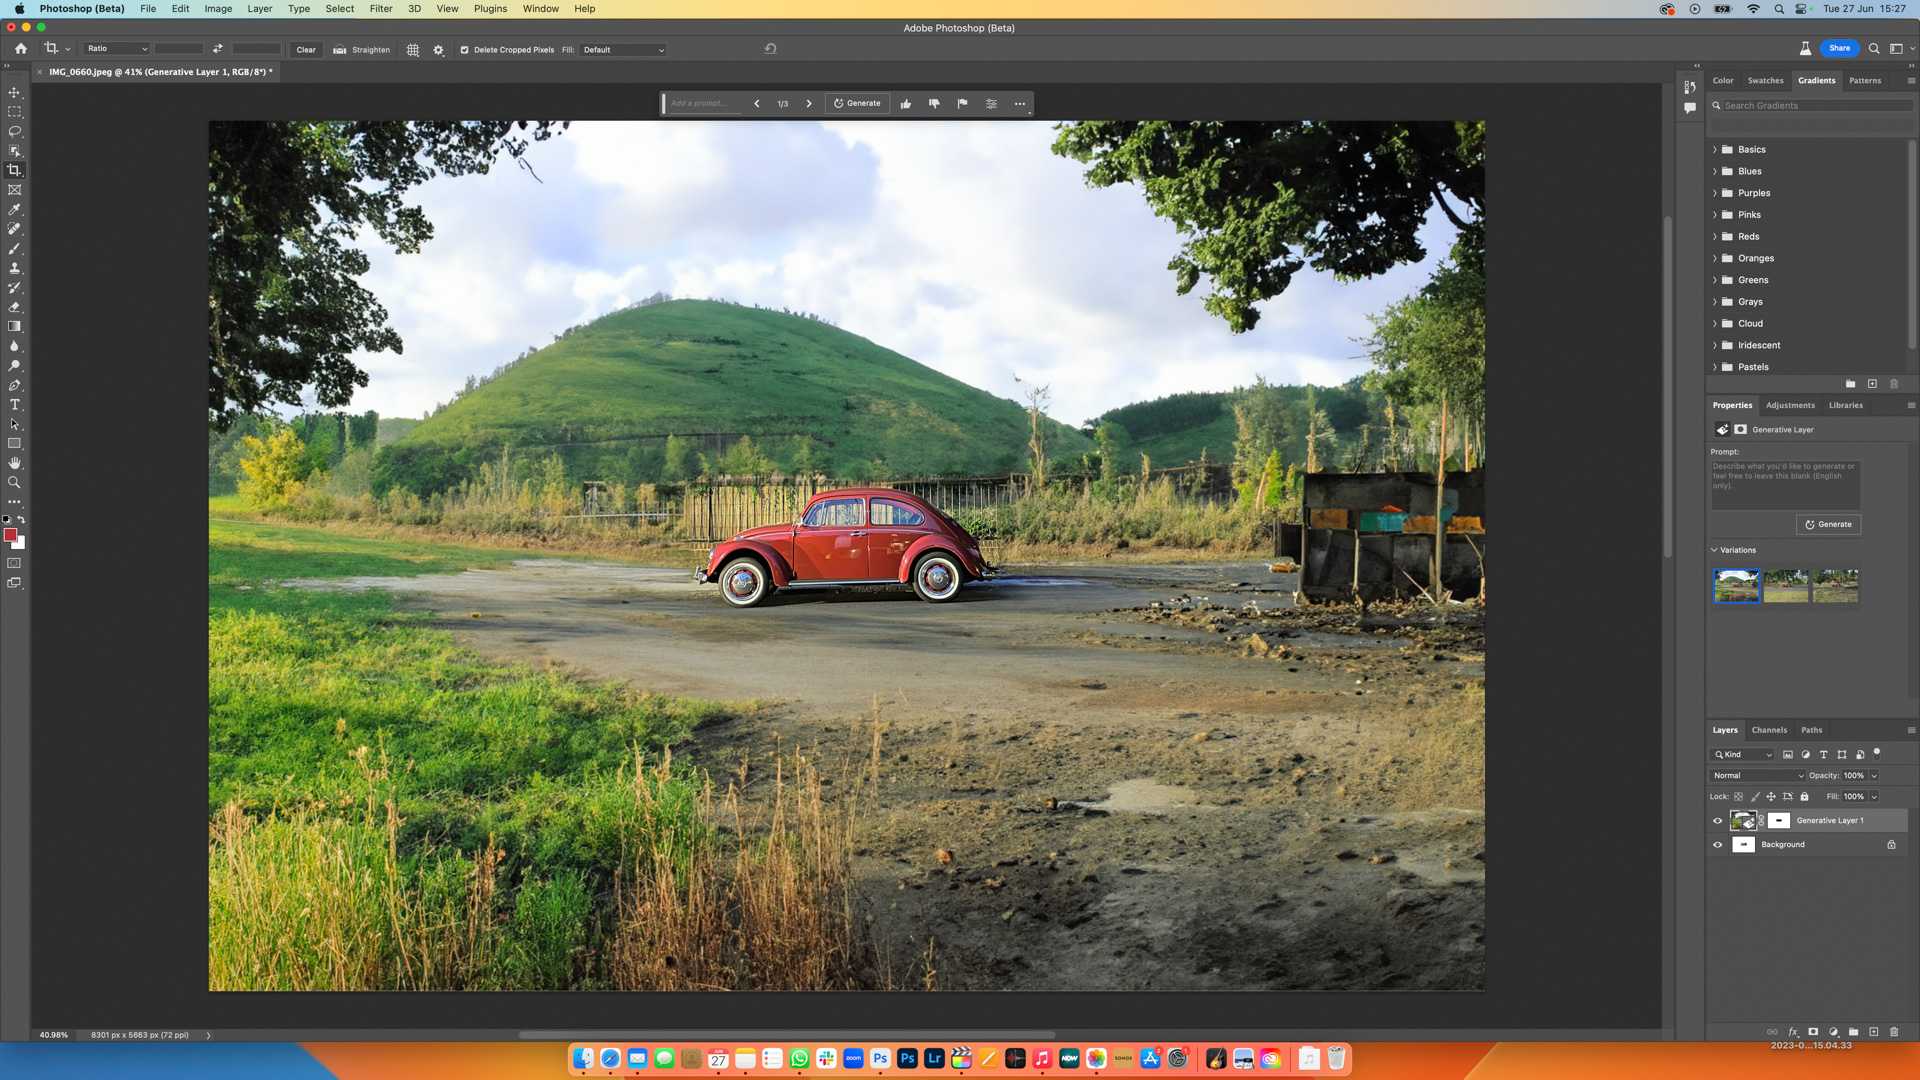
You might be more familiar with AI’s ability to write like a human with applications like ChatGPT. But artificial intelligence can also be used for creating and editing images.
There are lots of AI tools already capable of doing this, and here are the best AI art generators for 2023. But now Adobe has added a new function called Generative Fill to the latest Photoshop beta, more people than ever can experiment with AI-powered artwork and image editing.
Powered by Adobe Firefly, the Generative Fill function is fairly primitive for now, but in the right hands can already be used to make impressive changes to your photographs. All you have to do is select a portion of the image, type what you want Photoshop to do, and the AI will do the rest. It’s even possible to leave the prompt box blank, hit the Generate button and leave Photoshop to do whatever it likes.
This doesn’t mean the AI will subtly adjust the contrast, exposure and white balance to make your photos pop. It’s a little more heavy-handed than that, and will instead add objects into the image, take others away, change the background, and even attempt to virtually zoom out, filling it with whatever the AI thinks might have surrounded your original photo.
Instead of scraping the web, Generative Fill uses an AI model trained on Adobe Stock imagery, as well as content in the public domain and openly licensed work. This means the objects it adds into your work can feel a bit generic. Adding a commercial airliner or a recognisable car to the background of a photo is tricky, often resulting in the blurred mess of a child trying to draw a recent dream.
That said, there are moments when Generative Fill truly impresses with its ability to subtly add objects to your photographs, all while taking the background, lighting and shadows into account.
Steps for how to use Adobe Photoshop’s Generative Fill
- Create a Creative Cloud account
- Download the Photoshop beta
- Open a new image or import one
- Write prompts to control Generative Fill
- Learn how to adjust what Generative Fill creates
Tools and requirements
- An Adobe Creative Cloud account
- Photoshop beta
Step by step guide for how to use Adobe Photoshop’s Generative Fill
1. Create a Creative Cloud account
If you don’t yet have Photoshop, head over to Adobe.com and create a Creative Cloud account. Different subscription options are available, with Photoshop starting at £9.98 a month when bundled with Adobe Lightroom and 20GB of cloud storage.
A free seven-day trial is also available, and each package includes access to Photoshop applications for desktops, smartphones and iPad.
2. Download and install the Photoshop beta from Creative Cloud
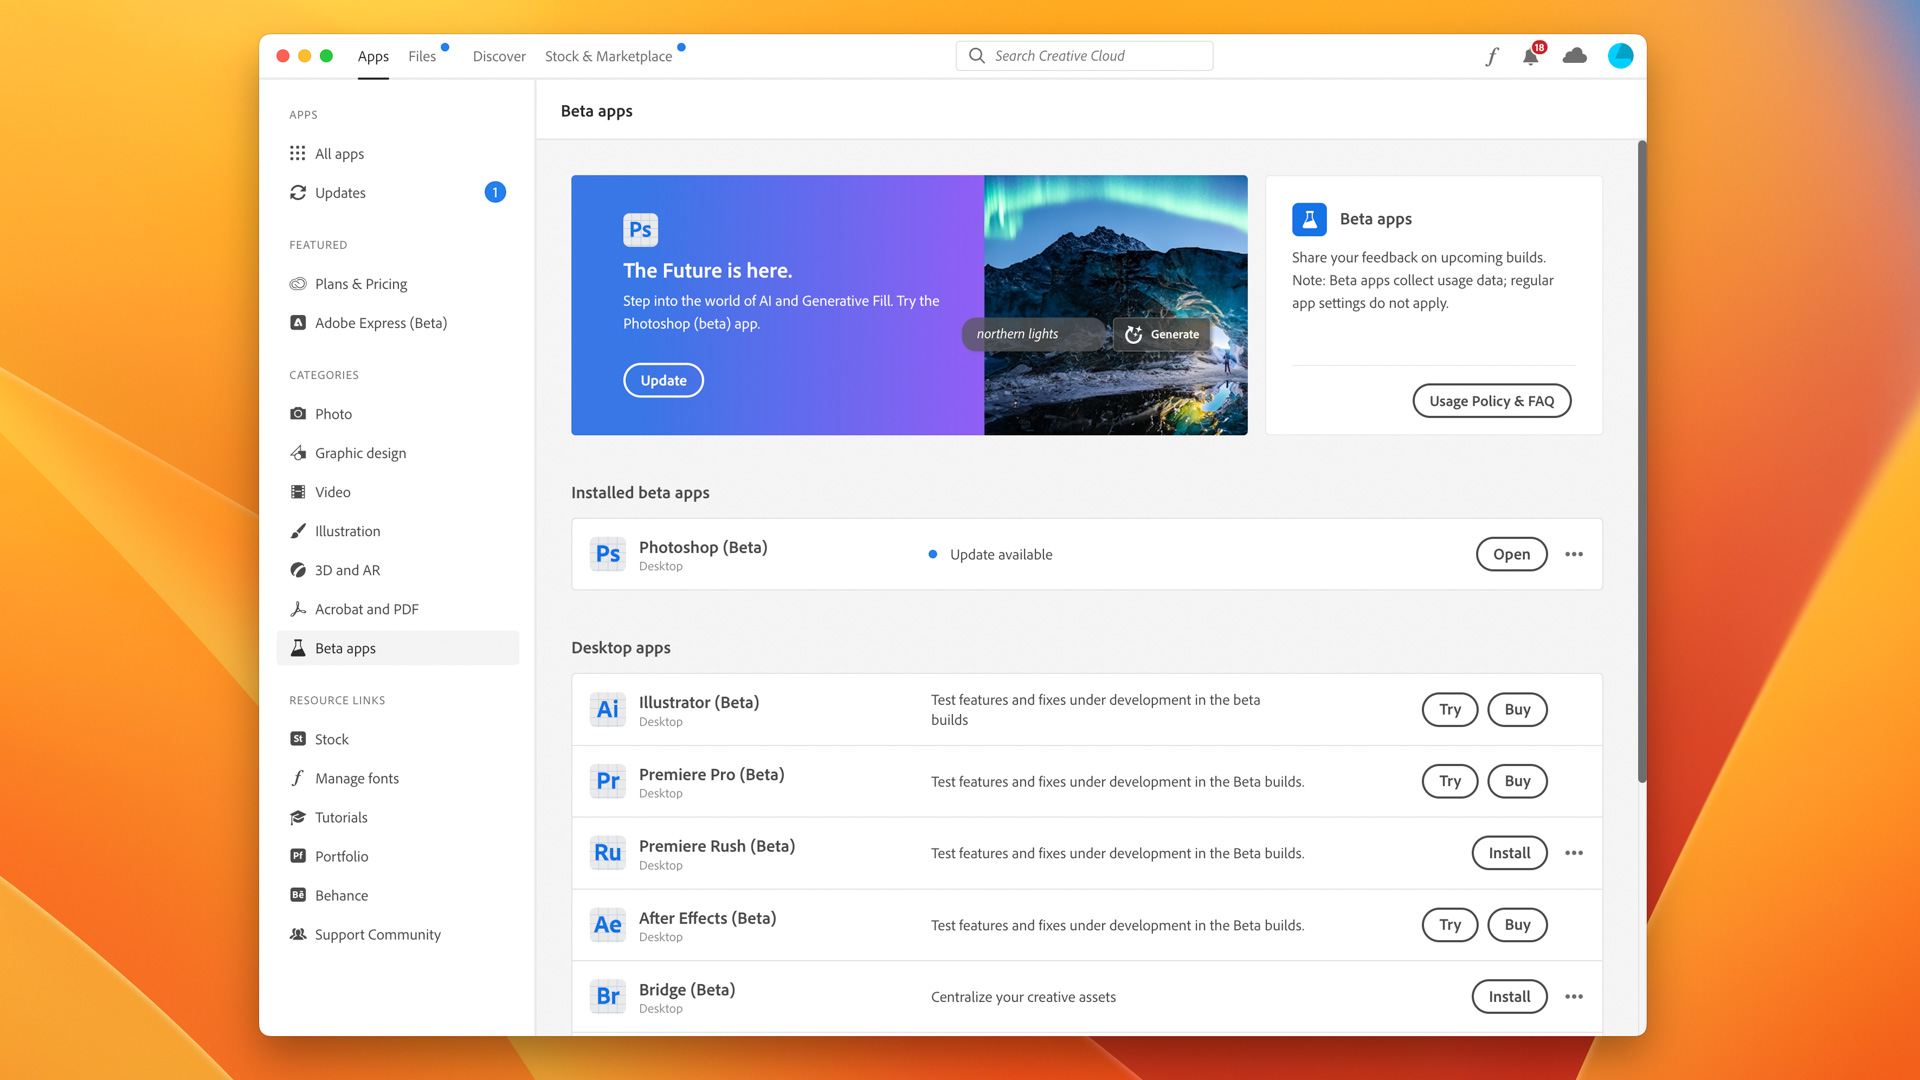
With your account made, you can access Adobe applications via the Creative Cloud download app. You can download the regular version of Photoshop, but for Generative Fill you’ll need the beta. Click on ‘Beta apps’ on the left-hand side, then find Photoshop (beta) and click ‘Install’.
Installations are handled within the Creative Cloud app, with the download time depending on your internet speed. Adobe applications are fairly large, so make sure you have enough space on your computer before starting the download process.
3. Open Photoshop (beta) and create a new project
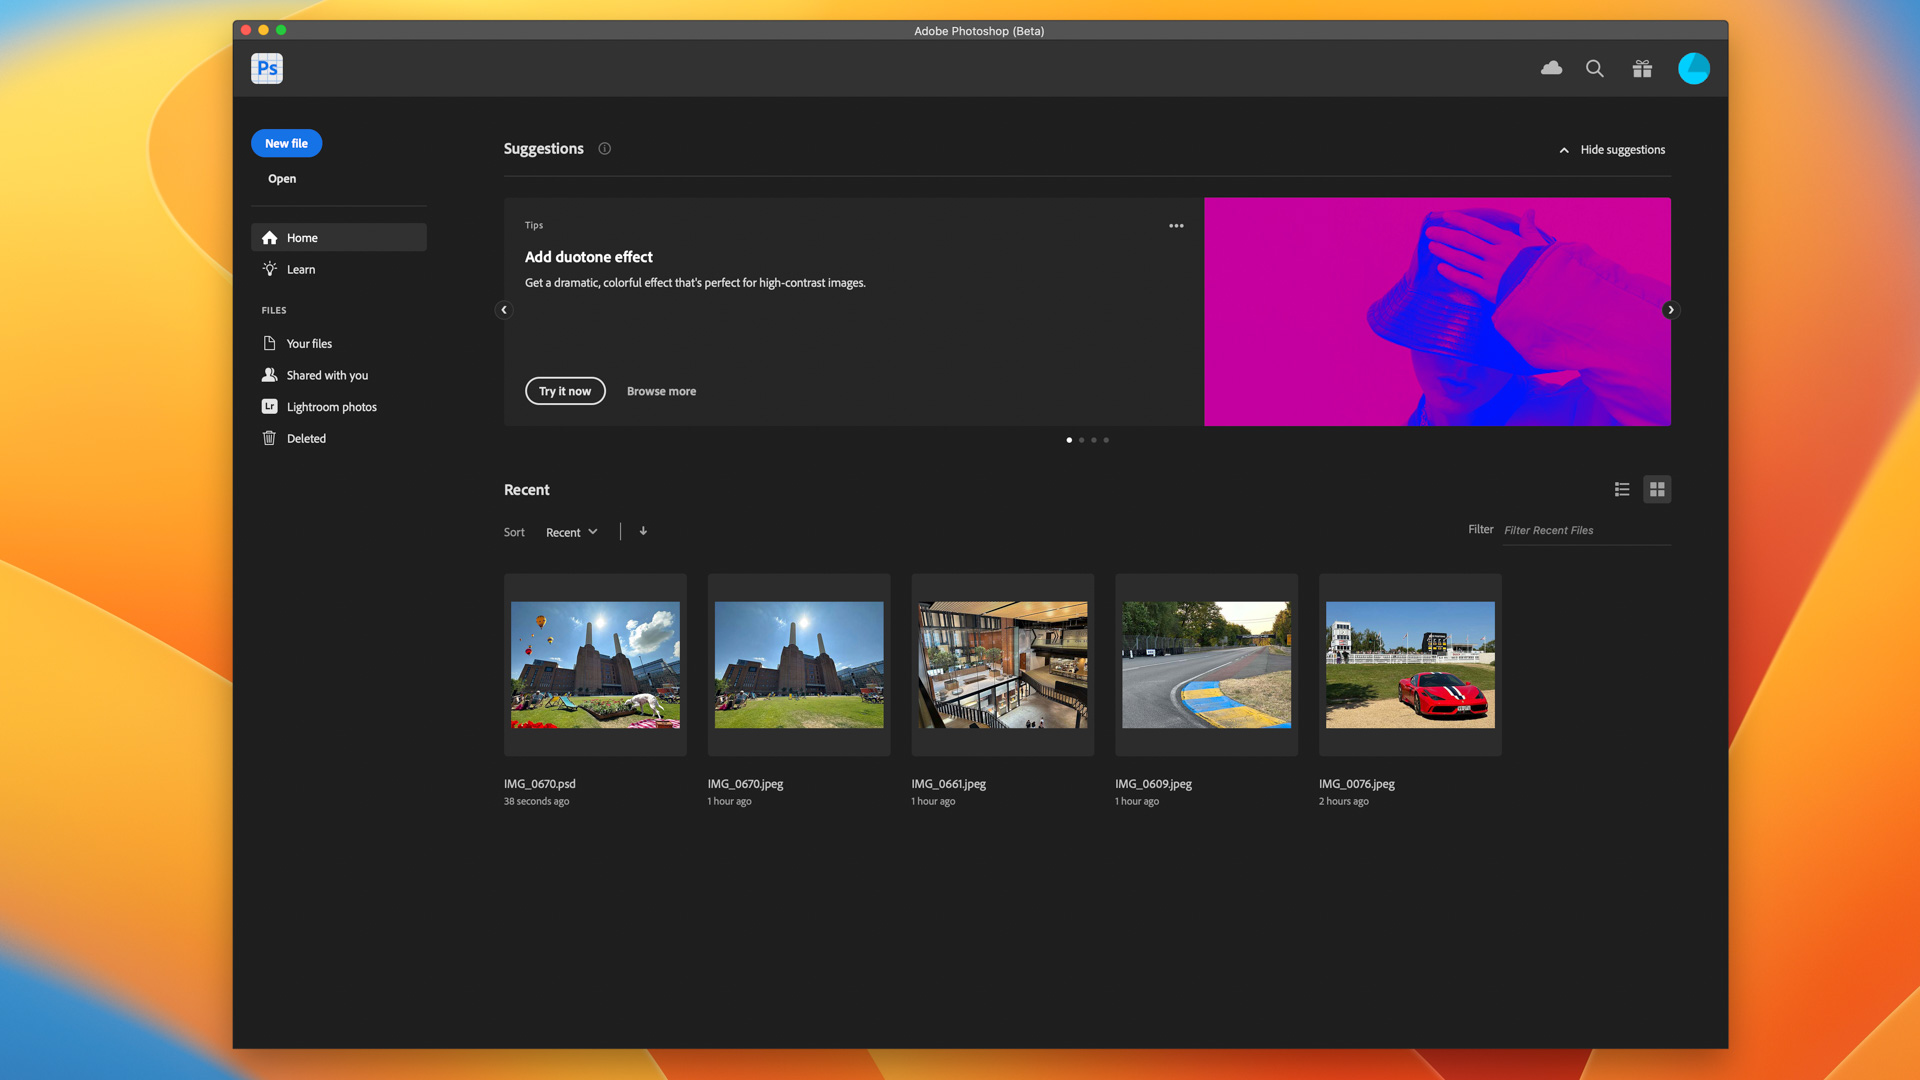
Once downloaded and installed, open Photoshop (beta) and either click New File to start with a blank canvas, or drag and drop an existing image into the application window. For this demonstration we’ll be using a couple of different photographs, both taken recently with an iPhone and not previously edited in any way.
Both have a good amount of clear space for objects to be inserted, and both offer the challenges of sunlight, shadows, reflections and complex textures like grass and tarmac. As you experiment with Generative Fill, you’ll find that environments like this work well, while the AI struggles to fully understand more complex images.
4. Select an area with the Marquee or Lasso tool
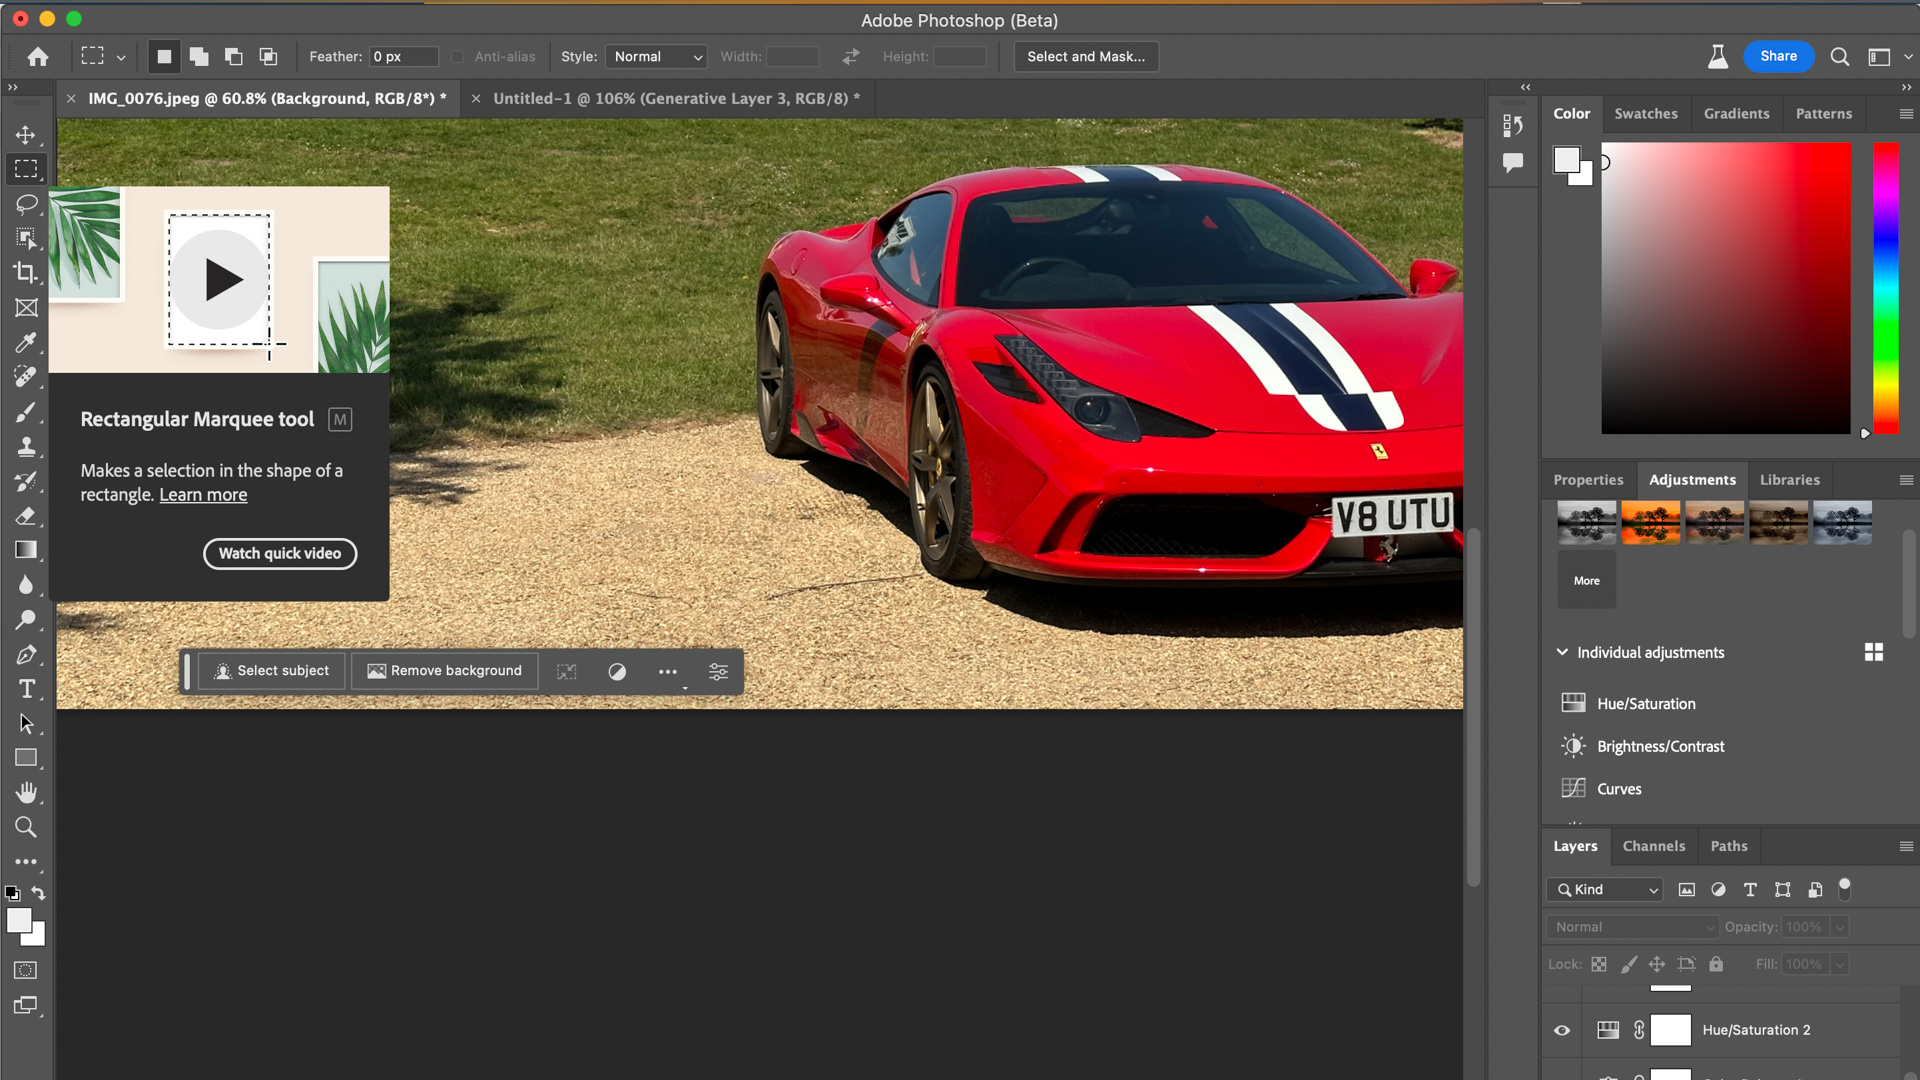
Both are on the left side of the screen. The Marquee tool lets you make a perfect square or rectangular selection, while the Lasso tool lets you create a selection of any shape.
When making your selection it is best to include a bit of the surrounding area. Generative Fill struggles when there’s no context to your selection – such as when selecting an area of perfectly blue sky – and performs better when some of the neighbouring grass, gravel or fencing is included. We found this also helps to give the AI a sense of scale, especially when people are included in the selection.
5. Click the Generative Fill button and enter a prompt
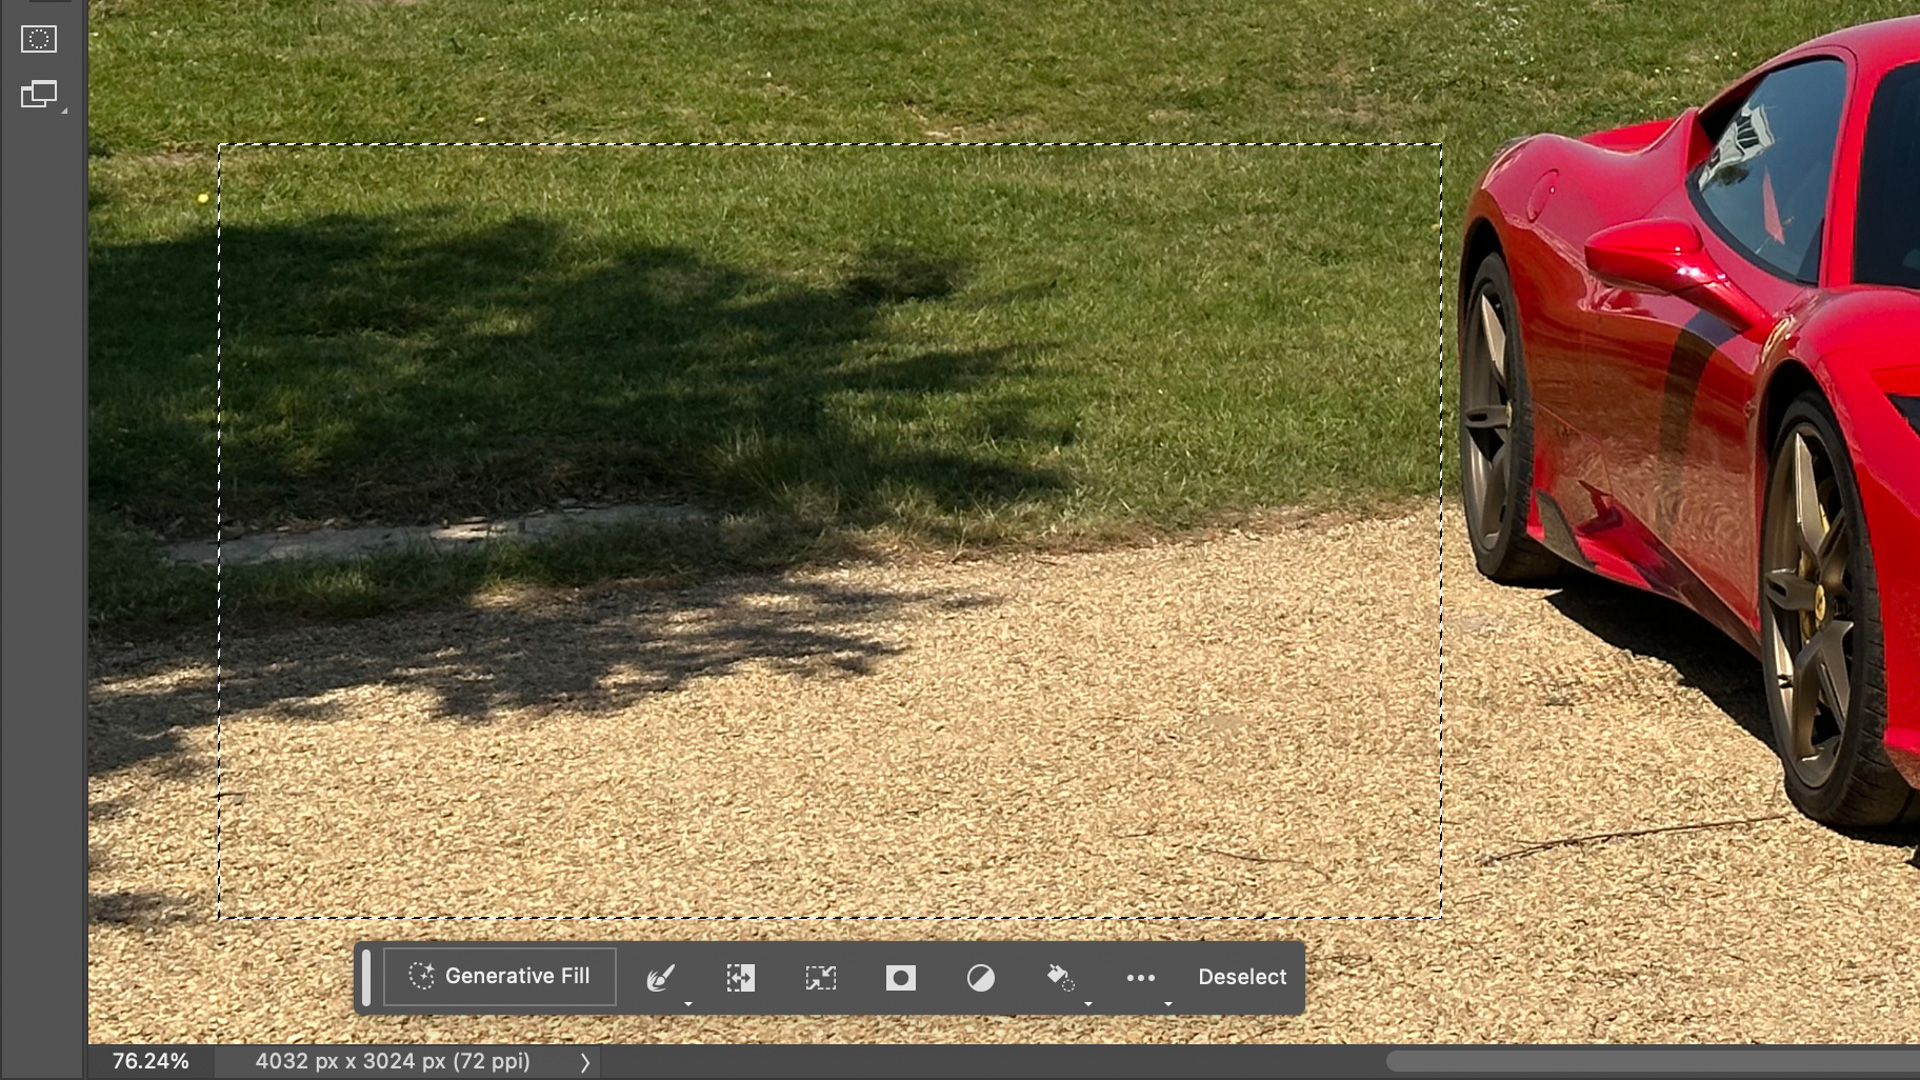
Now the fun can begin. Click 'Generative Fill' and you’ll be invited to enter a prompt.
At first we tried prompts like ‘turn the grass blue’, but Generative Fill doesn’t work that way. At least not yet, and using that prompt on the photo of the car, when selecting only a section of grass, inexplicably added a blue car to the image.
Instead, try something like ‘wooden picnic bench’ or 'water fountain' and Generative Fill will present three AI-generated options.
Or you can leave the text box blank and click Generate to see what Photoshop comes up with on its own. Your mileage will vary...
6. Picking which is best
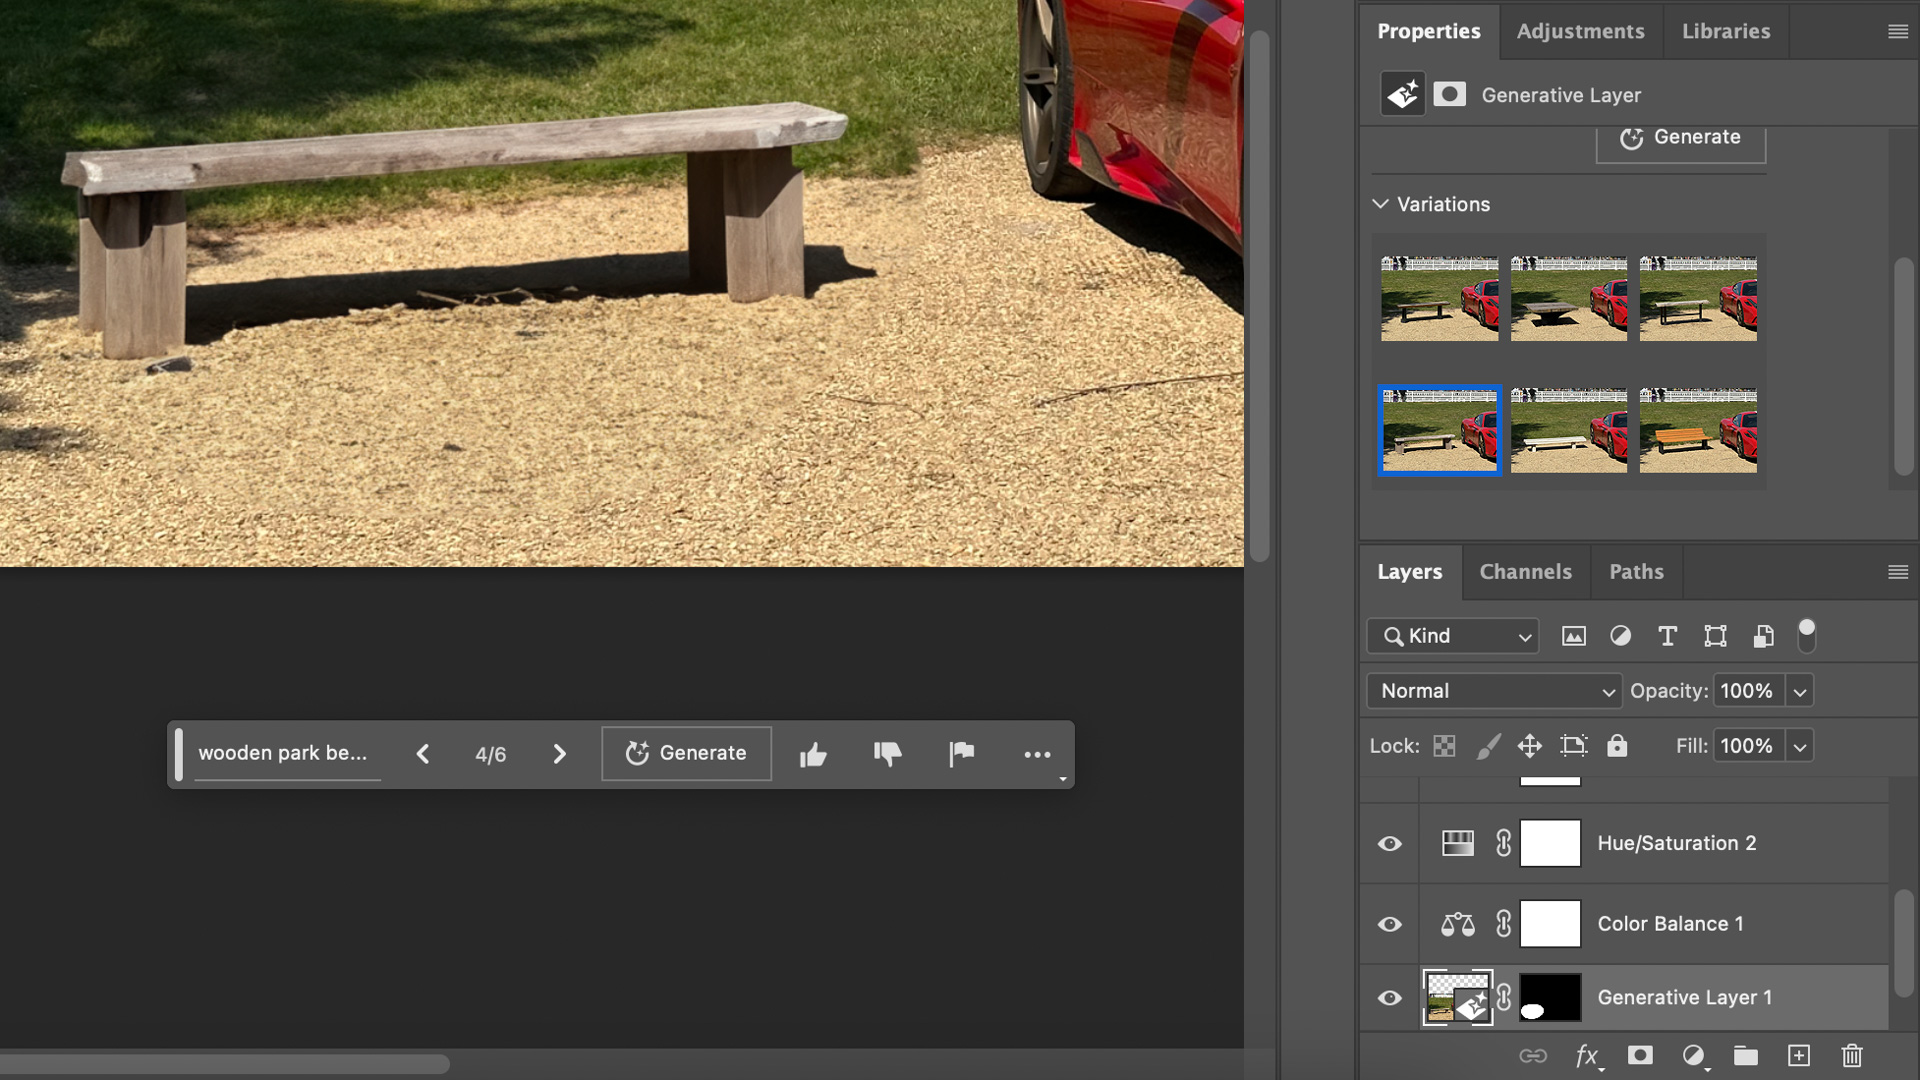
Click the arrows to cycle through these three options, or click the Generate button again to have the AI create three more. You can keep doing this until the AI creates what you’re looking for, or change the text prompt and try again.
7. The results
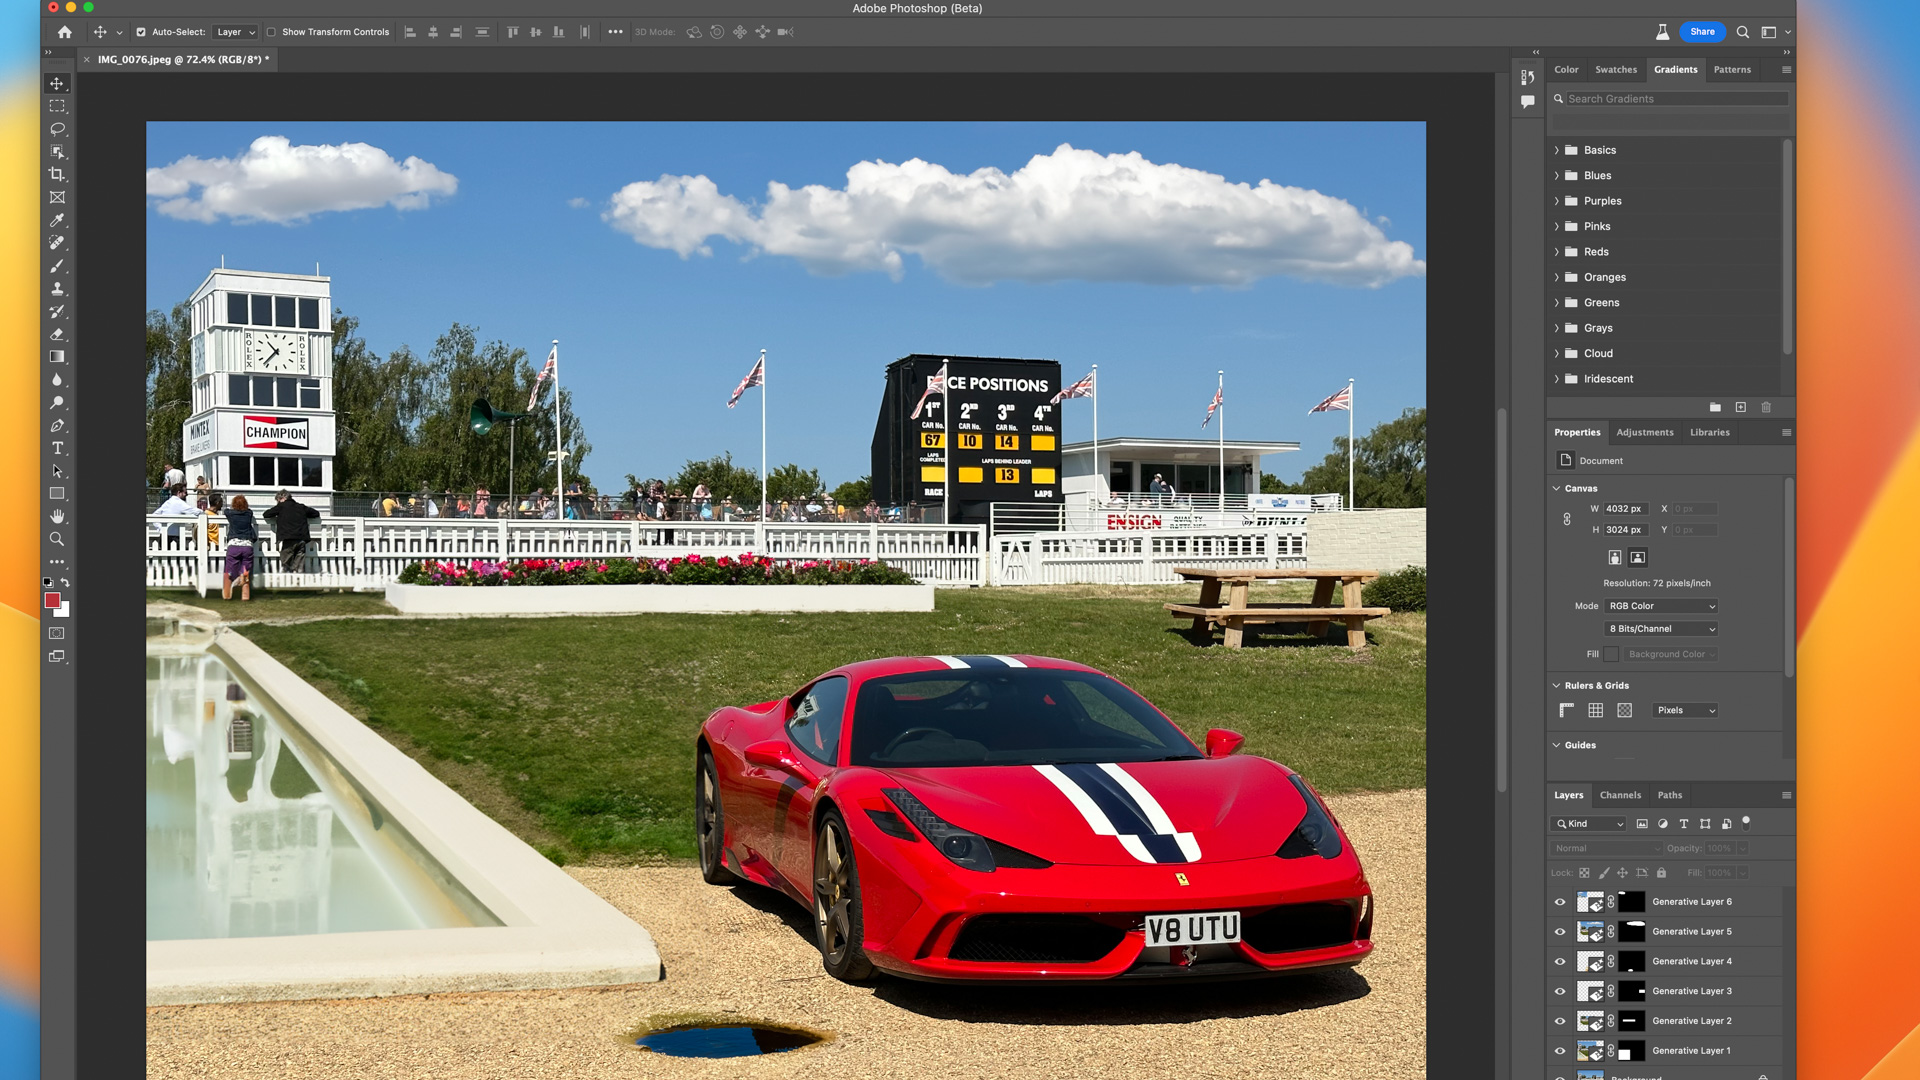
Asking Photoshop to add a water fountain to the left of the car produced some interesting results, varying from a huge green watering can to what we've included above. It's not exactly a fountain, but the complexity here is impressive.
Buildings are reflected in the water, gravel interacts neatly with the stonework, and there's a sense that the structure heads off into the distance, albeit seemingly to nowhere.
We've also added a flower bed, picnic table, clouds and puddle to this image, all using Generative Fill. They mostly do the job, and are especially impressive given adding them took just a couple of minutes, but we have questions about where that guy's legs have gone.
8. Giving feedback
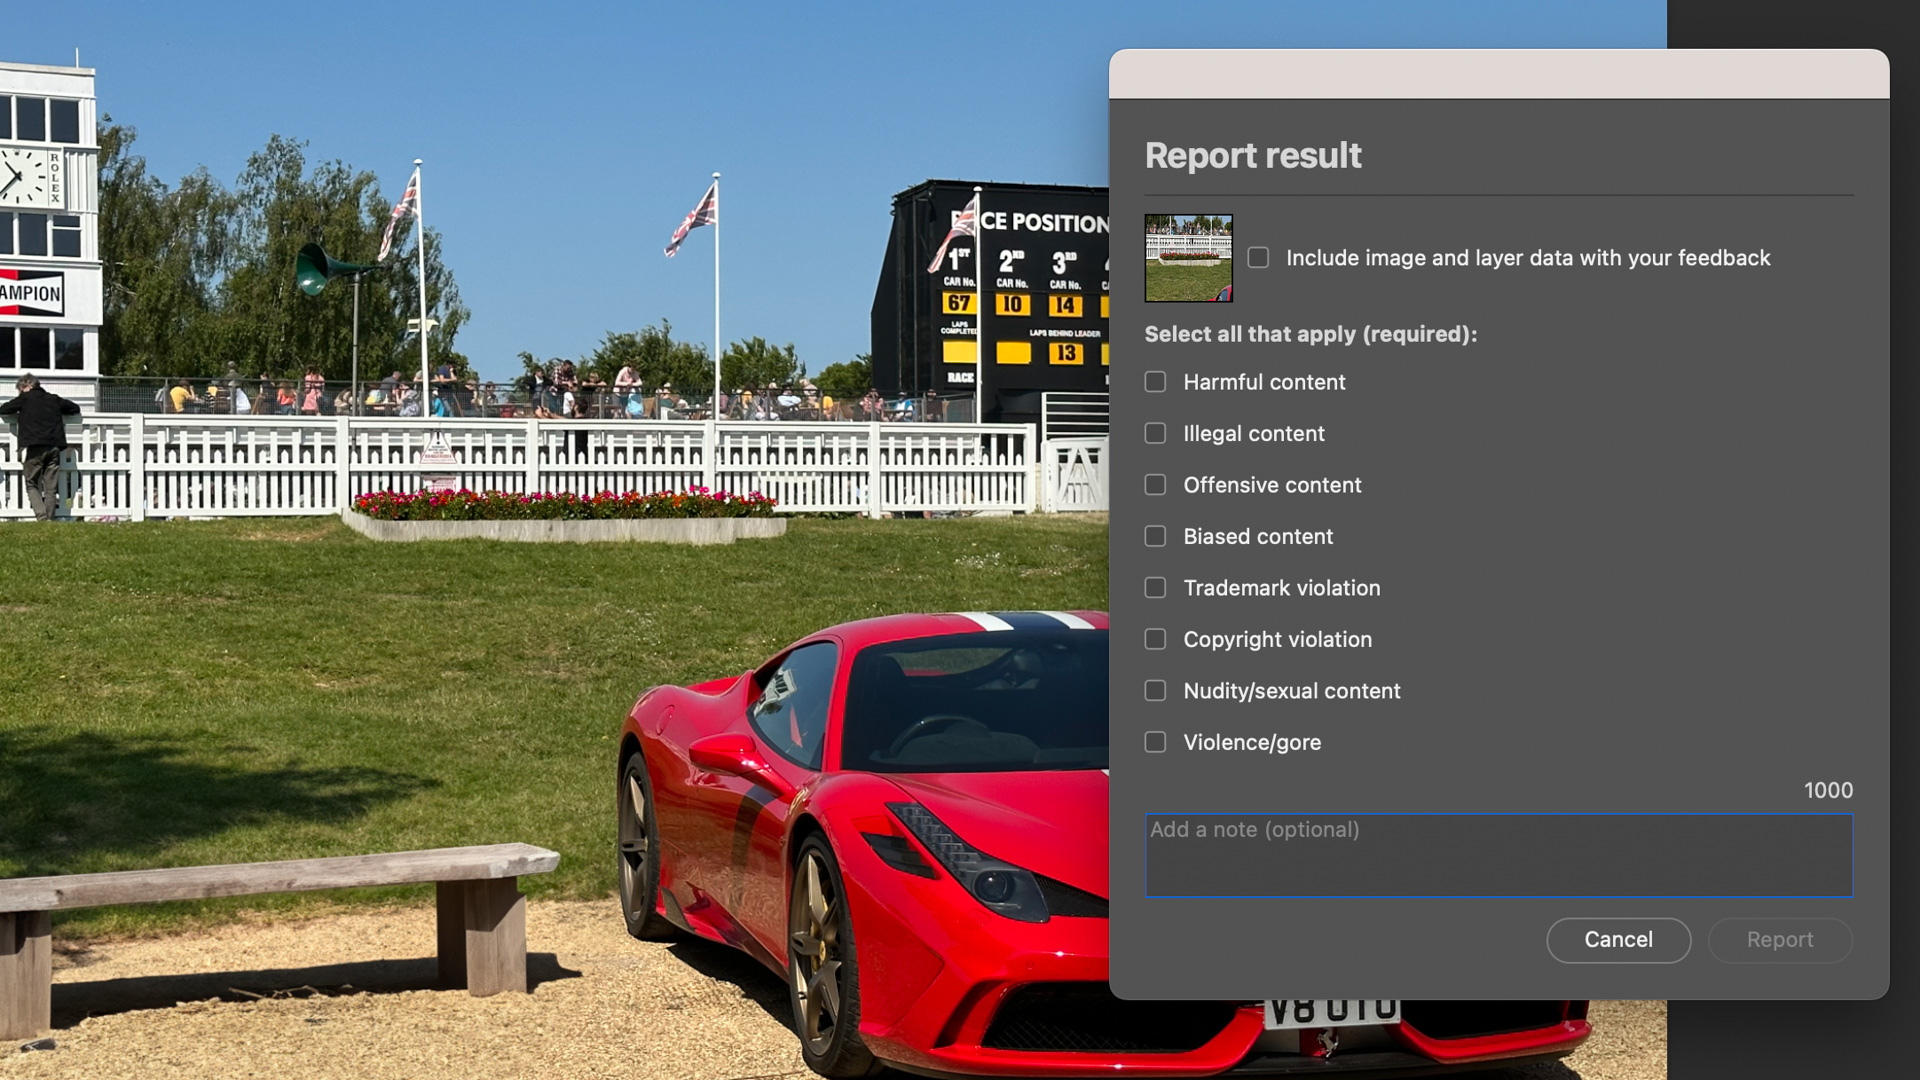
The Generative Fill toolbar can be used to provide feedback on the AI’s efforts. There are thumbs-up and thumbs-down buttons, plus the option to flag an AI-generated image if it contains offensive, harmful or illegal content, and if it has committed a trademark or copyright infringement.
9. Editing AI-created layers
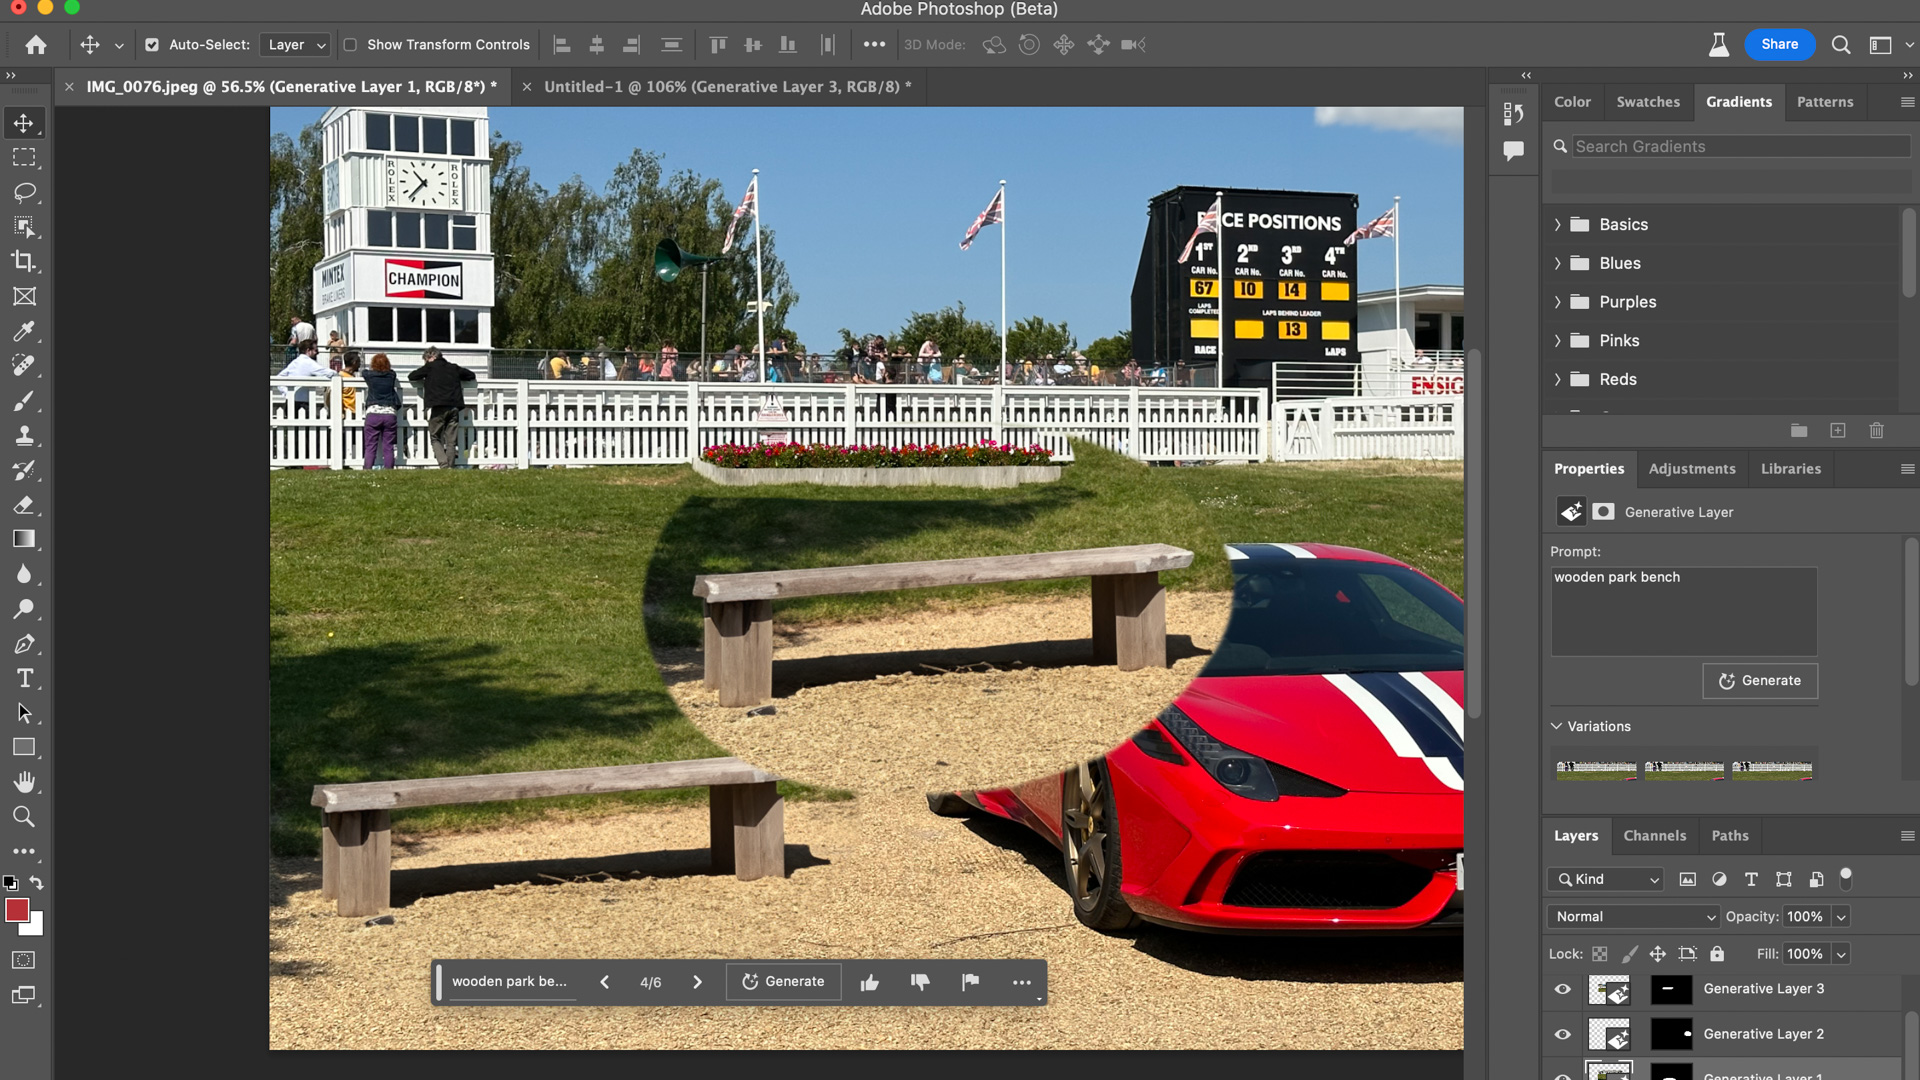
Photoshop’s existing tools can be used to adjust an object added by Generative Fill. However you need to remember that these objects are layers, and each layer is the size of the area you selected with the Marquee or Lasso tool earlier.
In other words, that bench we've created above cannot be copied and pasted on its own to another part of the image, as the surrounding area will also be duplicated. It also isn’t possible (at least yet) to have the AI insert another identical object elsewhere. Each time you ask the AI to create an object, you’ll get a different result.
Similarly, you can’t just pick up an AI-generated object and move it, unless you manually cut it out, as the background and shadowing will be relocated too.
10. Expanding an image with AI
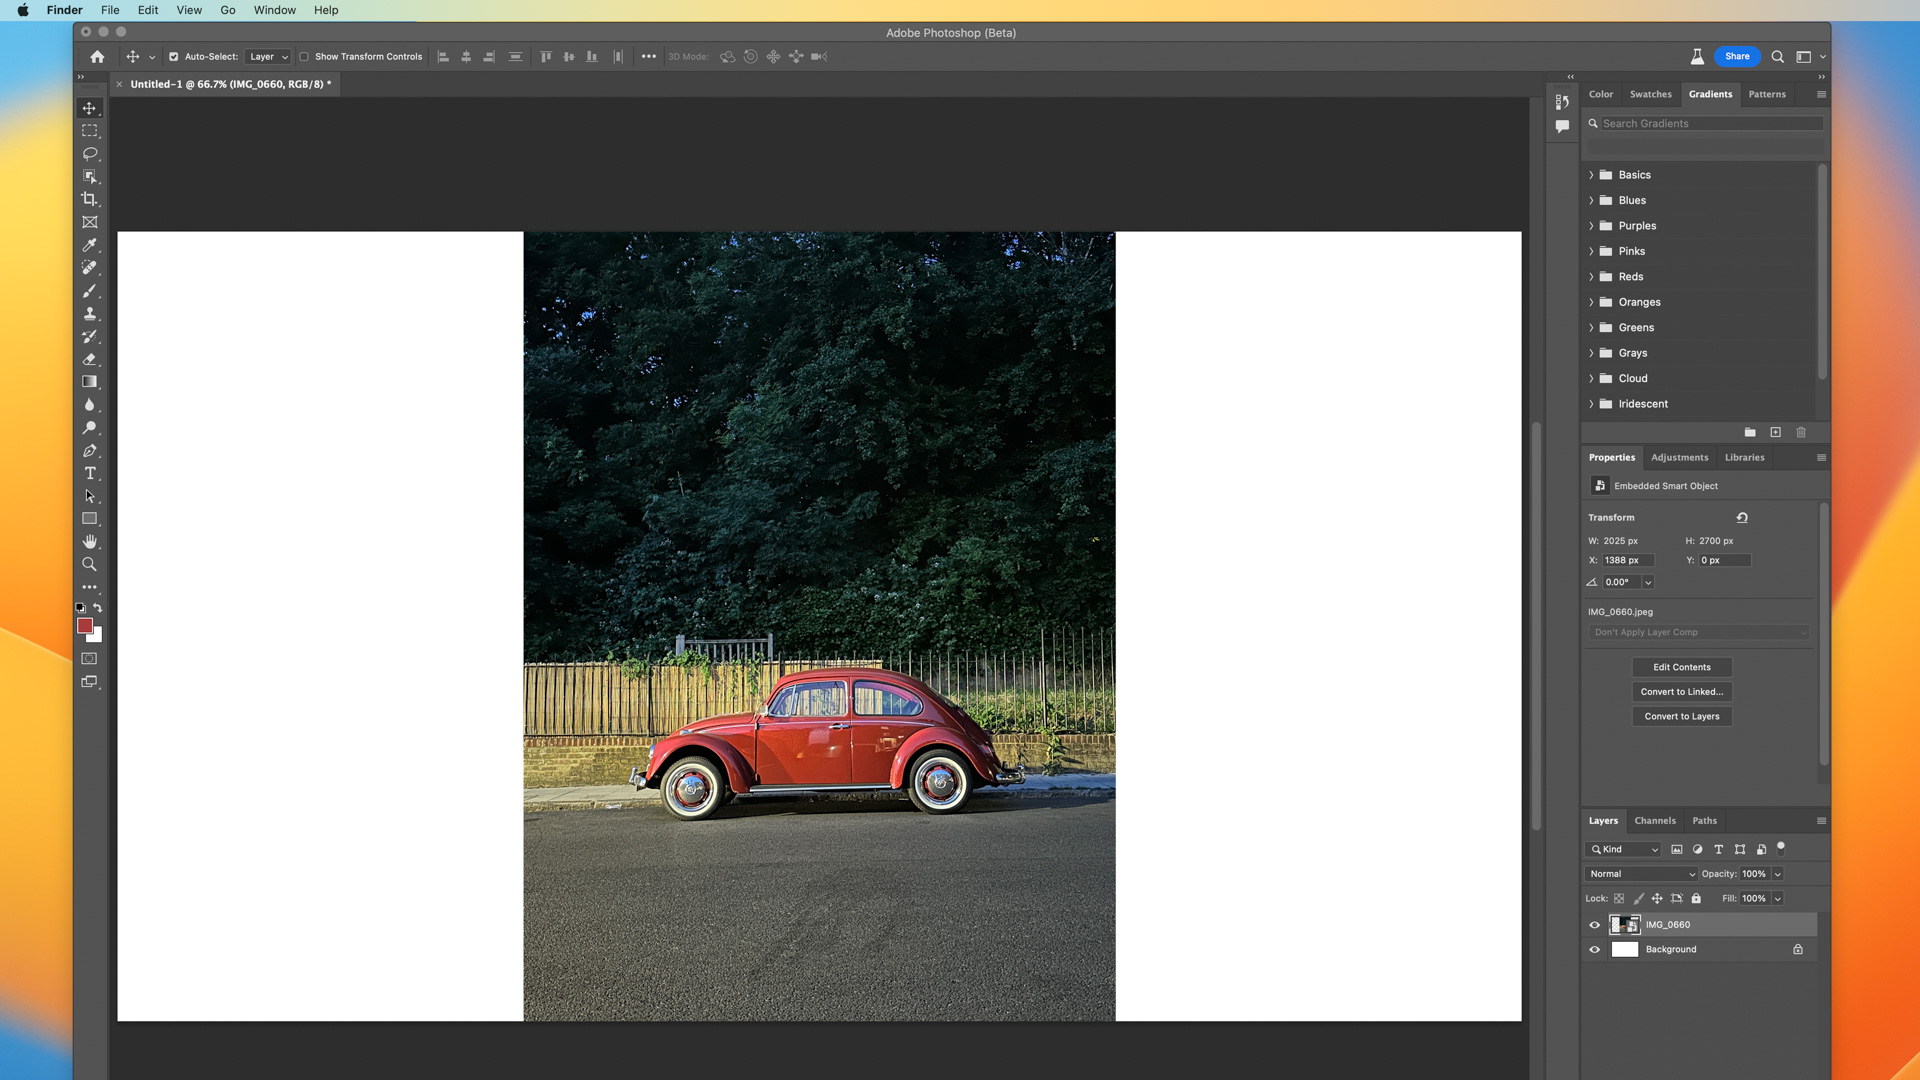
A fun trick is to use the crop tool to create some empty space either side of an image, in which Adobe’s AI talents can run wild. Select the Marquee tool then hold the shift key and draw rectangles that cover a small amount of the existing image and extend into the blank space.
Now hit the Generate button without entering any text prompts and see what Photoshop comes up with.
For this example we've taken a photo shot in portrait for an Instagram story, then extended the canvas to 16:9 and asked the AI to fill in the blanks.
11. A whole new background
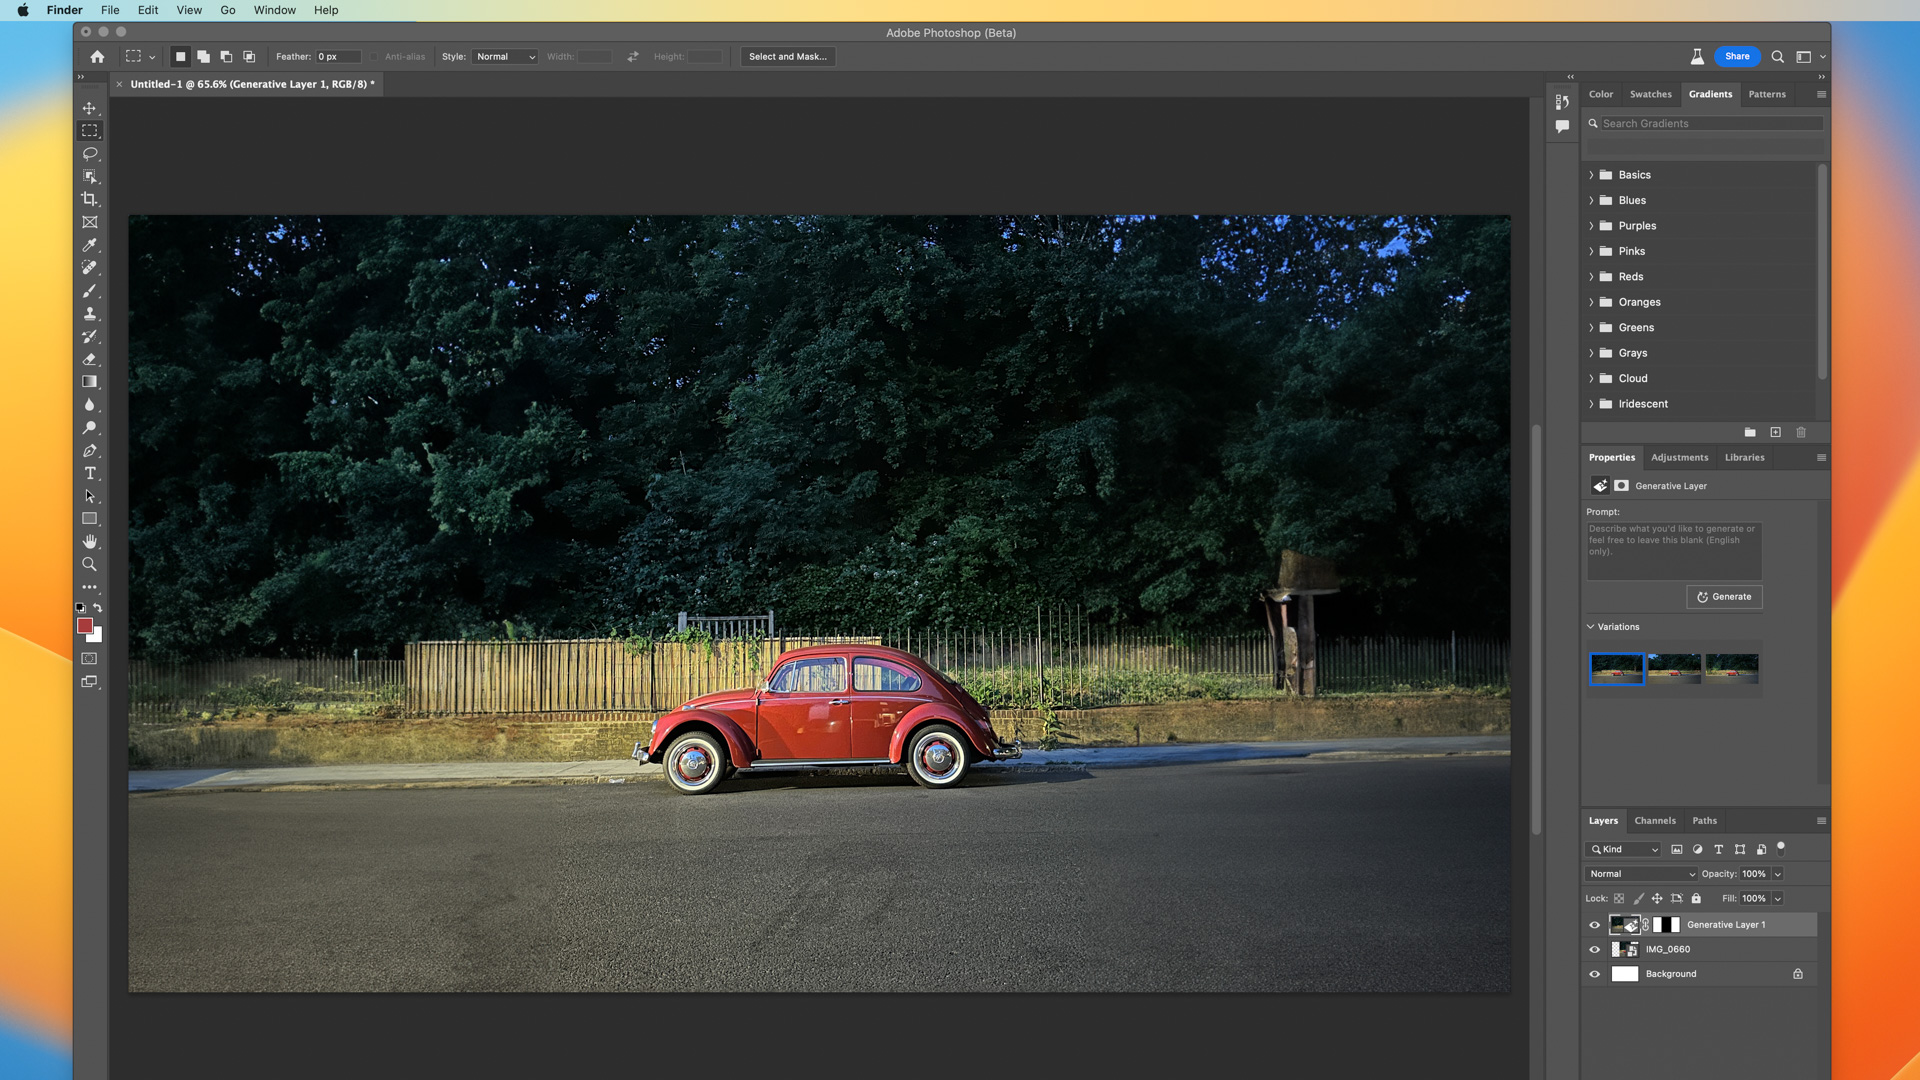
Impressive, huh? Generative Fill has, in a matter of seconds and with zero creativity from the user, turned a portrait image into landscape, complete with a photo-realistic backgrounded created entirely by AI.
12. And finally...
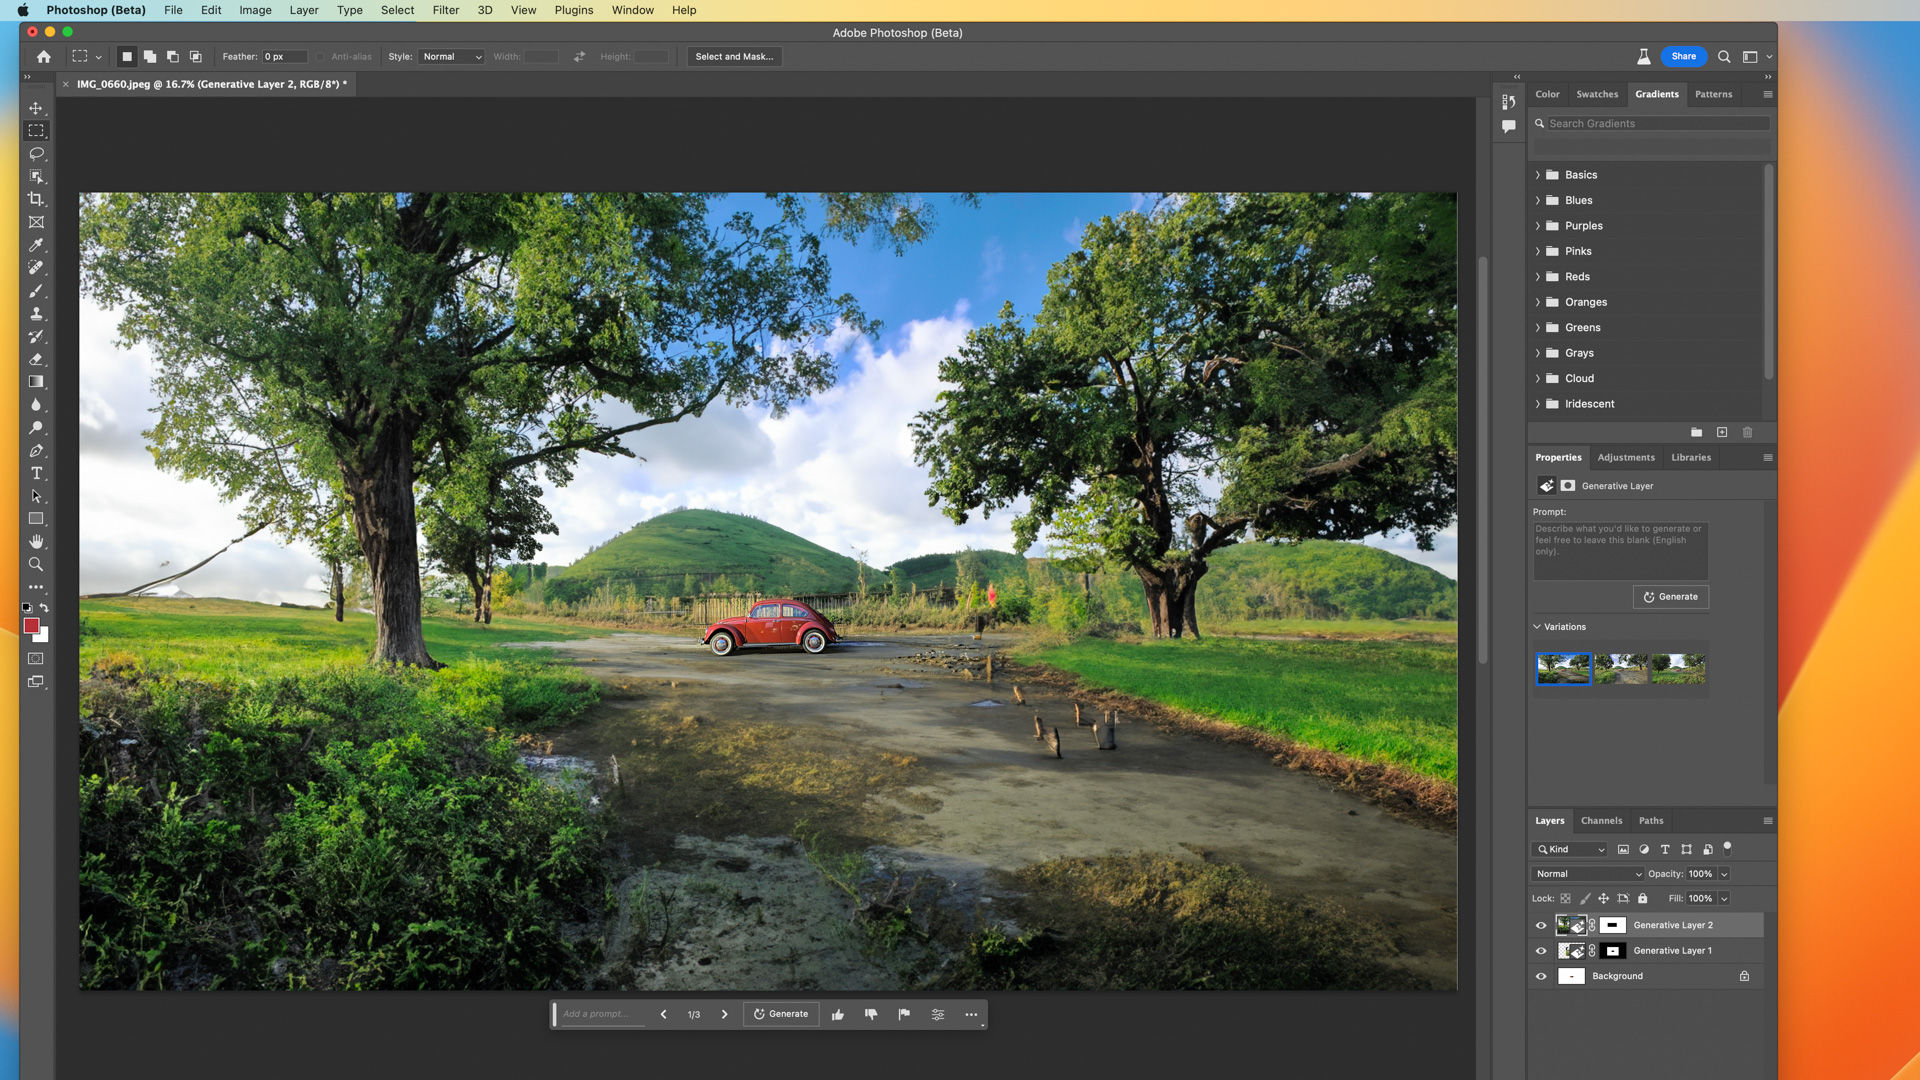
Lastly, what happens if you crop tightly around the car above, then give the AI a much larger blank canvas to play with? Firstly, it takes quite a long time to generate, and once complete you end up with a very large Photoshop file that your computer may struggle to work with.
But more importantly, the results can be truly jaw-dropping. This entire background was created by computer in just a couple of minutes. Not what you wanted? Just hit the 'Generate' button and try again.
Troubleshooting
Like other cloud-based AI tools, where the processing is done by a server rather than your own computer, the sudden popularity of Generative Fill means Adobe’s systems are sometimes overwhelmed.While writing this article we encountered several instances of the error message: "We're experiencing high demand. Please wait and retry your prompt soon. Thank you for your patience."All you can do is keep trying, and after a few minutes the system works again.
Final thoughts
It’s early days for Photoshop’s big new AI tool. And while it has the ability to impress in the way ChatGPT does, truly jaw-dropping acts of artificial artistic flare are few and far between. For now.
There’s no doubt that Generative Fil will improve. Over time it will get smarter and become more able to firstly understand what users ask of it, then act on their demands in a way that is more reliable and more accurate than it is today.
The way AI-made objects interact with their real-world environment is often very impressive, and the tool’s understanding of light and shadow isn’t at all bad. But Generative Fill’s inability to create human faces can hold it back for now.


