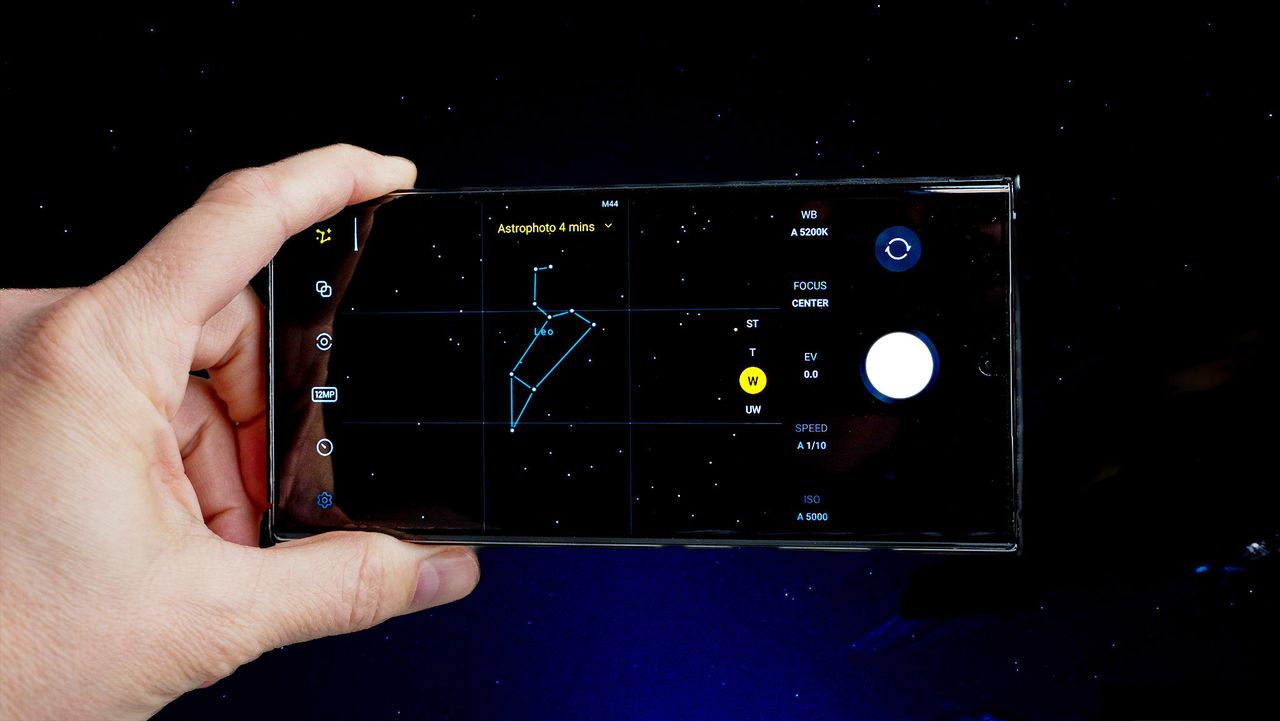
The Astrophoto mode is one of the best features found on premium Samsung Galaxy phones. If you're looking to capture the brilliance of the starlit sky with your Galaxy S25, this is the right mode to use on your camera app. However, to enjoy the feature to the fullest, you'll need the Samsung Expert RAW app and a tripod for improved stability. While Samsung says that it works on the Galaxy S20 or later models, the camera prowess of the S22 series or newer releases is ideal.
Astrophoto differs from moon photos that you may use with your Galaxy S25 Ultra, which is undoubtedly one of the best Samsung phones. One difference is that Astrophoto images take a few minutes to get while the moon shots take less time. Another difference is that one feature targets the stars, while the other focuses on the moon.
Here's how you can use the Astrophoto mode on a compatible Samsung Galaxy phone.
How to enable Astrophoto mode on a Samsung Galaxy phone
To start with Astrophotography, you must first ensure the Samsung Expert RAW mode is available in your phone's camera software. Here's how to do that.
1. Open the camera app.
2. Swipe over to the more area on the mode carousel at the bottom of the camera viewfinder.
3. Tap Expert RAW.
4. Tap the settings icon in the top left.
5. Choose Expert RAW Labs.
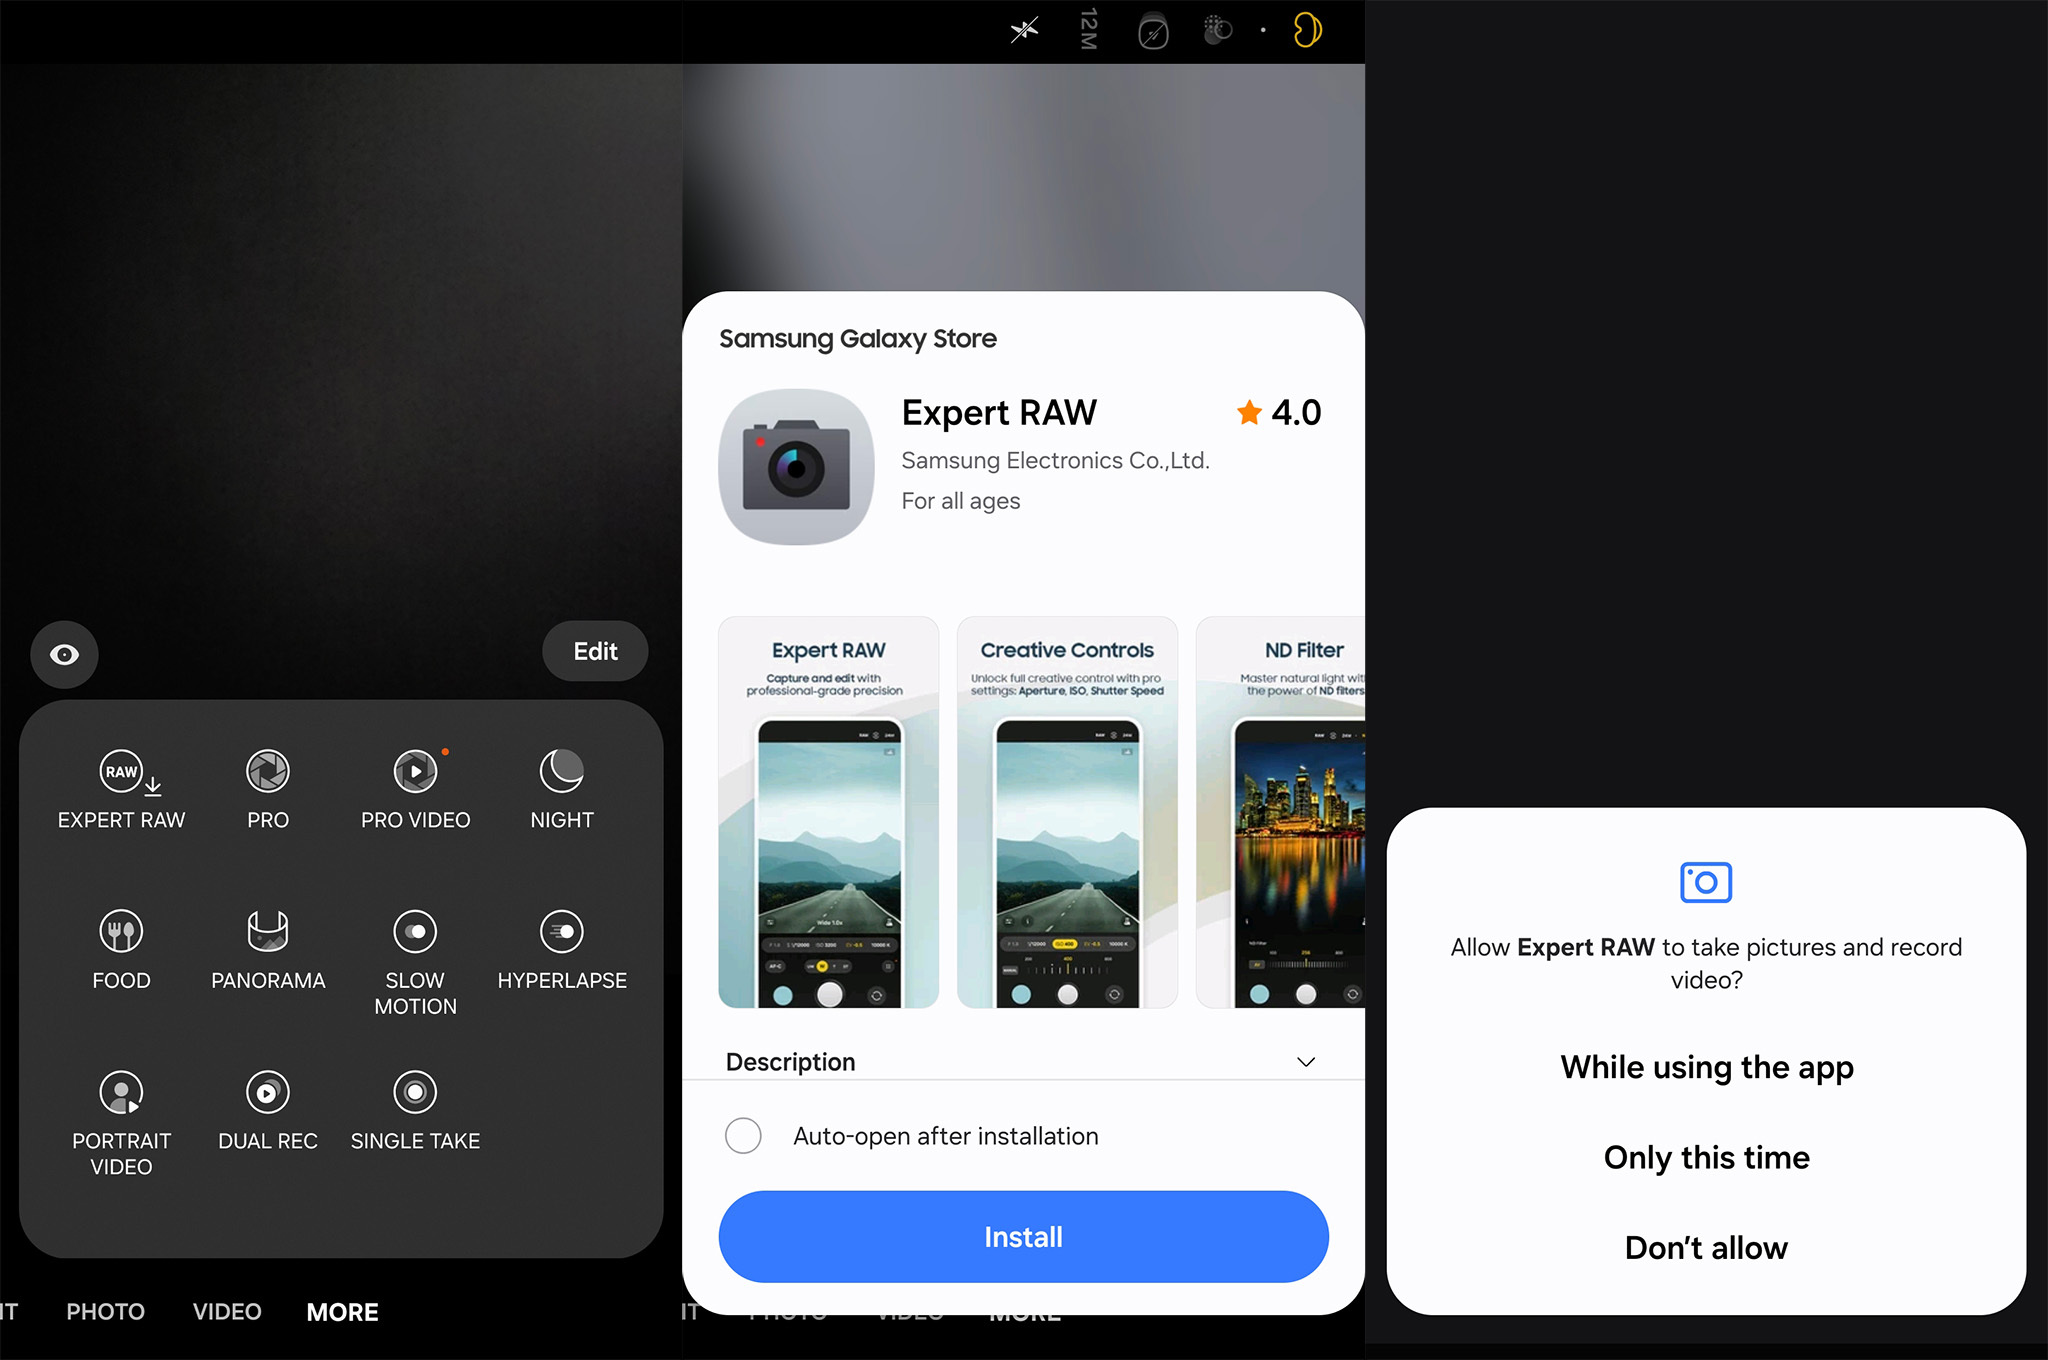
If you haven't done so before, you will have to download Expert RAW from the Galaxy Store. If you don't already have it installed, the phone will automatically go to the Galaxy Store when you tap the Expert RAW mode so you can download it.
In order for the Astrophoto setting to become available, you'll need to stabilize your phone on a tripod so that it doesn't move. If you don't already have one, we recommend picking up this affordable phone tripod from KraftGeek.
How to use Astrophoto mode on a Samsung Galaxy phone
Once your phone is mounted on the Tripod and you have opened the Expert RAW app, follow these instructions to take an Astrophoto and capture the stars:
1. In the Expert RAW viewfinder, ensure that your photos are set to 12MP resolution. Astrophoto isn't available when using higher resolutions.
2. Tap the lab icon on the bottom right.
3. Tap the constellation icons for either Astrophoto or Astroportrait.
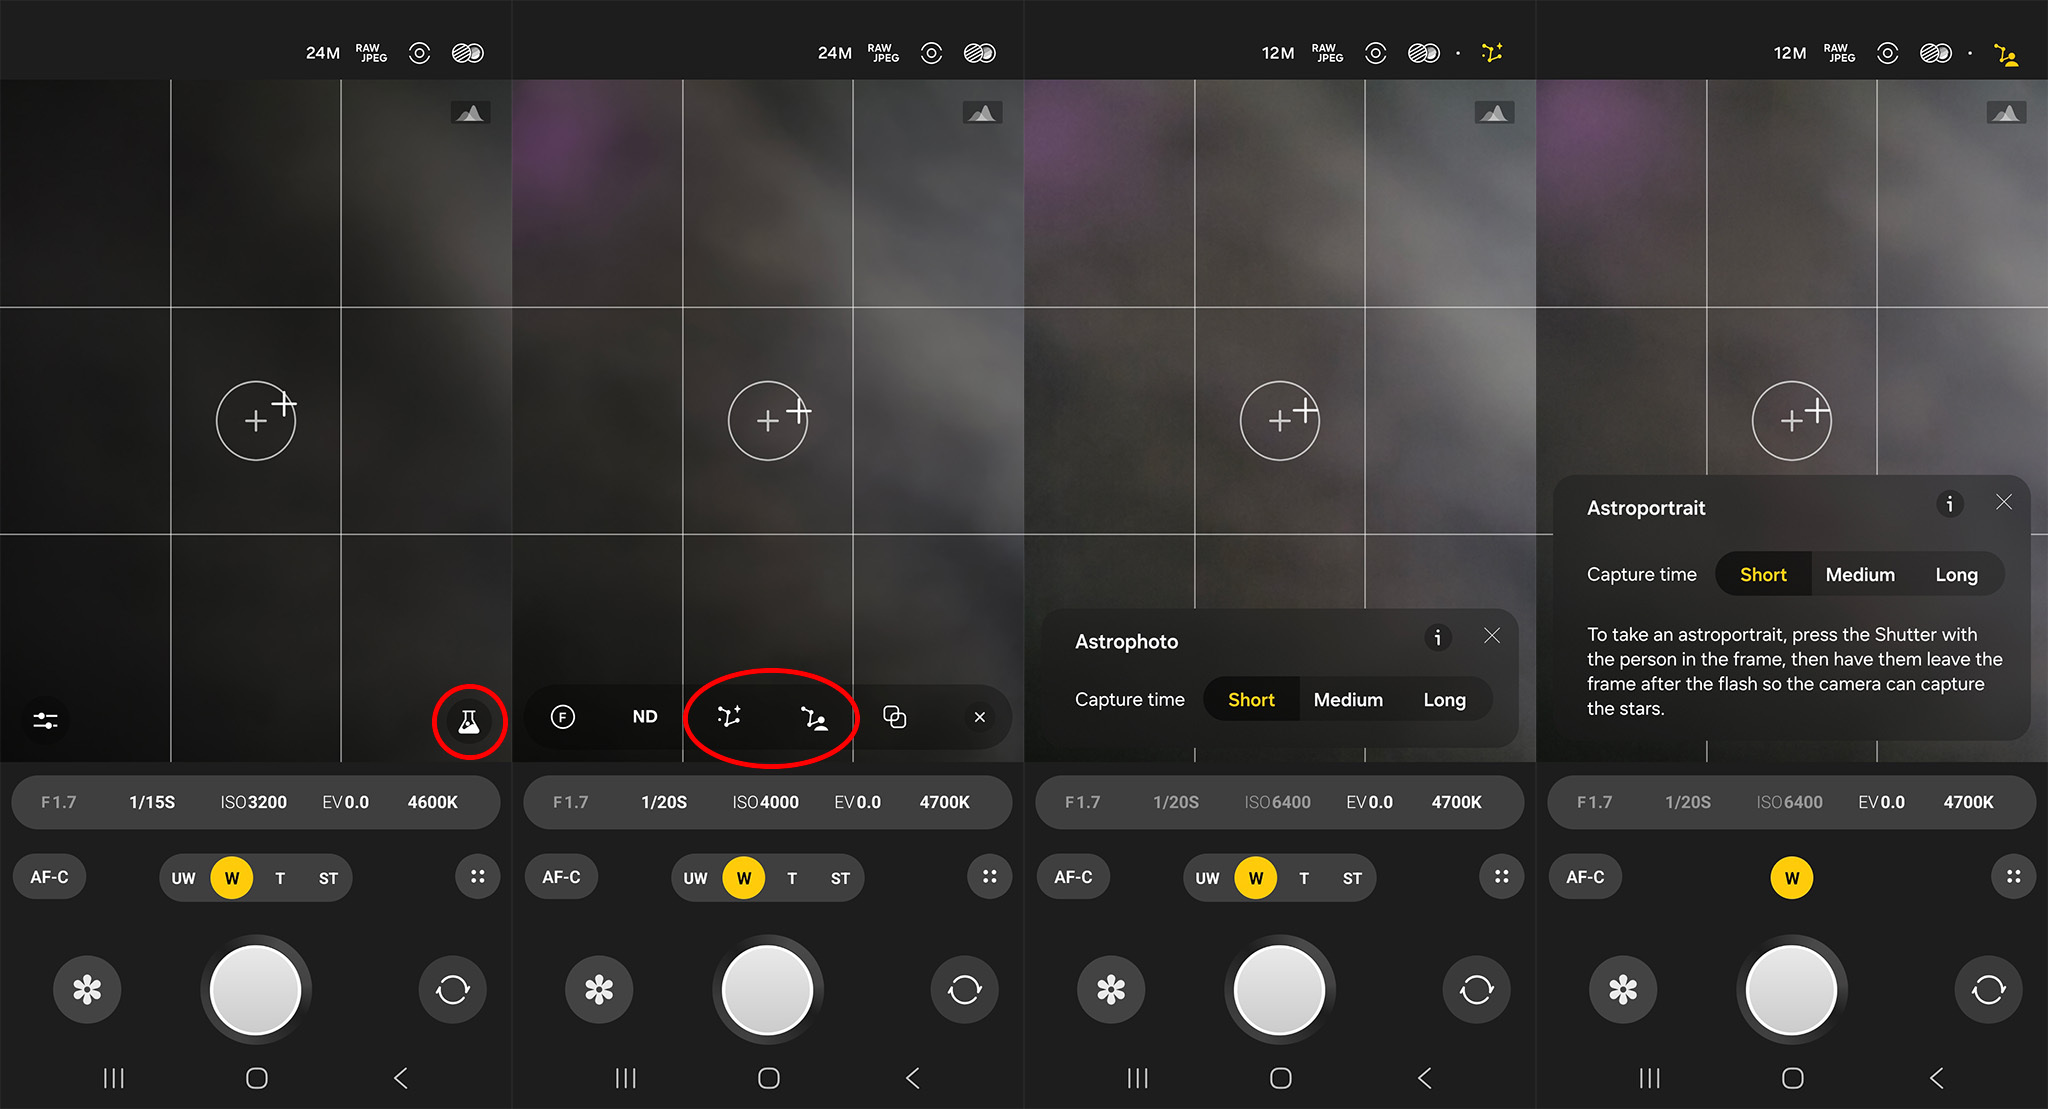
4. Select Capture time.
5. To enable the sky guide to find named stars and constellations easily from the viewfinder, click the icon that looks like a constellation with a question mark.
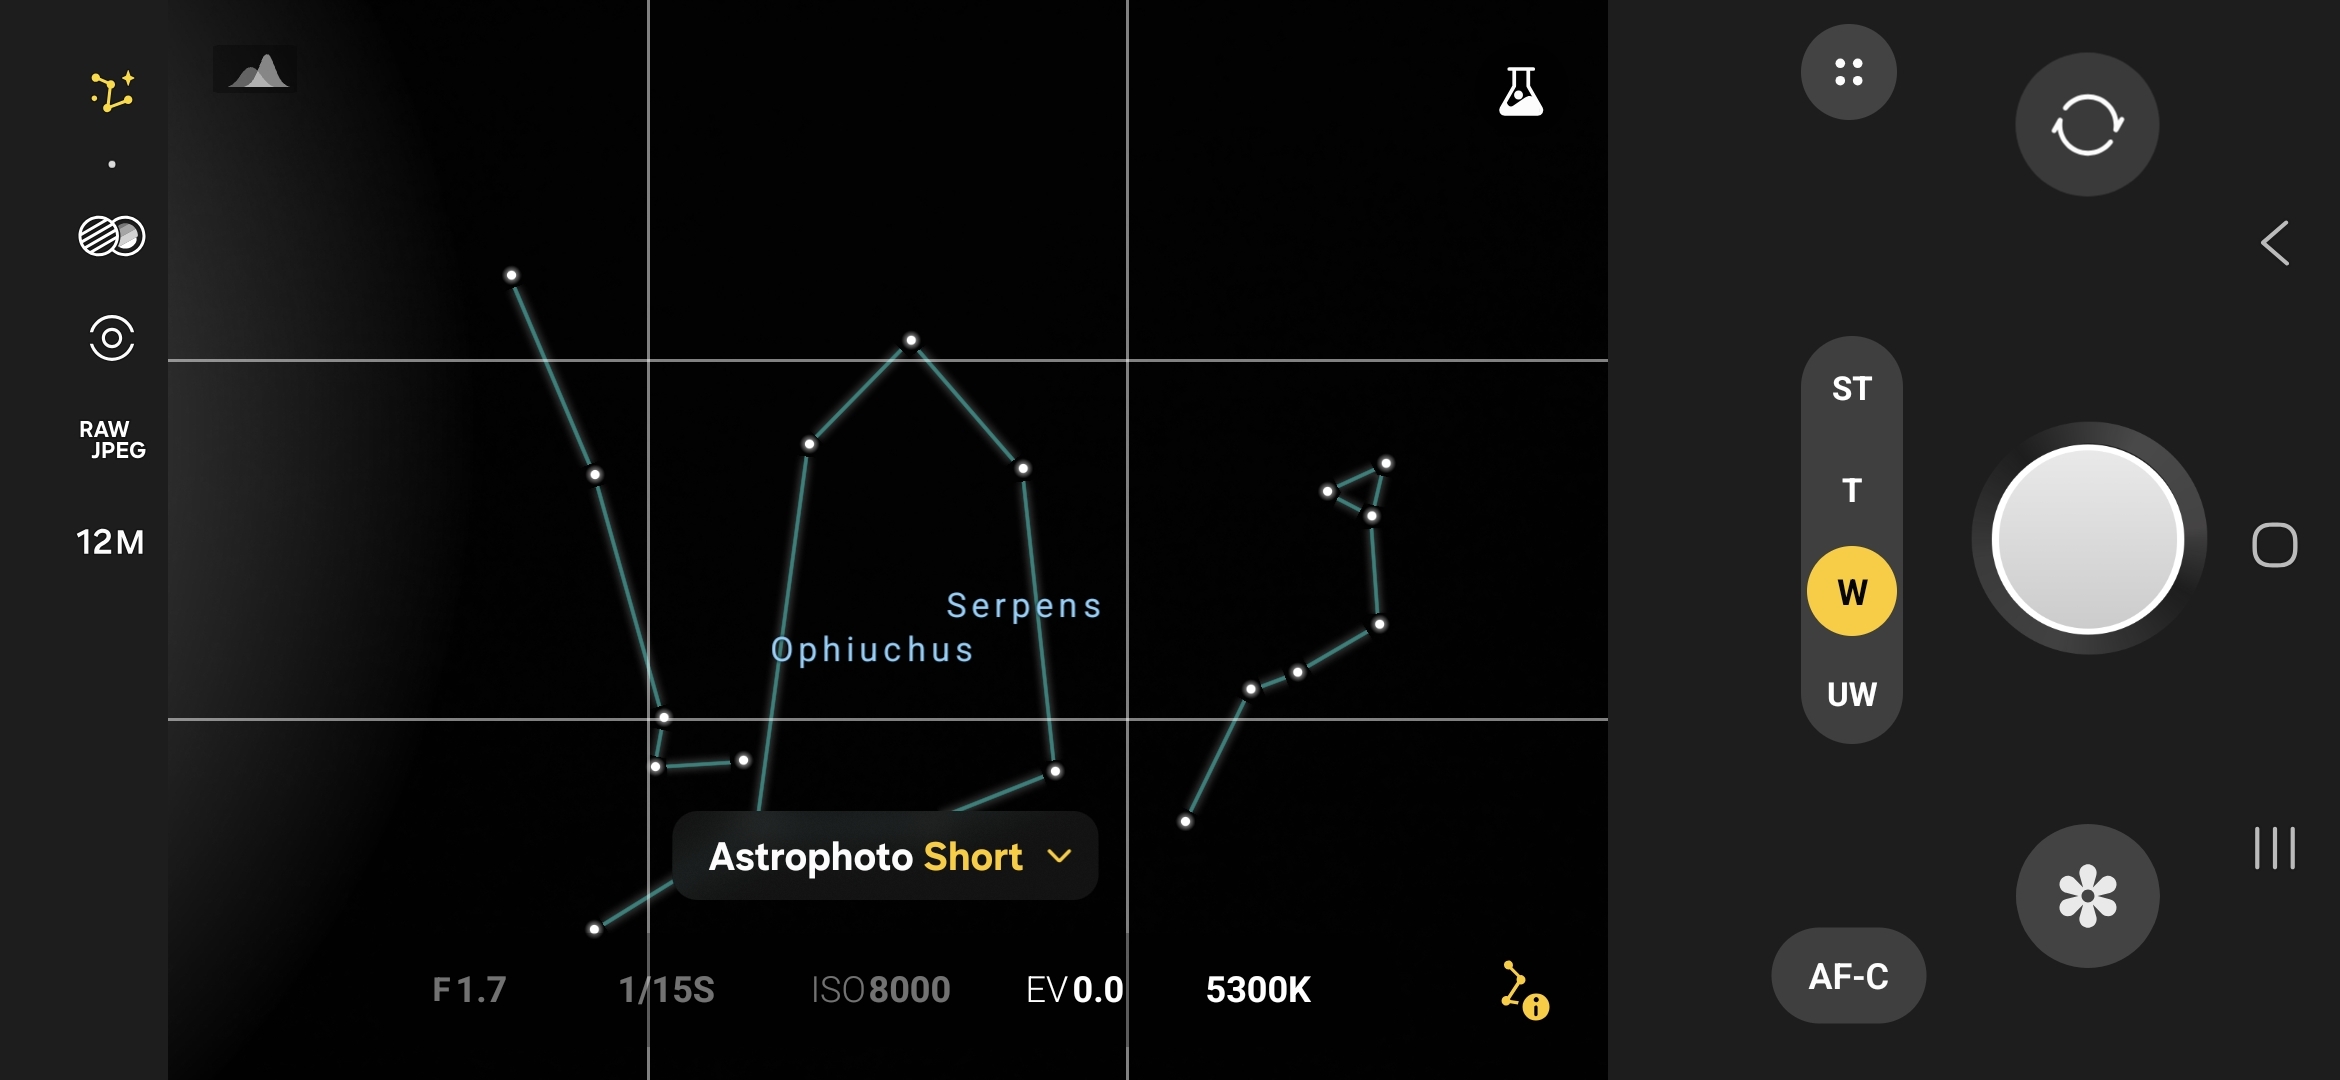
6. Tap the shutter button when you're ready to take the picture.
7. Don't move the phone while it's taking the Astrophoto. Otherwise, you'll just end up with a blurry image.
Making the picture better
After you take the photo, tap on the thumbnail preview in the viewfinder to preview it. The Camera RAW app will likely suggest editing it a bit to make it look more impressive. We recommend Adobe Lightroom as it provides excellent tools for this express purpose. Samsung's software also suggests that you use Lightroom.
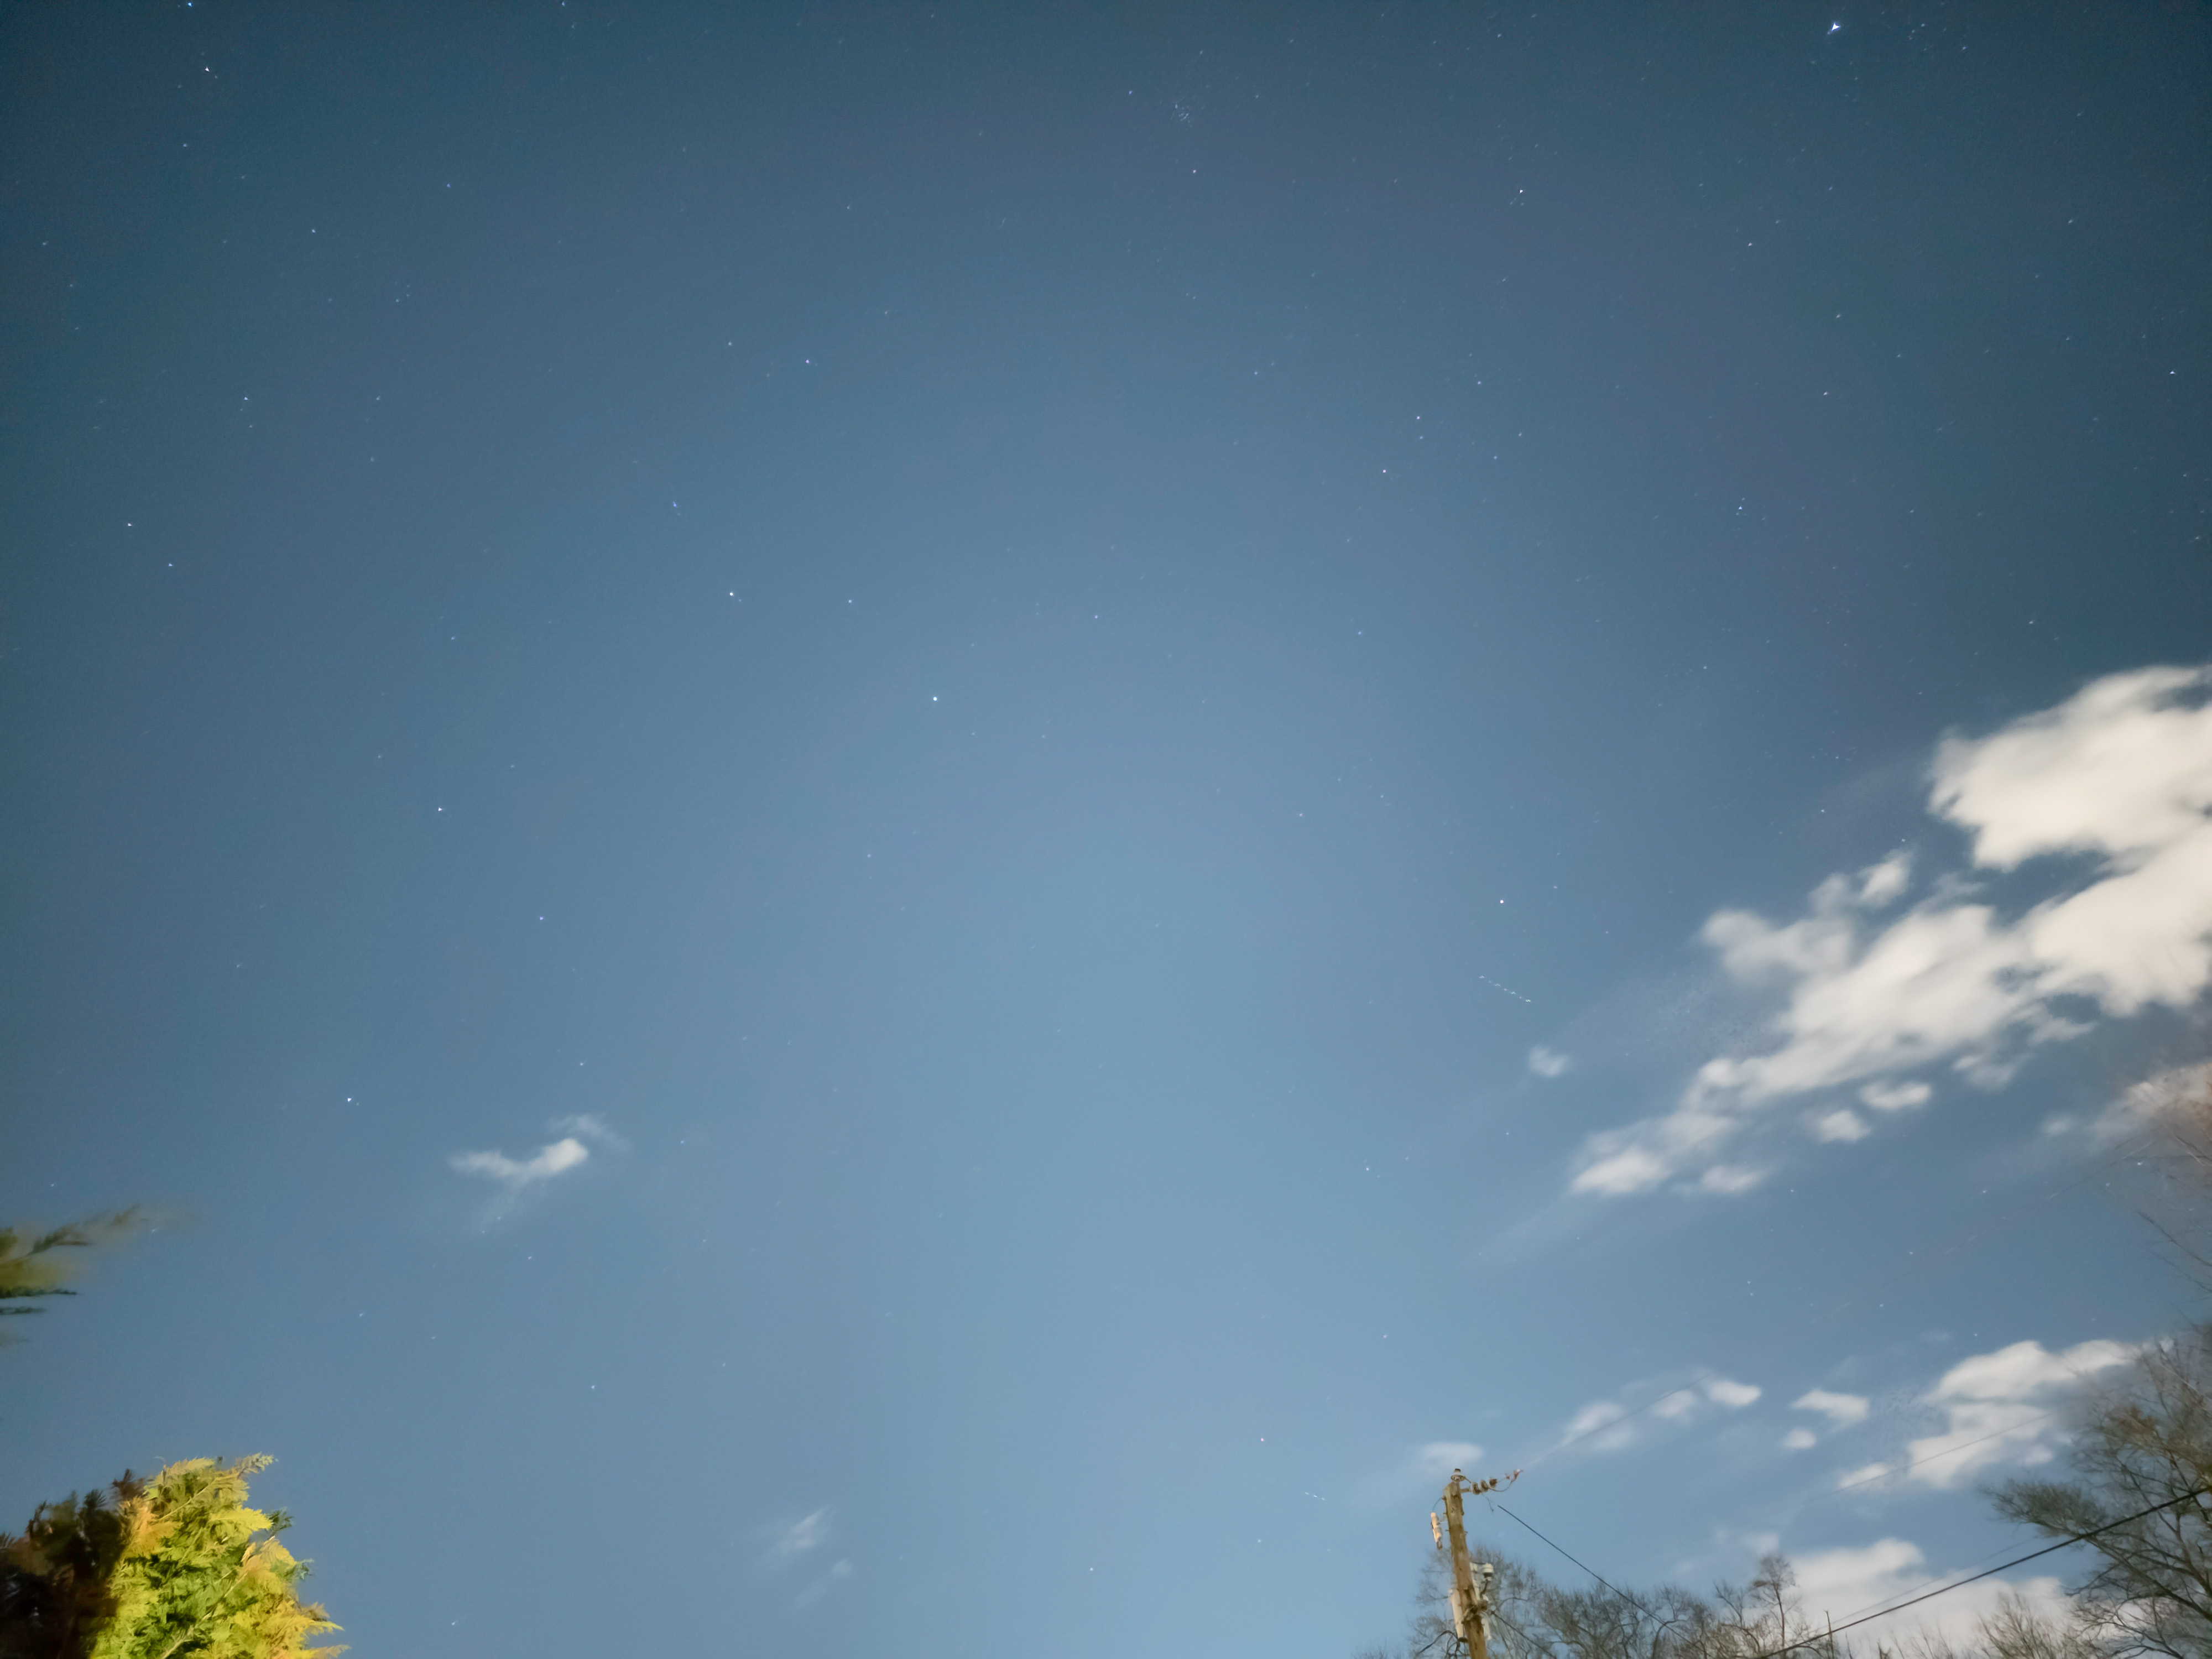
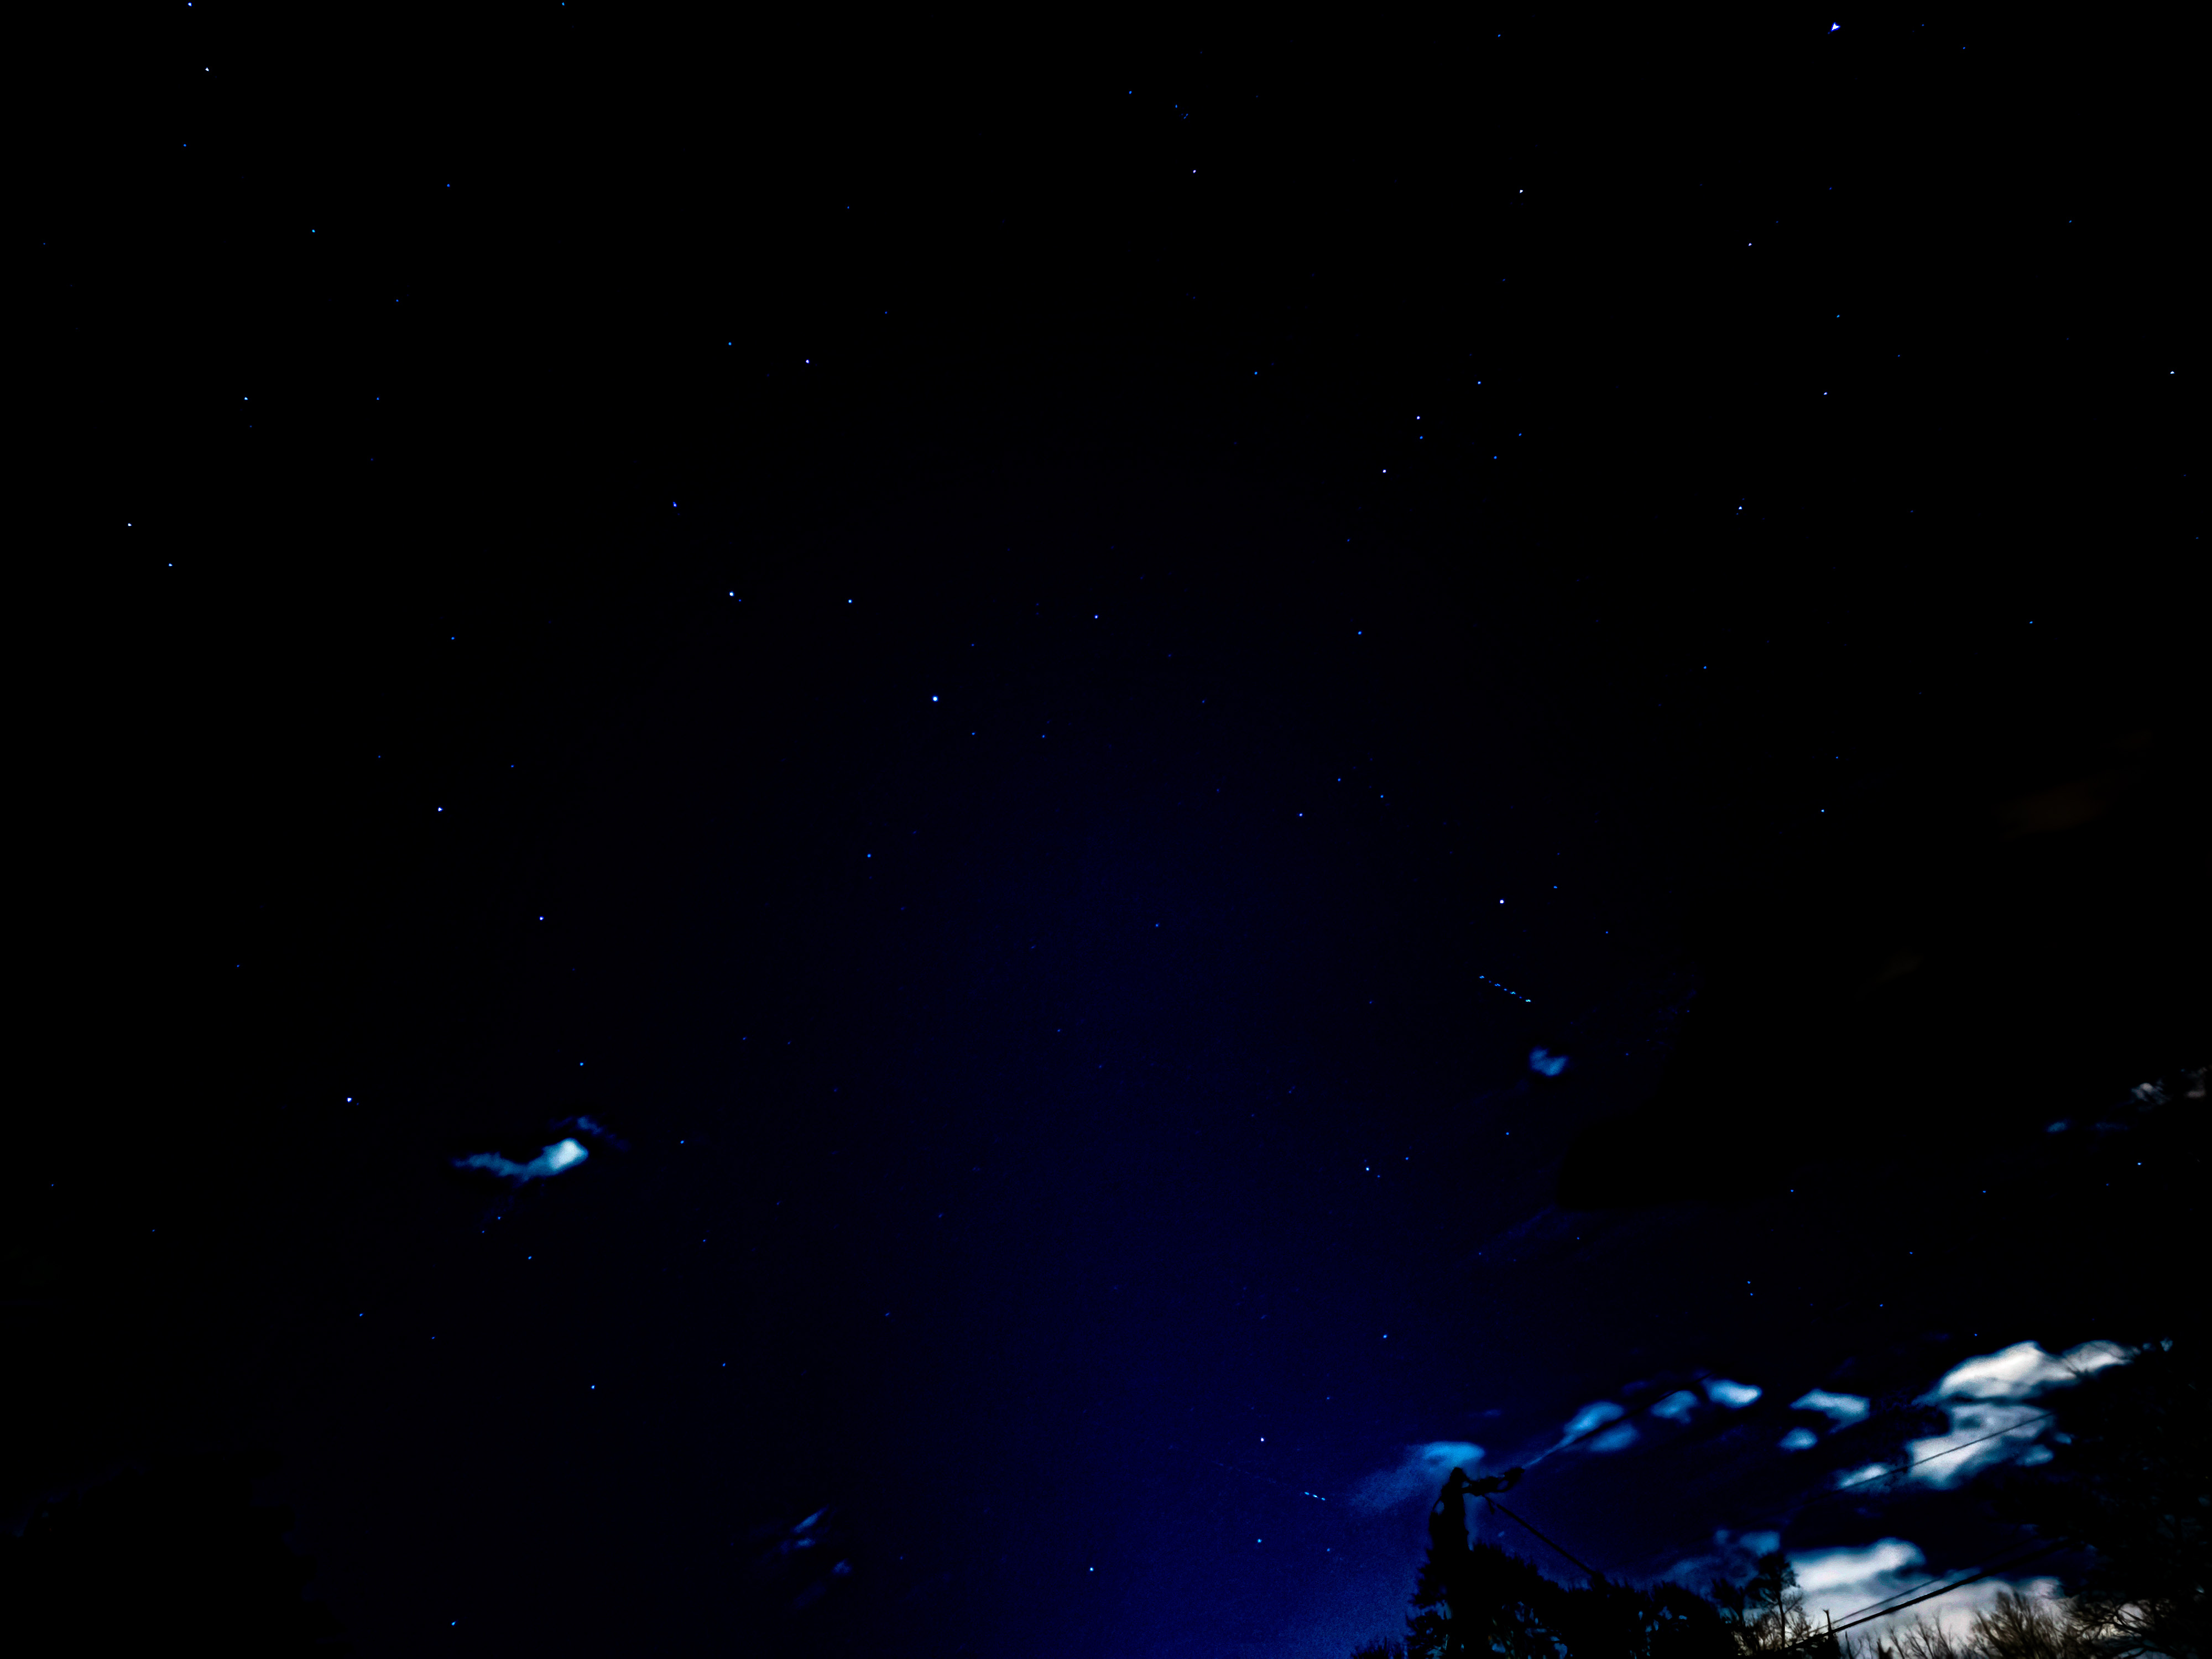
As you can see from above, the original picture looks like a photo taken of a blue sky during the day. As this photo was taken initially past 10 PM in March, I can assure you it was nowhere near this bright outside. The second photo shows how different the same image can look after editing it in Lightroom.
Since this is a RAW photo, photo editing can be used to make substantial changes in the final photo by adjusting the "raw" parameters. Pulling down the exposure slider, blacks, and shadows and ramping up the highlights and whites help produce a much better-looking nighttime photo of the sky.
Stabilize your Astrophotos with this tripod
Ready to take better nighttime photos of the stars? This excellent, budget-friendly tripod makes it easy to mount your phone thanks to the magnetic mount. Despite the fact that it stretches up to 66 inches, the KraftGeek JustTap Magnetic Phone Tripod is surprisingly compact and lightweight. It even comes with a Bluetooth remote and thanks to the brilliant "tap-to-unfold" mechanism, it only takes a matter of seconds to set up.


.png?w=600)

