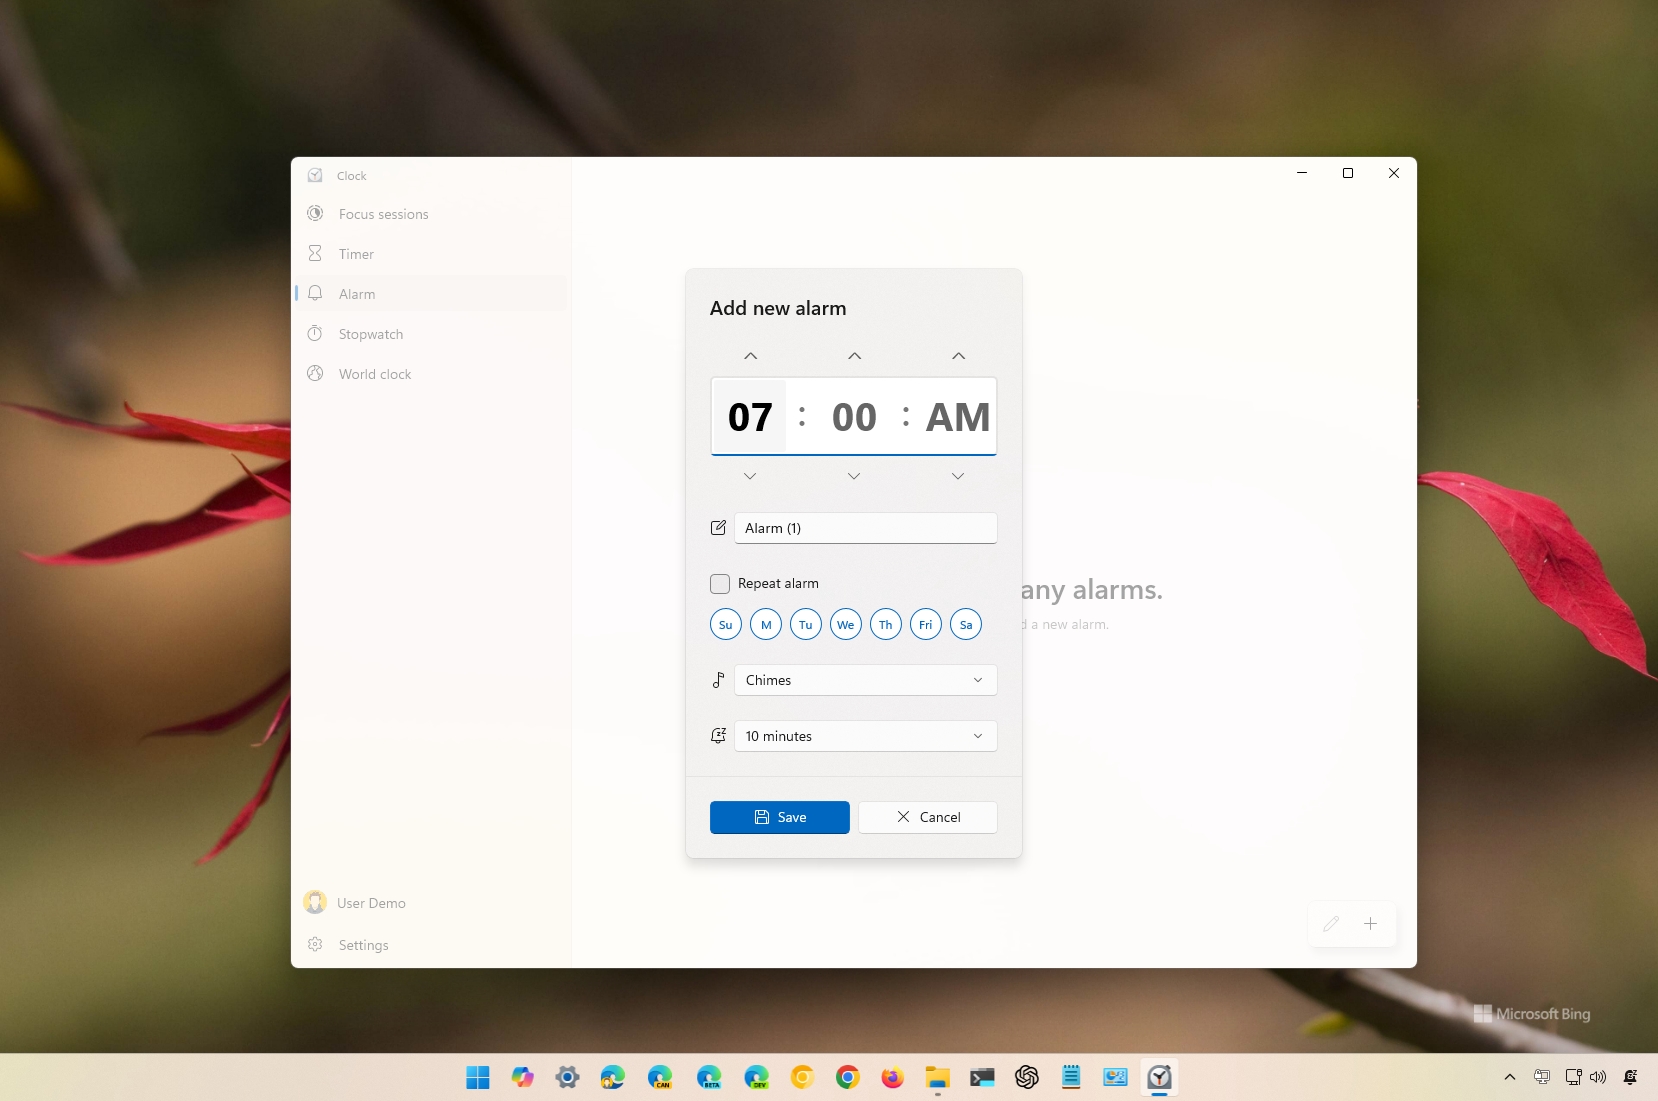
Although Windows 11 doesn't have native support for alarms and timers (or stopwatch), the operating system brings these features through the Clock app, so you don't have to reach for your phone to perform these simple tasks.
Regardless of the reason, if you need to create an alarm to wake up, set a reminder, or schedule breaks, or you have to set a timer to keep track of a specific task, or you want to measure the duration of particular activities or tasks, such as exercise routines, study sessions, or work projects, the Clock app provides the tools to manage your time.
In this how-to guide, I will explain the easy steps to use the Clock app to get started with the alarm, timer, and stopwatch features on Windows 11.
How to set an alarm with the Clock app on Windows 11
In the Clock app, creating, editing, and removing alarms is a straightforward process.
Create an alarm
To create an alarm on Windows 11, use these steps:
- Open Start.
- Search for Clock and click the top result to open the app.
- Click on Alarm from the left pane.
- Click the "Add an alarm" button from the bottom right.
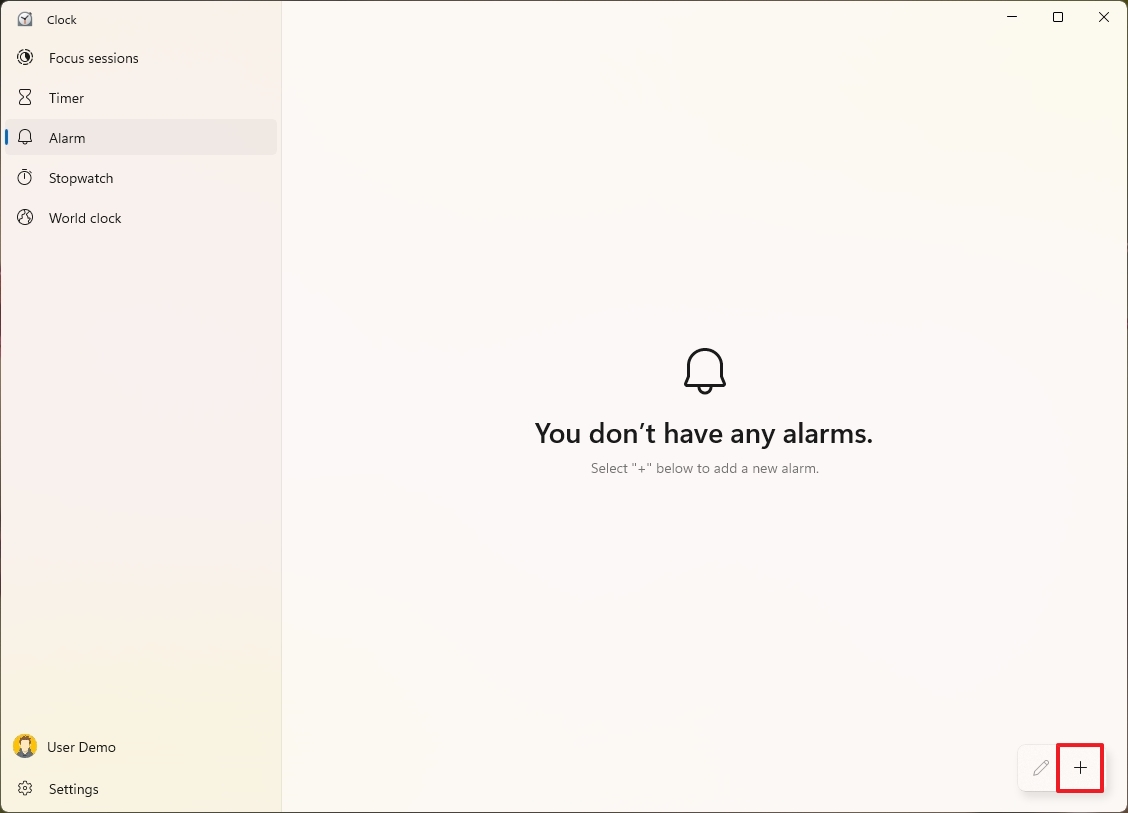
- Quick tip: You can create as many alarms as you need using the same option.
- Confirm the alarm time.
- Choose a descriptive name for the alarm.
- (Optional) Check the "Repeat alarm" option and choose the days to repeat the alarm.
- Choose the sound for the alarm.
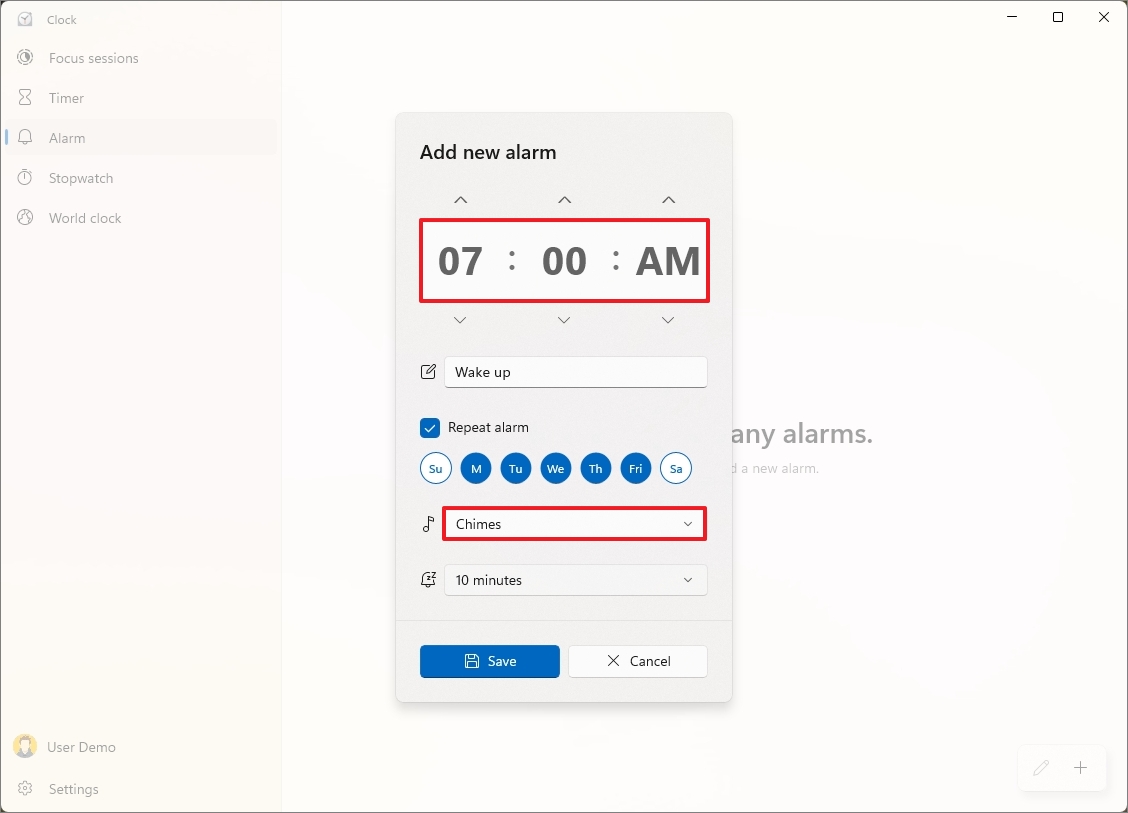
- (Optional) Choose the Snooze time.
- Click the Save button.
Once you complete the steps, the alarm will go off at the specified schedule, and you will receive a toast notification where you can also snooze the alarm, according to your configuration.
Edit an alarm
To reconfigure an alarm, use these steps:
- Open Start.
- Search for Clock and click the top result to open the app.
- Click on Alarm from the left pane.
- Click the alarm to edit.
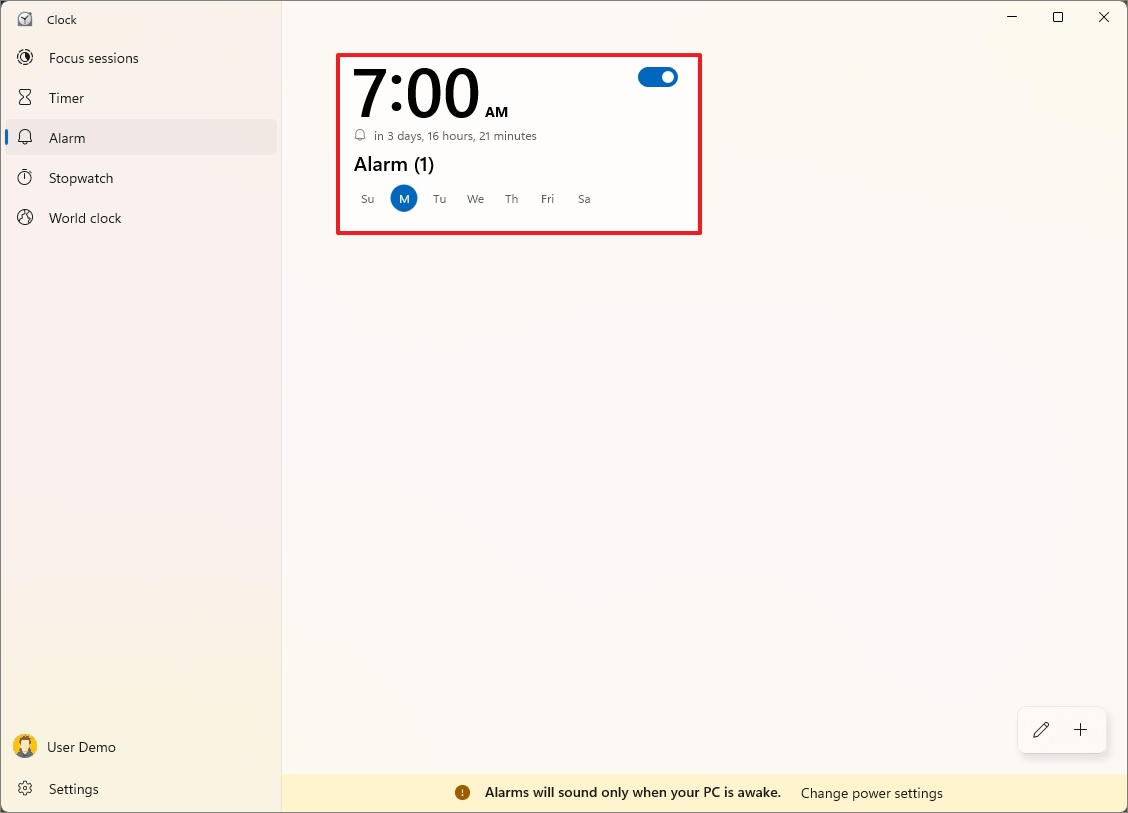
- Confirm the changes to the time, sound, etc.
- Click the Save button.
If you want to disable the alarm, turn off the toggle switch from the top right.
Delete an alarm
To remove an alarm from the Clock app, use these steps:
- Open Start.
- Search for Clock and click the top result to open the app.
- Click on Alarm from the left pane.
- Click the alarm to edit.

- Click the Delete button from the top right.
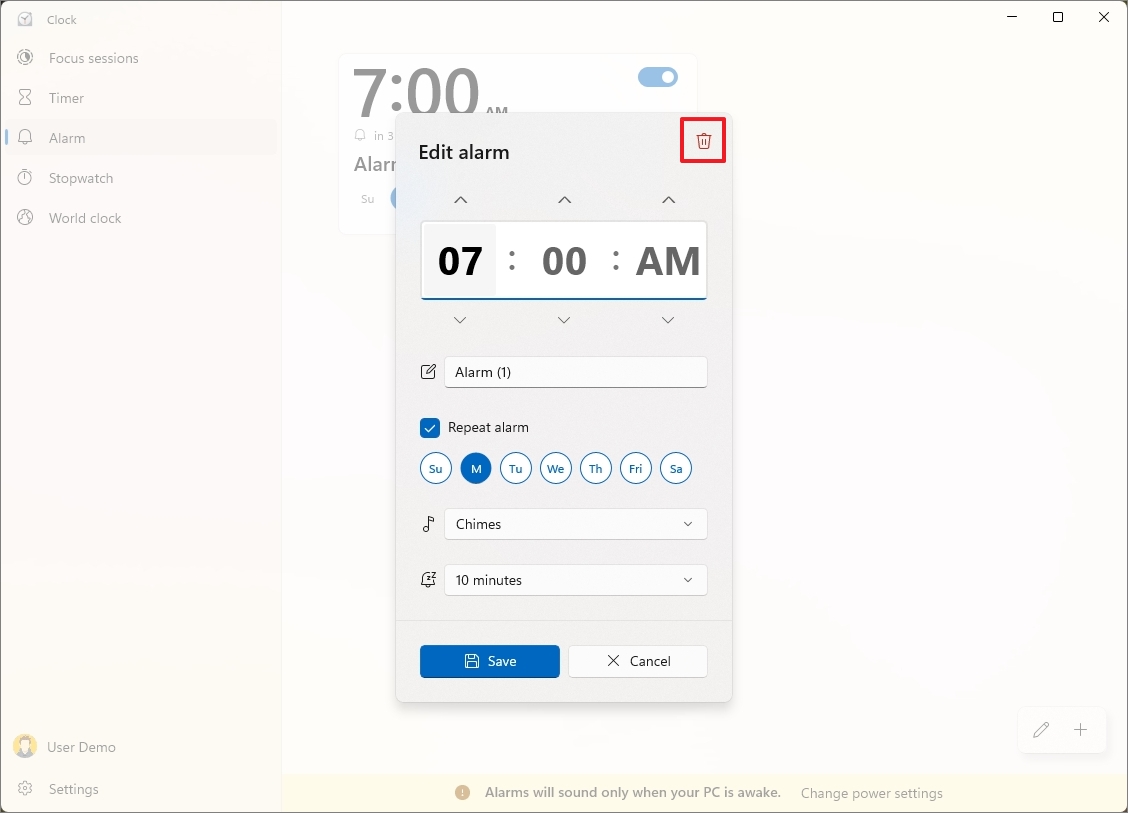
You can also right-click the alarm and choose the "Delete" option.
It's important to note that this feature will only work if the computer is awake. If the device is in sleeping mode, the alarm won't work.
You can check your device power settings on Settings > System > Power & battery (or Power), and on the "Screen, sleep, & hibernate timeouts" settings, make sure that the computer is not configured to enter into sleep mode when you are not actively using the computer.
How to set a timer with the Clock app on Windows 11
Using the Clock app, you can set timers to allocate specific time blocks for different tasks or activities.
Create a timer
To set a timer on Windows 11, use these steps:
- Open Start.
- Search for Clock and click the top result to open the app.
- Click on Timer from the left pane.
- Click the "Add a timer" button from the bottom right.
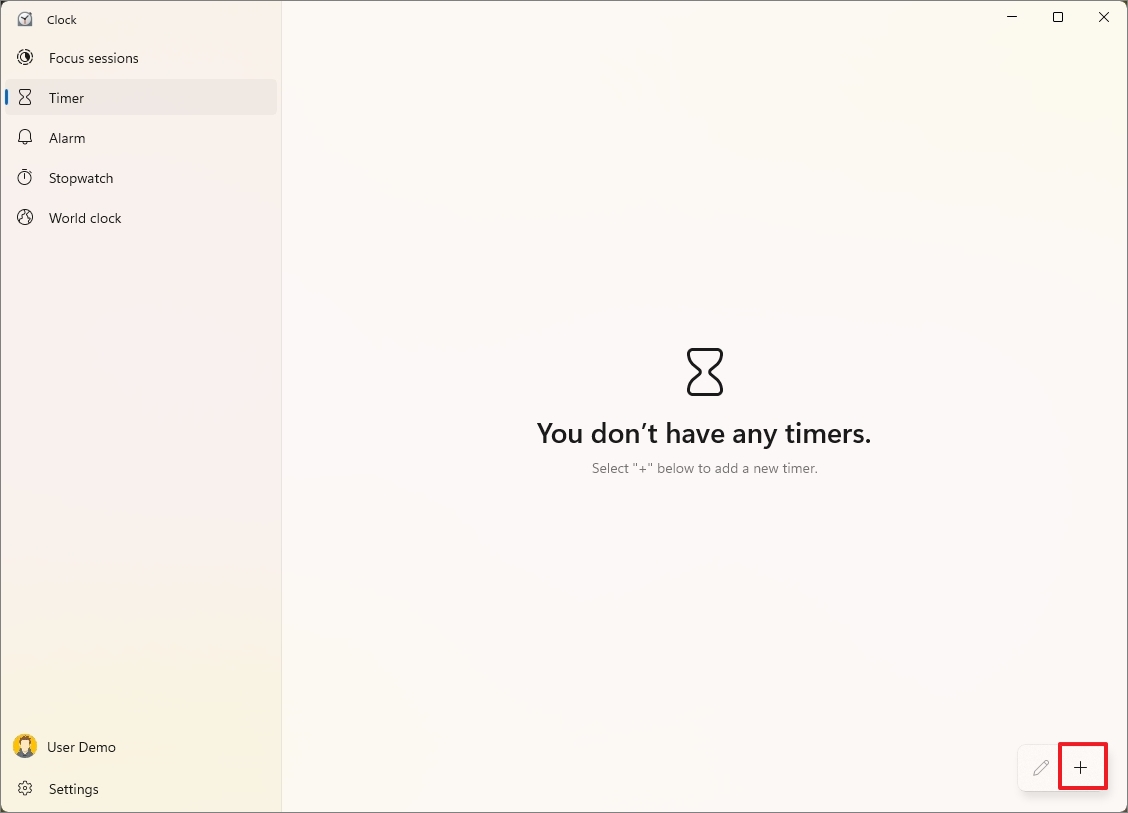
- Select the hours, minutes, and seconds from the timer.
- (Optional) Choose a descriptive name for the timer.
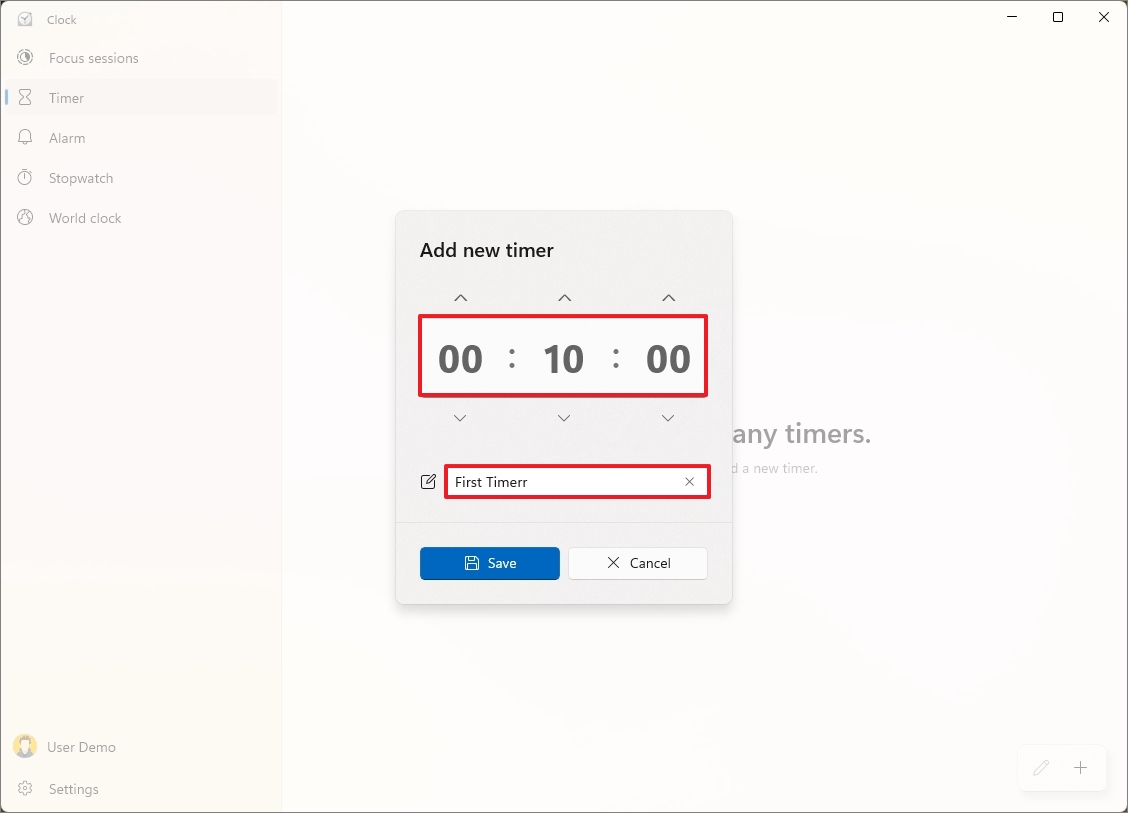
- Select the hours, minutes, and seconds from the timer.
- (Optional) Choose a descriptive name for the timer.
- Click the Save button.
- Click the Start button.
- (Optional) Click the "Keep on top" button to launch the compact version of the timer that stays on all apps.
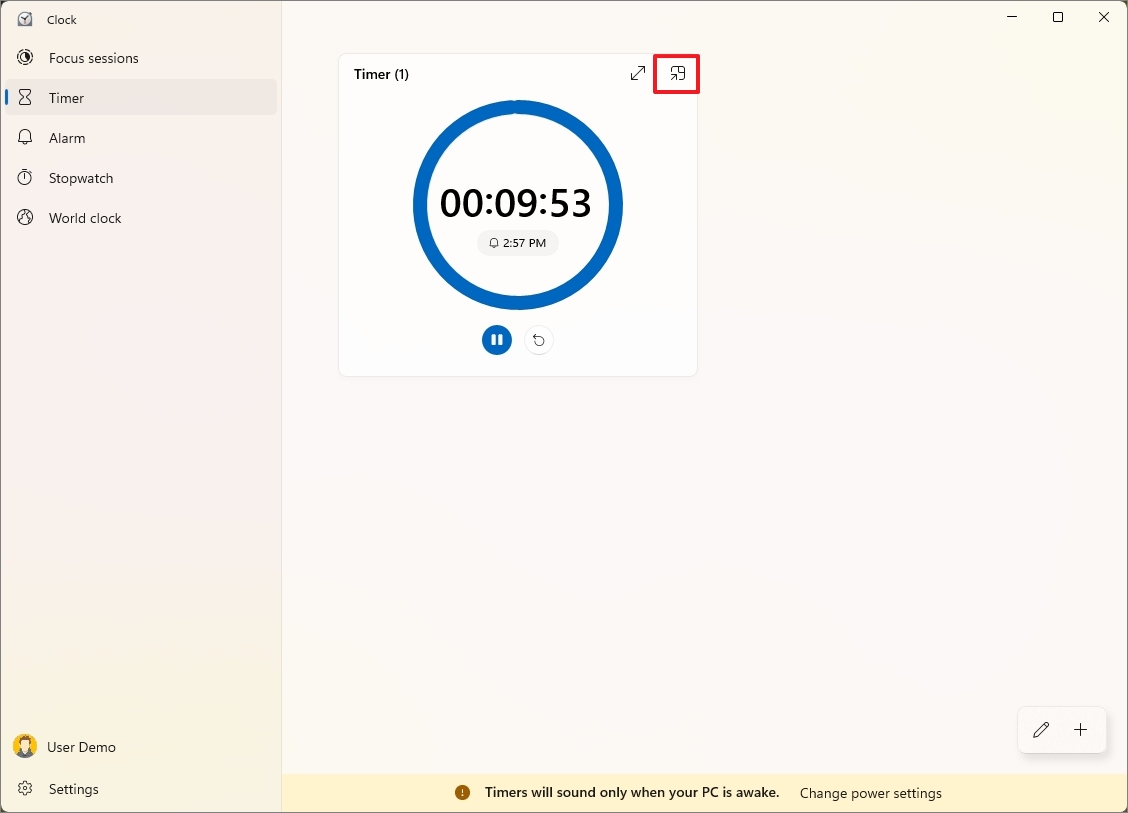
Once you complete the steps, the timer will start, but you can always pause or reset it with the available options.
Edit a timer
To reconfiguration a timer, use these steps:
- Open Start.
- Search for Clock and click the top result to open the app.
- Click on Timer from the left pane.
- Click the timer on the right.
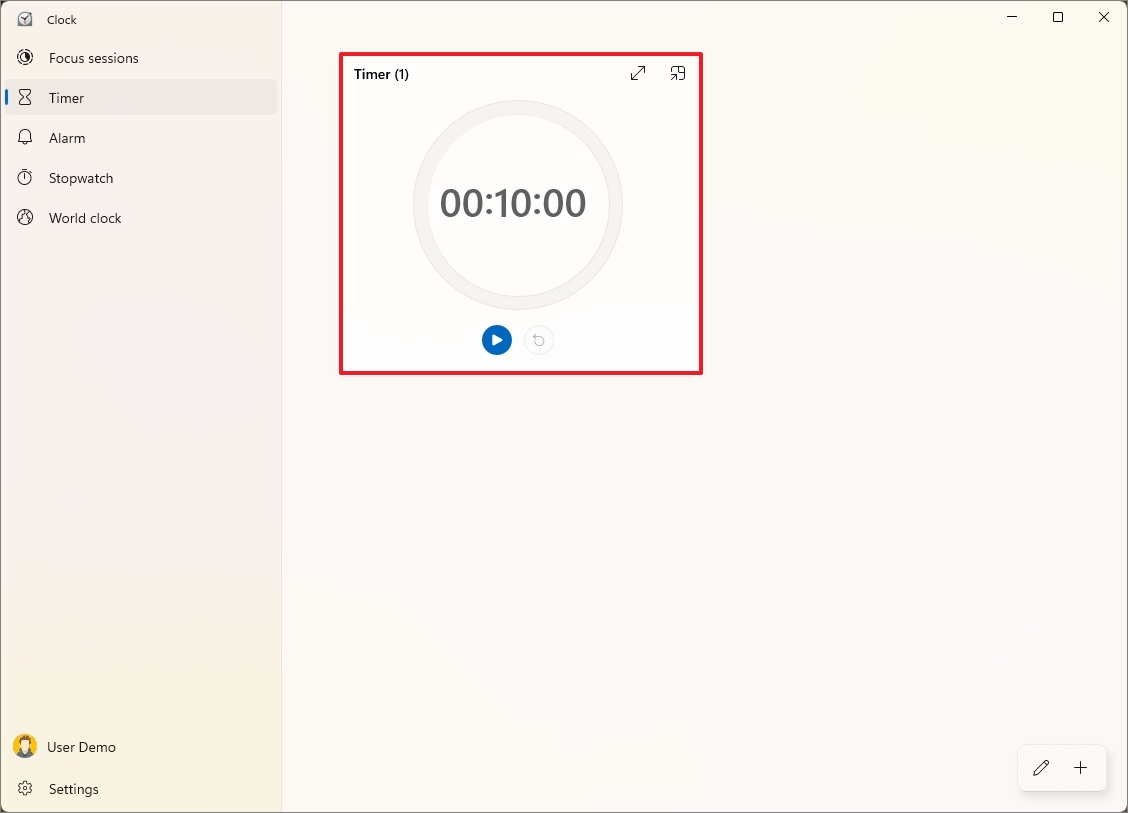
- Reconfigure the hours, minutes, and seconds.
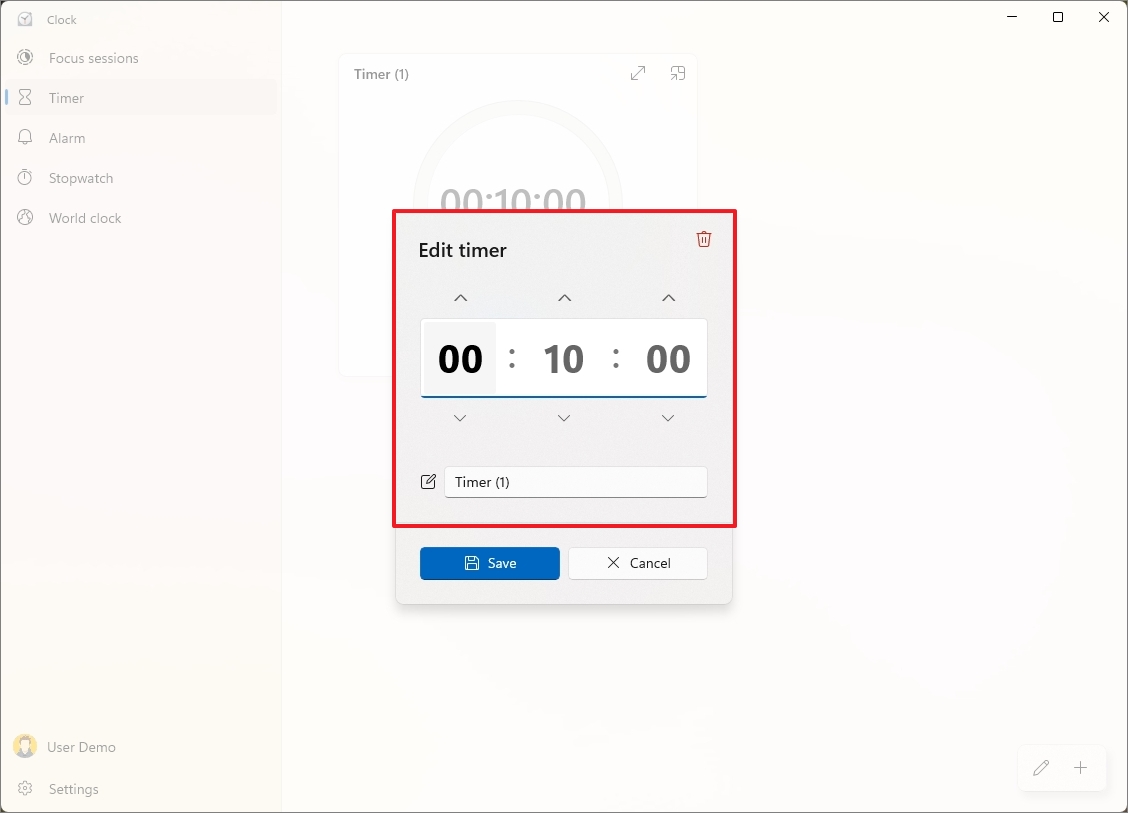
- Click the Save button.
After editing the timer, you can click the Start button to run the timer again.
Delete a timer
To remove a timer from the Clock app, use these steps:
- Open Start.
- Search for Clock and click the top result to open the app.
- Click on Timer from the left pane.
- Click the timer to edit.

- Click the Delete button from the top right.
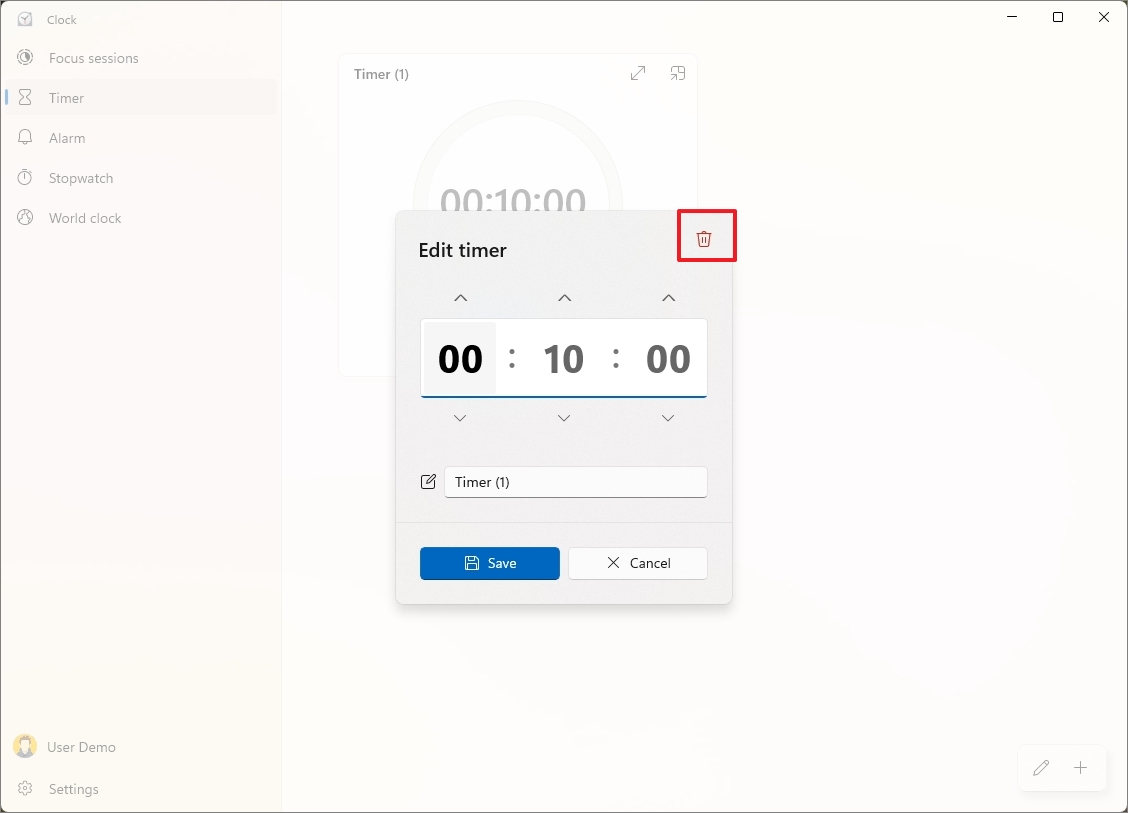
You can also right-click the timer and choose the "Delete" option.
How to use the Clock app stopwatch on Windows 11
To get started with the stopwatch on Windows 11, use these steps:
- Open Start.
- Search for Clock and click the top result to open the app.
- Click on Stopwatch from the left pane.
- Click the Start button.
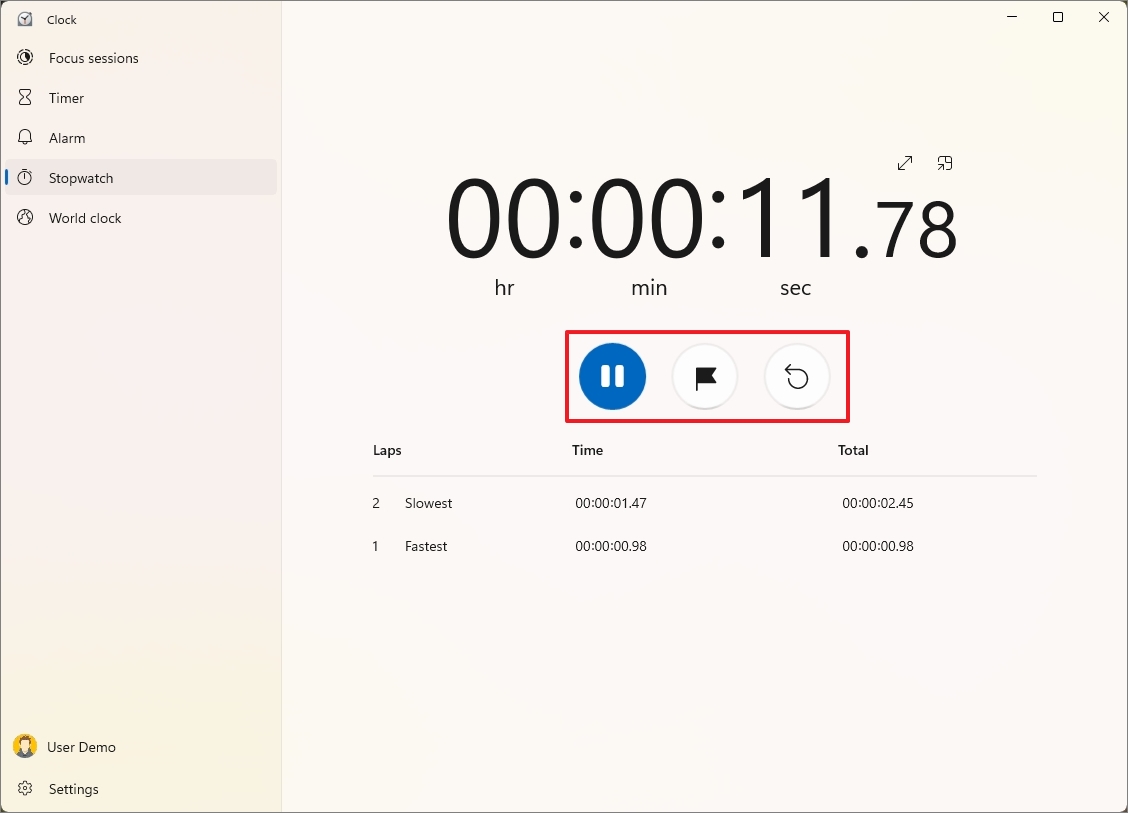
- (Optional) Click the flag button to record a lap (or split).
- Click the Reset button once you are done.
If you want to keep the stopwatch on the screen but out of the way, click the "Keep on top" button to open the compact version of the feature. Once you're done, click the "Back to full view" button to reopen the Clock app.
More resources
For more in-depth insights, troubleshooting tips, and the latest updates on Windows 11 and 10, be sure to explore these resources:


