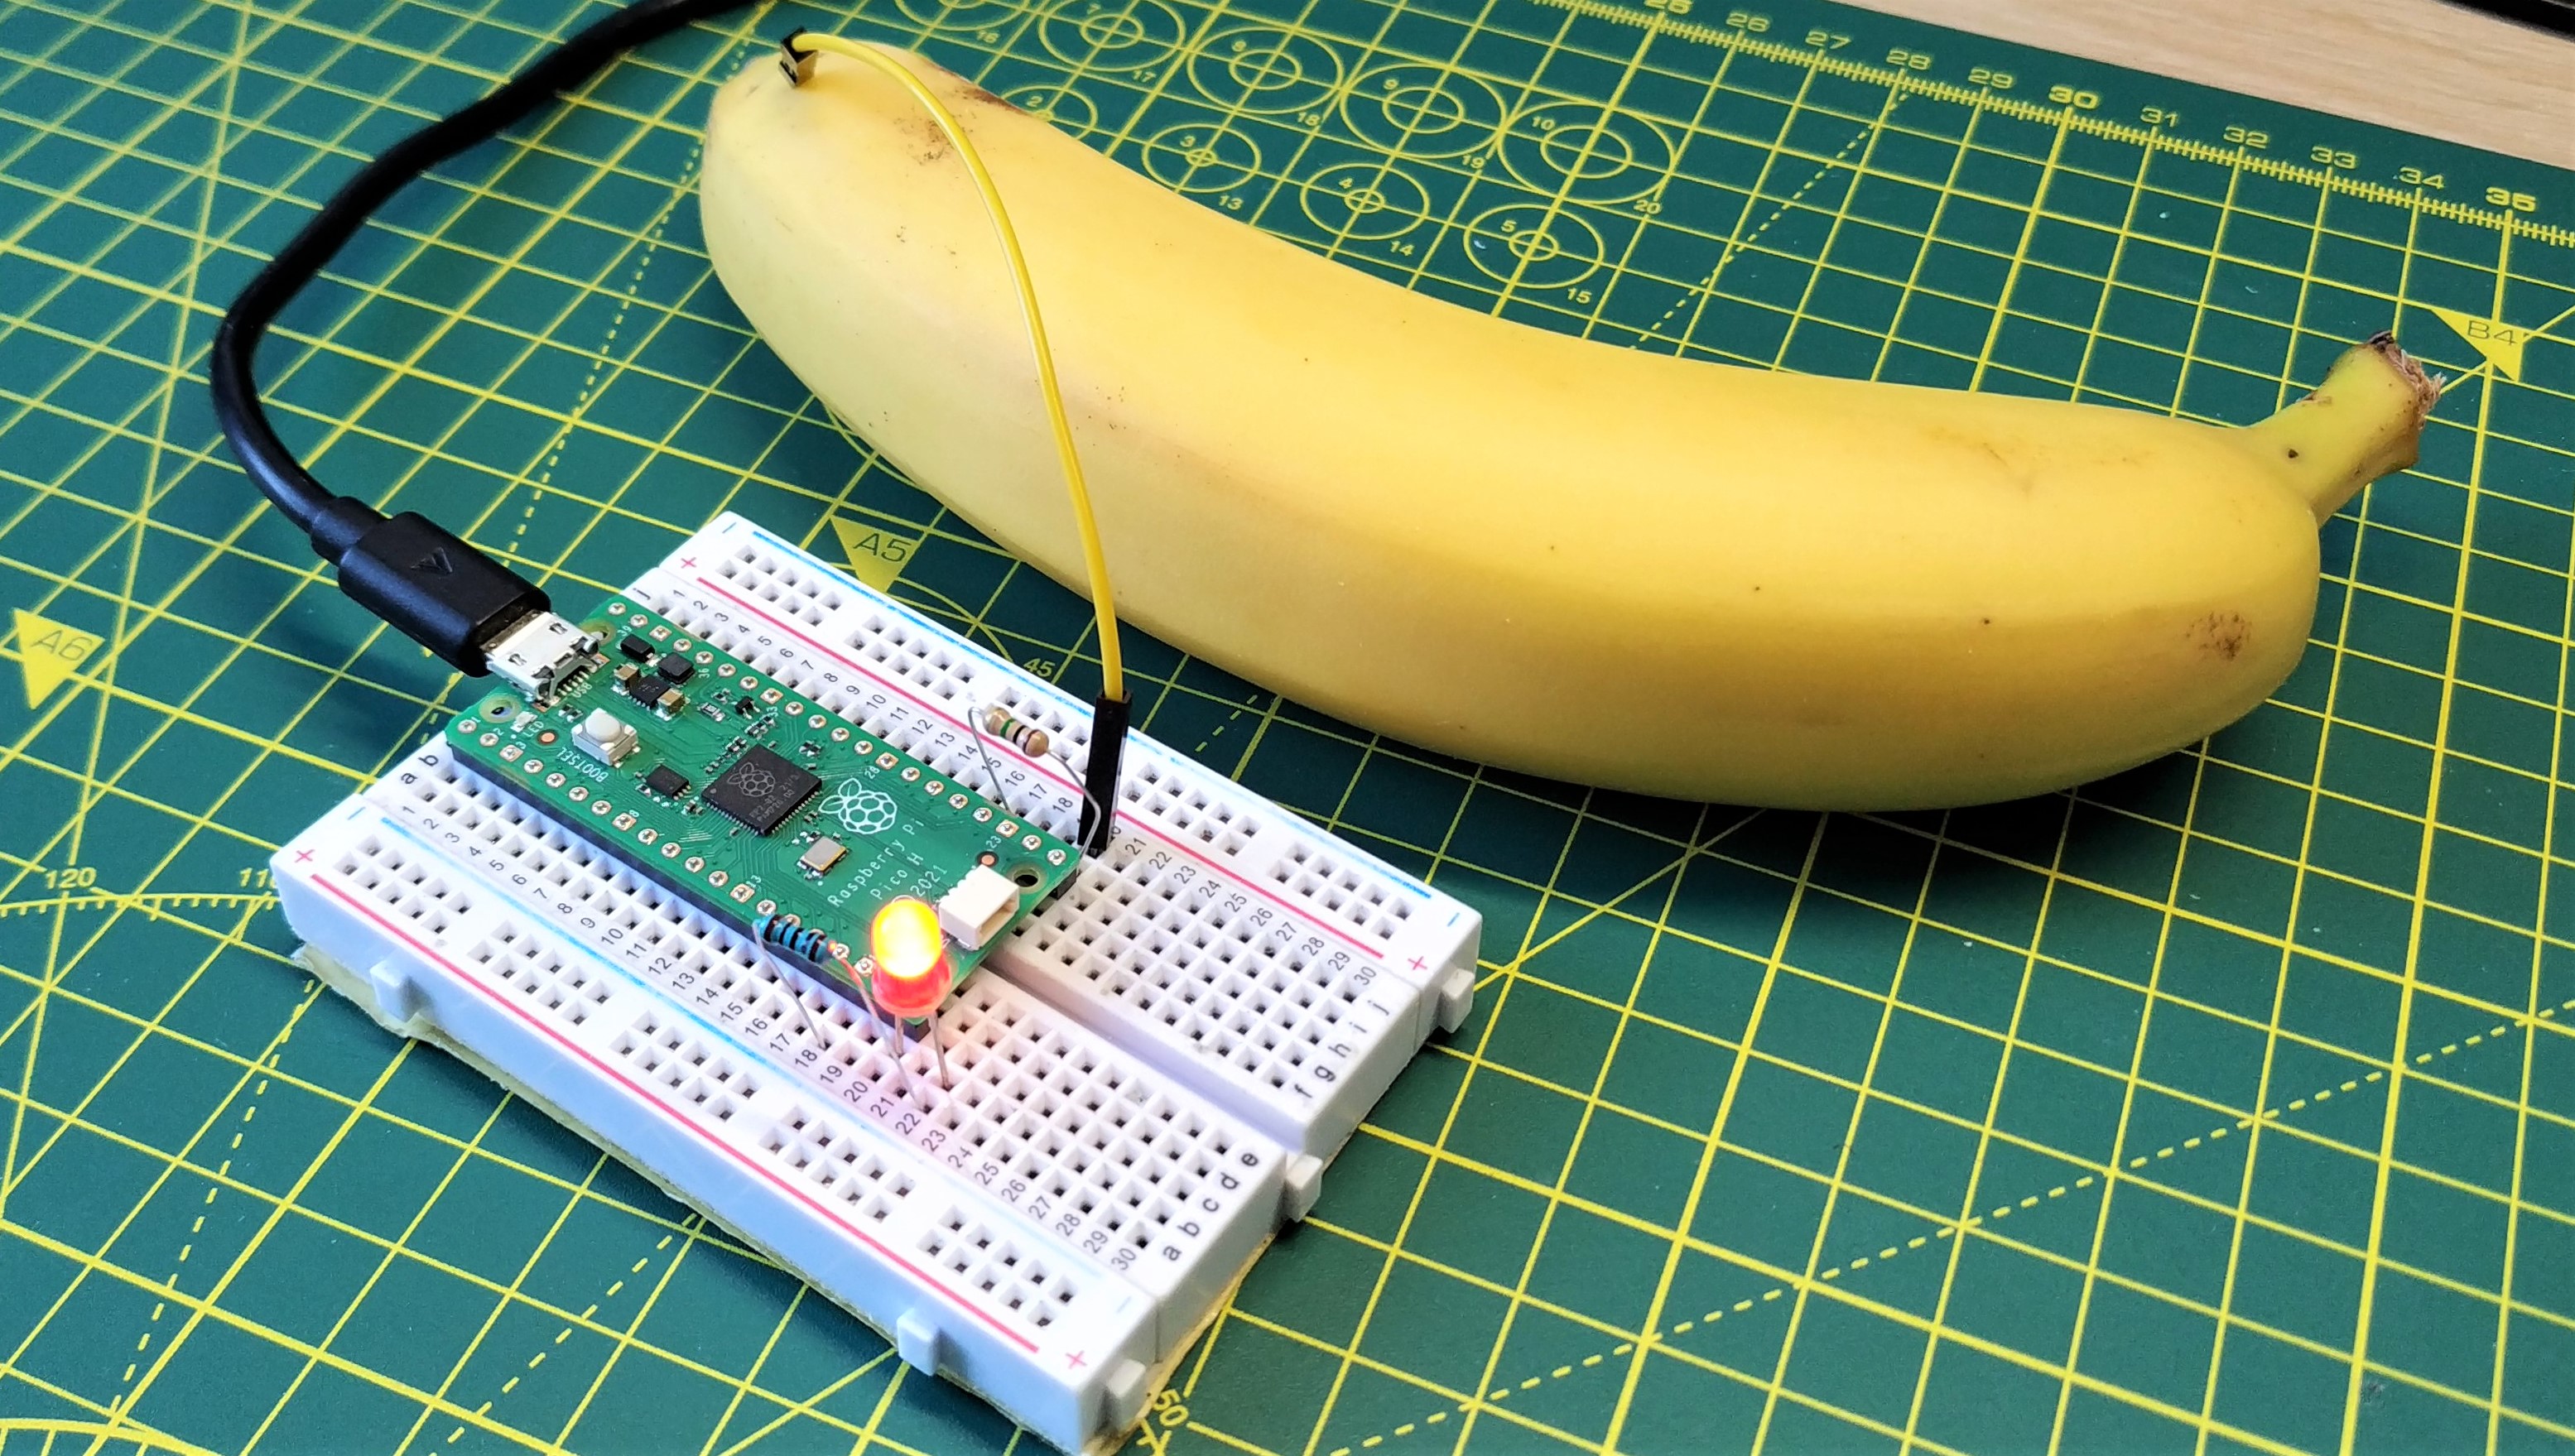
Capacitive touch is a simple means to detect user input by measuring the dielectric constant. If it is different to a baseline measurement then it can be used as an input. In the past, we have used an MPR121 touch sensor to trigger an event using a Raspberry Pi Pico. The MPR121 is a dependable Stemma QT sensor that comes in various form factors for crocodile clips and standard wire gauges. We love it so much that we put it on our list of best Stemma QT and Grove add ons page. But is there a way to do it without using a sensor board?
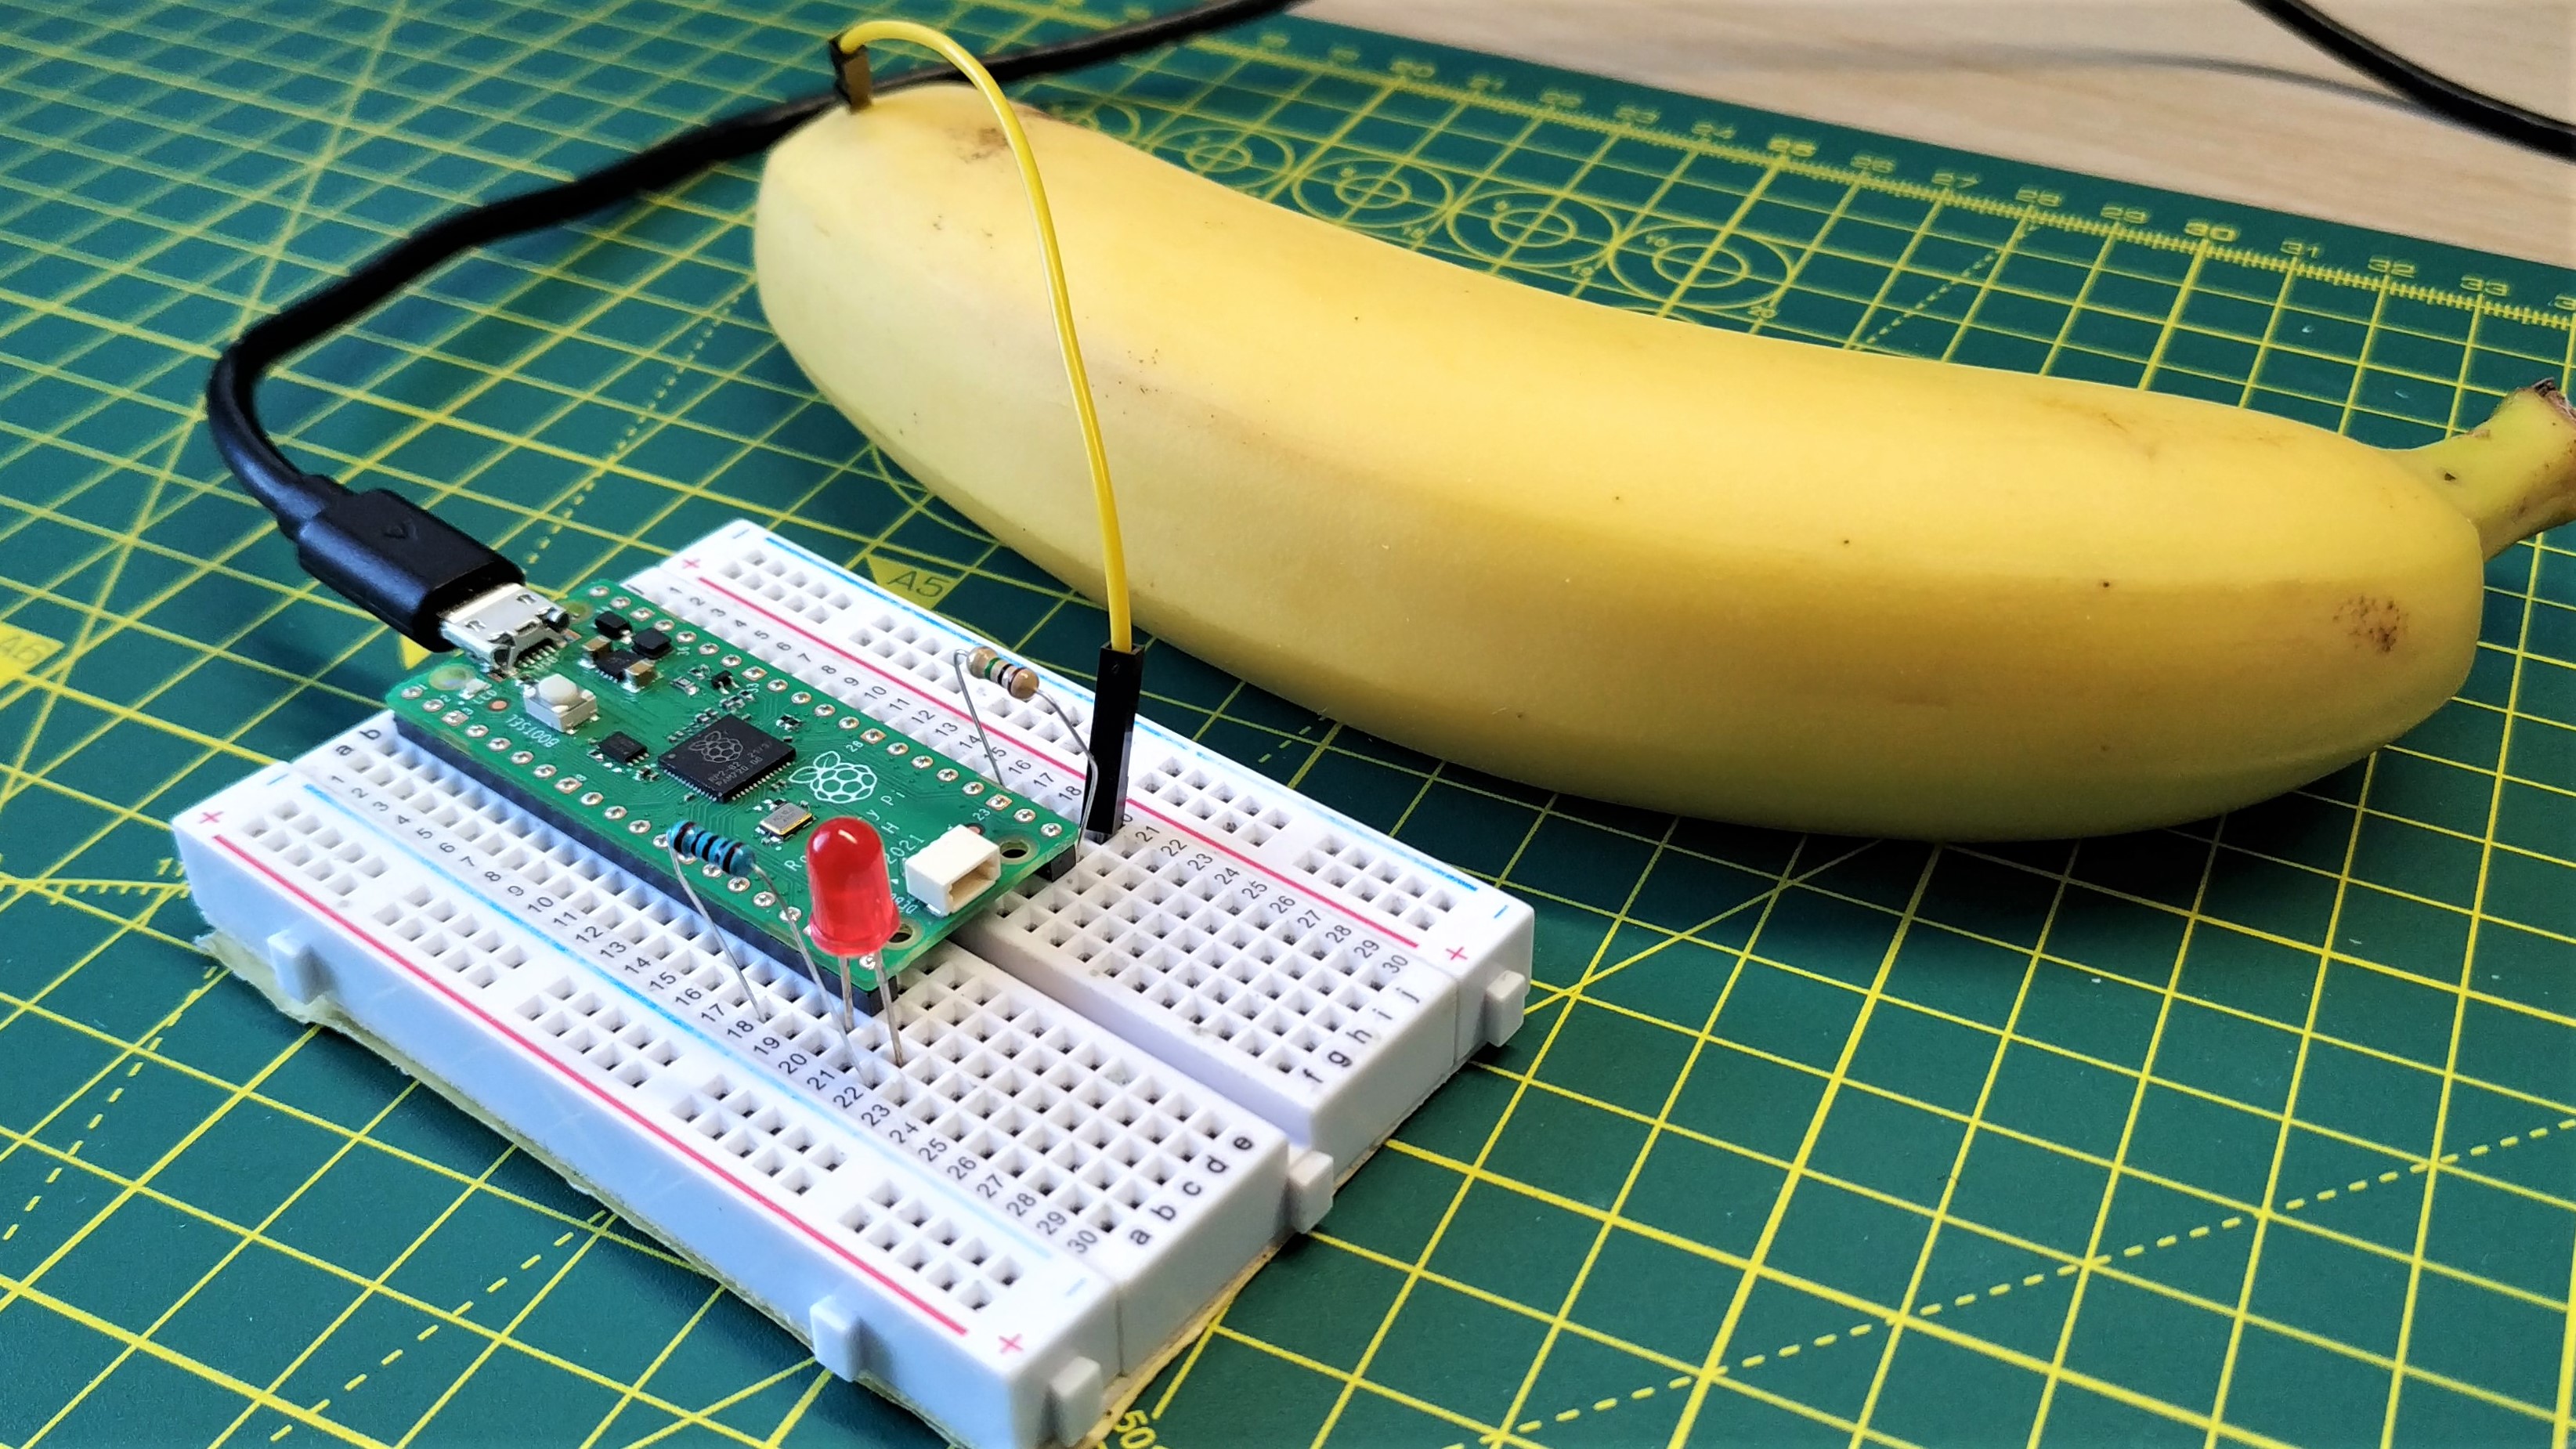
Using just a piece of wire and a 1 Mega Ohm resistor in a banana, we can create our own touch interface and have a healthy snack. In this how-to, we will use the banana to toggle an LED on and off.
Why something so simple? Learning to turn an LED on / off is the best way to understand how every part of your project works. Sure we could turn the banana into a space bar and play Flappy Birds, use it to open a browser window and “Rick-roll” a friend or start a robot to make a mad dash for the door. But before we can do that we need to understand how and why things work, and the humble LED is a cheap and easy way to do this.
For This Project You Will Need
- Raspberry Pi Pico
- Half-size breadboard
- 1 x 100 Ohm resistor (Brown-Black-Brown-Gold)
- 1 x 1 Mega Ohm resistor (Brown-Black-Green-Gold)
- 1 x Male to male jumper wire
- 1 x Banana (optional)
Building the Circuit
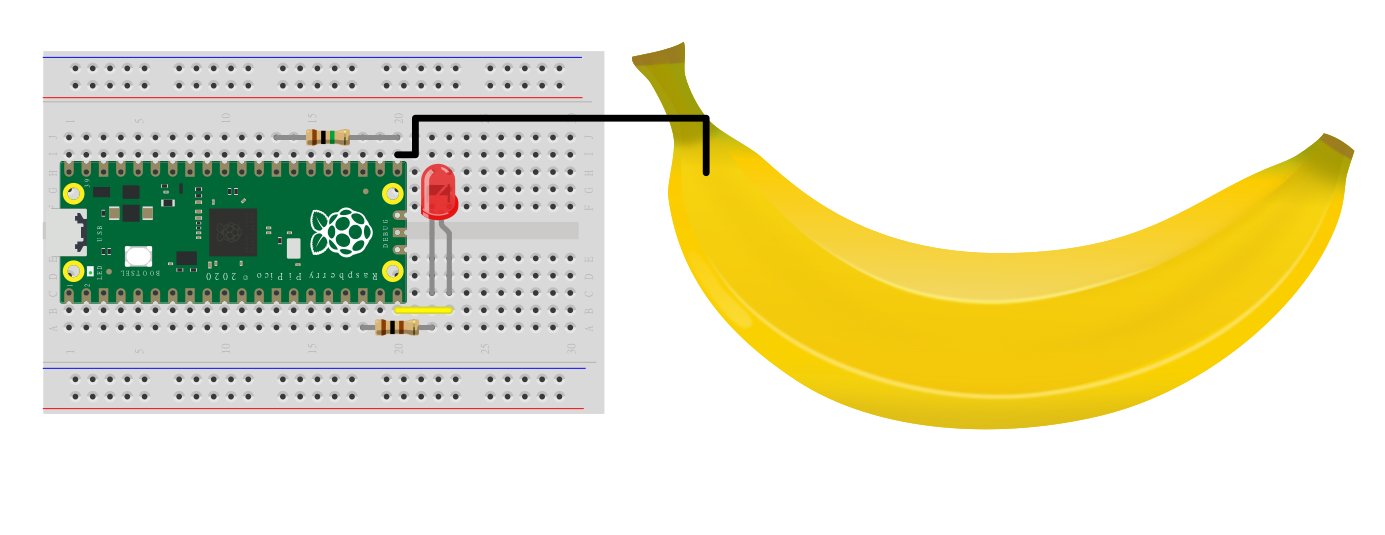
There are two parts to the circuit: the input and the output. The input is a banana (optional), connected to GPIO 16 on the Raspberry Pi Pico using a long jumper wire. GPIO 16 also has a 1 Mega Ohm resistor to connect it to GND. This is a pulldown resistor and ensures that the GPIO pin sees a constant 0V reference. Without it, the input would be erratic. This process can be repeated for multiple inputs, your only limits are GPIO pins, 1 Mega Ohm resistors and bananas.
The output is a simple LED with the long leg (Anode) connected to GPIO 15 and the short leg (Cathode) connected to GND via a 100 Ohm resistor.
The banana can be replaced with anything that is conductive. Aluminum foil, play-doh and other fruits / vegetables can be used as inputs. You can also forgo the culinary inputs for bare wires. In certain cases this works better.
Build the circuit and double check your connections before moving onwards.
Configuring CircuitPython
We chose CircuitPython for this project for two key reasons. One, it is so easy to use and understand. Our code is easy-to-read, debug and we can write it on any device, even a Chromebook. Two, CircuitPython has the Touchio module which makes it easy to create touch inputs using the GPIO. But before we can start the project we need to write the latest version of CircuitPython to the Raspberry Pi Pico.
1. Go to the official CircuitPython page for the Raspberry Pi Pico and download the latest release UF2 firmware image. At the time of writing this was CircuitPython 8.10. We have chosen the Raspberry Pi Pico as we do not need Wi-Fi, but this project could be used to trigger a web-event, for that you will need a Raspberry Pi Pico W.
2. Whilst holding the BOOTSEL button, connect the Raspberry Pi Pico to your computer. A new drive, RPI-RP2 will appear.
3. Copy the downloaded CircuitPython UF2 file to RPI-RP2. This will write CircuitPython to the internal flash storage of the Pico . A new drive, CIRCUITPY will appear.
Writing the Code
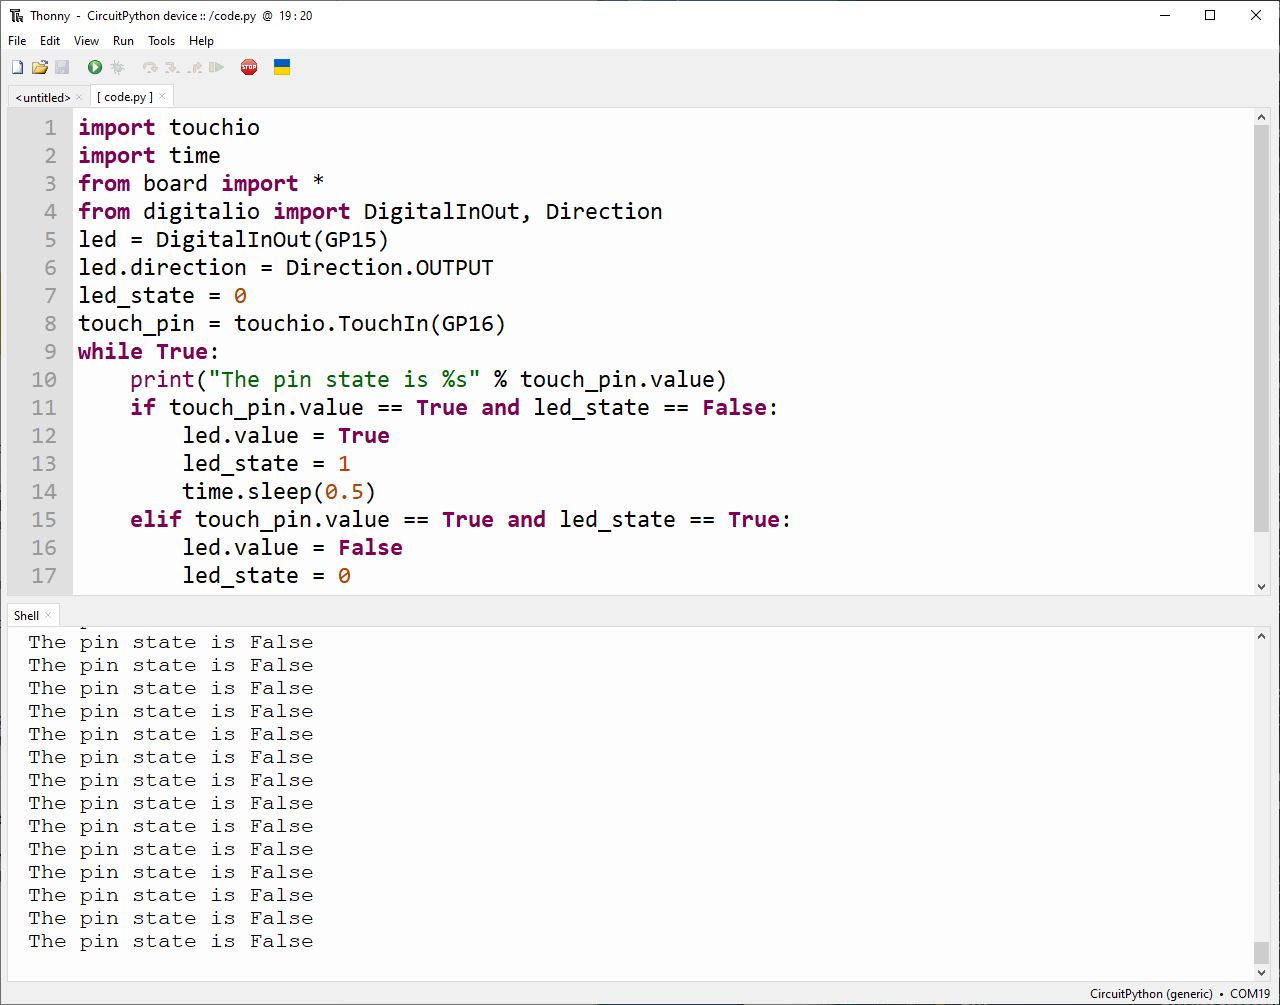
To write the code we used Thonny on Windows 10. You are free to use your choice of text editor, but Thonny has great CircuitPython (and MicroPython) integration which makes it a breeze to use. Best of all it is free and easy to install on Windows, macOS and Linux devices.
Writing the Code
1. Download and install Thonny if you don’t have it already. Thonny is a Python editor which covers Python 3, MicroPython and CircuitPython.
2. Open Thonny and go to Tools >> Options.
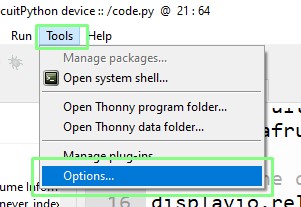
3. Select Interpreter, then set the interpreter as CircuitPython, port to automatic, and click OK. Thonny will now connect to the Pico running CircuitPython.
4. Click on File >> Open and select the CircuitPython device. Then select code.py. Code.py is used by CircuitPython as the main file for a project. It is set to auto-run when the Pico is powered up.
5. Delete any code in code.py. If you need the code, make sure to back it up to your computer.
6. Import four modules of code necessary for the project to work. Touchio is used to create a capacitive touch input using a GPIO pin. Time controls how long the code will pause between actions. Board is used to work with the GPIO, importing using * means that we do not have to include the module name. Digitalio is used to control the status of a pin. It can be an input or output.
import touchio
import time
from board import *
from digitalio import DigitalInOut, Direction
7. Create an object, led, and set the GPIO pin to GP15, and then set it to be an output. This will ensure that when the LED is triggered, current will flow from pin GPIO 15 to the anode of the LED. As the cathode is connected to GND via the 100 Ohm resistor, the complete circuit will turn on the LED.
led = DigitalInOut(GP15)
led.direction = Direction.OUTPUT
8. Create an object, led_state and store the integer value 0 inside of it. This object will be used to record the current state of the LED. It can either be off (0) or on (1).
led_state = 09. Create an object, touch_pin to make a connection between the code and physical GPIO pin.
touch_pin = touchio.TouchIn(GP16)10. Create a loop to continually run the code.
while True:11. Inside the loop create a print function that will report the current state of the touch input pin. We use %s to use the value stored in touch_pin.value and convert it into a string for concatenation to the text.
print("The pin state is %s" % touch_pin.value)12. Write a conditional test to check if the input has been touched, and that the LED is turned off. Both tests have to pass in order for the conditional test to pass.
if touch_pin.value == True and led_state == False:13. Set the LED to turn on, then update the led_state object to 1, so that the code knows that the LED is on. Sleep for half a second to prevent accidental debounce (double press). This code will only run if the conditional test passes.
       led.value = True
       led_state = 1
       time.sleep(0.5)
14. Create a conditional test to check if the input has been touched and that the LED is currently on. This code will turn off the LED.
elif touch_pin.value == True and led_state == True:15. Toggle the LED off, update the led_state object so that the code knows the LED is off, and then pause for half a second.
       led.value = False
       led_state = 0
       time.sleep(0.5)
16. Outside of the conditional tests, but still inside the loop, pause the code for 0.1 seconds. Each time the loop iterates, it will pause for 0.1 seconds, this is useful pacing the project code.
time.sleep(0.1)17. Save the code to code.py on the CircuitPython device (Raspberry Pi Pico).
18. The code should autorun, if not click on Stop and then Run.

19. Touch the banana to toggle the LED on / off.
Complete Code Listing
import touchio
import time
from board import *
from digitalio import DigitalInOut, Direction
led = DigitalInOut(GP15)
led.direction = Direction.OUTPUT
led_state = 0
touch_pin = touchio.TouchIn(GP16)
while True:
   print("The pin state is %s" % touch_pin.value)
   if touch_pin.value == True and led_state == False:
       led.value = True
       led_state = 1
       time.sleep(0.5)
   elif touch_pin.value == True and led_state == True:
       led.value = False
       led_state = 0
       time.sleep(0.5)
   time.sleep(0.1)


