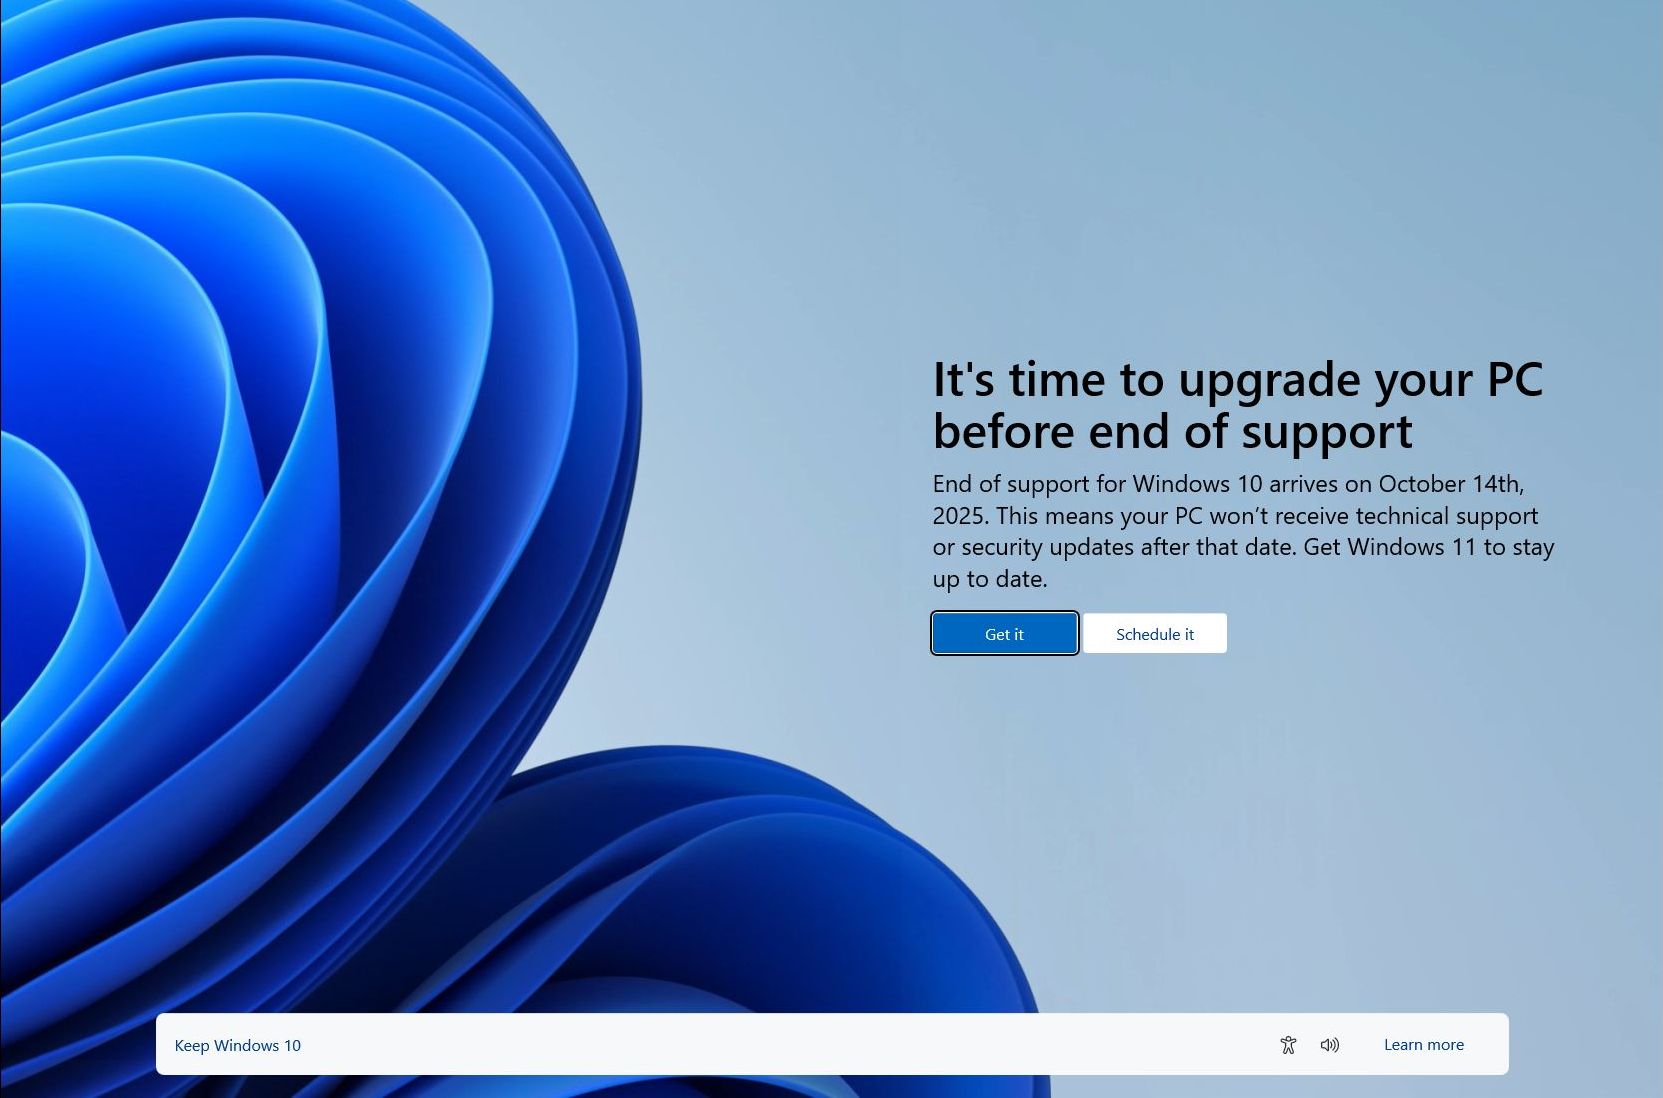
As support for Windows 10 will come to an end on October 14, 2025, it's time to start thinking about upgrading to Windows 11 to maintain the continuity of updates and support. In this guide, I will outline three easy ways to complete this process without losing your files.
Windows 11 has been widely available since 2021, bringing a fresh, modern look and feel to the experience with its sleek design, enhanced features, and improved performance, making it a significant upgrade over its predecessor and the best part is that the upgrade from Windows 10 is free.
If you're ready to make the leap to the more advanced version of the operating system, you have different ways to upgrade. For instance, you can use the Windows Update settings.
If the upgrade isn't available, you can also use the Installation Assistant tool, which offers a similar experience to the Windows Update, but using this method, you will force the download.
Alternatively, you can download the official ISO file for Windows 11, which you can mount directly into File Explore to launch the upgrade process.
In this how-to guide, I will outline the steps to download and upgrade to Windows 11 on a desktop, laptop, or tablet that is already running Windows 10.
Important: This is a non-destructive process, but there is always a chance of something going wrong during and after the upgrade, which means that you should consider creating a temporary backup before proceeding. You've been warned. Also, to minimize the changes or issues, these instructions assume the device has the most up-to-date release of Windows 10 with the latest system and driver updates.
Windows 11 upgrade requirements
Although Windows 11 is a free upgrade for existing Windows 10 devices, it doesn't mean that everyone's computer will support the new version.
Hardware requirements
Here are the minimum hardware requirements to perform the free upgrade:
- CPU: 1GHz or faster or System on a Chip (SoC) with two cores minimum.
- RAM: 4GB.
- Storage: 64GB or larger.
- Firmware: UEFI
- TPM: Trusted Platform Module (TPM) version 2.0.
- Graphics: Compatible with DirectX 12 or later with WDDM 2.0 driver.
- Display resolution: High definition (720p) display greater than 9-inch diagonally, 8 bits per color channel.
- Connectivity: Internet and Microsoft account.
In addition, the processor must support SSE4.2 on Intel or SSE4A on AMD (which also includes the POPCNT instruction). Usually, most processors released after 2008 include these instructions.
Check compatibility
Whether you use Windows Update, ISO file, or Installation Assistant, any of these tools should be able to determine and inform you whether or not the device meets the minimum requirements, but you can always check manually.
To check the basic hardware specs, use these steps:
- Open Settings.
- Click on System.
- Click on About.
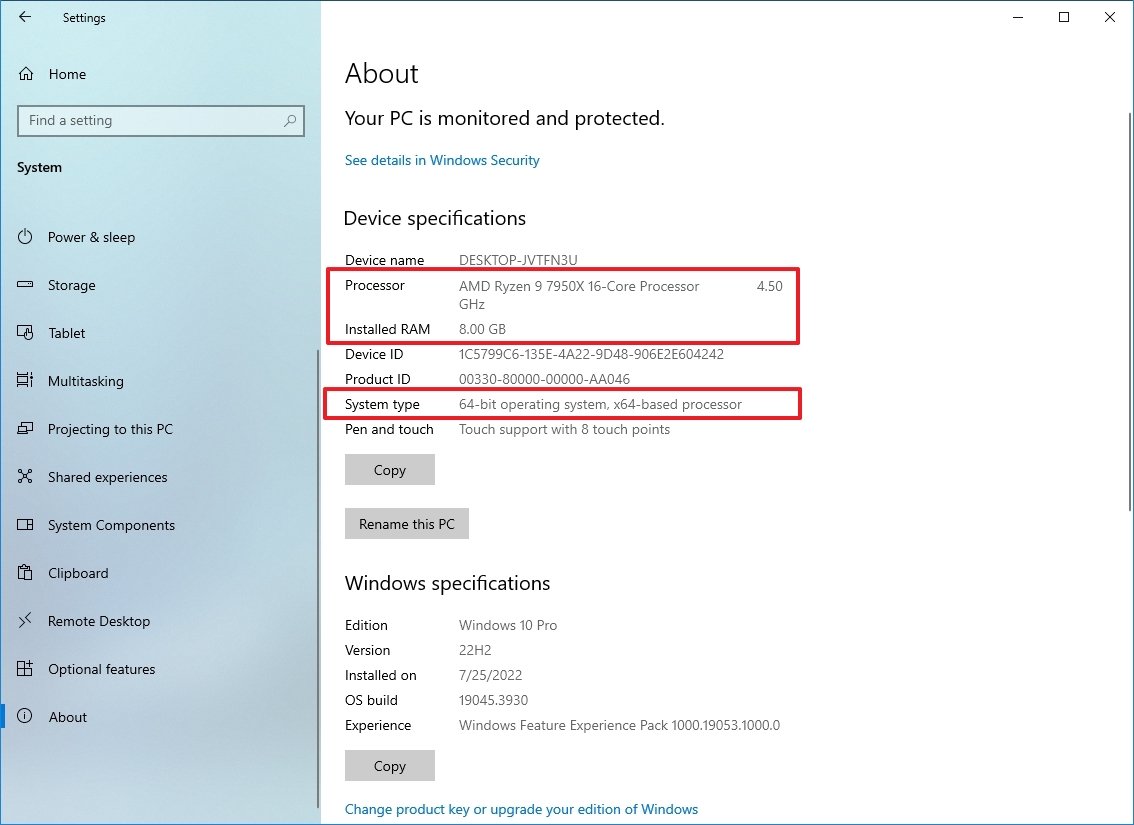
- Confirm the processor, memory, and system type.
- Quick note: The memory should be equal or greater (recommended) than 4GB, and the processor must be an Intel's 7th Get 7820HQ, Core X, Xeon W, or 8th Gen or newer or an AMD Zen 2 or newer. Also, the system type must be 64-bit. Windows 11 does not come in 32-bit.
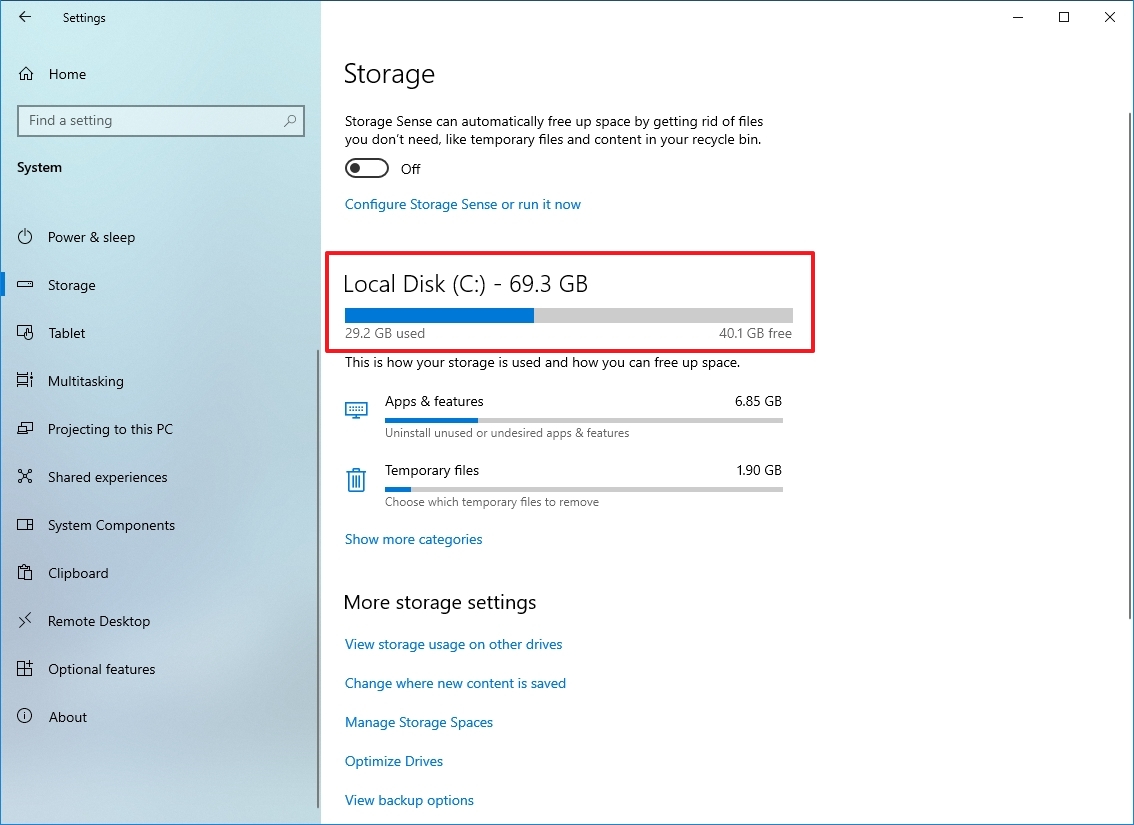
- Click on Storage.
- Confirm the main drive is greater than 64GB.
You can also check the specifications of your laptop or desktop hardware on the manufacturer's support website.
In addition, you will need to ensure that the computer has enabled the Trusted Platform Module (TPM) version 2.0. These instructions will help you complete this task.
Secure Boot is not a requirement, but it's recommended. You can use this guide to check the feature state and the steps to turn it on as necessary.
PC Health Check app
Alternatively, you can also use the PC Health Check app to determine if your computer will support Windows 11 quickly:
- Quick note: The app should already be installed on your computer, but if it's not, you can download it using the Microsoft support link.
- Search for the PC Health Check and click the top result to open the app
- Click the Check now button.
- Click the "See all results" button to display the final report.
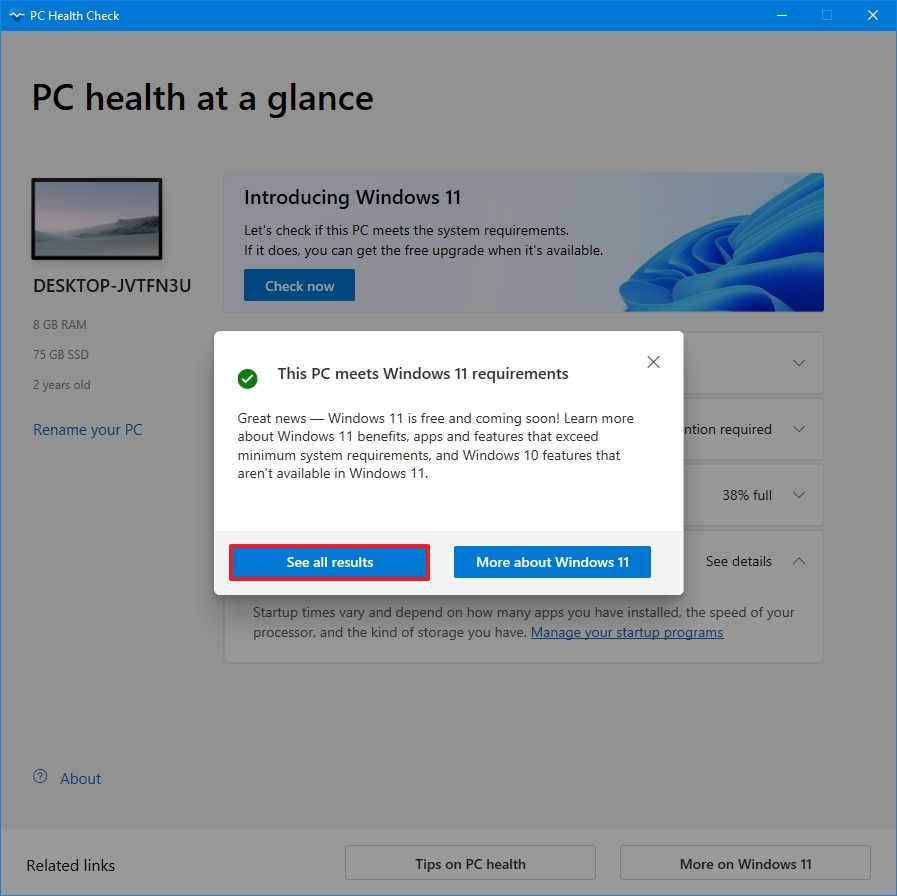
After you complete the steps, you will know if your computer can handle the new version of Windows. If there's a check that the device didn't pass, click the available link in the app to find out how to remedy the situation.
How to upgrade to Windows 11 using Windows Update
To upgrade a PC running Windows 10 to Windows 11 through Windows Update, use these steps:
- Open Settings.
- Click on Update & Security.
- Click on Windows Update.
- Click the Check for updates button.
- Click the "Download and install" button.
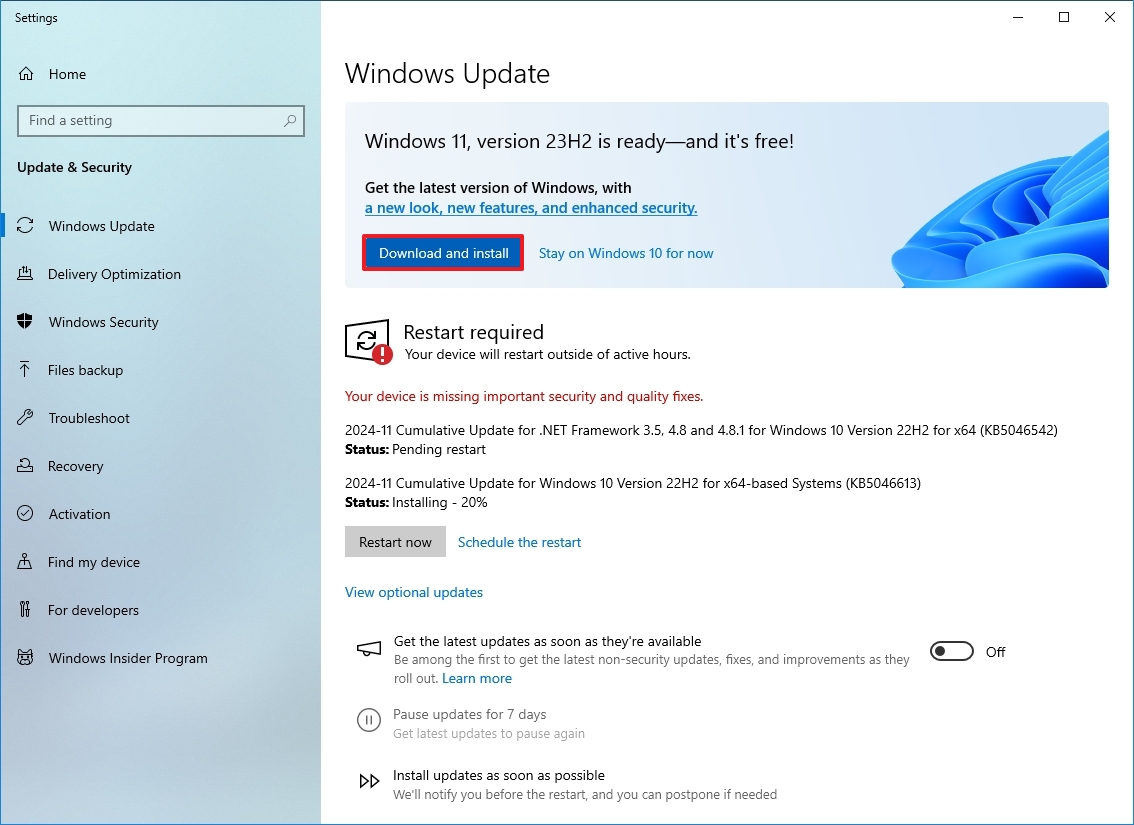
- Click the Restart now button.
Once you complete the steps, the computer will restart, and the upgrade to Windows 11 will begin. Since this is an in-place upgrade, you won't need to go through the entire out-of-box experience (OOBE).
How to upgrade to Windows 11 using Installation Assistant
If Windows Update is causing a problem, and you know the hardware is compatible, you can use the Installation Assistant.
To use the tool to upgrade to Windows 11 from Windows 10, use these steps:
- Open this Microsoft support website.
- Click the Download Now button under the "Windows 11 Installation Assistant" section.
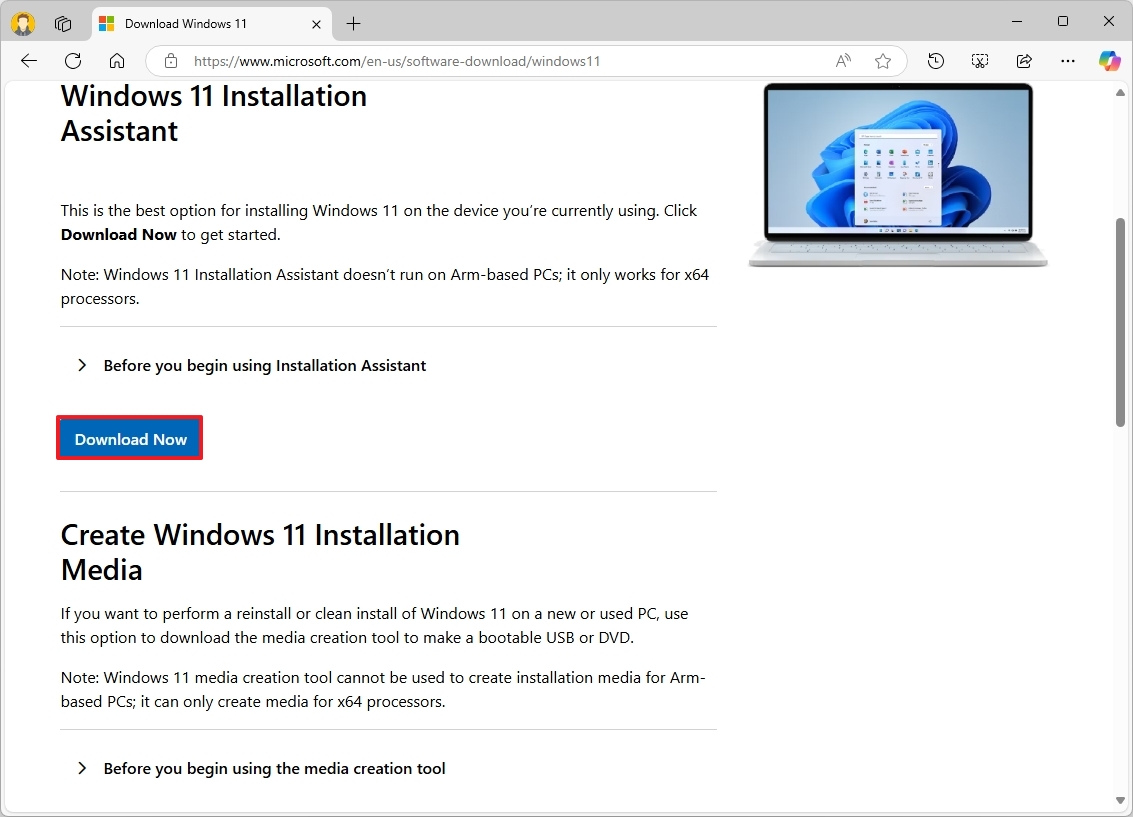
- Save the file on the computer.
- Double-click the Windows11InstallationAssistant.exe file to launch the setup.
- Click the Accept and install button.
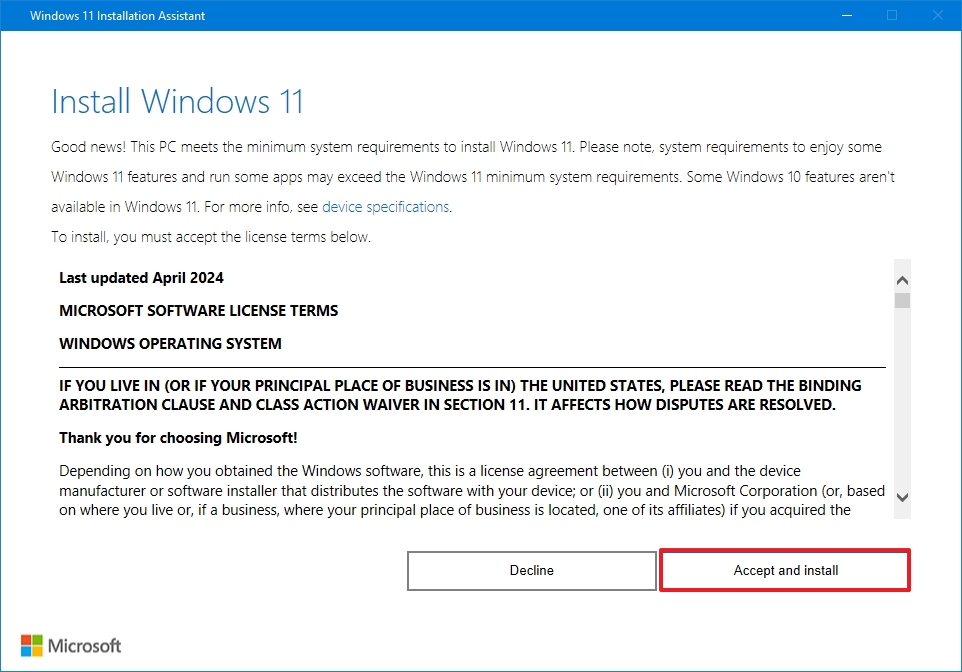
After you complete these steps, the tool will download the installation files and will proceed to upgrade the computer to Windows 11, preserving your files, apps, and most of the settings. The time of completion will depend on your internet connection and device hardware.
How to upgrade to Windows 11 using official ISO file
You can also mount the ISO file to File Explorer to proceed with the upgrade process.
To upgrade a device to Windows 11 from the ISO file, use these steps:
- Open Windows 11 download page.
- Under the "Download Windows 11 Disk Image (ISO)" section, select the Windows 11 option.
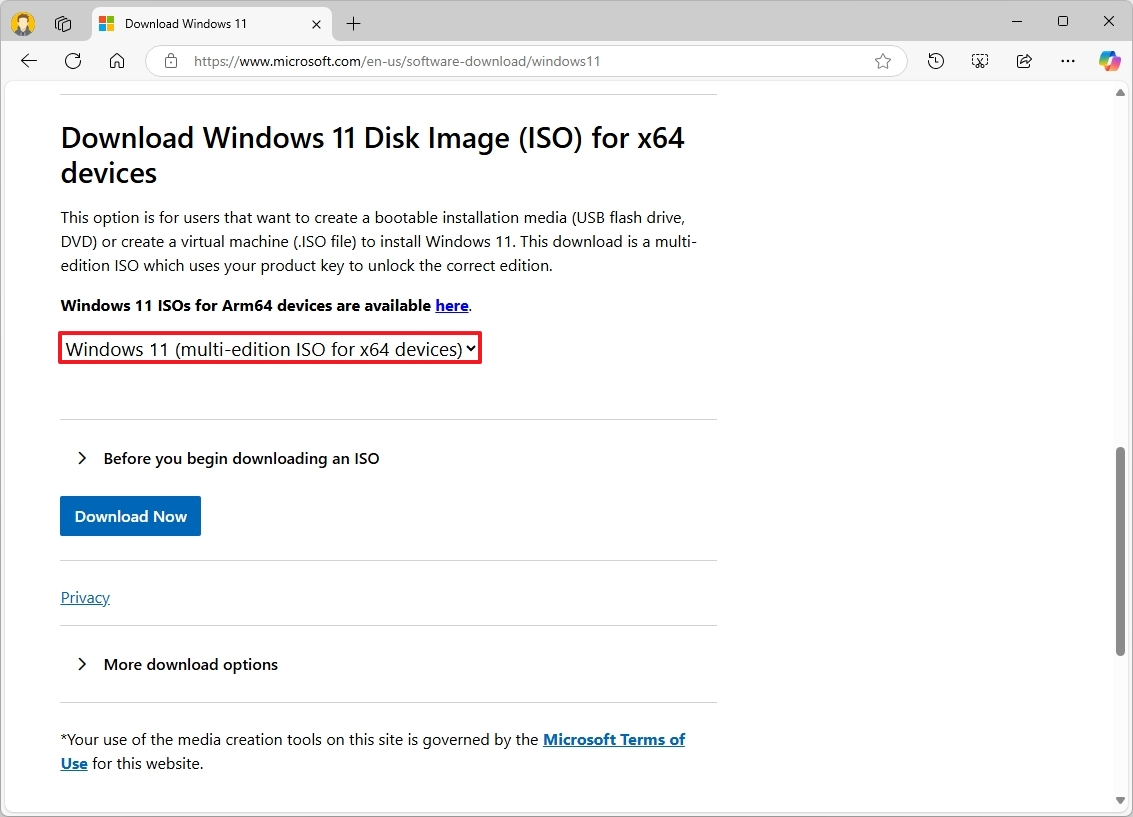
- Click the Download button.
- Select the ISO language.
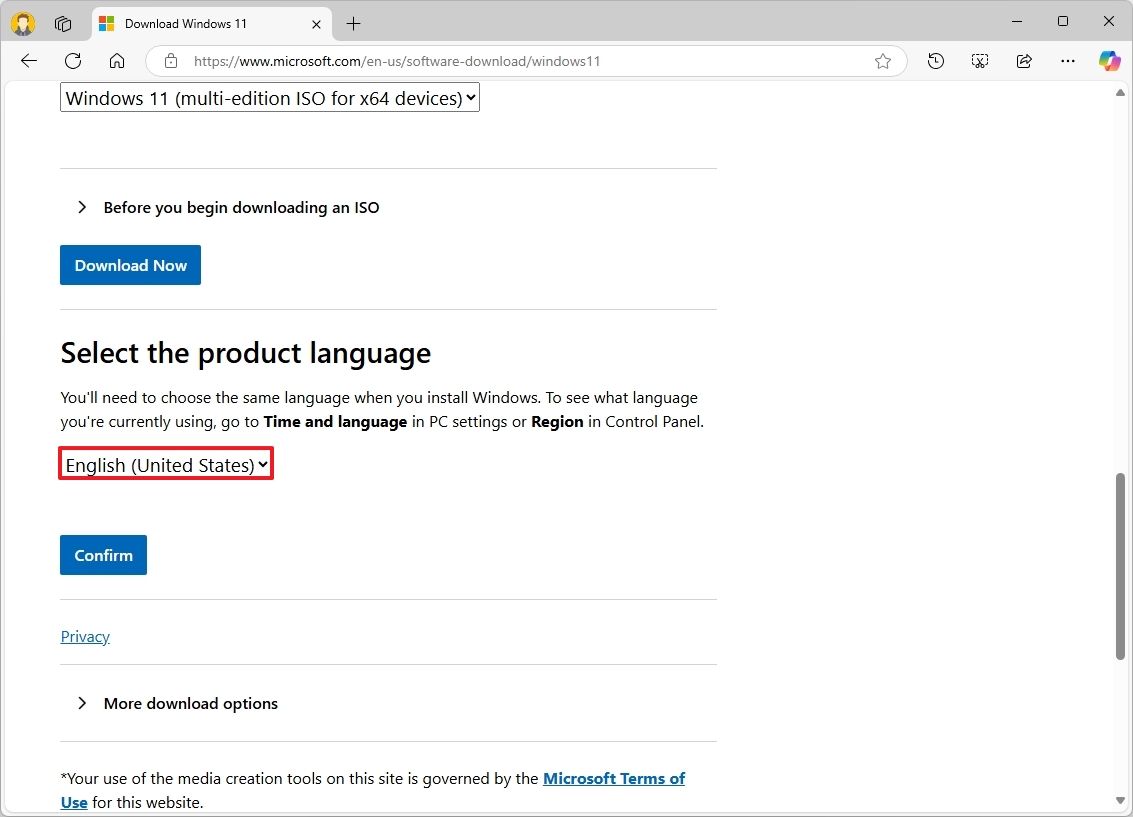
- Click the Confirm button.
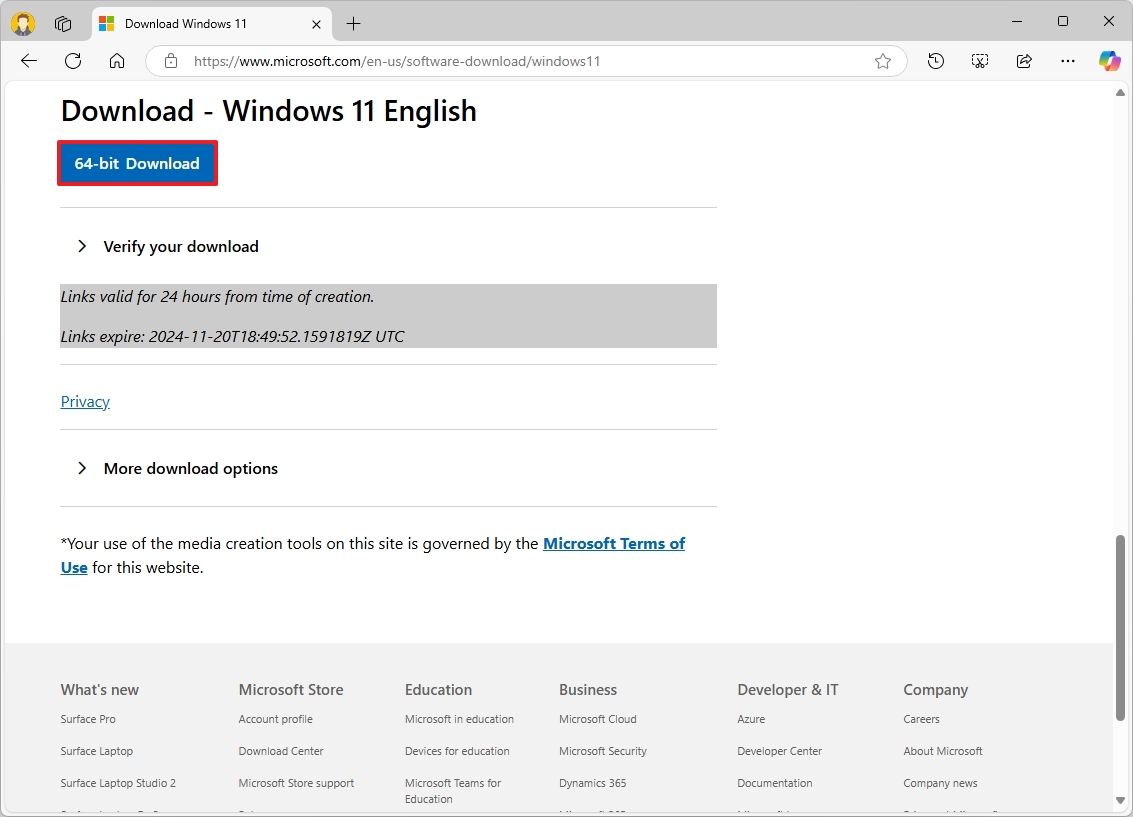
- Click the 64-bit Download button.
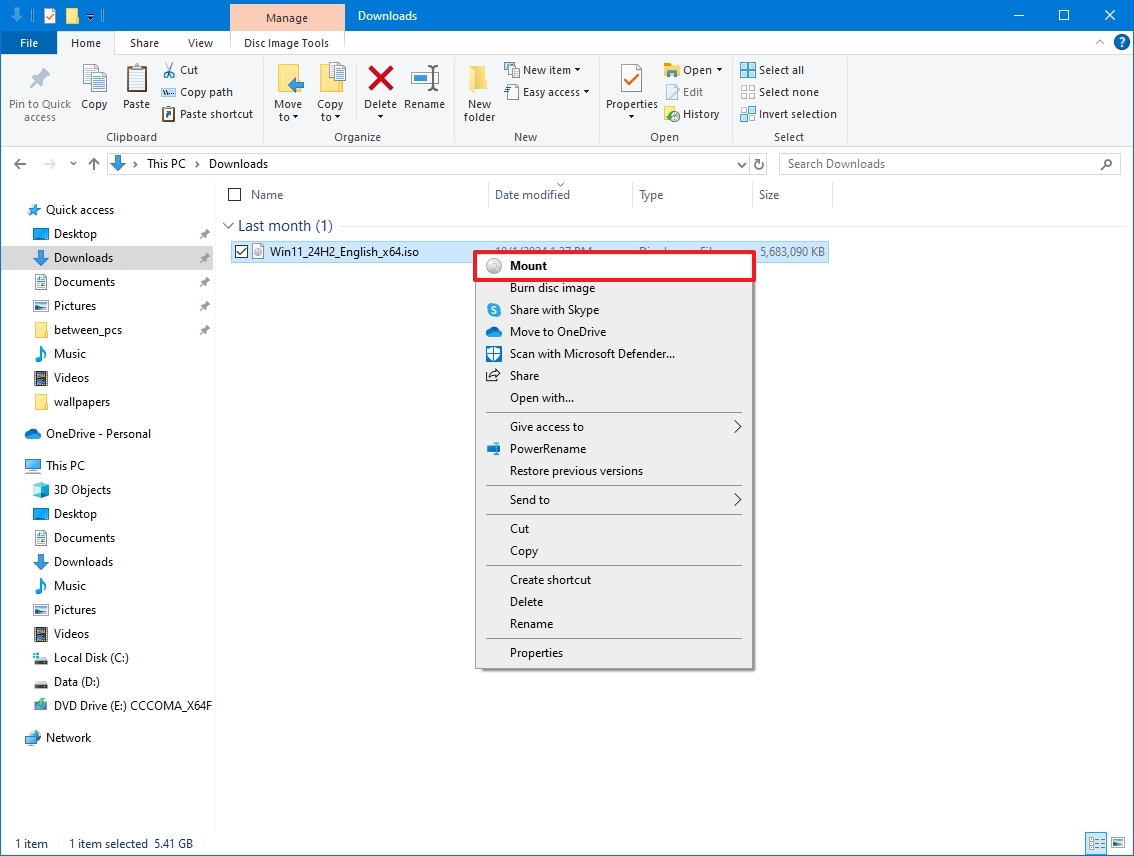
- Right-click the image file and select the Mount option.
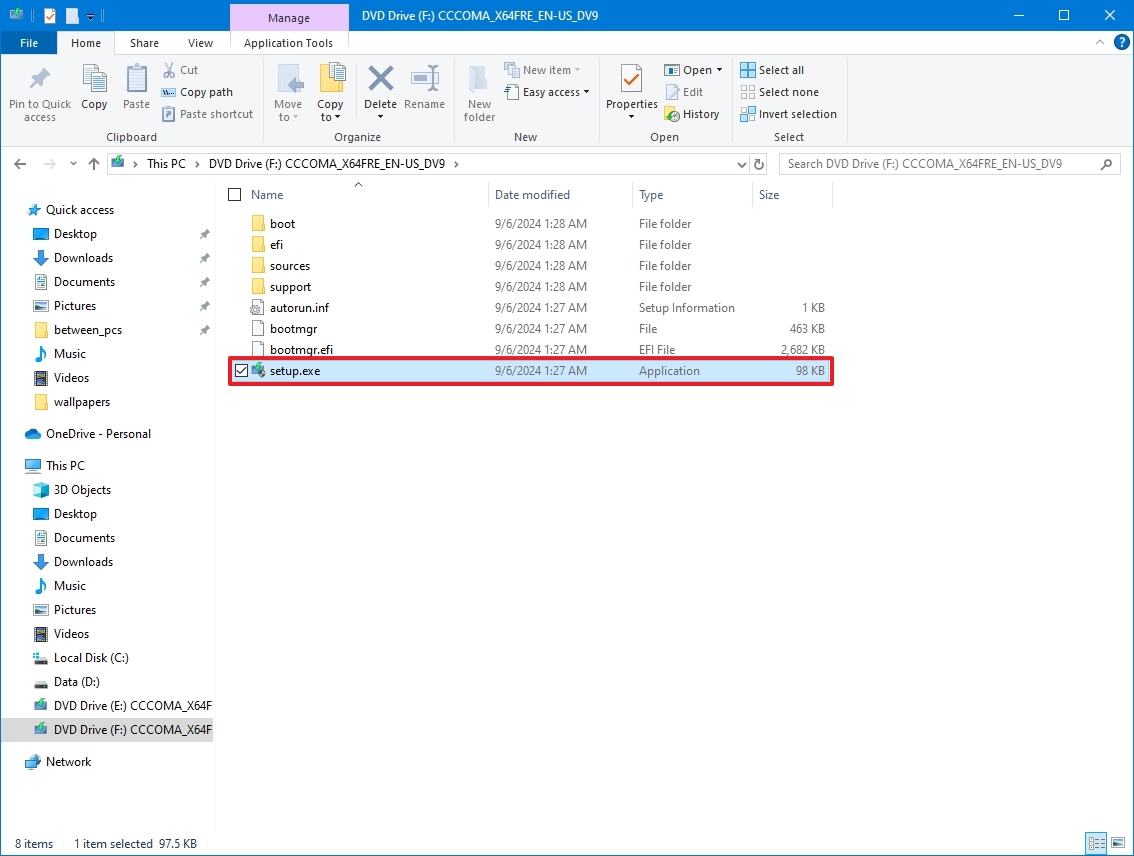
- Select the virtual drive from the left navigation pane (if applicable).
- Double-click the setup.exe file to launch the setup manually.
- Click the Next button.
- Click the Accept button to agree to the terms.
- Click the Install button.
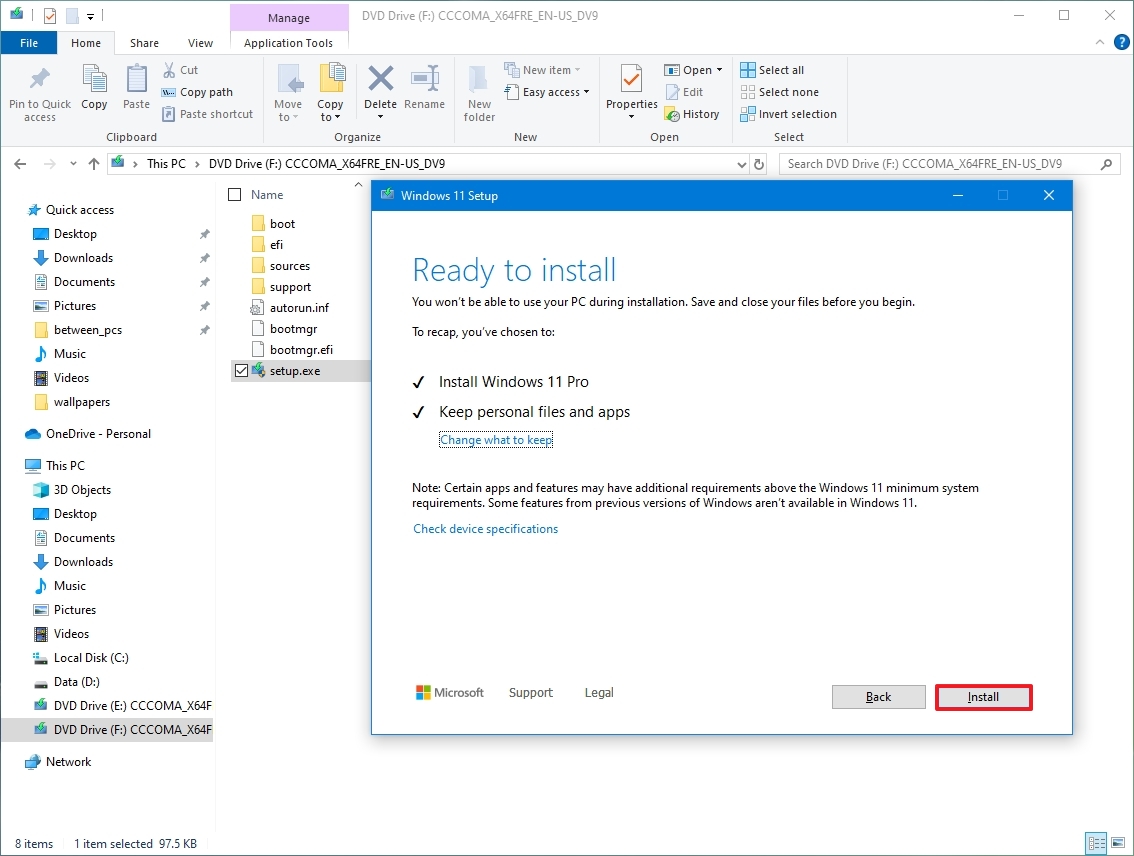
Once you complete the steps, the upgrade will begin preserving your files, and most of your settings and applications.
More resources
For more helpful articles, coverage, and answers to common questions about Windows 10 and Windows 11, visit the following resources:


