If you want the best performance from your Windows 11 device, it's essential to carry out regular updates. Even the best computers will suffer if they aren't updated, as updating applies software tweaks that help your device run faster and more smoothly. It also improves security and means you can benefit from Microsoft's latest features
While Windows 11 devices offer automatic updates, going the manual route gives you more control over when and how updates are installed. In this guide, we'll walk you through the step-by-step process of manually installing updates on Windows 11 so you never need to be behind the curve again.
How to update Windows 11
Follow the straightforward steps below to ensure that you have all the latest updates on your Windows 11 device.
1. Select Start icon
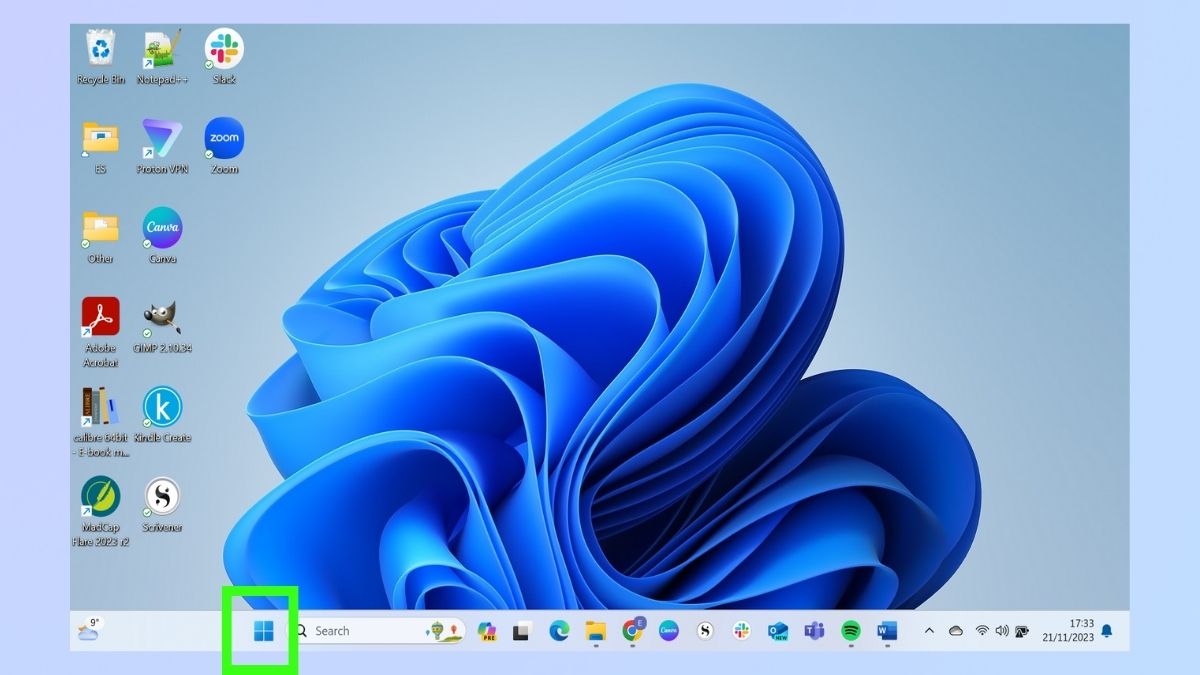
Select the Windows icon on the toolbar at the bottom of your screen. This is the Start button and it will take you to the Start menu.
2. Select Settings icon
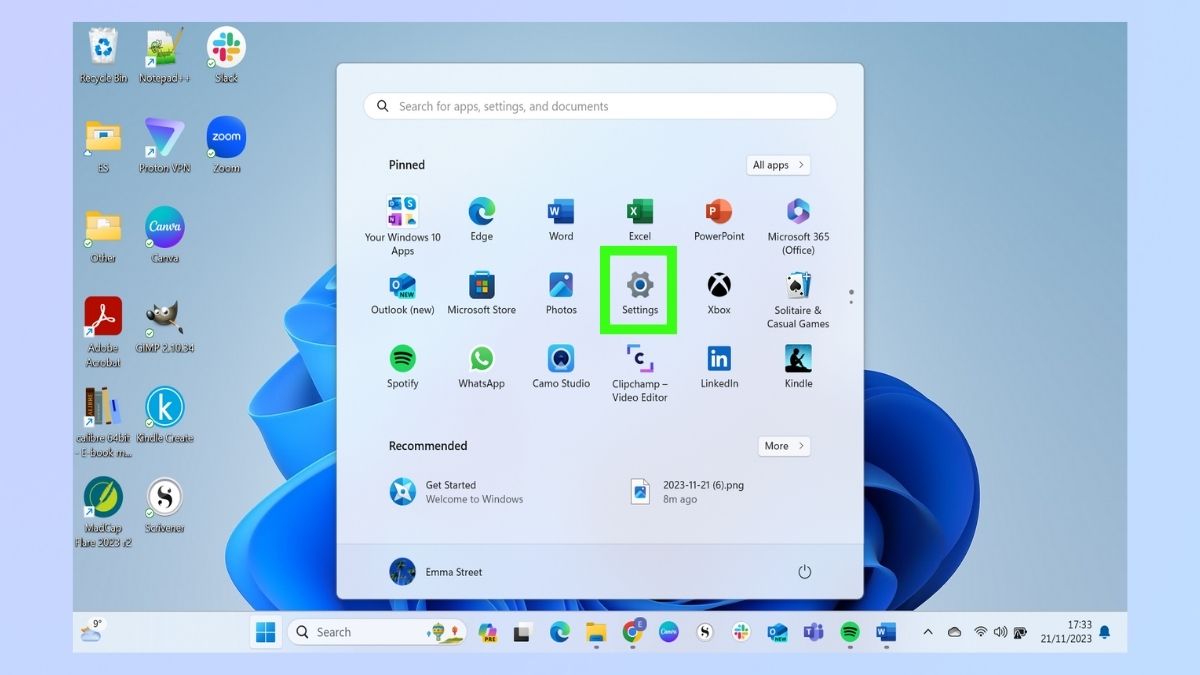
On the Start menu, select the Settings icon. Alternatively, you can type "settings" in the search bar at the top of the window.
3. Select Windows Update
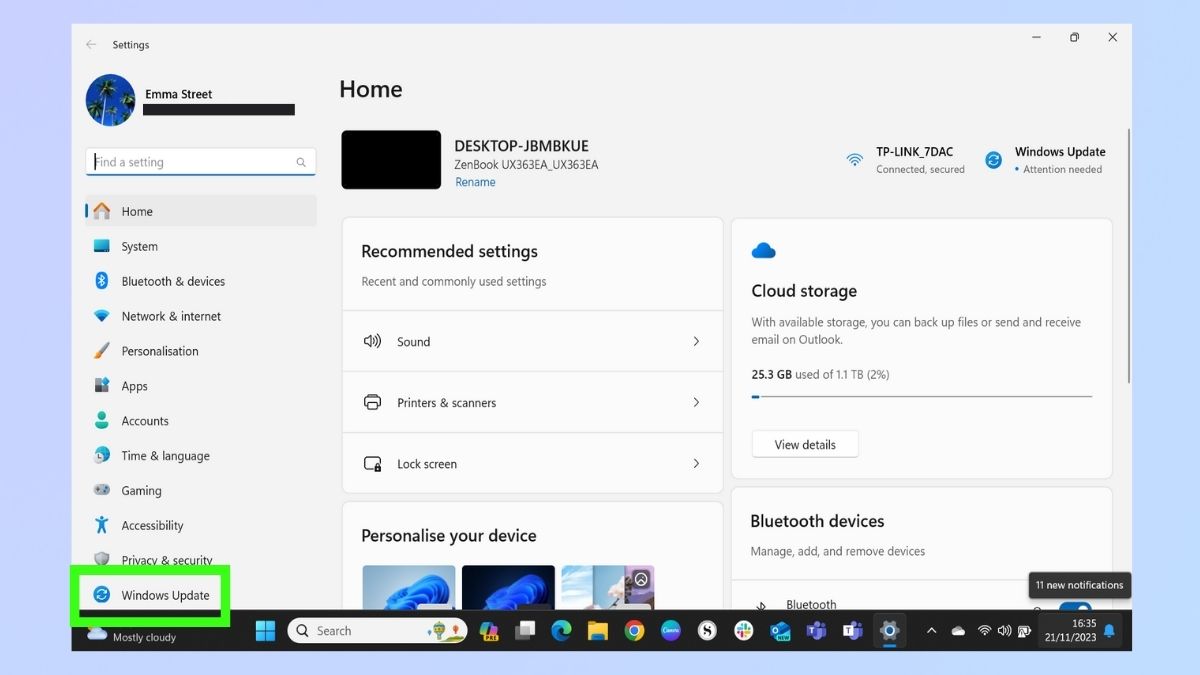
Select the Windows Update option from the list on the left-hand side of the page. Again, if it's easier, you can type "Windows Update" in the search bar above the settings list.
4. Select Download & install all
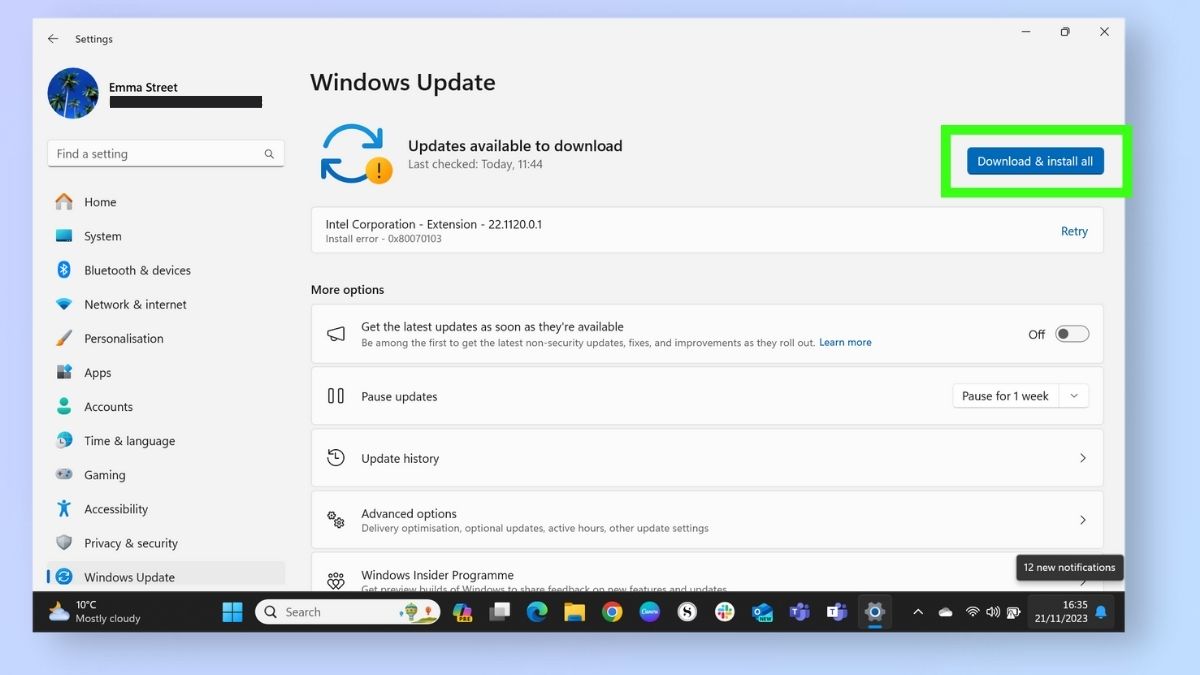
On the Windows Update screen, you can see if there are any updates available to download. If there are, select Download & install all.
If there are no updates available, you will see a message saying 'You're up to date.'
5. Windows will check for updates
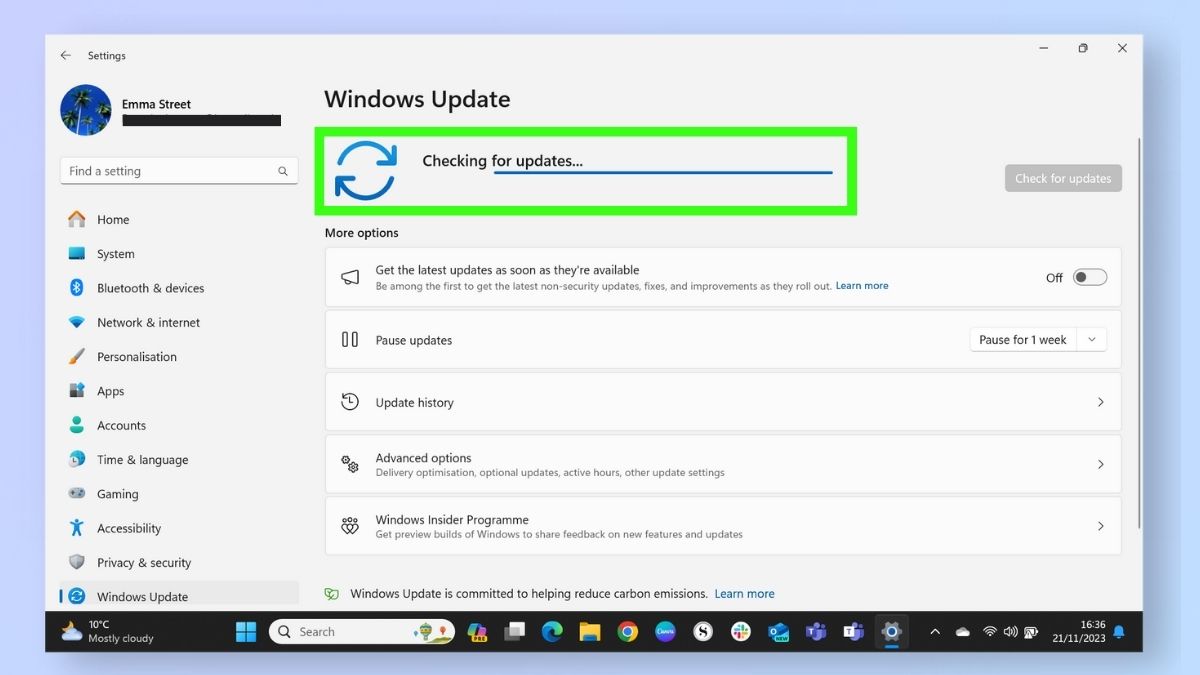
After you have selected the Download & install all option, Windows 11 will check for updates. You do not need to take any action while it is doing this. Dependng on the number of updates, this stage may take a while, but you can still use your device as usual while it's checking.
6. Restart your computer
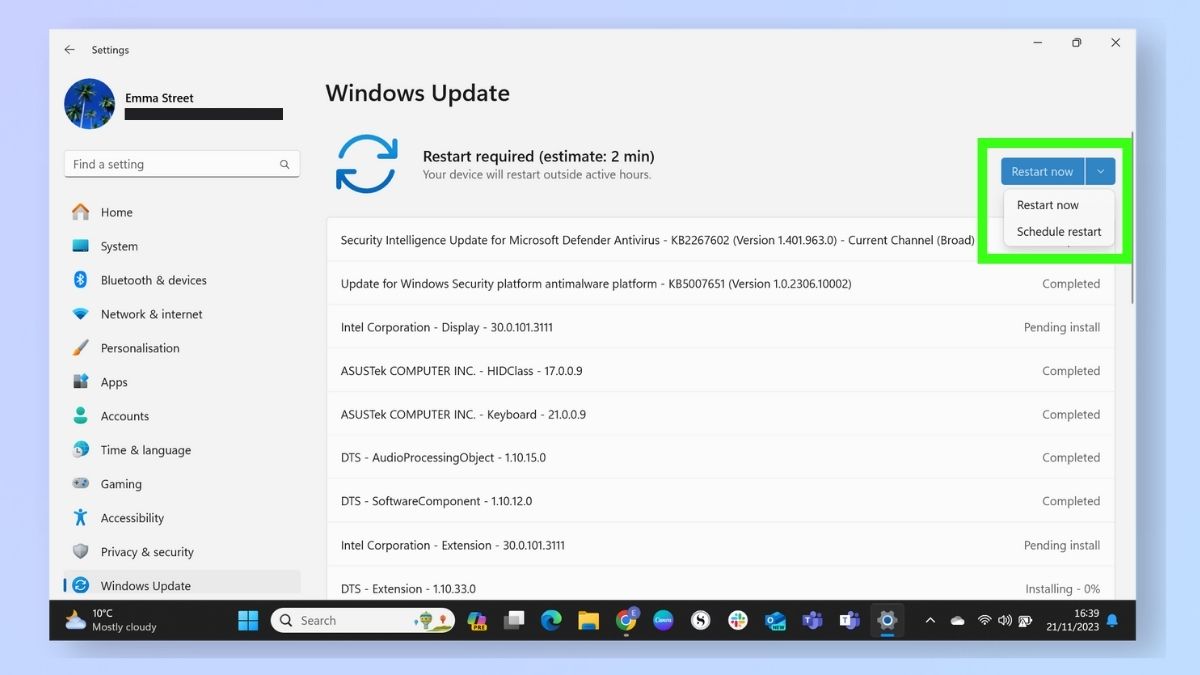
Windows 11 displays a list of the updates it is downloading and shows the download progress. Once these have been completed, you'll need to restart your device.
If you want to restart your device immediately, you can just select the Restart now option. However, if you are in the middle of something and don't want to restart your device straightaway, select the down arrow icon next to Restart now and click Schedule your restart.
How to check Windows updates have been installed
Once your device has restarted, your updates are complete and you don't need to do anything further.
However, if you want to confirm that the updates have been successful, there are a couple of ways that you can do this.
1. Checking updates after restart —Windows update main page
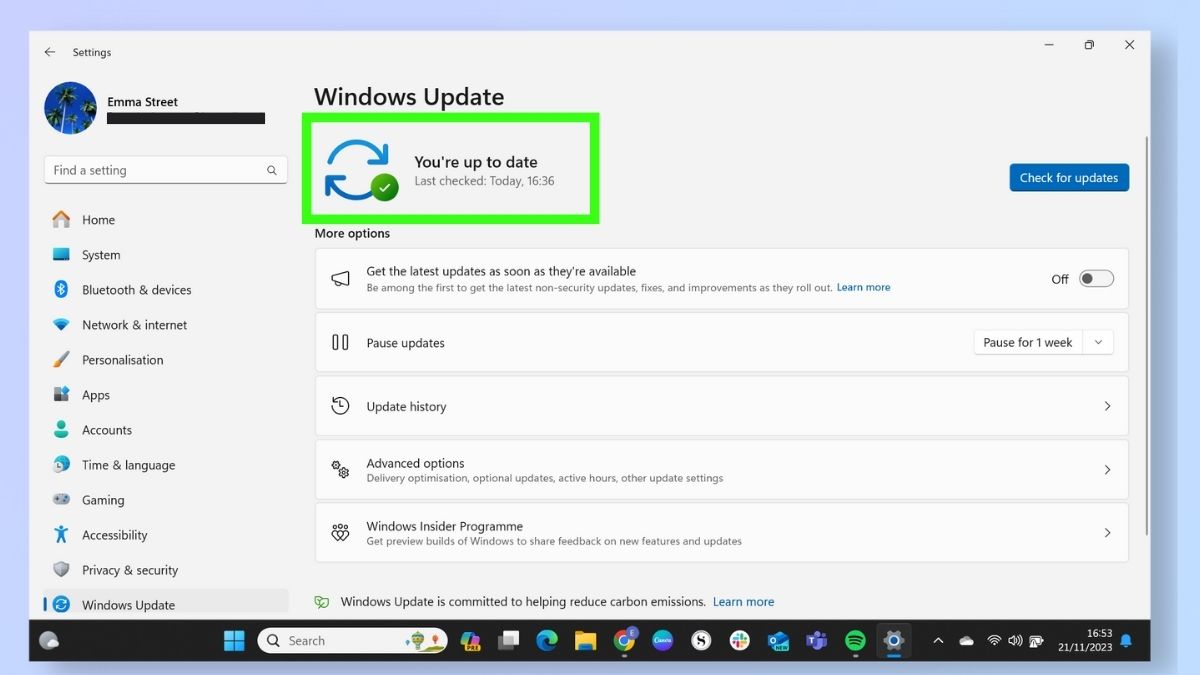
The first way is to check the status on the Windows Update page. Navigate back to this page the same way you did in the earlier steps.
The status at the top of the page will now have a green tick and display the message "You're up to date".
2. Checking updates after restart — Individual updates
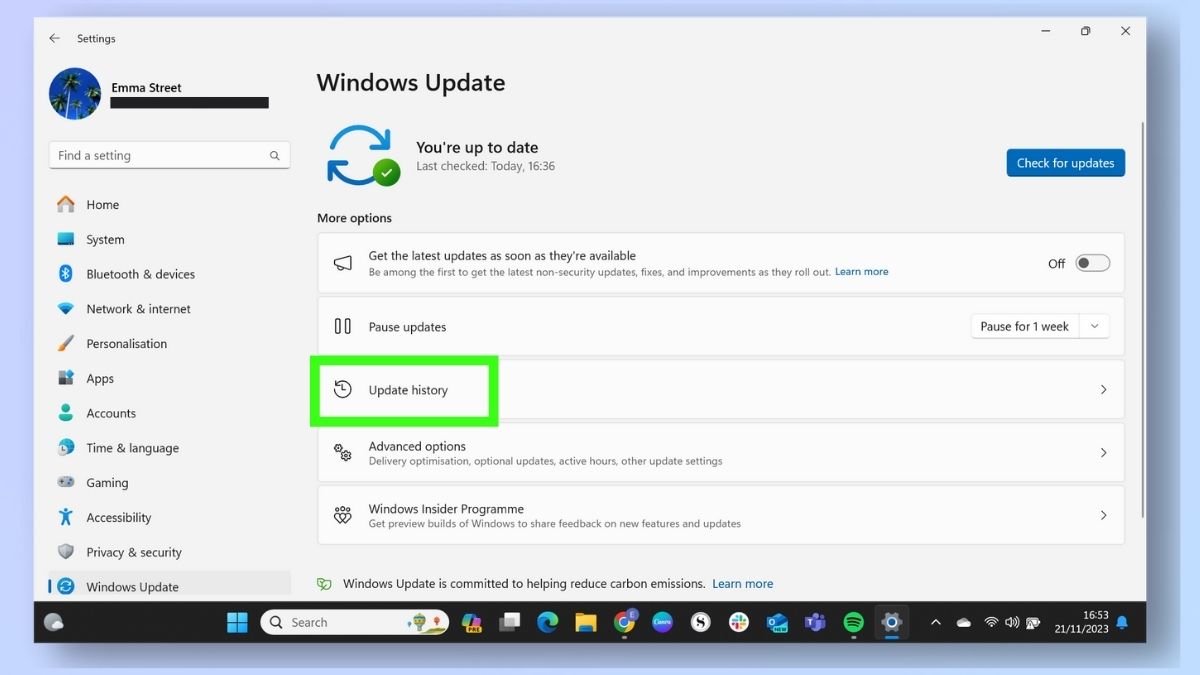
If you have made multiple updates and you want to check the status of one particular update, you can do this in the Update history.
On the Windows Update page, select Update history.
9. Update history information
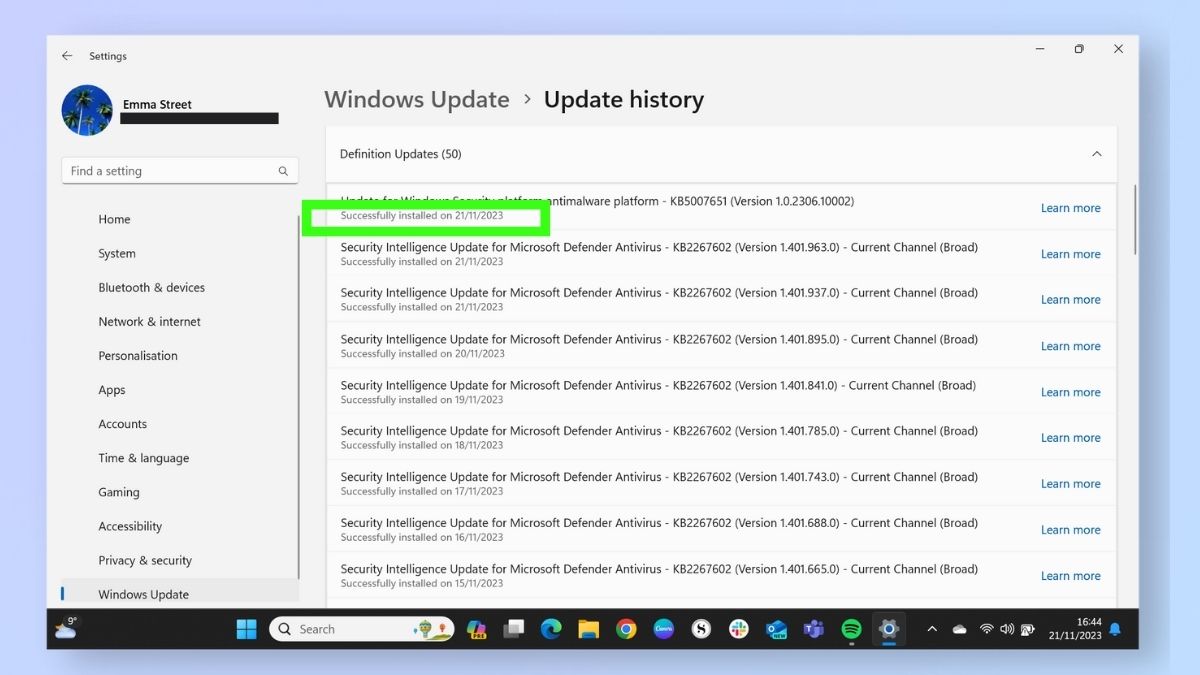
The Updates history page shows all successful updates and the time that the update took place. You can use ths information to check if a particular update was successfully applied.
Now you've got the hang of updating your device, you can check regularly for new Windows 11 updates and make sure you're always running the most up-to-date version available. If you’re concerned about the battery life of your device, then take a look at our guide to checking your Windows 11 laptop battery health.
To learn more about cool features and hacks available to Windows 11 users, check out our other articles, like how to change keyboard shortcuts, how to create custom desktop icons, and how to use Windows 11 PowerToys.


