Working as a freelance creature and character concept artist, my main passion is bringing imaginative sci-fi and fantasy designs to life through 3D sculpting, sketching, and digital painting. I’m excited to share my hands-on learning experience, which blends all of these skills into an intriguing and interactive compilation.
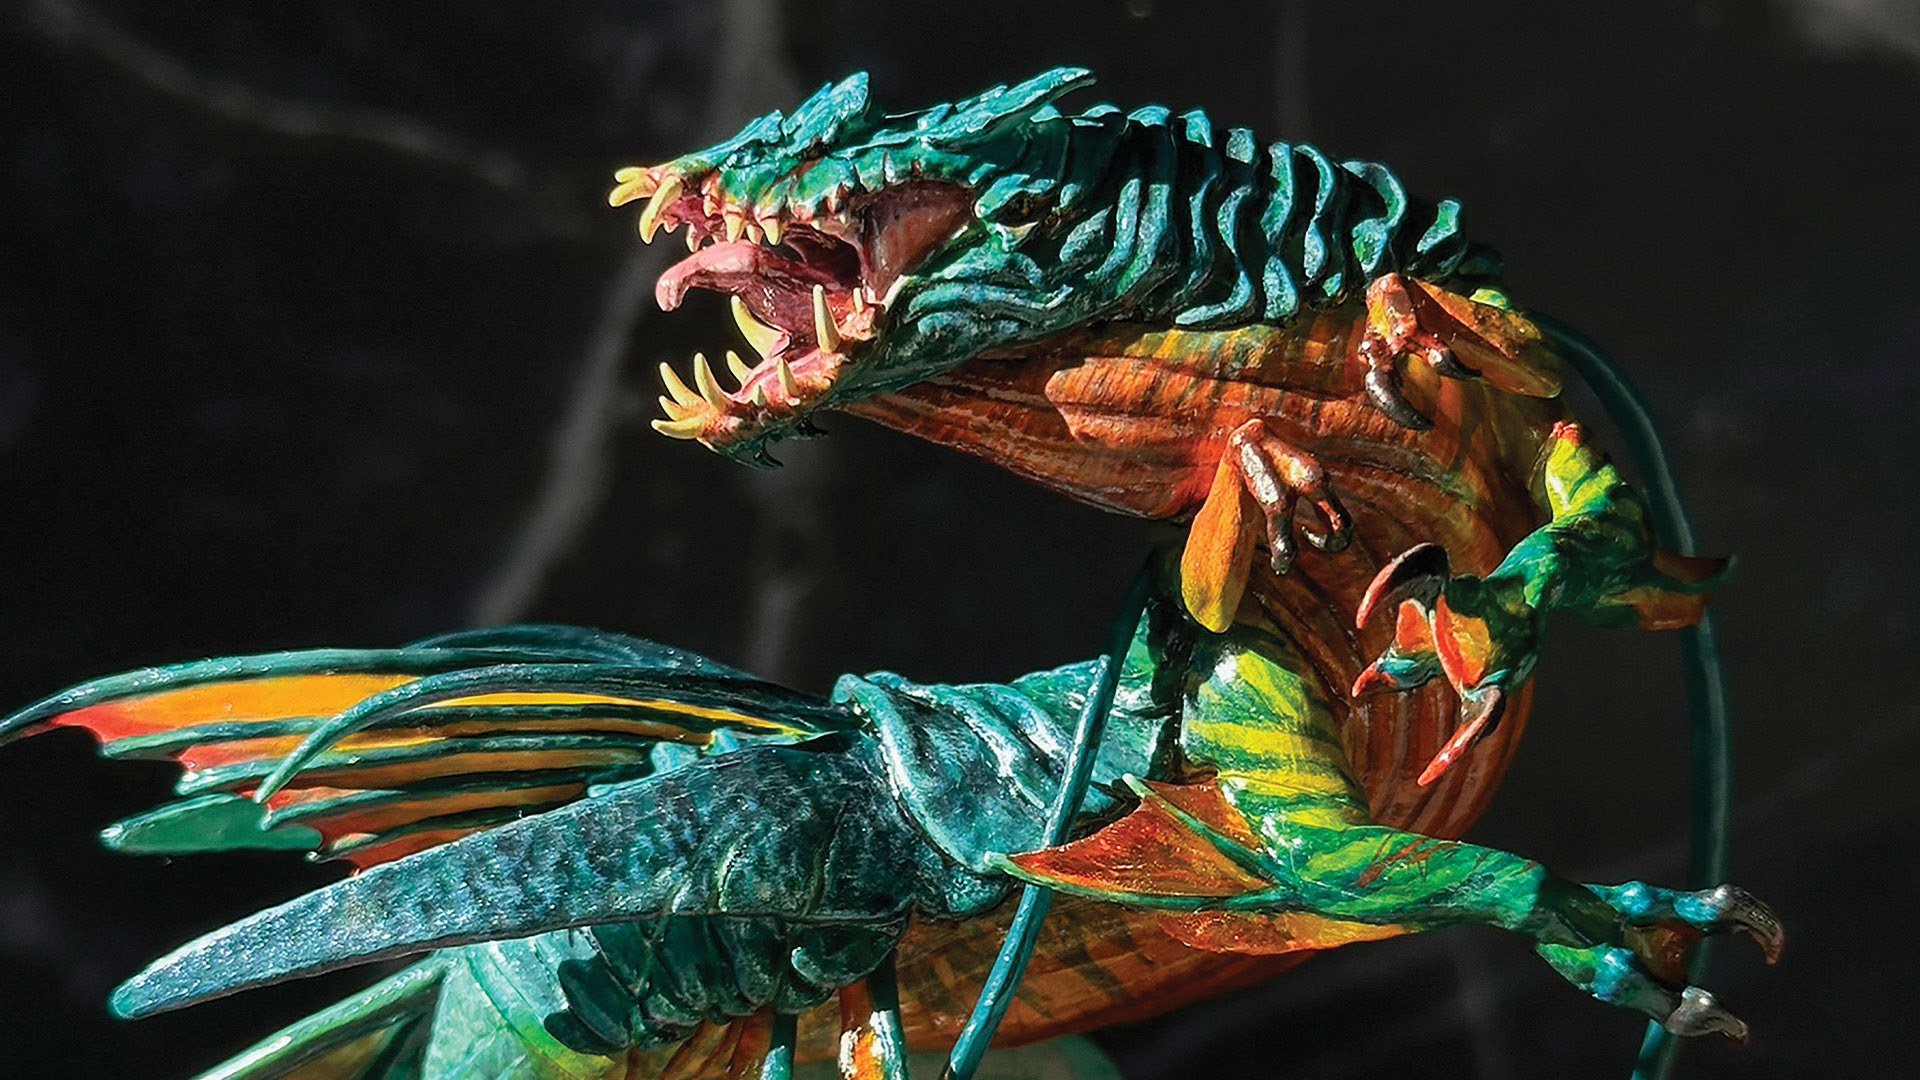
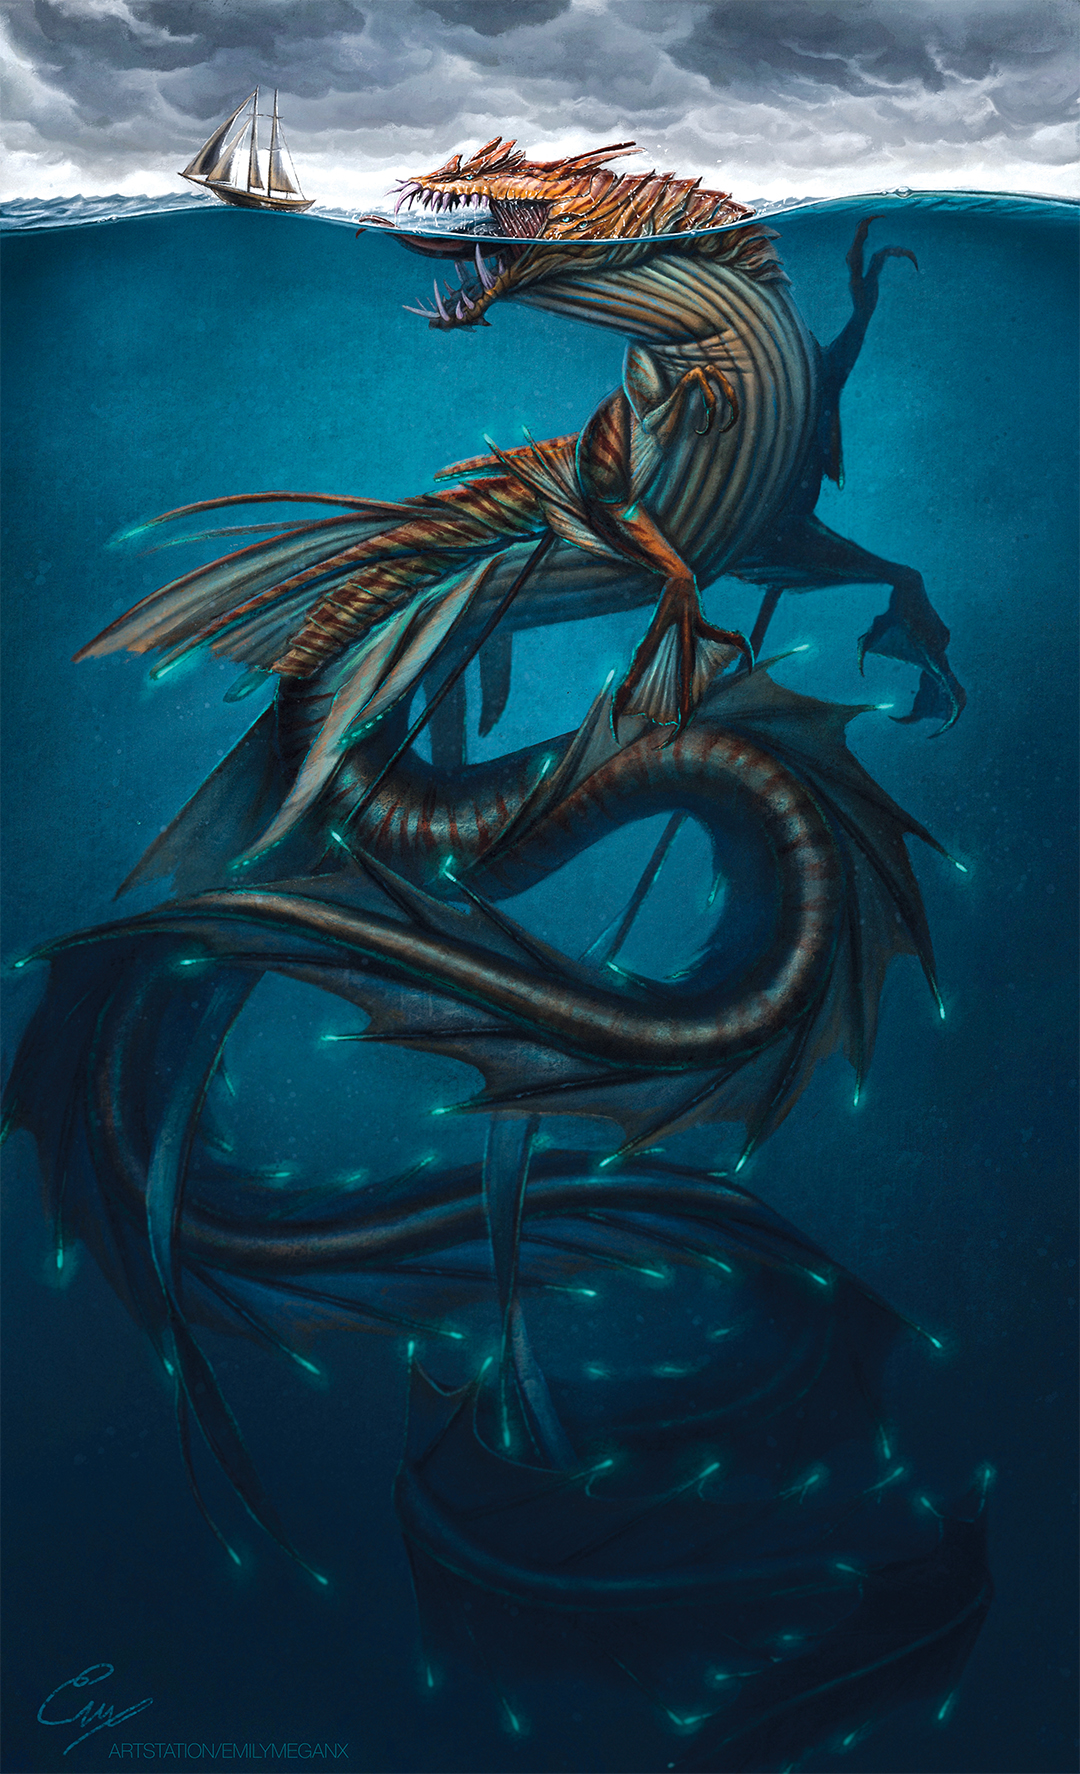
In this tutorial, we’ll explore the journey of turning a 2D concept illustration into a fully realised 3D figure. My starting point was a bust that I’d previously sculpted as a standalone piece before realising the potential to push it further, envisioning a more intricate and larger-scale artwork. This decision set the stage for our workshop, where I’ll expand on how to create a more complex and aesthetically pleasing statue. (If you're looking to upgrade your creative kit, check out our guide to the best laptops for 3D modelling).
First we’ll delve into sculpting. I’ll walk you through my brief-but-useful process for refining and detailing the sculpt, showcasing techniques that enhance realism and depth. We’ll touch up on various tools in ZBrush that I enjoy using to shape our sculpture with precision and creativity.
Next, we’ll move on to 3D printing, where the digital design becomes tangible reality. We’ll explore the use of both clear and grey resins, discussing their properties and how they impact the final outcome of the 3D print. You’ll gain insight into my printing process, including how to prepare a model and troubleshoot any issues that you may run into to improve the success of your print.
Once we have our printed pieces, I’ll show you how I like to paint 3D prints. I’ll demonstrate how to use alcohol inks on clear resin, and how acrylic paints can bring life and vibrancy to your physical designs. I also want to share some personal techniques I use to achieve realistic textures, dynamic colour schemes, and intricate little details that will elevate your piece.
Hopefully this will give you inspiration and further your own knowledge to take your individual creative projects from concept to completion. Whether you’re an aspiring artist or a seasoned creator, this session should equip you with a practical approach you can apply to your own work.
01. Begin with basic shapes
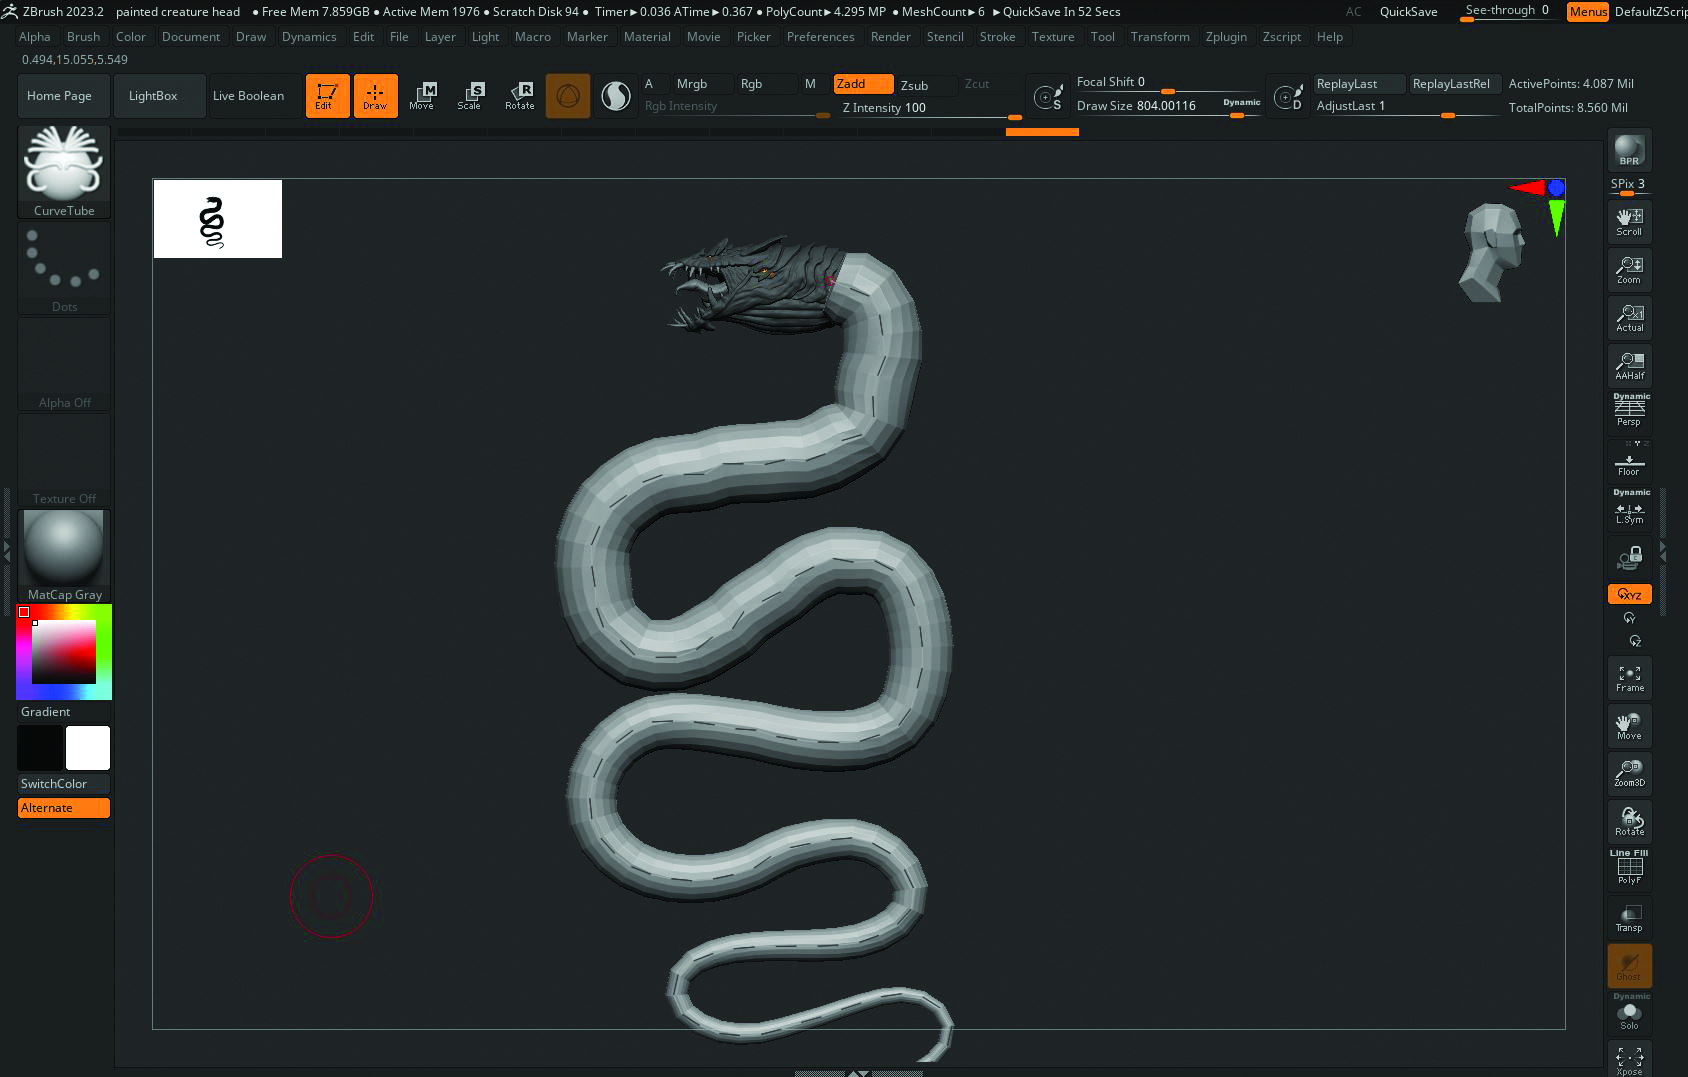
Referring to our original concept illustration, we need to match the flow of the serpent’s body with a basic shape. The best brush for this would be the Curve Tube brush with a tapered end. Draw the curve shape beginning from the base of the bust, following a similar shape to the reference. Once you’re happy with the shape, DynaMesh the SubTool at a low resolution to help move the object easily, as we now need to push and pull the ‘S’ shape with the Move brush to improve the turnaround angles.
02. Extract the tail fins
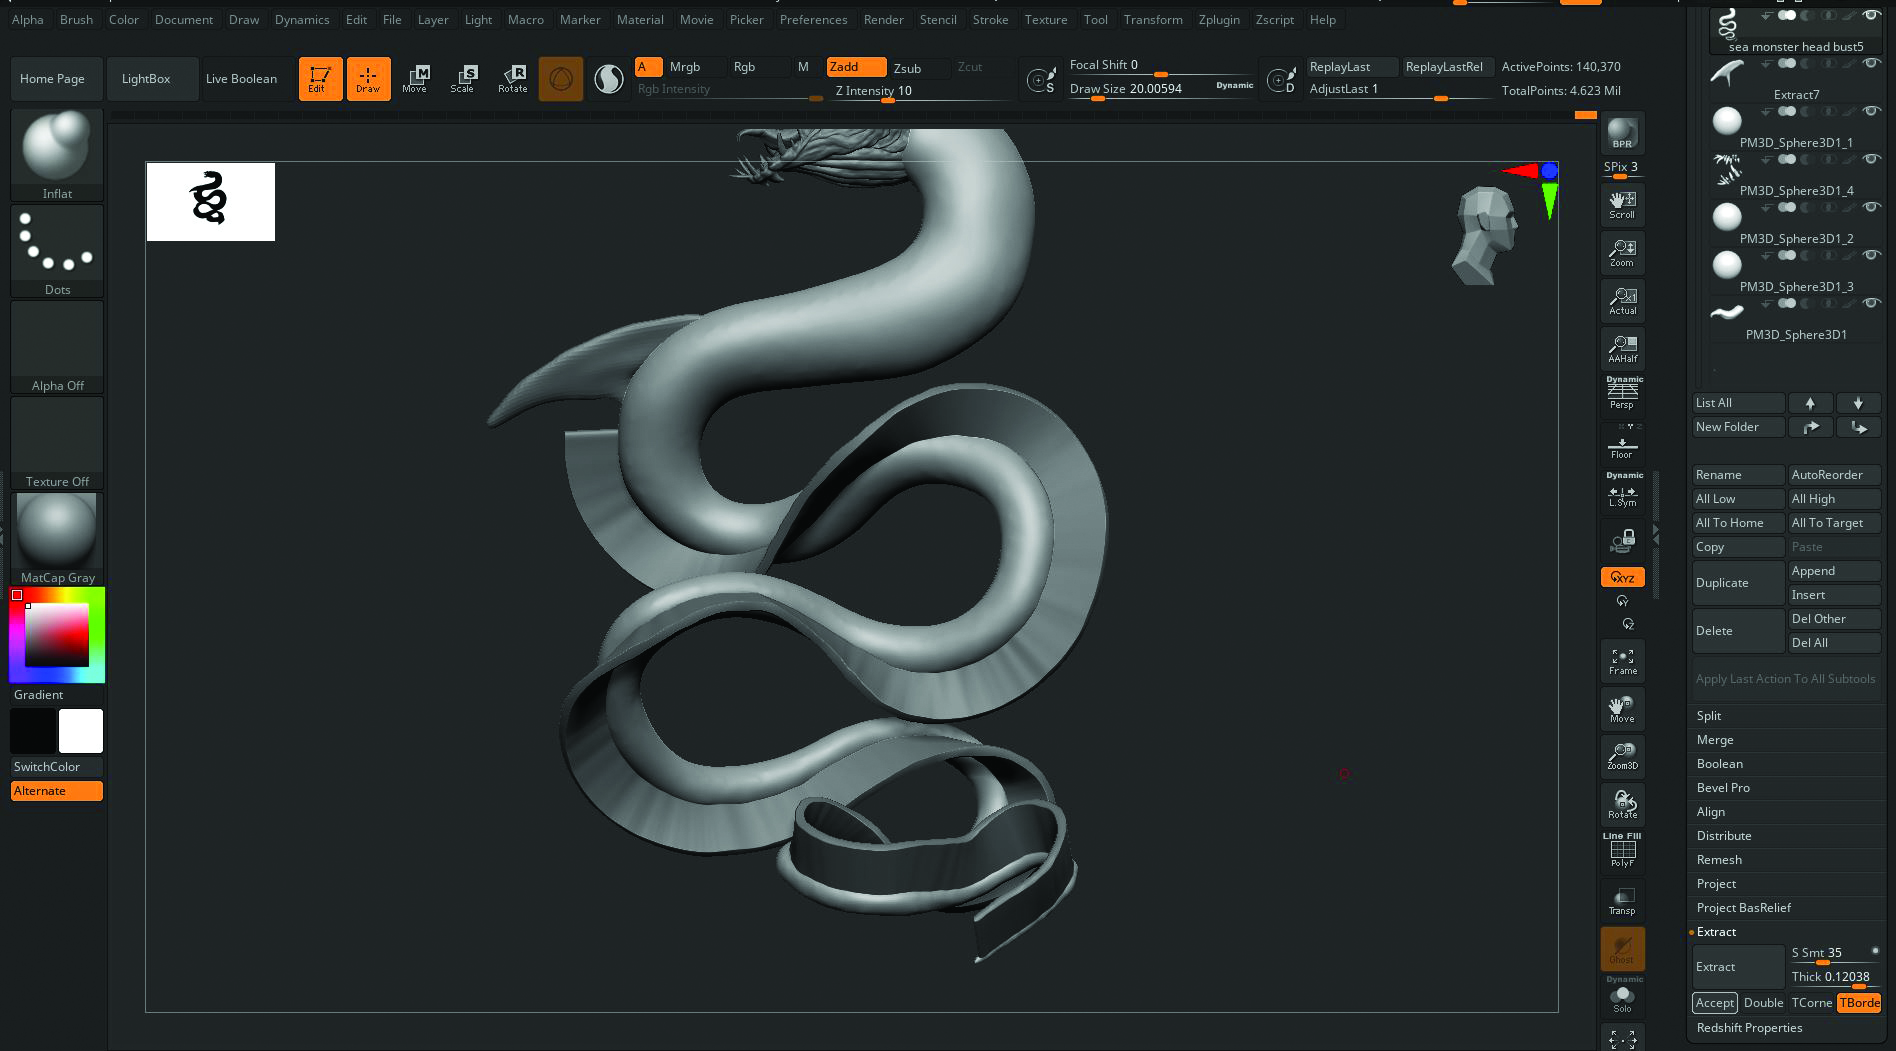
We’ll use the Extract tool for the fins. Subdivide the body to add more resolution, then use the Mask Pen brush and paint a solid line for the top of the fin. Press Extract to preview it and experiment with the sliders for thickness and length. DynaMesh to a low resolution that keeps the shape recognisable. Add the spines by inserting a sphere or cylinder SubTool, then sculpt and duplicate it down the body. On the extracted fin, use the Move brush to gently push between the spines to create a wavy look. Repeat for the underside.
03. Design the plating
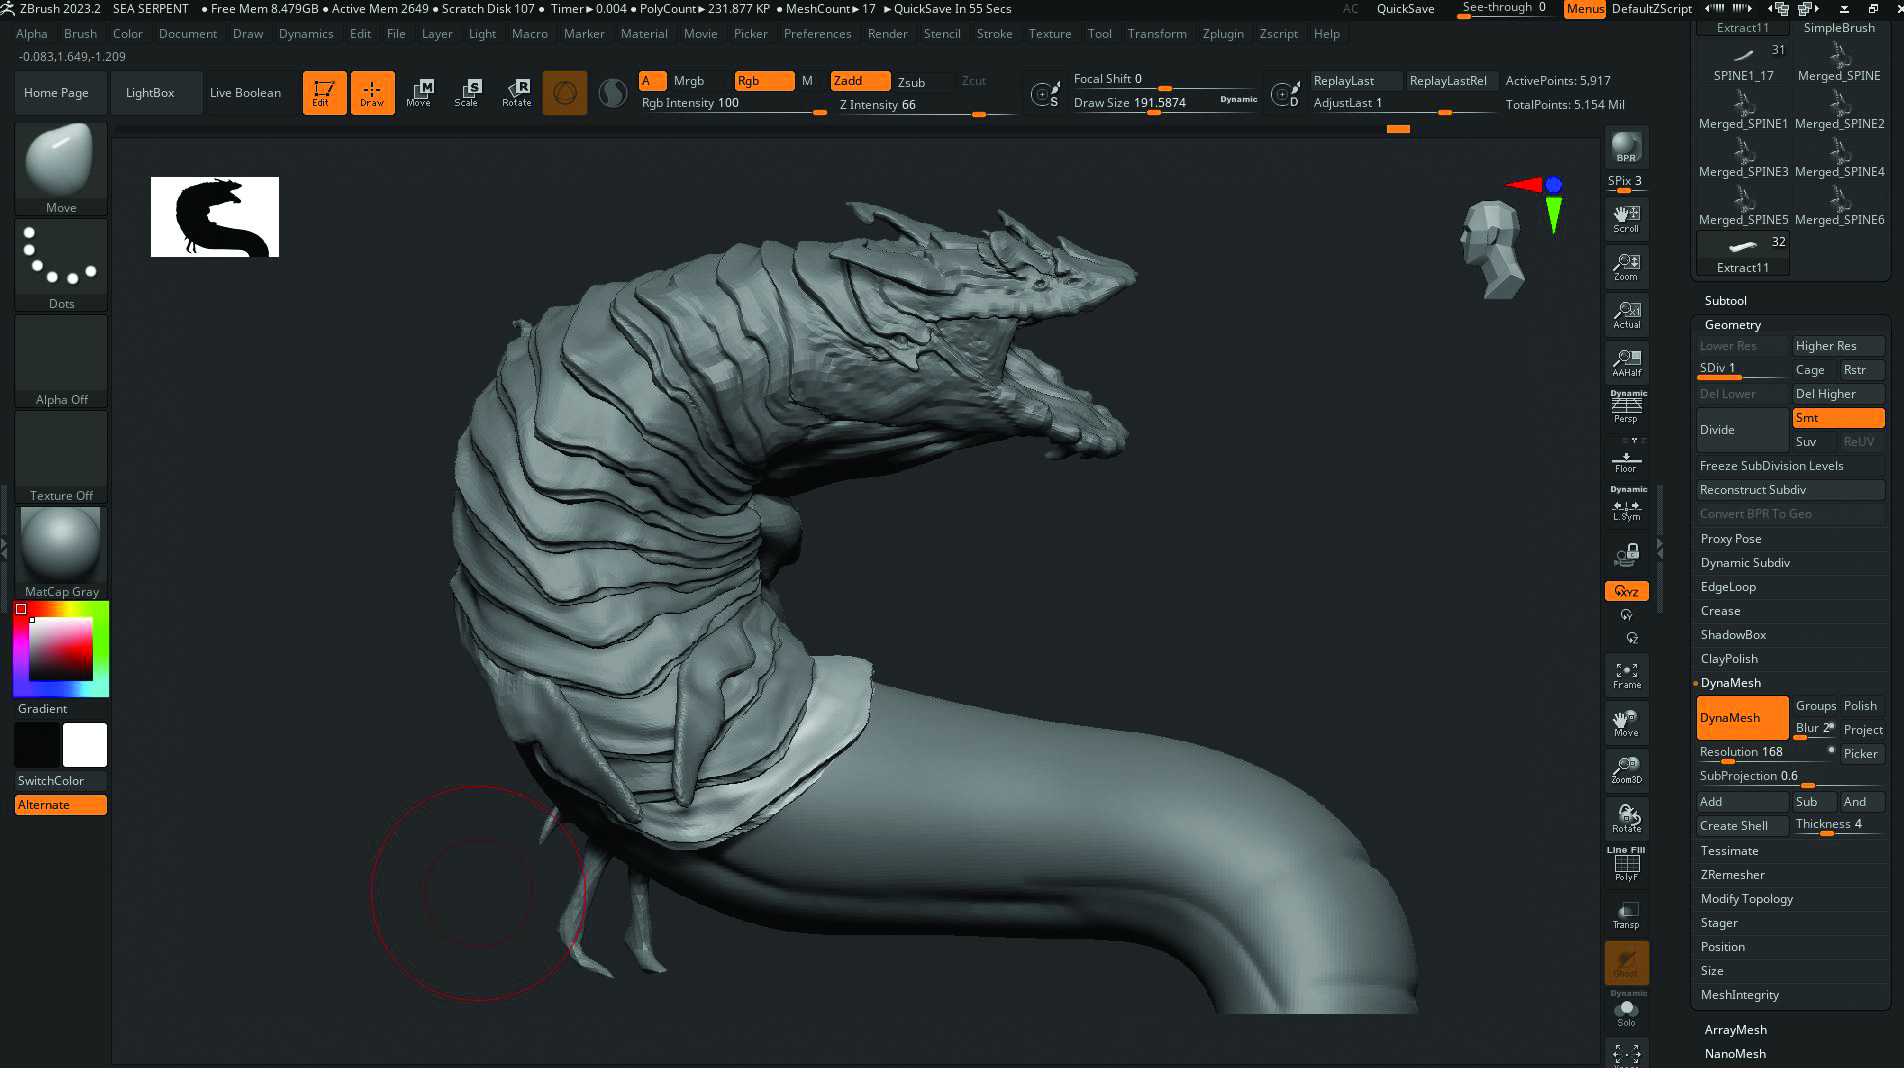
With the Dam Standard brush, we can sketch in the section on the body where the serpent’s plating will go. When you’re satisfied, paint in a section on the body using the Mask Pen brush that represents a similar shape to the scales. Use the same Extract process as the fins, DynaMesh and subdivide to then sculpt details. Duplicate them along the back of the body.
04. Sculpt the extremities and merge
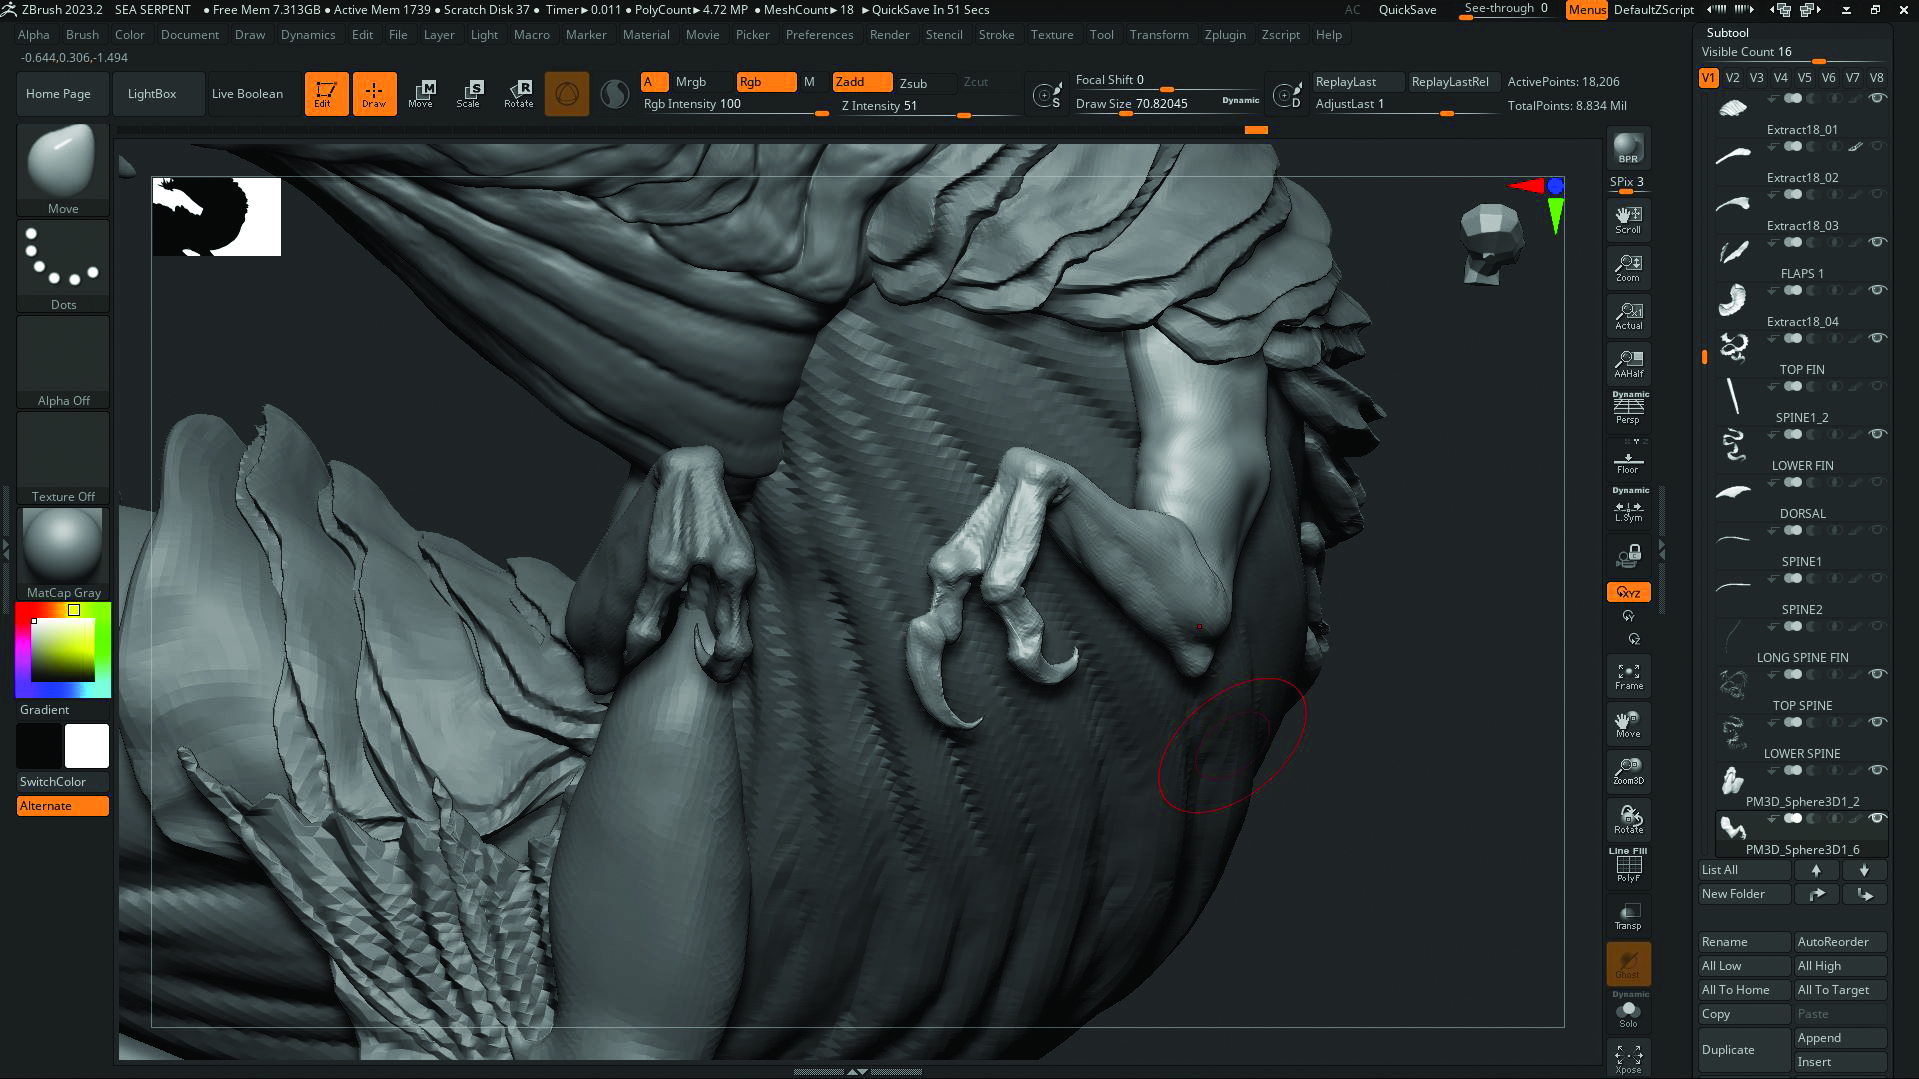
Insert a new SubTool and start sculpting each arm. When the limbs, plating and other extremities are done, we’ll merge everything into one mesh. Duplicate every SubTool as a back-up, then merge your pieces into one SubTool and DynaMesh at a relatively low resolution. Subdivide a few times and use the back-up SubTools to project the details onto the newly merged body. Fix any small issues and sculpt in any missed details. It’s usually best to isolate the projection area by masking, then inverting the mask.
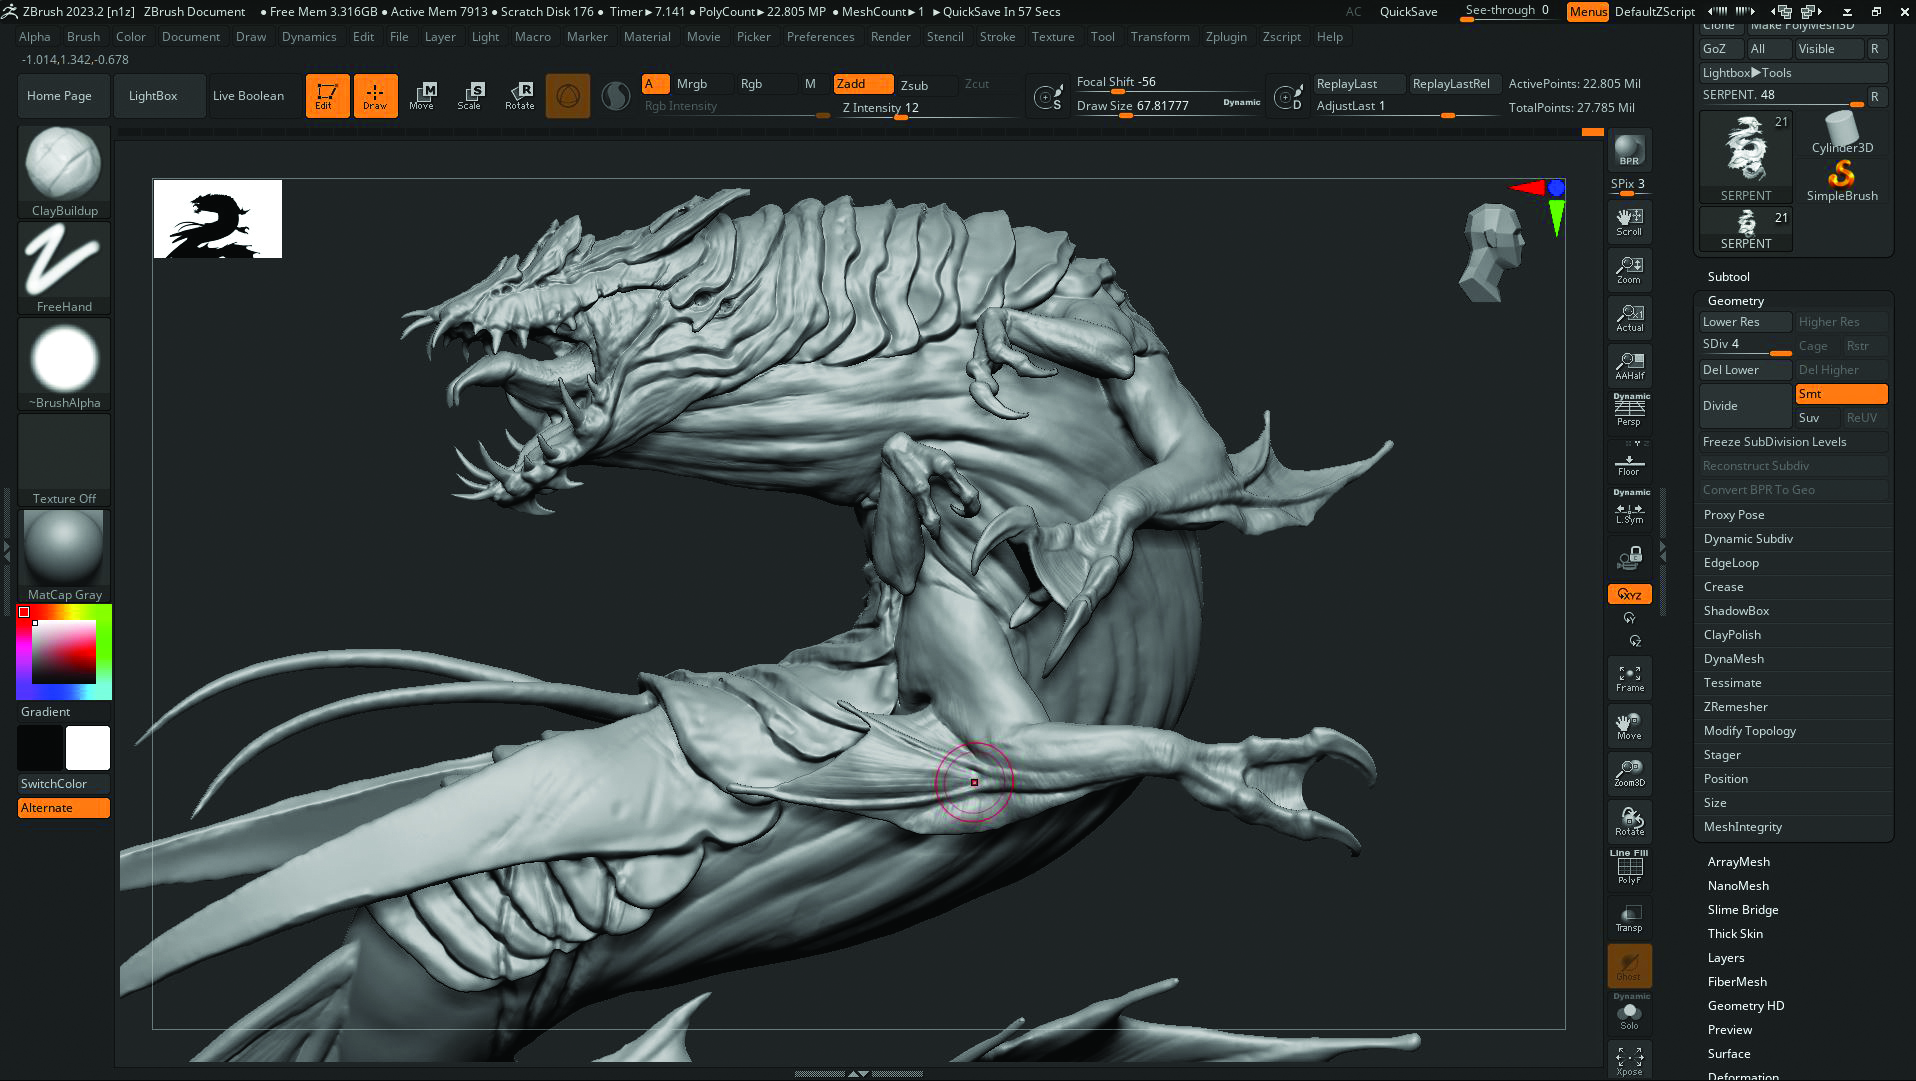
05. Build a base
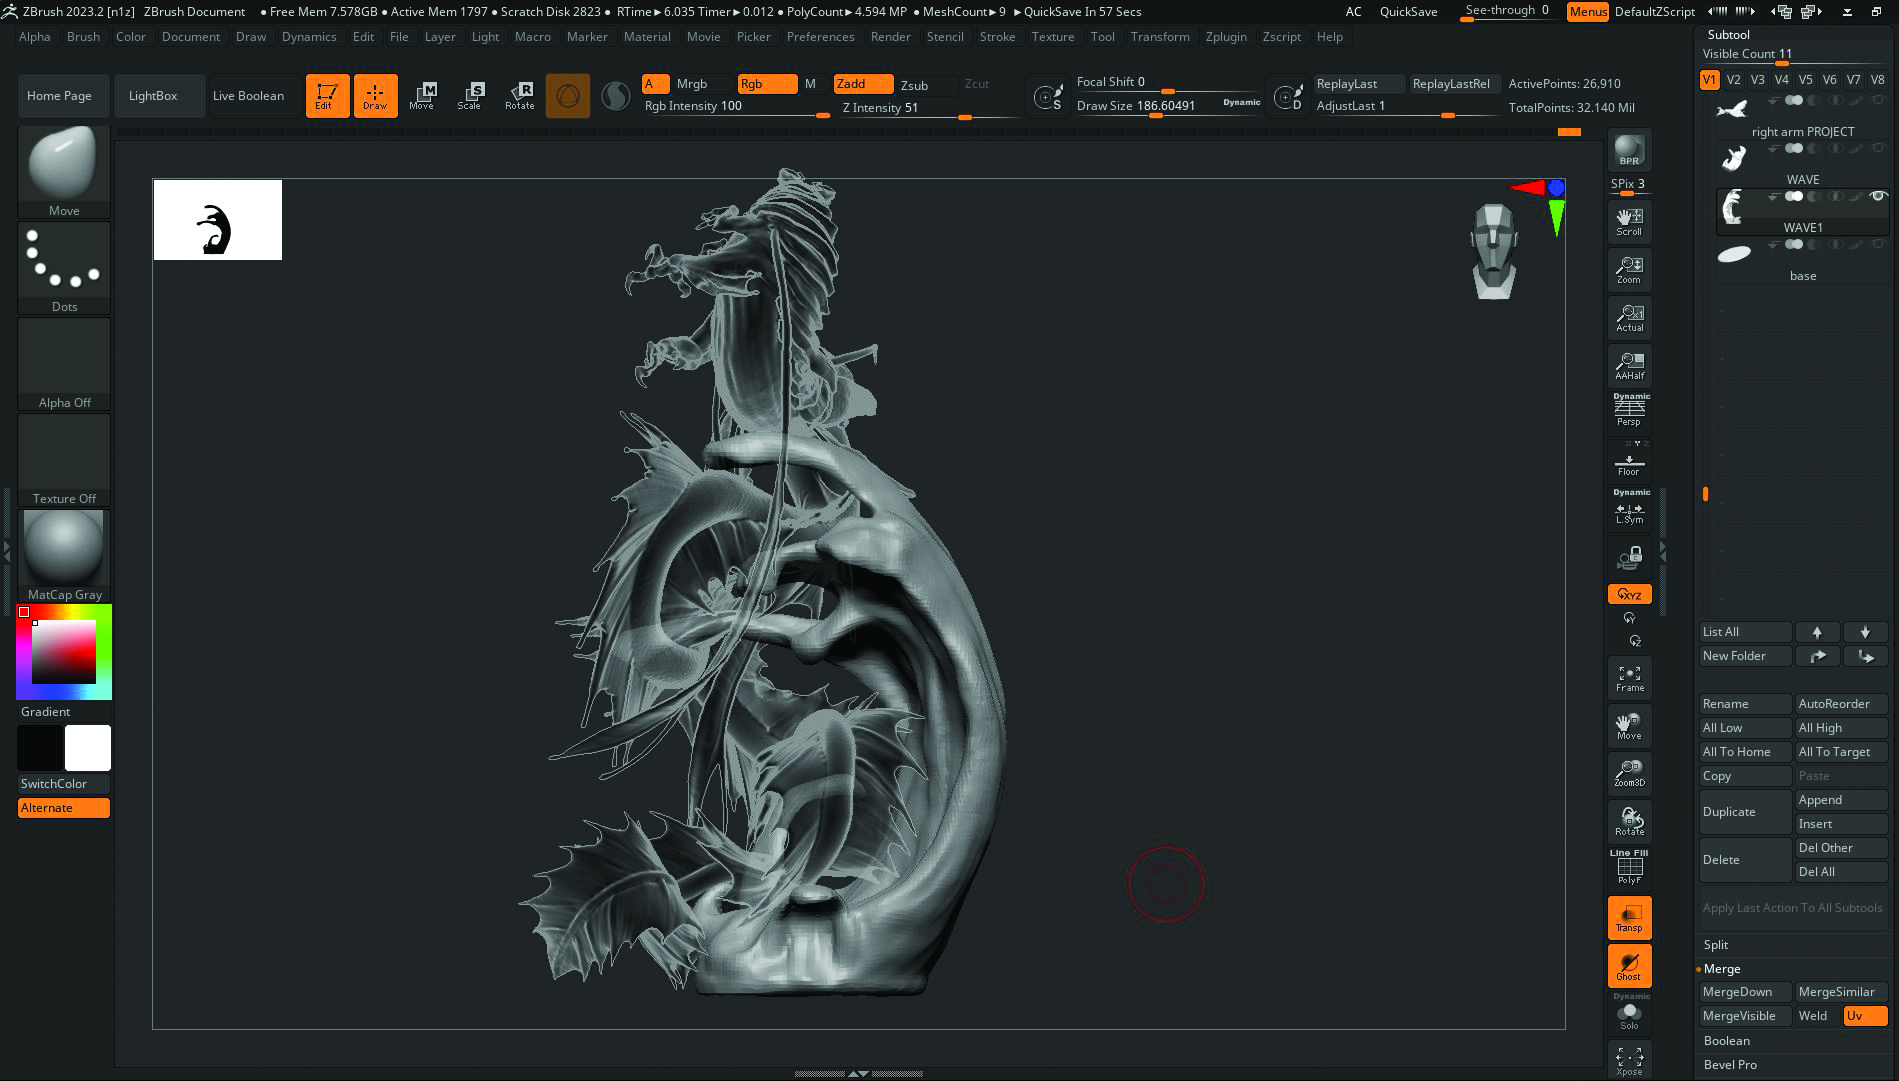
Since this piece is being made for 3D printing, we need to design a supporting base for our creature to be displayed on. As this is a sea creature, a large wave felt like the best support design. Insert a new SubTool, then sculpt in a loose wave shape, using the body of the serpent in the transparent Ghost mode as a guide to see where the waves need to be placed to hold it.
06. Create details
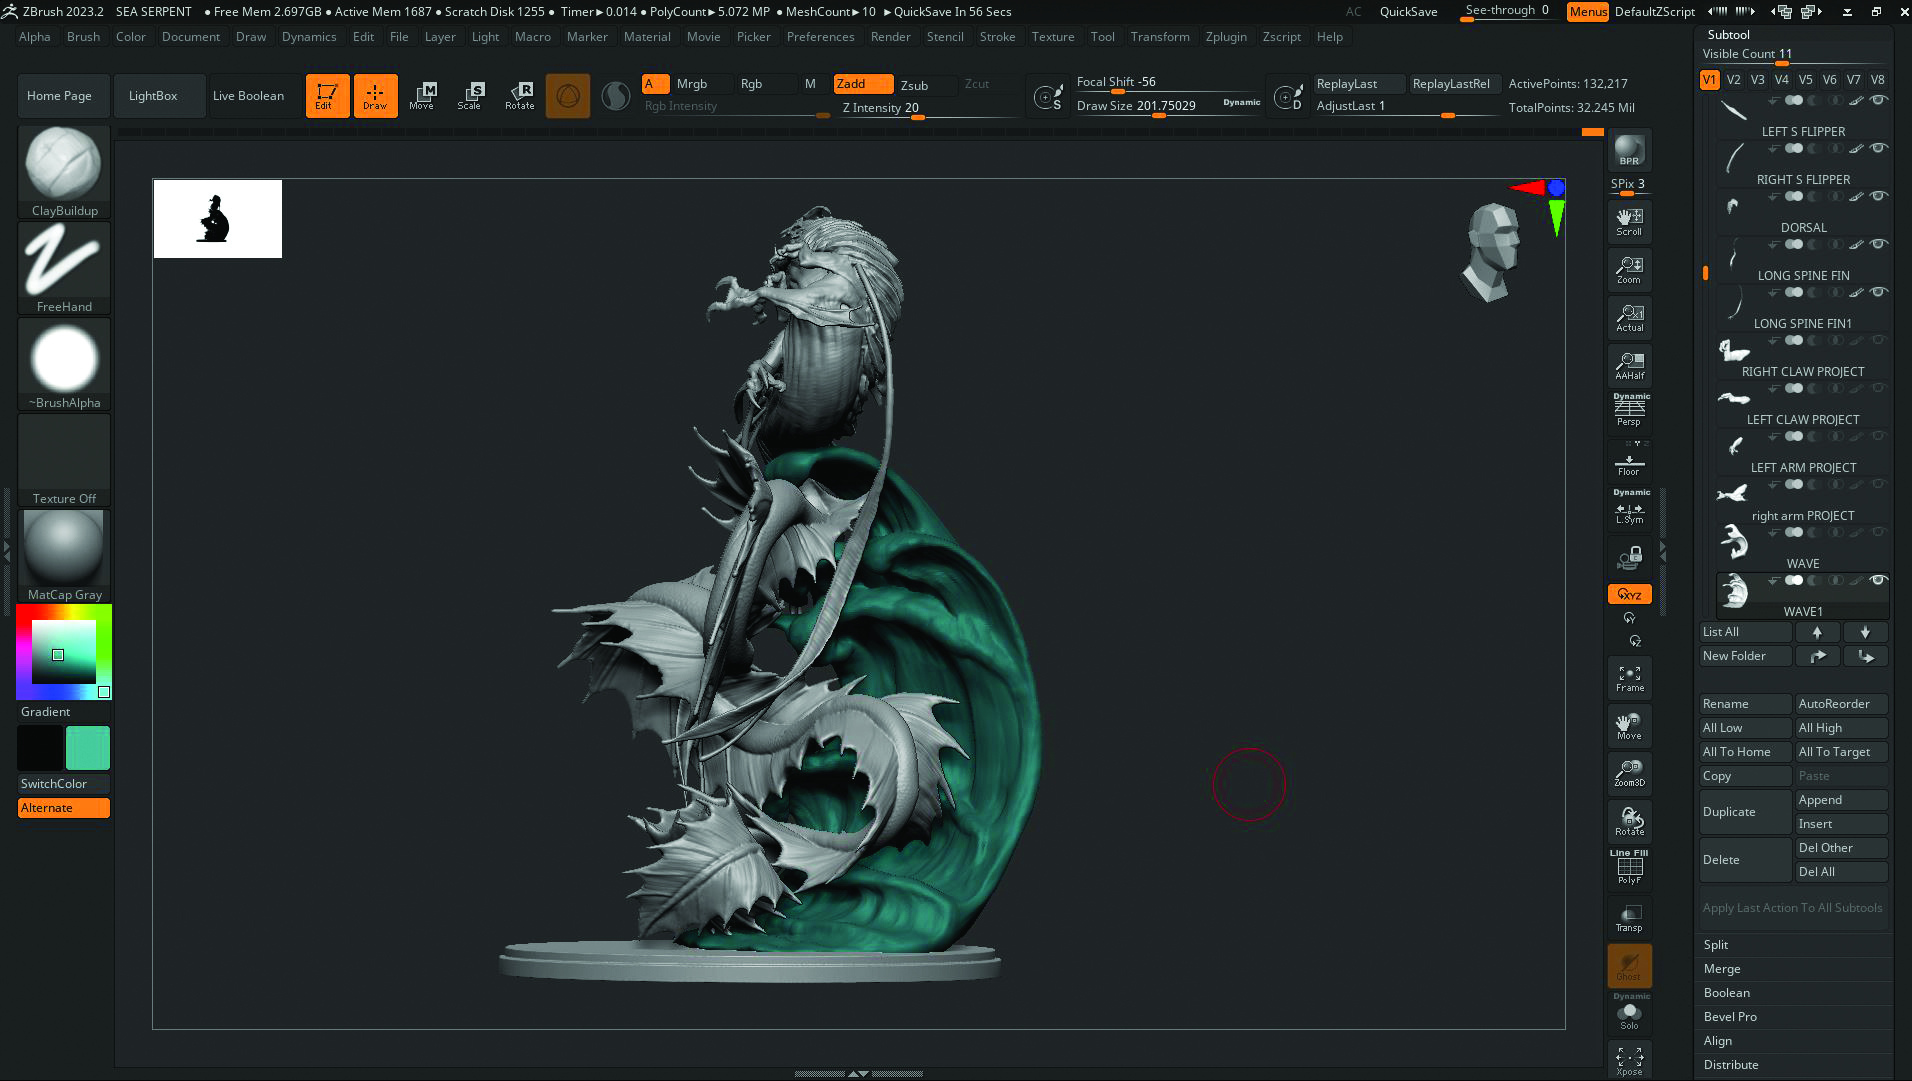
Using references of real-life waves, use the Move and ClayBuildup brushes to sculpt a structure that represents the look of a convincing wave design. Think about how this will look 3D printed, and how you would want to paint it. This always helps me figure out how far to push the details, or whether I keep it fairly simple so it can support the overall aesthetics of the piece.
07. Set up the base with Booleans
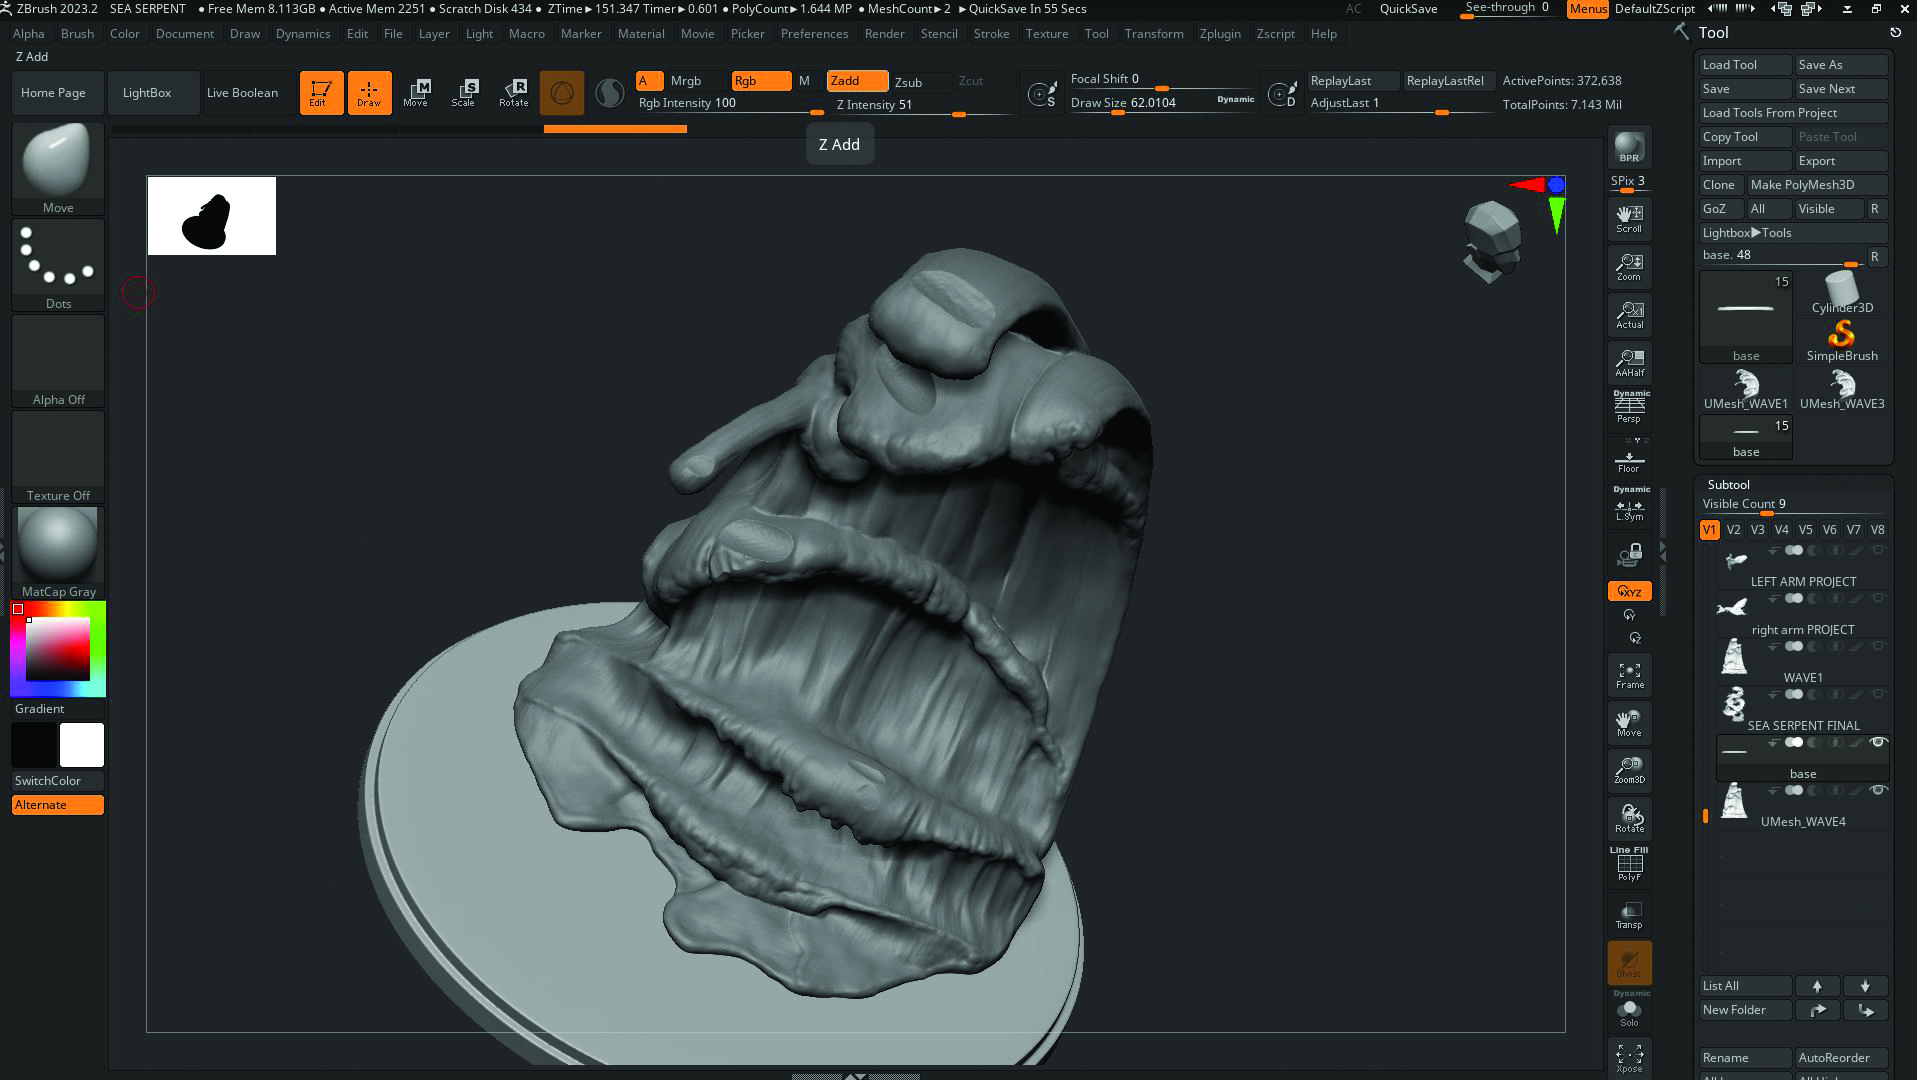
To make sure our serpent fits on the base in a snug fashion, we can use the Live Boolean tool to make dents and cuts into the wave for the body to sit in when printed, using our serpent as the ‘cutter’. For all our pieces to be stable, we must include a standard base shape. Insert a cylinder SubTool and create the main base the same width as our serpent, which the wave will be placed onto.
08. Split up the model and create keys
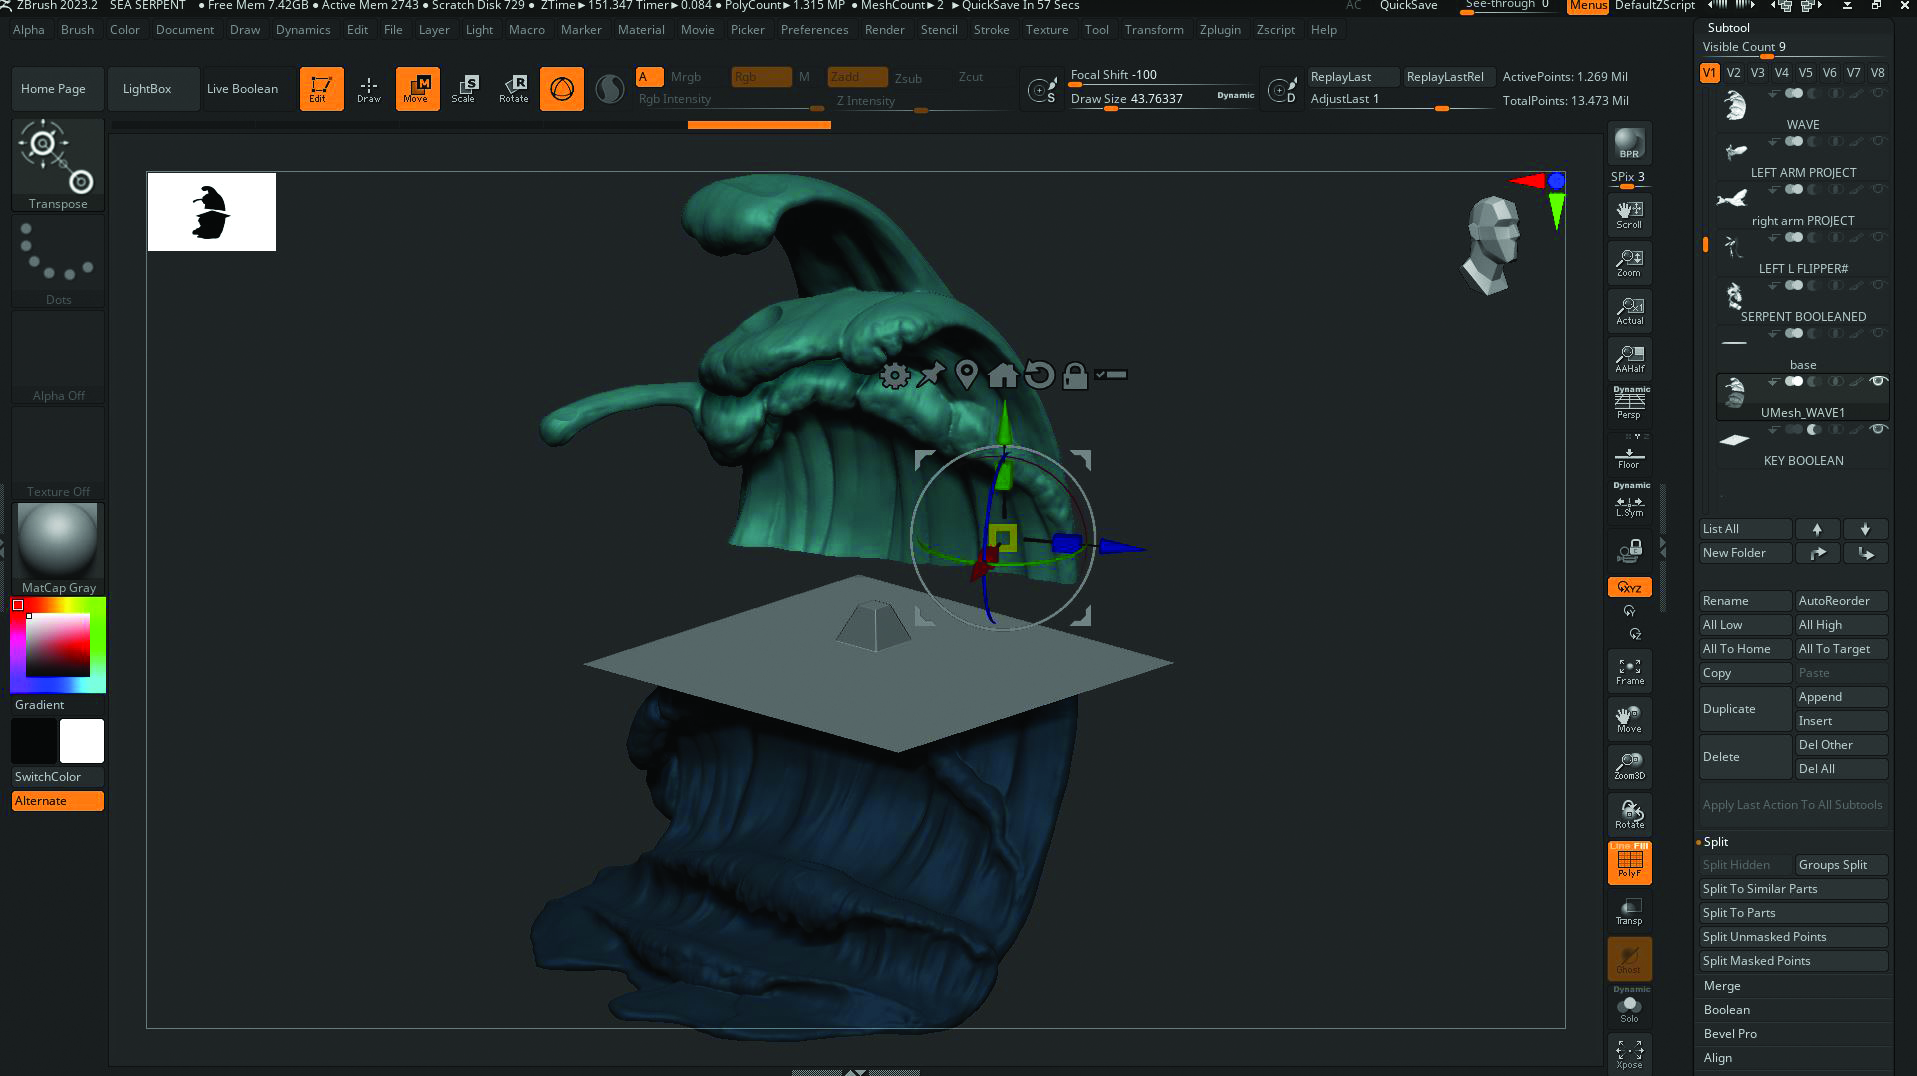
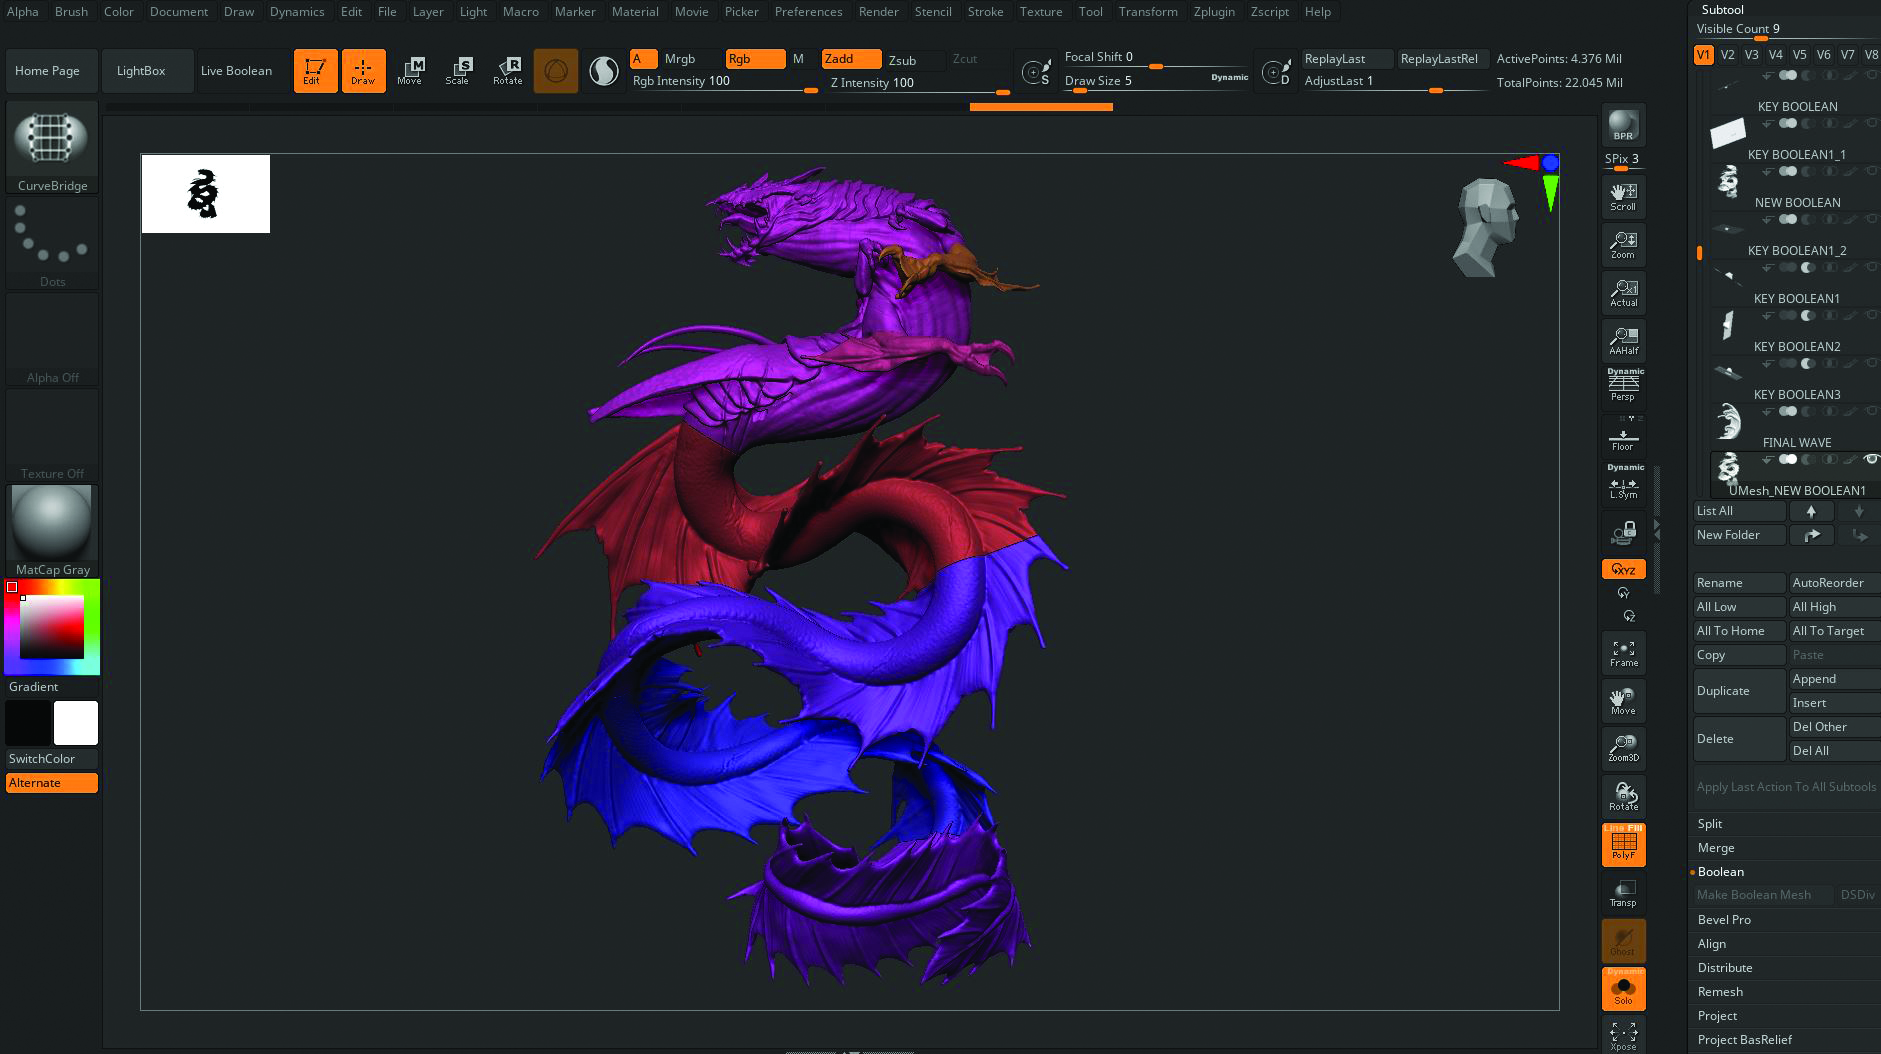
Think about how the objects will be printed, which parts would be best as individual sections to ensure minimal print failures, how they’ll fit on the base plate, and which resin will be used for each part. The waves will be cut and keyed into three sections as it’s a large shape. Use the Live Boolean tool during this cutting process, using a SubTool key that will cut the male and female keys simultaneously. For the serpent, since the tail is winding, it’s best to slice into multiple parts, focusing the cuts on the apexes of the bends.
09. Prepare for printing
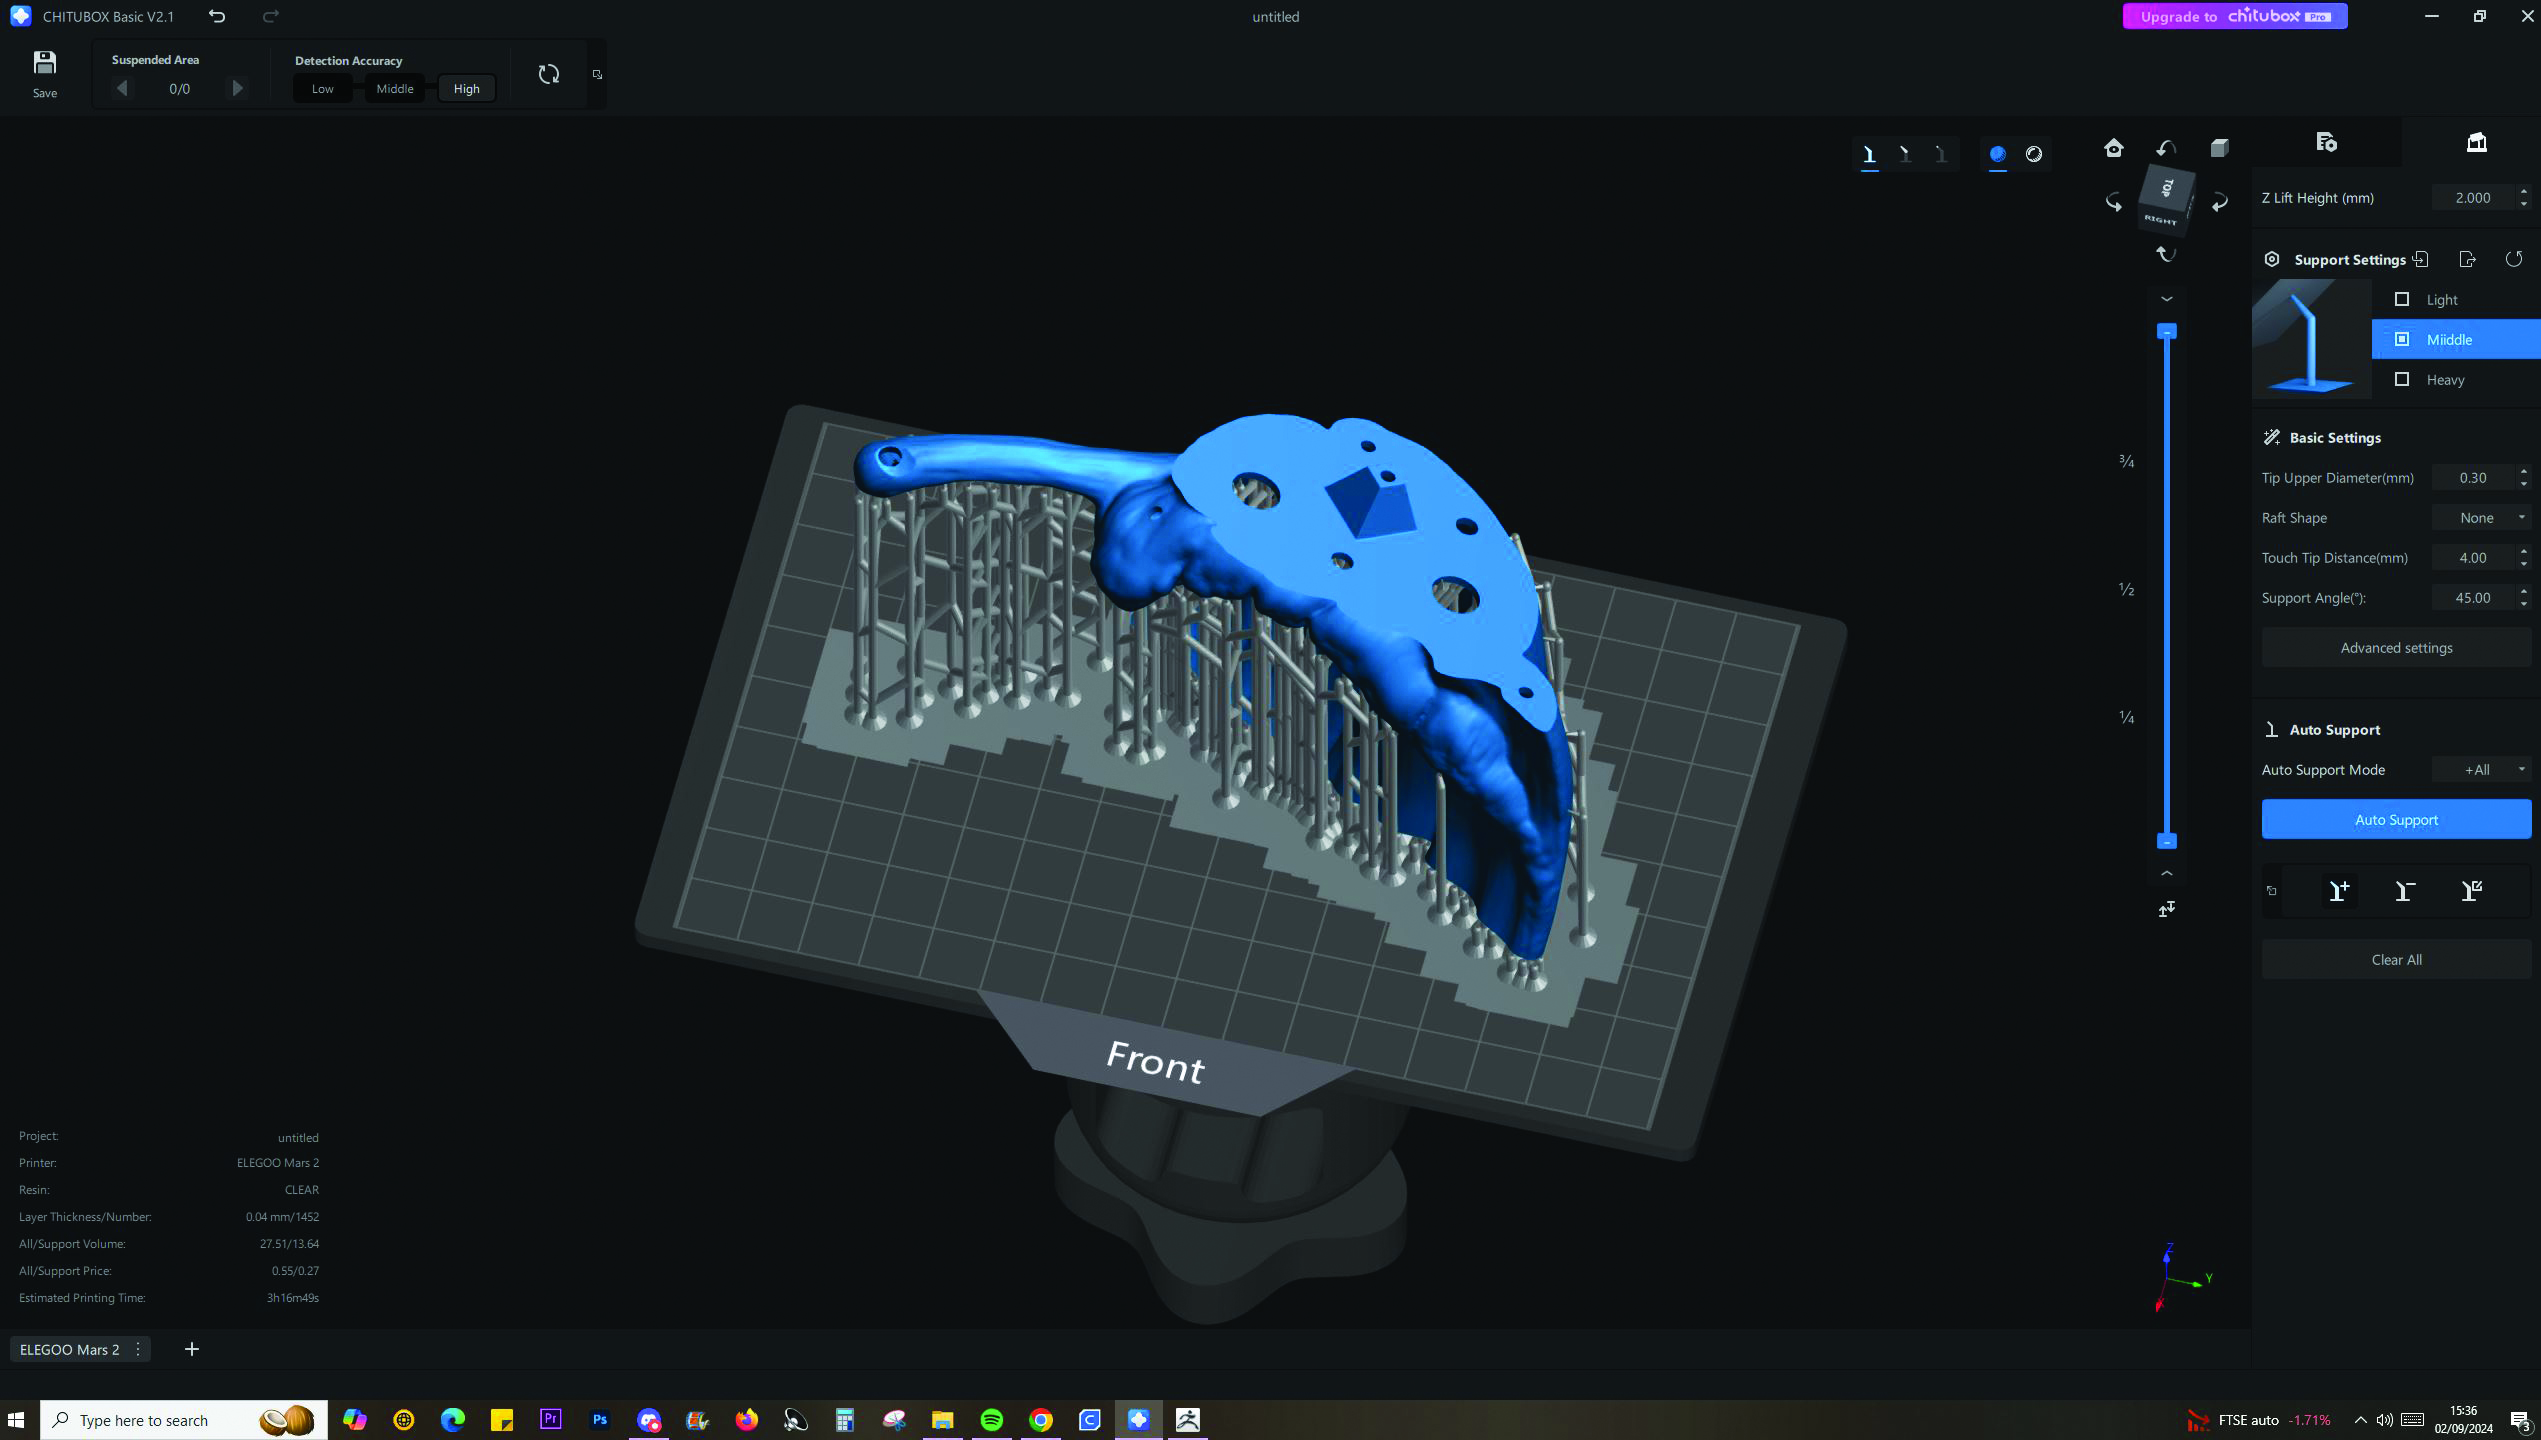
Let’s focus on getting each SubTool right for the printing phase. Load a SubTool into Chitubox, for example the midsection of the wave. Since this piece is fairly large, it could end up being too heavy for the supports, so we must hollow it out. Add drainage holes at the top and bottom so the resin can pour out. Smaller, lighter pieces are fine to be printed as solid parts.
10. Master how to use clear and grey resin
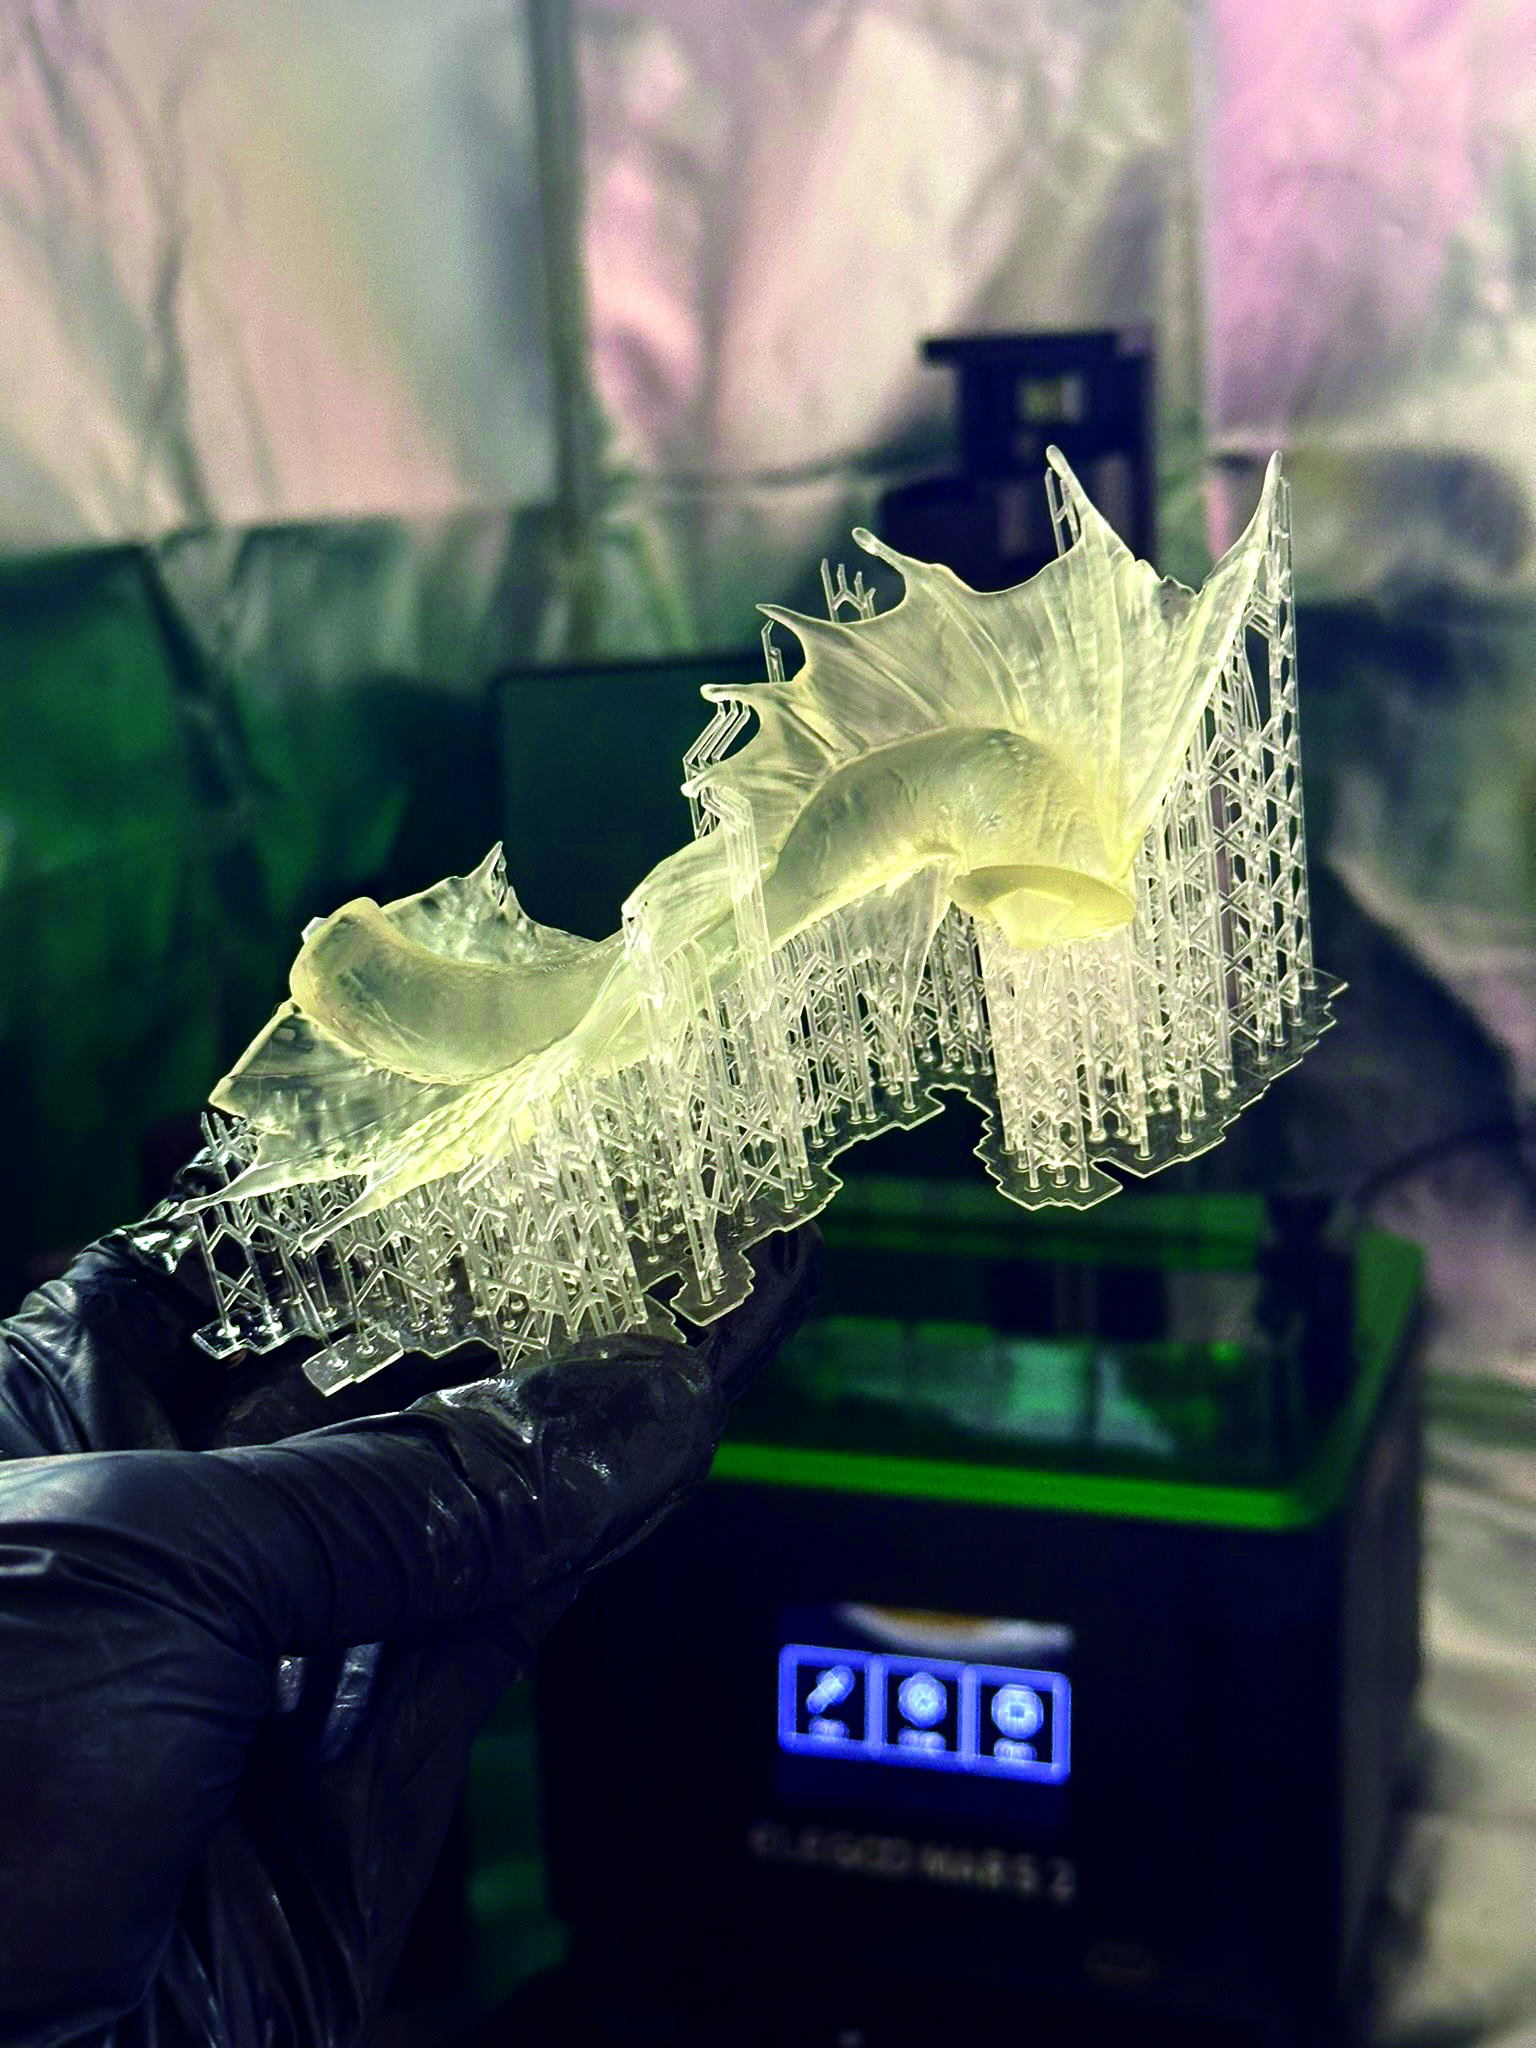
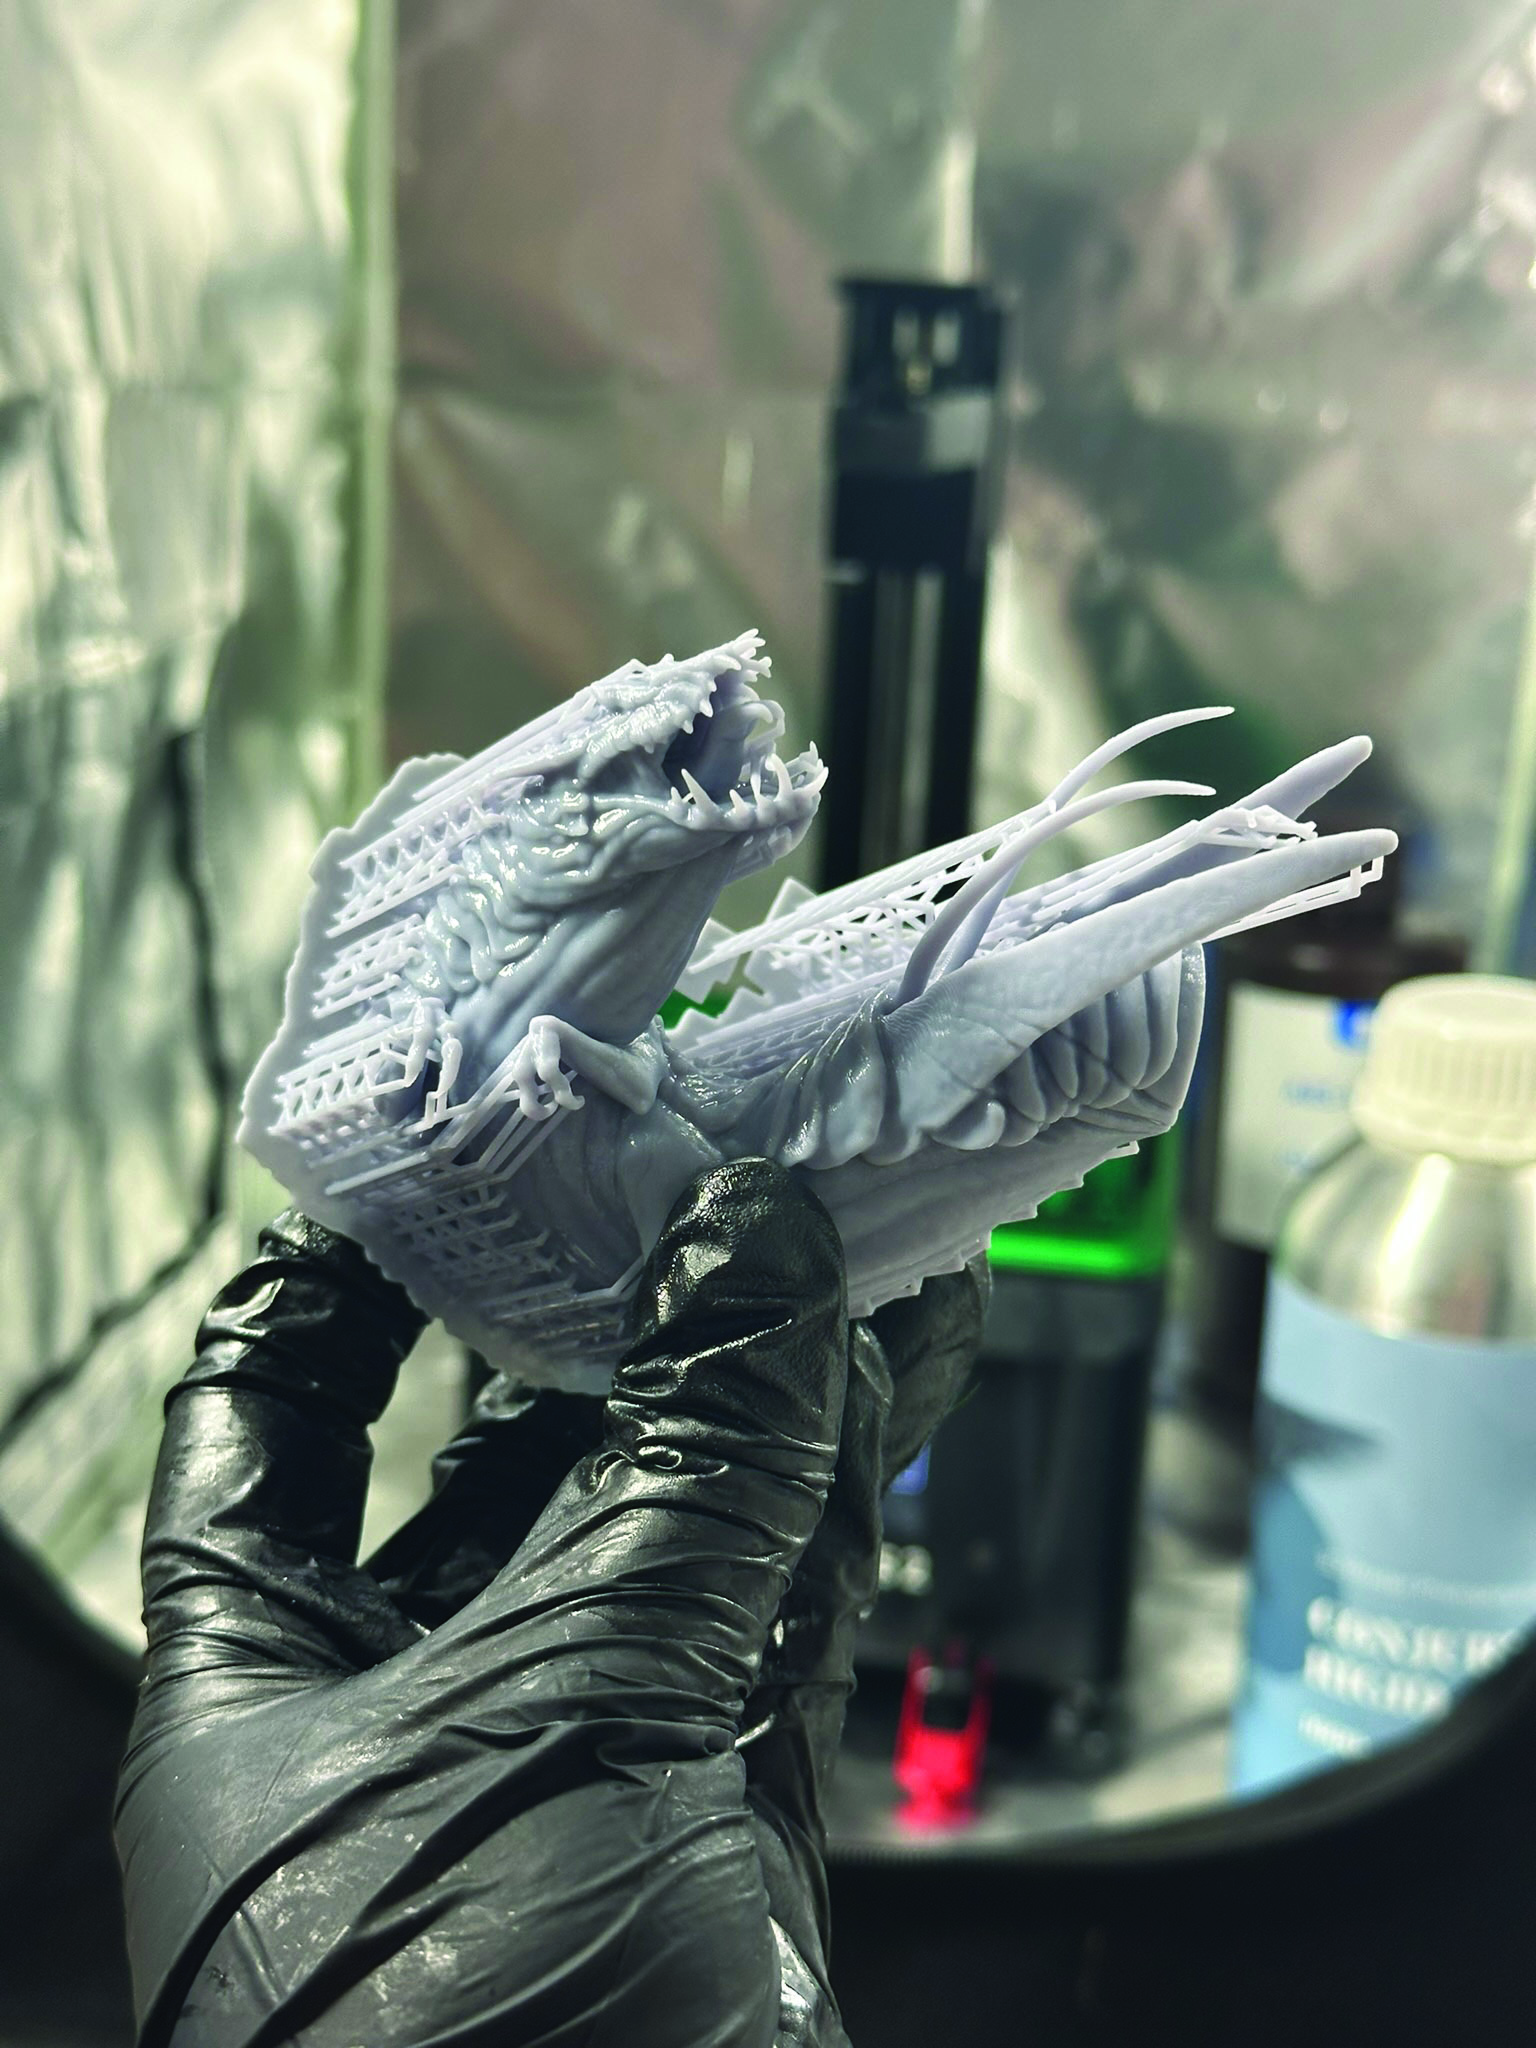
As we’ve previously determined which parts of our prints will be in certain resins, it’s best to stick with one resin type at a time and print all the pieces you want in that resin first. The whole wave and 90 per cent of the serpent will be printed in the clear resin, as we want that transparency for the fins. Clear resin needs less projection time as it can overexpose easily, so be sure to do a quick test print first. After your clear prints are done, empty and clean out the vat and switch to the grey resin, which is less temperamental.
11. Clean and cure
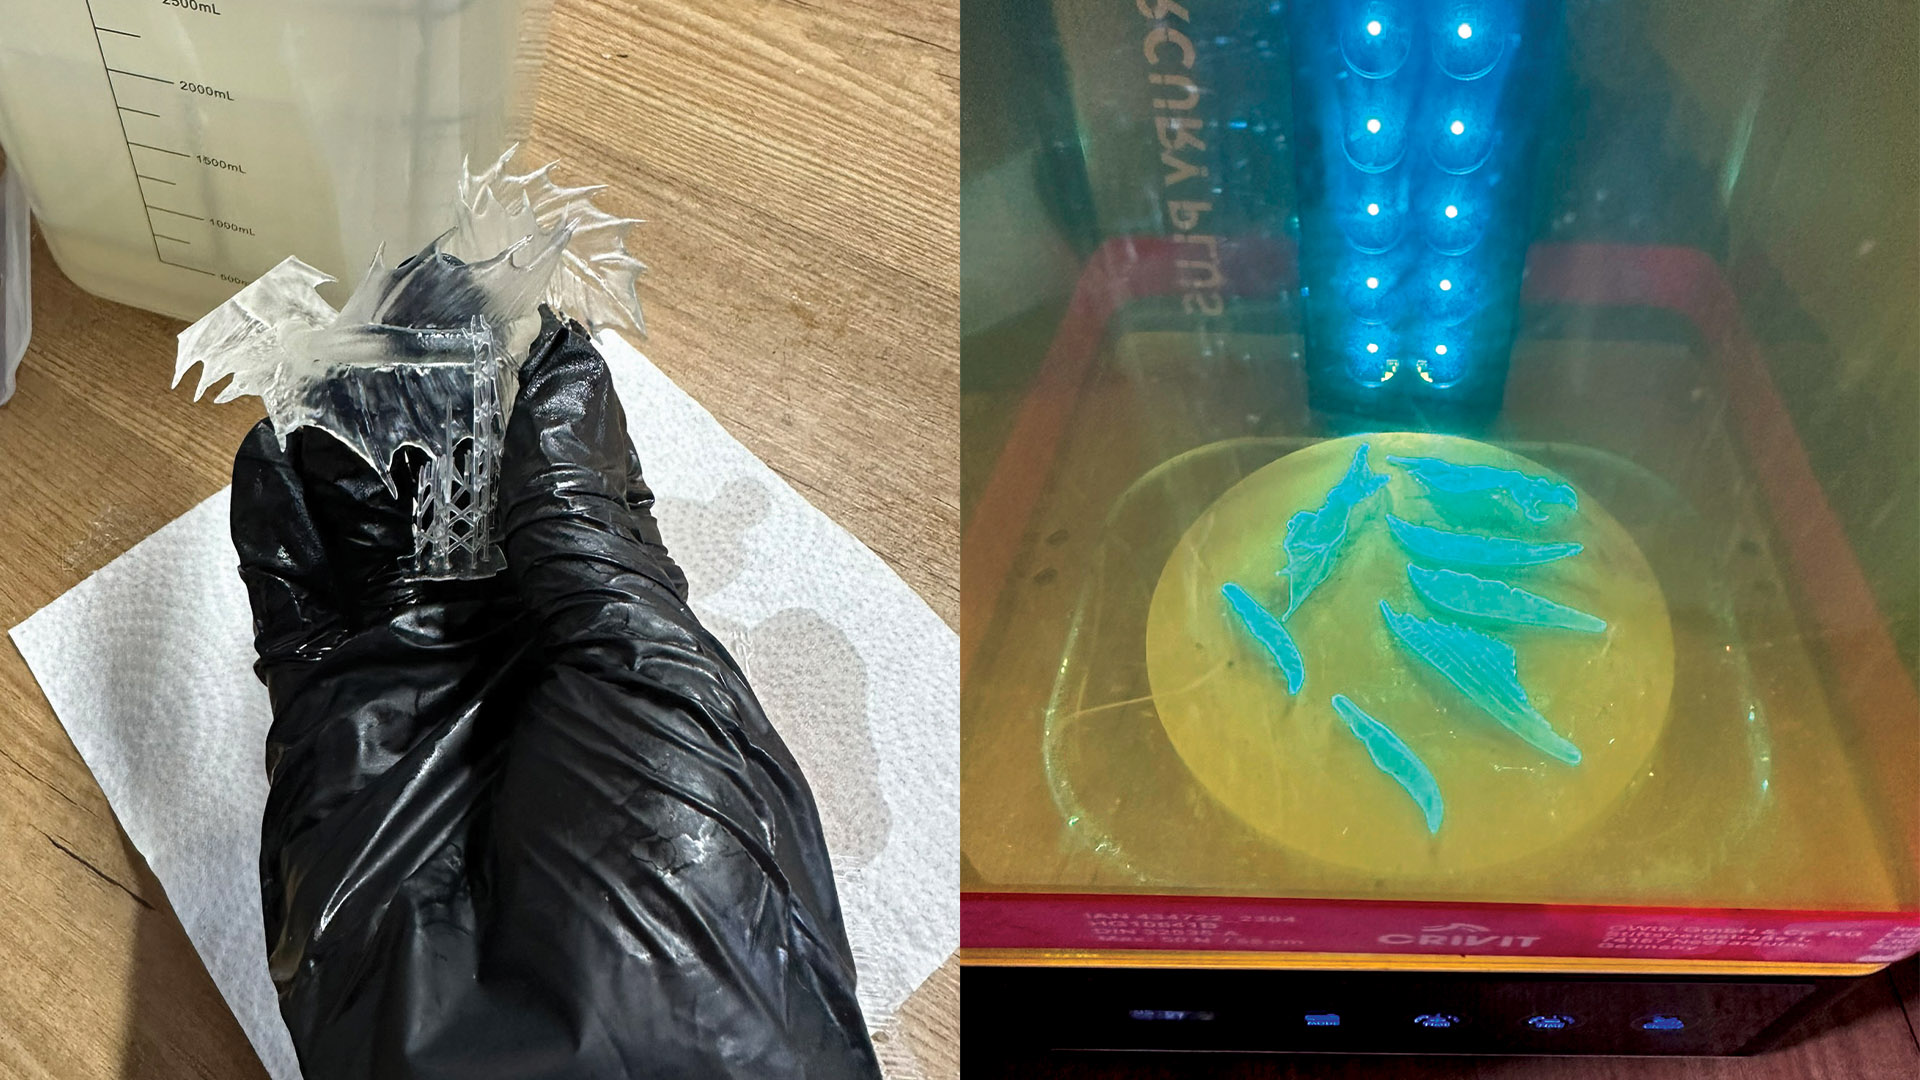
After each print, make sure you clean off any uncured resin using isopropyl alcohol (IPA), and always use gloves to handle your fresh prints. I like to use a toothbrush during this process to get into any awkward or small spaces. Gently pull and press off the supports, being cautious around any delicate areas such as the spines or arms. Dry off any excess IPA using a paper towel, then cure each piece with UV for five or more minutes to make sure the resin fully sets.
12. Sand away imperfections
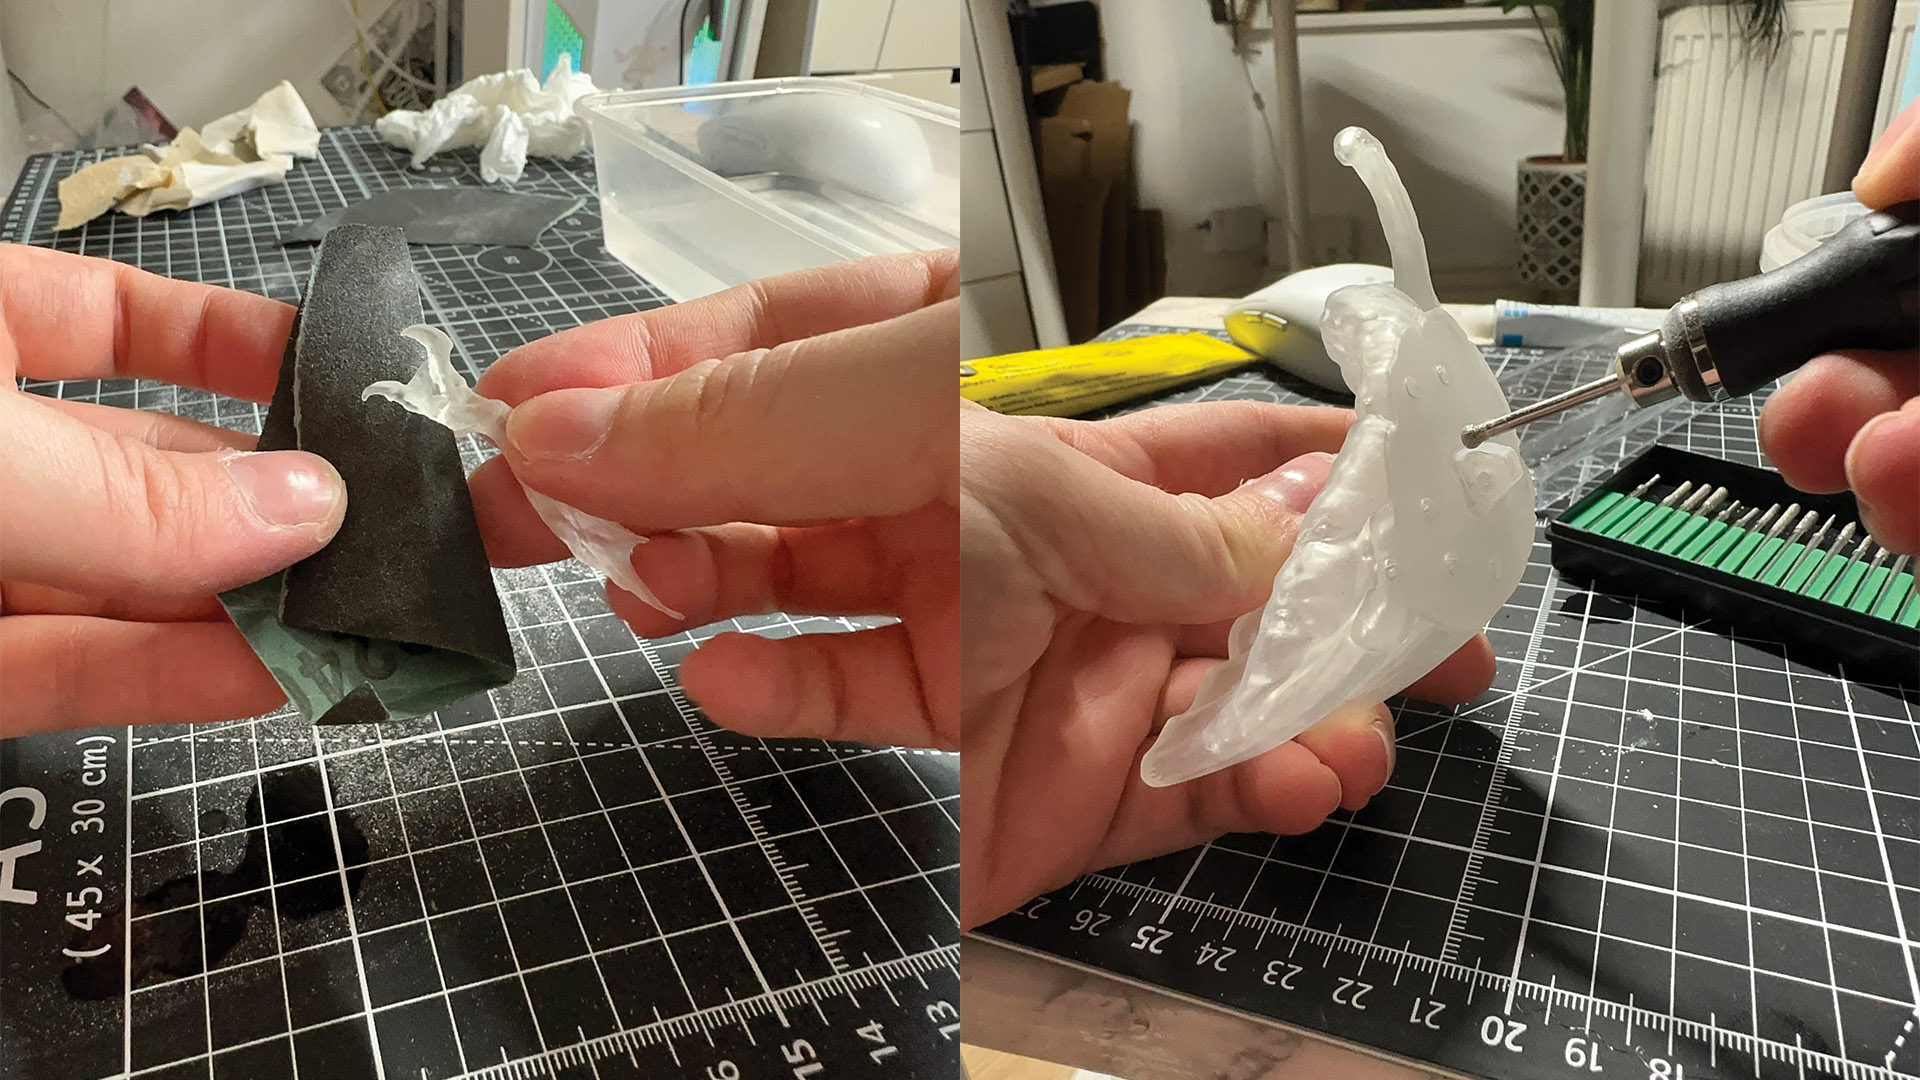
Print supports often leave slight imperfections, as they’re actually embedded into the print itself. Paired with clear resin, these can be even more of an issue as slight overexposure can make the imperfections more noticeable or harder to remove. With fine-grit sandpaper, gently sand away these support bumps while being careful not to get rid of too much detail. Sometimes the resin can shrink, expand or overexpose and the keys sometimes may not fit flush together, so use a dremel or engraving pen to sand them down.
13. Glue the pieces and fill gaps
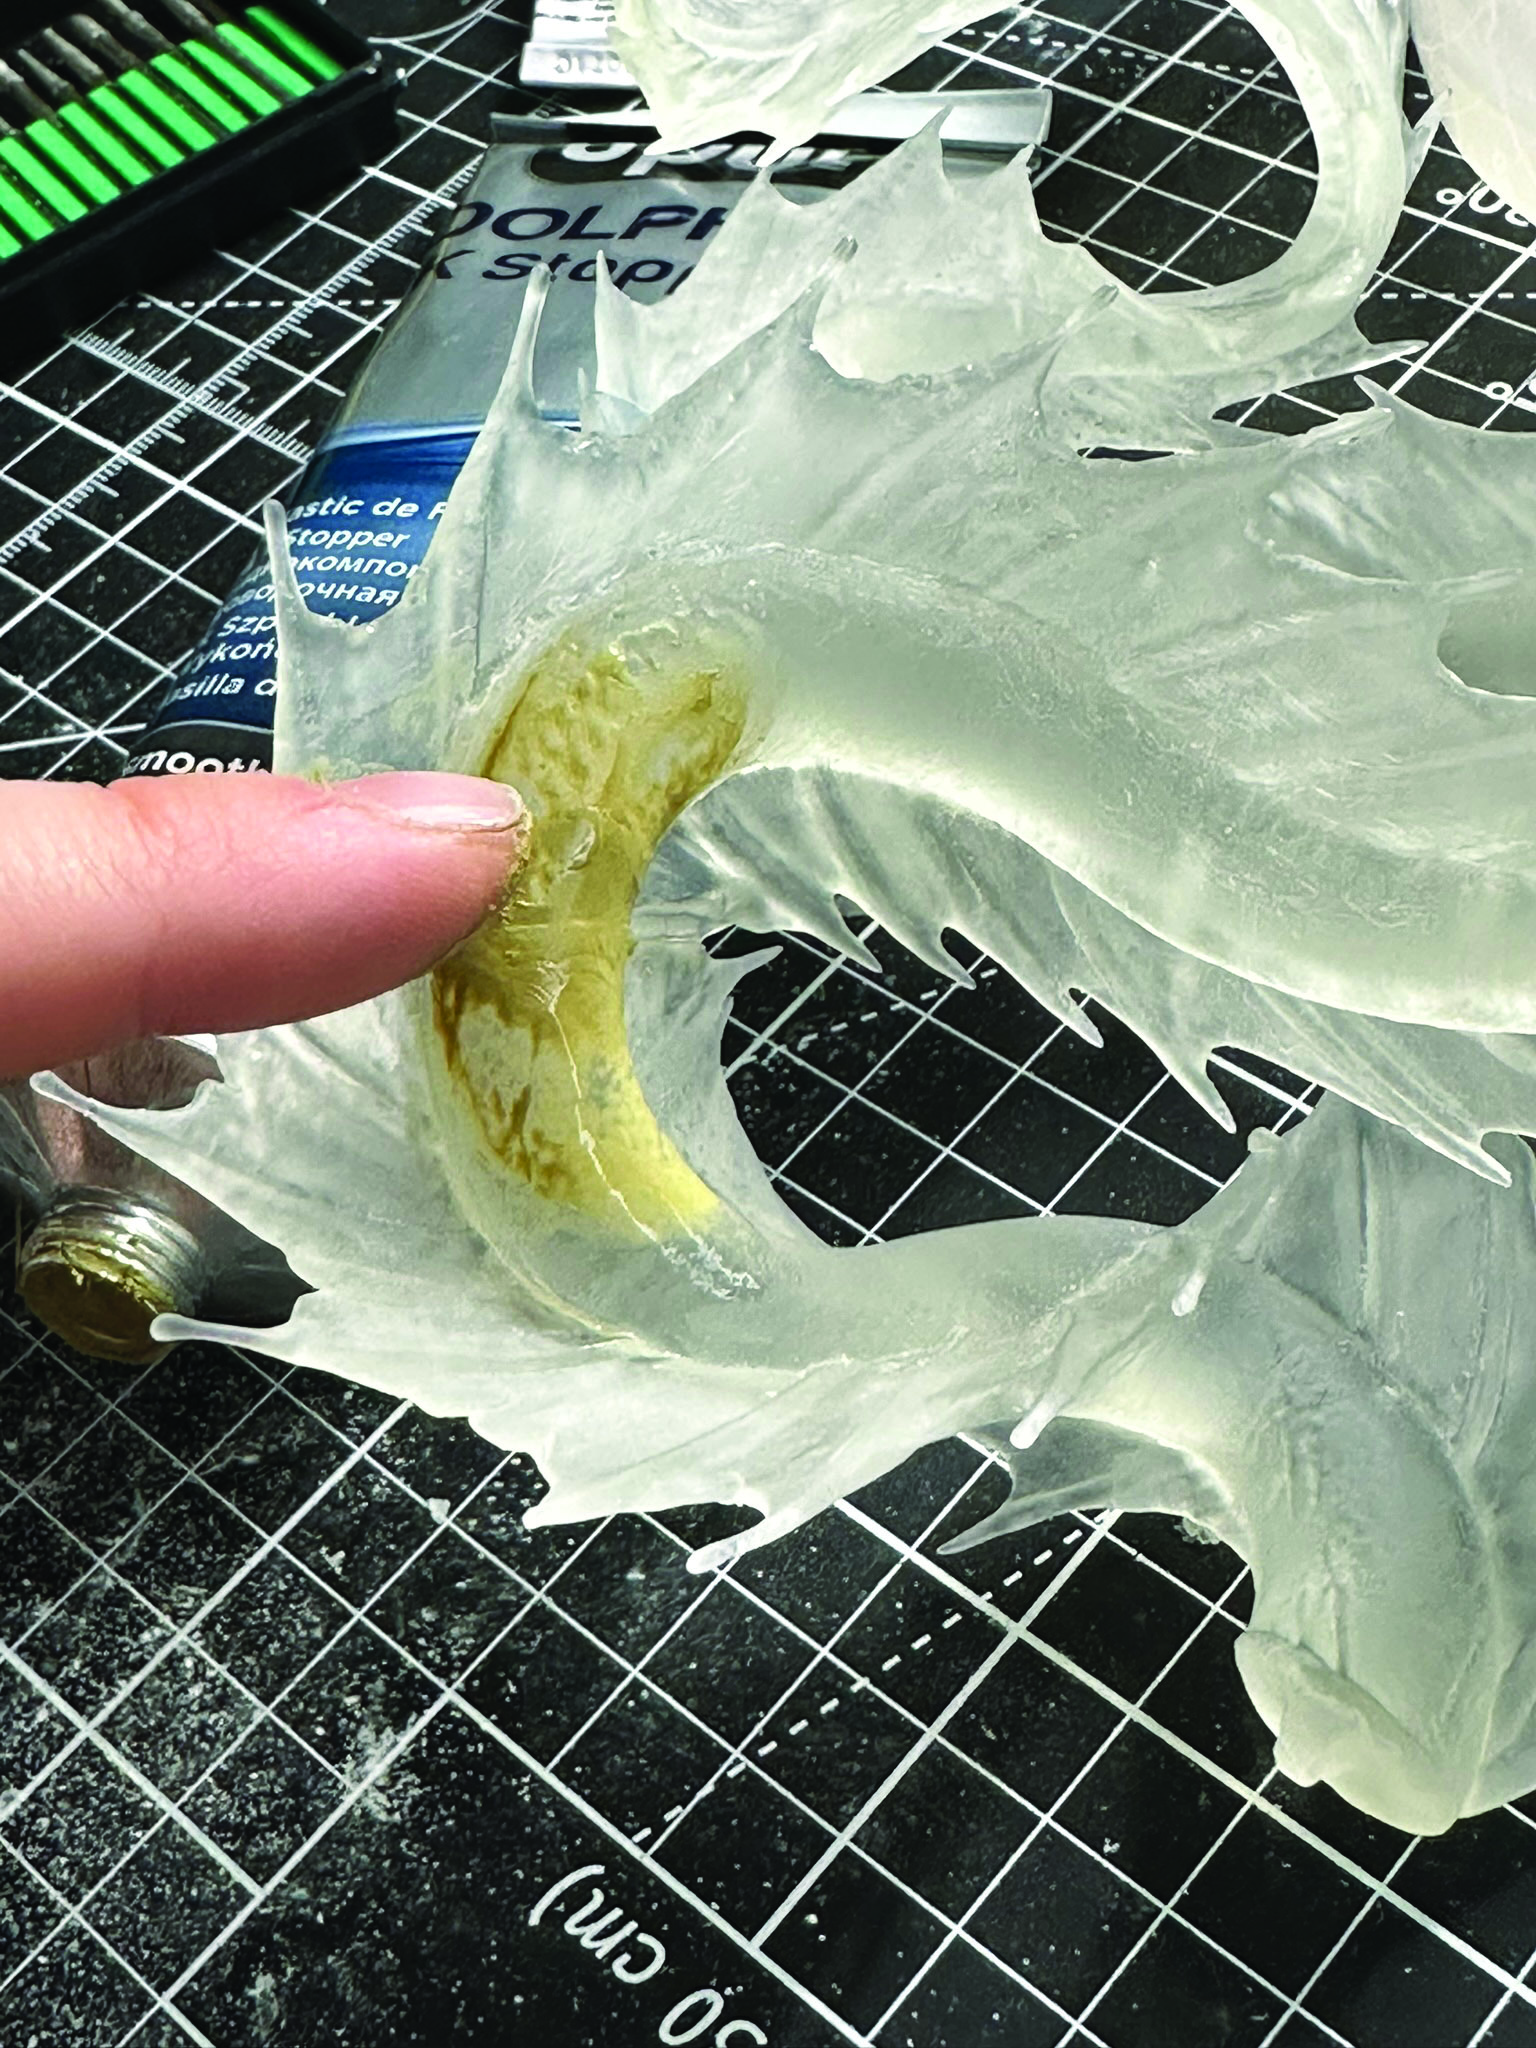
Think about which pieces you want to glue together and paint as a whole. For instance, the tail would benefit from being painted as a full piece to keep its colours consistent. Where pieces connect, there may be gaps we need to fill with acrylic filler to smooth things out. Use IPA to thin down the filler. Using opaque filler on the body is fine as it isn’t going to be transparent.
14. Paint in alcohol ink
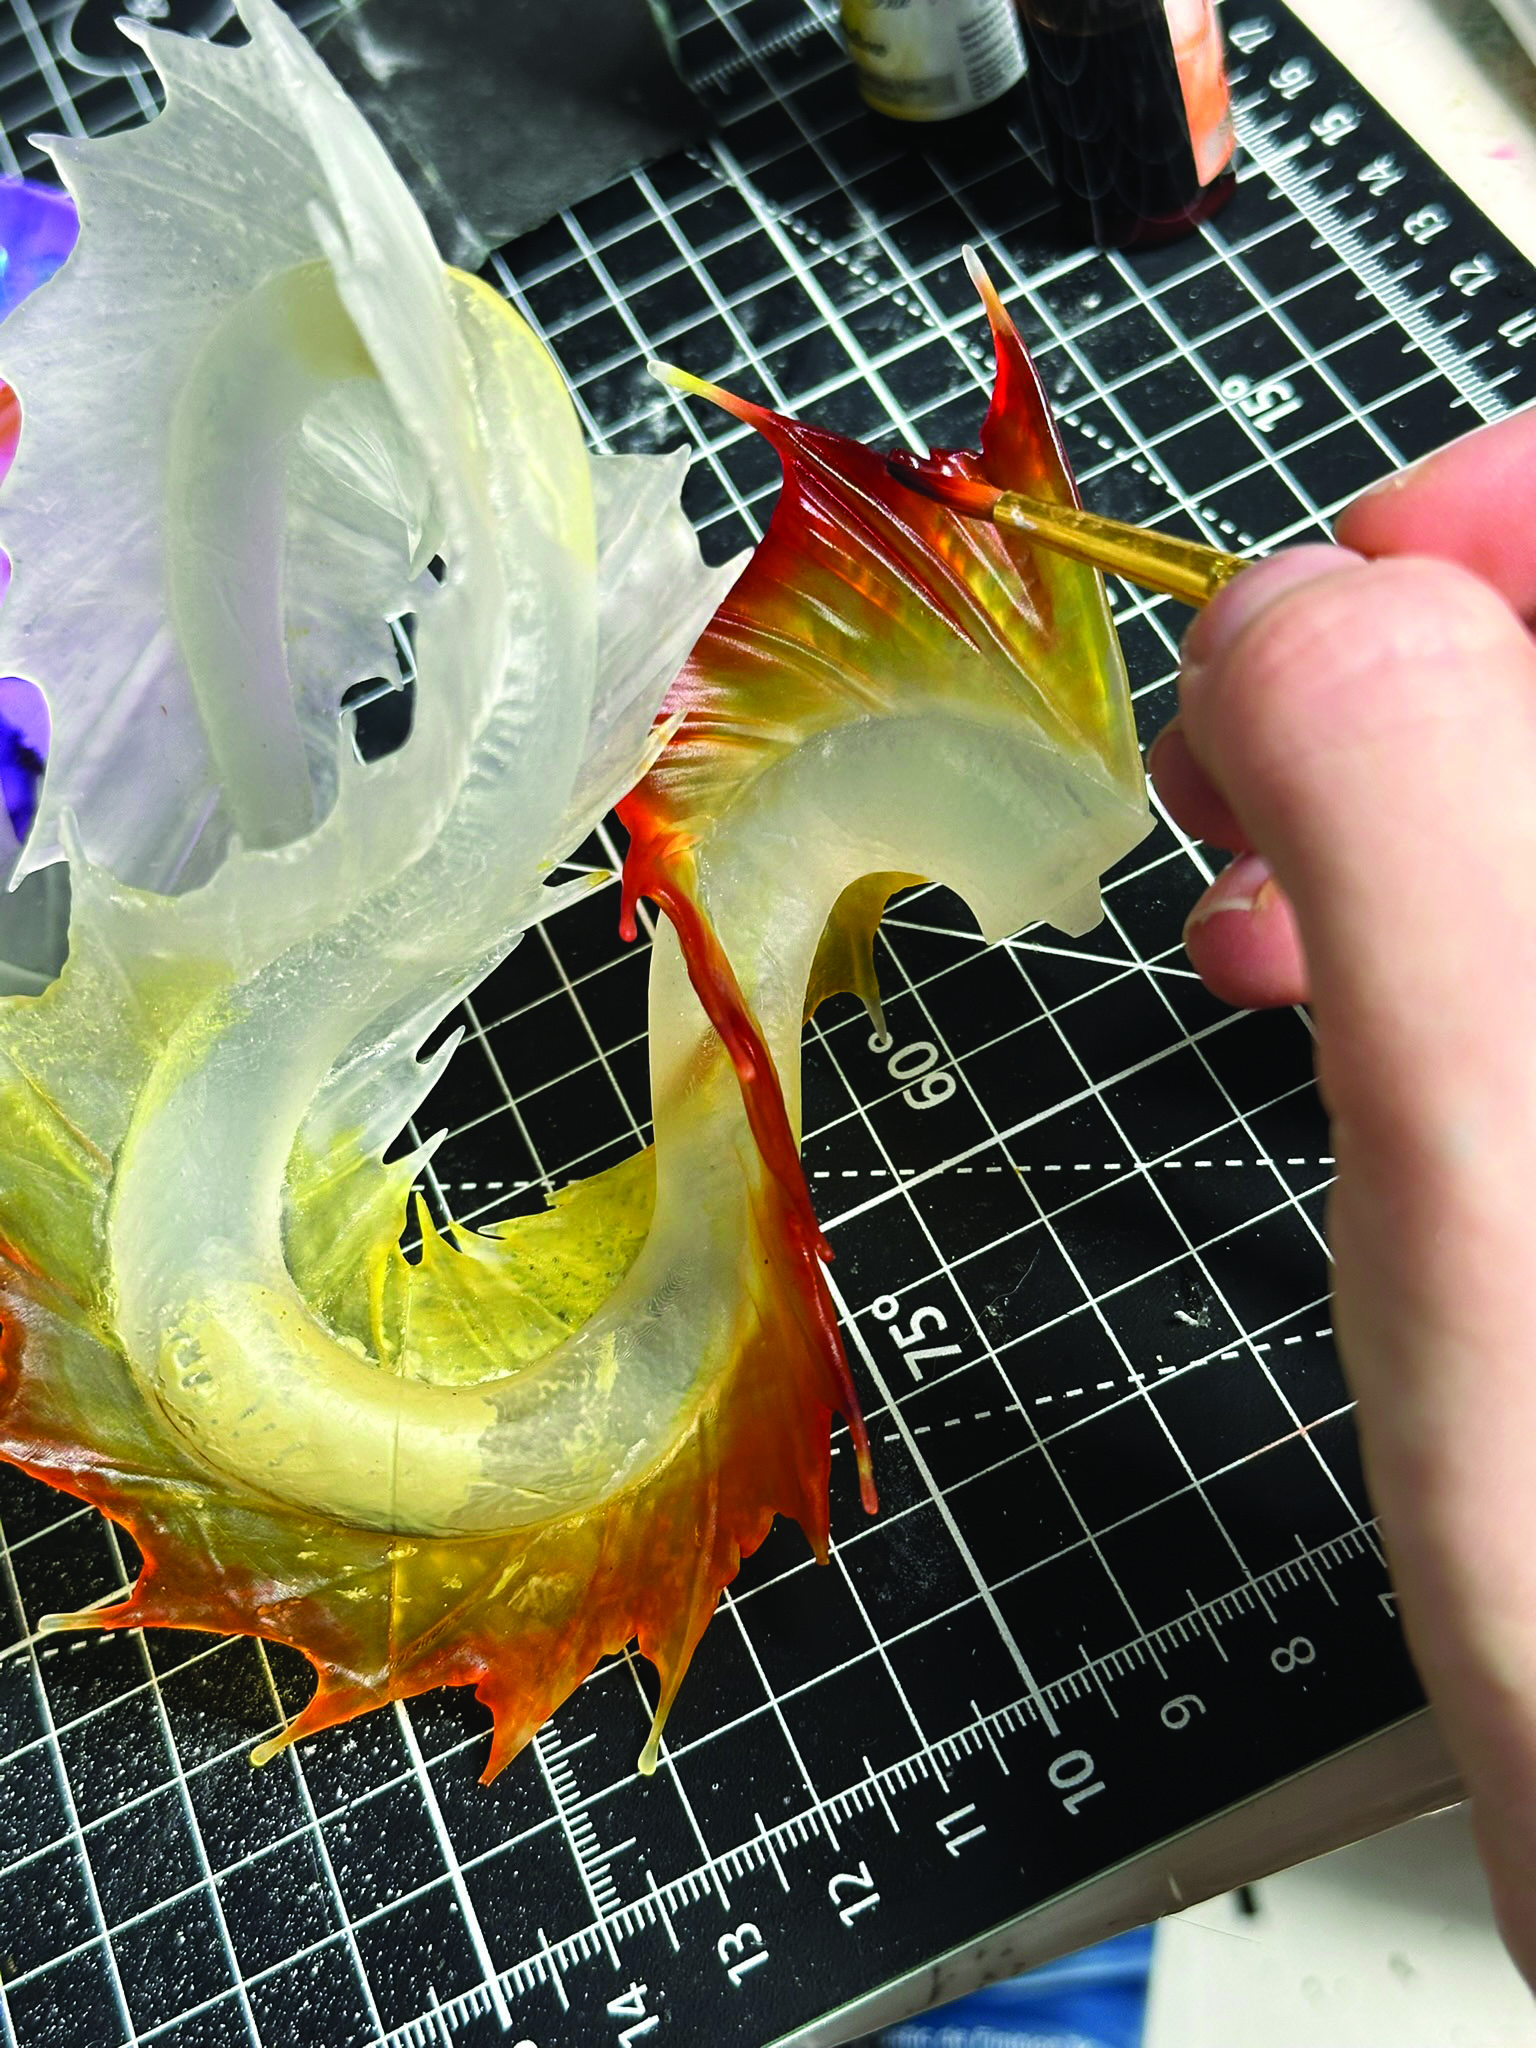
As we want to keep the fins and the wave support translucent, alcohol inks are a better choice to colour clear resin rather than acrylic paint. There’s also no need to prime clear resin, as the alcohol inks immediately take to it. It’s always best to build up to a stronger, darker colour, so use IPA to dilute your alcohol ink and do layers of washes over the resin. Start off with the paler colours first and then slowly add more concentrated ink to get a bolder, deeper shade. Once the inks touch the resin they can’t be removed, so be extra vigilant here.
15. Prime for acrylic painting
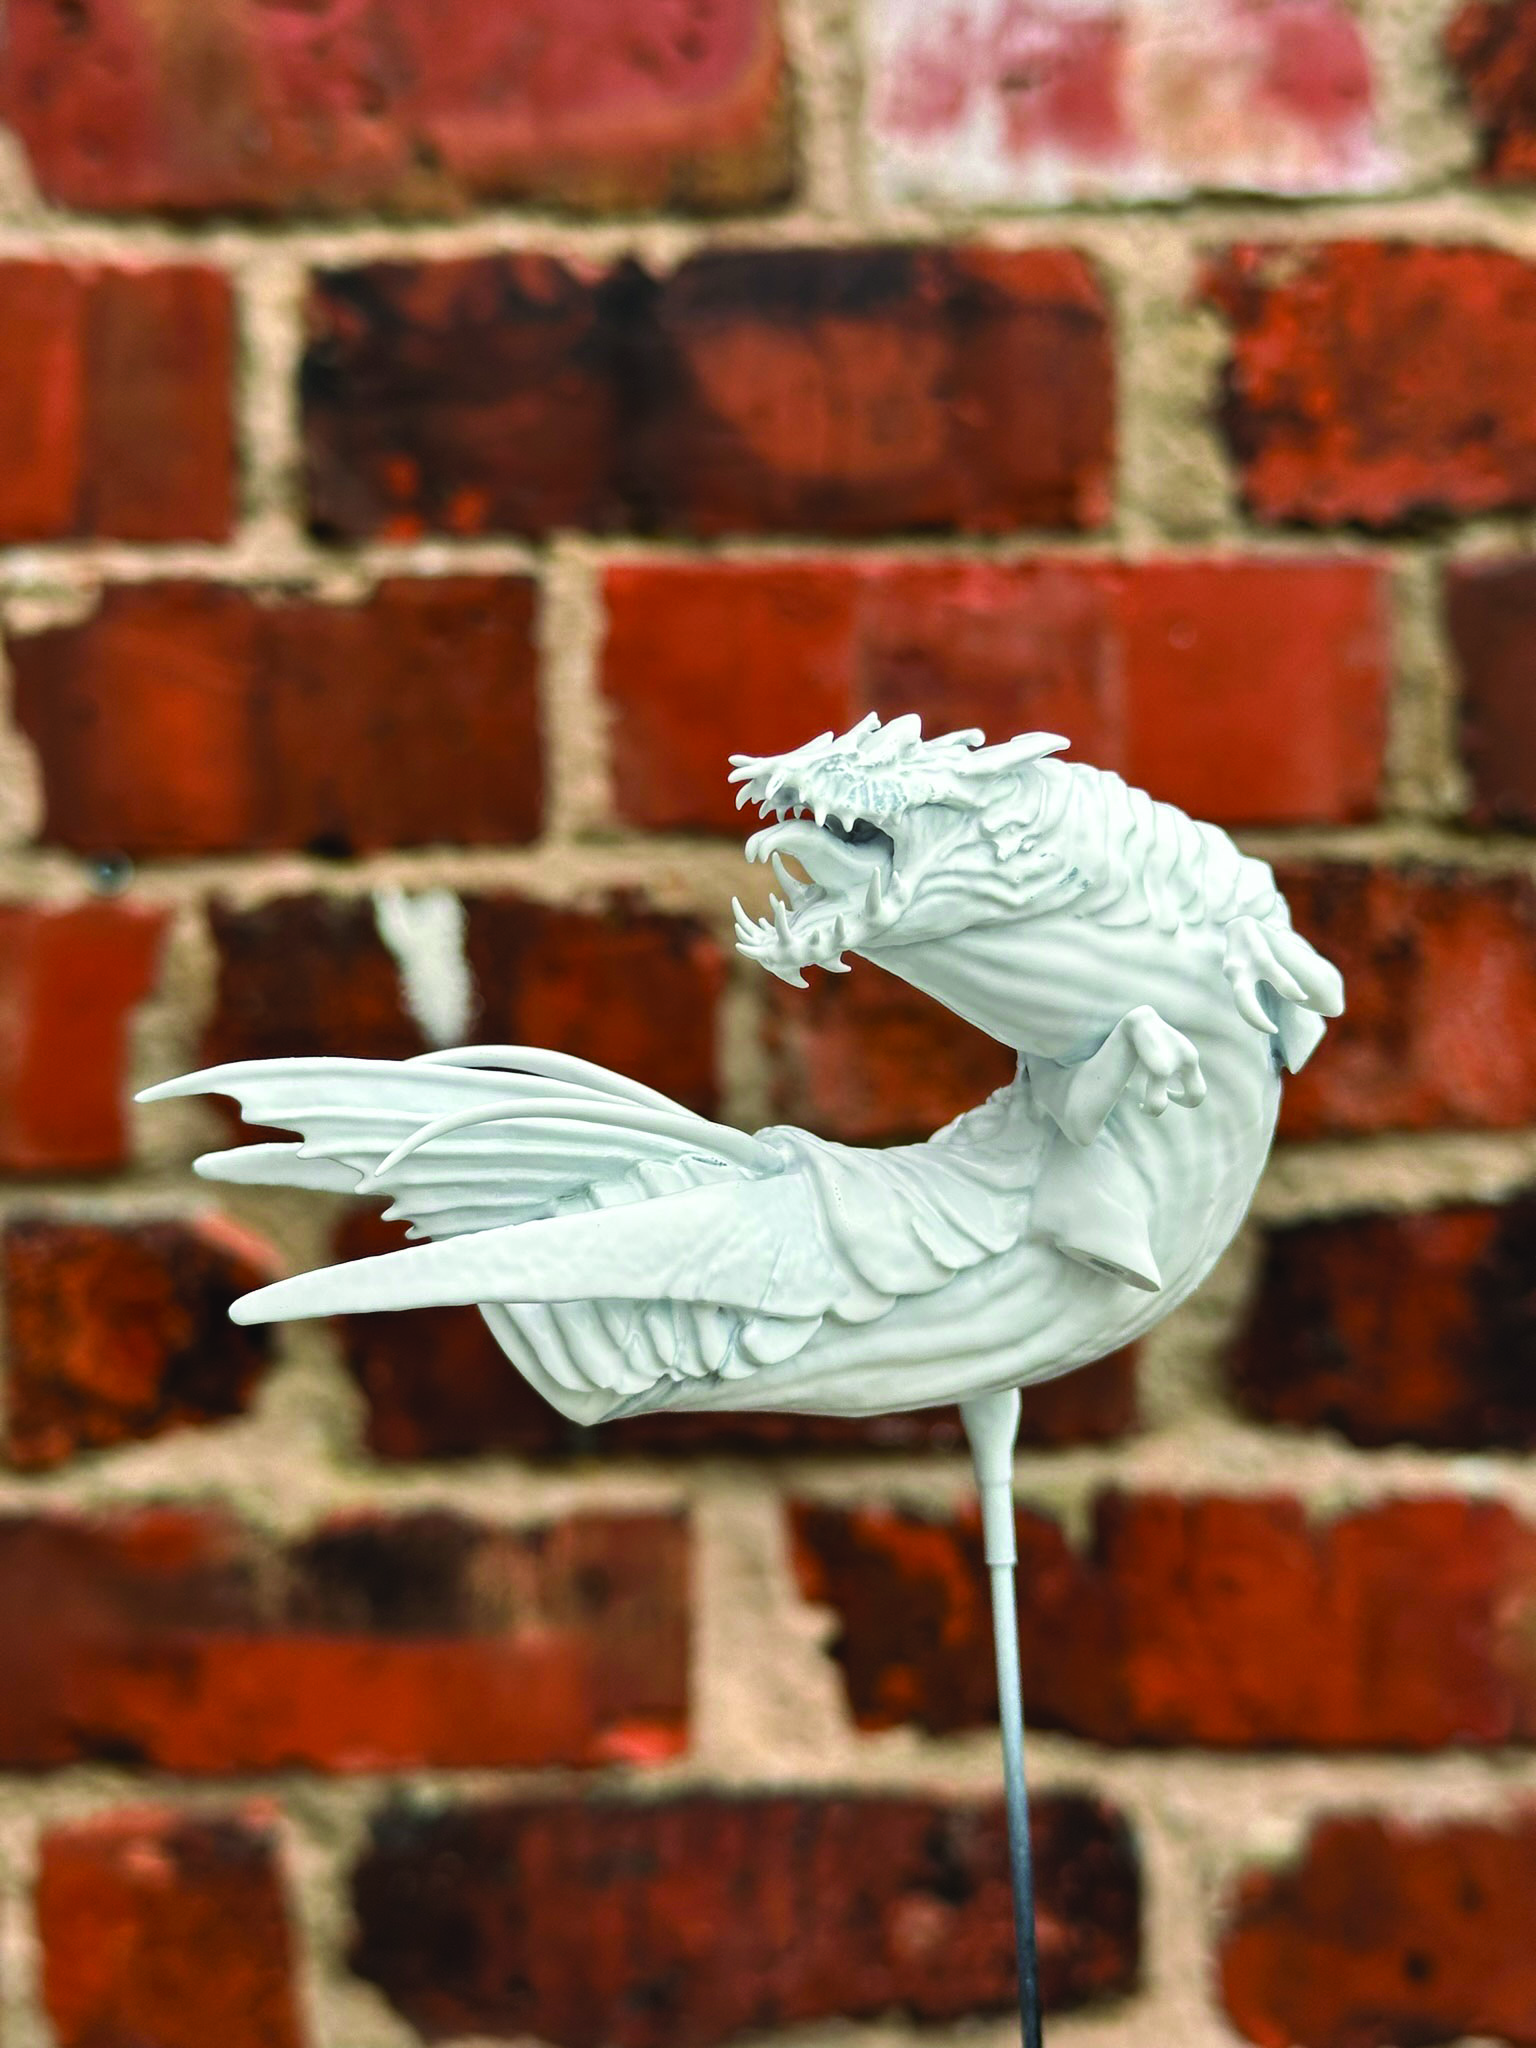
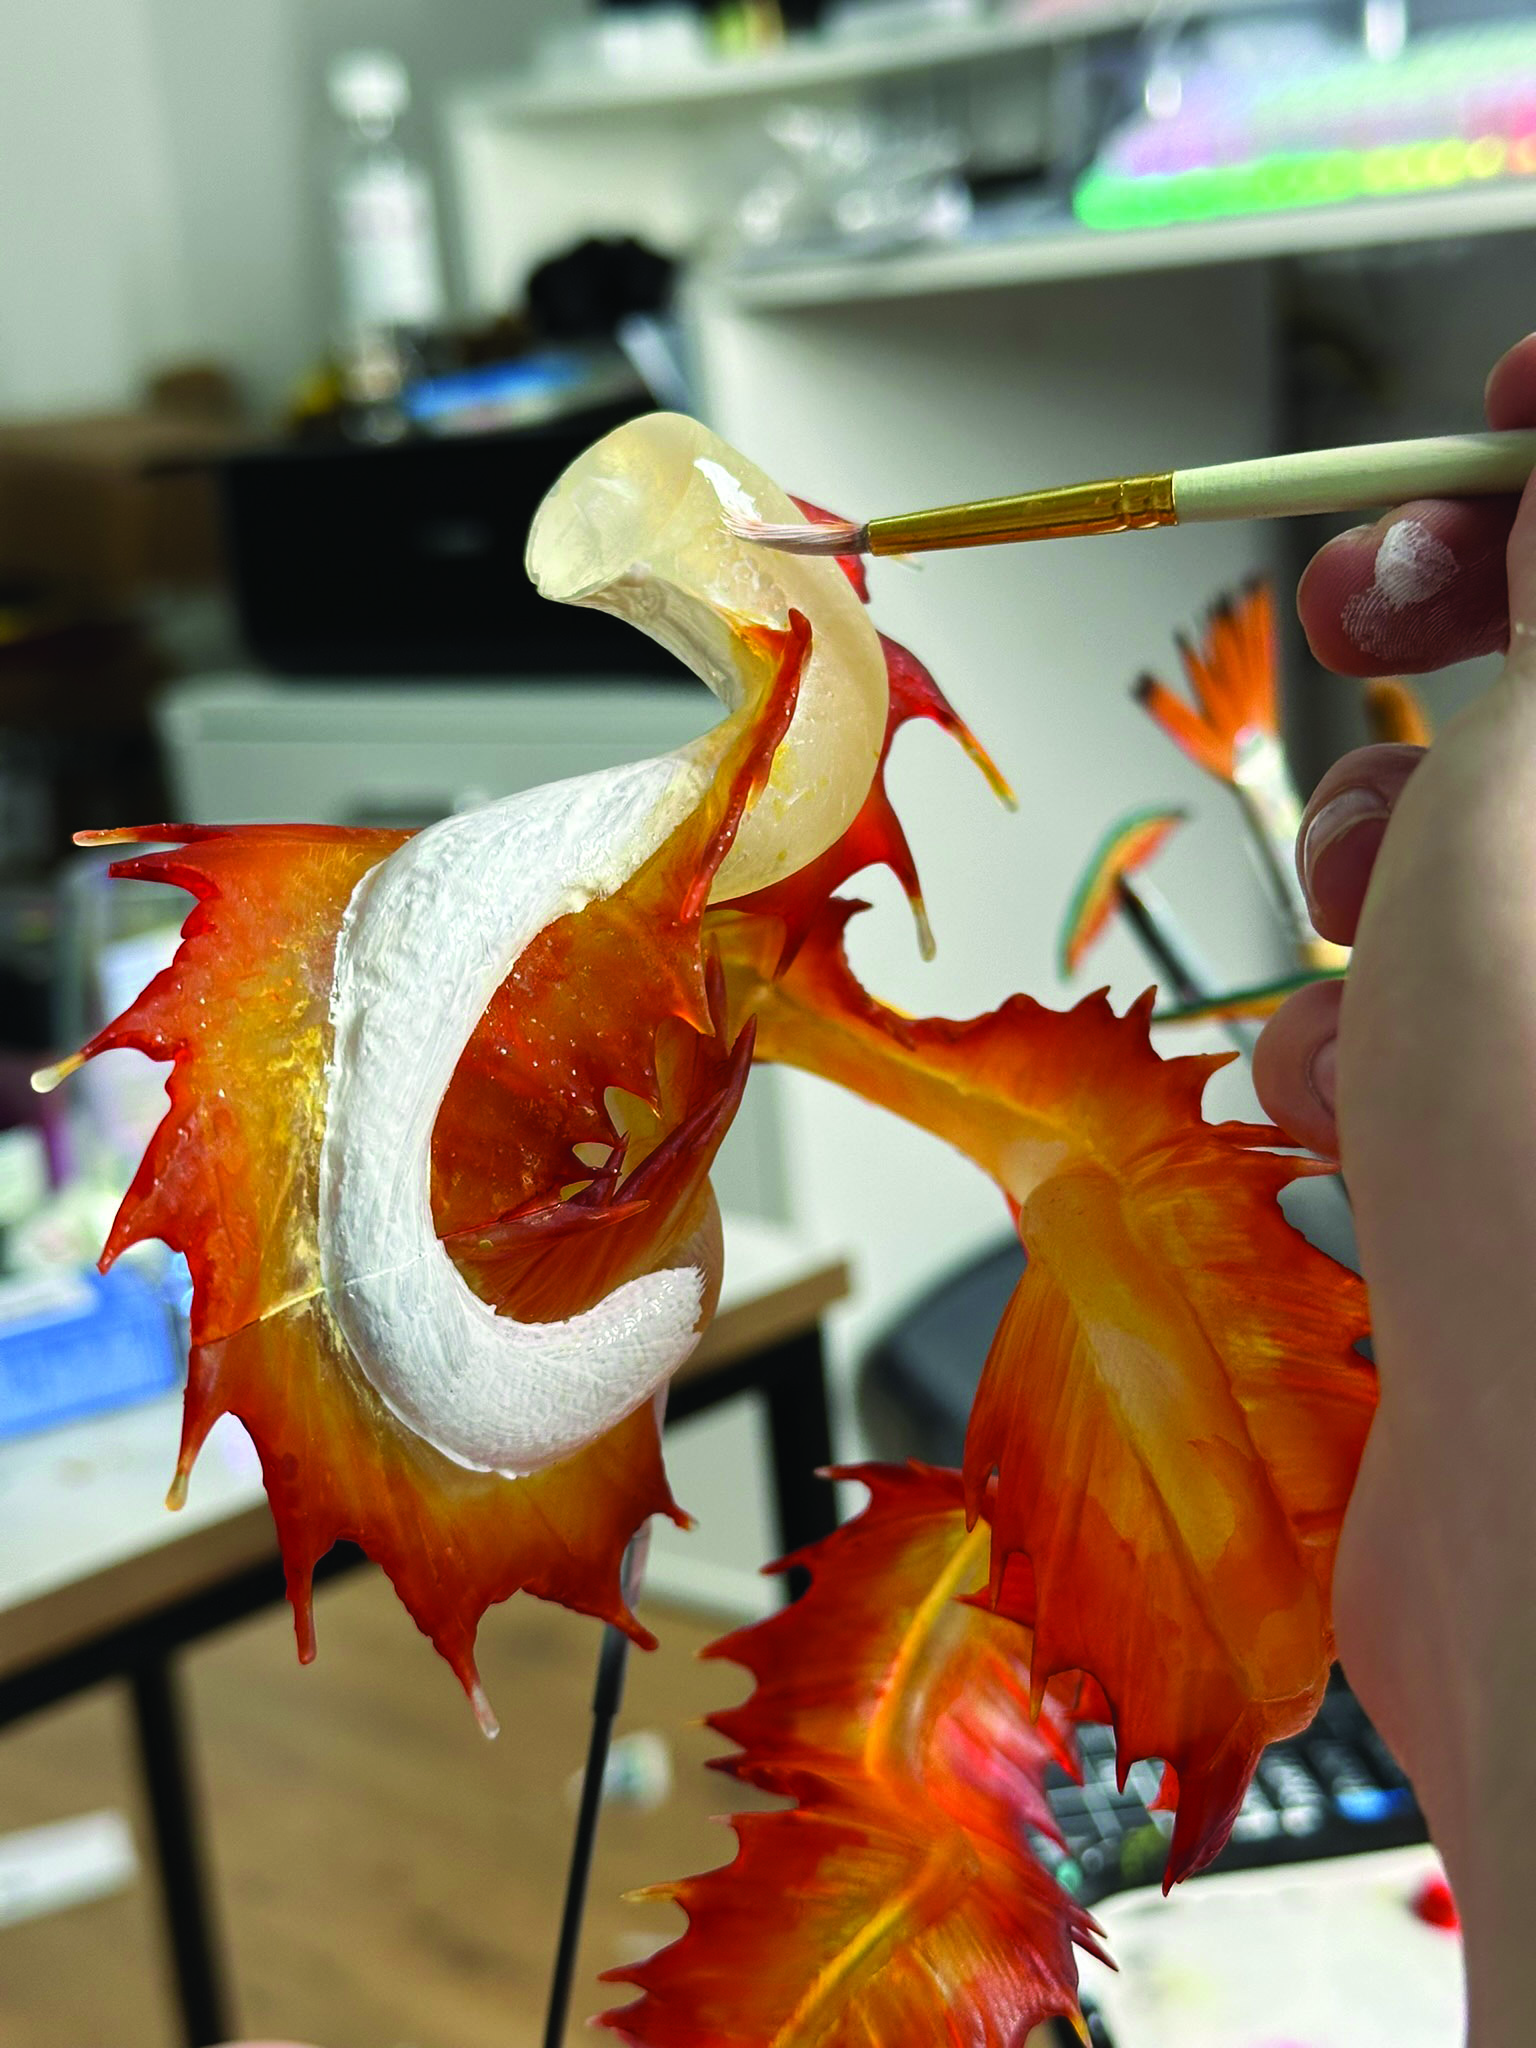
Use a white primer spray paint for a single coat on your grey resin print to prepare a base for the acrylics. On the clear resin tailpiece we can use white acrylic paint for a base layer on areas that will be opaque, such as the body of the tail and spines. This also helps the opacity as we want to differentiate between the translucent fins and the body. Spray paint a colour of your choice for the base.
16. Determine initial colours and washes
It’s usually best to begin painting anything that will be internal, so start with painting the mouth area since it will be the palest part and can be harder, and more of an issue to fix any stray paint flecks. Make sure to use references of real-life creatures, especially ones with similar mouths as our creature such as crocodiles, other reptiles and fish. Once the mouth is mostly finished, we can wash the body with thin layers of paint. Diluted paint washes can help pick out the peaks and valleys of the sculpt for its ambient occlusion.
17. Paint in layers
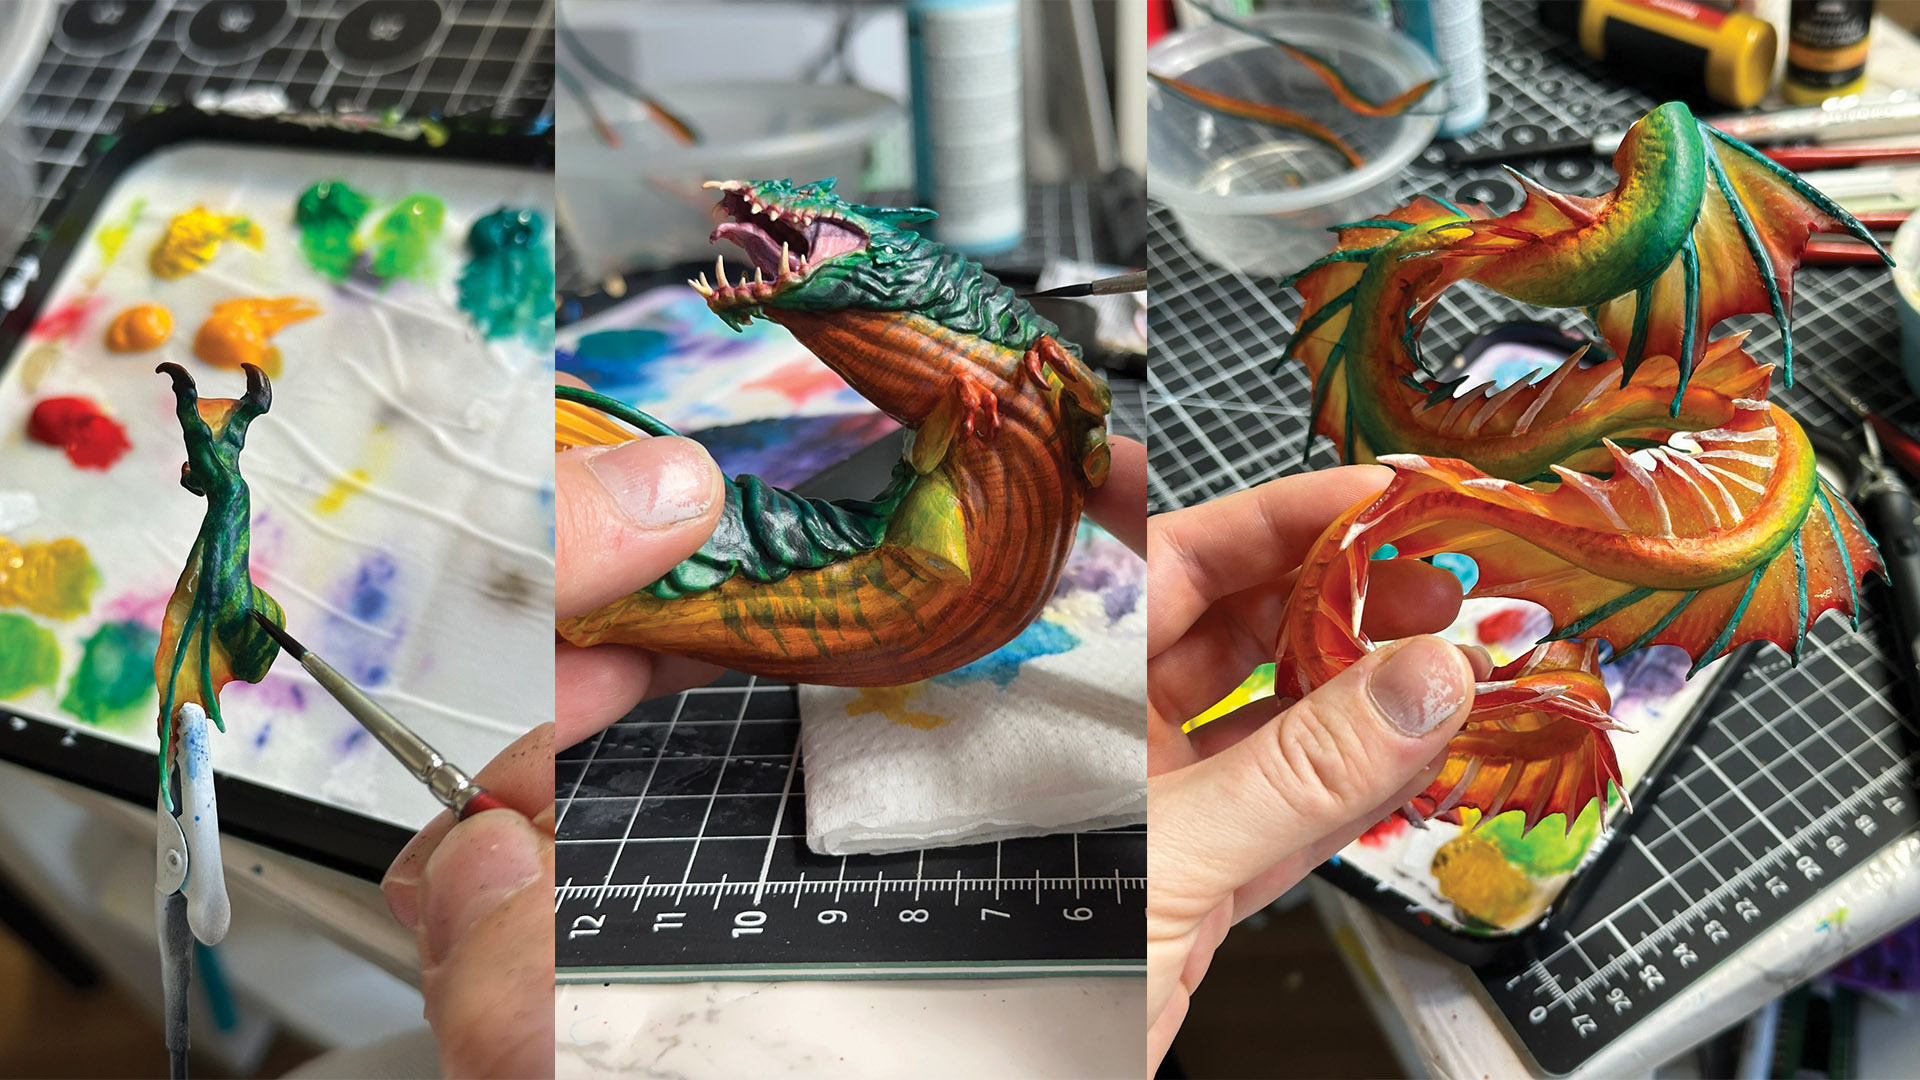
Paint gradually for more control of each layer. Start with paler shades and determine if you want a gradient in certain areas. Save the darkest shades for last. Parts of this serpent are bioluminescent, so paint a thin, light wash of the colour over areas the light would be reflected after the previous layers are dry, and repeat until you get the desired look. Paint over that area again with a thin layer of a deeper pigment for more saturation. Using minimal paint and no water, you can also dry brush a light tone over the scales to create highlights.
18. Glaze and clear coat
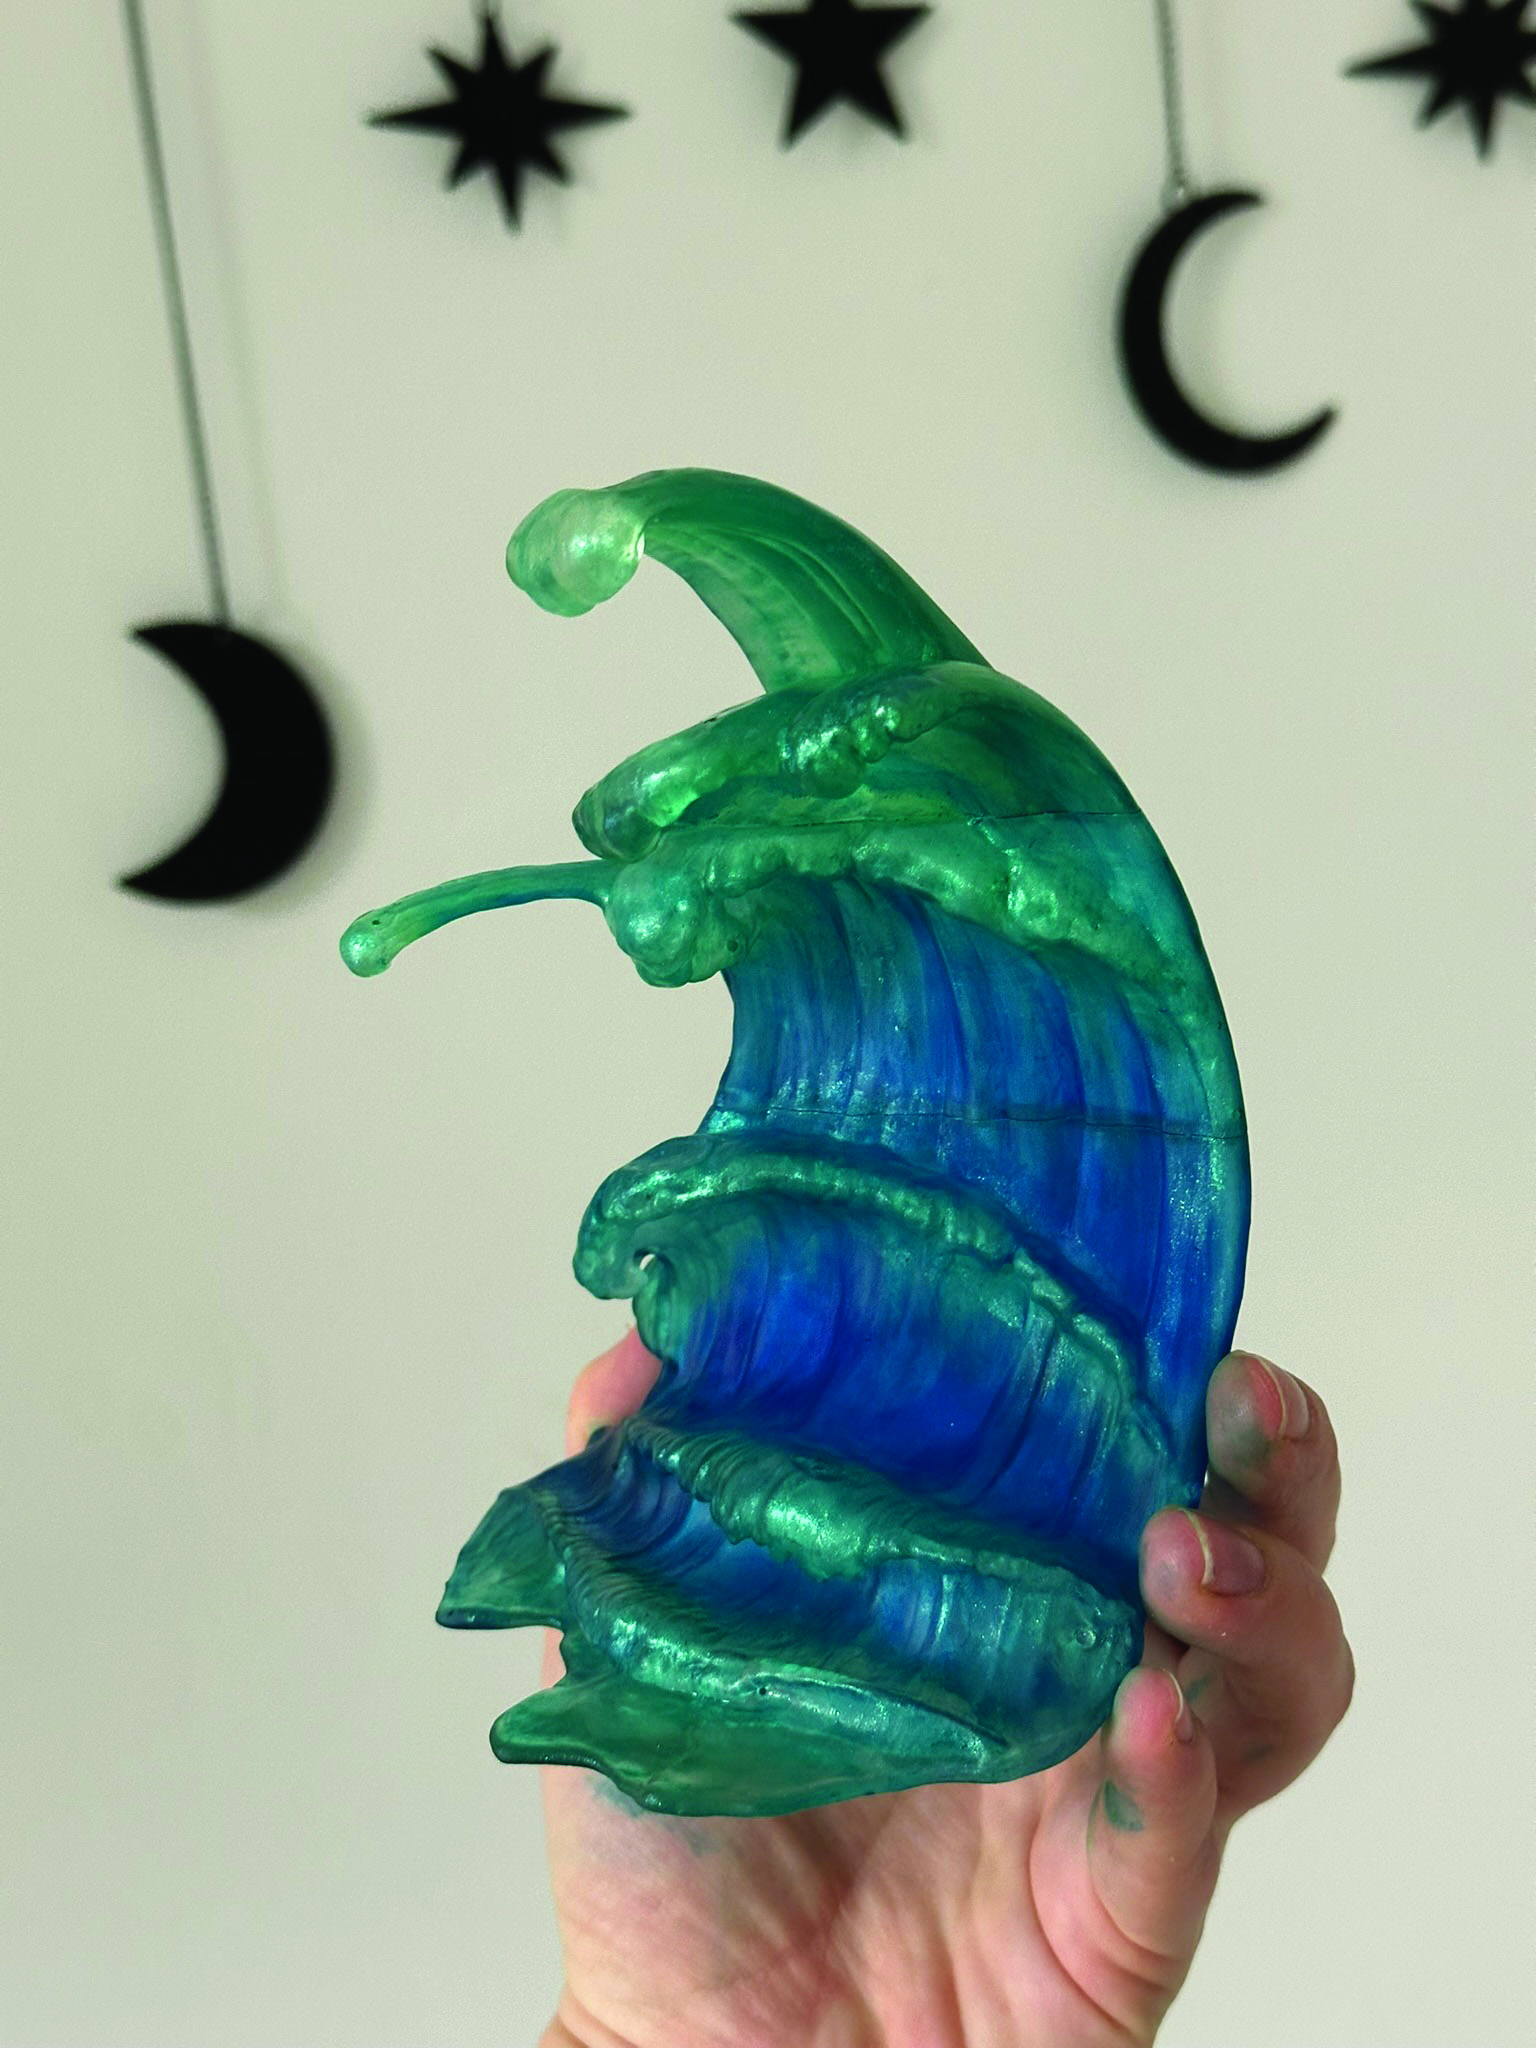
We can now clear-coat our pieces for protection and aesthetics. Make the supporting wave as realistic as possible by spraying with a glossy clear coat to push the specularity with a wet look. After the clear coat has dried, paint on the white foam and breaches for crashing waves, as the roughness of the acrylic paint will mimic the foam. Clear-coat each piece of the main serpent as well.
19. Assemble the pieces
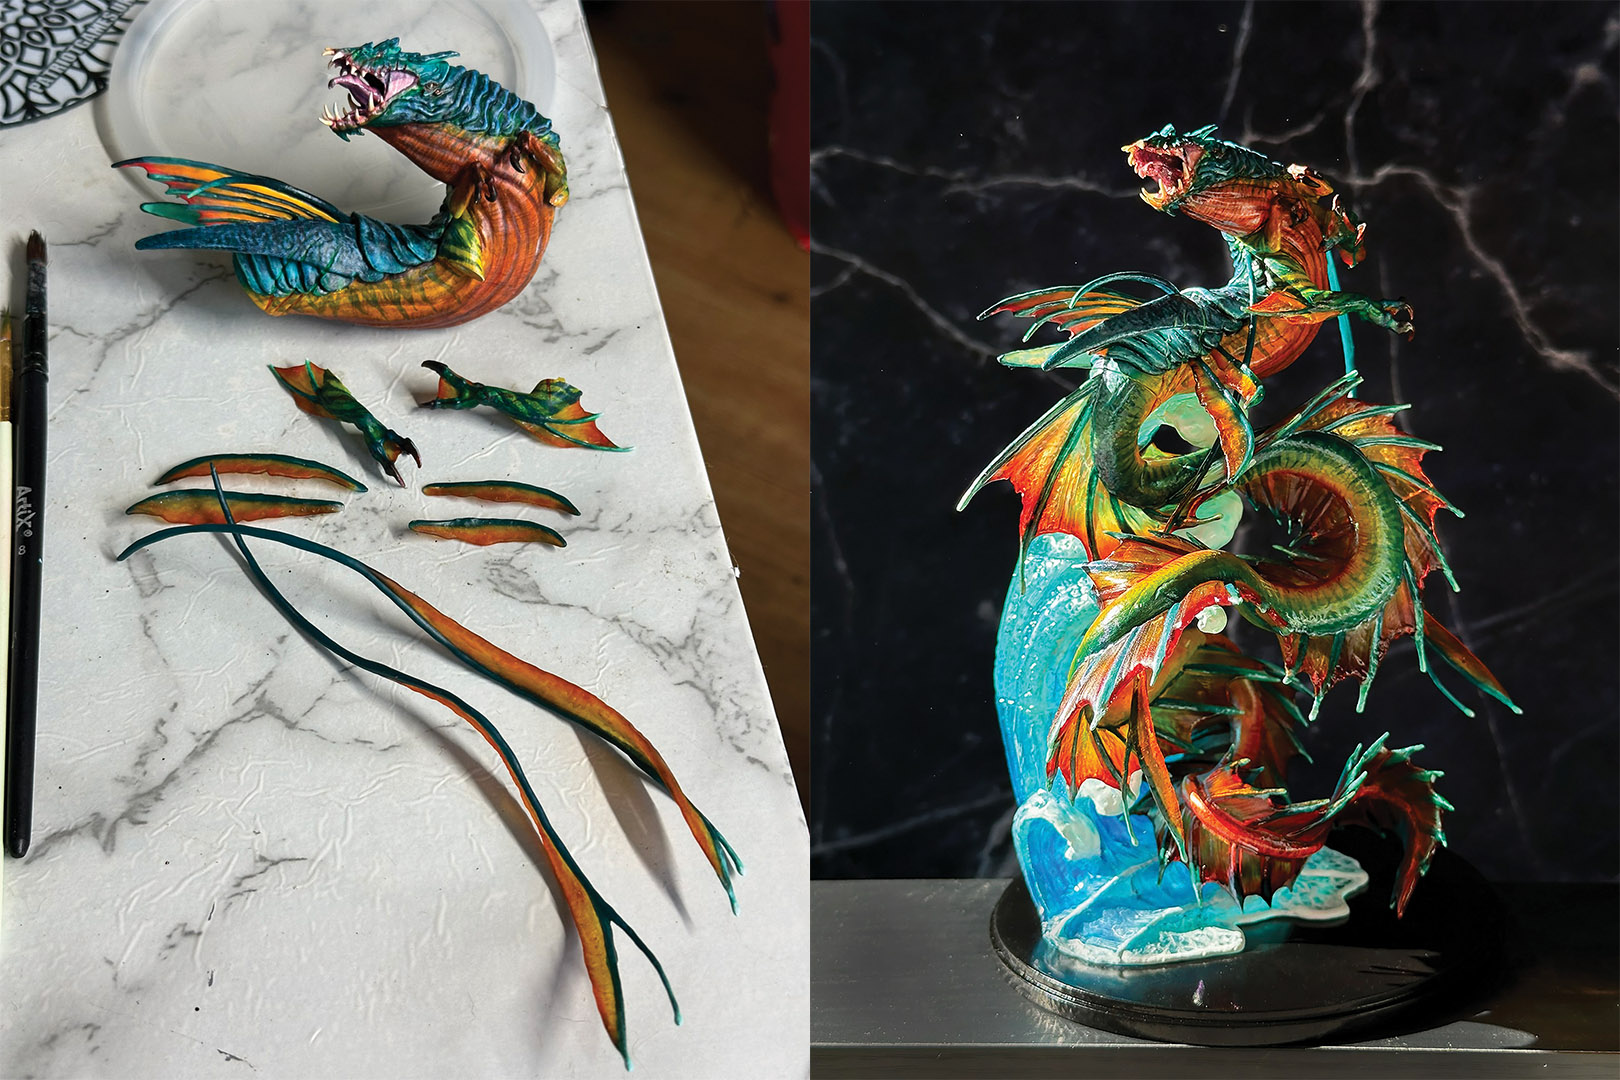
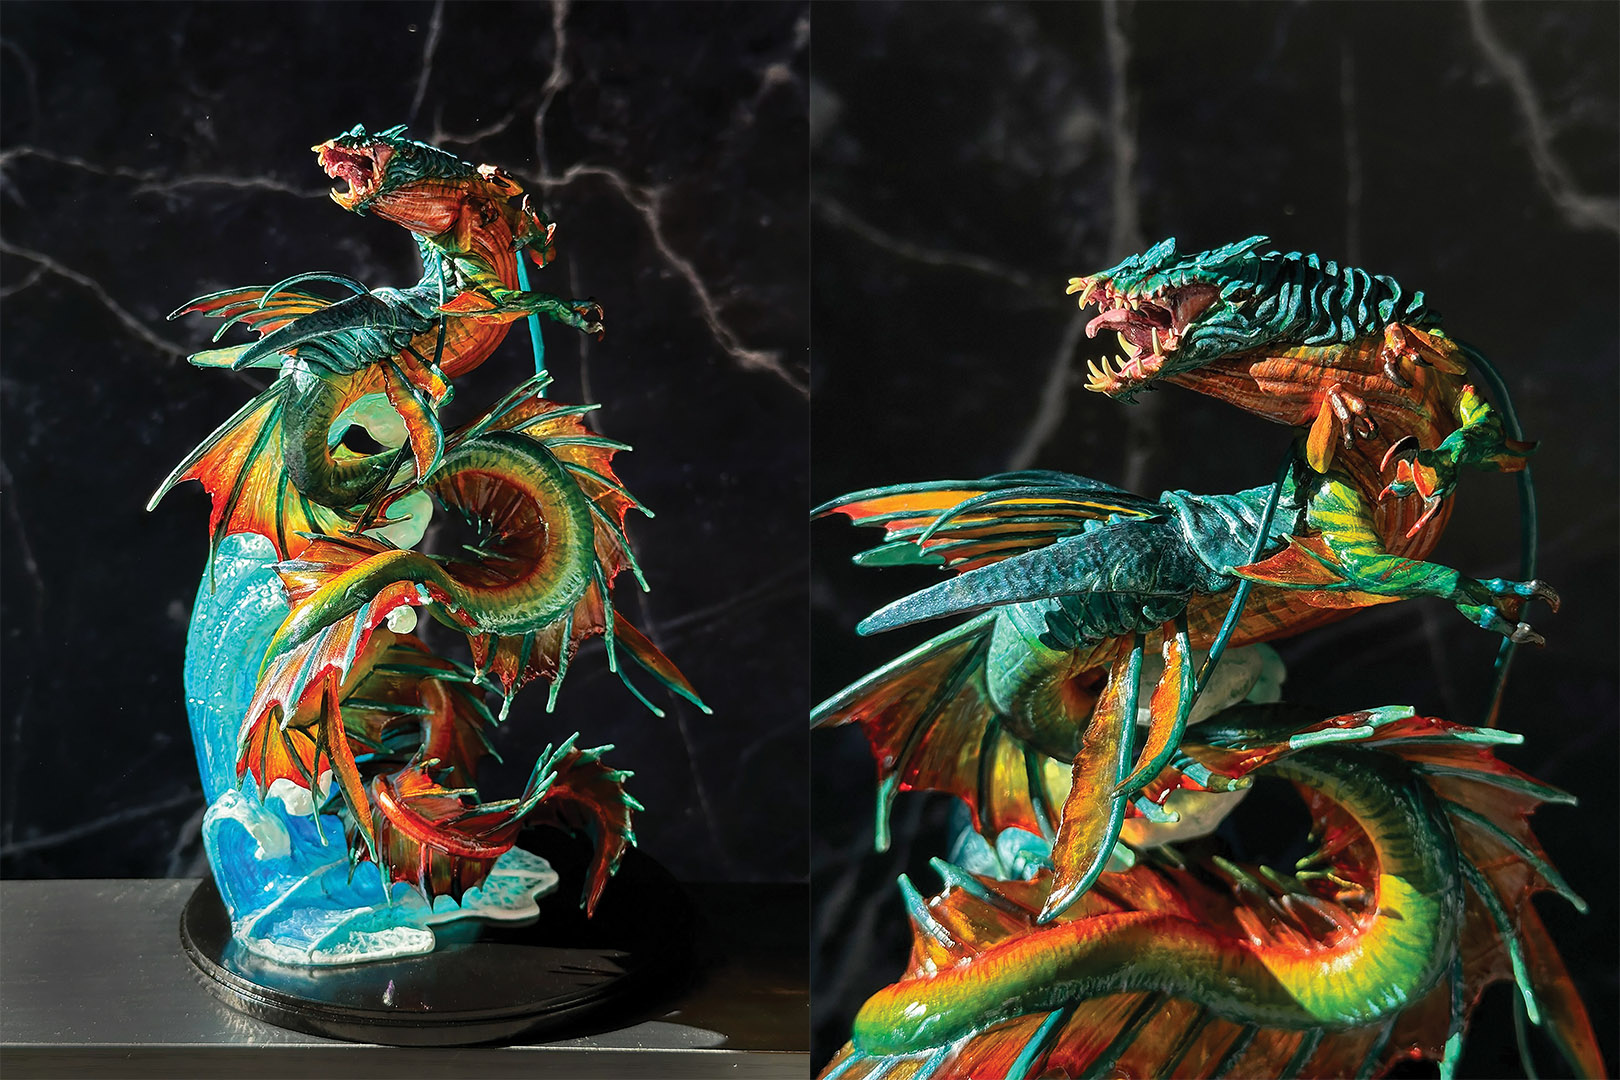
All our pieces are complete, so it’s time to assemble the sculpture! Super glue is probably the best choice of adhesive as it’s strong, quick-drying and doesn’t string or bulge out of the sides. It’s best to have the support structure intact first, so figure out the best position for the wave and glue it in place. Add small amounts of glue to each piece of the body and attach them as needed. Give this a moment to dry and solidify, then glue the full serpent piece to the wave support. It’s best to glue the smallest fins and extremities to the body once this has been set in place.
This content originally appeared in 3D World magazine, the world's leading CG art magazine. 3D World is on sale in the UK, Europe, United States, Canada, Australia and more. Limited numbers of 3D World print editions are available for delivery from our online store (the shipping costs are included in all prices). Subscribe to 3D World at Magazines Direct.

