Multiple virtual desktops are great for productivity, but to utilize this feature well, you’ll want to know how to switch between desktops in Windows 11.
Virtual desktops are a lifesaver for people who need multiple monitors but have just one at hand. They reduce clutter, improve organization, and enhance productivity, but if you aren’t switching between them seamlessly, you’re missing out.
In this guide, we’ll show you the exact steps to switch between desktops, and to boost your efficiency, check out these 7 hidden Windows 11 features.
How to switch between desktops in Windows 11
Note: To change the position of the virtual desktops, you can drag and reposition them on Task view.
1. Press Windows key + Tab

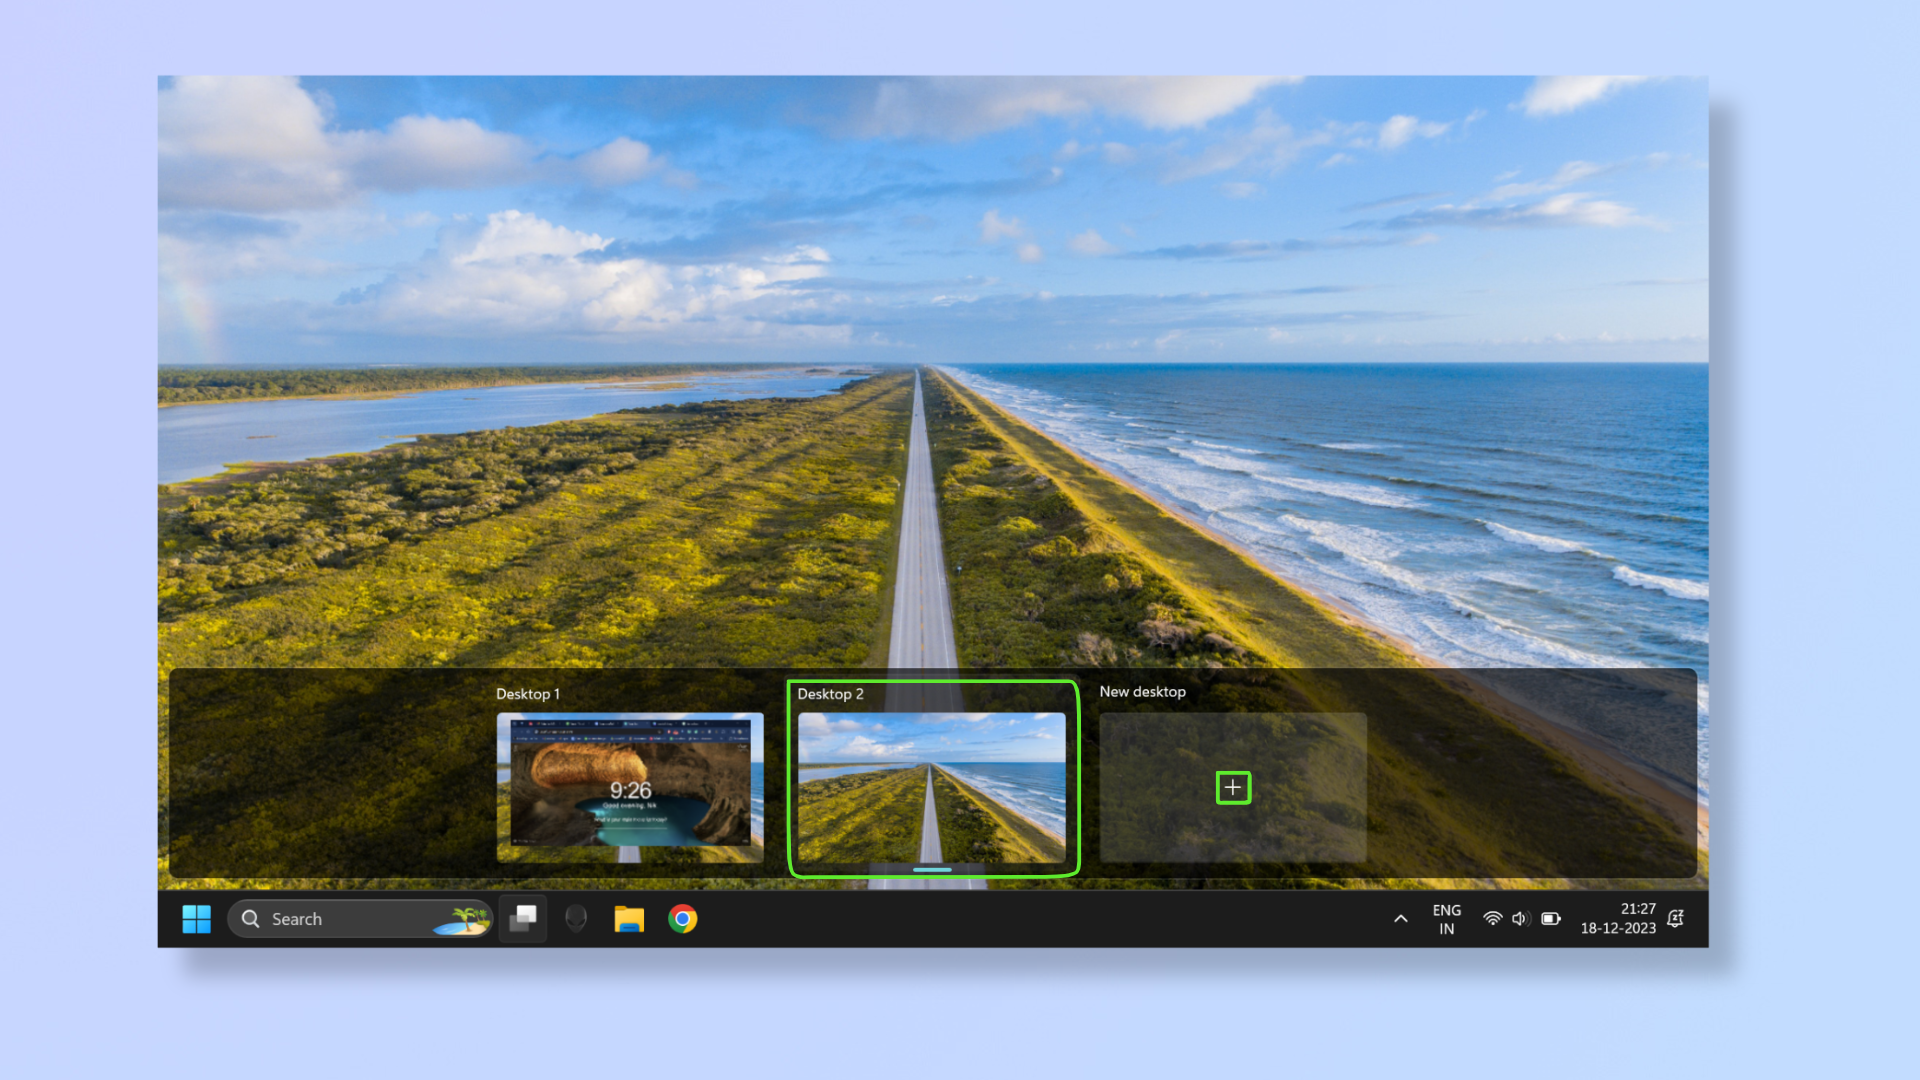
Press the Windows key + Tab to bring up the Task View. If you don’t have a second desktop open, click the plus icon to create a new one, and then click the new Desktop to open it.
To switch between the desktops, press the Windows key + Tab and click the desktop you want to switch to.
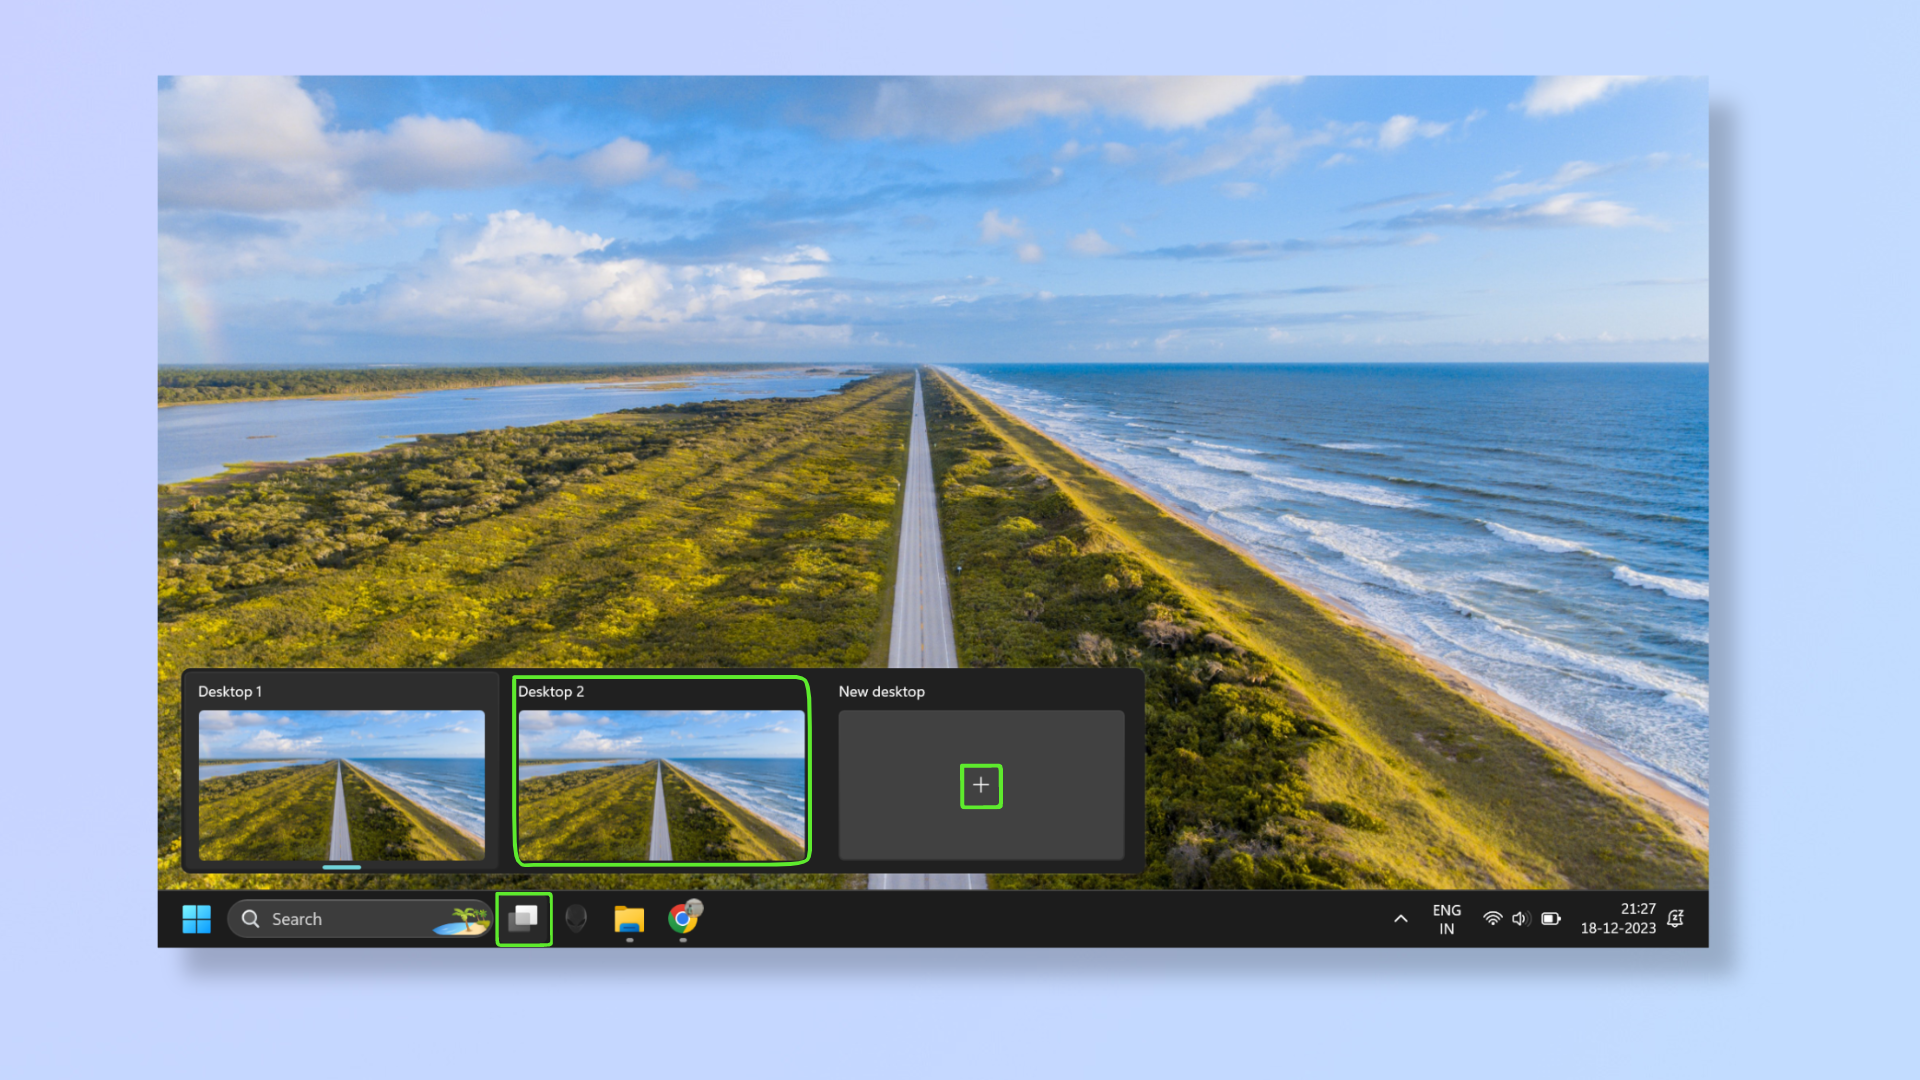
2. Use the Task view button

Hover over the Task view button (overlapping squares icon). To create and launch a new desktop, click the plus icon. To switch between the desktops, hover over the Task view button and click the desktop you want to switch to.
3. Use touchpad gestures

Swipe with four fingers to the left or right on the touchpad to switch between desktops. This option will not let you create a new desktop.
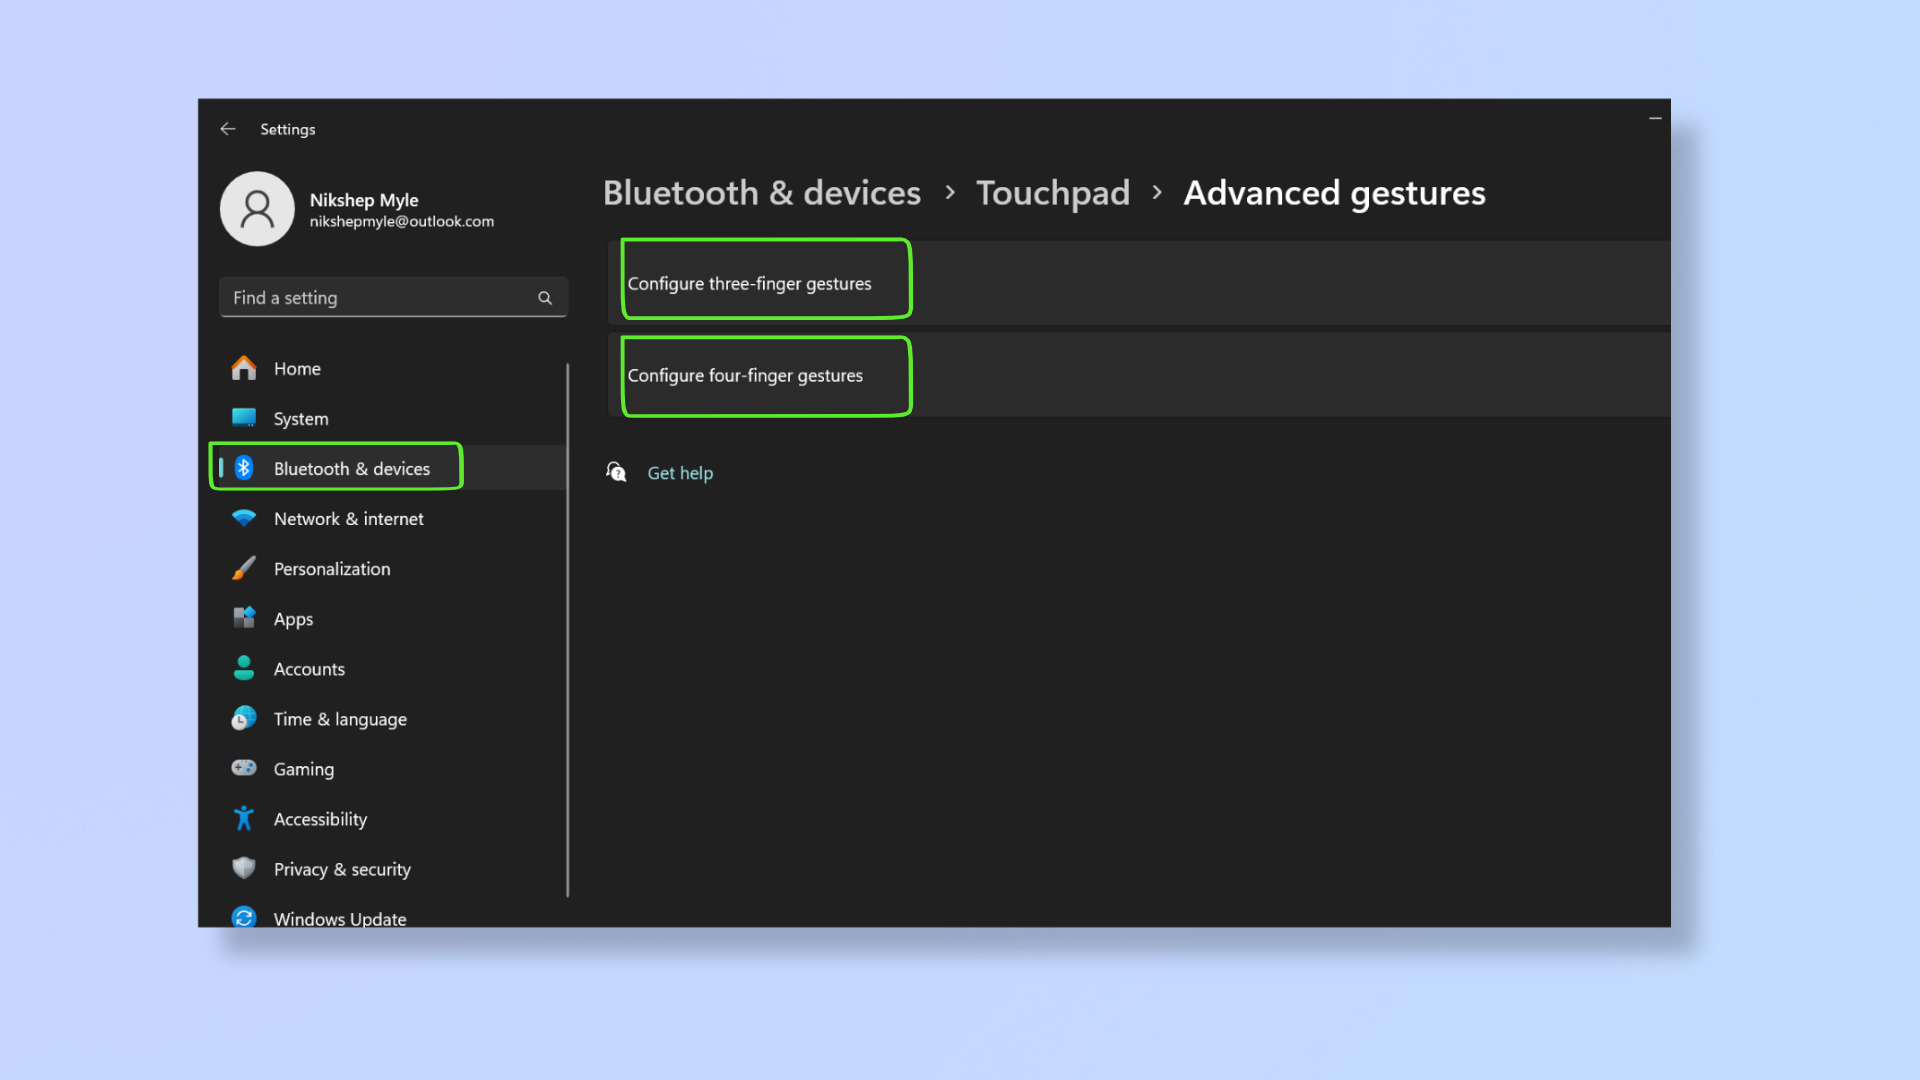
To change the gesture to switch between desktops or to bring up the Task view, press Windows + I to open Settings, then click Bluetooth & devices, scroll down to select Touchpad, then scroll down to select Advanced gestures. Here, you can assign Task view or switch desktop functions to three-finger and four-finger gestures.
Windows 11's multiple desktops are sure to streamline your workflow. For more tutorials on Windows 11, read how to convert an MBR partition to GPT on Windows 11, how to see your computer's RAM specs on Windows 11, and how to find your MAC address on Windows 11.


.png?w=600)


