On Windows 10, when you install a new printer, the system assigns it a default name based on the manufacturer's name and model number. While this naming convention is generally descriptive, there are scenarios where renaming the printer can enhance clarity and efficiency.
For instance, if you manage several printers of the same model across various locations, assigning unique names to each printer helps users select the correct device, reducing the likelihood of printing errors.
If you're a network administrator, you may need to use consistent naming conventions to align with your organization's policies. Also, in cases where a printer requires a different driver for compatibility, the system might assign an incorrect or non-descriptive name, so renaming the printer ensures it accurately reflects its identity and function.
Regardless of the reason, Windows 10 includes multiple ways to rename a printer using the Settings app, Control Panel, PowerShell, and even Command Prompt.
In this how-to guide, I'll explain the different ways you can change the name of a printer installed on your device.
How to rename printer using Settings
To rename a printer using the Settings app, use these steps:
- Open Settings.
- Click on Devices.
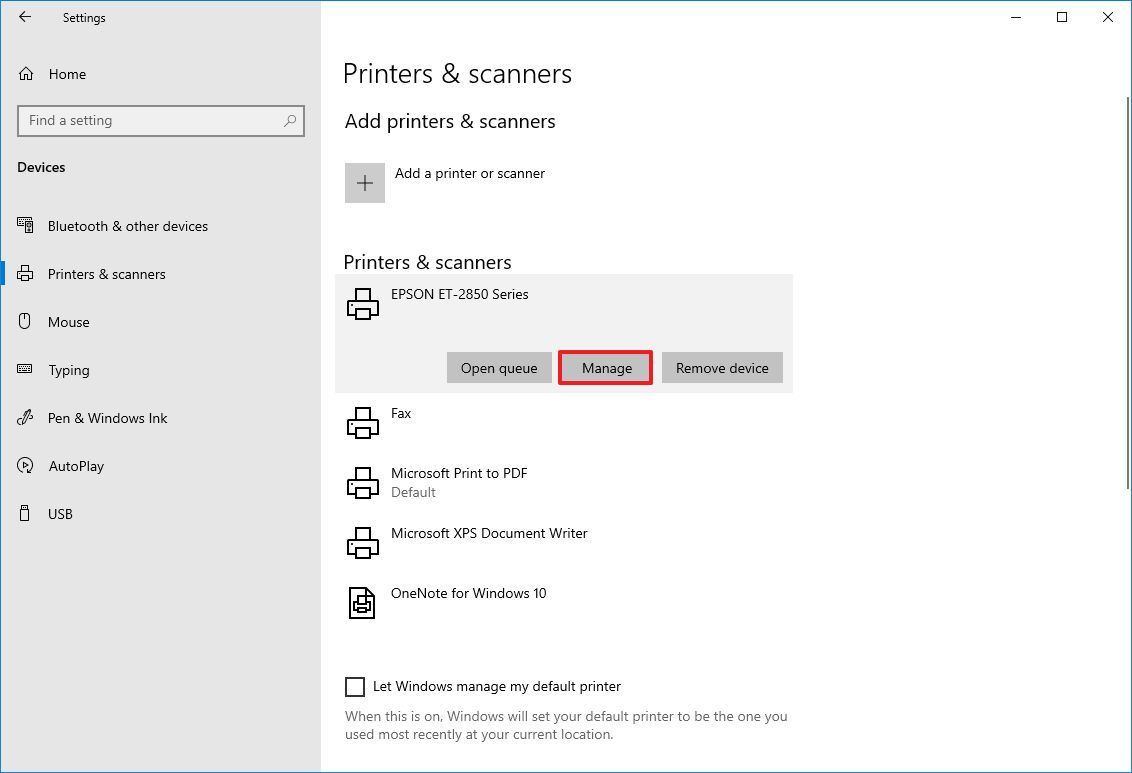
- Click on Printers & scanners.
- Select the printer under the "Printers & scanners" section.
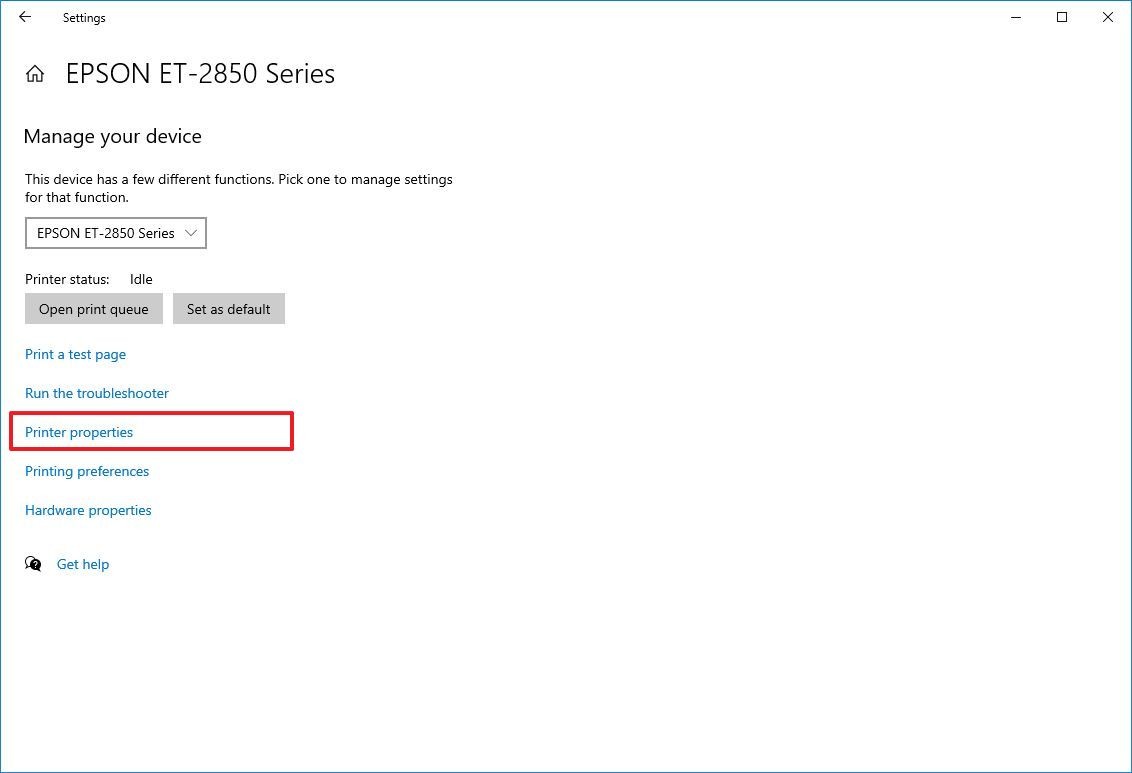
- Click the Manage button.
- Click the Printer properties option.
- Click the General tab.
- Specify a new name for the printer.
- Quick tip: If you're setting up a printer for an organization, you should be using a unique descriptive name. Usually, you would want to use the location, brand, and model as part of the name.
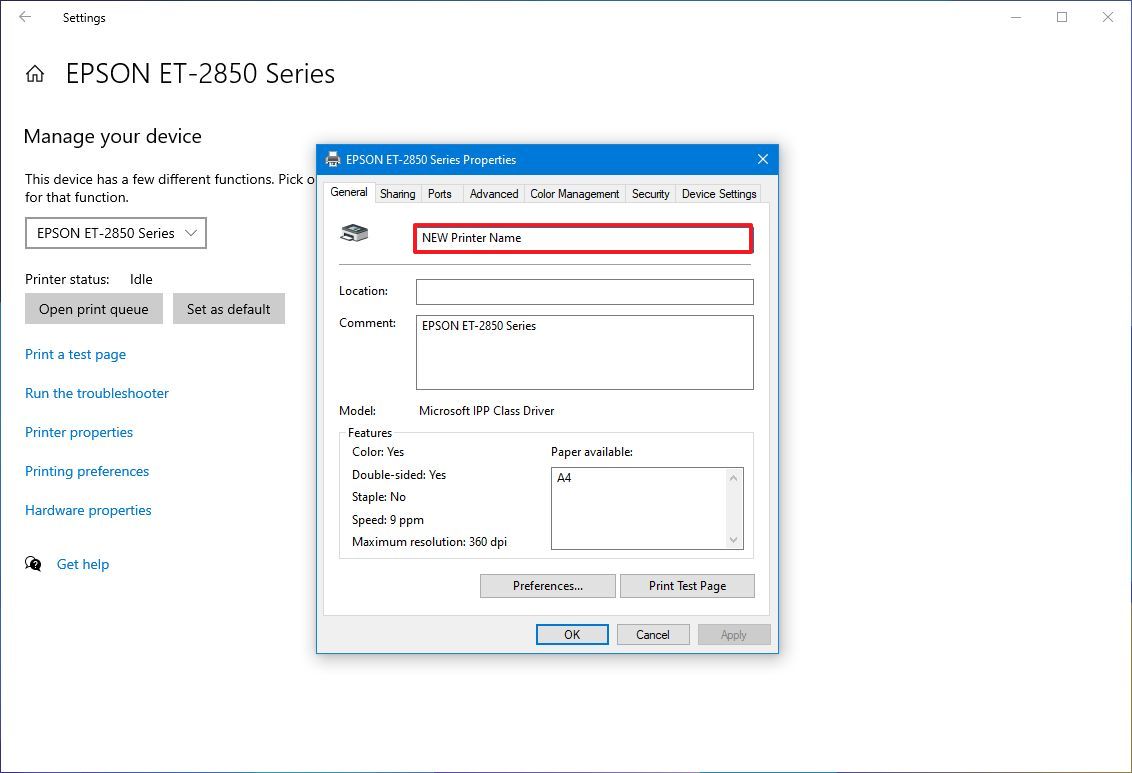
- Click the Apply button.
- Click the OK button.
Once you complete the steps, the name of the printer will change to the name you specified.
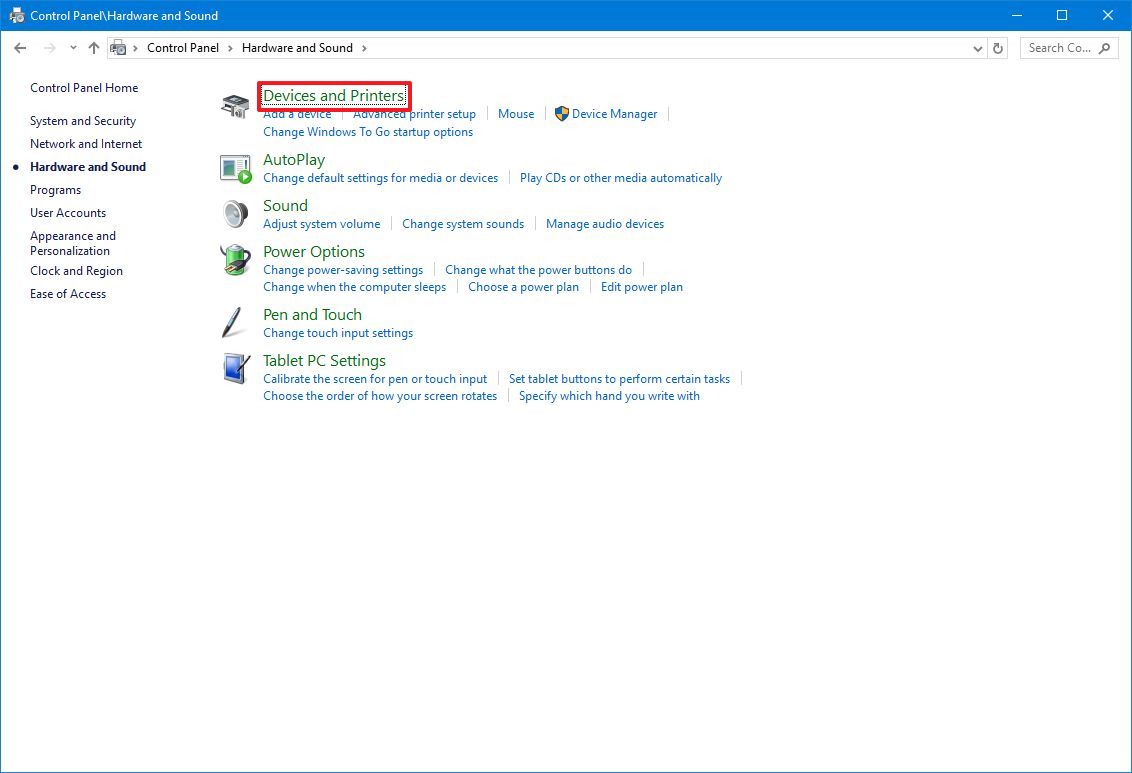
How to rename printer using Control Panel
To rename the printer using Control Panel, use these steps:
- Open Control Panel.
- Click on Hardware and Sound.
- Click on Devices and Printers.
- Right-click the printer and select the Printer properties option.
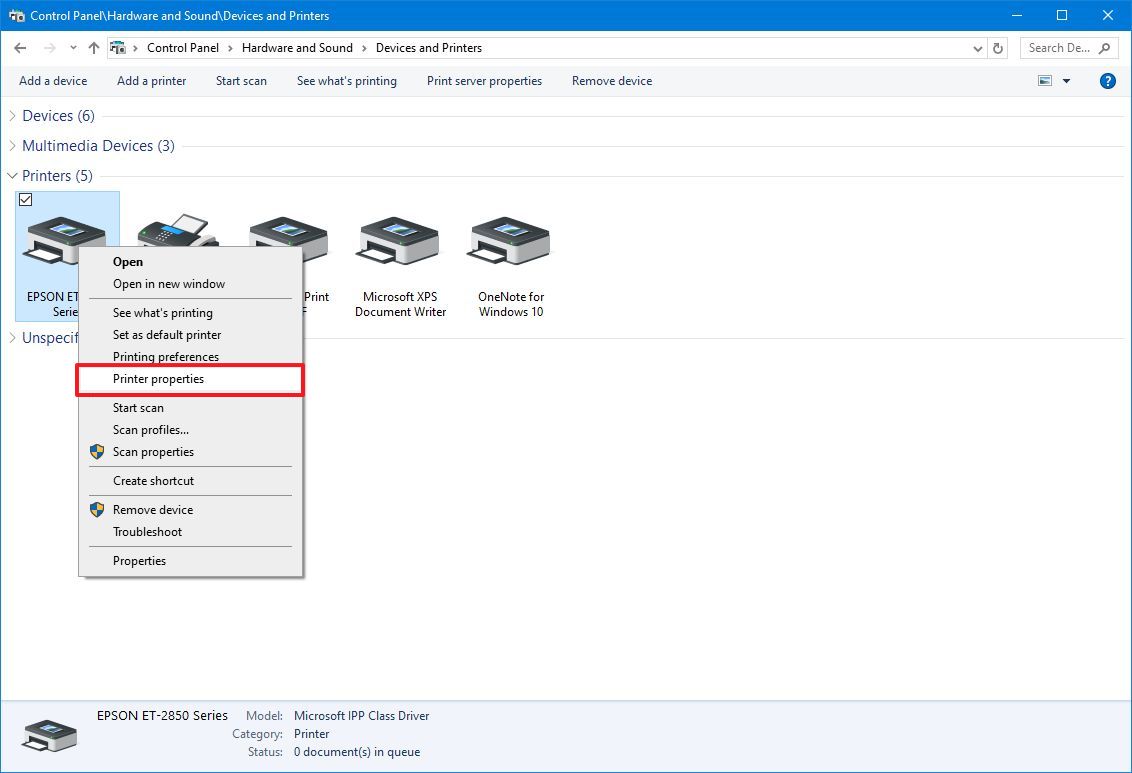
- Click the General tab.
- Specify a new name for the printer.
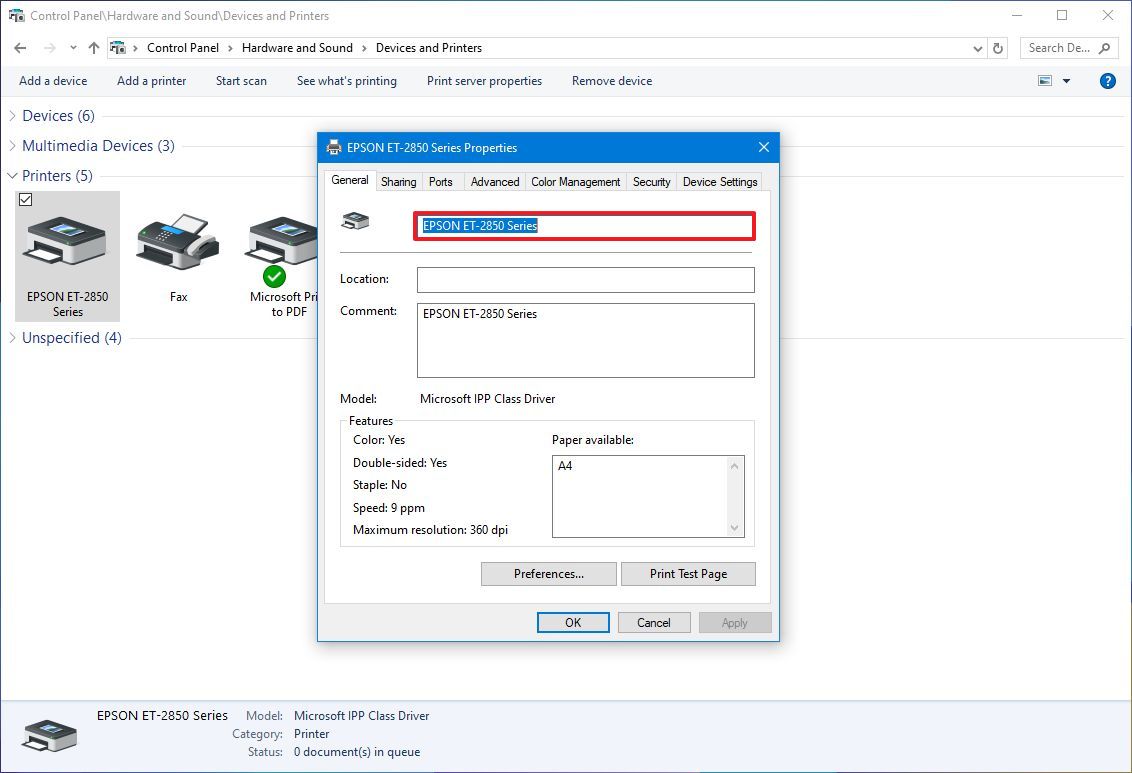
- Click the Apply button.
- Click the OK button.
After you complete the steps, the system will identify the printer with the new name.
How to rename printer using PowerShell
To change the printer name with PowerShell command, use these steps:
- Open Start.
- Search for PowerShell, right-click the top result, and select the Run as administrator option.
- Type the following command to list the available printers and press Enter: Get-Printer | Format-Table Name
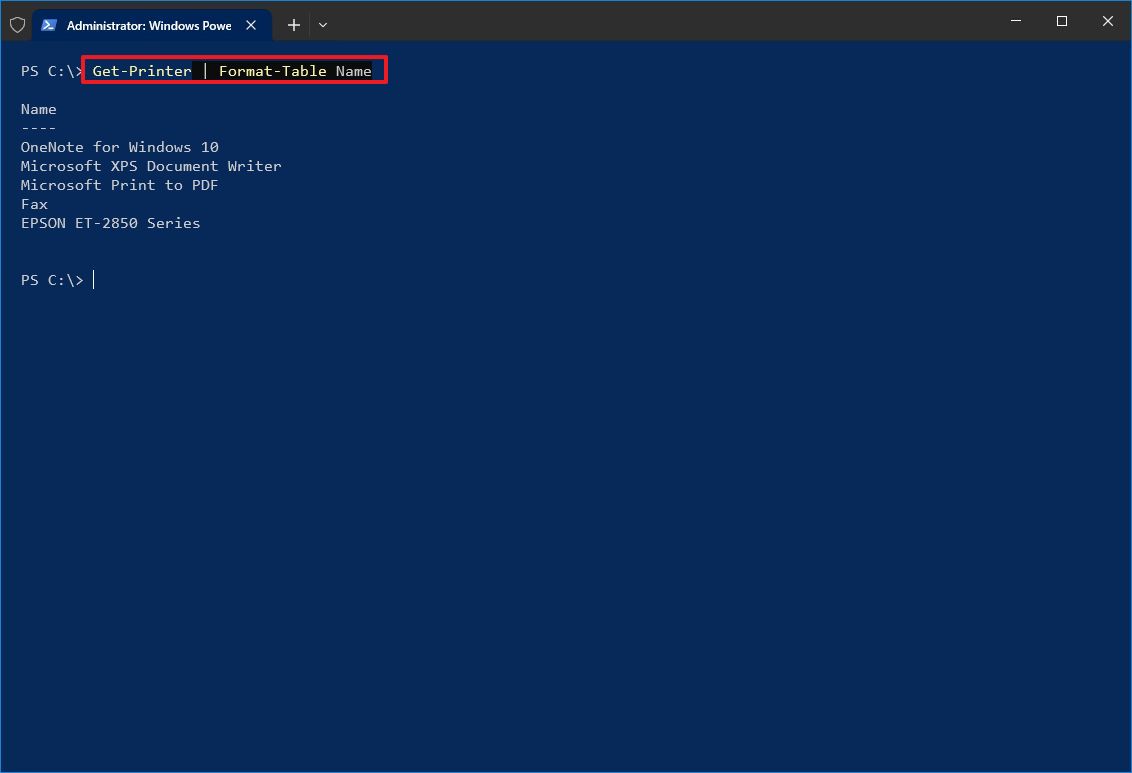
- Type the following command to change the name of the printer and press Enter: Rename-Printer -Name "CURRENT-PRINTER-NAME" -NewName "NEW-PRINTER-NAME"
For example, the following command changes the printer name to "HomePrinter": Rename-Printer -Name "EPSON ET-2850 Series" -NewName "HomePrinter"
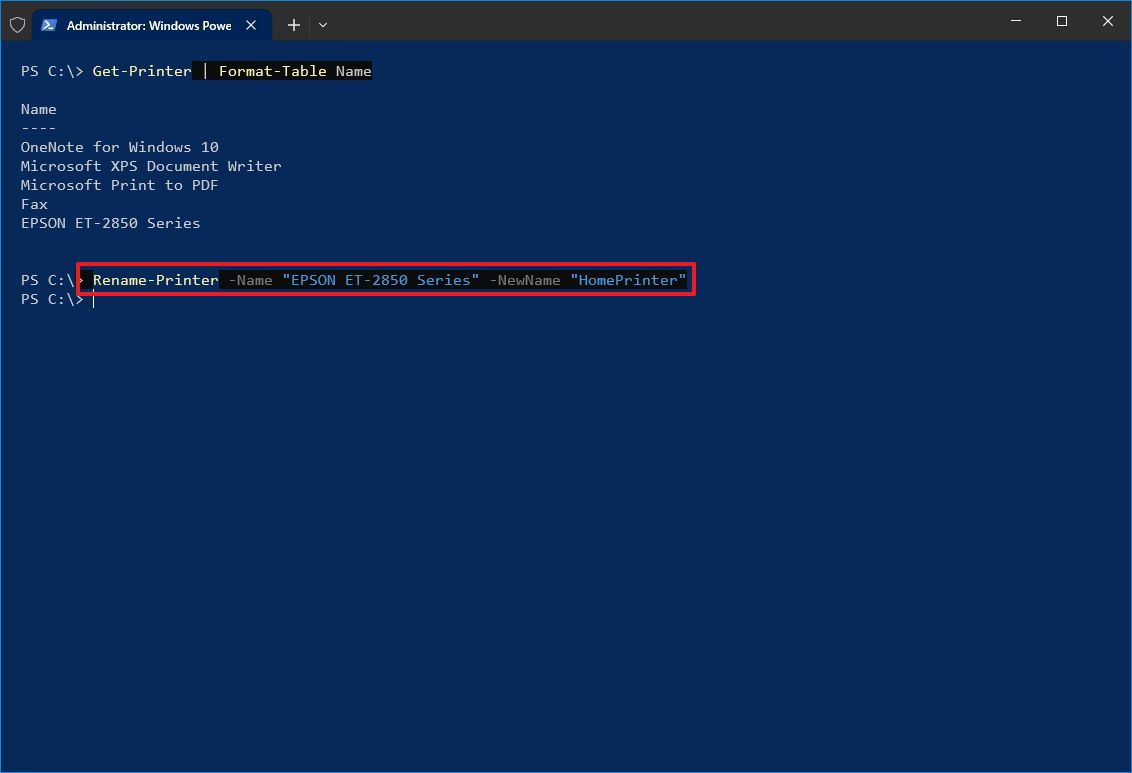
Once you complete the steps, the PowerShell command will change the printer name to the name you specified.
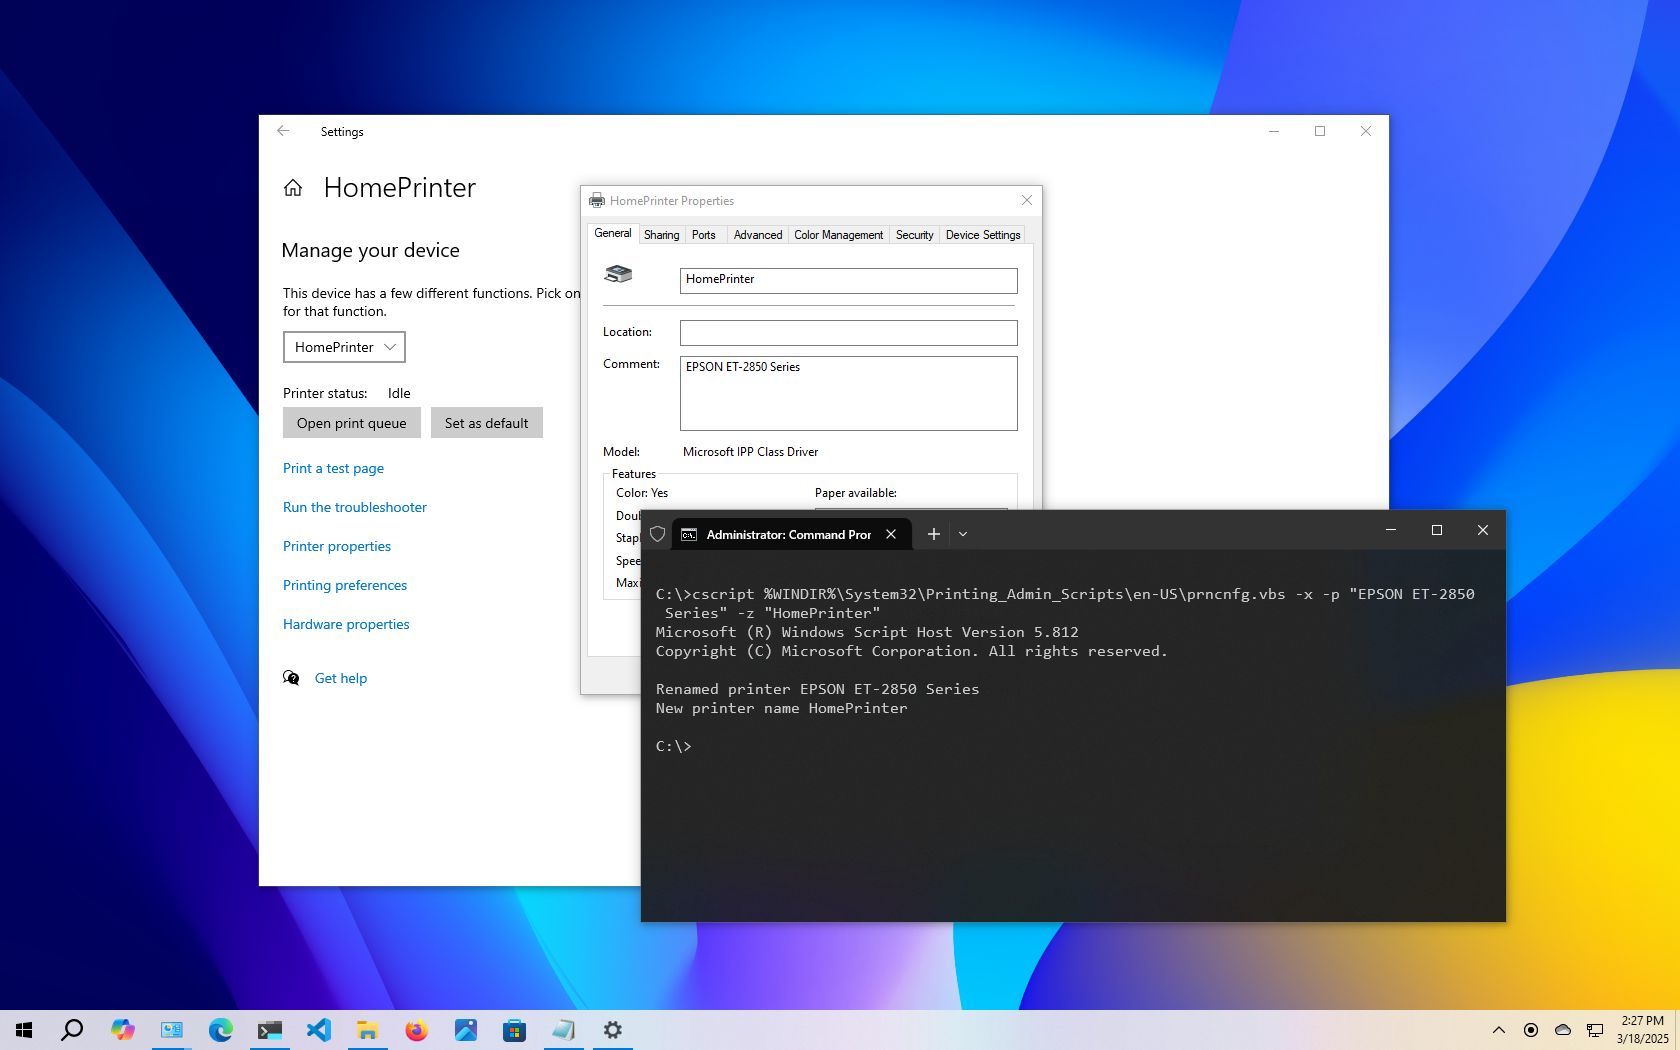
How to rename printer using Command Prompt
Although the steps are not conventional, if you must, Command Prompt offers a way to change the printer name using the "prncnfg.vbs" script on Windows 10.
To change the printer name using Command Prompt, use these steps:
- Open Start.
- Search for PowerShell, right-click the top result, and select the Run as administrator option.
- Type the following command to change the name of the printer and press Enter: cscript %WINDIR%\System32\Printing_Admin_Scripts\en-US\prncnfg.vbs -x -p "CURRENT-PRINTER-NAME" -z "NEW-PRINTER-NAME"
For example, the following command changes the printer name to "HomePrinter": cscript %WINDIR%\System32\Printing_Admin_Scripts\en-US\prncnfg.vbs -x -p "EPSON ET-2850 Series" -z "HomePrinter"
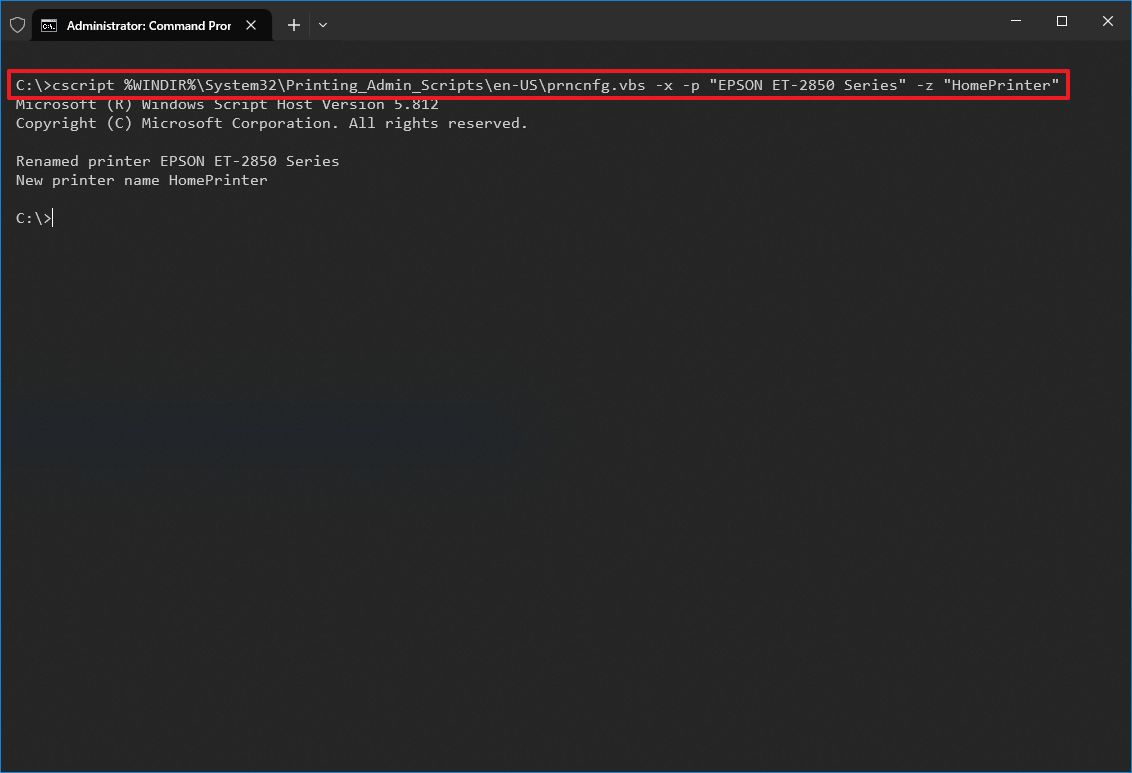
After you complete the steps, the script will run and change the printer name using the name you specified in the command.
More resources
Find in-depth guides, troubleshooting tips, and the latest updates on Windows 11 and 10 here: