On Windows 11, Microsoft delivers mandatory monthly quality updates to address security vulnerabilities, enhance stability, and introduce incremental improvements. While these updates are essential to keep devices protected and supported, they can occasionally introduce unexpected issues for a small (or large) number of users.
Nearly every year, at least one cumulative update triggers significant reliability problems on certain hardware configurations. Because there's no way to predict when an update might conflict with a specific setup, completely avoiding updates is not a safe strategy. Instead, the smarter approach is to prepare your system so you can recover quickly and minimize the risk of data loss if something goes wrong.
Although feature updates are optional while your current version remains within its support lifecycle, Windows 11 will automatically download and install the next release as the end of support approaches.
In this how-to guide, I'll outline the different ways you can protect your computer from any updates that may cause problems on Windows 11.
How to protect your PC from buggy updates on Windows 11

1. Enable System Restore
System Restore is a built-in recovery feature that captures snapshots of your system's configuration and saves them as restore points. If a problem occurs, you can roll back to a previous restore point to undo system changes, including removing recent updates, without affecting your personal files.
In earlier versions of the operating system, this feature was enabled by default. On Windows 11, however, you must configure it manually.
To ensure you can quickly recover from a problematic cumulative update, enable System Restore in advance and create a restore point before installing any new updates.
Turn on System Restore
To enable System Restore on Windows 11, use these steps:
- Open Start.
- Search for Create a restore point and click the top result to open the System Properties page.
- Select the main "System" drive under the "Protection Settings" section.
- Click the Configure button.

- Select the "Turn on system protection" option.

- Click the Apply button.
- Click the OK button.
Once you complete the steps, the feature will be enabled on your computer.
Although the feature should create restore points automatically upon specific triggers, such as installing a system update or driver, this is not always the case. As a result, it's recommended to create a restore point manually before making system changes.
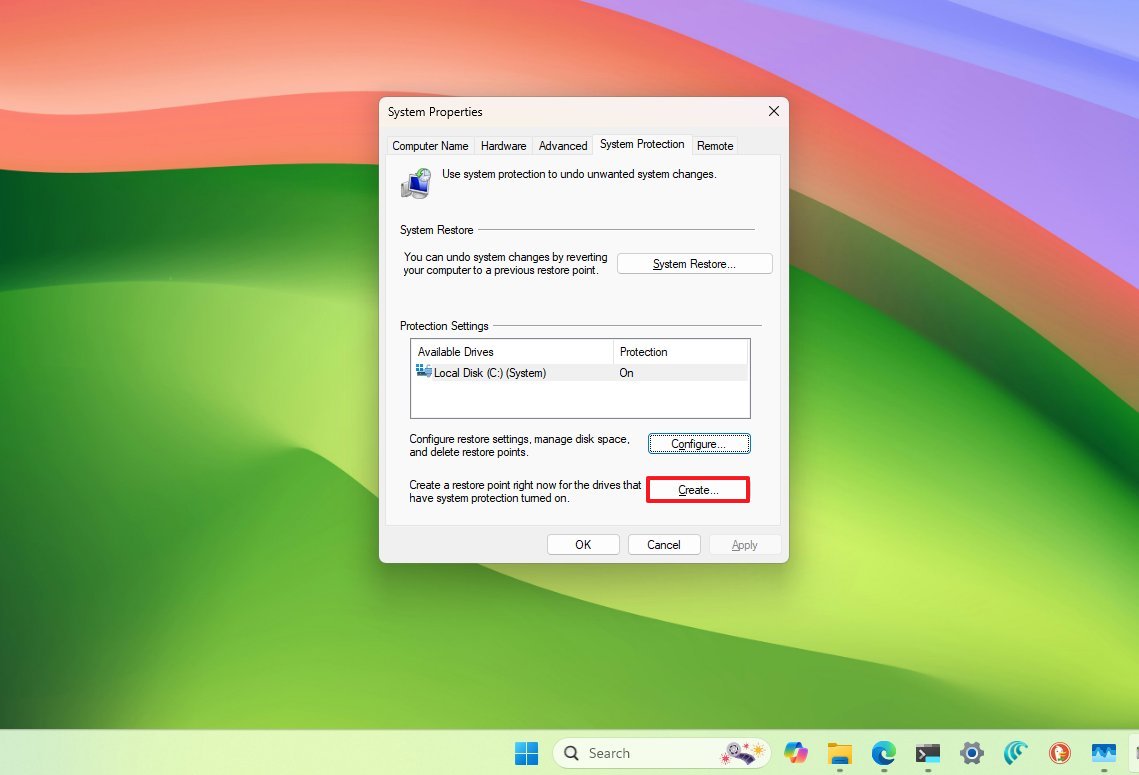
Create a restore point
To create a restore point before installing a cumulative update, use these steps:
- Open Start.
- Search for Create a restore point, and click the top result to open the System Properties page.
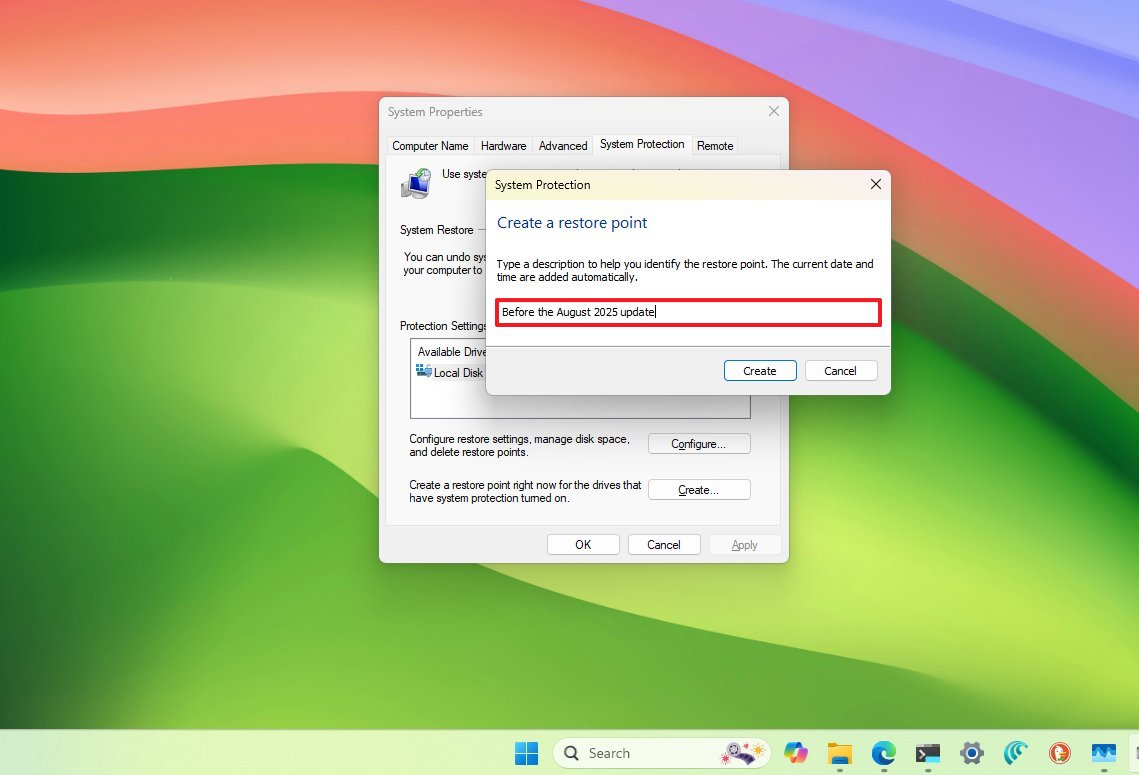
- Click the Create button under the "Protection Settings" section.
- Confirm a descriptive name for the restore point – for example, Before the August 2025 update.
- Click the Create button.
- Click the Close button.
- Click the OK button.
- Click the Close button.
After you complete the steps, you can proceed with the installation of a new update, knowing you can undo the changes if anything happens.
If you must undo the changes, you can check my previous guide to set up and recover a computer using System Restore.
2. Enable Quick Machine Recovery
Quick Machine Recovery (QMR) is a relatively new capability designed to automatically help Windows 11 recover from critical boot failures.
When the feature is enabled, and the device fails to start properly due to a faulty update or another startup issue, the system can connect to the internet, upload diagnostic logs to Microsoft, and download a targeted fix through Windows Update, if one is available. This process is designed to restore boot functionality without requiring manual intervention.
QMR has been available since the August 2025 Security Update for version 24H2 and later releases. It is enabled by default on Windows 11 Home, but on Windows 11 Pro, you must enable it manually.
Microsoft is also working on changing this behavior so that Quick Machine Recovery is enabled by default on Windows 11 Pro devices, provided they are not managed by an organization.
To configure the Quick Machine Recovery feature on Windows 11, use these steps:
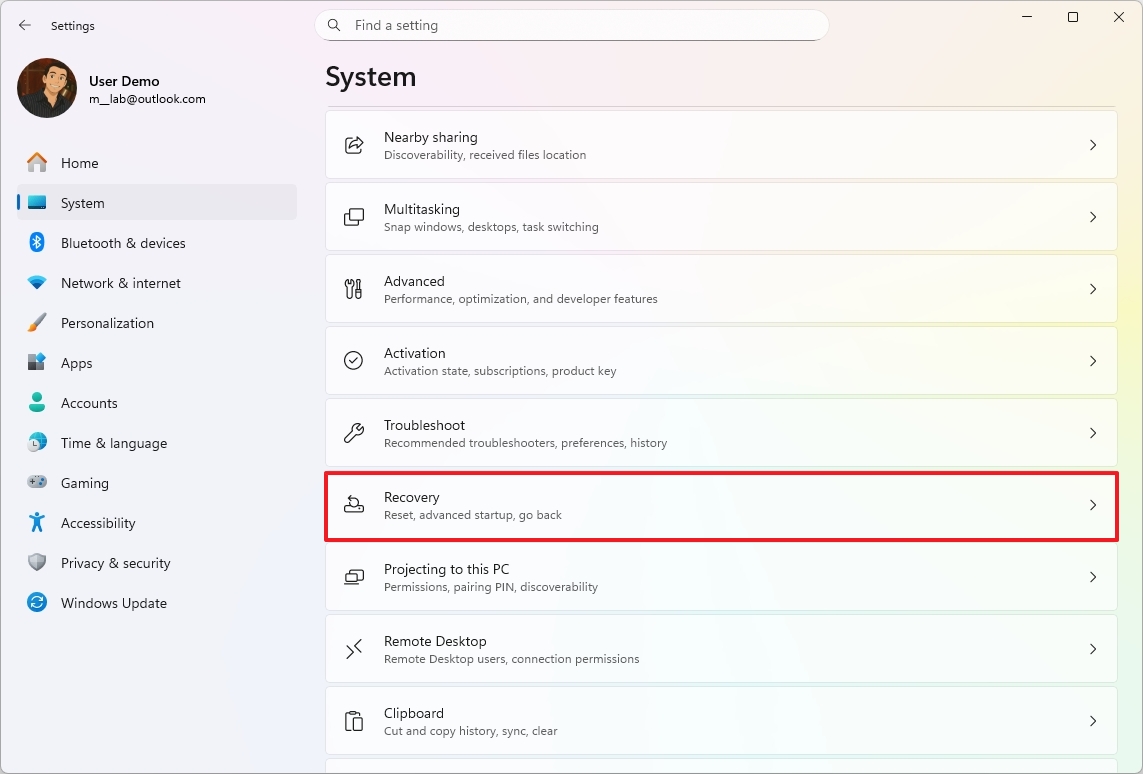
- Open Settings.
- Click on System.
- Click the Recovery page on the right side.
- Click the Quick machine recovery setting.
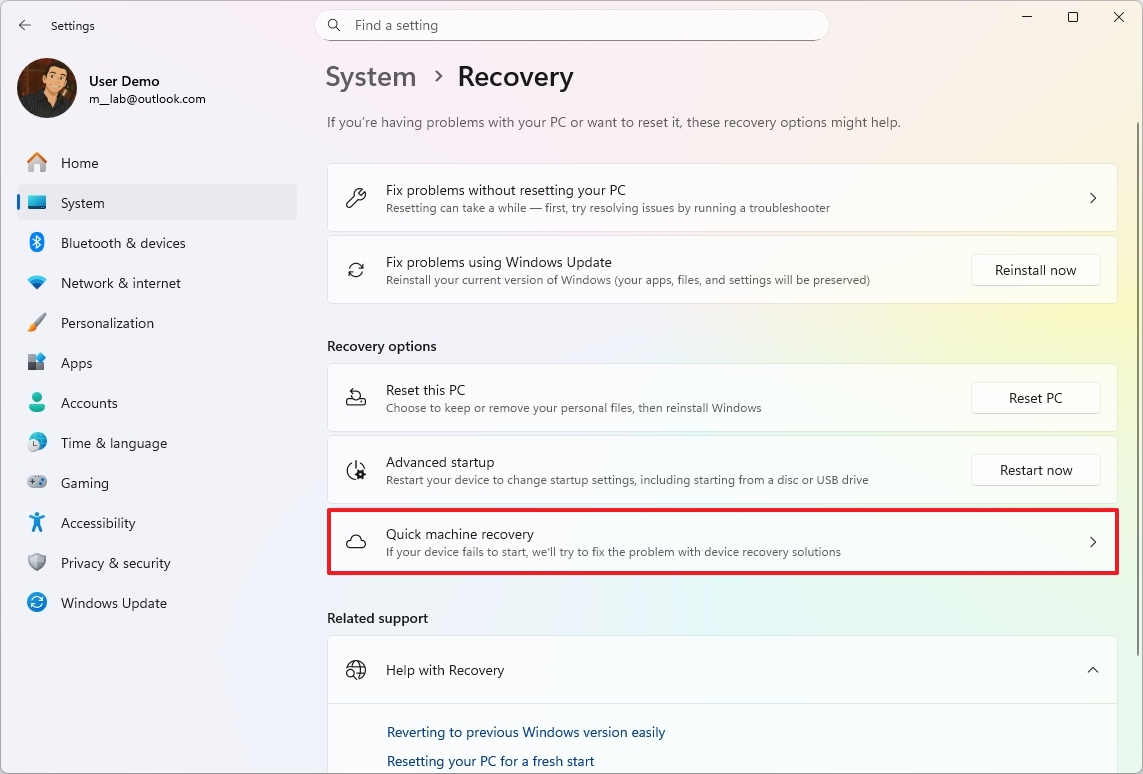
- Turn on the "Quick machine recovery" toggle switch to enable the feature.
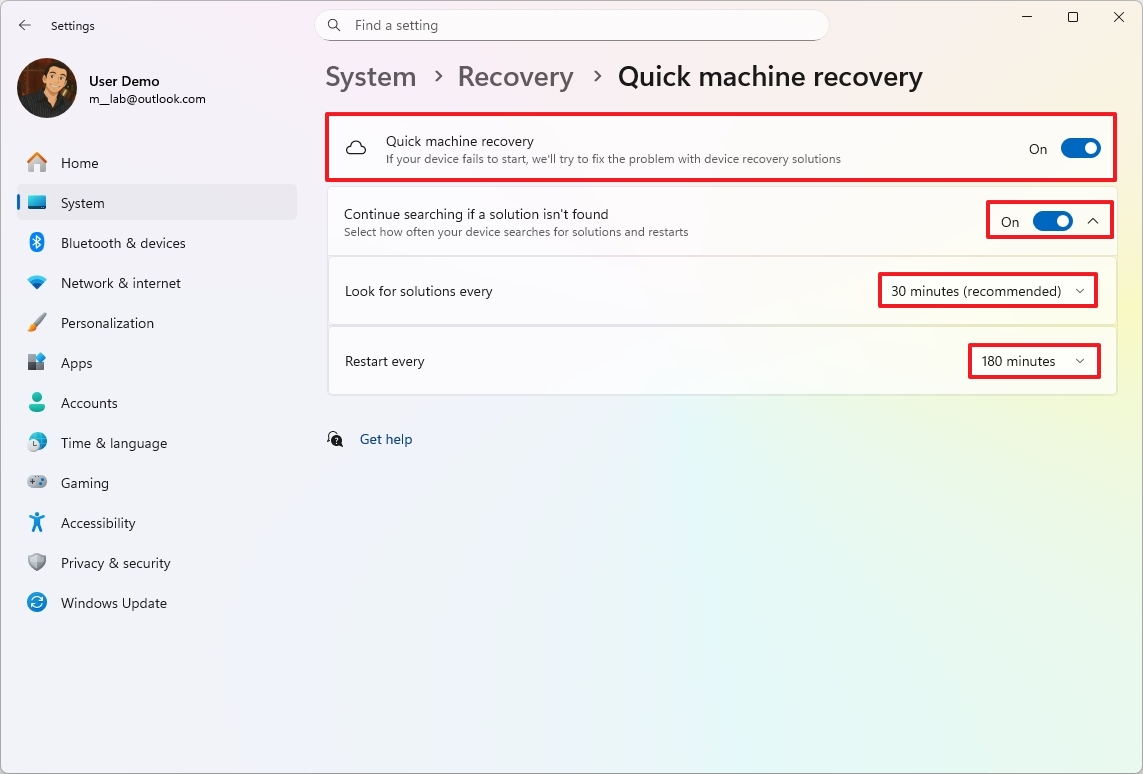
- Turn on the "Continue search if a solution isn’t found" toggle switch to control the feature behavior.
- Choose how long the system has to wait before checking for fixes using the "Look for solutions every" setting.
- Select when to restart the device to repeat the process using the "Restart every" setting.
Once you complete the steps, if you receive a buggy update that won't let the computer boot correctly, the Quick Machine Recovery feature will start automatically to download and apply any available fixes (if applicable).
Microsoft says that this is a "best-effort" feature, meaning that it won't work on every boot problem.
You can also check my comprehensive guide to set up and use Quick Machine Recovery on Windows 11.
3. Uninstall problematic update
If a cumulative update is known to cause issues, and you still have access to the desktop, consider uninstalling the update until a permanent solution is released.
On Windows 11, you can uninstall a cumulative update from the desktop or recovery environment.
From Settings
If you still have access to the desktop, use these steps:
- Open Settings.
- Click on Windows Update.
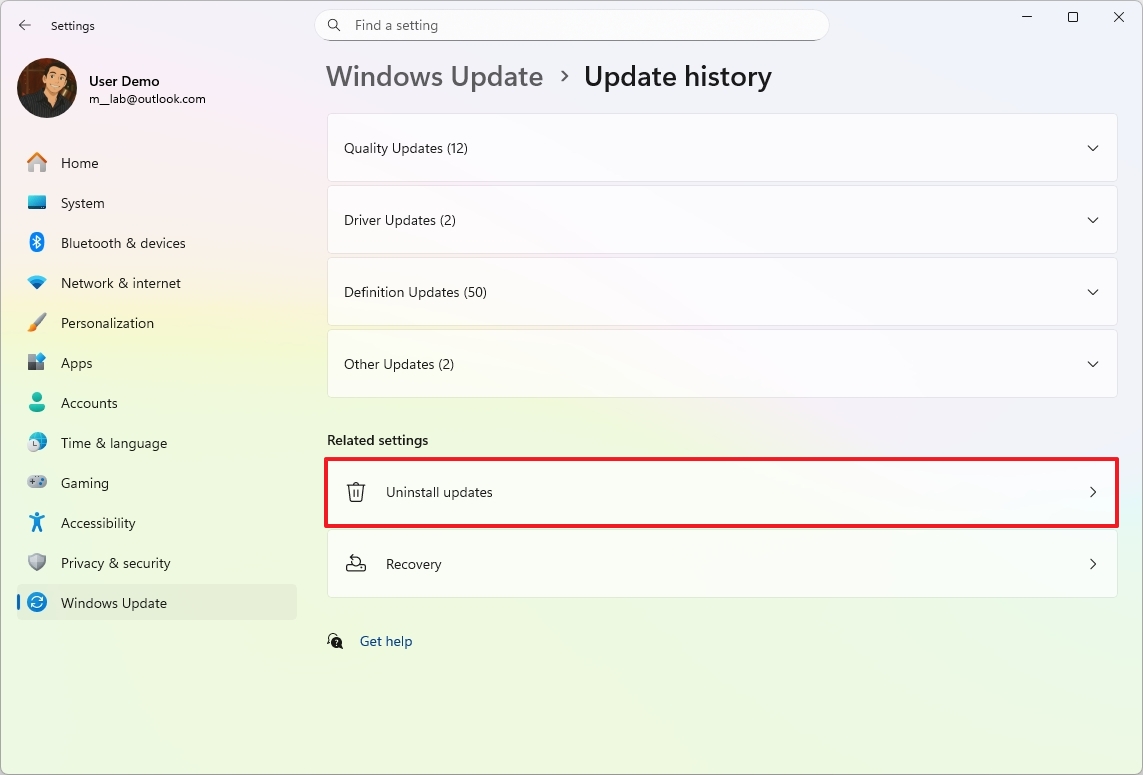
- Click the Update history page.
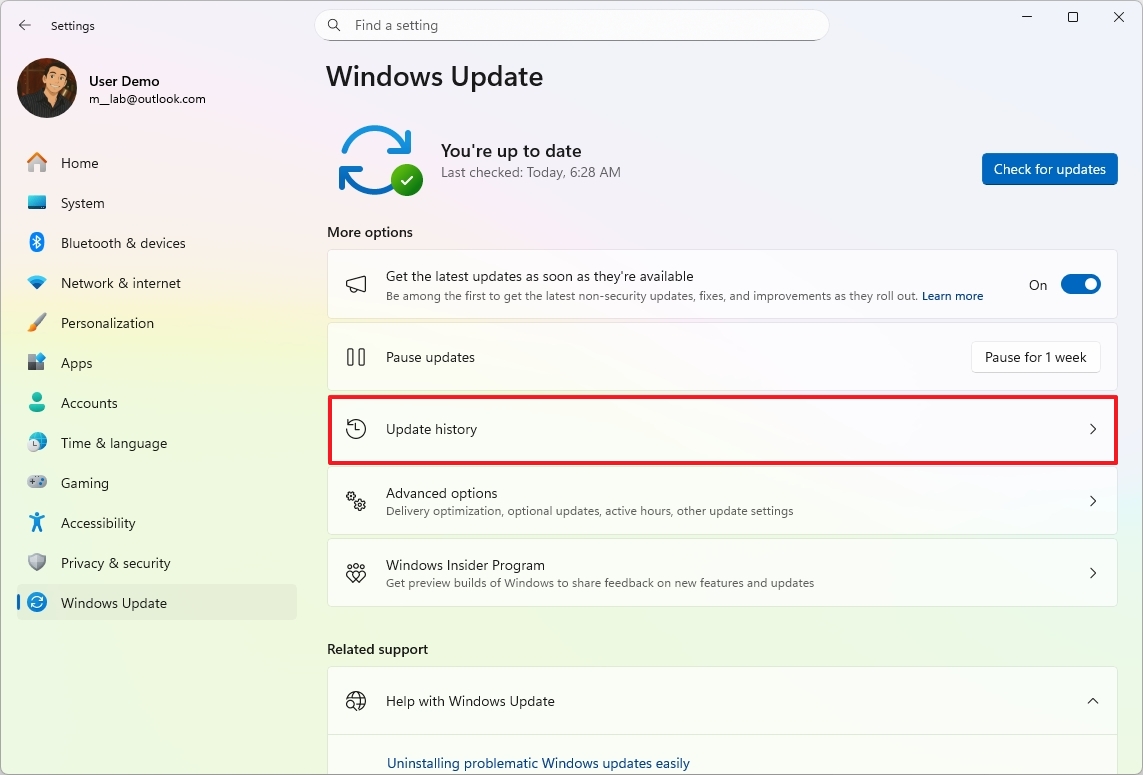
- Click the Uninstall updates setting under the "Related settings" section.
- Click the Uninstall option for the buggy update.
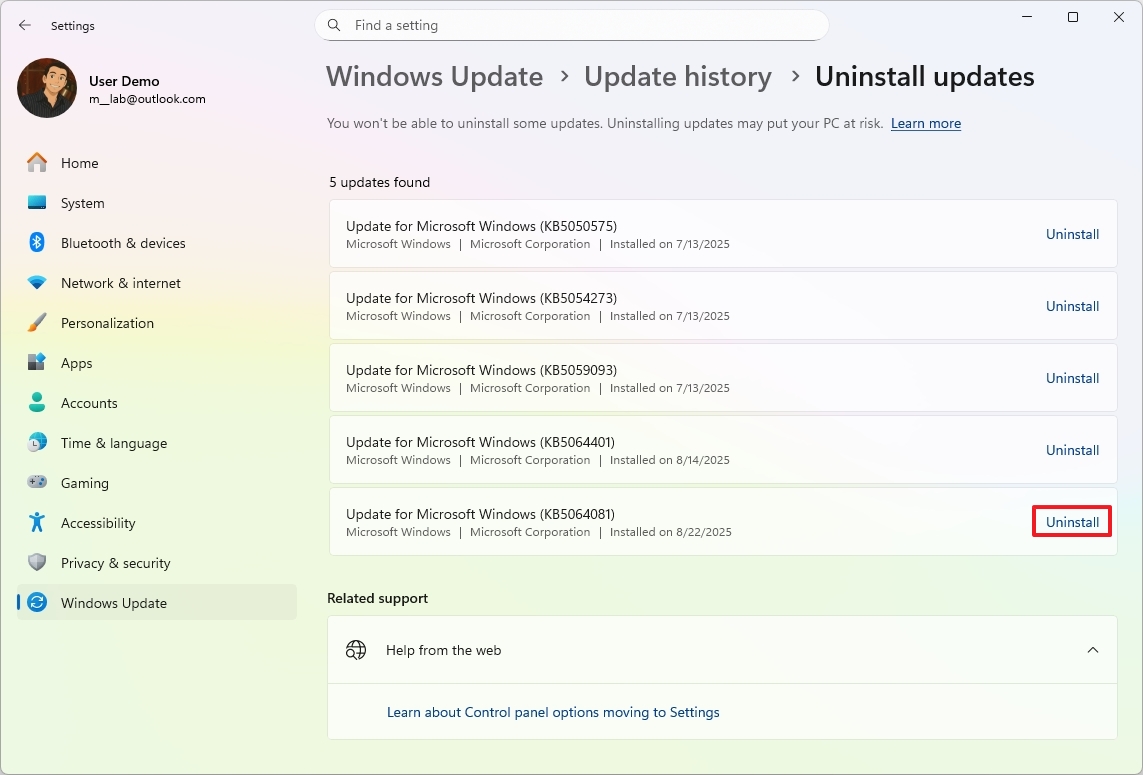
- Click the Restart now button (if applicable).
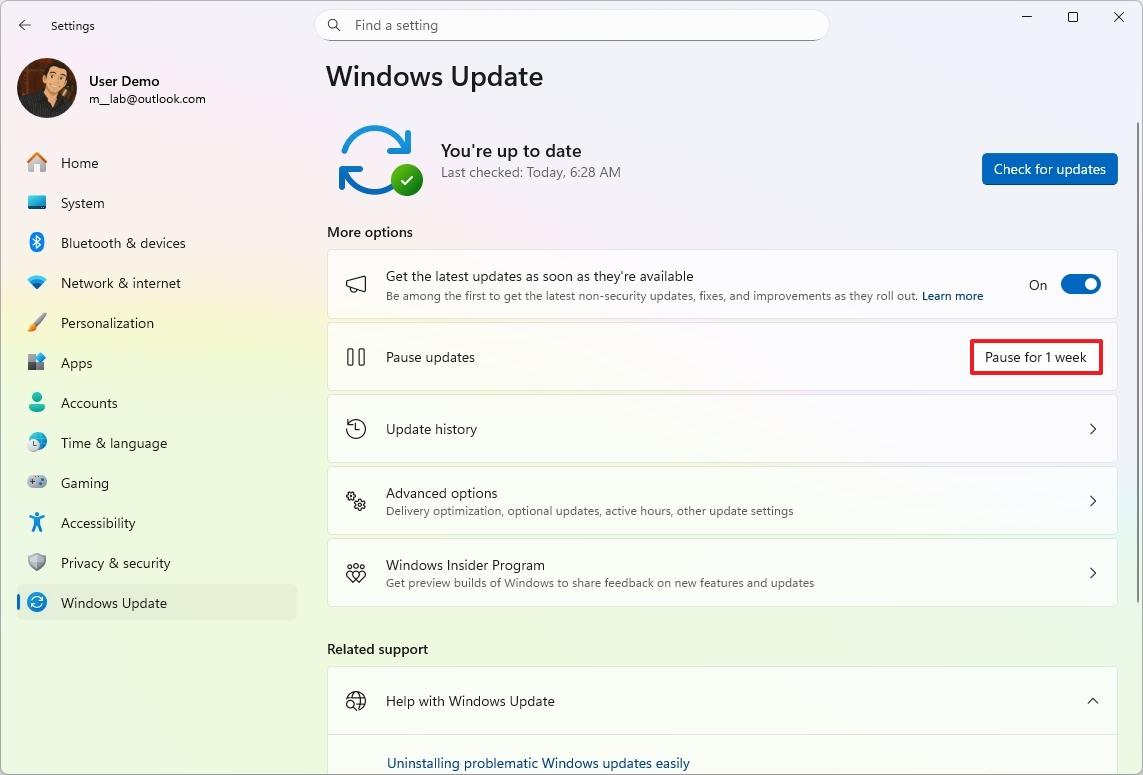
After you complete the steps, open the "Windows Update" page again through the Settings app, and under the "More options" section, click the "Pause for 1 week" button to prevent the system from reinstalling the same update again. If the setting offers more time, choose the longest period, such as four or five weeks.
From Windows Recovery Environment (WinRE)
If you don't have access to a desktop and the Quick Machine Recovery feature didn't work, you can still uninstall the most recent update with these instructions:
- Start PC.
- As soon as the Windows logo appears, press and hold the power button to interrupt the boot sequence.
- Repeat steps 1 and 2 two more times.
- Click the Advanced Startup option.
- Click the Troubleshoot option.
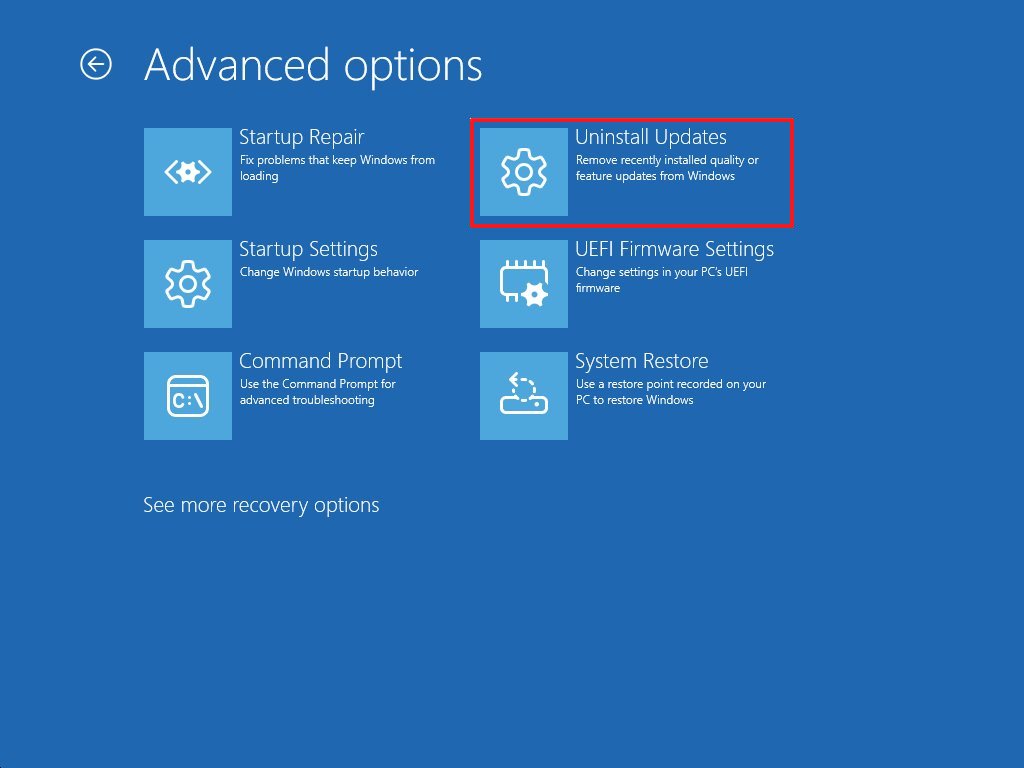
- Click on Advanced options.
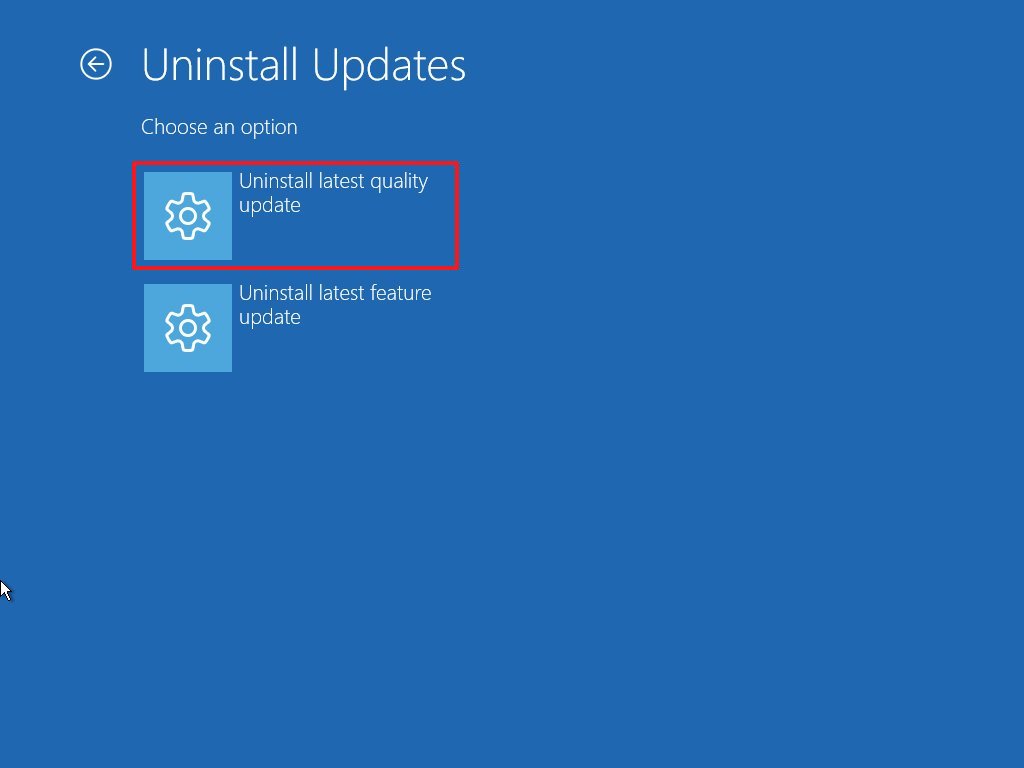
- Click the Uninstall Updates option.
- Click the "Uninstall latest quality update" option.
- Sign in using your administrator credentials (if applicable).
- Click the "Uninstall quality update" button.
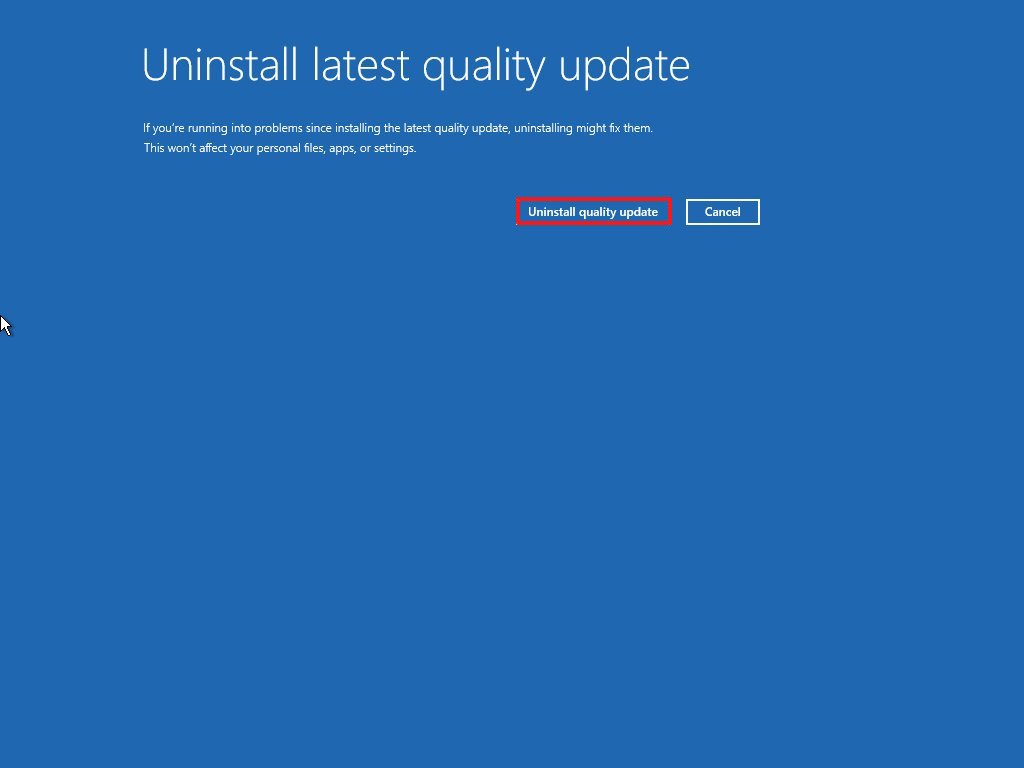
Once you complete the steps, the system will uninstall the most recent update, which in this case, should be the one causing the problem.
4. Disable automatic updates
On Windows 11, you can turn off updates in at least three ways. You can use the pause option within the "Windows Update" settings to temporarily prevent the system from downloading updates. Alternatively, you can permanently turn off the automatic mechanism and opt to trigger the update process manually.
From Settings
To temporarily disable automatic updates, use these steps:
- Open Settings.
- Click on Windows Update.
- Click the "Pause for 1 week" button to turn off automatic updates.
After you complete the steps, Windows 11 will stop downloading updates automatically for at least one week, which may be enough time for a newer update to address the current issue.
From Group Policy
To turn off automatic Windows 11 updates permanently from Group Policy, use these steps:
- Open Start.
- Search for gpedit.msc and click the top result to launch the Local Group Policy Editor.
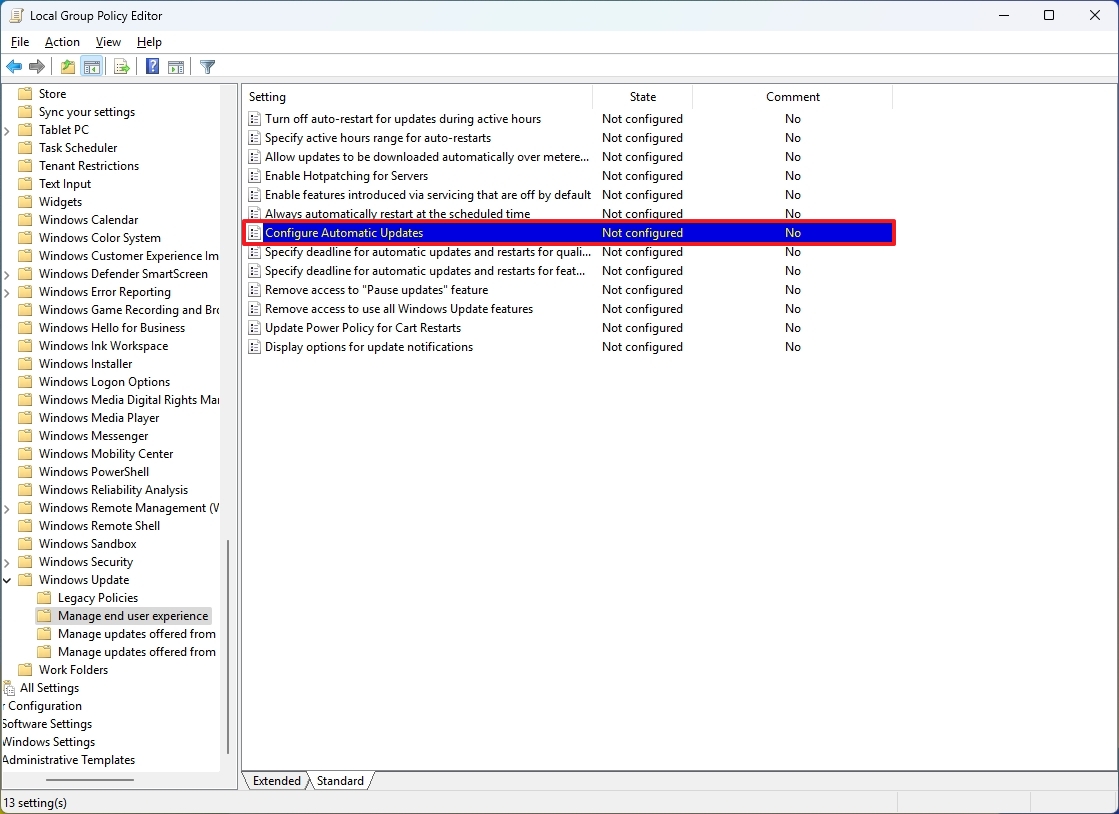
- Navigate to the following path: Computer Configuration > Administrative Templates > Windows Components > Windows Update > Manage end user experience
- Double-click the "Configure Automatic Updates" policy on the right side.
- Check the Disabled option to turn off automatic updates permanently on Windows 11.
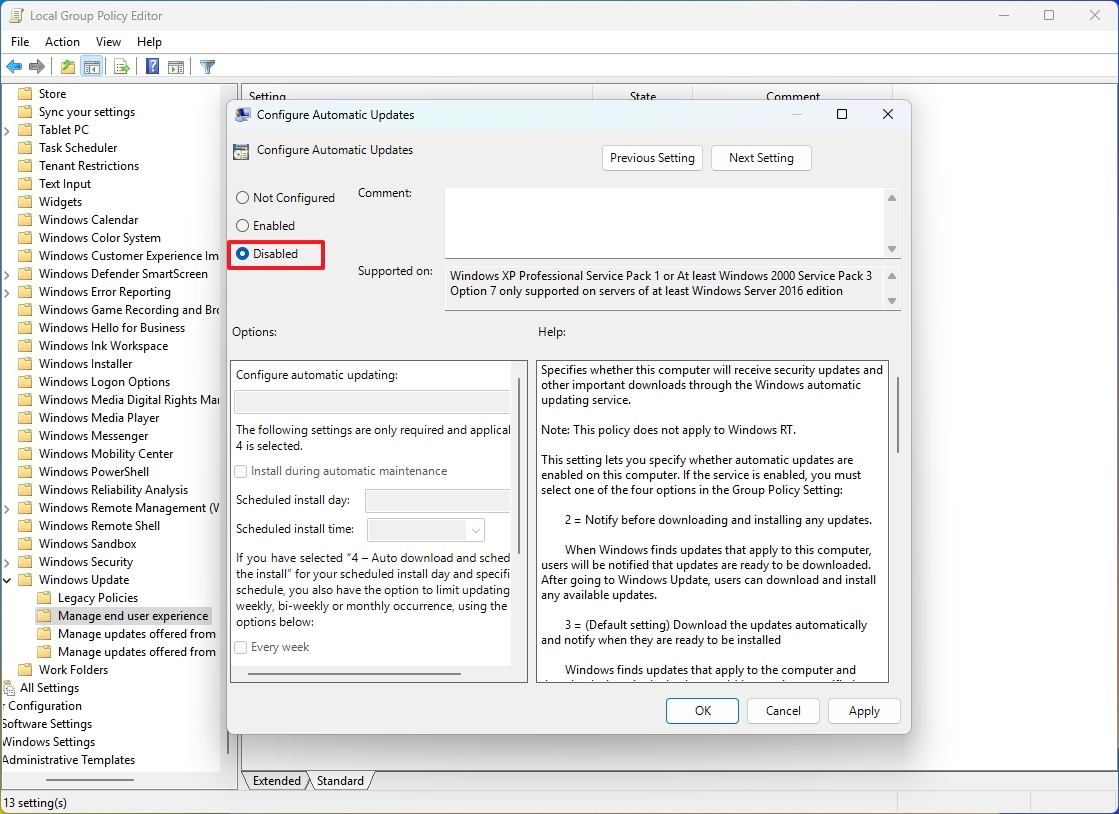
- Click the Apply button.
- Click the OK button.
Once you complete the steps, Windows 11 will stop automatically downloading and installing updates.
At any time, you can update the system manually by opening Settings > Windows Update and clicking the "Check for updates" button.
If you want to re-enable automatic updates, follow the same instructions outlined above, but in step 5, select the "Not Configured" option.
If you want to use the Registry or don't have access to the Group Policy Editor because you're using Windows 11 Home, you can refer to my comprehensive guide on how to disable Windows Update on your computer.
5. Create full computer backup
Another effective way to protect your system and personal data is to create proactive backups of your computer.
As a best practice, you should back up your device regularly, ideally at least once a week. However, it's especially important to perform a full backup before installing a new cumulative or feature update. If the update causes serious issues, you can restore the entire system to its previous working state.
If you use third-party backup software, you can rely on that solution. Otherwise, Windows 11 still includes the legacy System Image Backup tool, which allows you to create a complete backup of your installation to external storage.
To create a full backup, use these steps:
- Open Start.
- Search for Control Panel and click the top result to open the app.
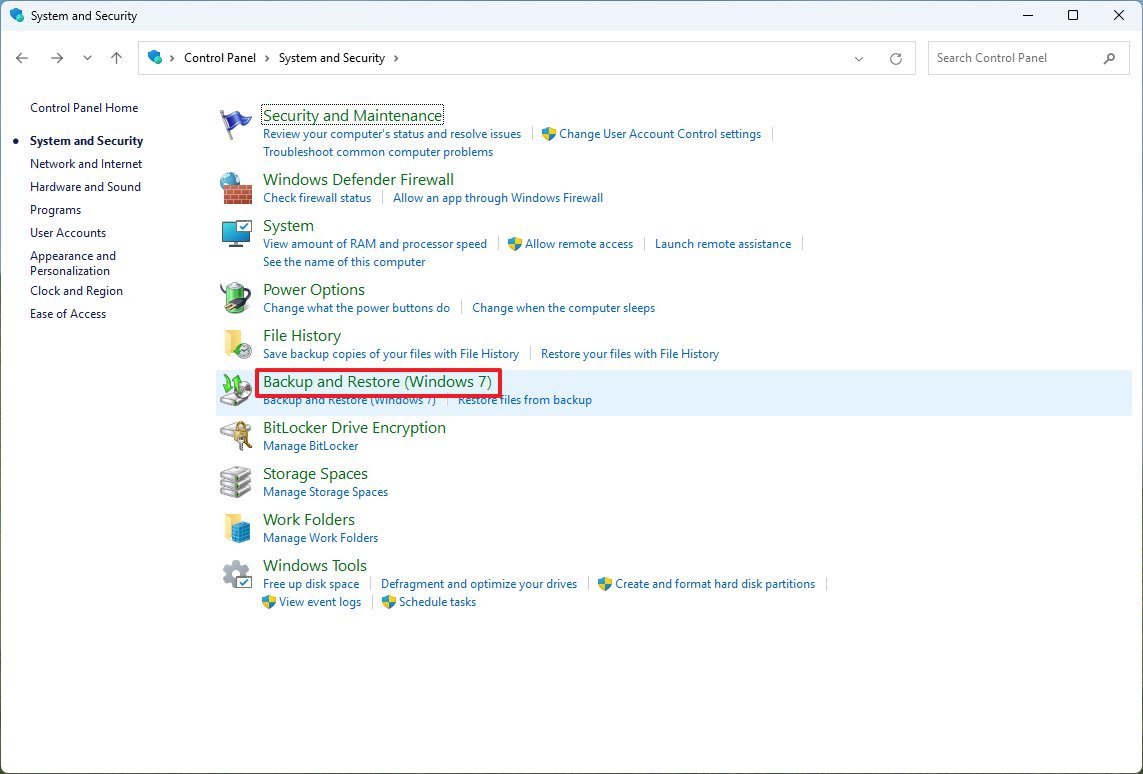
- Click on System and Security.
- Click the "Backup and Restore" setting.
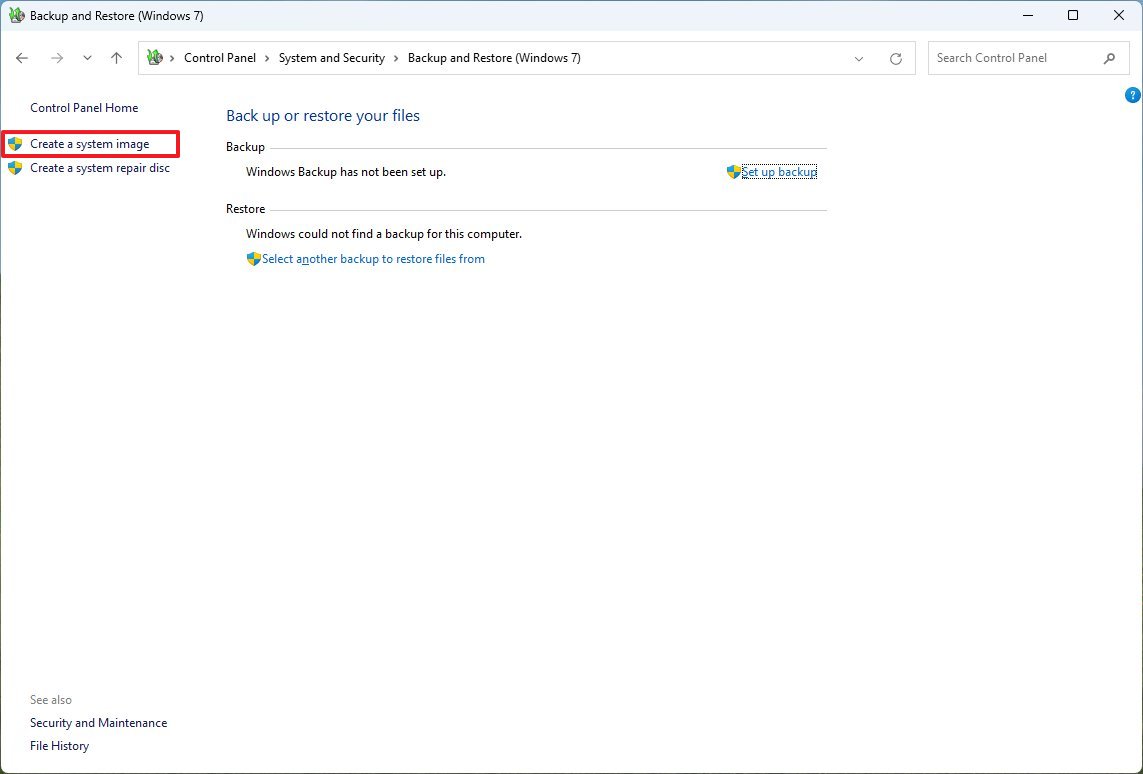
- Click the "System Image Backup" option from the bottom-left corner.
- Select the "On a hard disk" option.
- Use the "On a hard disk" drop-down menu and select the Windows 11 full backup destination.
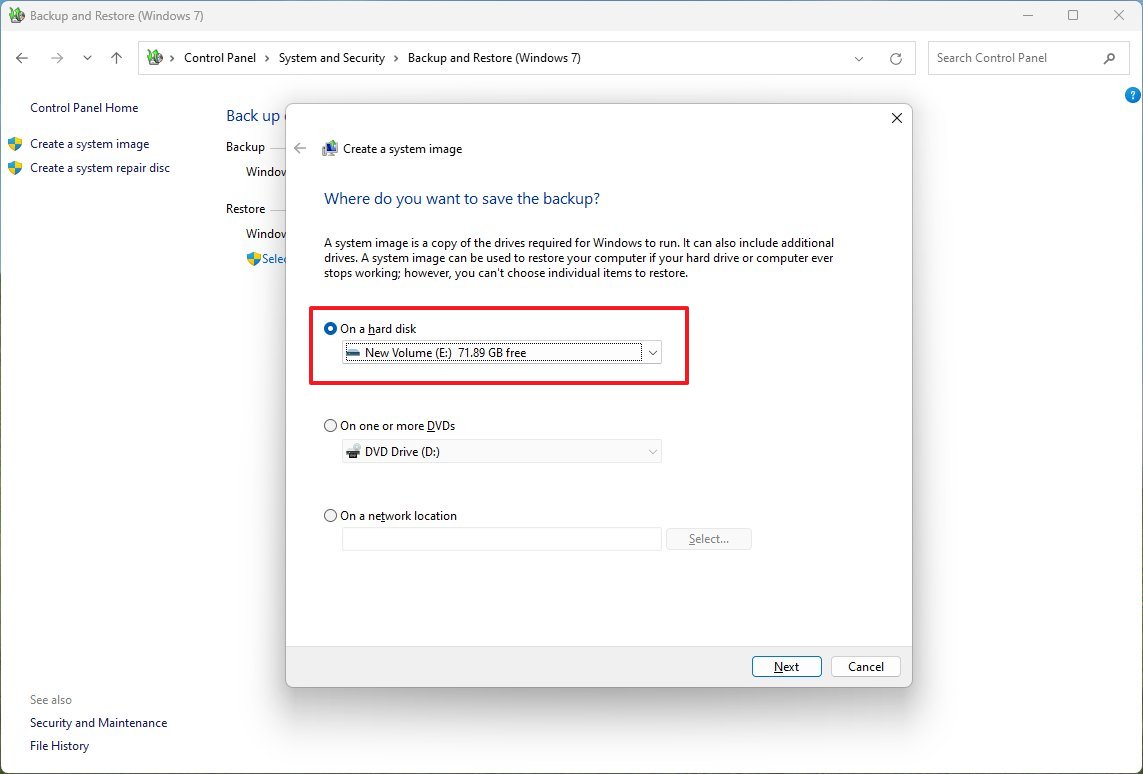
- Click the Next button.
- (Optional) Select any additional drives to include in the backup.
- Click the Next button.
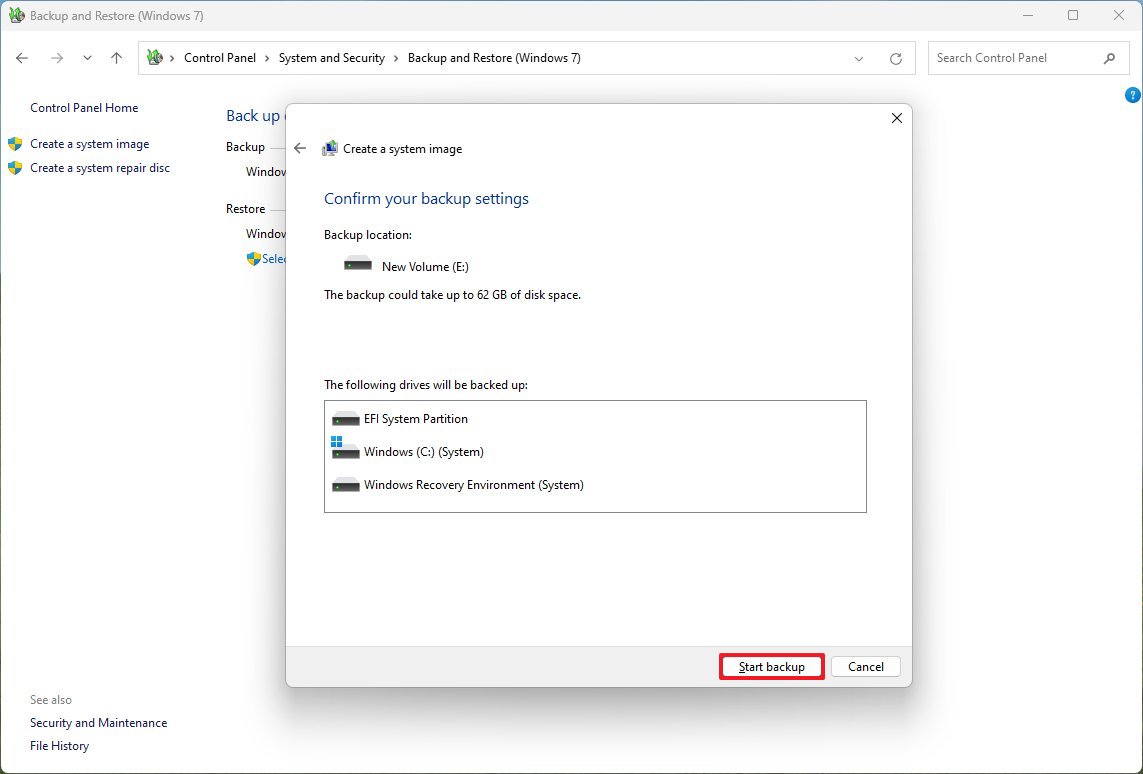
- Click the Start backup button.
- Click the No button.
- Quick note: You'll also receive a prompt to create a system repair disc, but you can skip it. If you need to roll back to a previous installation, you can use a USB installation media to access the recovery settings.
- Click the Close button.
After you complete the steps, you will have a way to recover your computer and files in case an update breaks the installation.
If something happens and you have to recover from a previous backup, you can refer to my previous guide on backing up and restoring Windows 11.
In addition to using the System Image tool, you can alternatively use the "Backup and Restore" feature. On Windows 11, this feature allows you to set up daily automatic backups of the operating system and your files.
Once it's configured, it'll create an initial full backup and then continue creating incremental backups according to the schedule you have selected.
Furthermore, you should also complement your recovery plan with a file backup, which can be easily done using OneDrive or another cloud service.
Of course, you can always copy your files manually to an external storage, or you may use third-party tools.
Additional tips for updating the system
Although updates are essential for maintaining security and stability, you don’t always need to install them the moment they become available. Unless a release addresses a critical vulnerability that affects your system, it’s wise to delay installation for at least a couple of weeks. This waiting period allows time for widespread issues to surface and for Microsoft to resolve them if necessary.
You can temporarily pause updates from the Windows Update settings page to prevent automatic installation. If you choose to hold off, avoid clicking the "Check for updates" button, as this action can immediately trigger the download and installation of the latest release.
Before proceeding with any update, review the official Windows release health dashboard to check for known issues, safeguard holds, or compatibility blocks that may affect your device.
Additionally, once an update has been installed and is pending a restart, you can defer the reboot for up to several days. Delaying the restart provides a valuable window to create backups and prepare recovery options in case the update introduces unexpected problems.
FAQs about protecting PC from buggy update
These are common questions regarding the steps to protect a computer from a buggy update.
Should I disable Windows 11 updates completely to avoid problems?
No. Disabling updates permanently is not a safe long-term strategy. Monthly quality updates patch security vulnerabilities and keep your device supported. A better approach is to prepare for potential issues by enabling recovery features, creating restore points, and backing up your system. If necessary, you can temporarily pause updates instead of turning them off indefinitely.
Are feature updates mandatory like monthly updates?
Feature updates are optional while your current version of Windows 11 remains within its support lifecycle. However, as the end of support approaches, Windows 11 will automatically download and install the next supported version to keep the device secure and compliant.
Does System Restore delete my personal files?
No. System Restore rolls back system settings, drivers, and updates to a previous restore point without affecting personal files such as documents, pictures, or videos. However, apps and drivers installed after the restore point was created may be removed.
Is System Restore enabled by default on Windows 11?
No. Unlike earlier versions of Windows, System Restore is typically disabled by default on Windows 11. You must enable system protection manually for your primary drive before restore points can be created.
What is Quick Machine Recovery (QMR), and who should enable it?
Quick Machine Recovery is a built-in Windows 11 feature that automatically attempts to resolve boot failures by downloading targeted fixes from Windows Update. It is available starting with version 24H2 and later releases. It is enabled by default on Windows 11 Home, but Pro users may need to turn it on manually unless the device is managed by an organization.
How do I uninstall a problematic update if Windows still boots?
If you can access the desktop, open Settings > Windows Update > Update history > Uninstall updates. From there, remove the most recent cumulative update. After uninstalling, pause updates temporarily to prevent the same patch from reinstalling immediately.
What if Windows 11 won’t boot after an update?
You can access the Windows Recovery Environment (WinRE) by interrupting the boot process three times. From Advanced options, choose "Uninstall latest quality update" to remove the most recent patch. If that fails, restoring from a system image backup may be necessary.
How often should I create a full backup?
At minimum, create a full backup before installing a cumulative or feature update. As a general best practice, perform a complete system backup weekly and maintain separate file backups more frequently, particularly if you work with important data daily.
Is the legacy System Image Backup tool still reliable?
Yes. Windows 11 still includes the System Image Backup feature through Control Panel. While considered legacy, it remains a dependable way to create a full image of your installation that can be restored if an update breaks the system.
Should I install updates immediately after release?
Not always. Unless an update addresses a critical vulnerability affecting your system, waiting one to two weeks allows time for major bugs to surface and be resolved. Before installing, review the official Windows release health dashboard to check for known issues and safeguard holds.
Can I delay a restart after an update is installed?
Yes. If an update is pending a restart, you can postpone the reboot for several days. This gives you time to create backups and verify that no widespread problems have been reported before finalizing the installation.
More resources
Explore more in-depth how-to guides, troubleshooting advice, and essential tips to get the most out of Windows 11 and 10. Start browsing here:
- Windows 11 on Windows Central — All you need to know
- Windows 10 on Windows Central — All you need to know

Join us on Reddit at r/WindowsCentral to share your insights and discuss our latest news, reviews, and more.