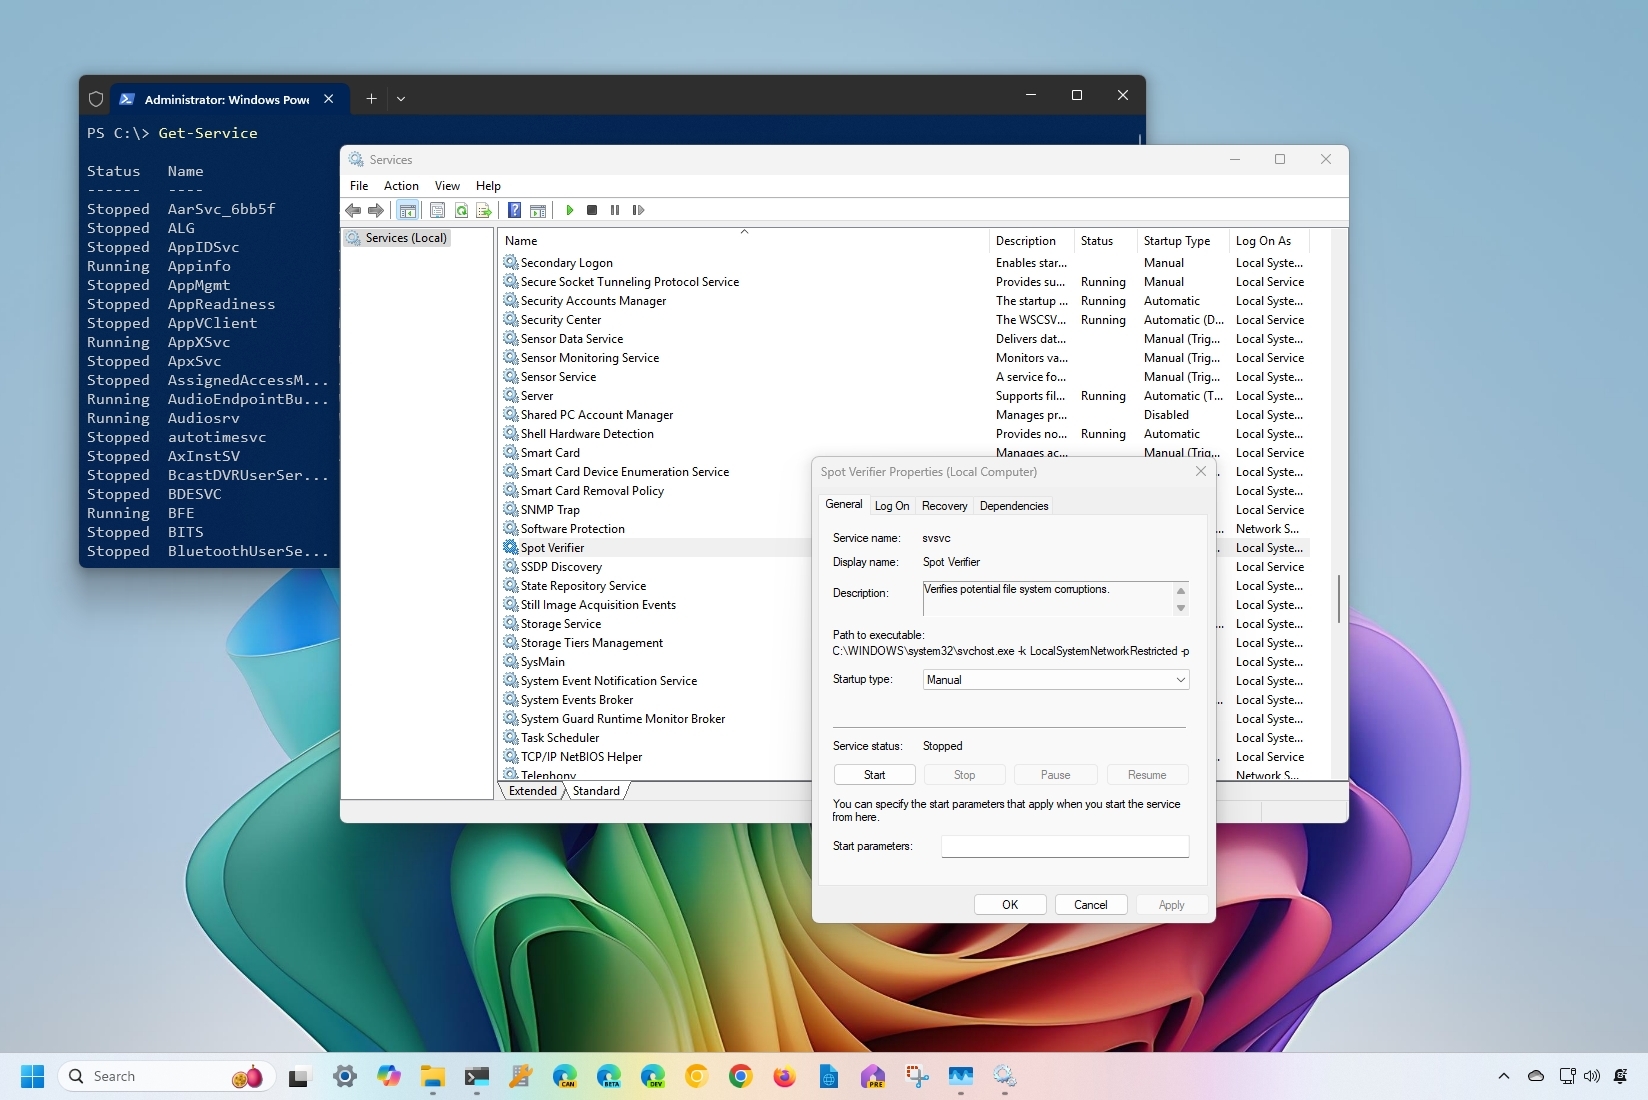
On Windows 11, services are usually referred to as essential programs running in the background to allow the system and apps to operate as intended with corresponding features (such as printing, networking, authentication, and many more).
Although the operating system manages services automatically, sometimes, you may have to manually control one or more services to troubleshoot problems with an app or Windows features or when a program requires managing services manually.
Regardless of the reason, Windows 11 includes multiple ways to start, stop, enable, or disable services using the Services app, Task Manager, PowerShell, and Command Prompt.
In this how-to guide, I will explain the different ways to start, stop, disable, or enable services on Windows 11.
How to manage services using Services on Windows 11
The easiest way to stop, start, disable, or enable a service on Windows 11 is to use the "Services" app available on Windows 11 and previous versions.
Stop a service
To stop a service on Windows 11, use these steps:
- Open Start.
- Search for Services and click the top result to open the app.
- Double-click the service you want to stop.
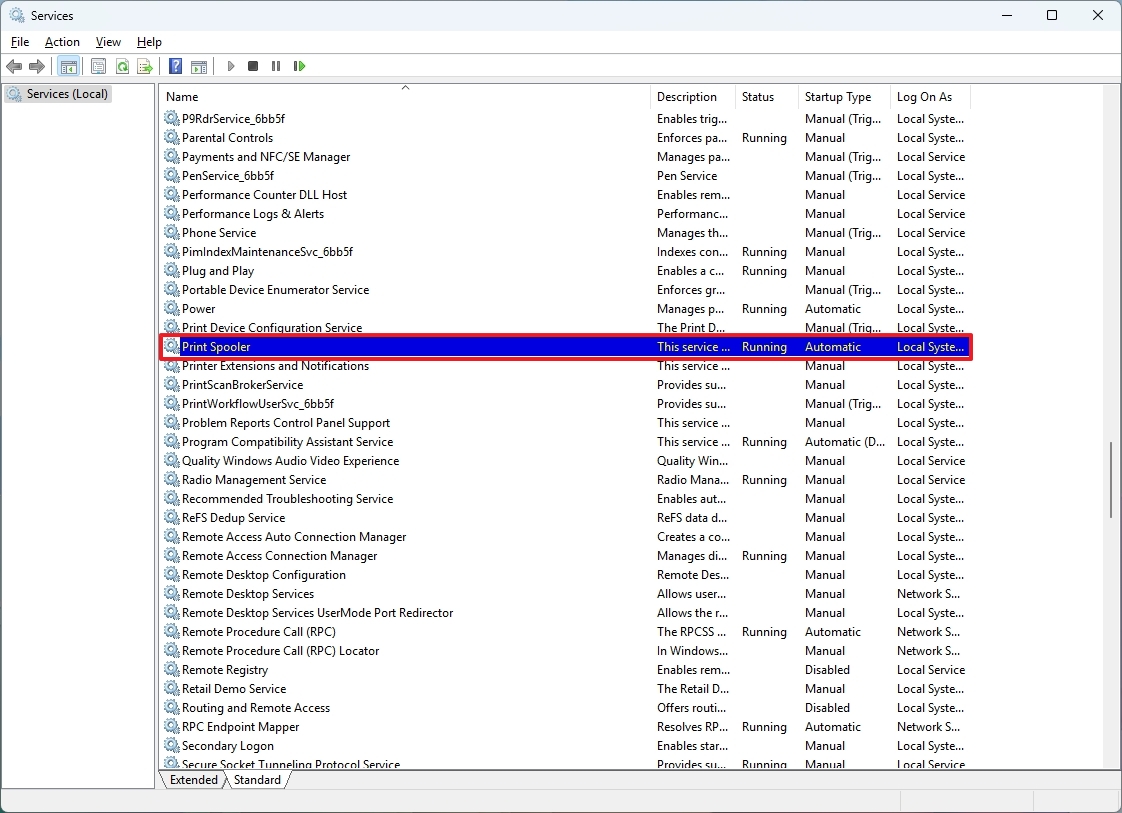
- Click the Stop button.
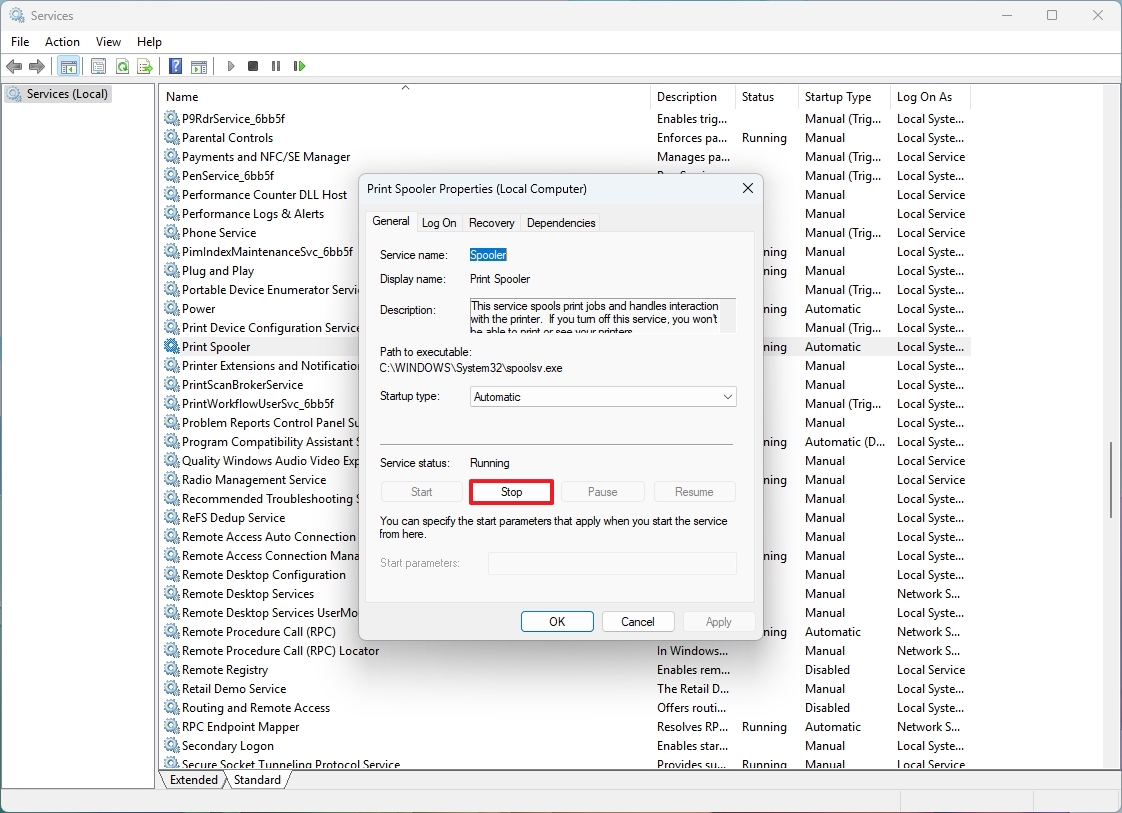
- Click the Apply button.
- Click the OK button.
Once you complete the steps, the system will terminate the service. If the service doesn't stop running, you may be trying to stop a critical service required for the system to operate correctly.
Start a service
To start a service on Windows 11, use these steps:
- Open Start.
- Seach for Services and click the top result to open the app.
- Double-click the service you want to start.

- Click the Start button.
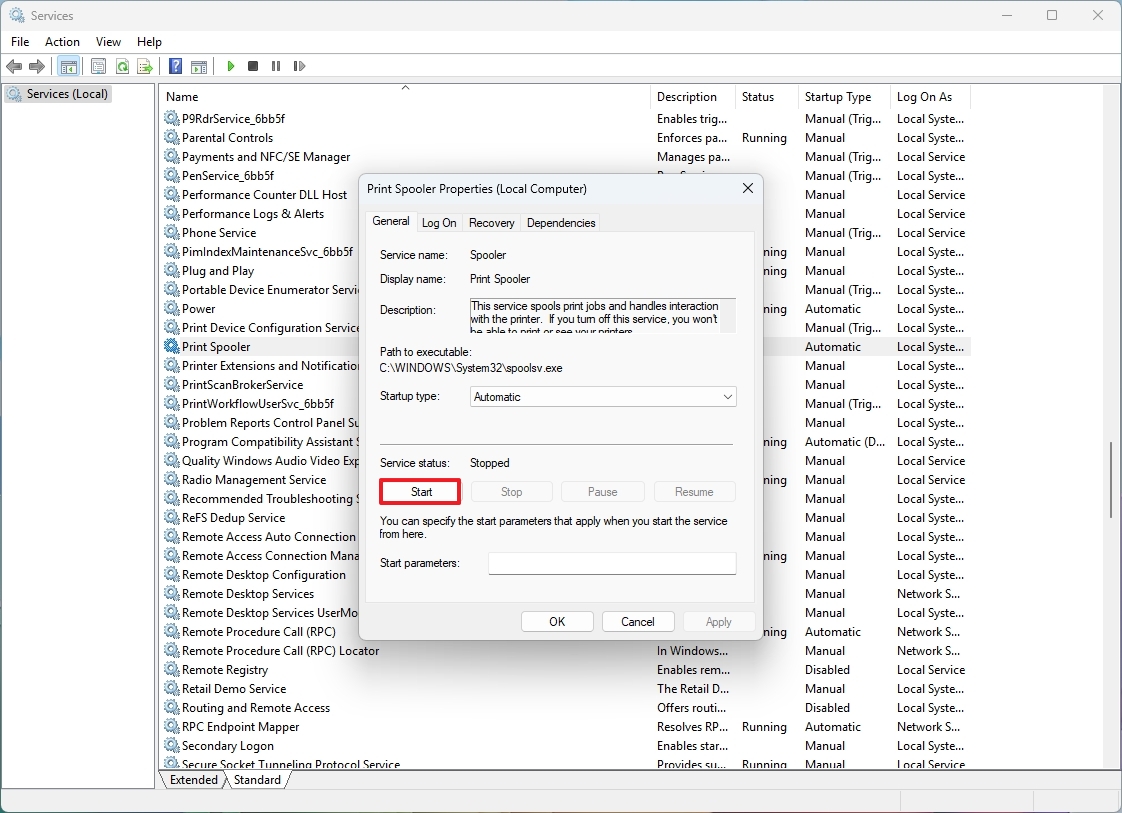
- Click the Apply button.
- Click the OK button.
After you complete the steps, the service should start immediately on Windows 11.
Disable a service
To disable a service on Windows 11, use these steps:
- Open Start.
- Search for Services and click the top result to open the app.
- Double-click the service you want to disable.

- Click the Stop button (if applicable).
- Select the Disabled option from the "Startup type" setting.
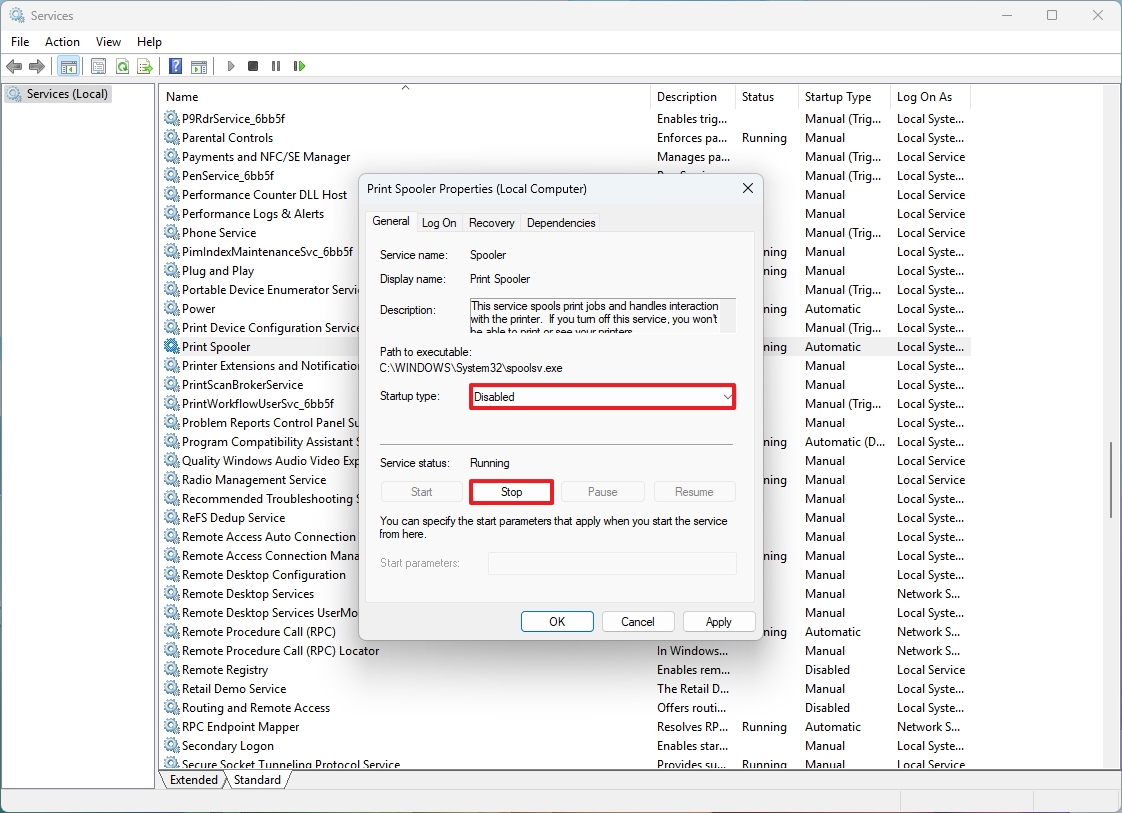
- Click the Apply button.
- Click the OK button.
Once you complete the steps, the service will no longer run on the device after restarting the system. If you click the "Stop" button, the service will stop immediately without the need for restarting.
Enable a service
To enable a service on Windows 11 using the Services app, use these steps:
- Open Start.
- Search for Services and click the top result to open the app.
- Double-click the service to enable.

- Click the Start button.
- Select the how to start the service option:
- Automatic: Starts the service automatically during start.
- Automatic (Delayed Start): Starts the service automatically but after the system loads.
- Manual: Allows users to start the service manually or through another service that the user tries to start.
- Disabled: Keeps the service stopped regardless of whether it is needed or not.
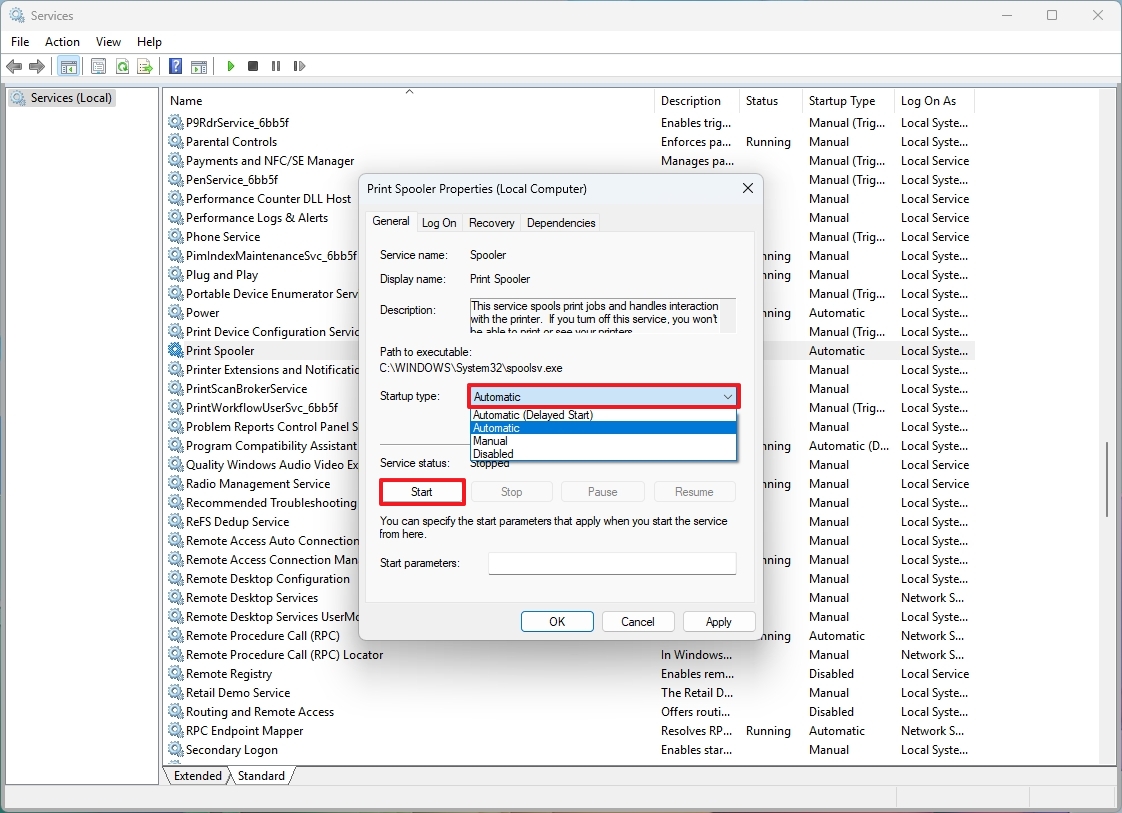
- Click the Apply button.
- Click the OK button.
After you complete the steps, the service will be enabled after restarting the computer. If you want to run the service immediately, you also need to click the "Start" button.
You can also right-click the service and select the state. You can also choose the service and the action (start, stop, pause, or restart) from the command bar at the top of the app.
How to manage services using Task Manager on Windows 11
On Windows 11, Task Manager includes the "Services" tab that allows you to manage services.
To stop or restart a service through Task Manager, use these steps:
- Open Start.
- Search for Task Manager and click the top result to open the app.
- Quick note: You can also right-click the Start button and select the Task Manager. Or use the "Ctrl + Shift + Esc" keyboard shortcut to open the app.
- Click the Services tab.
- Right-click the service and select the action:
- Start.
- Stop.
- Restart.
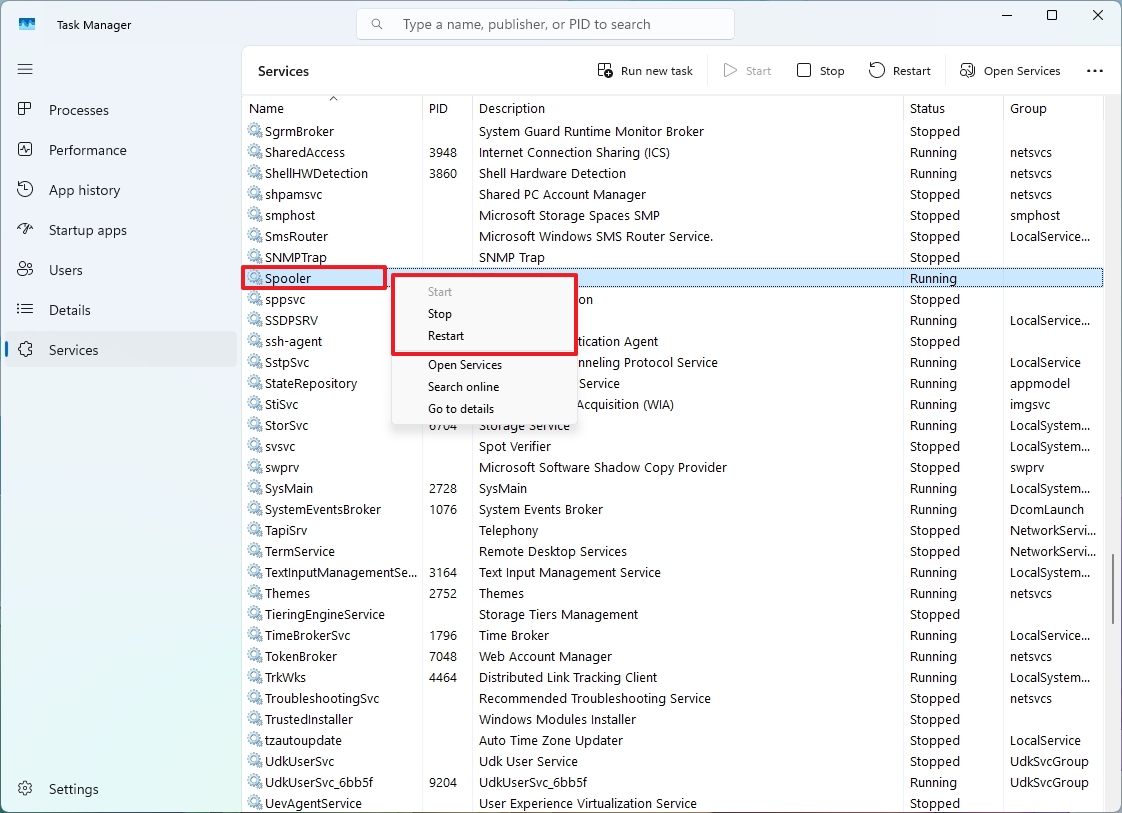
Once you complete the steps, the service will start, stop, or restart, depending on your selected option.
When using Task Manager, consider that you can't disable or configure the service to start automatically on Windows 11. This is something you have to do through the Services app or using commands.
How to manage services using Command Prompt on Windows 11
You can also use Command Prompt with the "net" (legacy) and "sc" (modern) command to disable, enable, stop, or start services on your computer.
Stop a service
To stop a service with Command Prompt, use these steps:
- Open Start.
- Search for Command Prompt, right-click the top result, and select the Run as administrator option.
- Type the following command to view the available services and press Enter: sc queryex state=all type=service
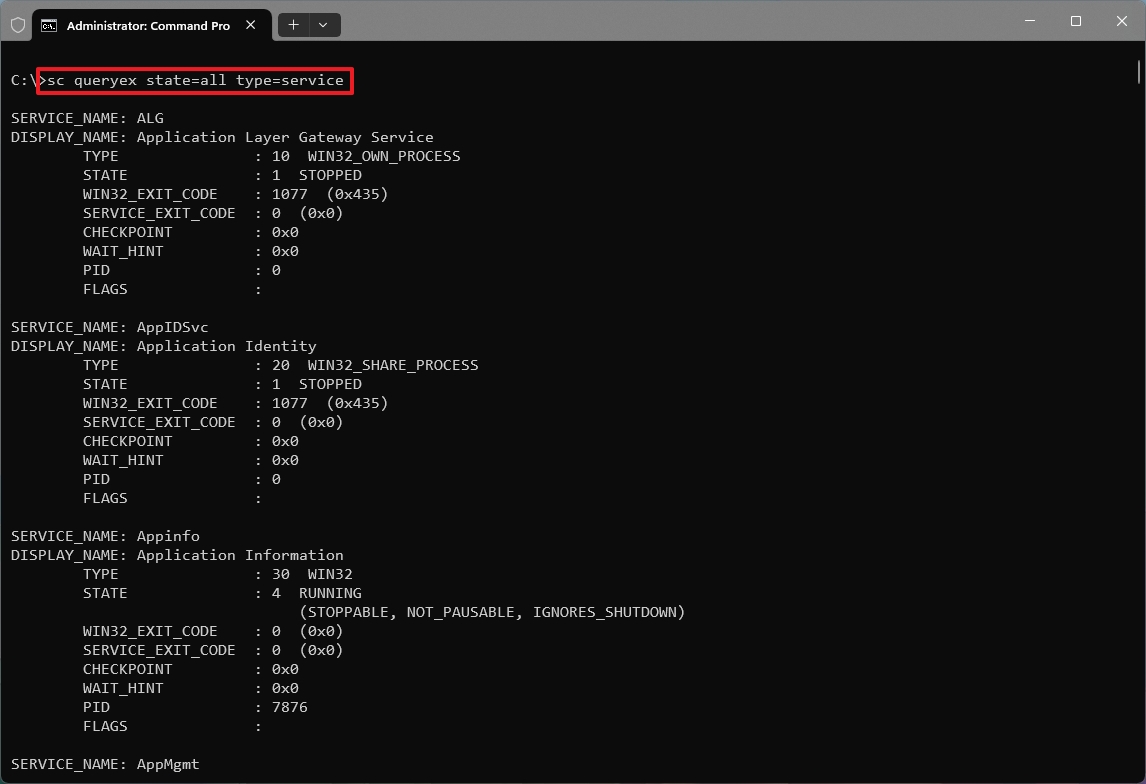
- Type the following command to stop one service with Command Prompt and press Enter: net stop "SERVICE-NAME"
In the command, replace "SERVICE-NAME" for the name of the service. The quotation marks are only needed if there's a space within the name. This example stops the printer spooler from using the service name on Windows 11: net stop "spooler"
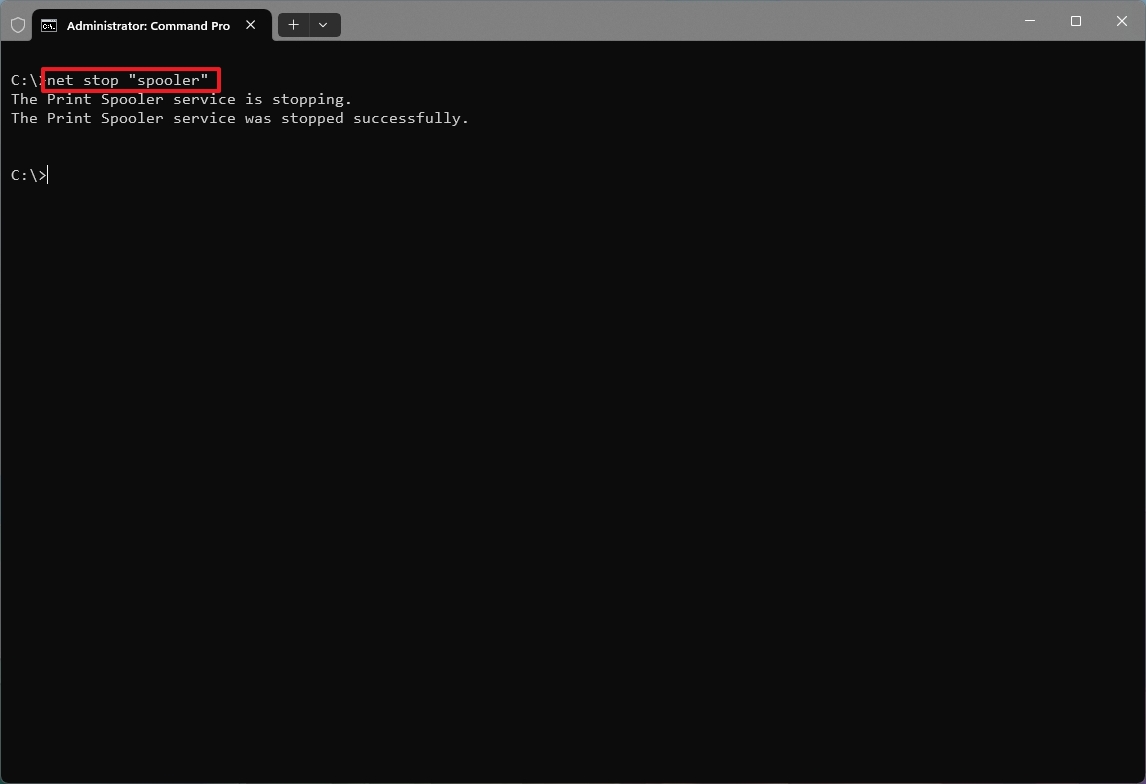
- (Optional) Type the following (different) command to stop a service and press Enter: sc stop "spooler"
After you complete the steps, the Command Prompt command will stop the Windows 11 or app service.
Start a service
To use Command Prompt to start a service, use these steps:
- Open Start.
- Search for Command Prompt, right-click the top result, and select the Run as administrator option.
- Type the following command to view the available services and press Enter: sc queryex state=all type=service

- Type the following command to start a service with Command Prompt and press Enter: net start "SERVICE-NAME"
In the command, replace "SERVICE-NAME" with the name of the service. This example starts the printer spooler using the service name on Windows 11: net start "spooler"
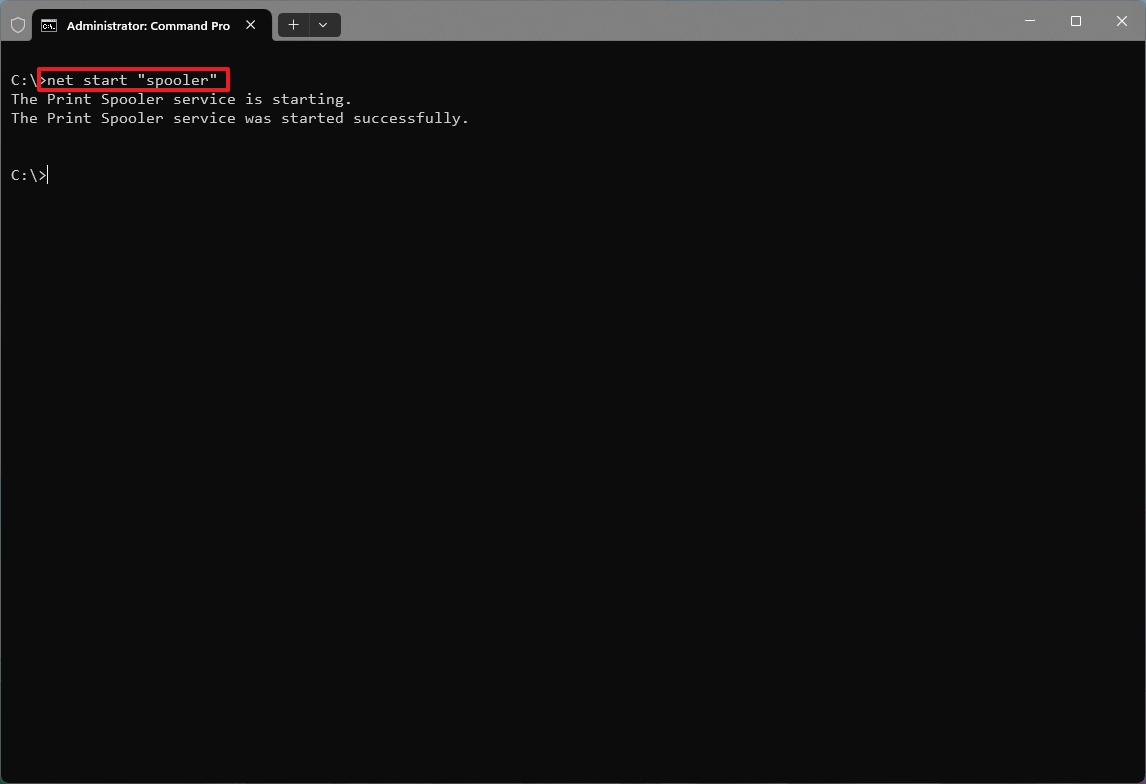
- (Optional) Type the following (different) command to start a service and press Enter: sc start "spooler"
After you complete the steps, the command will start the service on your computer.
Disable a service
To disable a service on Windows 11 with commands, use these steps:
- Open Start.
- Search for Command Prompt, right-click the top result, and select the Run as administrator option.
- Type the following command to view the available services and press Enter: sc queryex state=all type=service

- Type the following command to disable a service with Command Prompt and press Enter: sc config "SERVICE-NAME" start=disabled
In the command, replace "SERVICE-NAME" for the name of the service. The quotation marks are only needed if there's a space within the name.This example disables the printer spooler using the service name on Windows 11: sc config "spooler" start=disabled
- Quick note: When you use the disable option on Windows 11, the service doesn't stop in its current state. If you want to stop immediately, you can restart the computer or stop the service using the following command.
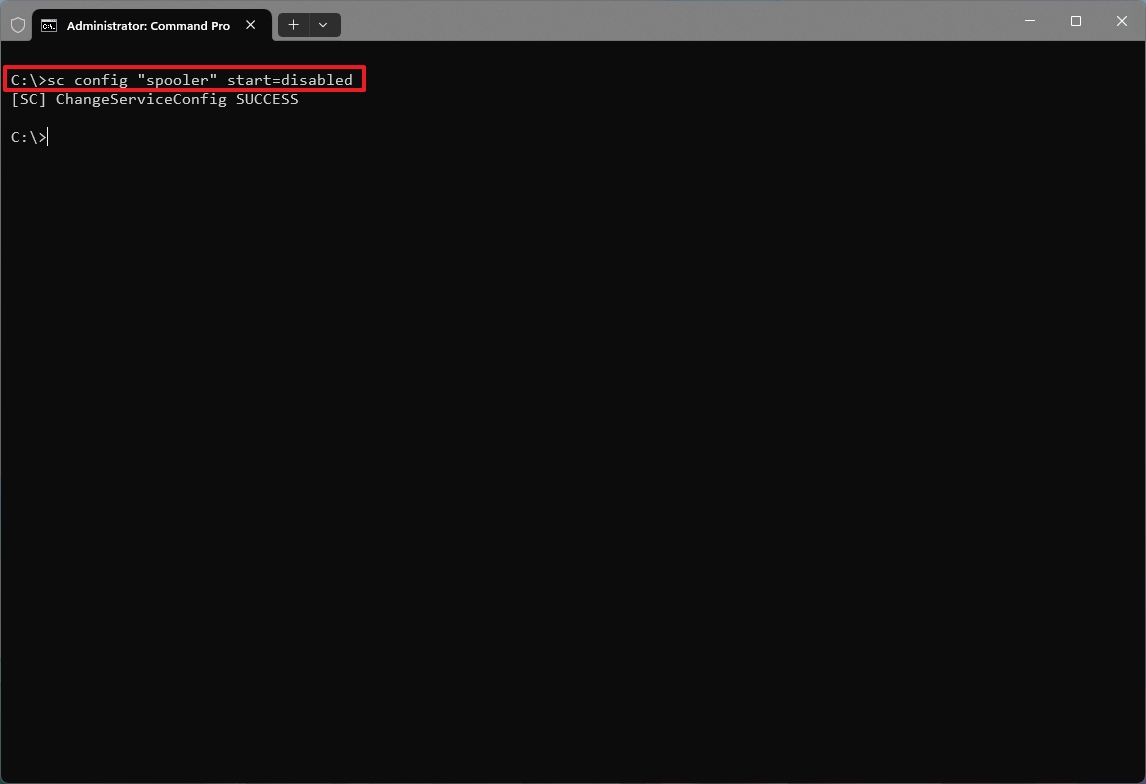
- (Optional) Type the following command to stop a service and press Enter: sc stop "SERVICE-NAME"
Once you complete the steps, the Command Prompt command will be disabled on Windows 11.
Enable a service
To enable a service with Command Prompt, use these steps:
- Open Start.
- Search for Command Prompt, right-click the top result, and select the Run as administrator option.
- Type the following command to view the available services and press Enter: sc queryex state=all type=service

- Type the following command to enable a service and press Enter: sc config "SERVICE-NAME" start=auto
In the command, replace "SERVICE-NAME" with the name of the service. This example enables the printer spooler: sc config "spooler" start=auto
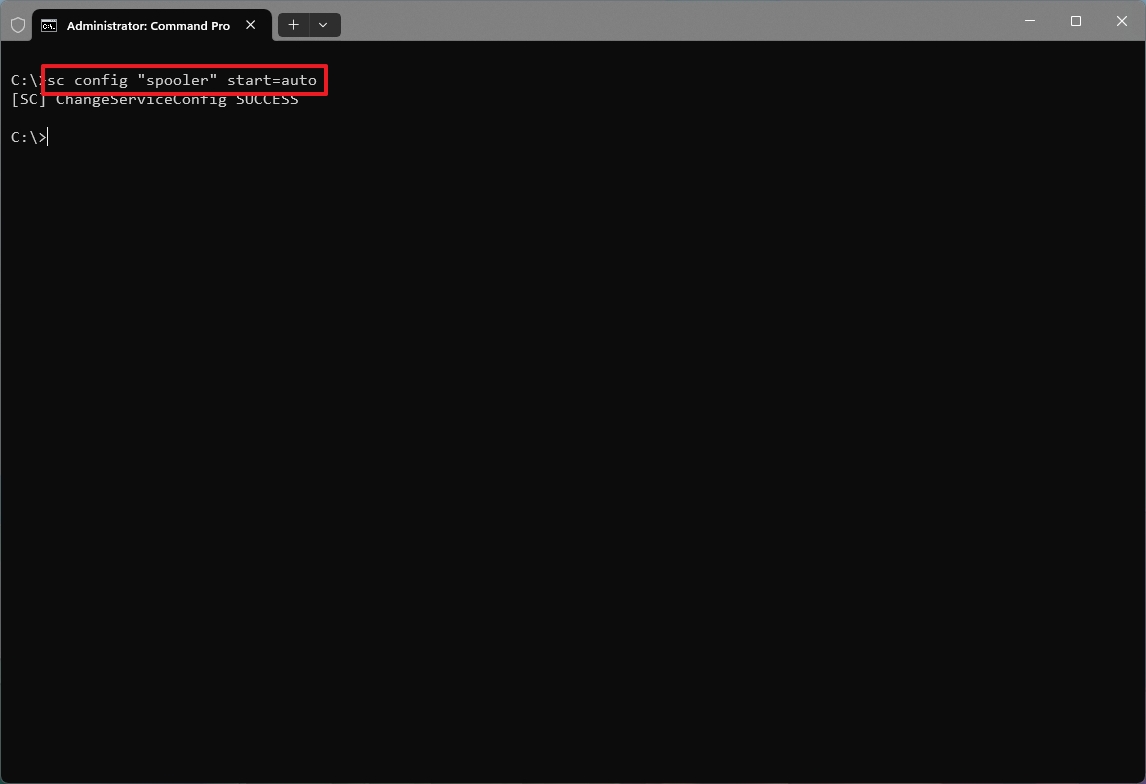
- (Optional) Type the following command to start a service with the "Manual" option and press Enter: sc config "SERVICE-NAME" start=demand
- (Optional) Type the following command to start a service with the "Automatic Delayed" option and press Enter: sc config "SERVICE-NAME" start=delayed-auto
- (Optional) Type the following command to start a service immediately and press Enter: sc start "SERVICE-NAME"
After you complete the steps, the service will start immediately.
How to manage services using PowerShell on Windows 11
If you need to create a script or use commands, PowerShell also lets you manage system and app services.
Stop a service
To stop a service with PowerShell, use these steps:
- Open Start.
- Search for PowerShell, right-click the top result, and select the Run as administrator option.
- Type the following command to view the available services and press Enter: Get-Service
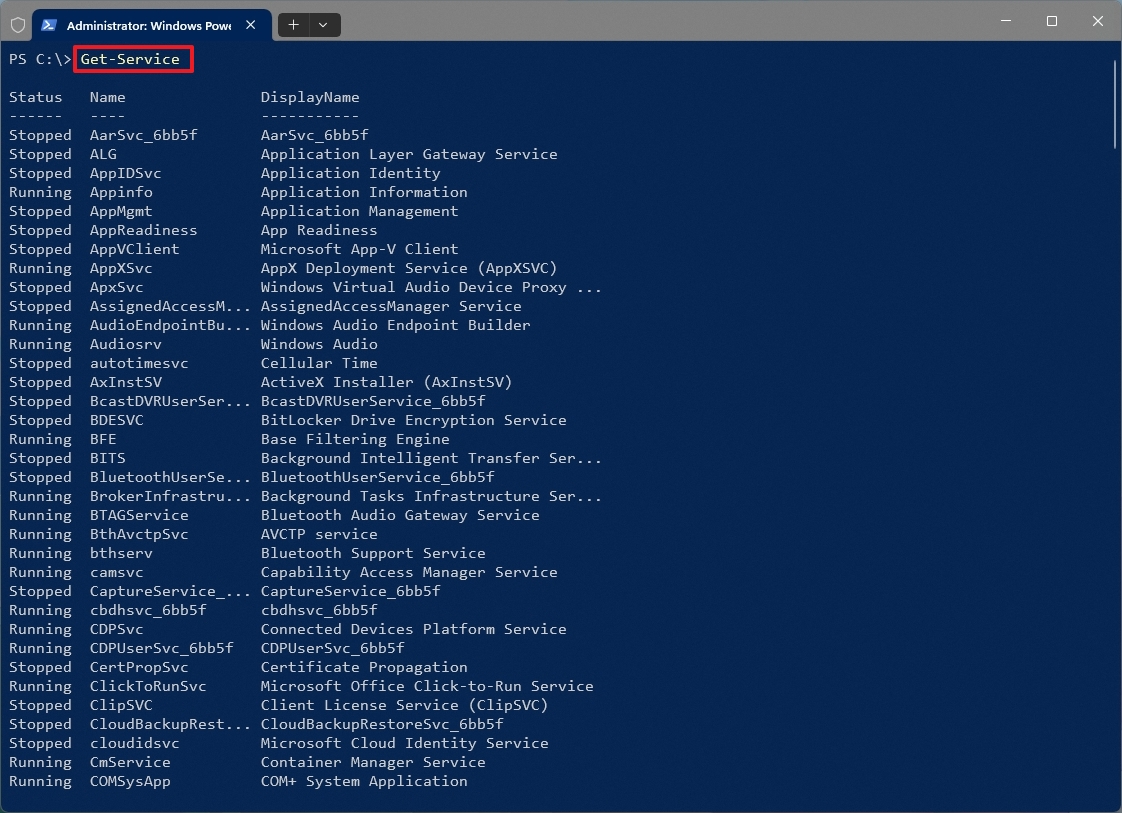
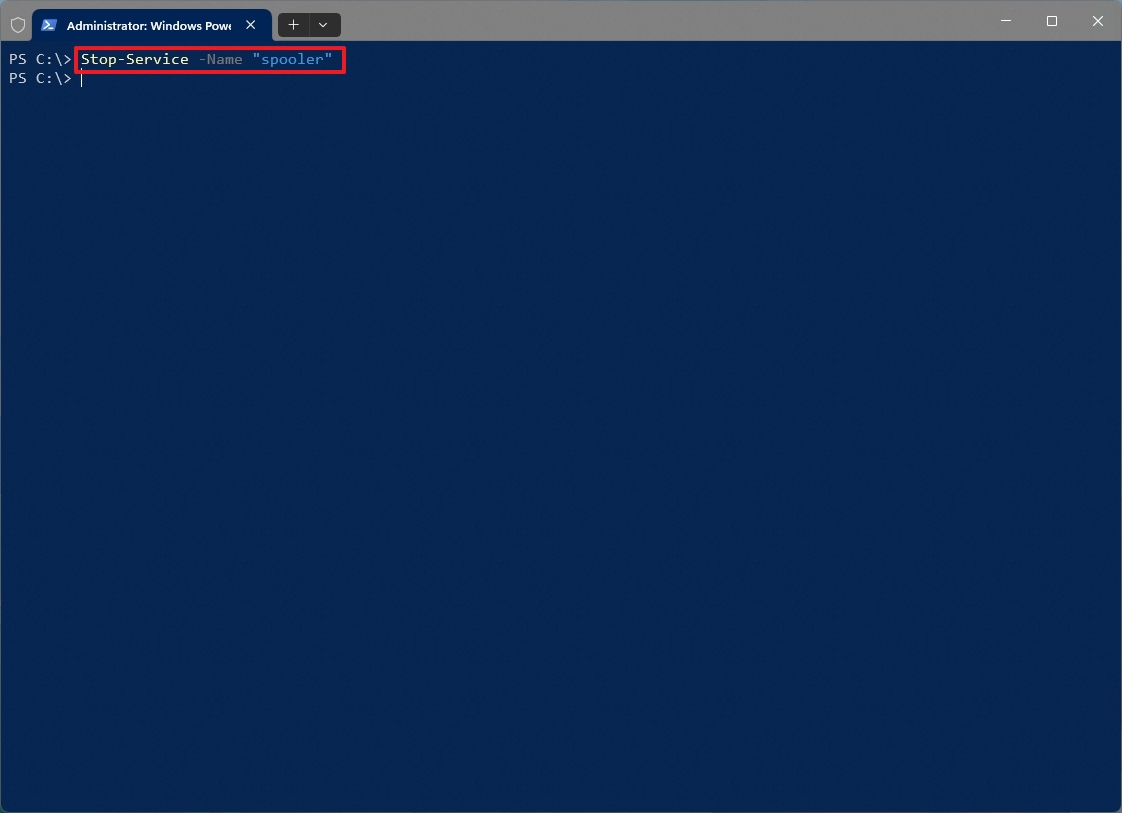
- Type the following command to stop a service on Windows 11 and press Enter: Stop-Service -Name "SERVICE-NAME"
In the command, change "SERVICE-NAME" with the name of the service to stop. If you want to use the service's display name, then replace "-Name" for "-DisplayName" and specify the service name. This example stops the printer spooler on Windows 11: Stop-Service -Name "spooler"
- (Optional) Type the following variant of the command also to stop a service and press Enter: Set-Service -Name "SERVICE-NAME" -Status stopped
In the command, change "SERVICE-NAME" with the name of the service to stop.
- (Optional) Type the following command to force stop a service that results in dependency errors using the previous commands and press Enter: Set-Service -Name "SERVICE-NAME" -Force
Once you complete the steps, the PowerShell command will stop the Windows 11 or app service.
Start a service
To start a service on Windows 11 with PowerShell, use these steps:
- Open Start.
- Search for PowerShell, right-click the top result, and select the Run as administrator option.
- Type the following command to view the available services and press Enter: Get-Service

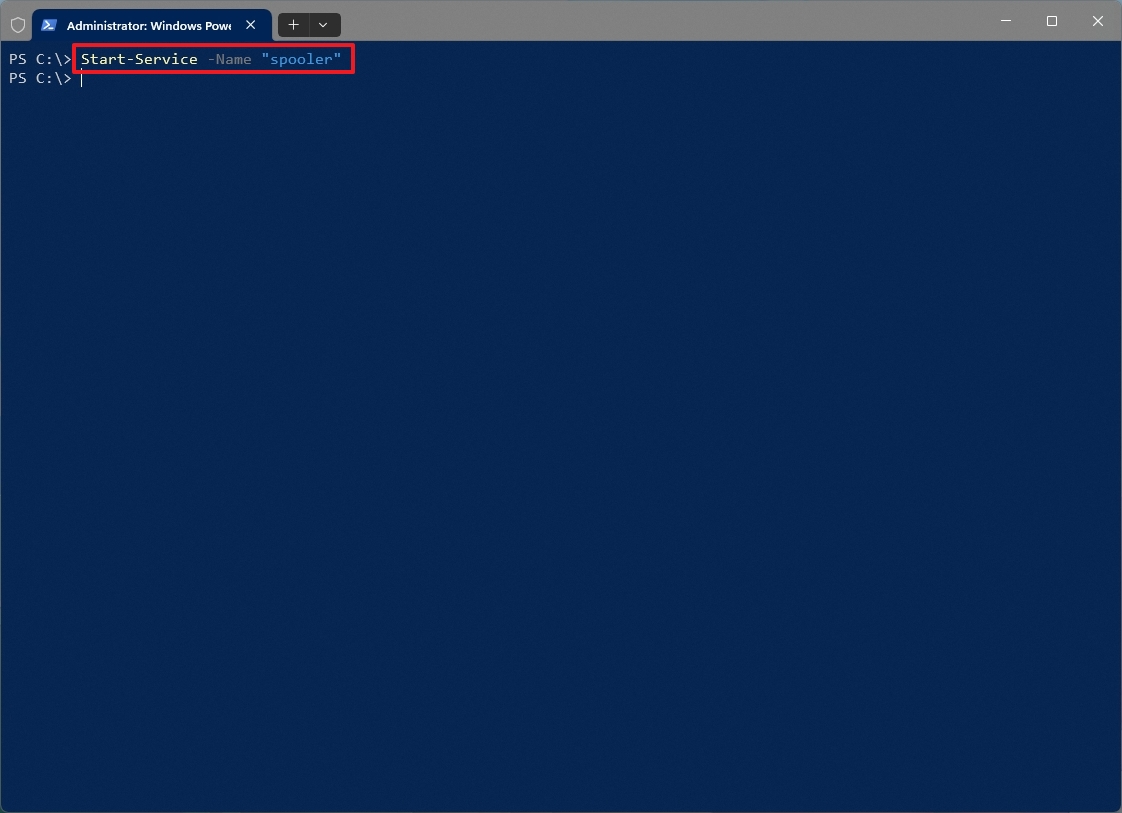
- Type the following command to start a service on Windows 11 with PowerShell and press Enter: Start-Service -Name "SERVICE-NAME"
In the command, change "SERVICE-NAME" with the name of the service to start.This command starts the printer spooler service on Windows 11: Start-Service -Name "spooler"
- (Optional) Type the following variant of the command also to start a service and press Enter: Set-Service -Name "SERVICE-NAME" -Status running
In the command, change "SERVICE-NAME" with the name of the service to start.
After you complete the steps, the command will start the service immediately.
Disable a service
To disable a service with PowerShell commands, use these steps:
- Open Start.
- Search for PowerShell, right-click the top result, and select the Run as administrator option.
- Type the following command to view the available services and press Enter: Get-Service

- Type the following command to stop a service and press Enter: Stop-Service -Name "SERVICE-NAME"
In the command, change "SERVICE-NAME" with the name of the service to stop. If you want to use the service's display name, then replace "-Name" for "-DisplayName" and specify the service name.This example stops the printer spooler on Windows 11: Stop-Service -Name "spooler"
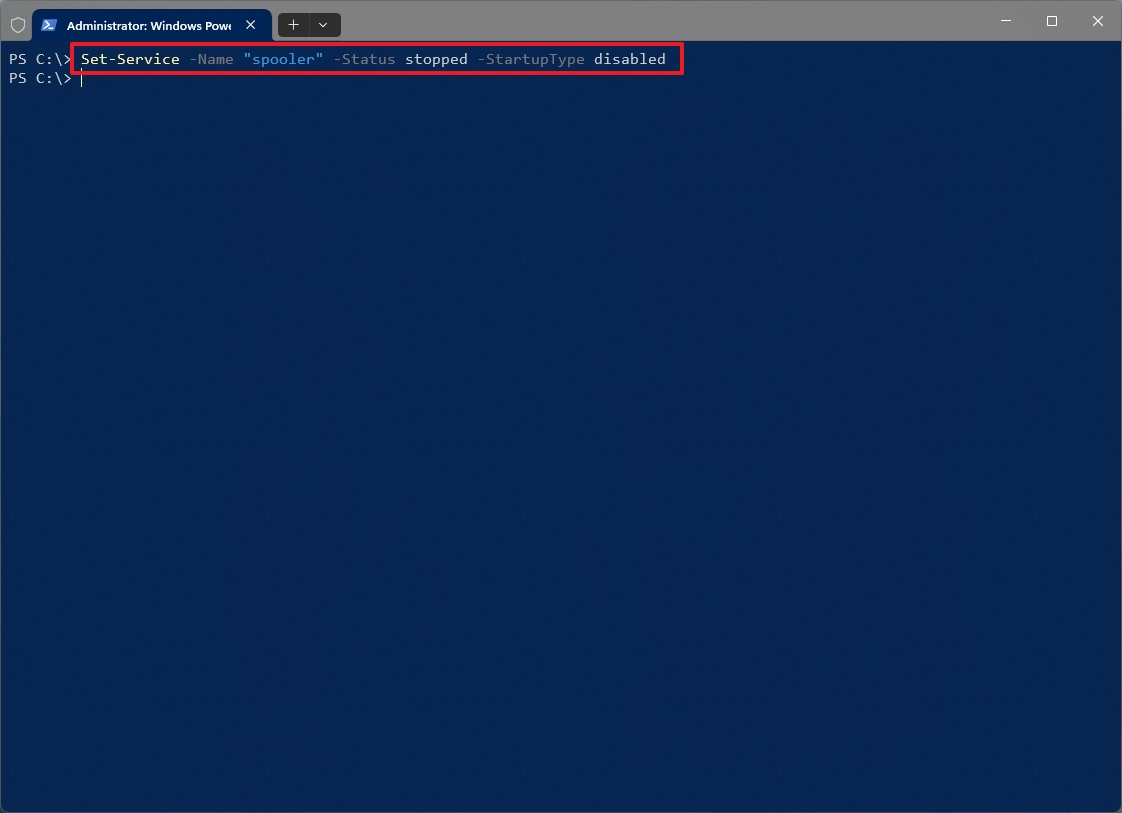
- Type the following command to disable a service on Windows 11 and press Enter: Set-Service -Name "SERVICE-NAME" -Status stopped -StartupType disabled
In the command, change "SERVICE-NAME" with the name of the service to disable. You can also use the "-DisplayName" option instead of "-Name" to use the service's display name. This example disables the printer spooler service: Set-Service -Name "spooler" -Status stopped -StartupType disabled
- Quick tip: If the service has dependencies, you may need to use to the command to stop the service first before you can run the command to disable it.
- (Optional) Type the following command to disable the service without stopping it immediately and press Enter: Set-Service -Name "SERVICE-NAME" -StartupType disabled
Once you complete the steps, PowerShell will disable the service you specified.
Enable a service
To enable a service with PowerShell on Windows 11, use these steps:
- Open Start.
- Search for PowerShell, right-click the top result, and select the Run as administrator option.
- Type the following command to view the available services and press Enter: Get-Service

- Type the following command to enable service and press Enter: Set-Service -Name "SERVICE-NAME" -Status running -StartupType automatic
In the command, change "SERVICE-NAME" with the name of the service to enable. You can also use the "-DisplayName" option instead of "-Name" to use the service's display name. In this case, you may be able to use the display "-DisplayName" option. However, the command may prompt you to enter the name of the service, adding an extra step to the overall process. This example enables the printer spooler service: Set-Service -Name "spooler" -Status running -StartupType automatic
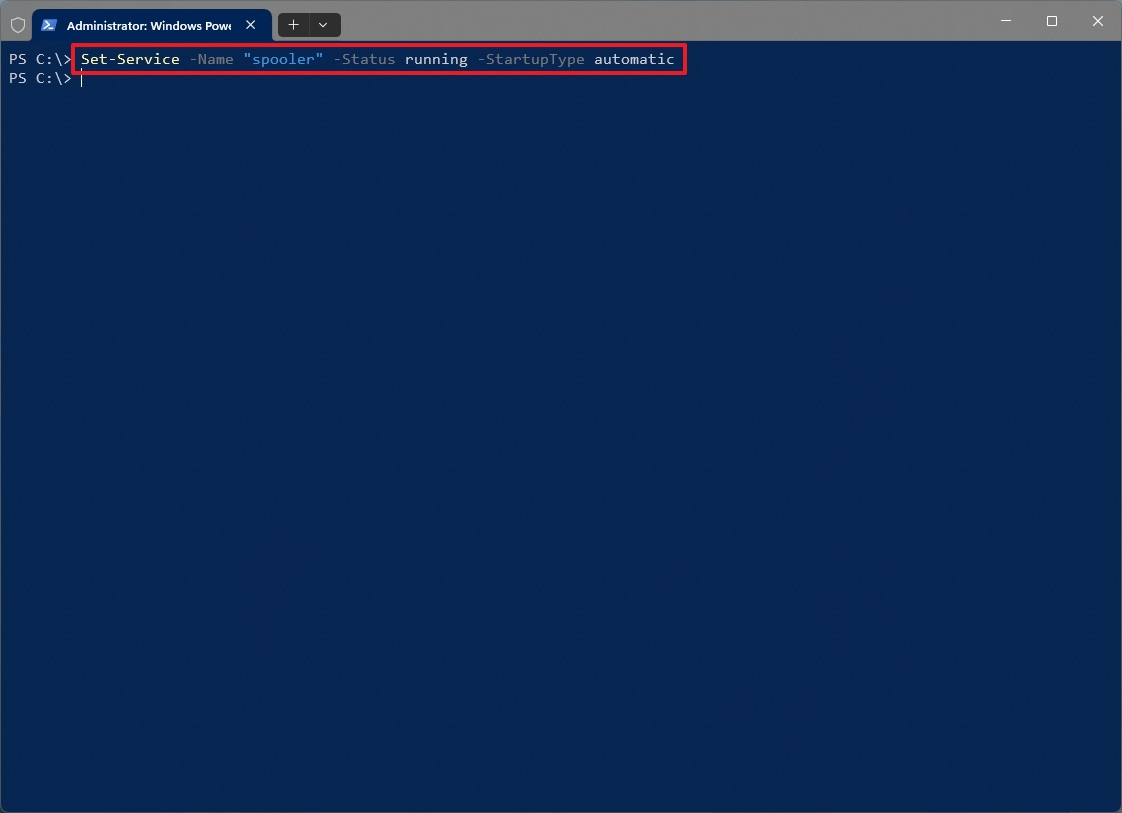
- (Optional) Type the following command to enable the service without starting it immediately and press Enter: Set-Service -Name "SERVICE-NAME" -StartupType automatic
After you complete the steps, the PowerShell command will enable the service on Windows 11.
More resources
For more helpful articles, coverage, and answers to common questions about Windows 10 and Windows 11, visit the following resources:
