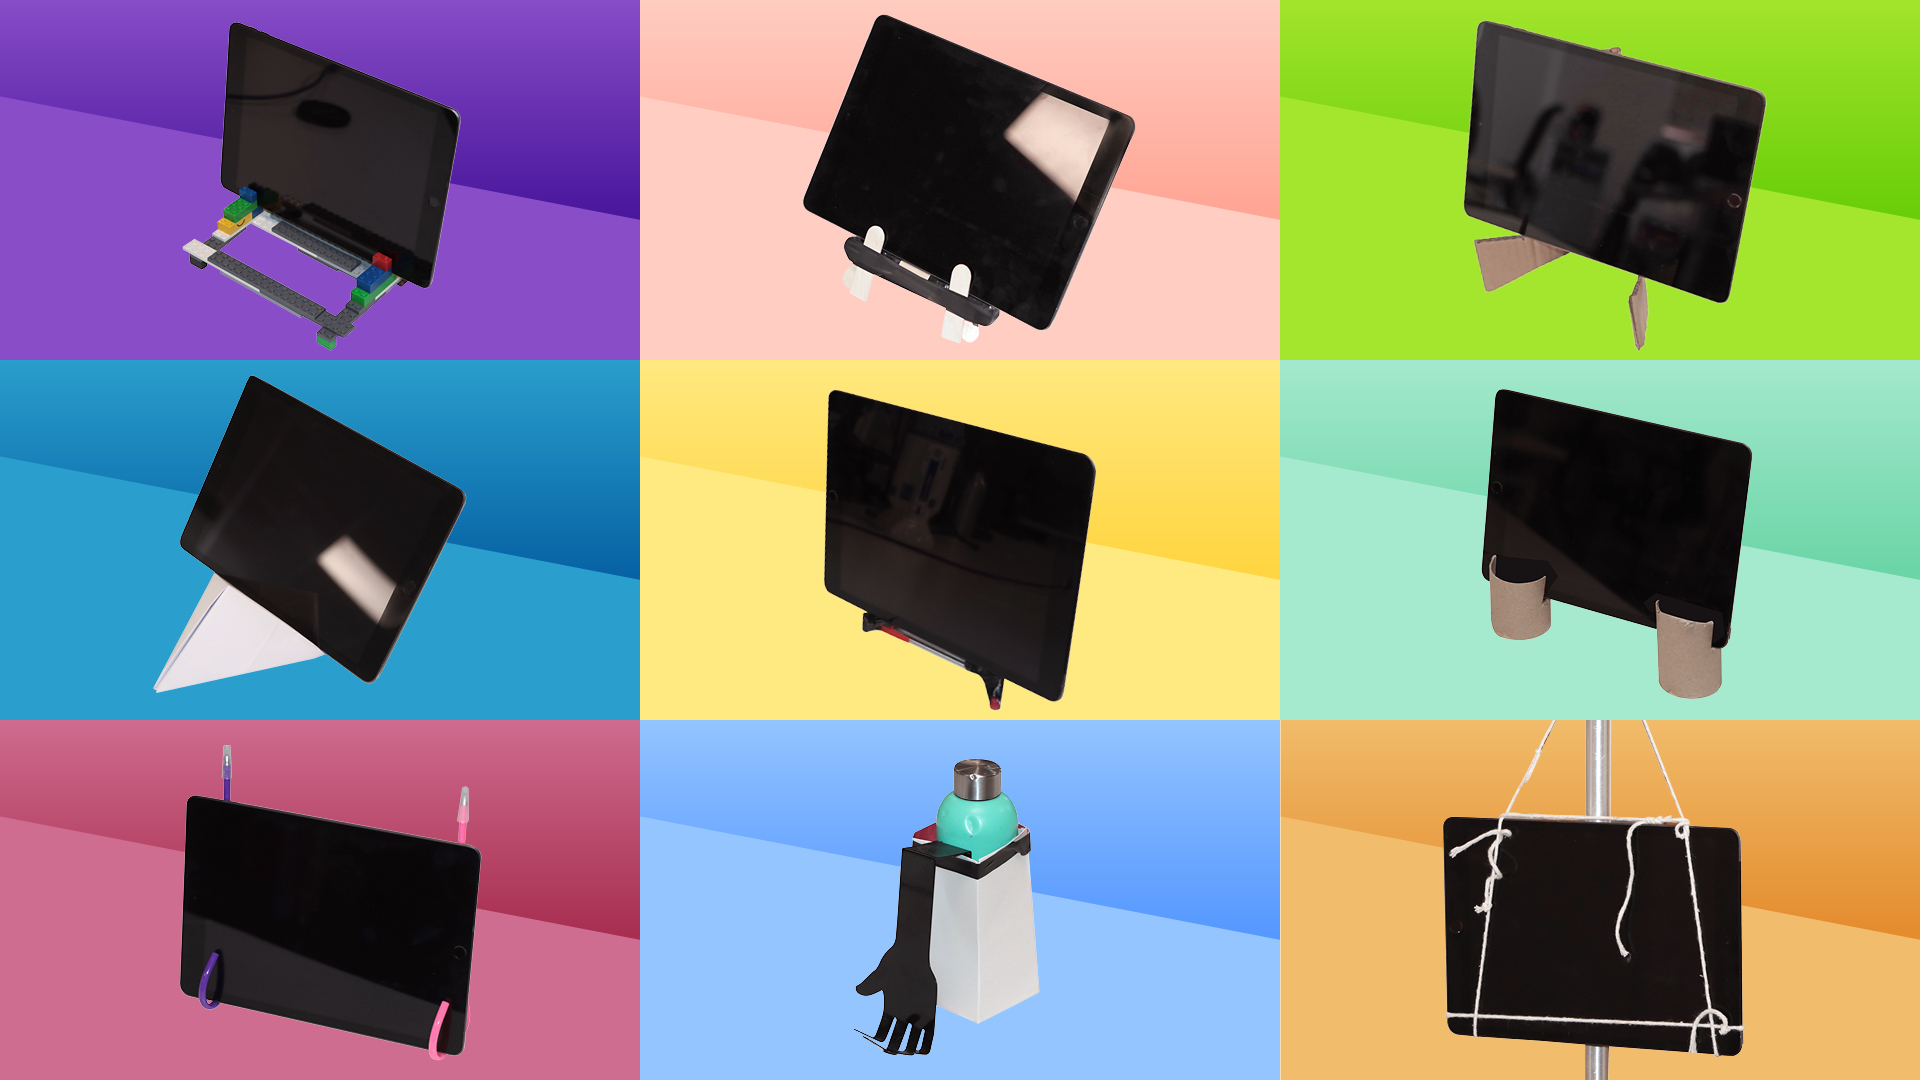
Wondering how to make an iPad stand yourself with simple everyday objects? There are plenty of quality, versatile iPad stands available on the market, but they require you to part with cash – sometimes quite a lot of it. But if you're up for a fun creative project, you could make your own iPad stand without spending very much at all.
Chances are that if you use an iPad without a stand, you'll find your arms getting tired at some point, or you'll have experienced those situations where you need to use your hands for something else, like cooking dinner or holding a hungry baby, while you read on your device. Making an iPad stand could make your life way easier and allow you use your iPad in a totally new way – as a viewing screen, a spare display for Sidecar or a canvas for art.
Below we suggest some simple, affordable ways to make your own iPad stand without breaking the bank by using materials that you'll probably be able to find lying about the house. If you try this tutorial and decide that you're ready to splash out on the real thing, see our extensive guide to the best iPad stands on the market, but in the meantime, here's how to make an iPad stand.
How to make an iPad stand with household items
Disclaimer: please make sure that any iPad stand you make is structurally sound before trying it out on your iPad, we cannot be held responsible for any accidents. Children should consult an adult before using any sharp objects.
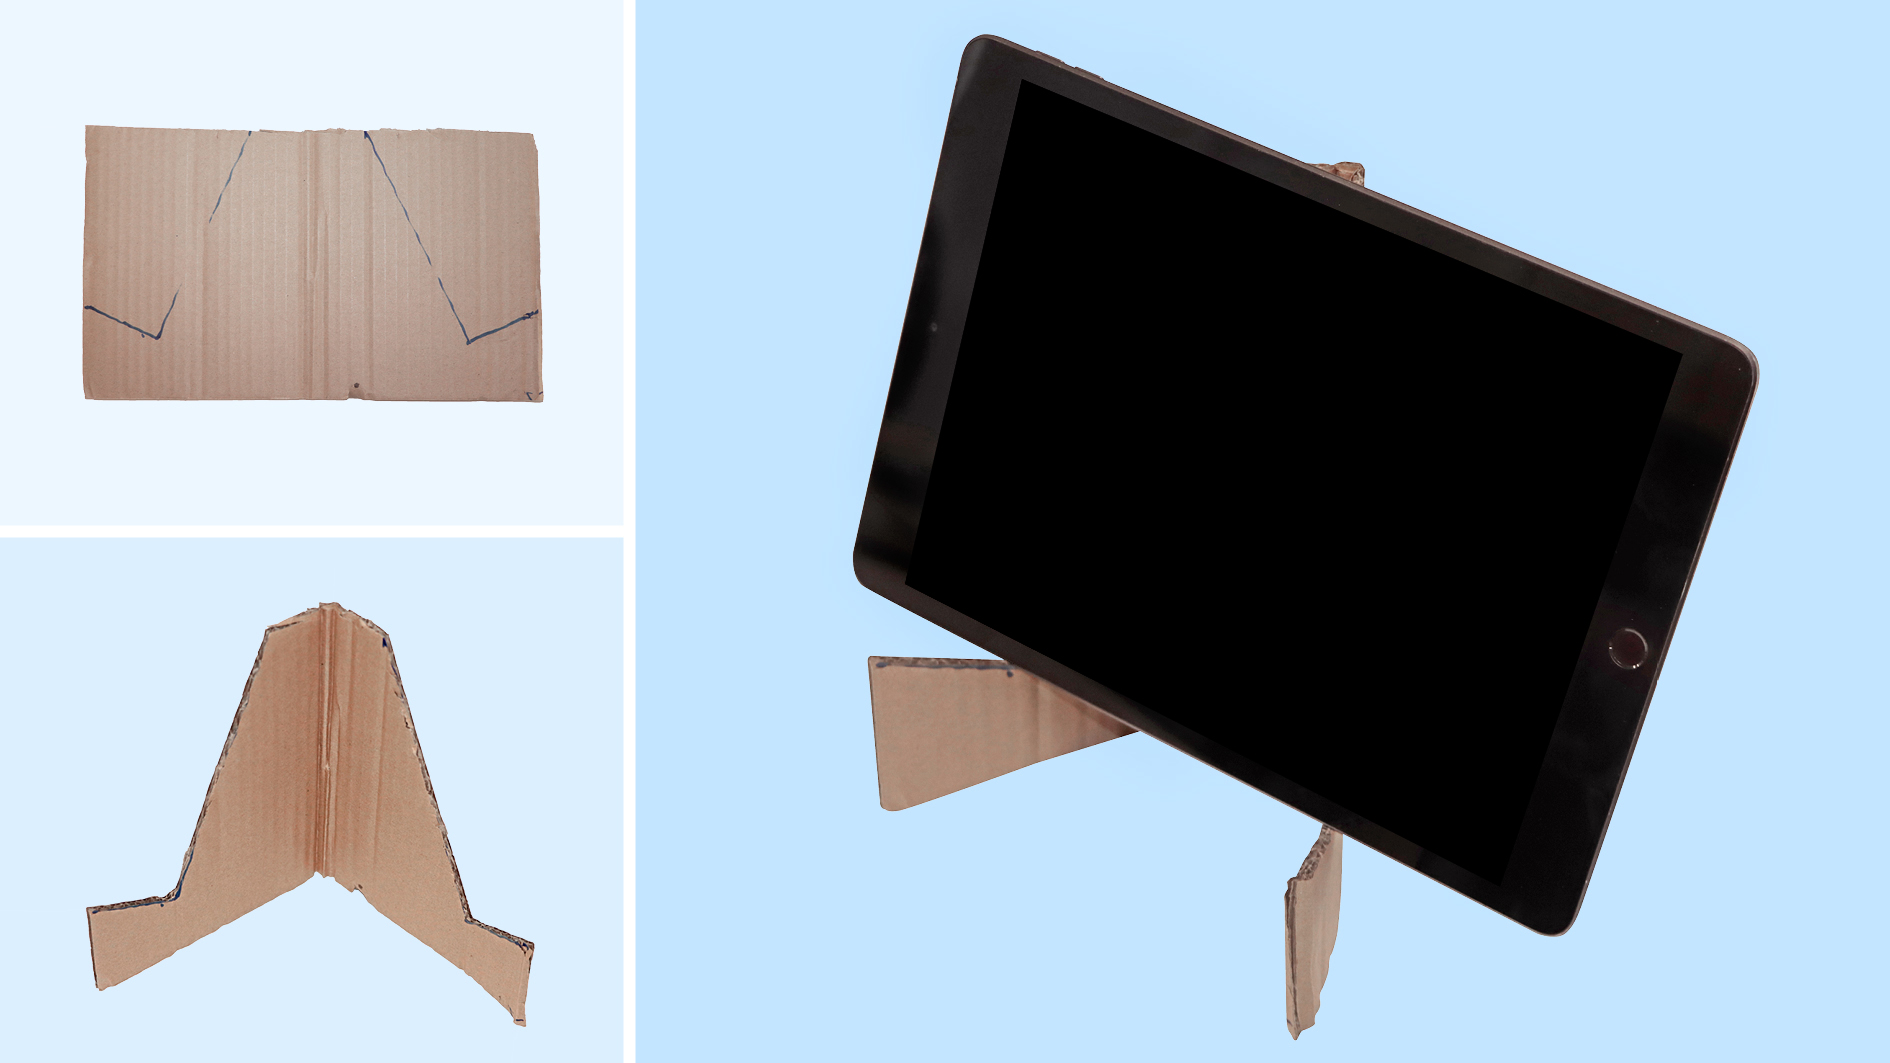
01. How to make an iPad stand with cardboard
How long it will take: 5 mins
What you’ll need: Packaging cardboard, scissors, marker pen (optional).
Although delivery companies claim to be transitioning towards sustainability, we're still inundated by a rising tide of cardboard packaging, which inevitably finds its way into the skip, the recycling bin or that bulging cupboard you can’t face clearing out. The benefit is that we're furnished with a plethora of raw materials with which to exercise our minds: children can jet off to other planets in cardboard box rockets, flaps become cutlasses for pirate duels and cardboard scraps serve for DIY projects, just like this.
This is probably the simplest and cheapest method on this list – it took me about five minutes to go from locating the materials to creating a fully functioning iPad stand.
- If you have a marker pen to hand you can sketch out marks to make the cutting easier and more accurate.
- In the pictured example, I have cut two V-shapes either side of the cardboard, then folded the centre over to use as a hinge. It should be a simple case of standing it up and slotting your iPad into the slot.
- With enough time and more tools, you can create more complicated and dynamic cardboard stands. There are plenty of examples on the internet of people using drills, saws and glue guns to create covers and stands that are nearly as good as the real thing.
- Because of the fragility of cardboard, this should be seen as a temporary fix – be careful not to leave it anywhere steamy, as the cardboard might lose integrity and become as limp as lettuce (lettuce makes a bad material as rabbits might eat it).
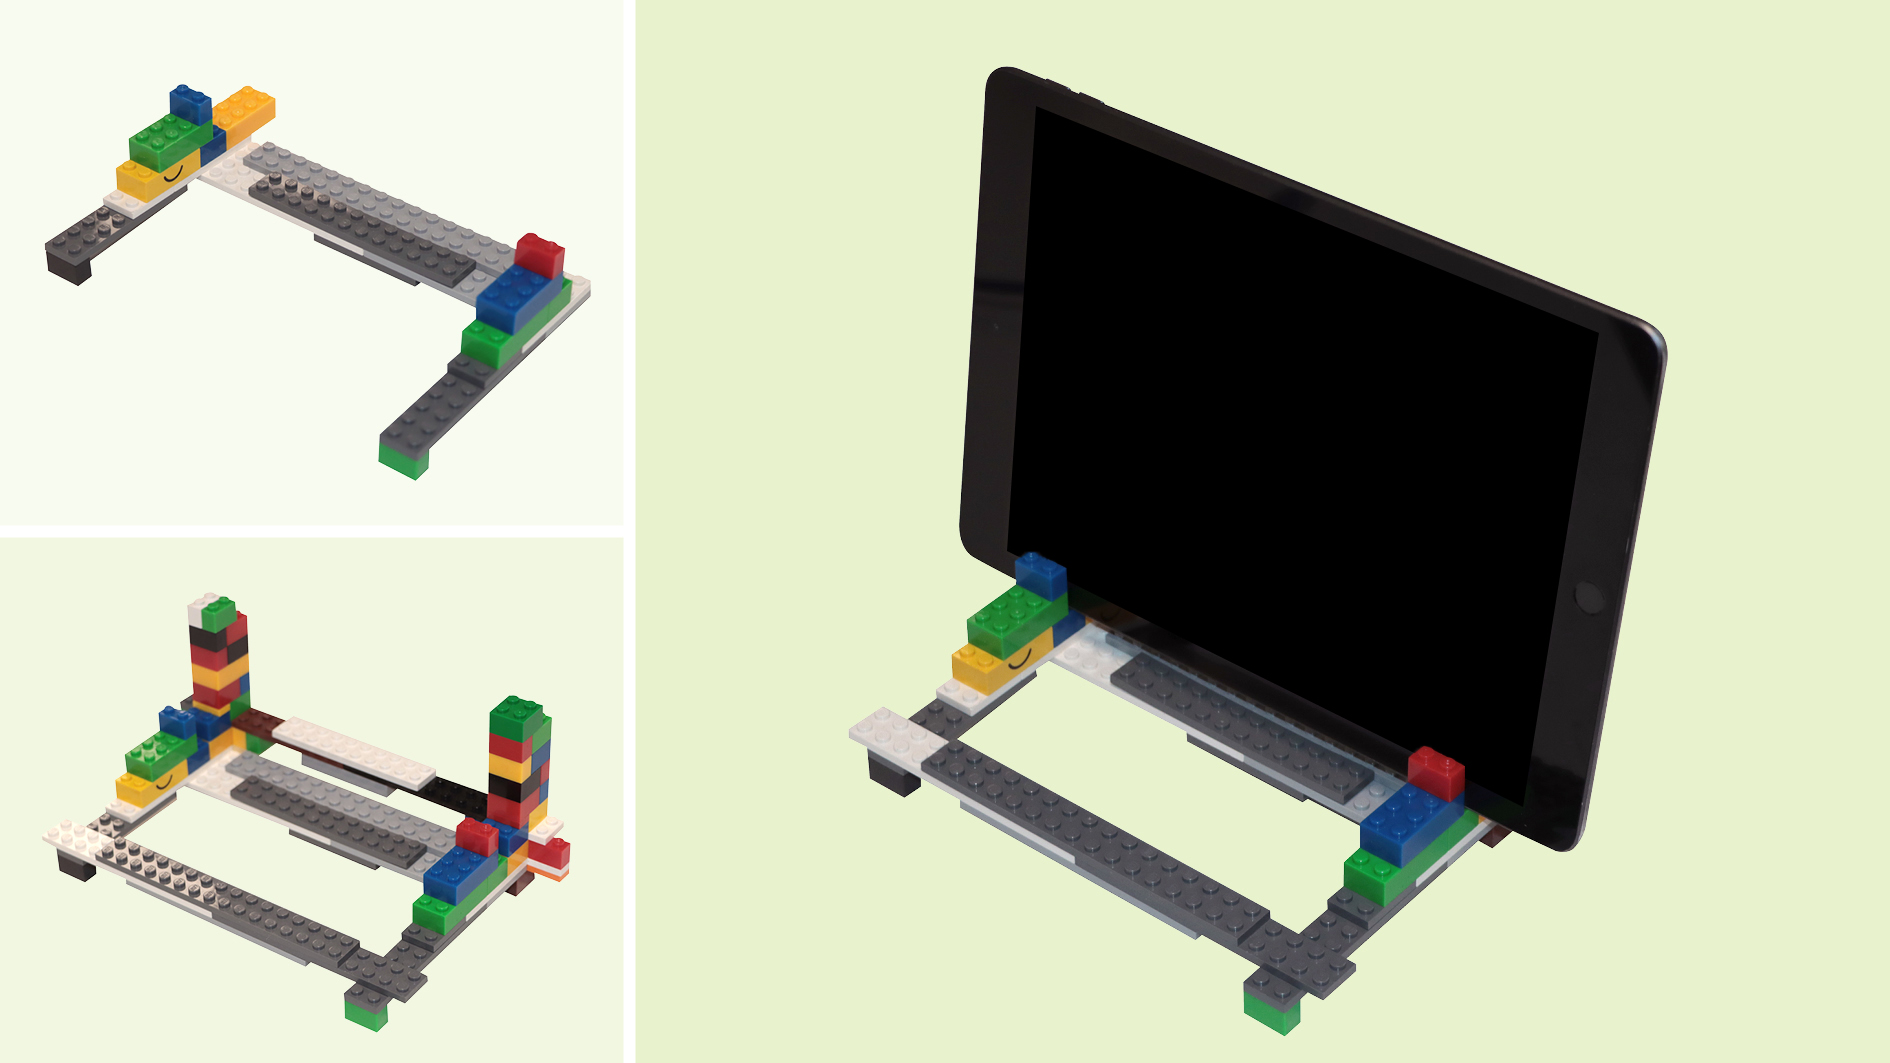
02. Make a Lego iPad stand
How long it will take: 30 mins
What you’ll need: Lego (other brands might be available?)
There are 400 billion lego bricks in the world and eight billion people, so that’s 50 bricks per person – they seem to proliferate in houses like occasional tables, woodlice and dry rot, so you shouldn't have any trouble getting your hands on some. This method is a fun way to spend an afternoon and one you can get the whole family involved in. Why not turn it into a competition?
- Start your structure with a simple base. I used a combination of brick types, trying to keep it as symmetrical as possible.
- Form two back struts – adding cross links will make the whole thing more stable.
- Create the gap for the iPad to sit in. I found ‘two-stud’ blocks perfect for this job, but supported them with sturdier blocks in front.
- Add flatter blocks to give strength to the structure – the more the better.
- You might want to add your own particular flourishes. With lego there is no limit to creativity, so go wild. Some of the newer kits have hinges in, so you can try to create your own folding iPad cover.
- You may like to glue the final structure together to give added strength and longevity to your stand. Just make sure to check with your parents/kids first.
- Don’t forget to leave an obligatory lego brick on the floor to locate at a later date and help you practise your hoppy, sweary dance.
03. Make an iPad stand with lolly sticks
How long it will take: 10 mins
What you’ll need: Lolly sticks (I used eleven), scissors, electrical tape (or another sticking material eg. elastic bands or wood glue)
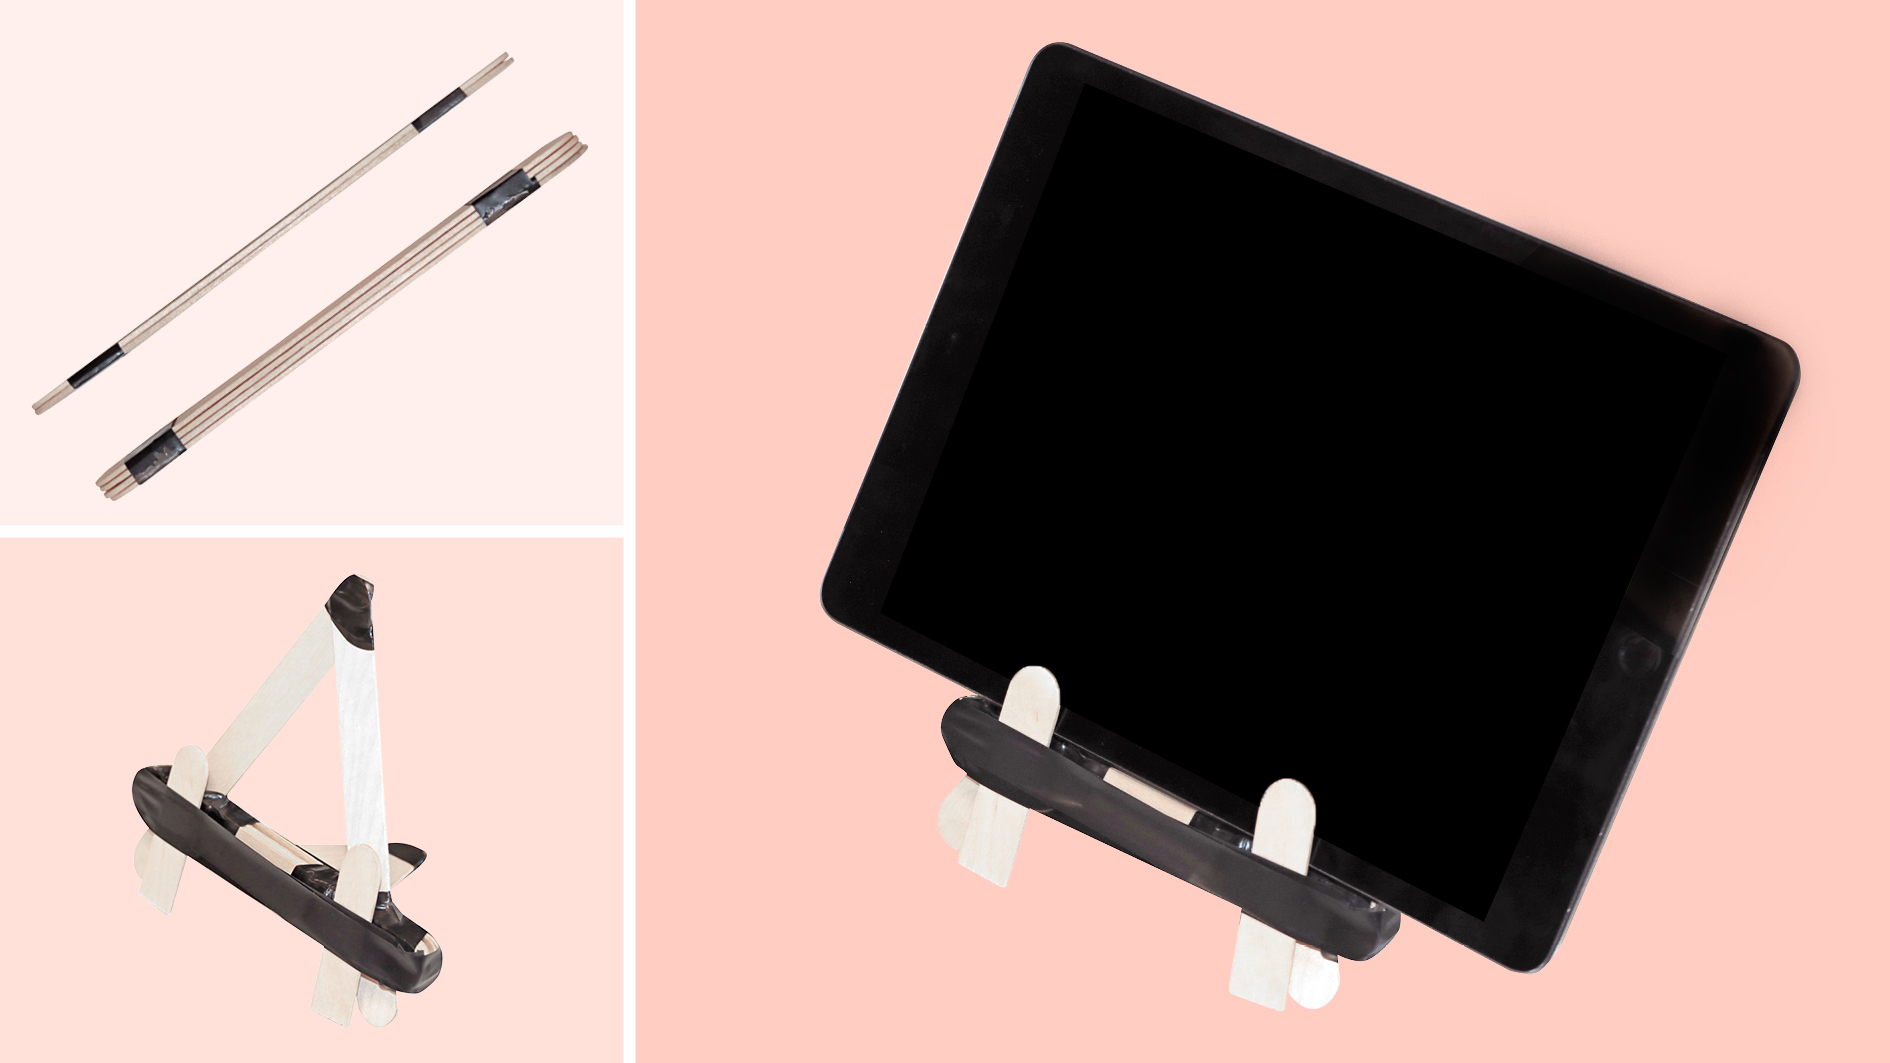
You can buy lolly sticks in most art shops, which saves giving yourself brain freeze and having an iPad stand that smells of bubblegum. For this example, I used electrical tape to attach the sticks together, as it’s cheap and easily accessible, but there are plenty of alternatives, such as wood glue, gaffer tape or elastic bands.
If you’re very clever and have a sharp scalpel, you might be able to cut grooves into each stick and slot them together, like flatpack furniture. When I tried this, the sticks splintered apart, but you may have more luck if you soak them first.
- Stick two bundles of sticks together – one with at least four sticks and one with at least two sticks.
- Create an A-frame and slide it between the two bundles. Stick them all together with tape – the more tape the more likely it will hold.
- Add the feet by sticking two long sticks to the bottoms of the two stacks, emanating out backwards.
- Break a stick in half and tape the two fragments to the front of the smaller stack, creating two prongs to hold the iPad in.
- This creates a smaller frame, suitable for an iPhone or smaller iPad model. You can adjust the method to create a larger frame for larger models.
04. 3D print an iPad stand
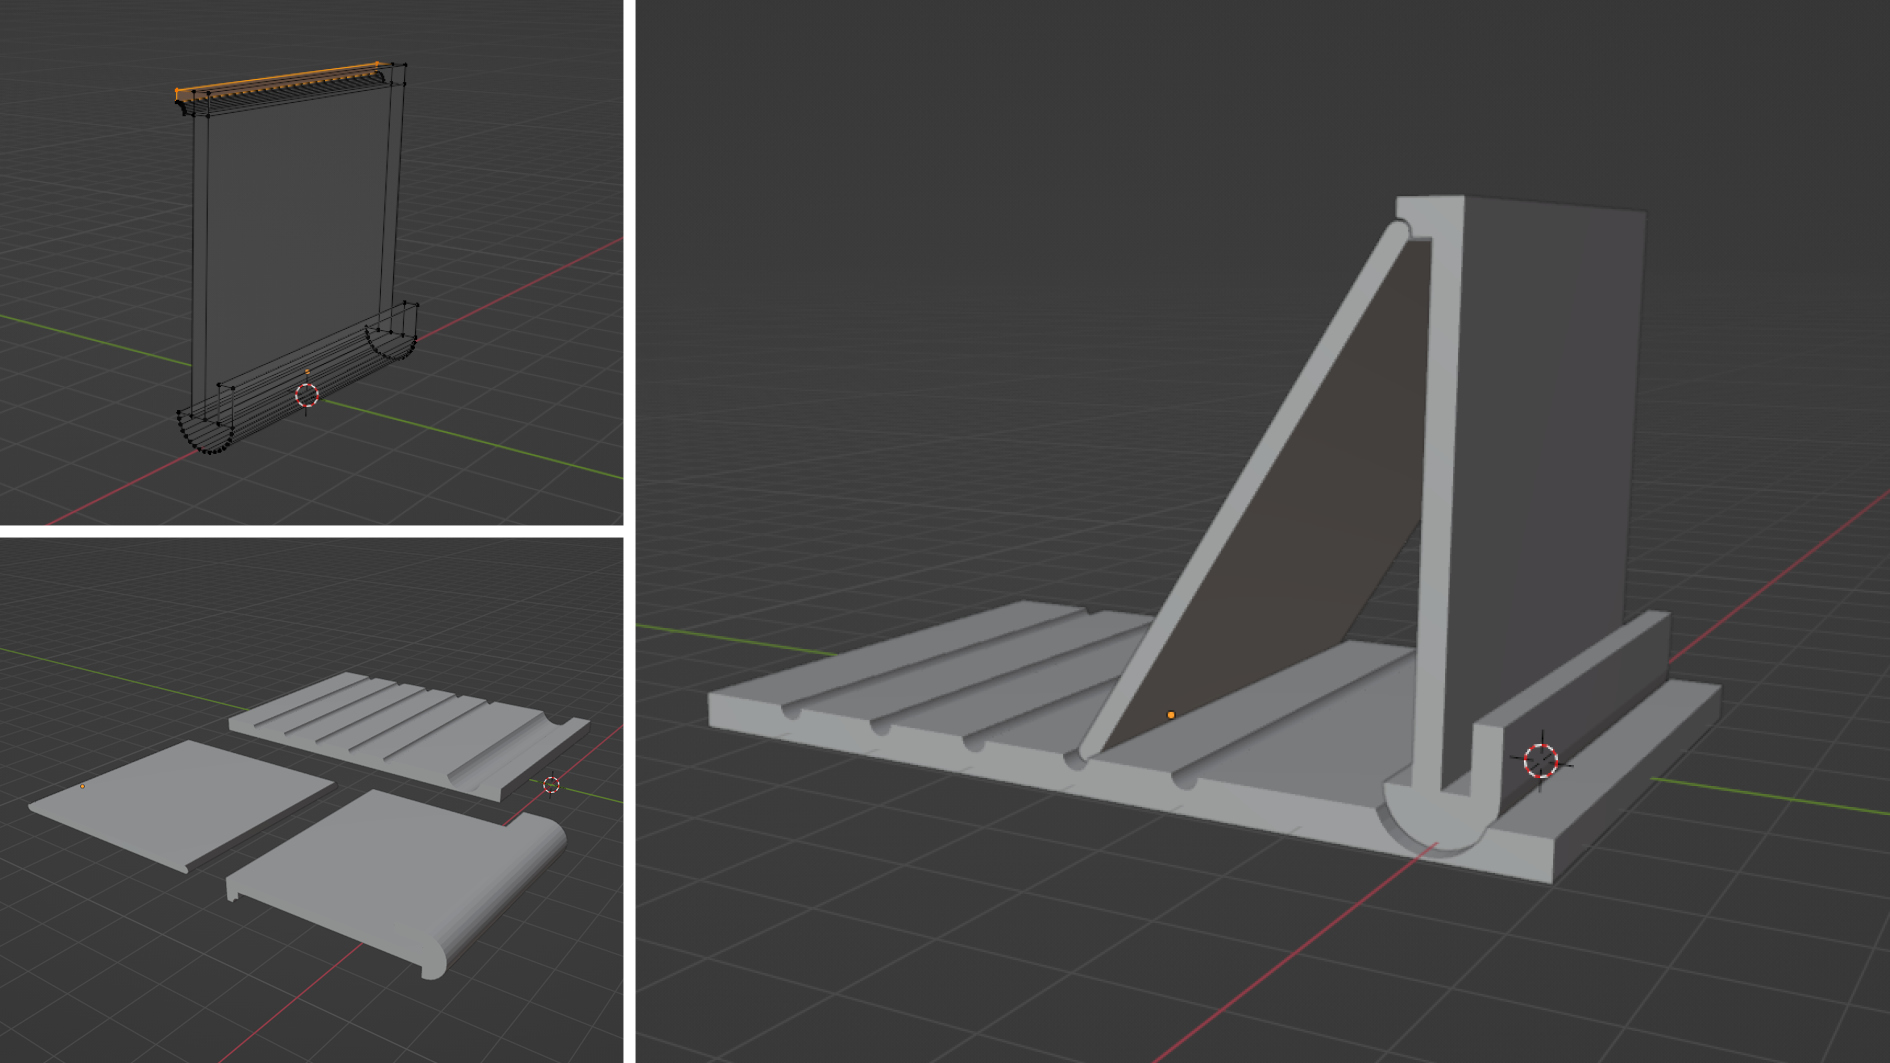
How long it will take: 30 mins (depending on your ability)
What you’ll need: A 3D printer, template (downloaded) or 3D software (to create your own)
The future is here and it’s multi-dimensional – if you already own a 3D printer then you’re probably surrounded by plastic totems of your printing career. 3D printing lets you design and produce your own items and has become more affordable in recent times.
I created this model in Blender, which is free to download, but other 3D software is also available. There are also plenty of websites where you can download free templates, such as Thingyverse or Printable.
- Open a new Blender file and create basic shapes. The main stand is a cylinder cut in half with added loop cuts, then a face is extruded up to create the back.
- I used the Boolean modifier and cylinders to cut out struts from the base of the stand.
- The arm is a simple cube with rounded ends.
- Make sure all your model is sturdy and doesn't have any thin struts that aren't being held up.
- Once you have the look you're trying to achieve, try to clean up your mesh to make it manifold, removing any overlapping internal cavities. You can do this by using Boolean modifiers. Some 3D printing software will try to clean up your mesh, but it's best to have it as clean as possible when you export it.
- Export as an stl file.
- Send to a 3D printer.
05. Make an iPad stand with pens or pencils
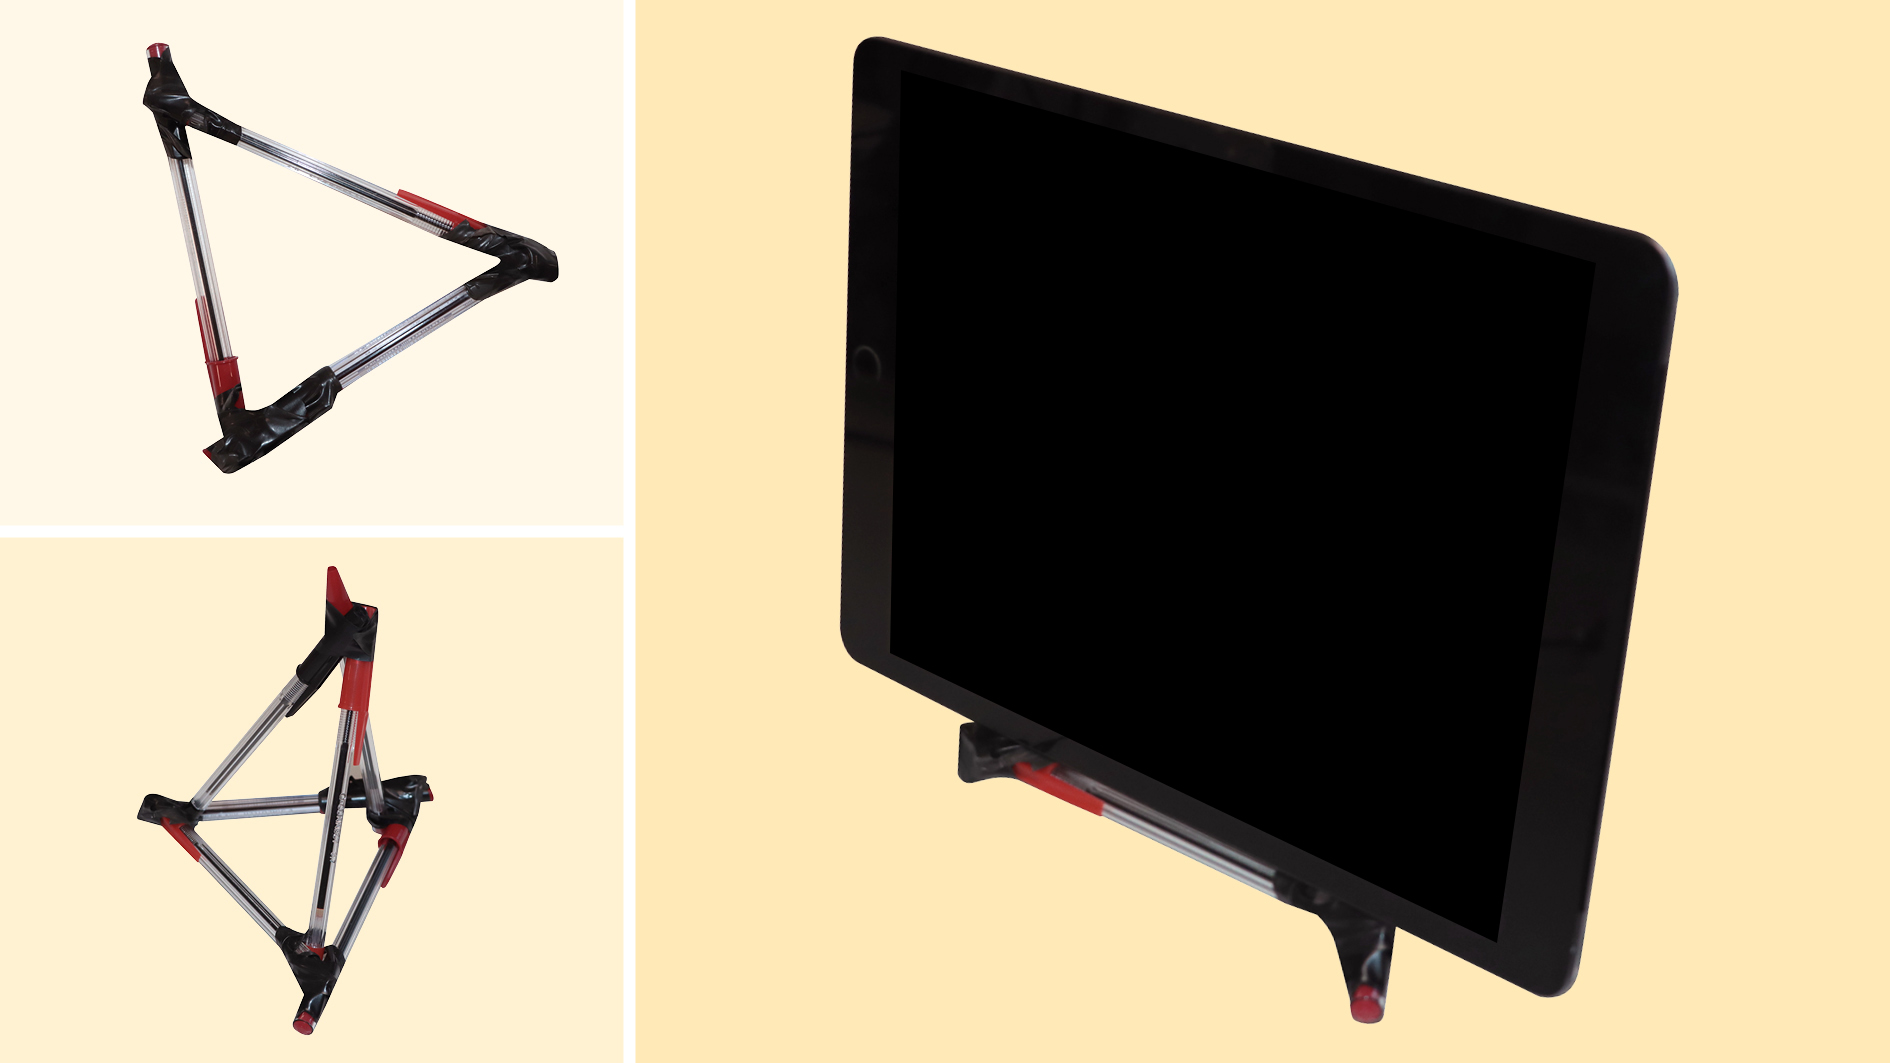
How long it will take: 10 mins
What you’ll need: Pens or pencils, electrical tape (or other attaching material eg. elastic bands)
In 1945, a pen cost around 188 dollars, but these days they are ten-a-penny – just go to any conference and people will throw them at you. Chances are you might have a few lying around that you could use to make an iPad stand.
- Form the base by strapping three pens together in a triangle shape.
- Create a pyramid shape by taping three pens together at the top.
- Attach the two structures together at the base to create a pyramid shape.
- Your structure may already have a natural shelf created, but if not, then add a final pen for the iPad to sit on.
06. Origami iPad stand
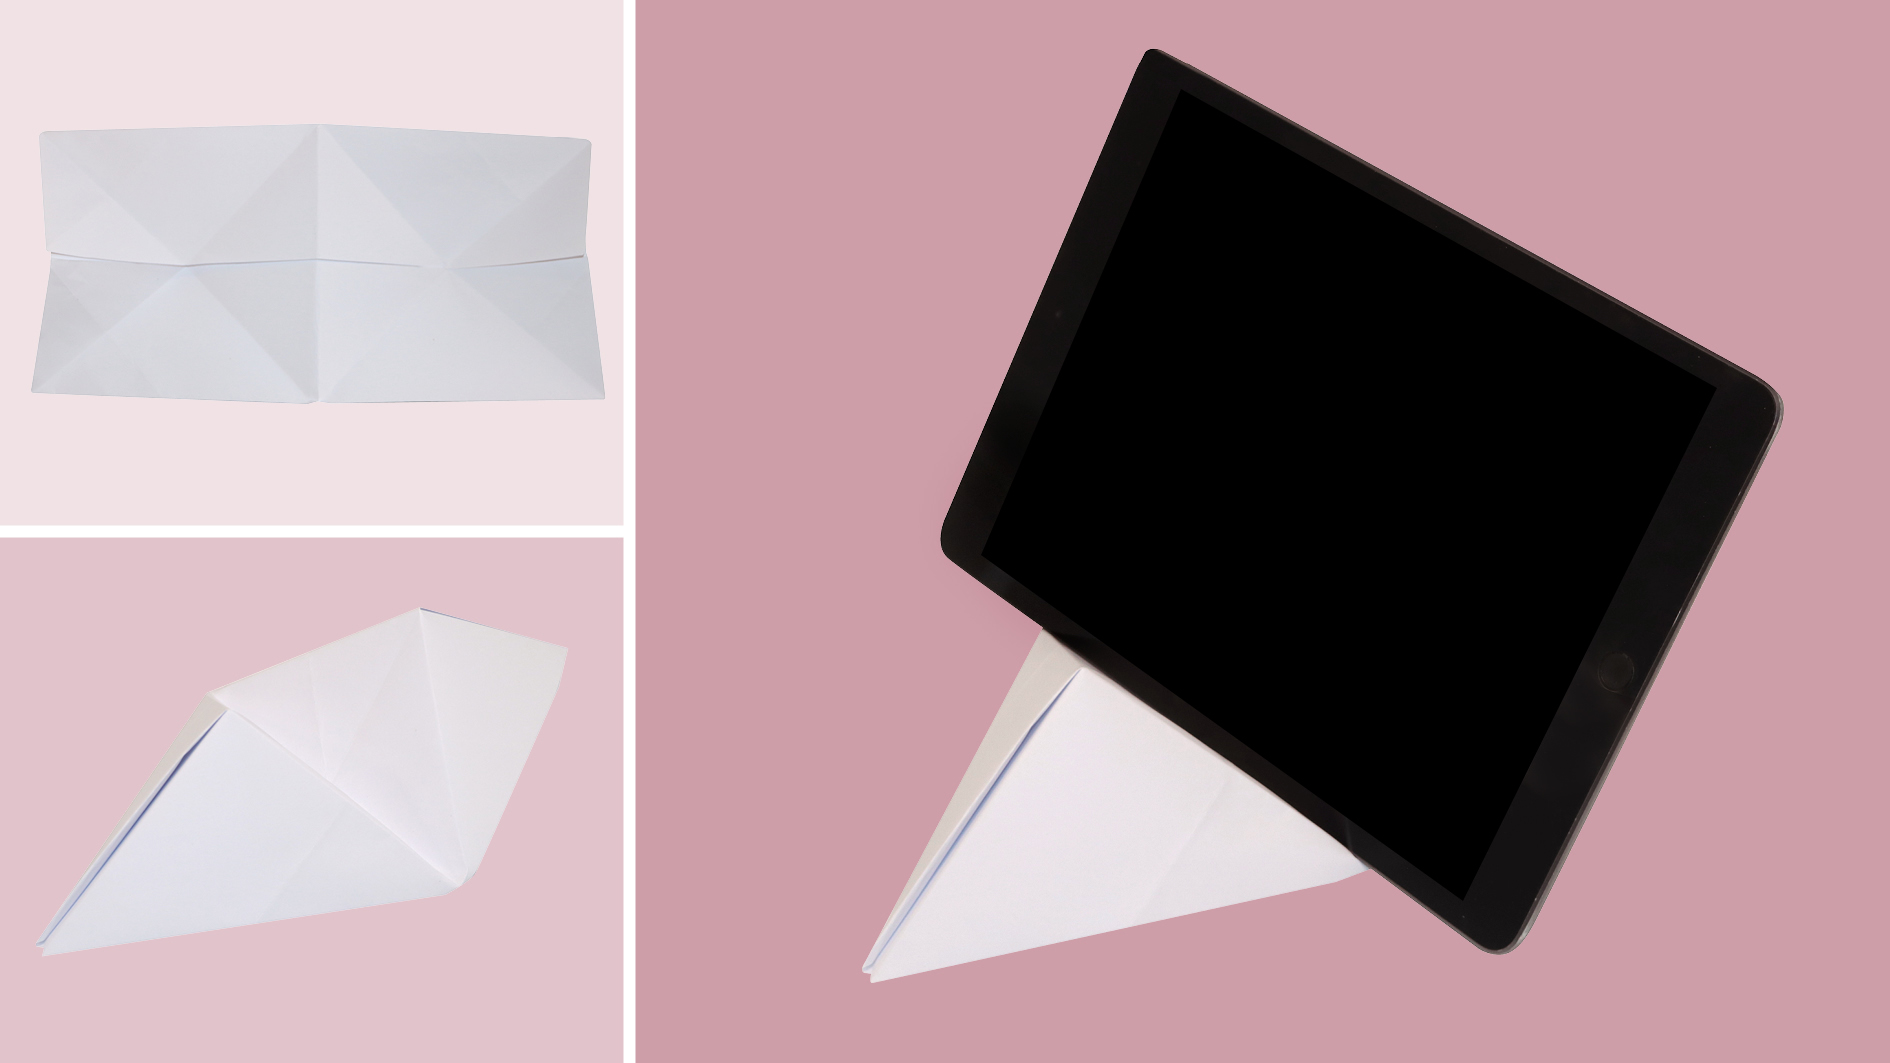
How long it will take: 5 mins
What you’ll need: Paper, scissors.
Paper folding is an ancient and precise art requiring a logical mind, able to deliberate complex geometrical and spatial patterns in the fold of a page. I followed a tutorial from Simple Steps, on YouTube, to create this paper iPad stand. It was simple to follow and didn't take long at all.
- Cut an A4 page down to a square, with each side equal to 210mm (the short side of the A4).
- Follow an online tutorial or find a book that describes the steps of folding required.
- This is a simple shape, so you can use thicker card for a sturdier stand.
- More complicated shapes are possible, but take longer and require more skill and concentration.
07. Get creative
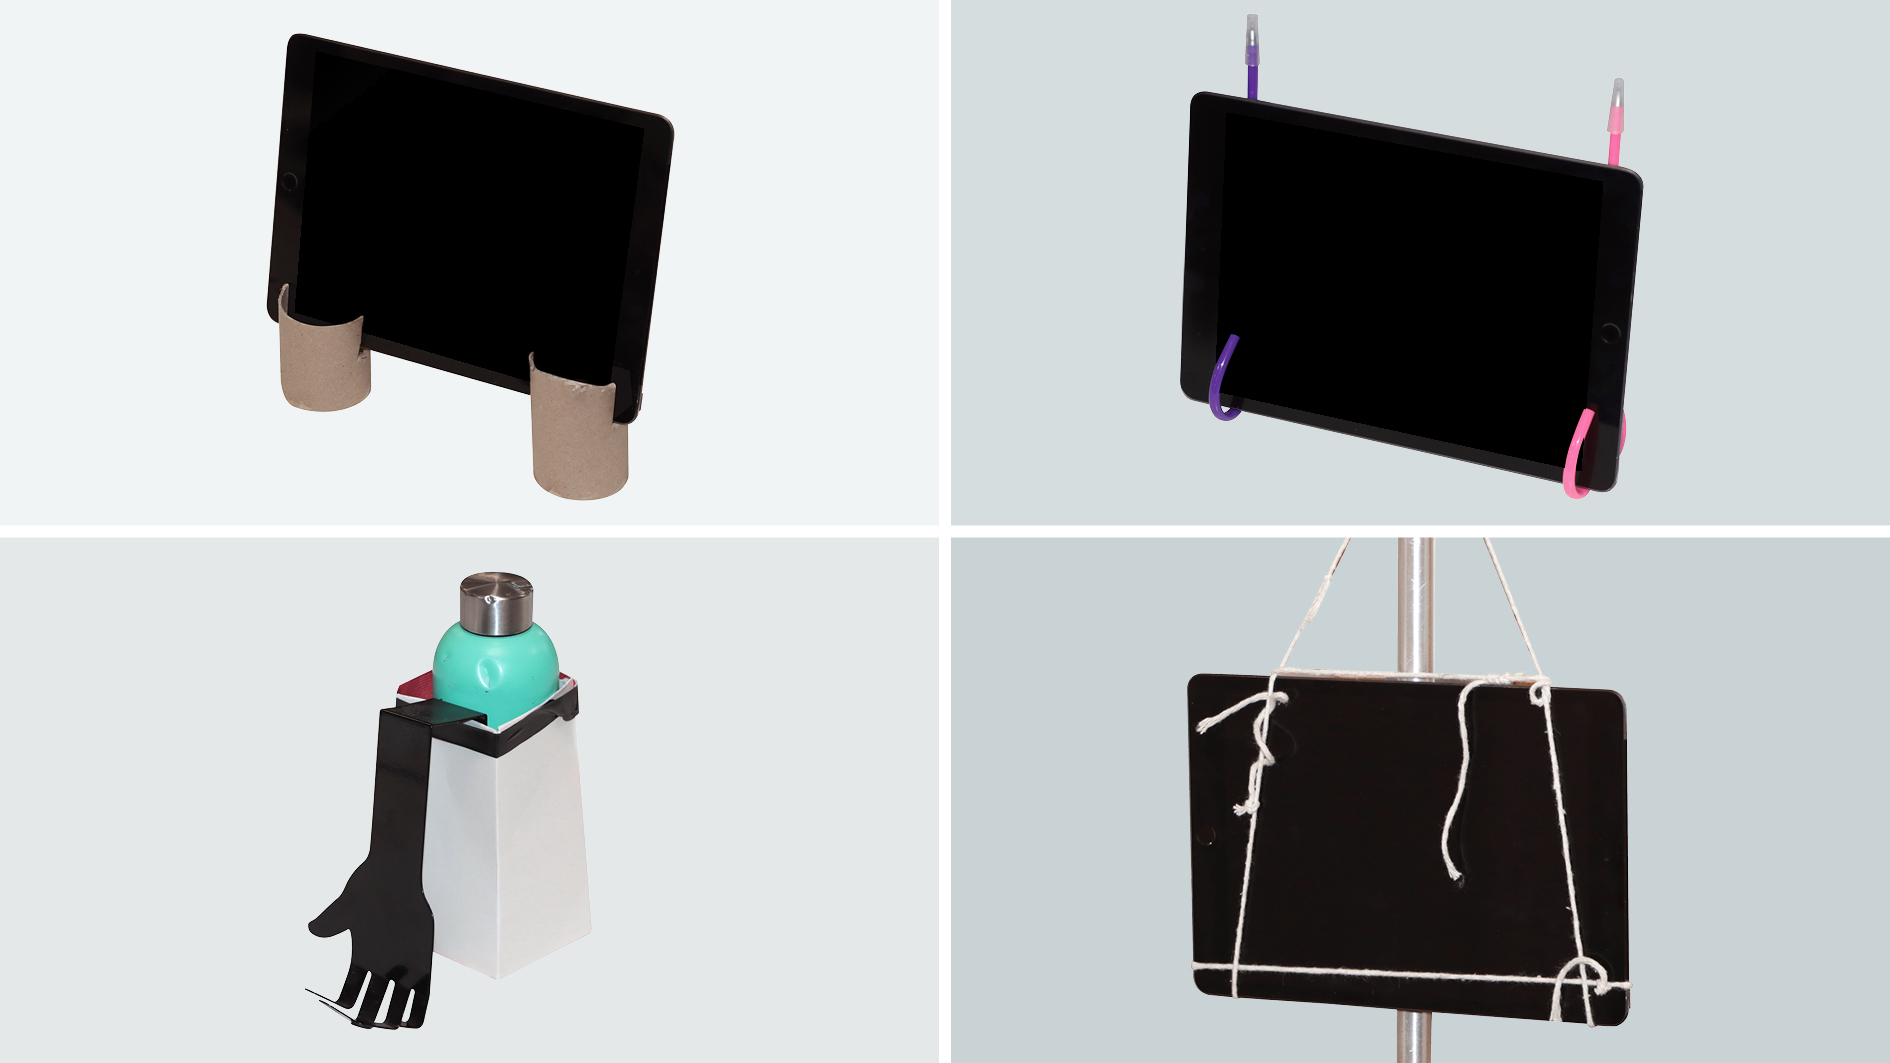
What you’ll need: Household items eg. cardboard packing tube, egg box, string.
When I was writing this, I walked around my flat, noting anything that might prove useful in building an iPad stand. My first epiphany was that I need a really good spring clean, but my second was just how many things I'm surrounded by that could be turned towards this purpose. In fact, it ruined a whole weekend, as I wandered around town mentally reforming objects as iPad stands before my very eyes. Here is a list of household items that can be used as an iPad stand:
- A mini bean bag.
- An egg box.
- Pens – these love heart ones were such a clean, simple solution I couldn't leave them out.
- Cardboard tubes – would avoid toilet roll for hygiene's sake. Thick packing tubes are the best, though they take a bit of practice to cut through.
- String. A good knitter will be able to assemble some kind of cosy papoose to nestle the iPad into. This is useful for hanging on cupboards.
- Coat hanger. If you still have any of the old-style metal coat hangers lying around, these can be bent and twisted into a stand that can either lie flat or be hung from the hook.
- Either a music stand or an instrument stand can be repurposed to hold an iPad.
- Old credit cards can be bent and cut to form basic feet for a stand.
- Books
- Various stationary – bulldog clips, folders, paperclips.


