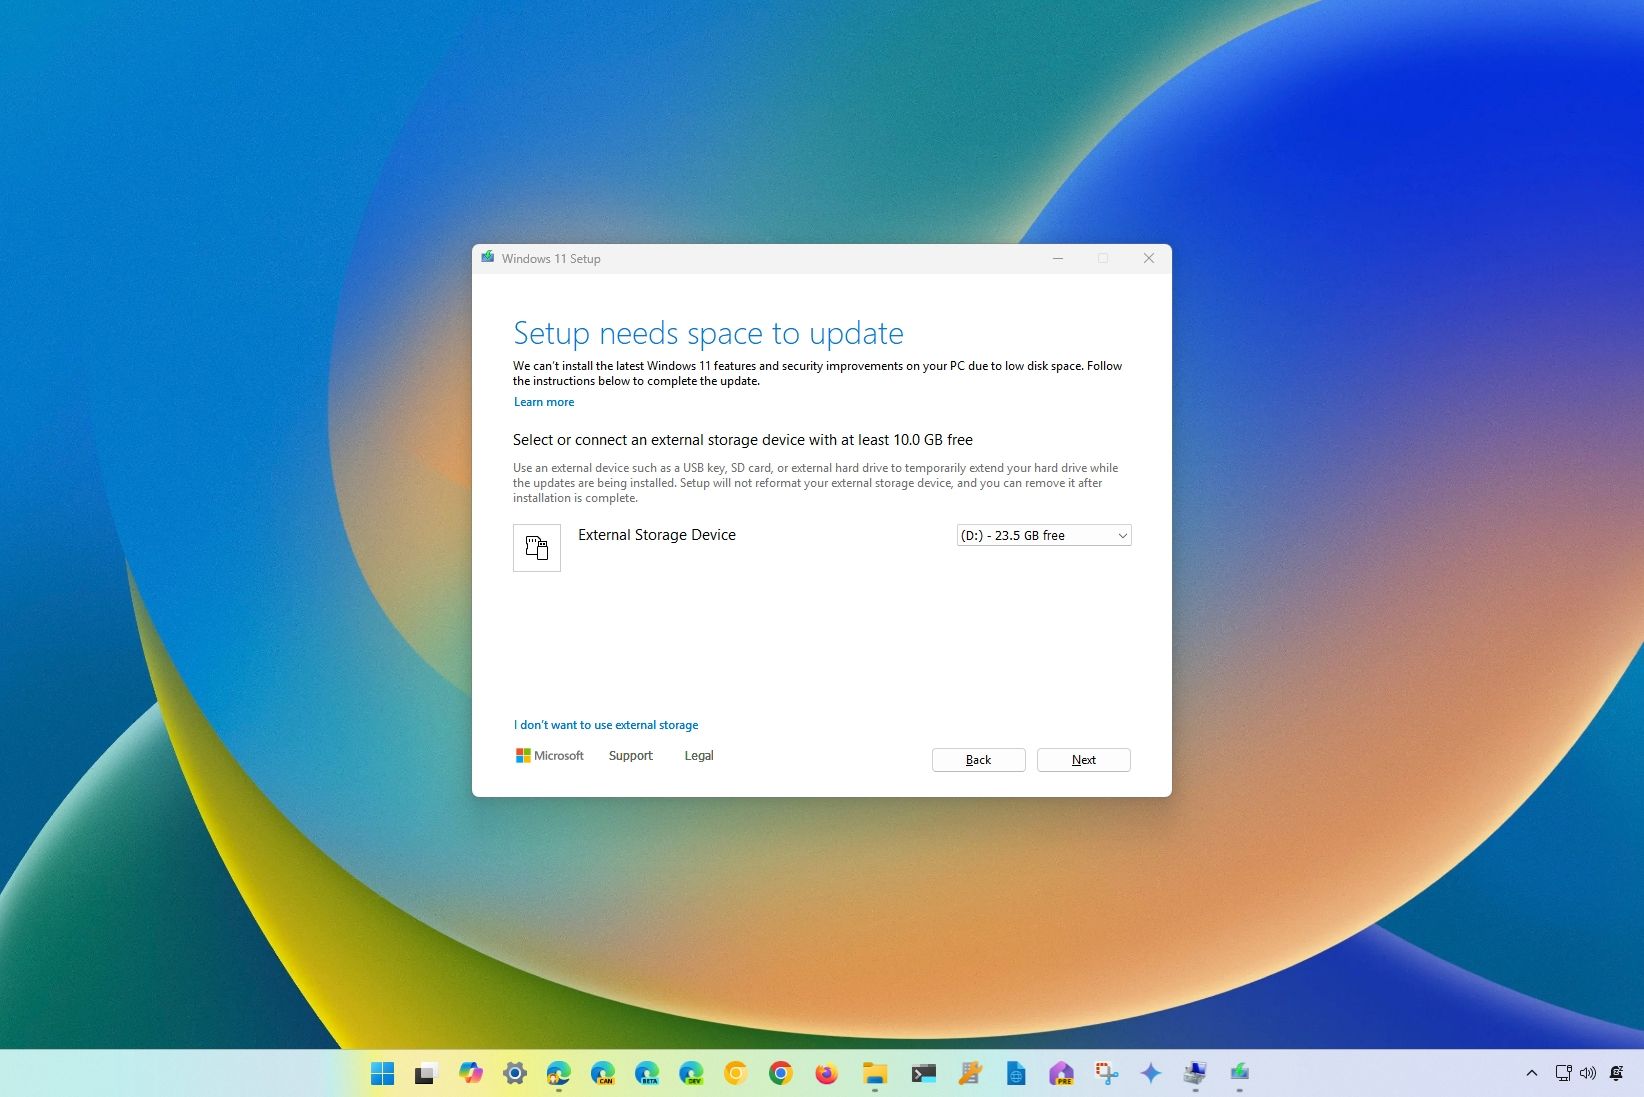
Although your computer may meet the minimum hard drive requirements to install Windows 11, the setup may still get stuck because there is not enough space to process the upgrade. If this is your case, you can use a pair of USB flash drives to circumvent this problem.
Windows 11, like its predecessor, has "reserved storage" to reserve part of the drive space to prevent issues during an update. However, the device still needs some additional space to process the upgrade, so you will need workarounds to continue with the setup.
In this how-to guide, I'll explain how to install Windows 11 on devices with limited disk space. These instructions apply to upgrading to a newer version of Windows 11 or when you want to upgrade from Windows 10 to 11.
How to install Windows 11 on PCs with low storage capacity
If you have a laptop or other device with limited storage capacity, you can still upgrade to Windows 11. You will only need to go through some additional steps with different components.
Hardware requirements
As part of the preparation process, you will need the following:
- Another computer to create a bootable drive.
- Two empty USB flash drives, each with at least 16GB in size.
- Two free USB ports on the computer.
- If the device has a Micro-USB or Type-C port, you must have a USB adapter to convert the port to a standard USB connector for the flash drive (unless you have a USB-C flash drive).
- If there is only one free USB port, you will also need a USB hub with at least two ports.
Windows 11 USB flash drive creation
To create a Windows 11 installation media, connect a USB flash drive to the secondary computer, and use these steps:
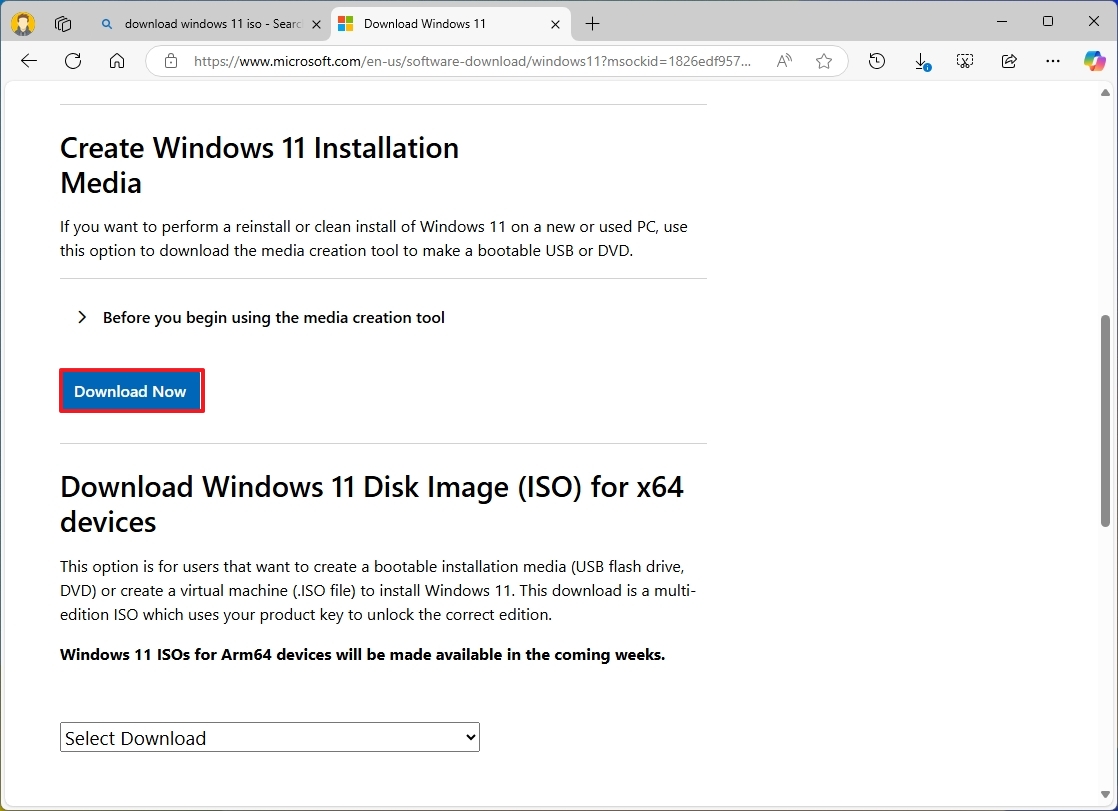
- Open Windows 11 download page.
- Under the "Create Windows 11 Installation Media" section, click the Download now button to save the file on the device.
- Double-click the MediaCreationTool.exe file to launch the tool.
- Click the Accept button to agree to the terms.
- Click the Next button.
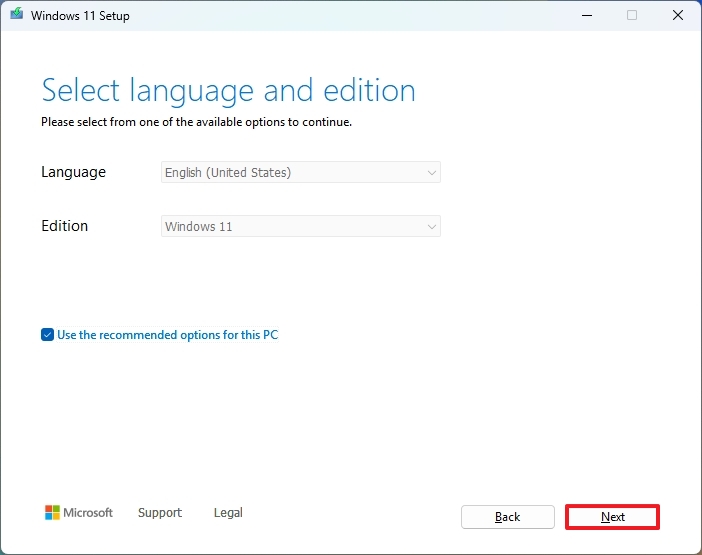
- Select the "USB flash drive" option.
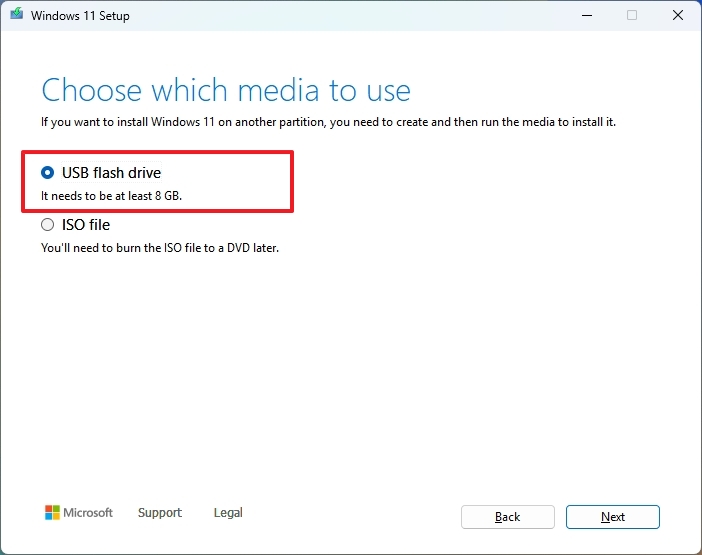
- Click the Next button
- Select the USB flash drive.
- Quick tip: If the device is not on the list, click the "Refresh drive list" option to make it available.
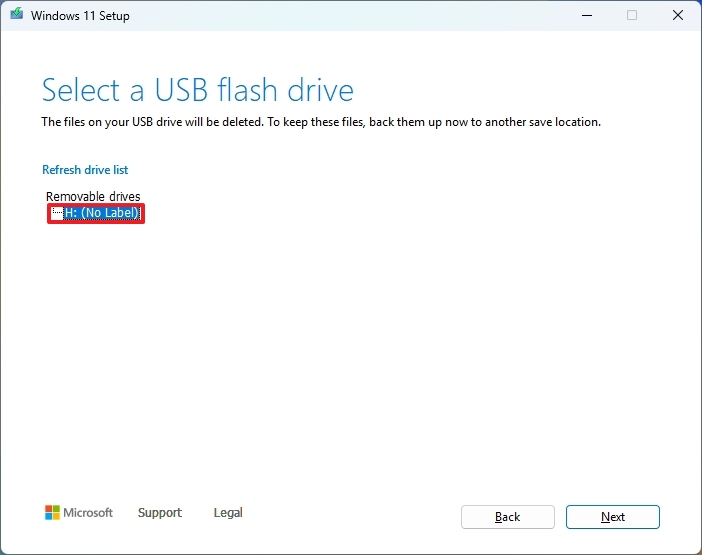
- Click the Next button.
- Click the Finish button.
Once you complete the steps, the tool will download the files to create a bootable media to install the operating system on a computer with limited capacity.
Windows 11 installation process
To install the initial release of Windows 11 on a computer with limited storage, use these steps:
- Connect the USB converter cable or the USB hub to the computer to be upgraded (if applicable).
- Connect the Windows 11 USB flash drive and the other empty USB flash drive.
- Open File Explorer.
- Quick tip: You can quickly open File Explorer from Start or using the "Windows key + E" keyboard shortcut.
- Select the This PC tab from the left pane.
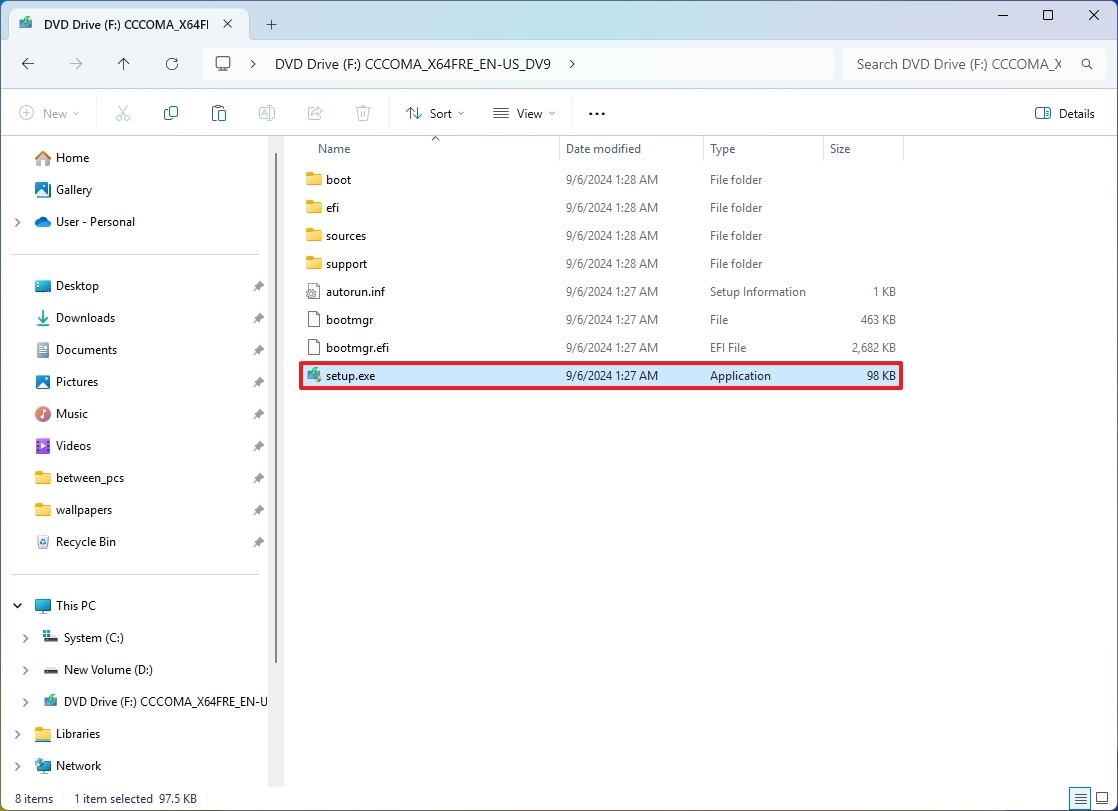
- Under the "Devices and drives" section, double-click the USB flash drive with the Windows 11 files.
- Double-click the setup.exe file to launch the Windows 11 setup.
- Click the Accept button (if applicable).
- Click the Next button.
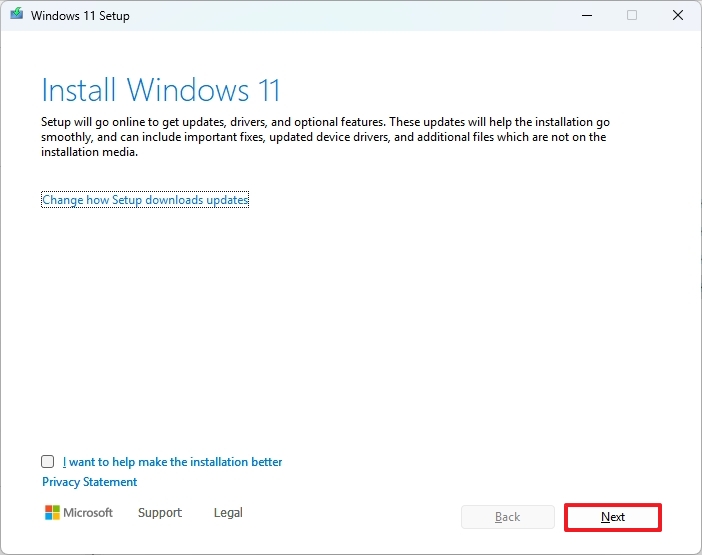
- Click the Accept button for the "Applicable notices and license terms" page.
- Check the option to keep your files and apps (if applicable).
- Click the Next button.
- Under the "Setup needs space to update" section, use the "External Storage Device" drop-down menu and select the empty USB flash drive.
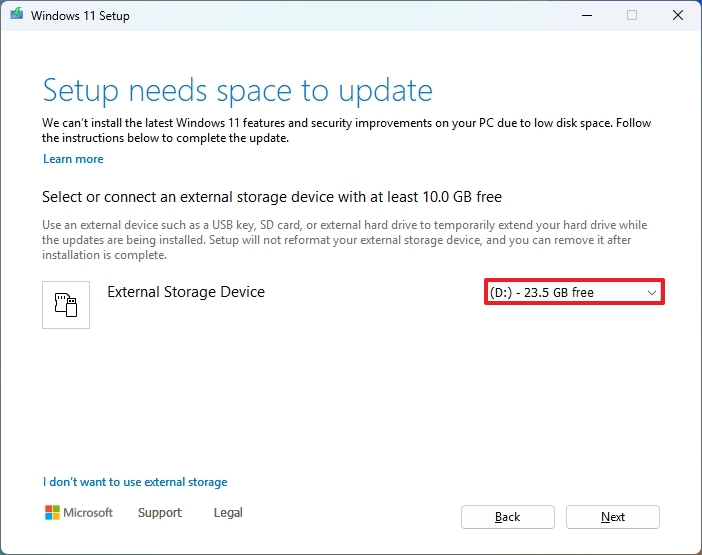
- Quick note: While you can use an external drive as temporary storage for the installation, the computer's internal hard drive may still require some minimum free space to proceed with the upgrade. If you have to free up even more space, use these instructions or use the "Compact OS" command-line tool (see below).
- Click the Next button.
- Click the Install button.
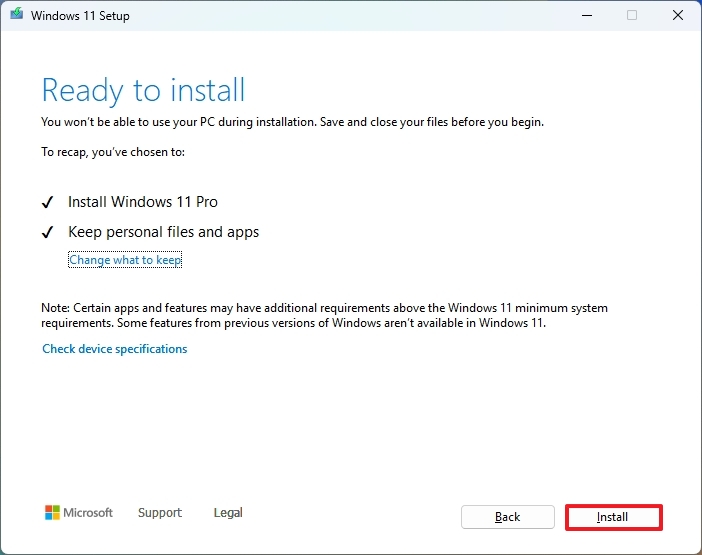
- Continue with the on-screen instructions to complete the installation process (if applicable).
After you complete the steps, the setup will proceed with the upgrade to the latest version of the operating system.
Shrink current setup (optional)
Alternatively, you can also use "Compact OS," a command-line tool designed to compress and reduce the footprint of the Windows setup and applications.
Warning: This is a friendly reminder that modifying system files is risky and can cause irreversible damage to your installation if you do not do it correctly. Before proceeding, it is recommended that you make a temporary full backup of your PC.
To shrink the size of the current installation of Windows, use these steps:
- Open Start.
- Search for Command Prompt, right-click the top result, and select the Run as administrator option.
- Type the following command to compress the installation of Windows 10 and press Enter: compact.exe /compactOS:always
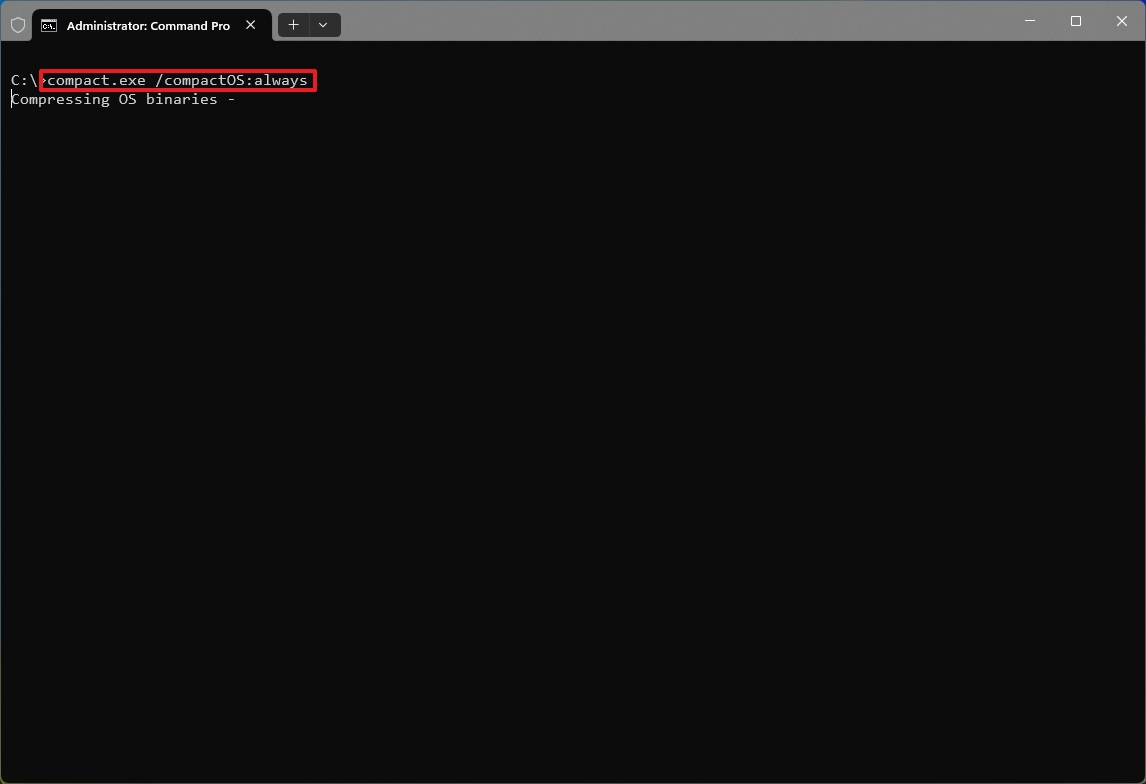
After you complete the steps, the installation footprint will be reduced, giving you around 2GB of extra storage that may help you continue with the setup.
You can always revert the changes after the upgrade using the same instructions, but in step 3, use the "compact.exe /compactOS:never" command.
More resources
For more helpful articles, coverage, and answers to common questions about Windows 10 and Windows 11, visit the following resources:

