Originally created by Guido van Rossum in 1991, Python is a versatile programming language used by makers on the Raspberry Pi, system administrators in the data center, Industrial Light and Magic to bring our movies to life and behind the scenes at NASA.
Python is a great language to learn, and thanks to the Raspberry Pi for the past thirteen years there have been countless tutorials covering the gamut of programming projects.
Whether you are a Python veteran, a “pythonista” or a complete newcomer to the language, installing Python on Windows is an easy task. In this how to we will walk you through installing Python 3 on Windows (including how to install via the Microsoft Store) and show two editors, one for beginners and the other for intermediate and advanced users, and how you can get coding with this fantastic language.
Installing Python 3 on Windows 10 and 11
The installation process for Python 3 on Windows is simple, with only a couple of extra steps that we have to follow. These steps enable us to access Python from anywhere on our system and install software using its built-in package manager, pip. Installing Python in this manner enables the creation of projects that work with the operating system, for example notifications and automated system tasks.
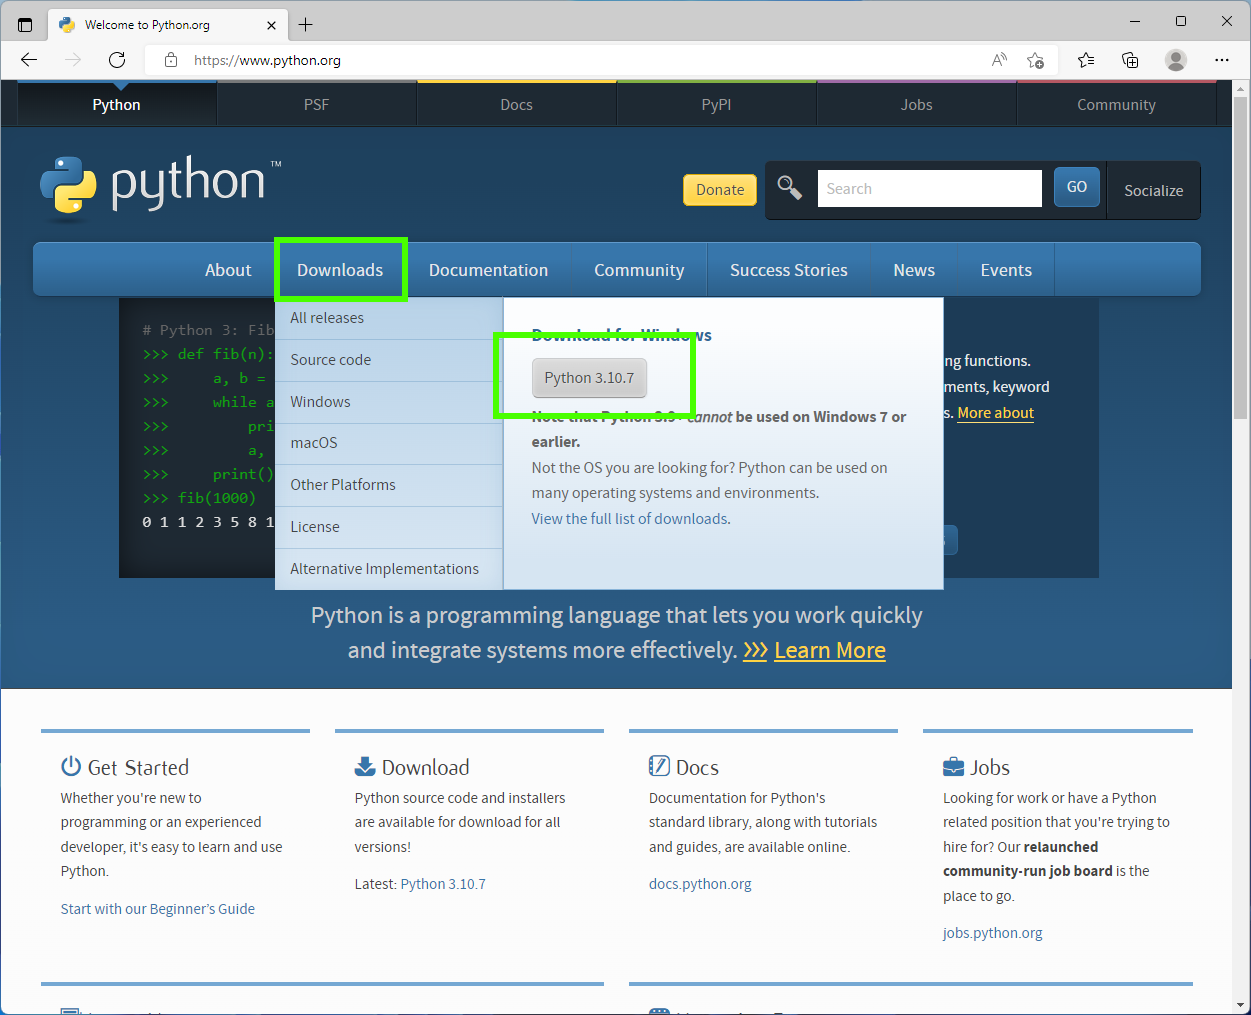
1. Open a browser to the Python website and download the latest stable Windows installer. In the screenshots you will see Python 3.10, which was the latest version at the time of writing.
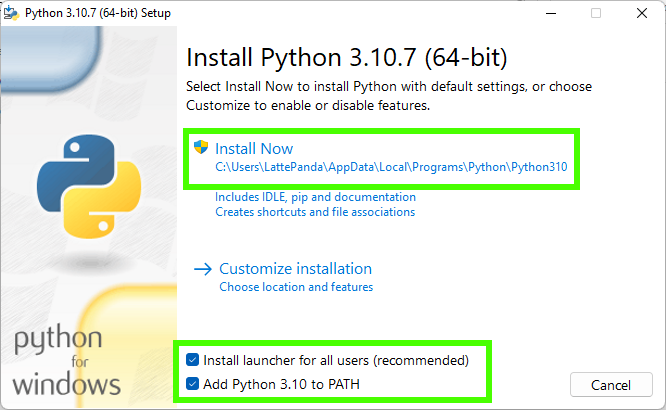
2. Double click on the downloaded file and install Python for all users, and ensure that Python is added to your path. Click on Install now to begin. Adding Python to the path will enable us to use the Python interpreter from any part of the filesystem.
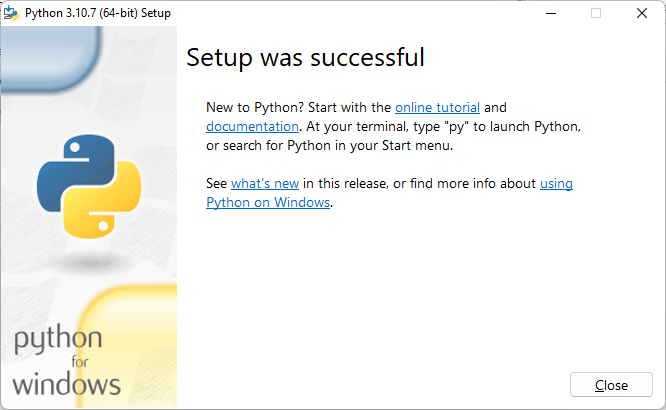
3. After the installation is complete, click Disable path length limit and then Close. Disabling the path length limit means we can use more than 260 characters in a file path.

4. Click Close to end the installation.
Installing Python via the Microsoft Store
An alternative to installing Python directly from the Python website is to use the Microsoft Store. Apps in the store are approved by Microsoft and can be easily installed. The downside is that this release may be one or two versions behind the official release.
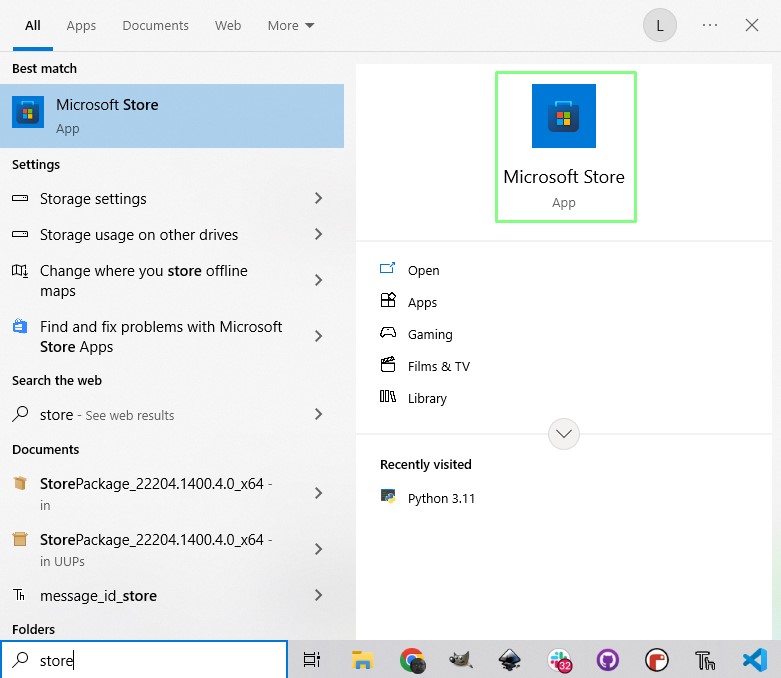
1. Click on Start and search for "store".
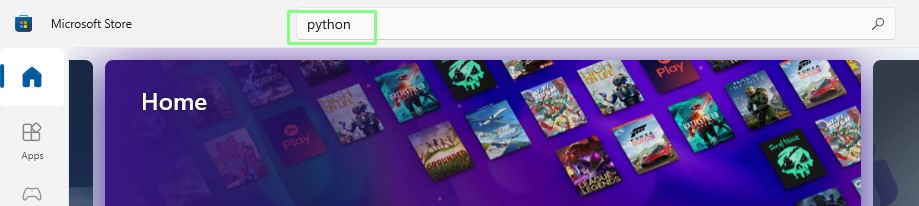
2. Search for Python in the Microsoft Store.
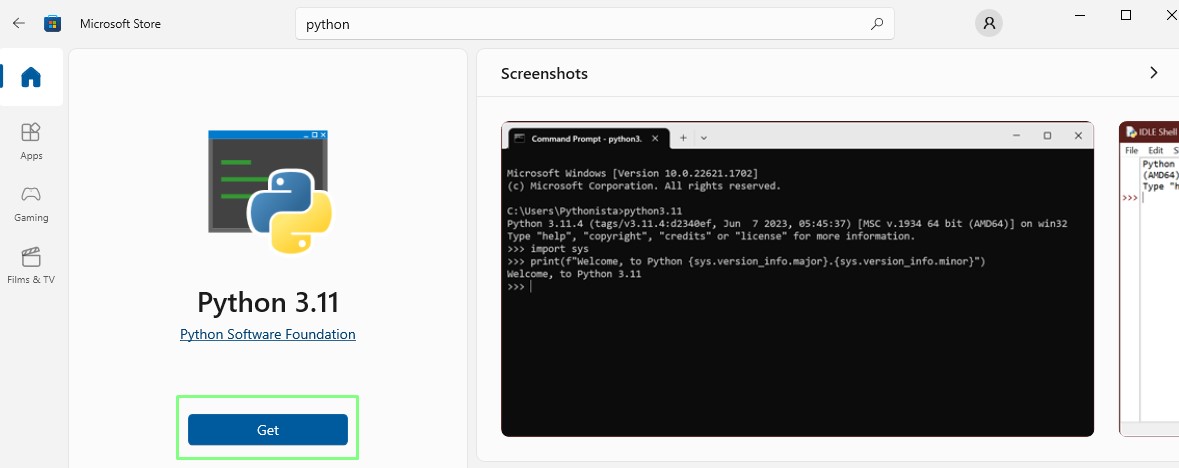
3. Select the latest version of Python. In this case Python 3.11.4 is available from the store.

4. Click "Get" to download and install Python to your computer. You will need to sign in to your Microsoft account. In a few moments Python will be installed and ready for use.
Running Python in Windows
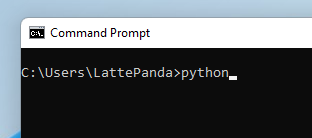
1. Open a Command Prompt and type “python” then press Enter.
2. Create a short Python script that uses a for loop to print a message to the Python shell ten times. Press space four times to indent the second line, otherwise Python will produce an error. Press Enter to run the code.
for i in range(10):
    print(“Python in the command prompt”)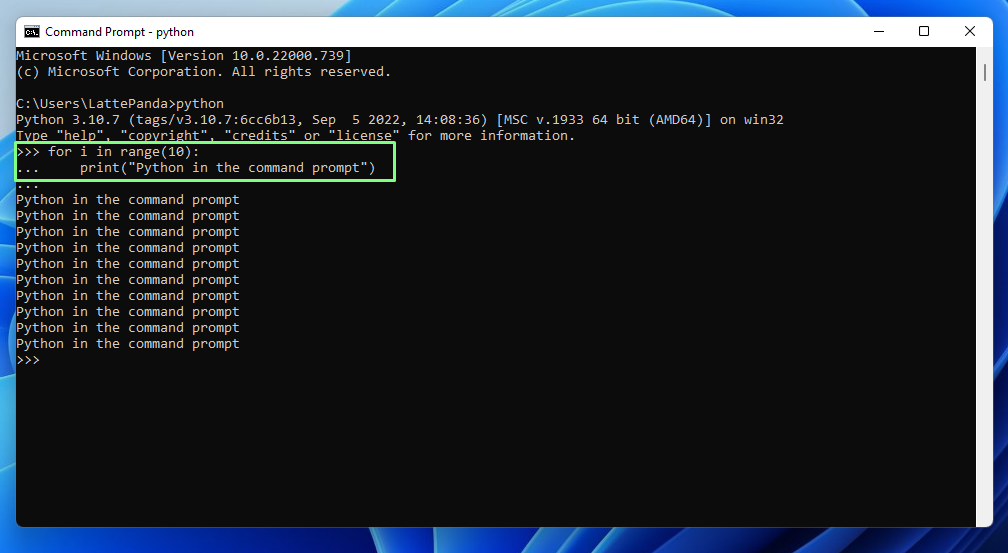
Python comes with its own package manager, pip, that is used to install, update and remove modules of pre-written Python code. These modules provide us with extra functionality. To demonstrate we will use pip to install the pyjokes module, a collection of programmer jokes.
1. Open a Command Prompt and use pip to install pyjokes then press Enter.
pip install pyjokes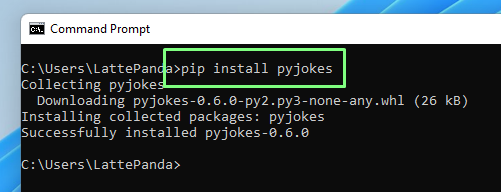
2. Open the Python interpreter.
3. Import the pyjokes module and then print a joke from the module. In our case, we got a “hip hip hurray” take on an array containing two hips.
import pyjokes
print(pyjokes.get_joke())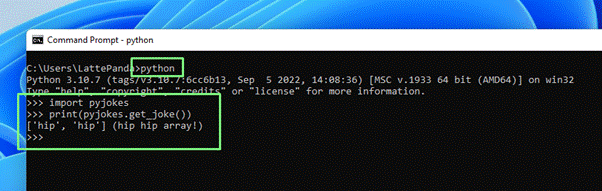
4. More modules can be found using the PyPi Package Index.
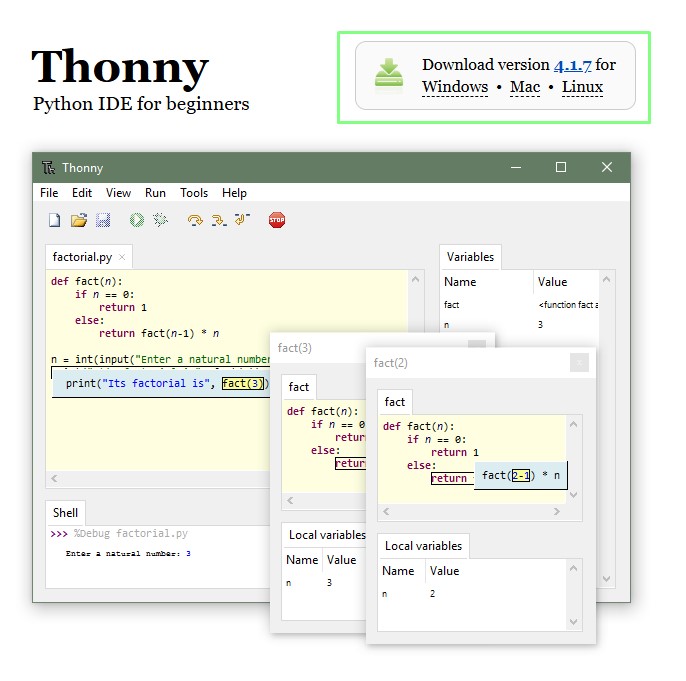
Beginning Python With Thonny
If you have never written a line of Python code, then Thonny is for you. Thonny is designed with beginners in mind. The simple interface means we can focus on our code. But don’t underestimate Thonny as under the hood we have tools to write code for the Raspberry Pi Pico series , Adafruit CircuitPython and many MicroPython boards, including those from Lego and the well known ESP32 boards.

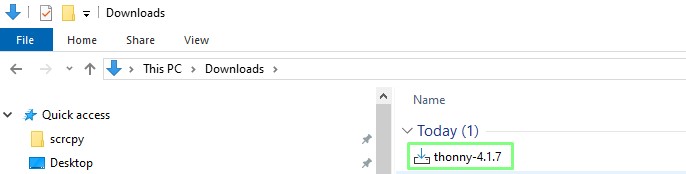
1. Open a browser to the Thonny website and download the Windows installer.
2. Go to the Downloads folder and double click the Thonny file to begin installation.
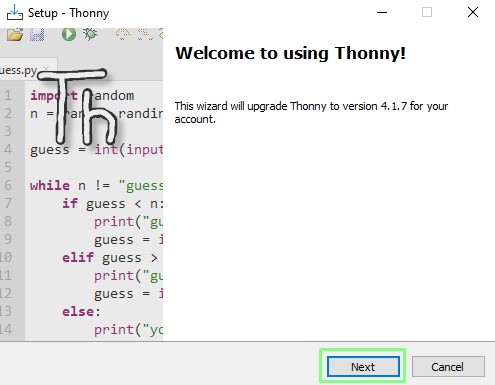
3. Click "Next" and follow the instructions to Install. The install process will take a few moments to complete.
4. Search for Thonny via the Start Menu and click on Thonny to start. You can also press Enter to run Thonny.
5. Wait for Thonny to start. Thonny’s first launch can take some time to complete, subsequent boots will be much faster.
The Thonny Editor Interface
Thonny was designed with beginners in mind and this is reflected in the user interface. It is uncluttered and easy to understand.
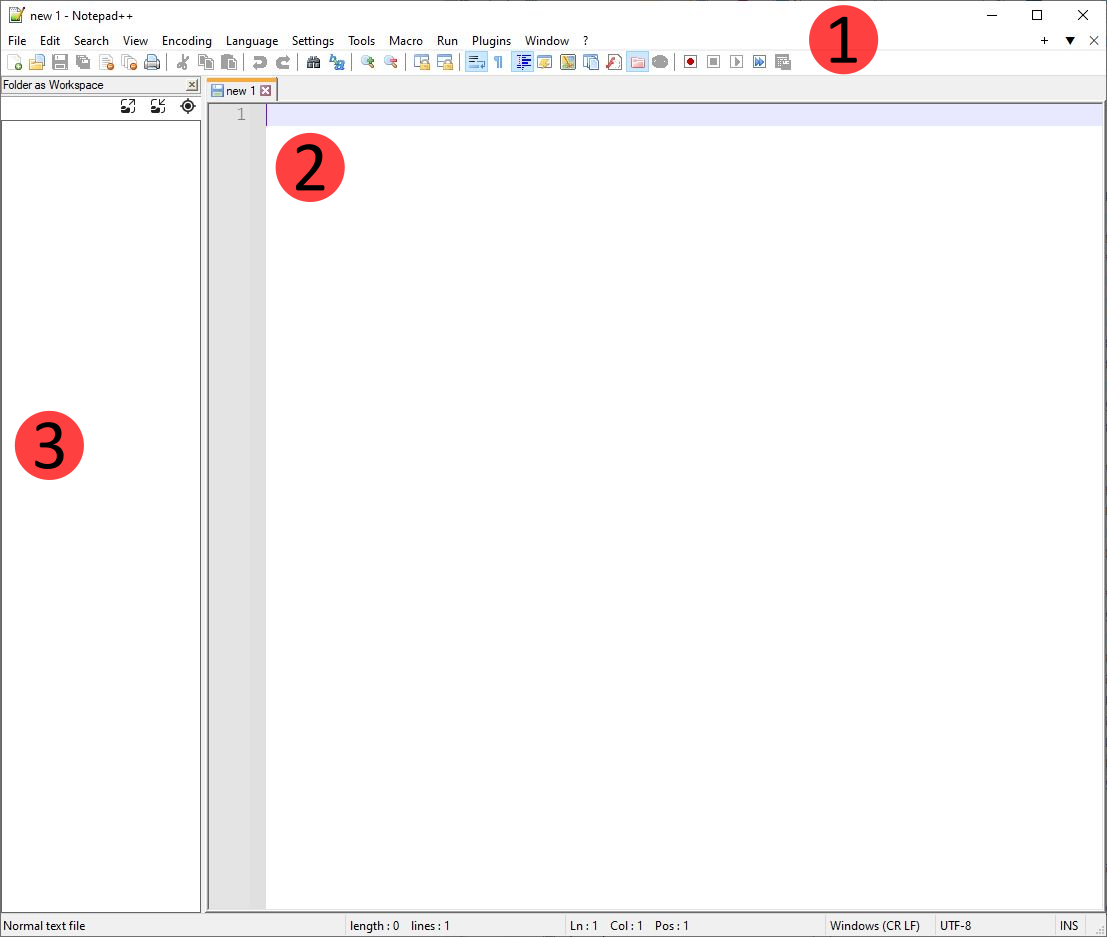
The user interface is broken down into three areas.
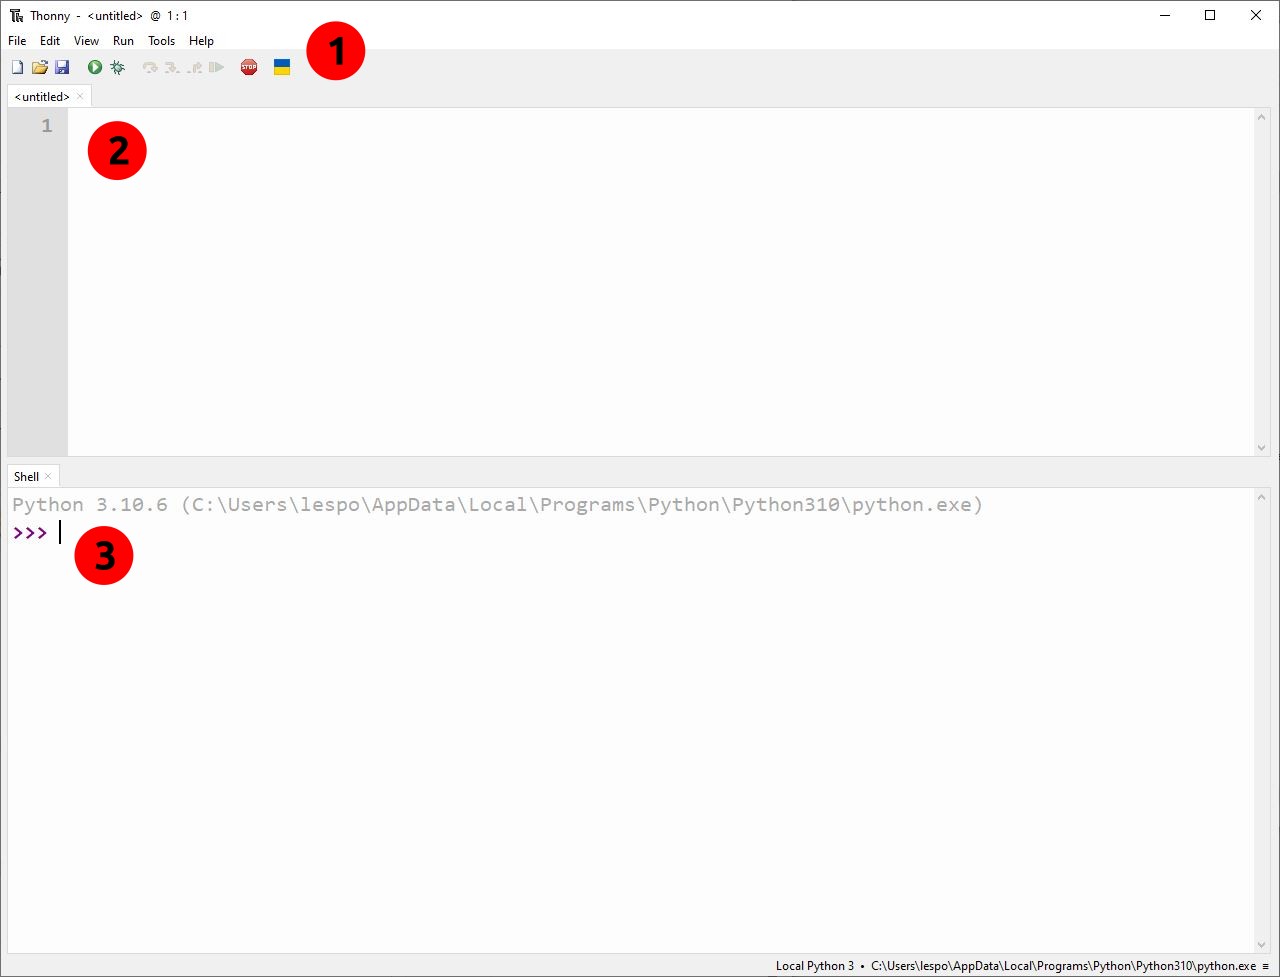
The menu bar. Here we can use the conventional drop-down menus or use the icons to open, save, create files. Run the project code, and install packages and swap interpreters for working with Python, MicroPython or CircuitPython
The coding area. Here is we write the code for our projects.
The Python shell. This is a REPL (Read, Eval, Print, Loop) where we can interact with the Python interpreter and see the output of the running code.
We can easily write Python code with Thonny. The default is to write Python 3 code, to be run on our machine.
If you are starting out with Python, Thonny is an excellent choice to introduce the language.
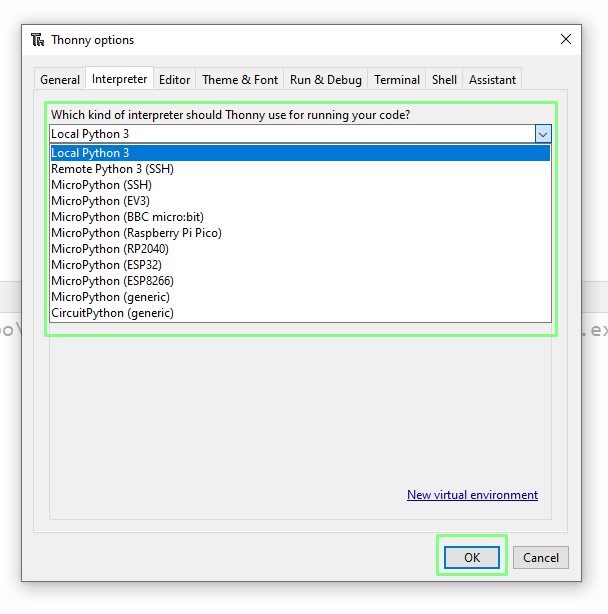
Changing the Python Interpreter to work with MicroPython or CircuitPython
Thonny has one feature that elevates it above other beginner editors. It can switch interpreters so that one application, Thonny, can be used to write Python, MicroPython and CircuitPython.
1. Click on Tools >> Options and from the dialog box choose Interpreter.

2. Select the Interpreter from the list. The top list are all of the interpreters for Local Python (on your machine), MicroPython for Raspberry Pi Pico, Pico 2 and Pico with Wi-Fi, RP2040 (for non-Raspberry Pi boards), ESP32 / 8266,BBC micro:bit and for CircuitPython devices.
To connect a Raspberry Pi Pico, we first need a Raspberry Pi Pico running MicroPython, we've got a guide that you can follow.
To follow this part of the how to you will need a Raspberry Pi Pico.
1. With Thonny open, connect a Raspberry Pi Pico to your computer.
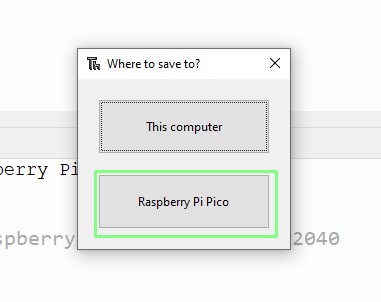
2. Go to Tools >> Options and select the Interpreter tab, and then select the MicroPython (Raspberry Pi Pico) interpreter. Leave the port to automatically detect. Click OK.
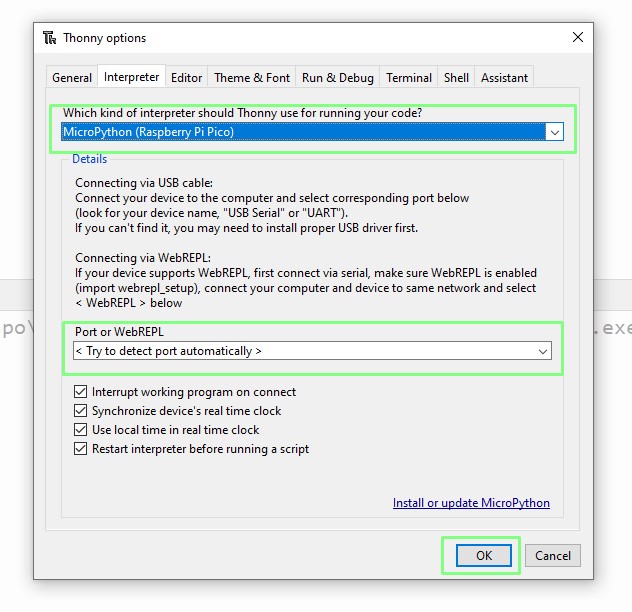
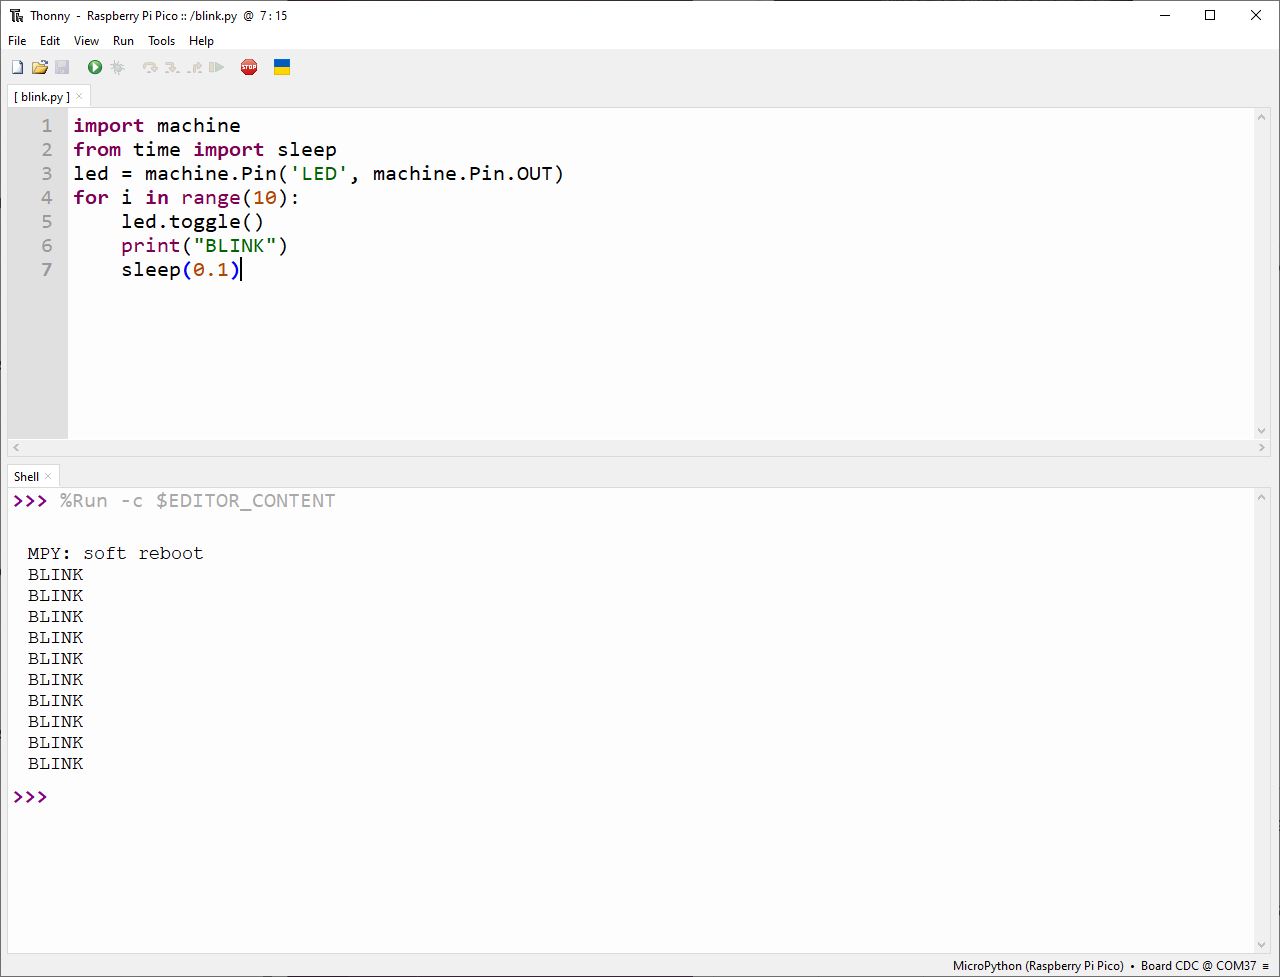
3. The Python Shell (3 in the annotated screenshot) will now show an active connection to the Raspberry Pi Pico.

4. In the editor (2 in the annotated diagram) import two modules of code. The first enables MicroPython to talk to the GPIO. The second is used to add pauses to the code.
import machine
from time import sleep
5. Create an object, led and use it to set the onboard LED as an output. For the Raspberry Pi Pico W use the line of code with ‘LED’, for the original Pico use the line of code with 25. The Pico has the LED connected to GPIO 25, but the Pico W does not.
Raspberry Pi Pico W
led = machine.Pin('LED', machine.Pin.OUT)Raspberry Pi Pico
led = machine.Pin(25, machine.Pin.OUT)6. Create a for loop that iterates 10 times, each time the loop runs it will toggle the LED on / off, print a message to the REPL and sleep for 0.1 seconds.
for i in range(10):
    led.toggle()
    print("BLINK")
    sleep(0.1)
7. Click Save and save the file to your Raspberry Pi Pico as blink.py
8. Click on Run >> Run Current Script (or click on the green play button) to start the code on the Pico. The LED on the Pico will blink on and off and the REPL will show the “BLINK” message.
Intermediate Python with Notepad++
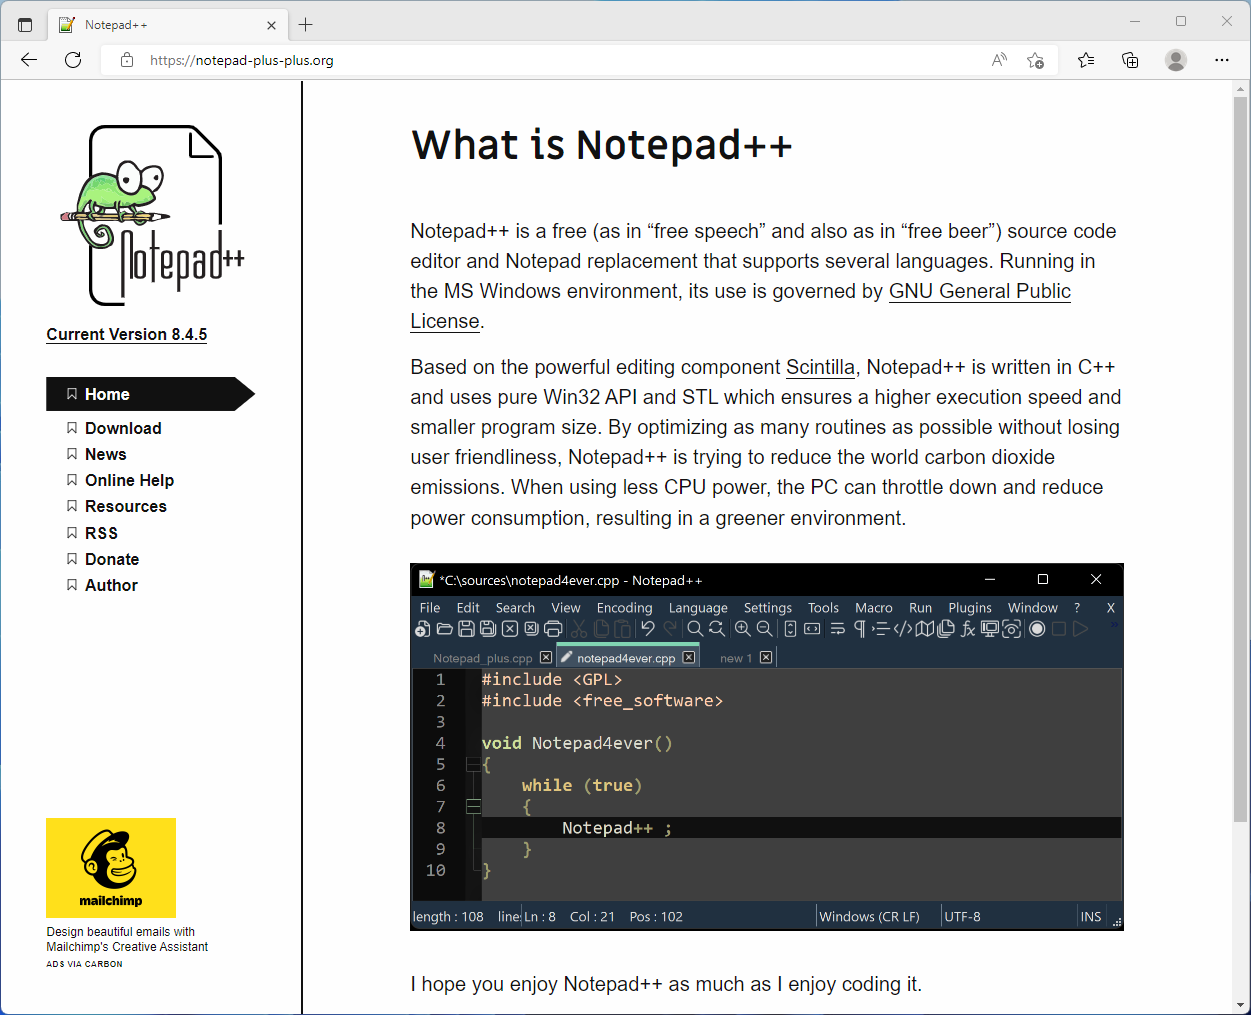
You know your stuff, and you need a lightweight editor to get your Python code done. Sure you can install Visual Studio Code, PyCharm etc. But if you just need to edit a few project files, Notepad++ is for you. Notepad++ is a Swiss Army Knife of an editor, and it works exceptionally well with Python. Here we will install Notepad++ and set it up to run our Python code at the press of a button.
Note that you will need to install the Python 3 interpreter, the steps for which are at the start of this how to.
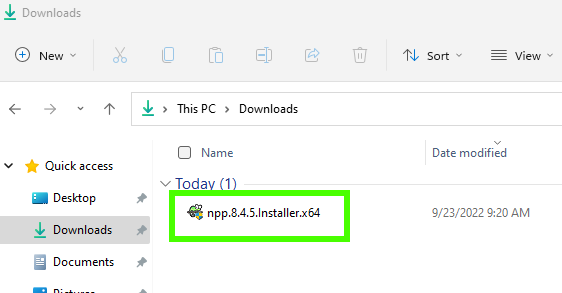
1. Open a browser to the Notepad++ website and download the latest Windows installer.
2. In the your Downloads folder, double click on the file to start the installer.
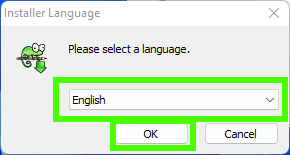
3. Set your preferred language and click OK.
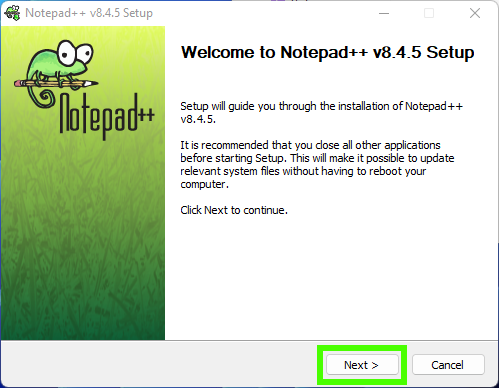
4. Select Next.
5. Select “I Agree”.

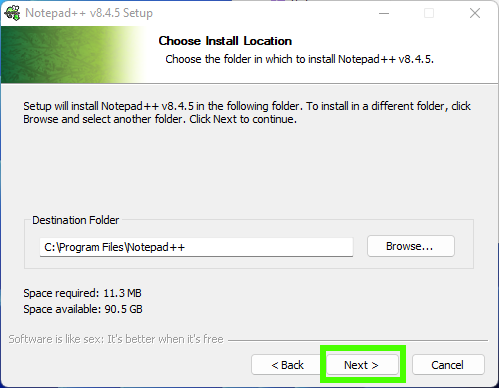
6. Click Next.
7. Click Next.
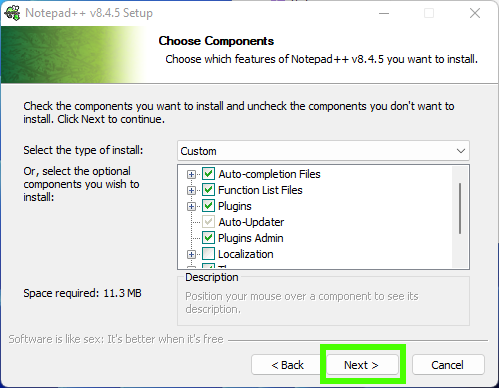
8. Click Install to begin the process.
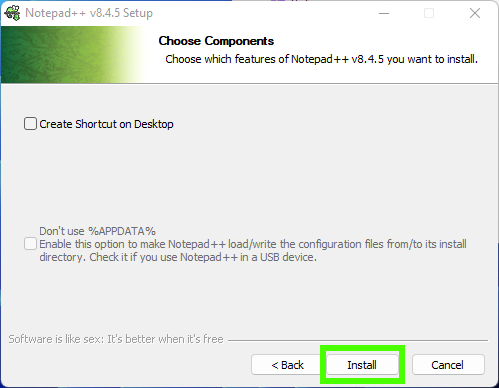
9. Check “Run Notepad++” and click Finish to end the installation and open Notepad++.

The Notepad++ Interface
Notepad++ has a more involved user interface than Thonny, and this reflects the flexibility of the editor. Notepad++ is much more than a Python editor, we can use it to write PHP, Perl, JSON etc.
Menus. Here we can load projects, save, create macros and install plugins for specific languages.
Editor. The code for our project is created here.
Workspace. If we are working on a large project with multiple project files, we can load the folder as a workspace and have quick access to the files.
Running Python code in Notepad++
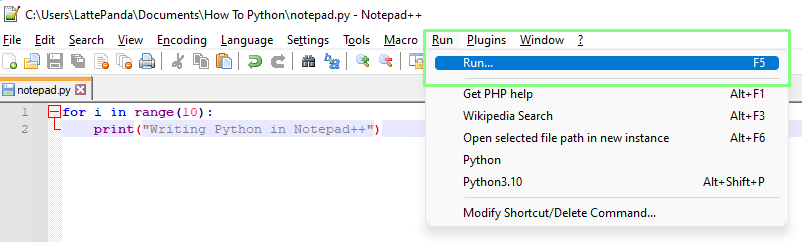
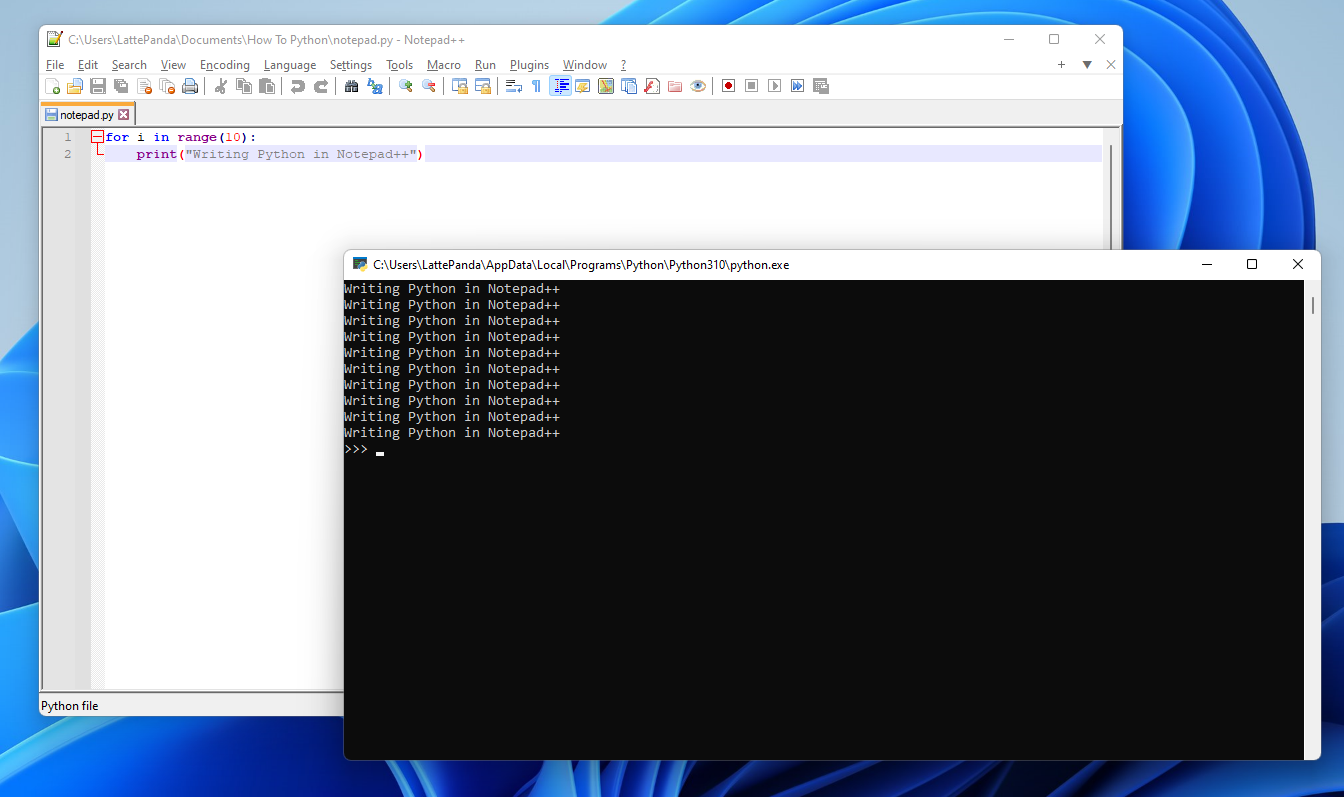
1. Create a simple Python project that uses a for loop to print a message to the Python shell.
for i in range(10):
    print("Writing Python in Notepad++")
2. Save the code as for_loop.py.
3. Click on Run >> Run..
4. Click on … and navigate to the Python executable file. Select the file and the path will be added to the dialog box. At the end of the path, add -i "$(FULL_CURRENT_PATH)" to force Notepad++ to open the file. Click Save.
Example path to Python
C:\Users\LattePanda\AppData\Local\Programs\Python\Python310\python.exe -i "$(FULL_CURRENT_PATH)"
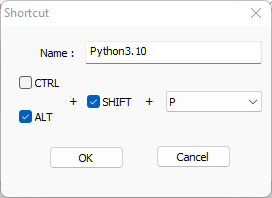
5. Create a shortcut called Python3.10 to launch the Python interpreter then click OK. We chose ALT + SHIFT + P as it didn’t conflict with other shortcuts on our system.
6. Use your shortcut to run the Python code.
Python How Tos
- How To Install Python on Windows 10 and 11
- How to use For Loops in Python
- How to Enumerate in Python
- How to Create Executable Applications in Python
- How To Remove Backgrounds From Images With Python
- How to Create Web Apps with Python, HTML and Thonny
- How To Use Raspberry Pi Camera Module 3 with Python Code