After months of doing my best Walter White impression in Schedule 1, I can finally expand my illicit substance empire with less combustible products. Compared to growing the best Schedule 1 weed mixes, shrooms feel awfully needy. The trippy toadstools won't turn the highest profit, but you'll need a small supply to keep the update's newer customers happy.
I've been working on my own mushroom kingdom since the update's beta build, so if you need help getting started, I've got the breakdown on how to grow shrooms in Schedule 1 below, including what NPCs and suppliers you'll need to befriend.
This is a guide for Schedule 1, a satirical videogame about the drug trade, and does not contain any real information about illicit drugs. Do not try anything in this guide. (Except in the videogame Schedule 1, then it's fine.)
Schedule 1 Shroom supplier and NPCs
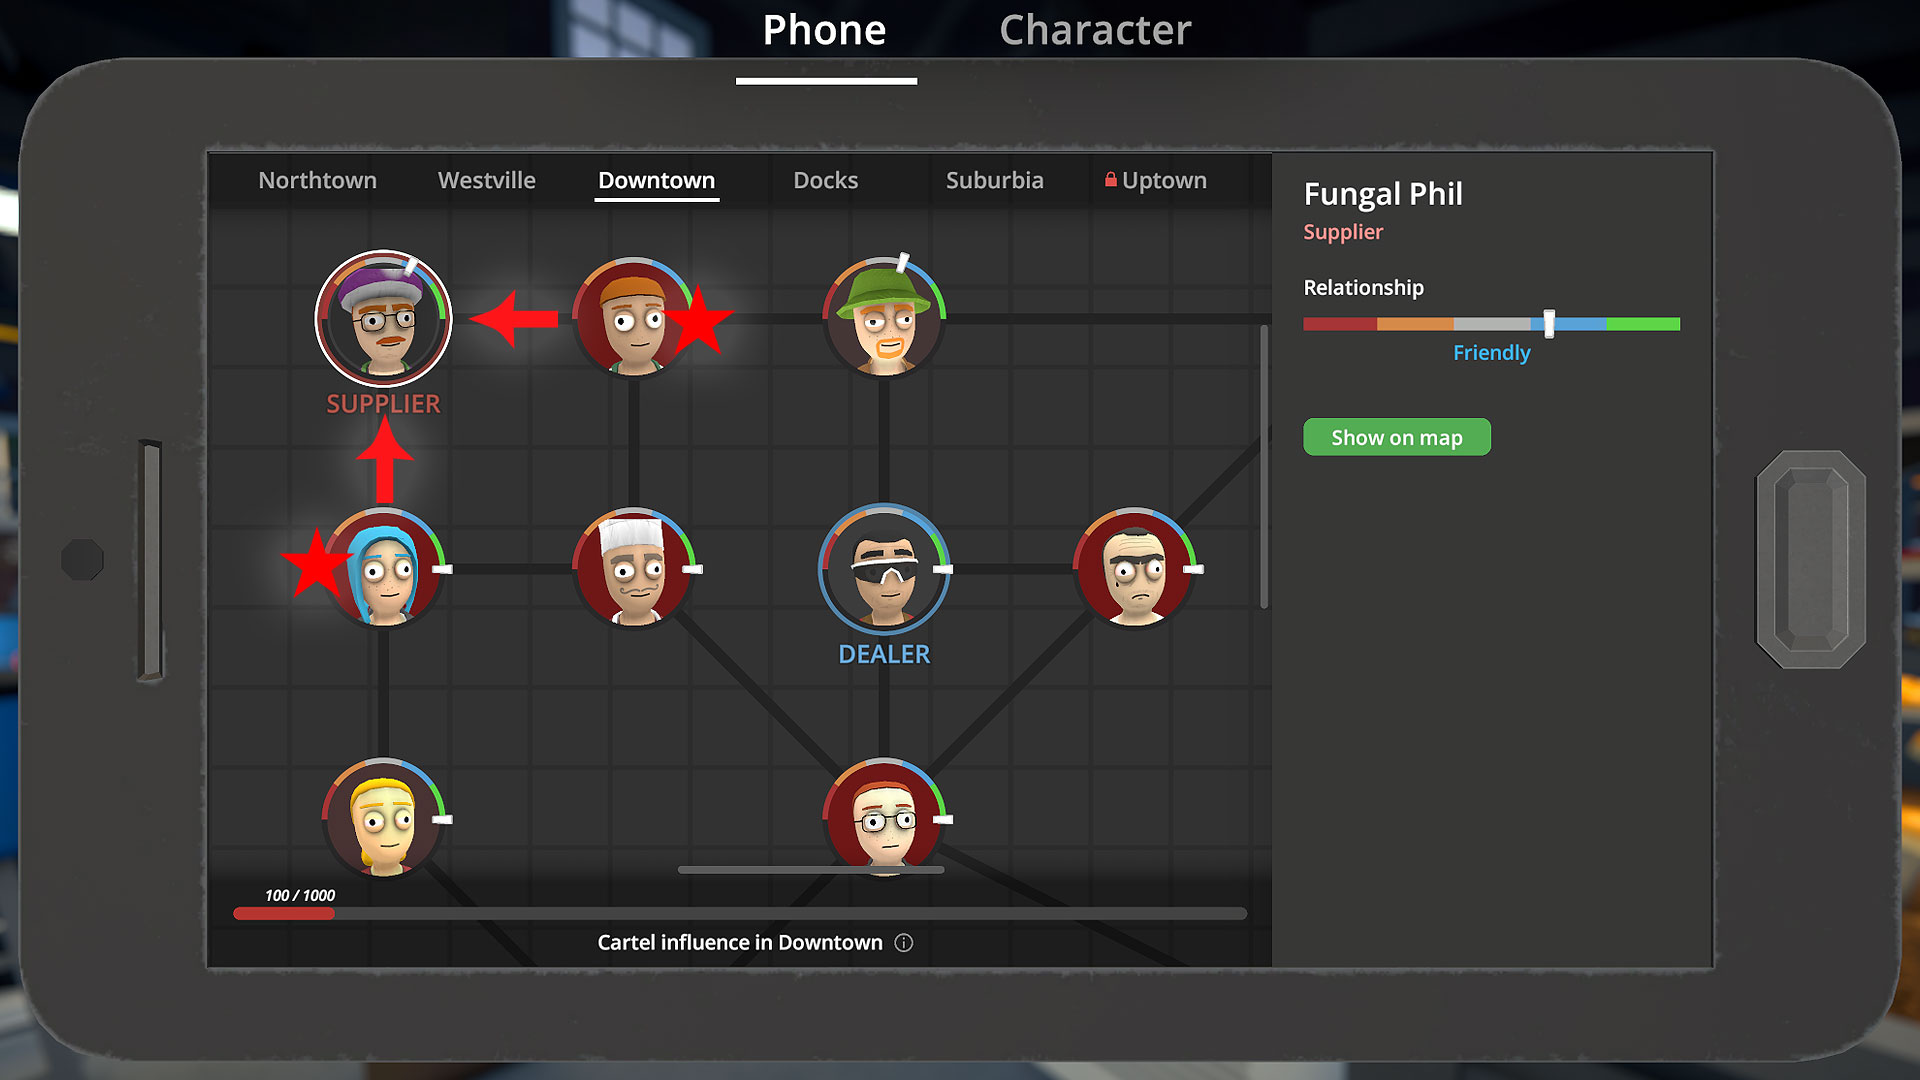
You'll need to befriend Schedule 1's shroom supplier and his relevant contacts before you can even start to stock up on the required supplies for harvesting fungus. Once you've unlocked the Hustler 1 rank and can sell to customers in the Downtown region, look for Elizabeth Homley and Kevin Oakley.
I unlocked access to the shroom supplier, Fungal Phil, after selling to both Kevin and Elizabeth just a few times, so it shouldn't take long before they're happy enough with your service to share the supplier's contact information. With Fungal Phil's number on speed dial, you can finally buy the three main ingredients for growing shrooms—substrate, syringes, and grain bags—now all we need is the infrastructure to do it.
Schedule 1 Shroom equipment and supplies

Once you've got Fungal Phil's number, there's not much left to do. You already have access to Dan's Hardware and the Warehouse (where you'll find Oscar's Store) in Northtown, so swing by both shops with your totally normal shopping list and stock up.
You'll only need one of each item from both Dan and Oscar, but if you want to increase production then I recommend buying a few extra mushroom beds. Fungal Phil's supplies are the only items you won't be able to reuse, so budget accordingly if you want to really get serious about the shroom business.
Item |
Cost |
Seller |
|---|---|---|
AC Unit |
$1,800 |
Dan's Hardware |
Spray Bottle |
$15 |
Dan's Hardware |
Plant Trimmers* |
$10 |
Dan's Hardware |
Drying Rack* |
$250 |
Oscar's Store |
Mushroom Spawn Station |
$1,500 |
Oscar's Store |
Mushroom Bed |
$200 |
Oscar's Store |
Spore Syringe |
$120 |
Fungal Phil |
Mushroom Substrate |
$60 |
Fungal Phil |
Grain Bag |
$20 |
Fungal Phil |
*The Trimmers and Drying Rack are items you'll probably already have, unless you decide to grow shrooms at a brand new, unfurnished property or somewhere not used for weed. You don't have to dry them, but it's worth the extra value.
You'll need packaging, too, so don't forget the extra packing stations, baggies, and jars. You can also add fertilizer to the soil and grow higher quality shrooms at a faster rate, but that's not a requirement to get started.
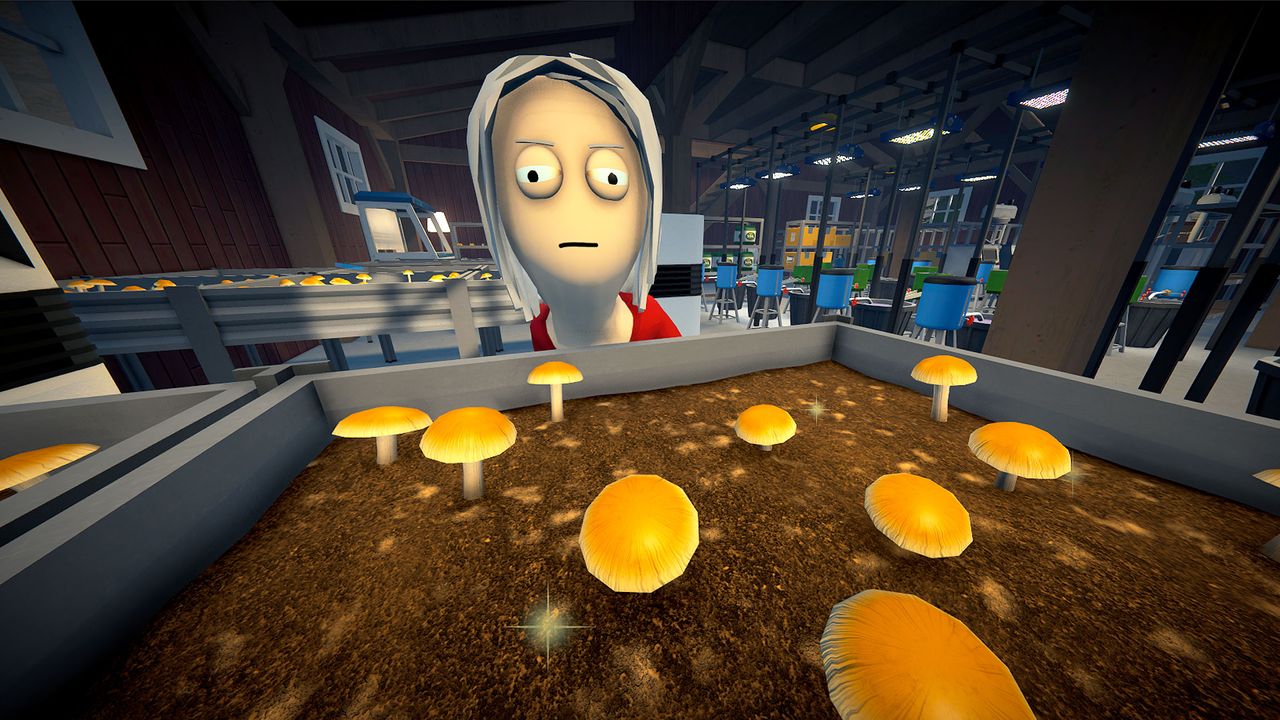
How to grow shrooms in Schedule 1
You can start growing shrooms in Schedule 1 at any property, so hit up whatever shady locale you've got with a bit of extra space and get ready to set up shop. The hardest part is over, but here's the step-by-step process for growing shrooms:
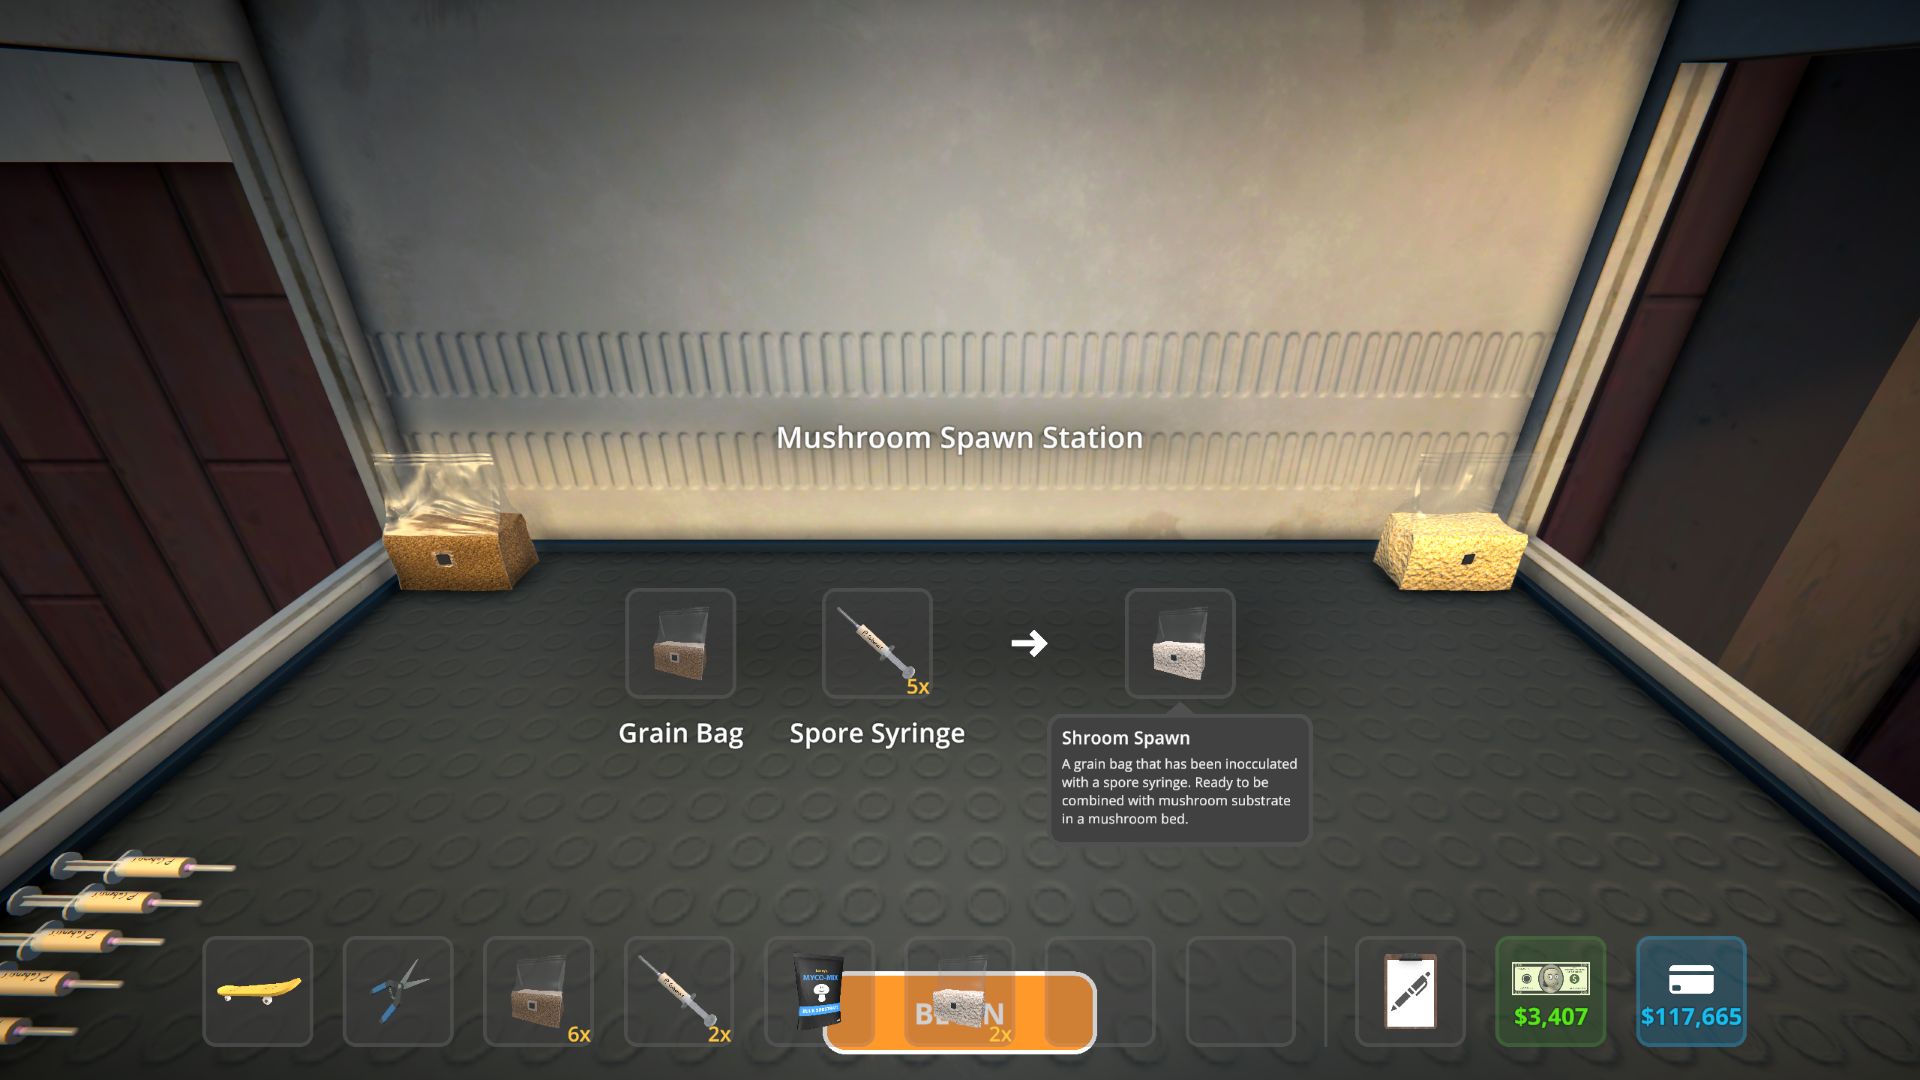
- Place a mushroom spawn station anywhere on your property
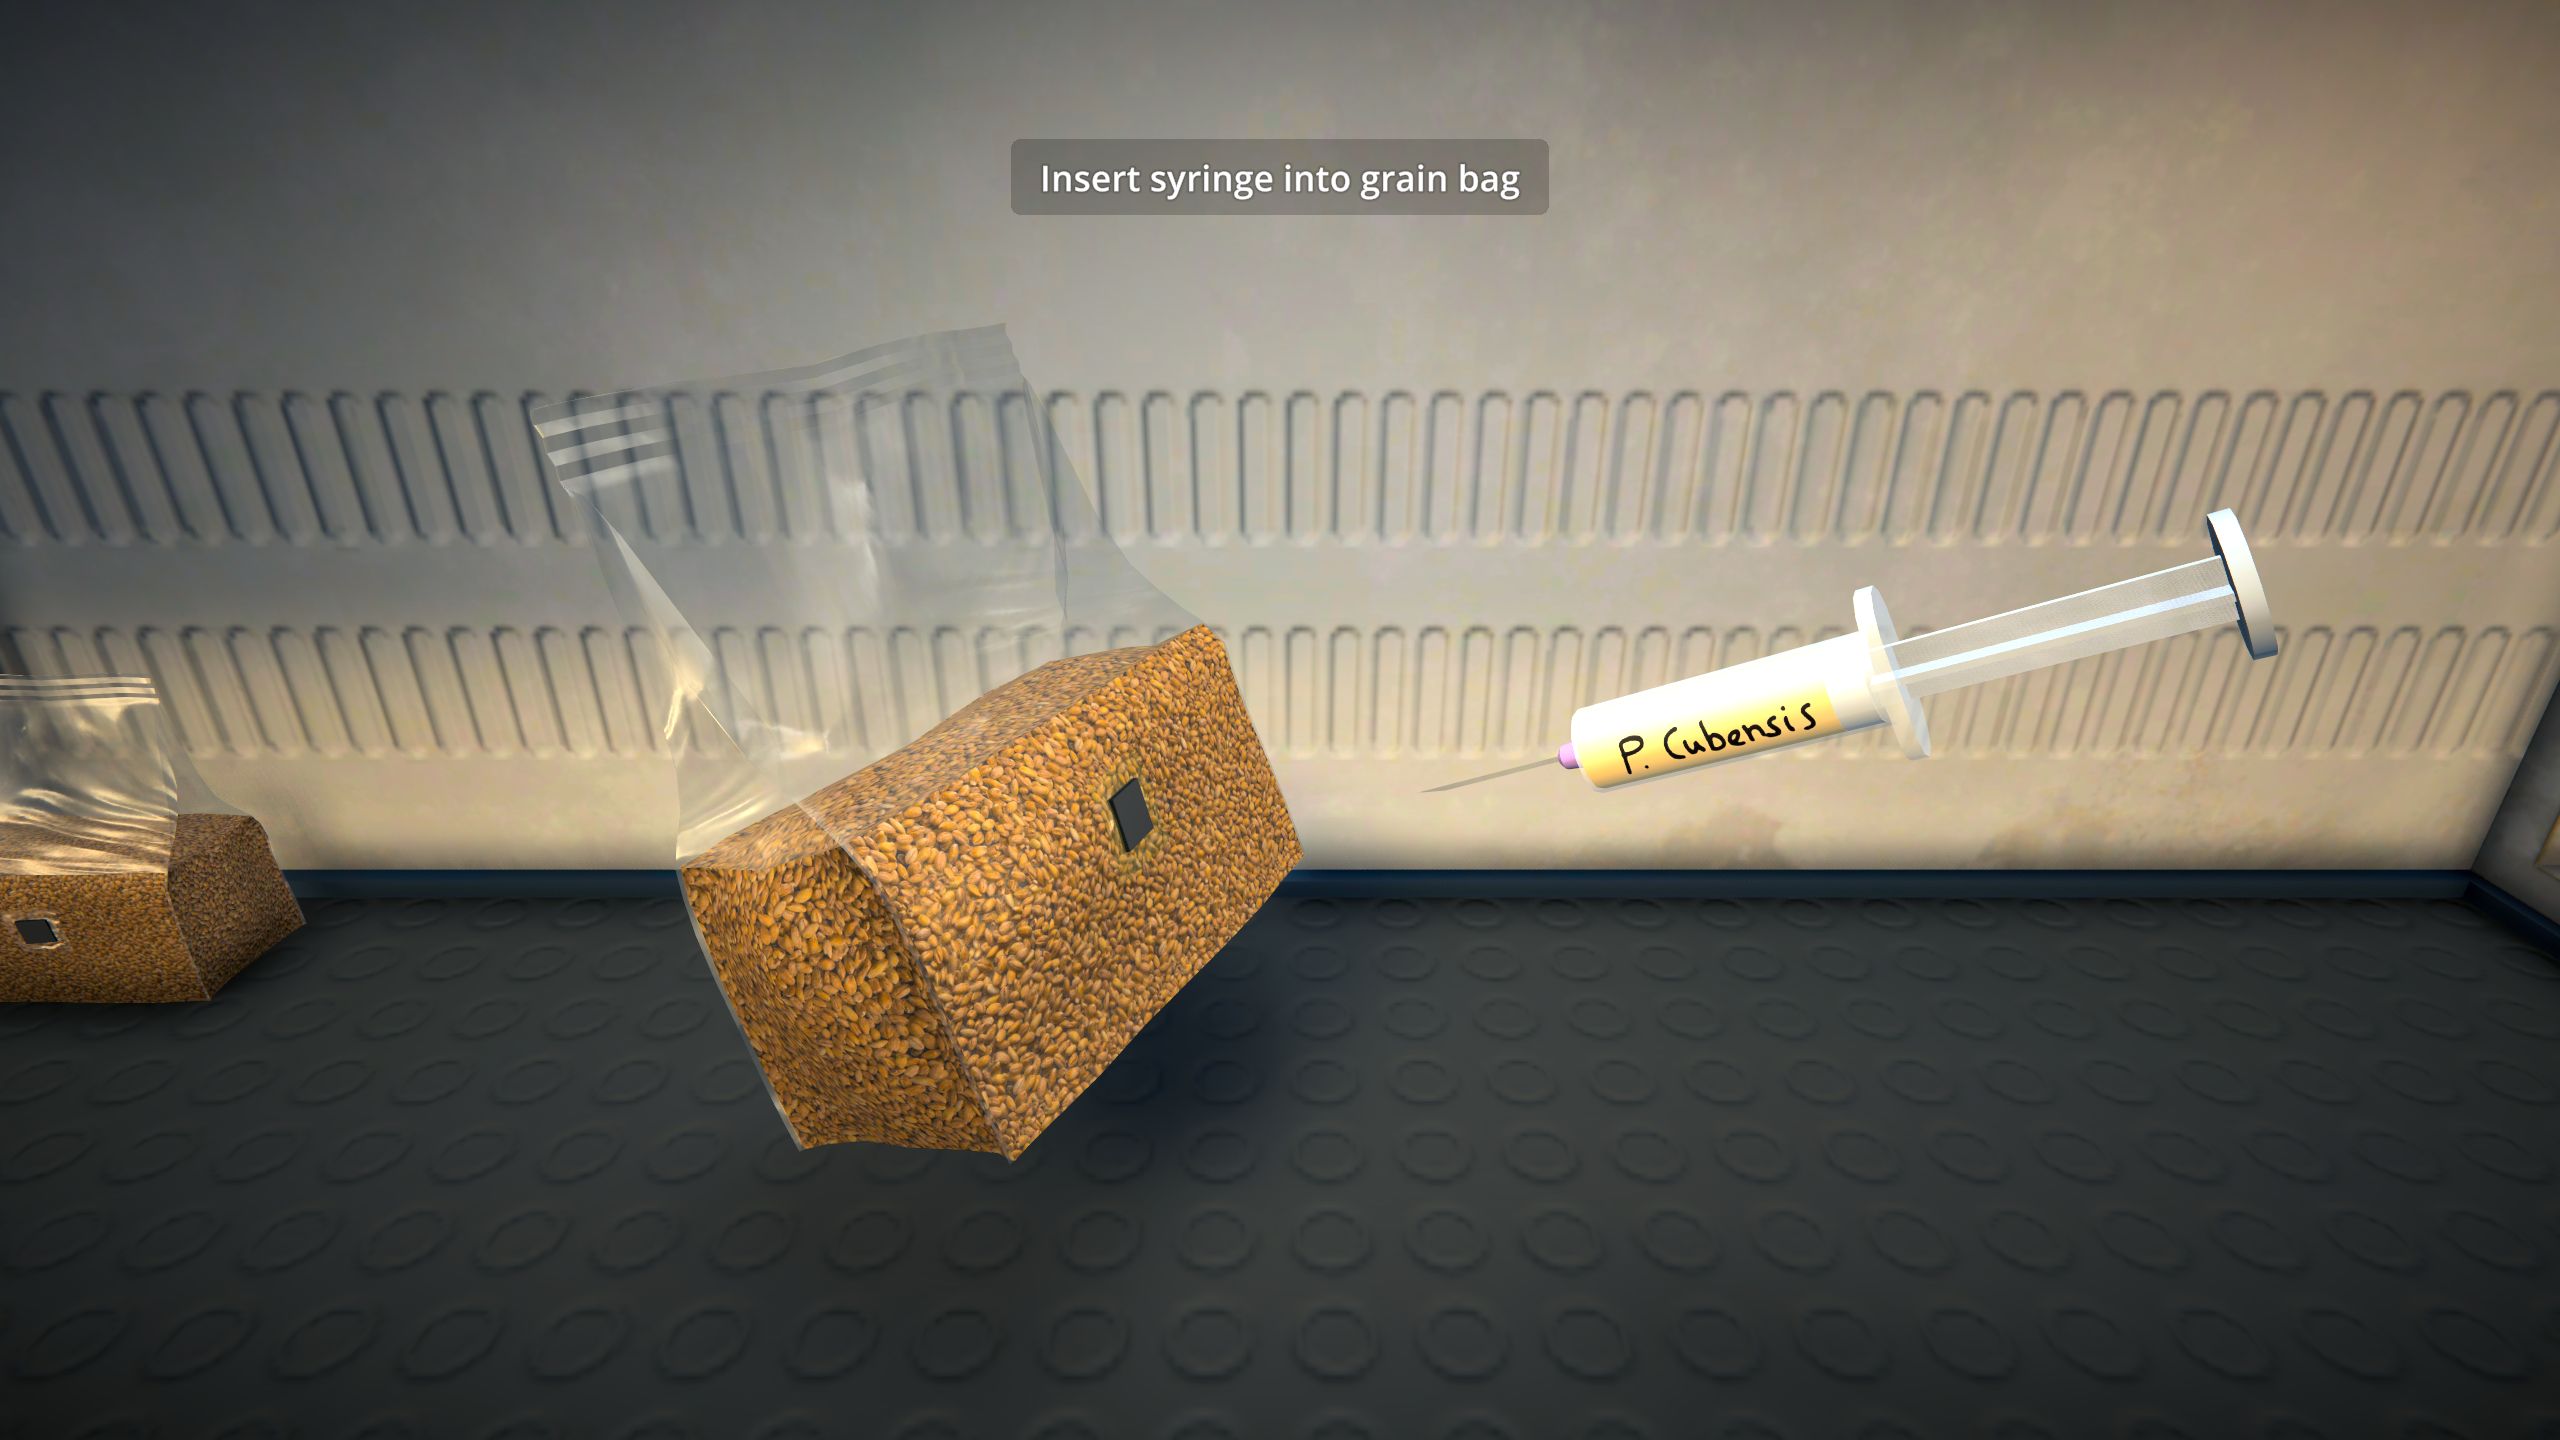
- Insert a Grain Bag and Spore Syringe and click "Begin"
- Remove the syringe cap and inject the substance into the Grain Bag
- Take the Shroom Spawn from the output slot and exit the spawn station
- Place your mushroom bed and AC unit near each other on your property
- Set the AC to cool; shrooms only grow when the temperature is below 59°F
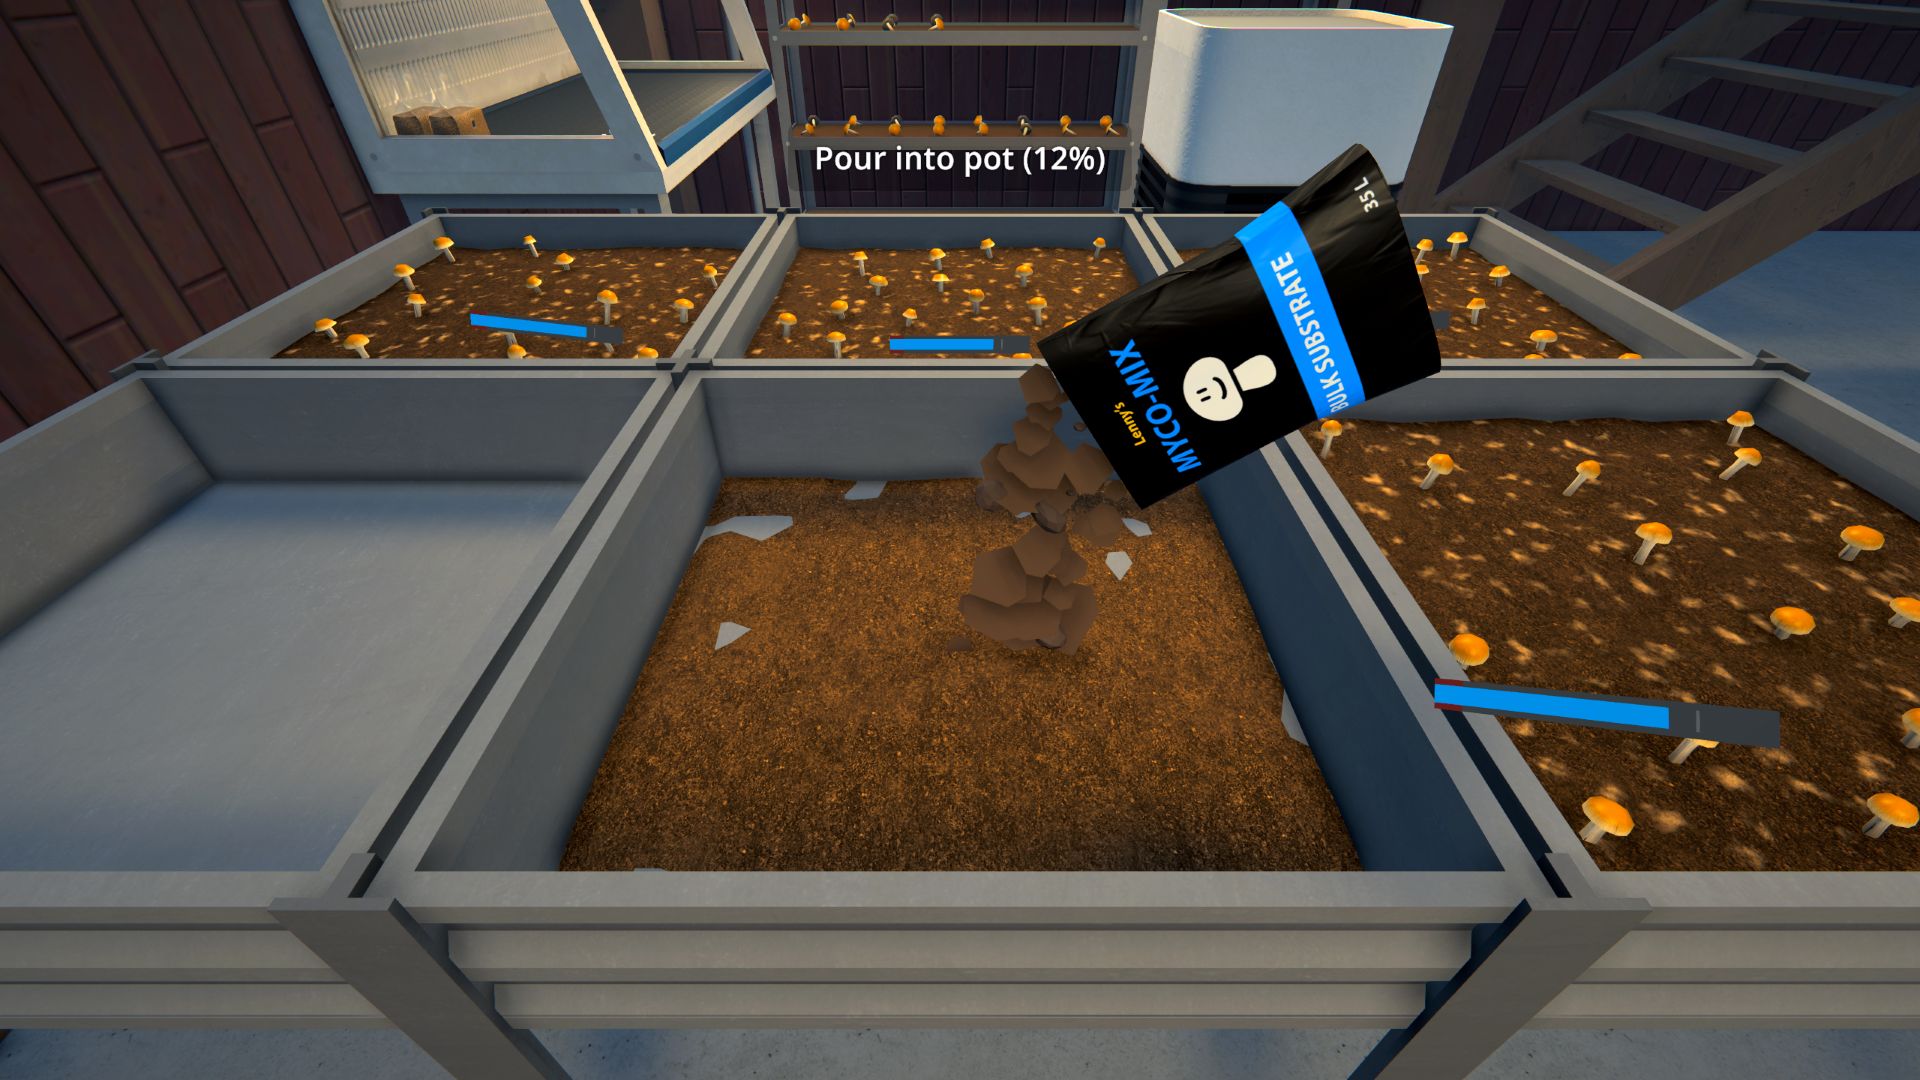
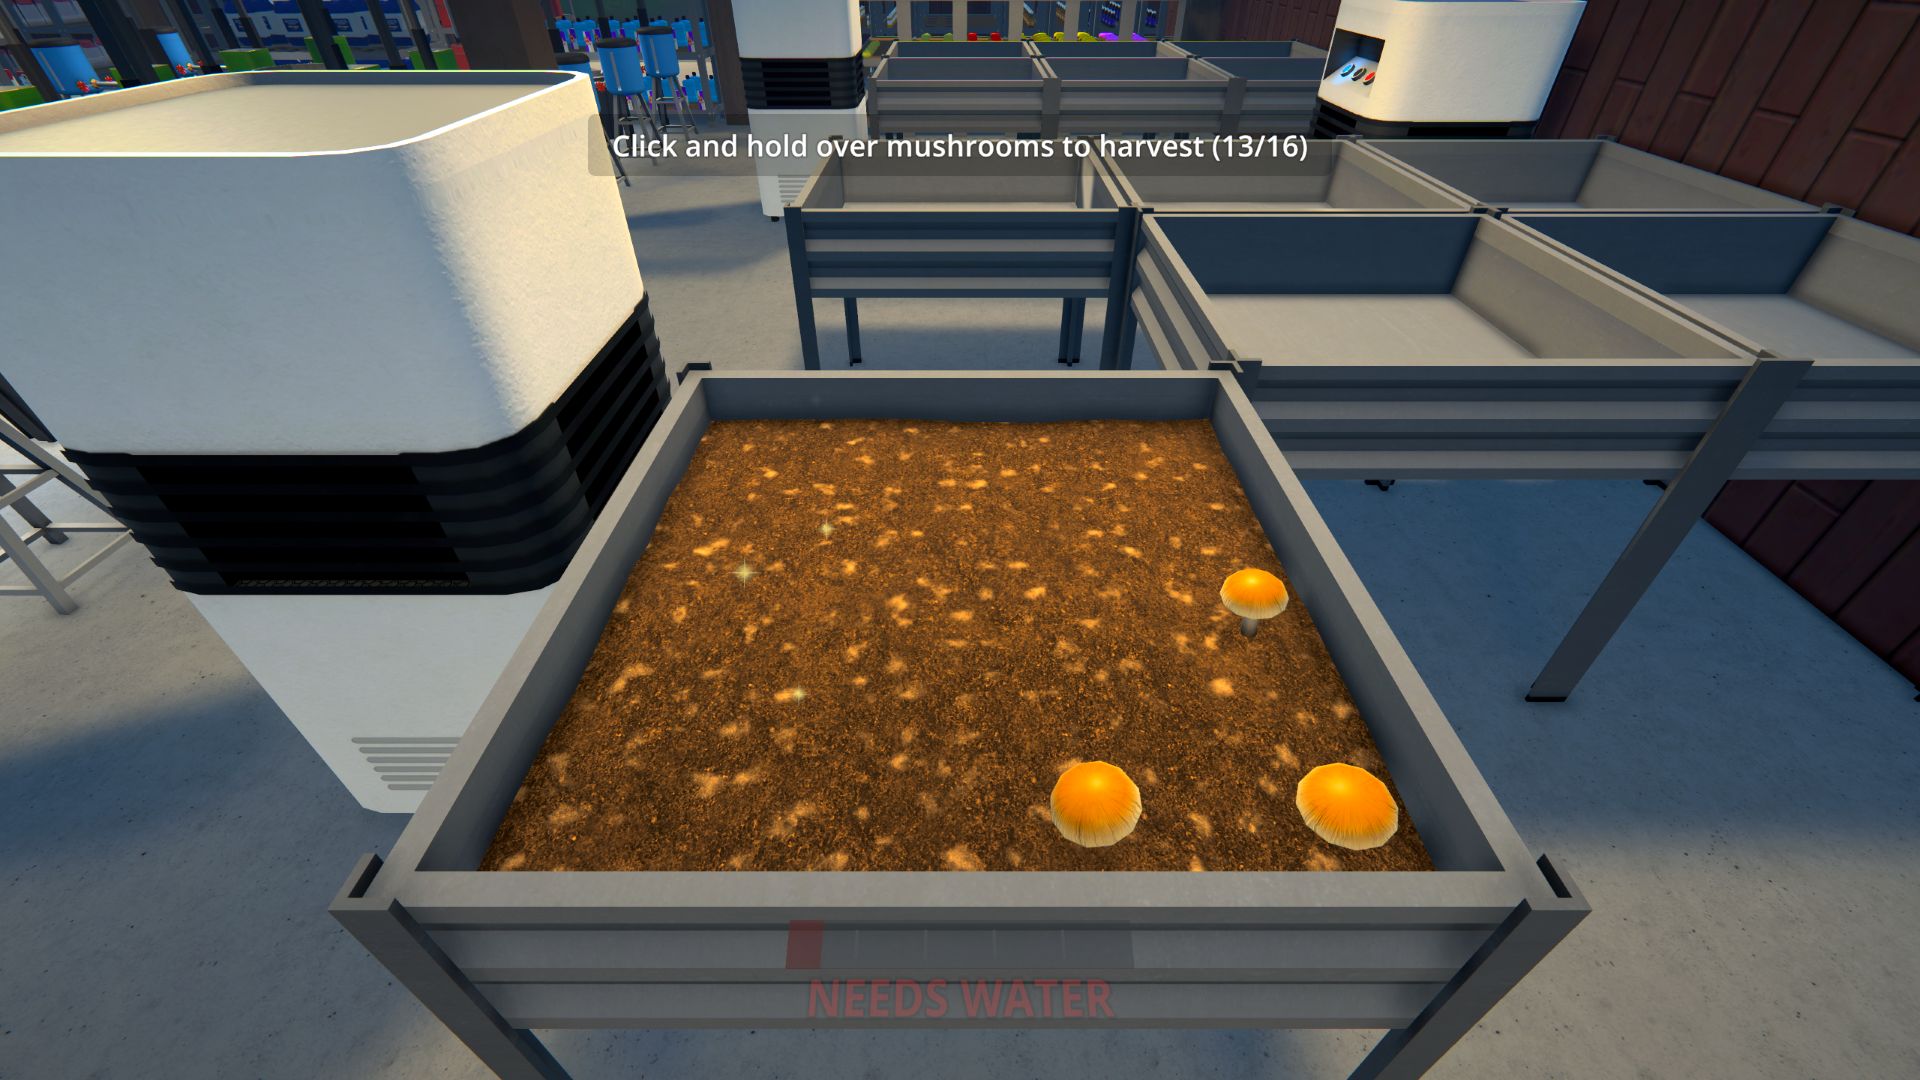
- Pour the mushroom substrate into the empty bed
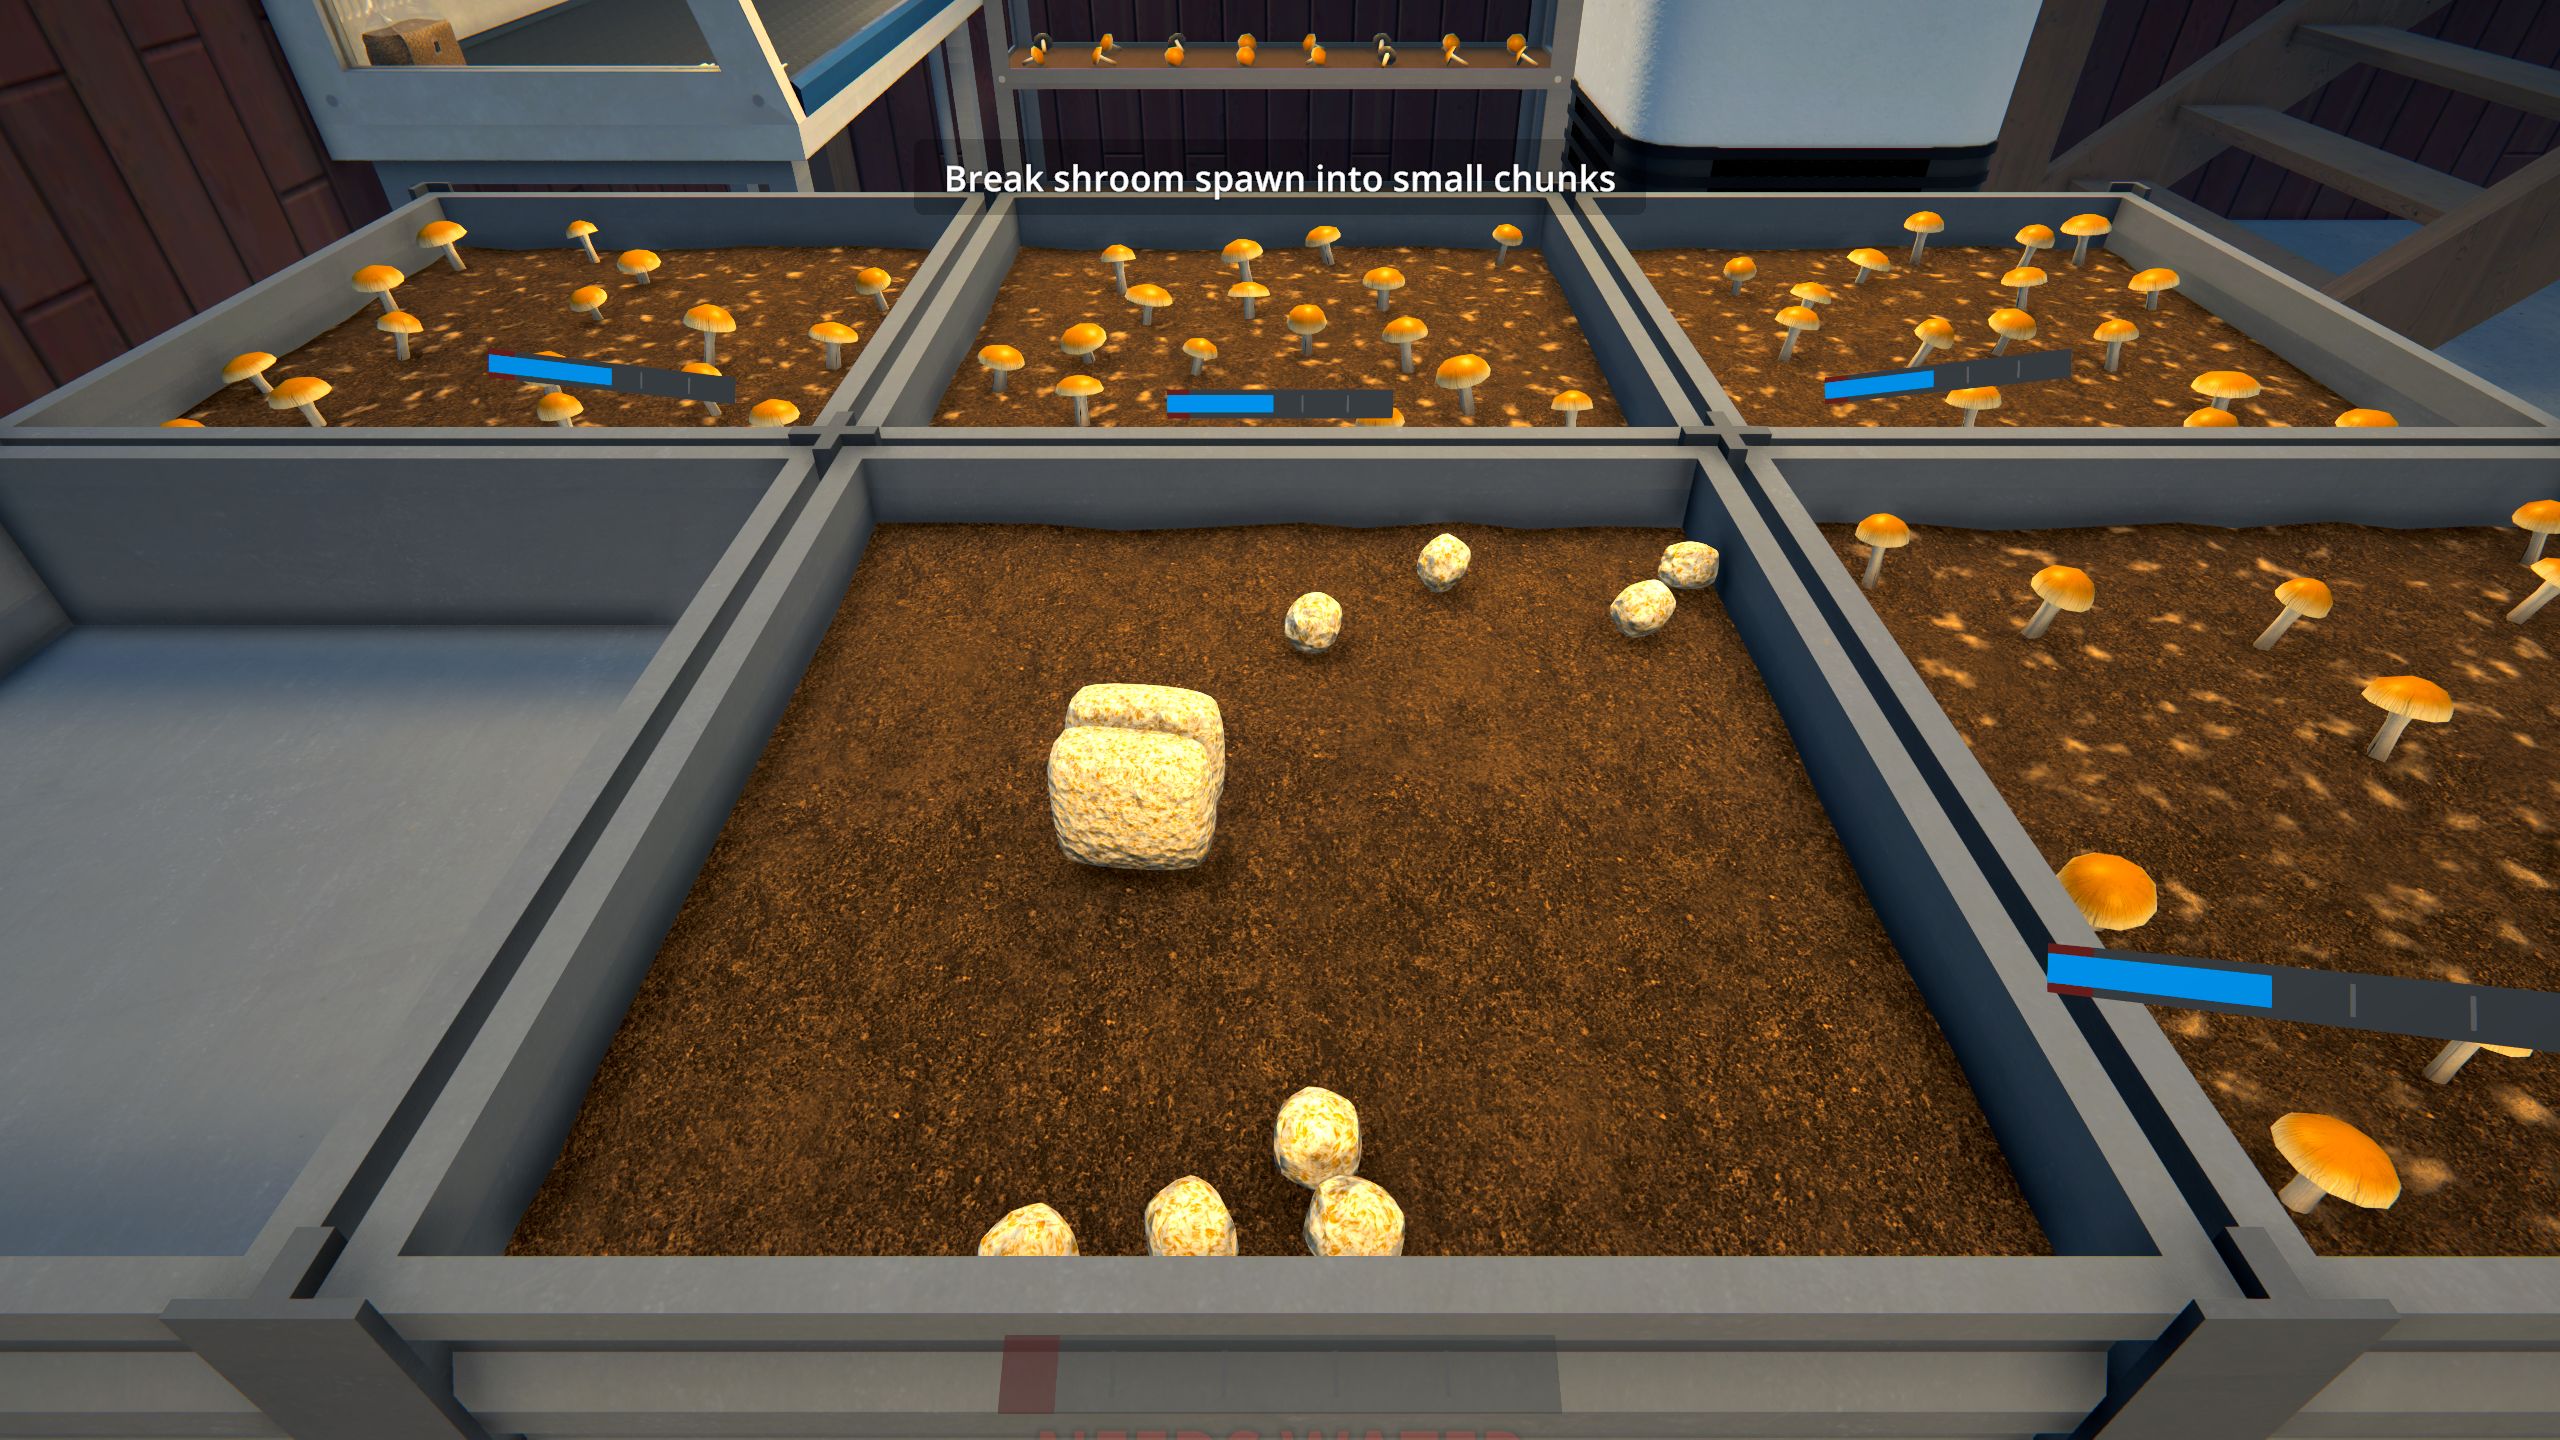
- Add the shroom spawn and mix it in with the substrate
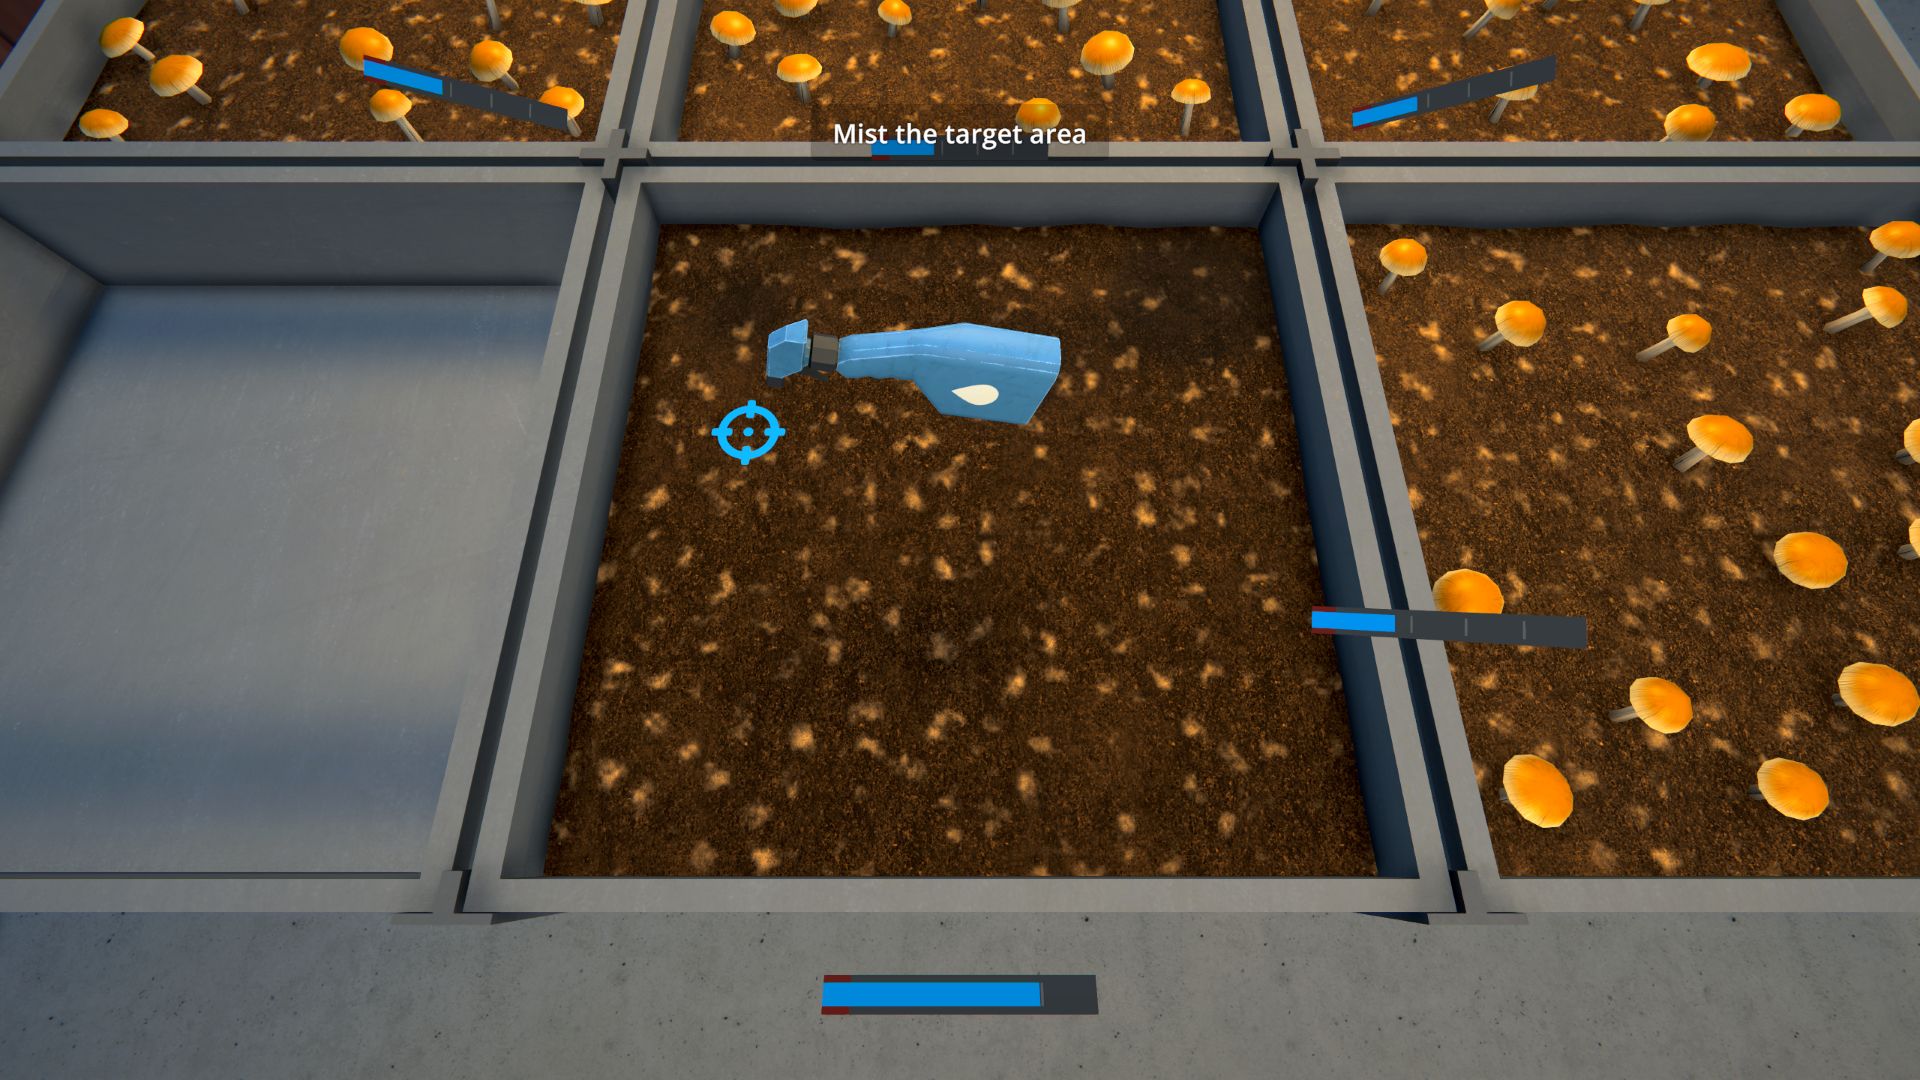
- Fill your spray bottle and mist the soil—now it's time to wait
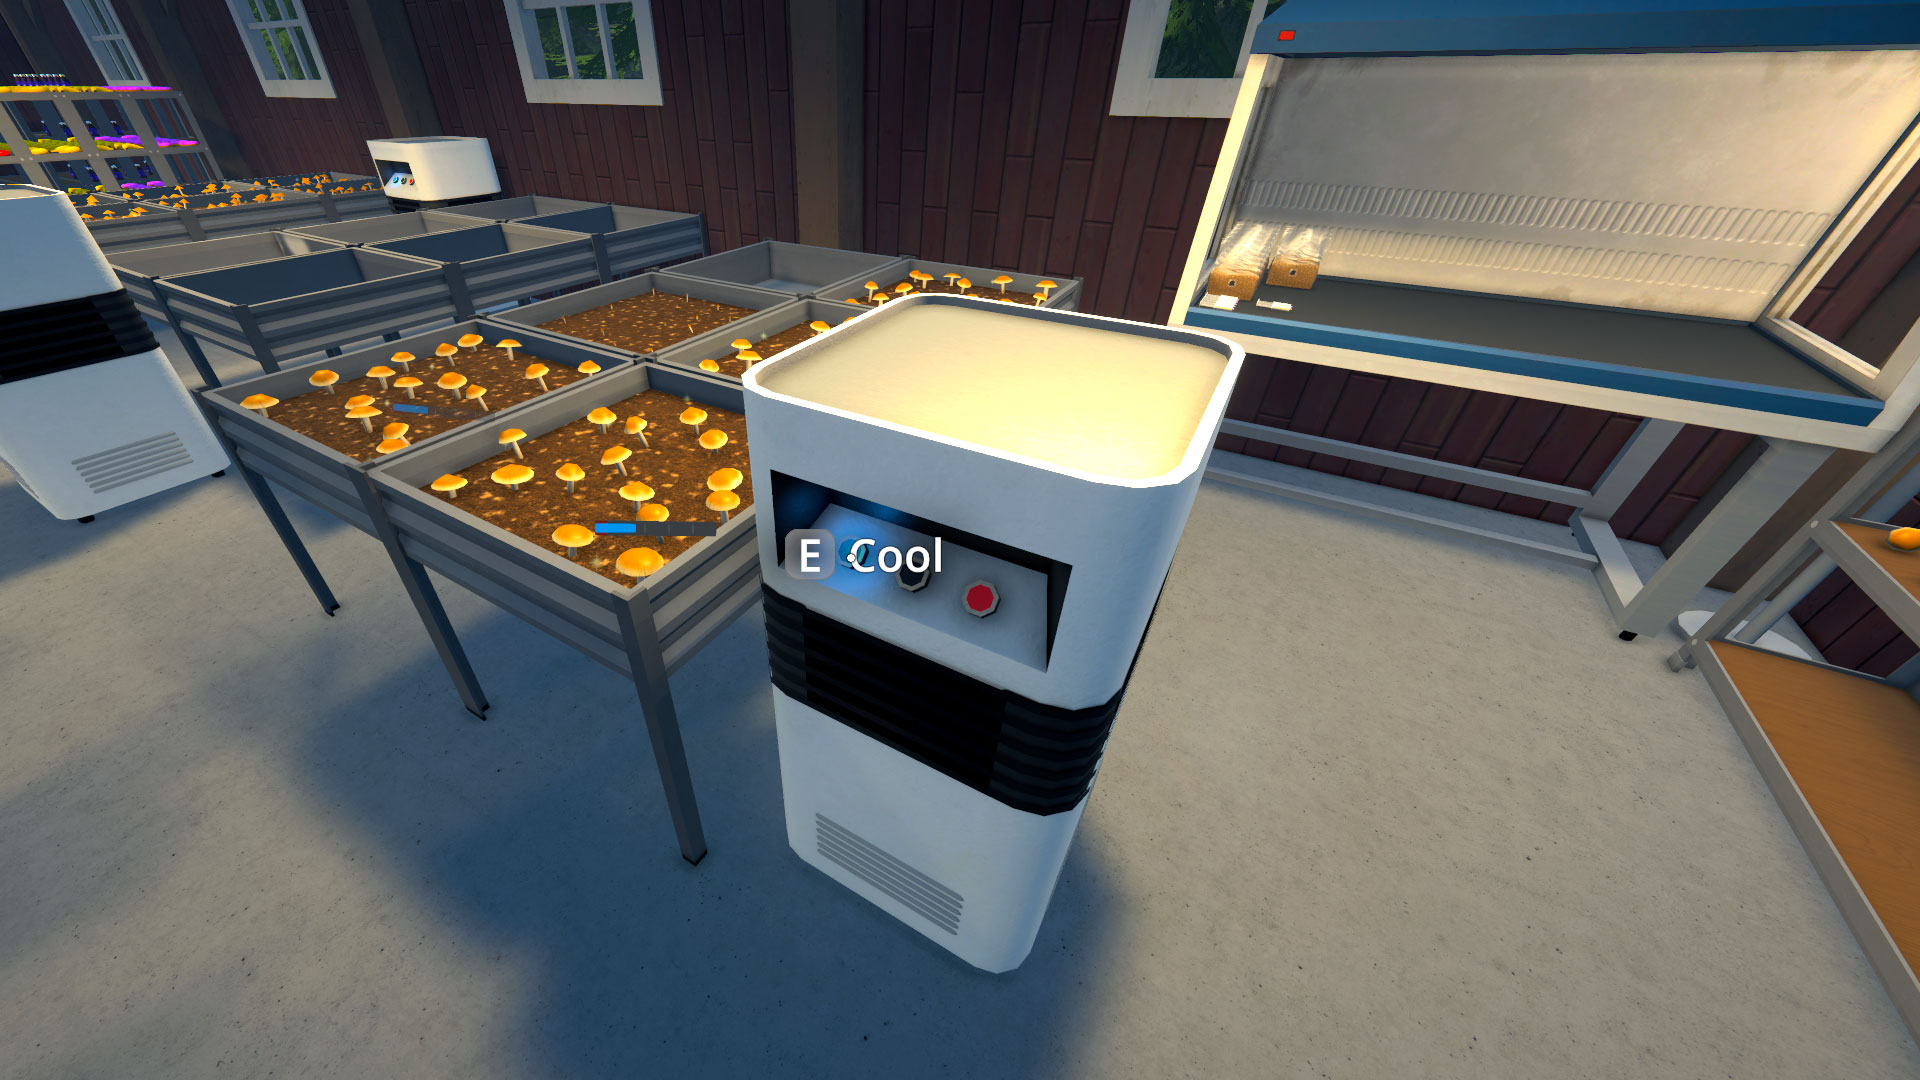
Just like the budding weed plants, you'll see your tiny toadstools slowly break through the soil until they're ready to be trimmed with the clippers. When you've clipped them free, it's time to resupply the mushroom bed with substrate and start the whole process over. Once you've mastered the process, you can always check out our list of the best Schedule 1 shroom mixes to keep your margins (and customers) high.