On Windows 11, connectivity problems with wireless adapters are common and often difficult to pinpoint. Users typically experience slow internet speeds, intermittent connectivity, or no connection to a local network or the internet.
These issues can originate from a wide range of factors, including outdated or corrupted drivers, signal interference, router or access point limitations, misconfigured radio settings, physical distance from the network, or even problems on the internet service provider's side. Because wireless networking involves multiple layers of hardware and software, identifying the root cause is not always straightforward.
To help diagnose these problems, Windows 11 includes a built-in command-line tool that generates a detailed report on the wireless network adapter. This diagnostic report provides a comprehensive overview of all Wi-Fi adapters installed on the system, recent connection sessions, configuration details, and logged error events.
Using this report, you can identify driver-related issues, authentication failures, signal problems, and other networking errors that may be affecting performance or connectivity. In many cases, the information collected is enough to isolate the cause of the problem and take corrective action without relying on third-party utilities.
In this how-to guide, I'll walk you through the steps to generate and read a wireless report on Windows 11.
How to create a wireless report on Windows 11
To create a report of your wireless network adapter on Windows 11, use these steps:
- Open Start.
- Search for Command Prompt, right-click the top result, and select the Run as administrator option.
- Type the following command to generate a Wi-Fi report and press Enter: netsh wlan show wlanreport
- Confirm the path to the report under the "Report written to" section.

Once you complete the steps, the tool will generate an HTML file containing all the details to troubleshoot the connection.
How to understand the wireless report on Windows 11
To understand a Wi-Fi report, use these steps:
- Open Start.
- Search for Run and click the top result to open the app.
- Confirm the path of the wireless report.
- Click the OK button.

After you complete the steps, the report will open in your default browser, and in the summary section, you'll find the connection sessions and their details.
You can select each connection to see the session duration and other related information.
You will also see icons for each event. For instance, the "X" icon indicates an error. The "D" icon shows when the adapter loses its connection. The "N" icon appears when the computer isn't connected.
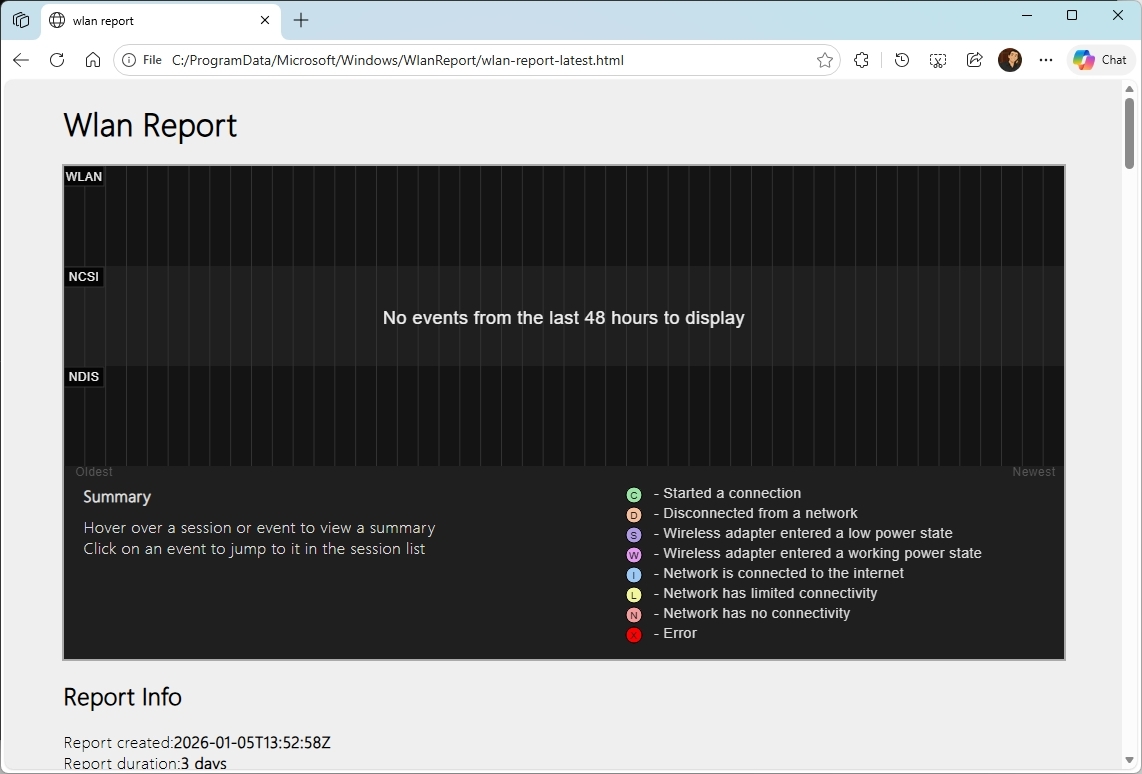
Under the "Report Info" section, you'll find the report dates. The report duration is usually three days.
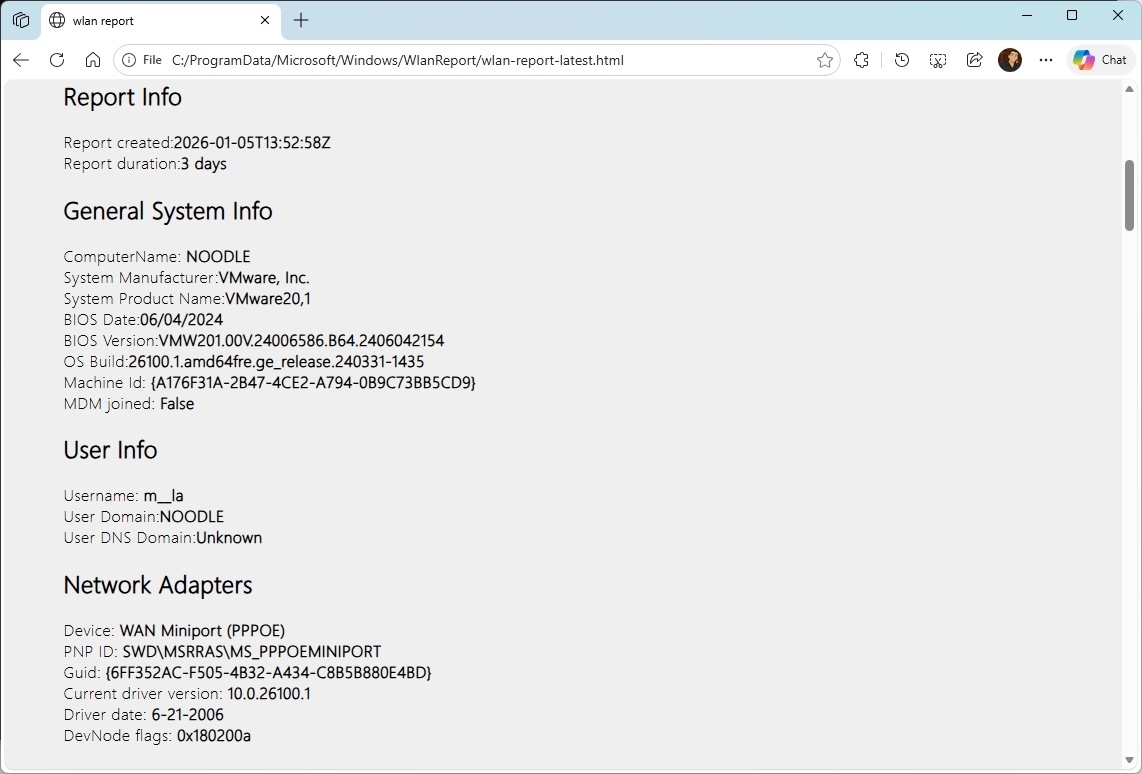
The "General System Info" section displays system-specific details, such as firmware, Windows version, and more. Usually, this information helps you troubleshoot compatibility issues on your laptop or desktop computer.
The "User Info" section includes some basic user details.
The "Network Adapters" section lists the details of the network adapters. For example, in this list, you'll find the name and version of the driver and error codes (if the adapter has any problems).
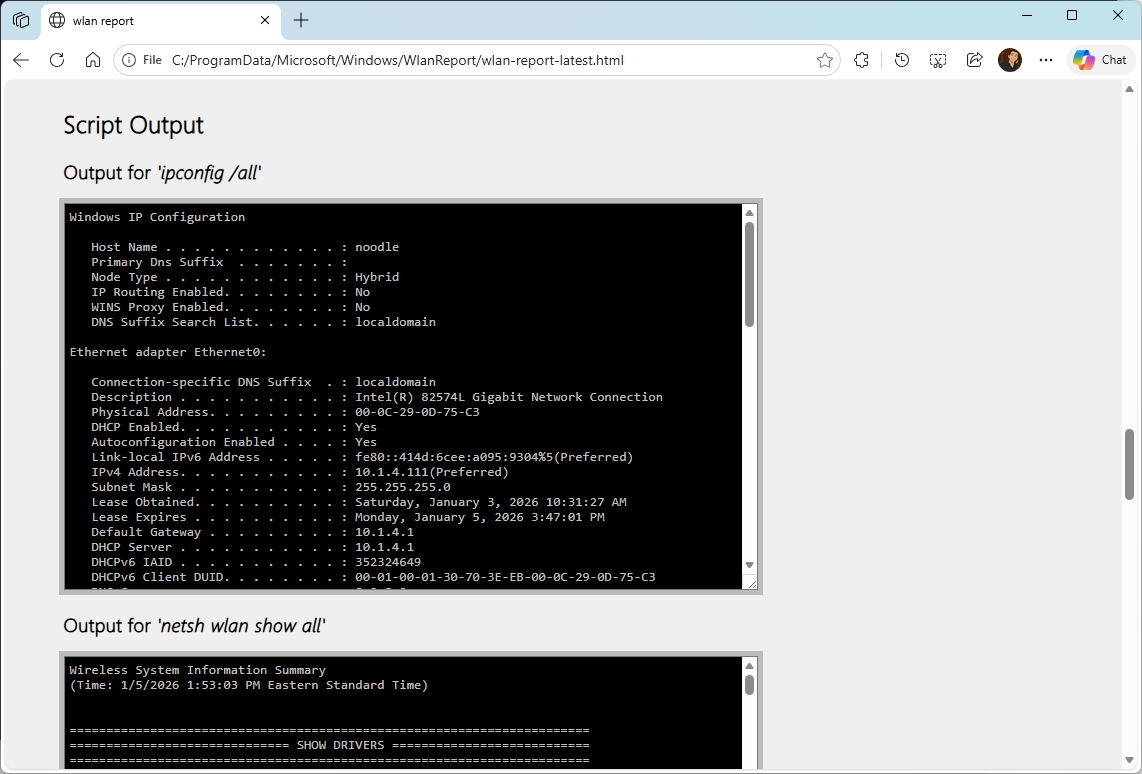
The "Script output" section shows details of several troubleshooting tools for networking, including "ipconfig," "netsh," and "certutil" tools.
The "ipconfig /all" command shows the current network configuration for all the adapters. The "netsh wlan show all" command displays the driver and wireless details, including a list of available network access points. Also, the report runs a "certutil" command that uncovers details about the wireless profiles.
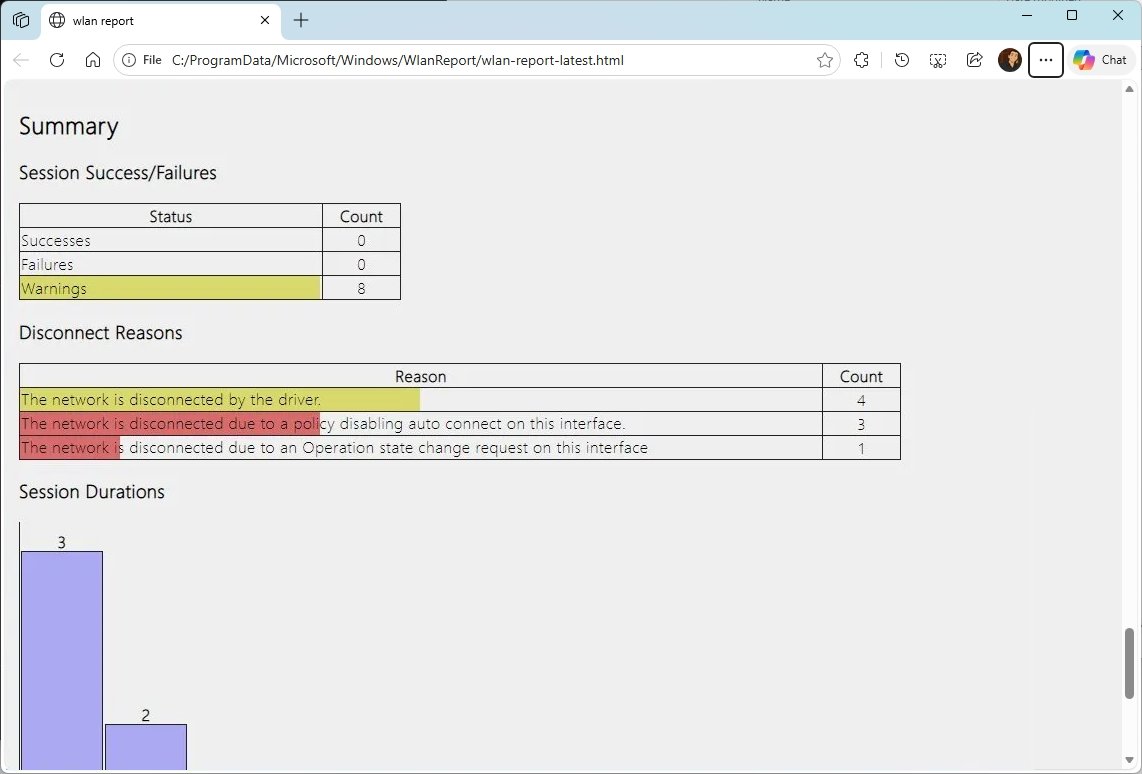
The "Summary" section includes the times the adapter successfully connected to a session and the failures and warnings encountered when connecting to the network.
Furthermore, the report can list the reason the adapter lost connectivity and the session duration.
Finally, the "Wireless Sessions" section houses the events for each session. Some of these include the wireless adapter name, connection method, and Service Set Identifier (SSID). You will also find event details, including the identifier, date, and time, and event description.
The report doesn't describe the steps to resolve the network problem, but it packs a lot of information that should help you to troubleshoot and fix common issues.
FAQs about creating a Wi-Fi report on Windows 11
These are common questions regarding creating a wireless report on Windows 11.
What is the Wi-Fi report on Windows 11?
The Wi-Fi report is a built-in diagnostic file generated by Windows 11 that shows wireless adapter details, connection history, errors, and events to help troubleshoot network problems.
How do I generate a Wi-Fi report on Windows 11?
Open Command Prompt as administrator, type netsh wlan show wlanreport, and press "Enter." Windows 11 will generate an HTML report and display the file location.
Where is the Wi-Fi report saved in Windows 11?
By default, the report is saved as wlan-report.html in the C:\ProgramData\Microsoft\Windows\WlanReport\ folder.
What problems can the Wi-Fi report help diagnose?
The report can help identify driver issues, authentication failures, signal drops, unstable connections, and adapter errors that affect wireless performance.
Can the Wi-Fi report fix network problems automatically?
No. The report does not apply fixes, but it provides detailed information that helps you identify the cause of wireless issues and take corrective action.
Does the Wi-Fi report show driver information?
Yes. The report lists the wireless adapter name, driver version, and any related error codes, which is useful for troubleshooting compatibility or outdated drivers.
More resources
For more helpful articles, coverage, and answers to common questions about Windows 10 and Windows 11, visit the following resources: