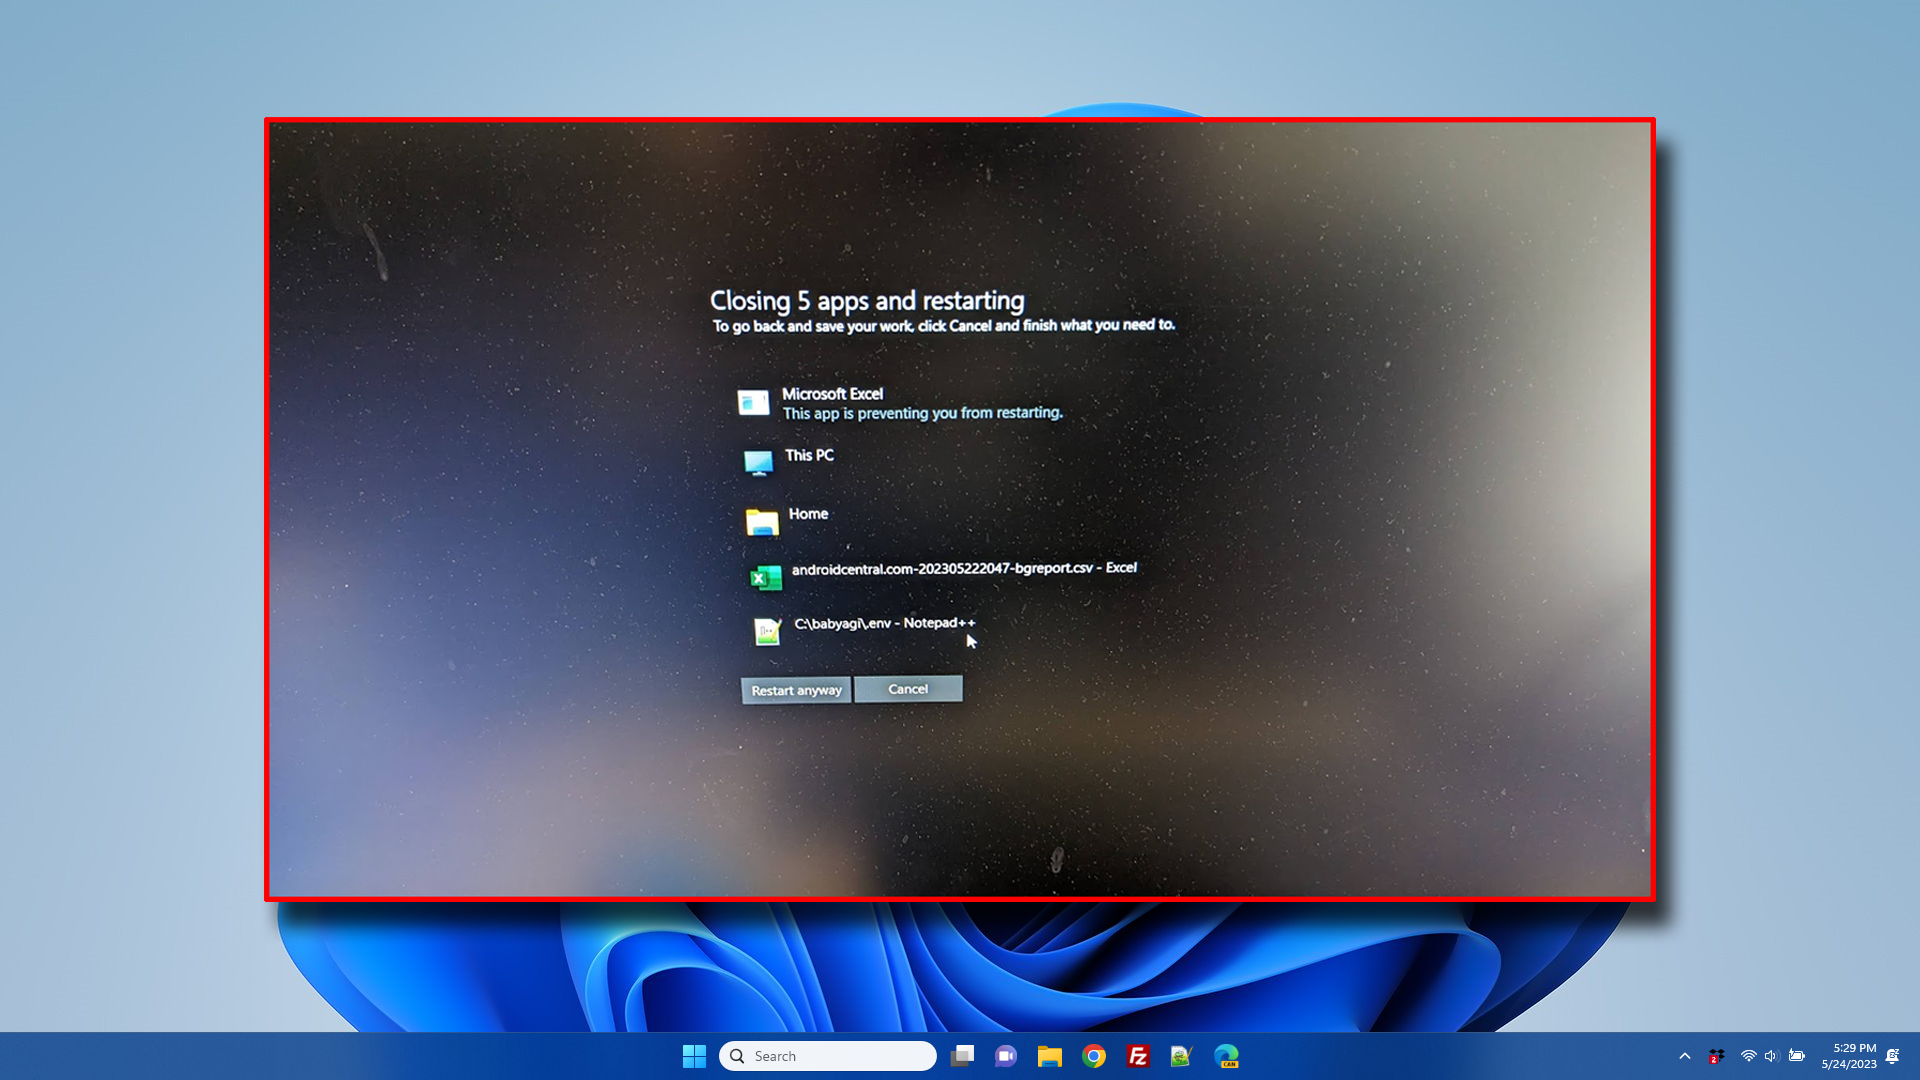
Windows 11 and Windows 10 have a lot of annoying default settings, but none is worse than the OS's refusal to kill unresponsive tasks when you choose to shut down or restart. By default, if a single program -- even a simple background program -- refuses to shut itself down or claims to have unsaved data, the OS will throw up an error message which gives you the opportunity to either cancel your shutdown or force close the apps by hitting "Restart Anyway" or "Shutdown Anyway."
In theory, this is a nice safety feature for people who are absent-minded about saving their work. Perhaps you had an important document open in Notepad, you went to restart to install an update and you forgot to save your work beforehand. This notice would give you the opportunity to go back to the Windows desktop, save your file and then initiate the restart again.
However, in reality, there are a ton of apps that refuse to shut down automatically -- I've even seen peripheral control software do this. So you end up selecting restart, walking away from the computer for a few minutes while you wait for it to do its thing (perhaps running a Windows update) and then coming back to see that your PC is still waiting for your permission to restart. Give me a break!
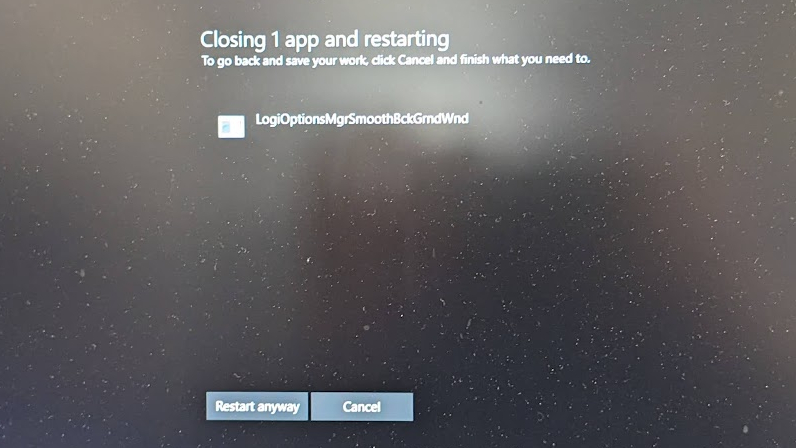
Fortunately, it's easy to fix this problem by editing the Windows registry. There are a few different settings you can tweak to change the amount of time Windows waits to kill a hanging app, but the most important thing to do is set HKEY_CURRENT_USER\Control Panel\Desktop\AutoEndTasks to 1. We'll go through this step-by-step below.
How to Auto End Tasks in Windows 11 or 10
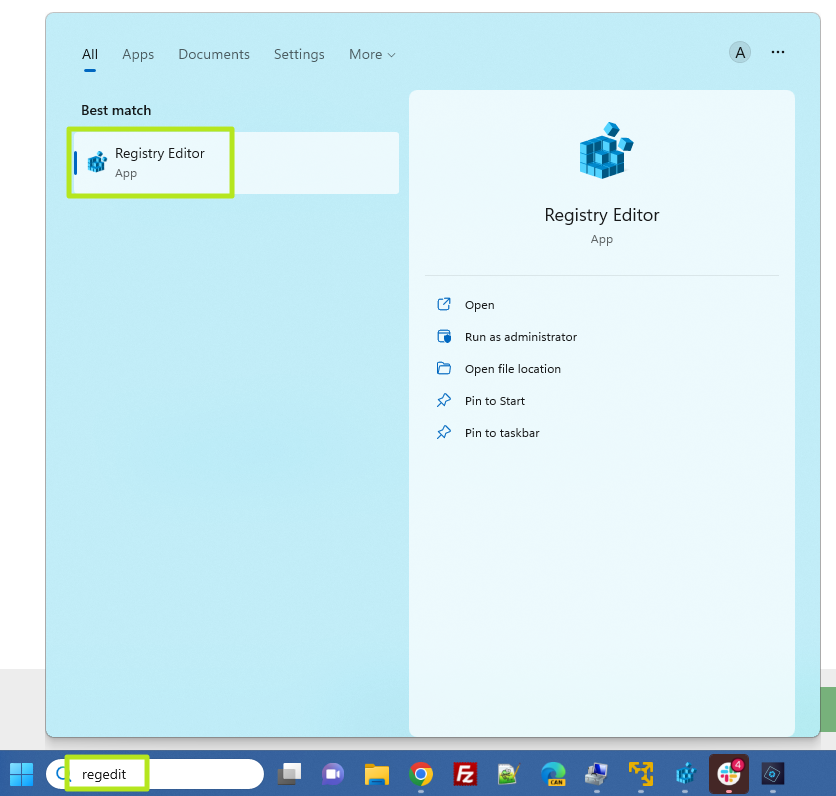
1. Open the registry editor. To get there search for "regedit" and click the top result. Click yes if prompted for permission.
2. Navigate to HKEY_CURRENT_USER\Control Panel\Desktop.
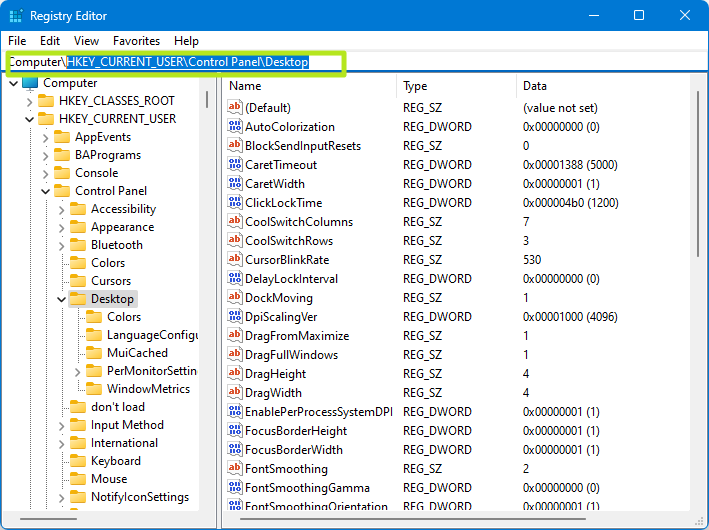
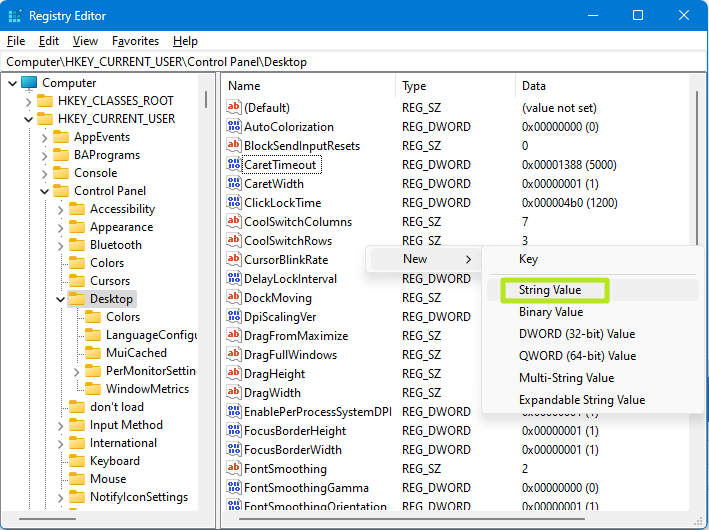
3. Create a String Value called AutoEndTasks if it doesn't already exist. To create a string value, right click in the right pane and select New->String Value. Then rename the one it creates to AutoEndTasks.
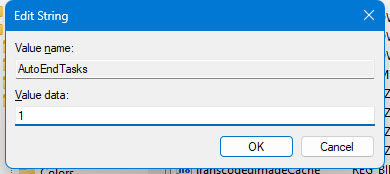
4. Set AutoEndTasks to 1. You can do that by doubleclicking on it and setting the number to 1.
5. Add the following optional strings to speed up shutdown time.
- WaitToKillAppTimeout: The amount of time windows waits before killing an open app. It defaults to 20,000 milliseconds (20 seconds), but you can set it as low as 2,000 (2 seconds) for less wait time.
- HungAppTimeout: The amount of time Windows waits for a non-responsive app to close itself. The default is 5,000 milliseconds but you can cut it to 2,000.
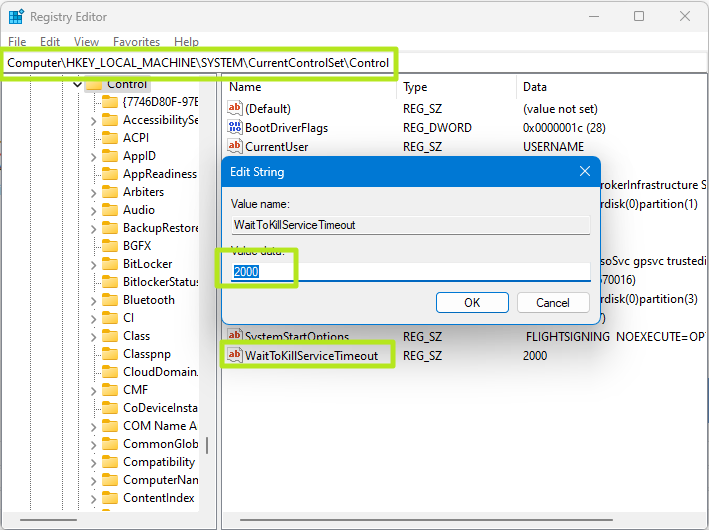
6. Set WaitToKillServiceTimeout to 2,000 under HKEY_LOCAL_MACHINE\SYSTEM\CurrentControlSet\Control if you want to speed up the time Windows waits for unresponsive services.
7. Close regedit and restart your PC.
From now on, Windows should wait just a couple of seconds before force-closing your apps on shutdown. So be sure you really have saved any work that you want to keep.
To change another annoying default Window setting that slows you down, see how to disable Windows web search.


