Gaps in laminate floors are unsightly and are the ideal place for debris and moisture to accumulate, which can ruin your flooring over time. Thankfully, you can fix such spaces in just a few minutes, with a few basic tools, and without completely rebuilding your flooring.
It's reasonably common for laminate floors to develop gaps over time due to various factors, from fluctuations in humidity and temperature to improper installation. However, there are solutions you can use to address this issue and restore the beauty of your flooring.
The best way to fix gaps in your laminate floor is by using a simple DIY solution. It involves using a laminate floor repair kit, which can be easily purchased online or at any home improvement store. Here's how to tackle the issue effectively, according to our experts.
How to fix laminate floor gaps
Whether gaps are spread across your floor or localized to a specific area, this technique can be used to move the boards back into place.
1. Identify the cause

Laminate floor gaps can occur for several reasons, and before attempting to fix them, it's important to determine the cause to find the best solution.
'The reason behind the gaps can include poor installation, changes in temperature and humidity, warped or damaged boards, or movement of the floorboards,' explains Shlomo Cherniak, owner of Cherniak Handyman Services.
If the issue is caused by the movement of the floorboards, skip to step 2. If another of the other reasons apply, consider the tips below before moving on.
If you are unsure of the issue, consult a flooring contractor. They can accurately assess the situation and recommend the most effective solutions for repairing the gaps. Whether it involves repositioning planks, using specialized fillers, or adjusting the subfloor.
Dealing with humidity
Laminate floors can expand and contract with changes in humidity. If your gaps are seasonal or due to humidity changes, consider using a humidifier or dehumidifier to maintain consistent indoor humidity levels.
'Additionally, consider installing expansion strips if changes in humidity cause the gaps,' advises Arpit Jain, interior designer at McLine Studios. 'These strips allow the floor to expand and contract naturally without causing gaps and are typically installed in doorways or other transition areas.'
Dealing with poor installation
Check the installation of the laminate flooring. Gaps may occur if the planks were not properly installed or there was insufficient expansion space around the room's perimeter.
'In cases where gaps are extensive or due to poor installation, it may be necessary to reinstall the affected planks,' explains Arpit Jain. 'This ensures a tighter fit and eliminates gaps.
'Addressing laminate floor gaps promptly not only enhances the aesthetic appeal of your space but also prevents further damage.'
Damaged or warped planks
If damaged or warped planks cause the gaps, you may need to replace them. Carefully remove the damaged planks and install new ones in their place. Be sure to leave the necessary expansion space around the edges.
2. Get a gap fixer tool

For issues related to the movement of your laminate floorboards, you will need to purchase or create your own gap fixer tool.
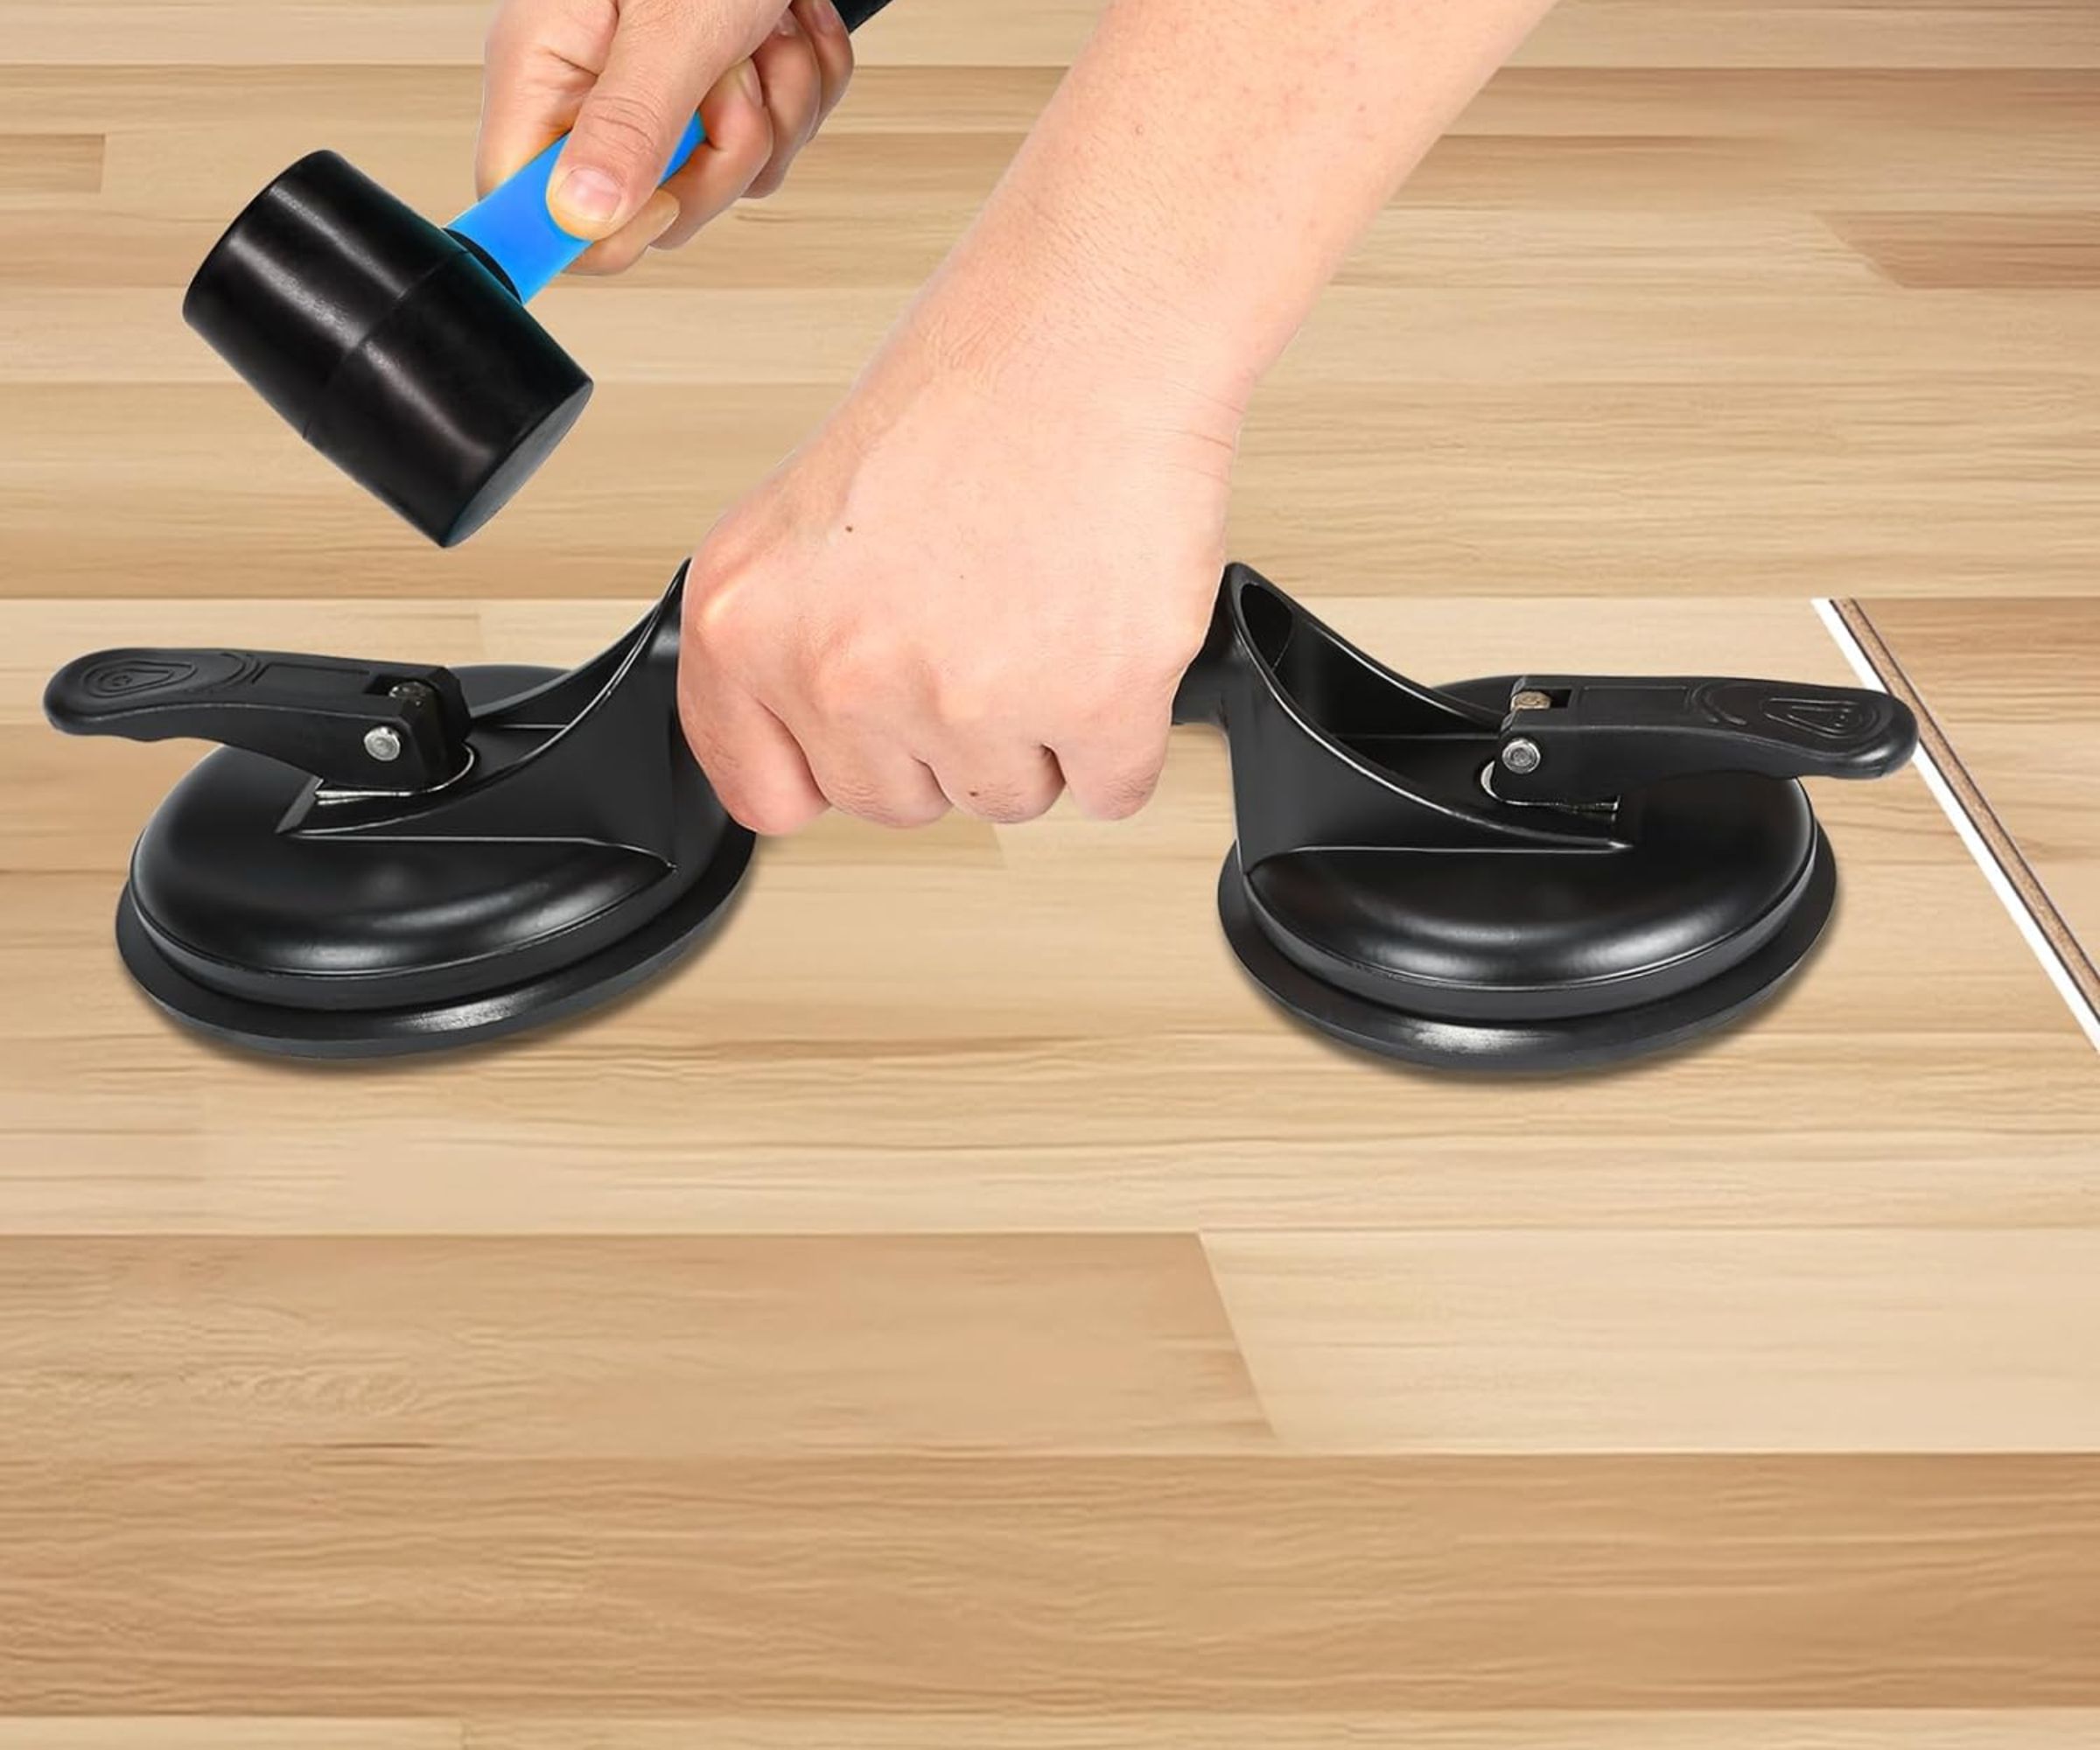
'Storebought gap fixer tools resemble a handle with suction cups,' explains Shlomo Cherniak. 'You use this tool to grip the laminate planks and slide them back into place.'
'You can make your own gap fixer tool by obtaining a solid piece of wood that is large enough to serve as leverage and applying double-sided tape to one side. When you have prepared the floor, you will stick the other side of the tape to the board you want to move.'
You will also need a mallet and wood glue or filler to complete this task.
3. Clean the surface

Start by cleaning the laminate floor's surface to remove any dirt or debris in the gap using a vacuum cleaner and a knife if needed. Consider using a DIY floor cleaner for this task.
4. Position the wood tool
Then, place the wood tool with the double-sided tape or suction tool onto the laminate plank that needs to be moved, ensuring it is positioned to apply pressure to the plank.
5. Use fillers and sealants

Use fillers and sealants specifically designed for laminate floor gap repair. These products come in various colors to match your floor and are easy to apply.
'If the gaps are small, you can apply a small amount of wood glue into the open tongue and groove gaps,' recommends Shlomo Cherniak. 'Use a toothpick or a low-viscosity glue to ensure it reaches deep into the joint.' Apply a sufficient amount to ensure a secure bond.
After doing this, quickly move on to the next step.
6. Use the wood tool to slide the plank into place

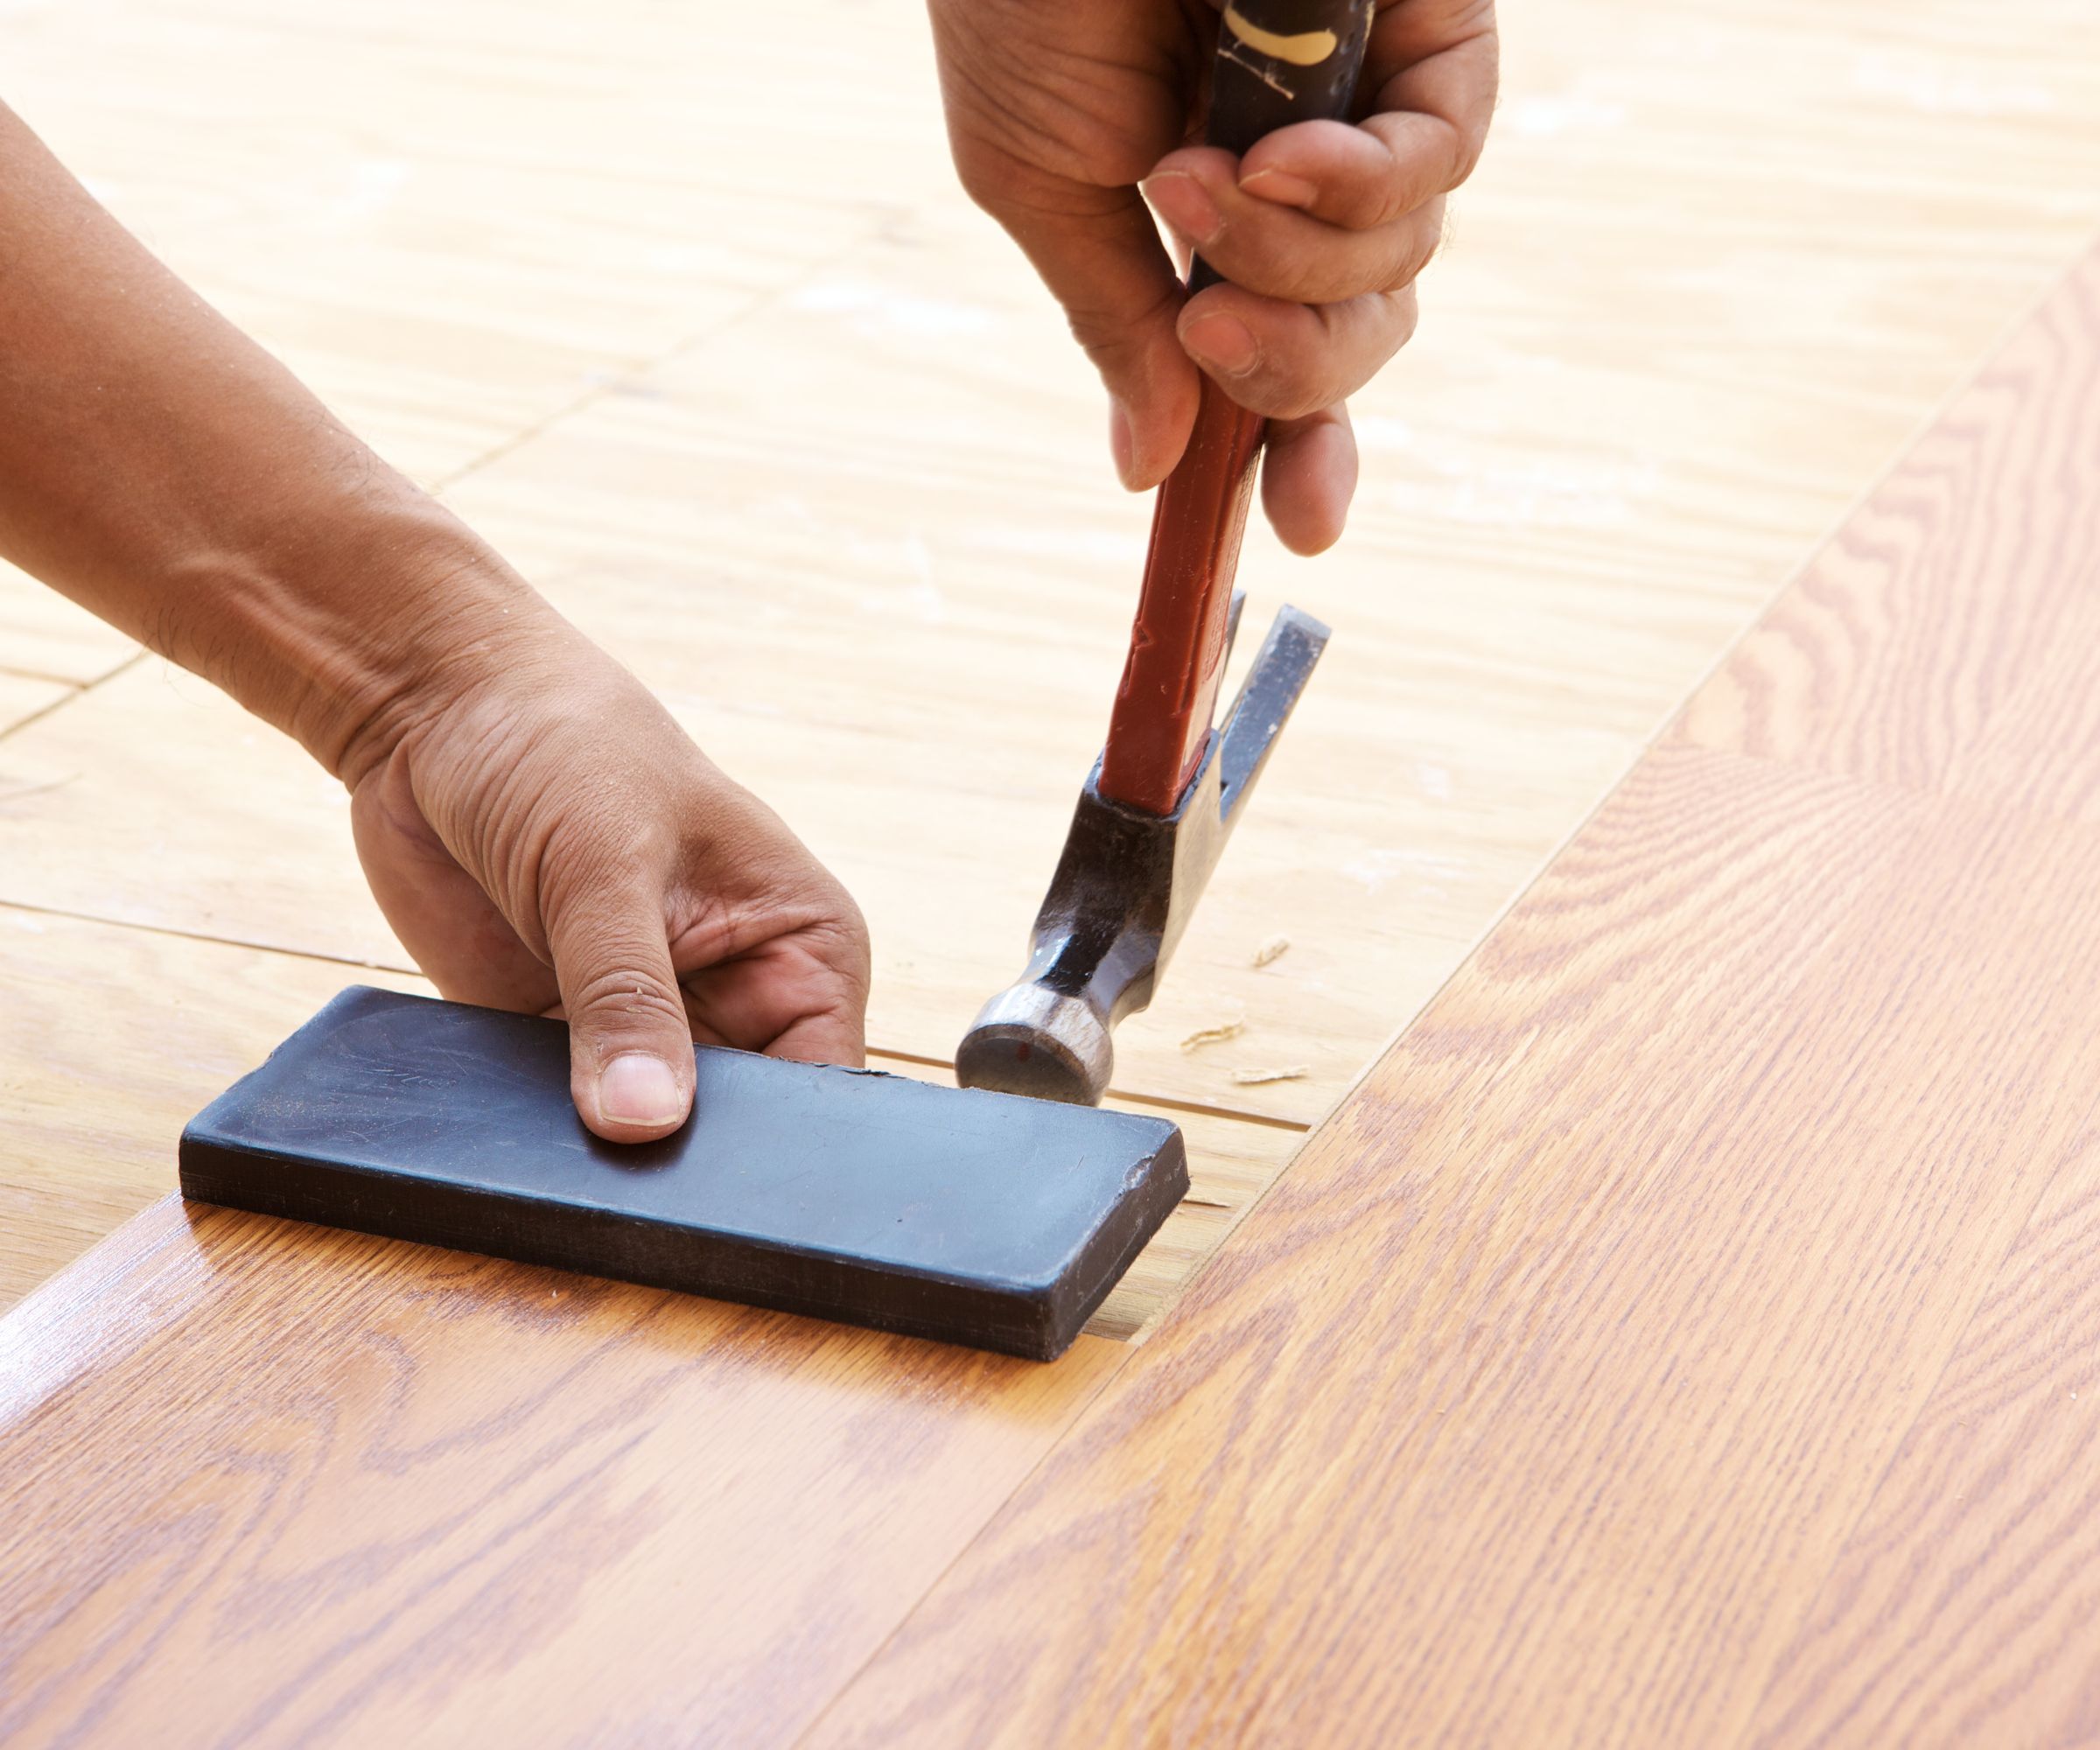
Step on the adjacent flooring to prevent it from moving. Slide the tool along the gaps to push the laminate planks back into place. You may need to use a mallet to knock it into place gently.
7. Clean excess glue
'After closing the gaps, immediately wipe off any excess glue on the surface using a damp rag,' recommends Shlomo Cherniak.
Allow the glue to dry out completely according to the manufacturer's instructions before sanding down any excess glue using sandpaper included in the kit.
Ensure the sealant is completely dry before walking on the floor.
8. Remove the tool and check other boards

After the plank is back in place, remove the suction cup or use a flat bar with double-sided tape to remove the wooden tool, being careful not to scratch your floor.
Check other boards along the same row for any new gaps that may have opened. Repeat the process of gluing and closing the gaps as necessary.
If you wish to seal gaps in areas where the laminate floor meets another type of flooring, such as tile or carpet, install transition strips to cover the gaps and provide a smooth transition between surfaces. Choose those that best suit your preferences and floor style. Walmart has a wide range of transition floor strips.


