Safe Mode is a diagnostic startup mode in Windows that allows users to troubleshoot issues with their operating system. When Windows starts in Safe Mode, it only loads essential system drivers and services, providing a clean environment to identify and fix problems.
This mode can be particularly useful when dealing with issues caused by problematic drivers, software, or malware. In Windows 11, there are several methods to access Safe Mode, ensuring that users have multiple options for diagnosing and resolving issues.
In this guide, we will walk you through the process of entering Safe Mode in Windows 11. Follow this step-by-step guide and you’ll learn how to enter Safe Mode in Windows 11 to troubleshoot a variety of different problems.
How to enter Safe Mode in Windows 11
Step 1: Open Windows Settings: Press the Windows key + I to open the Settings app.

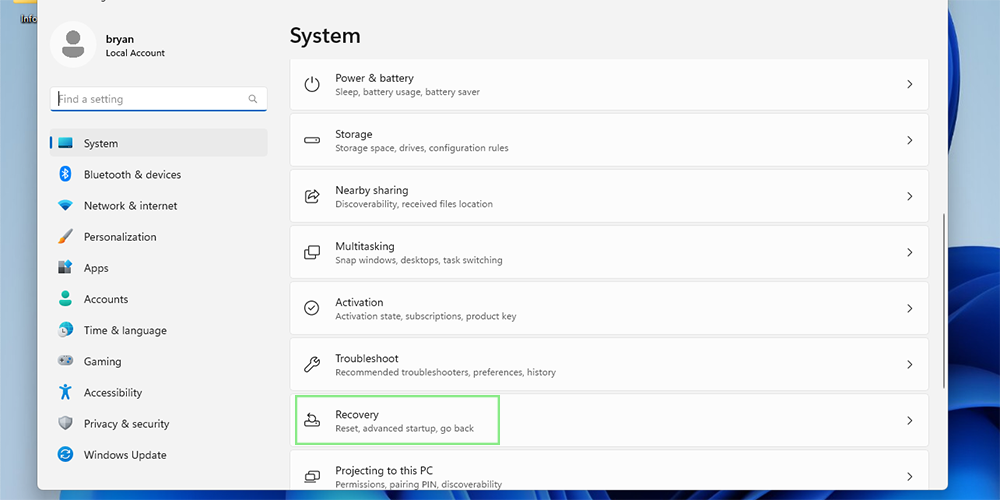
Step 2: Access the Recovery options: Click on "System" in the left pane, and then select "Recovery" in the right pane.

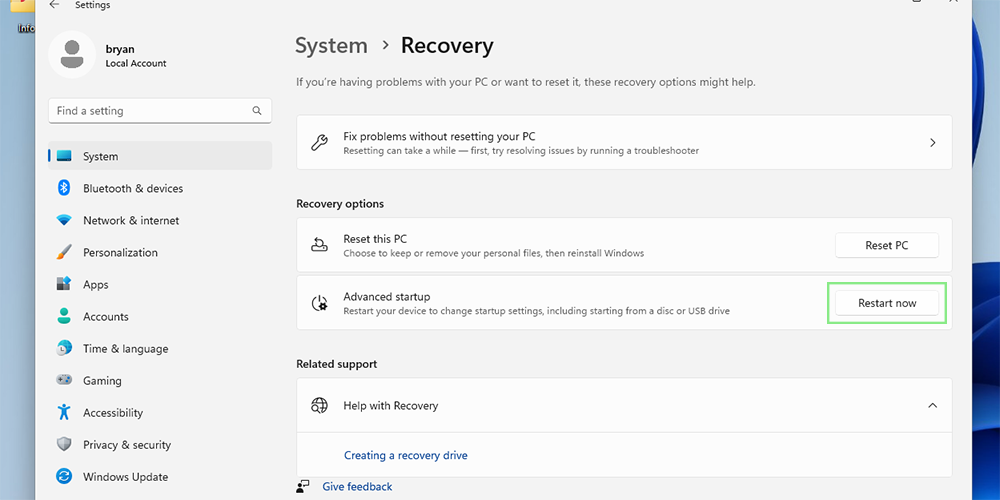
Step 3: Open Advanced Startup: Under the "Advanced startup" section, click the "Restart now" button and click “Restart now” once more if you’re prompted.

Step 4: Navigate to Startup Settings: After your computer restarts, click on "Troubleshoot."

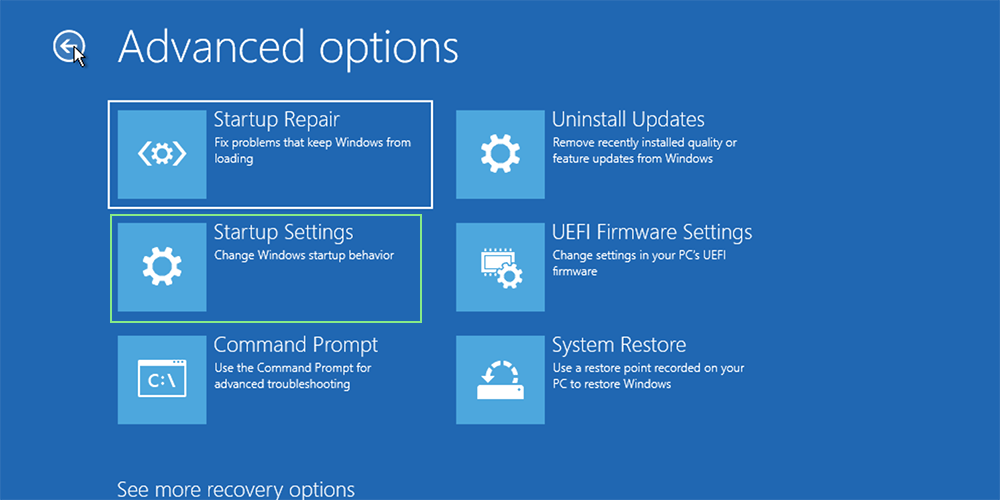
Step 5: Next click "Advanced options."

Step 6: And finally, click "Startup Settings."

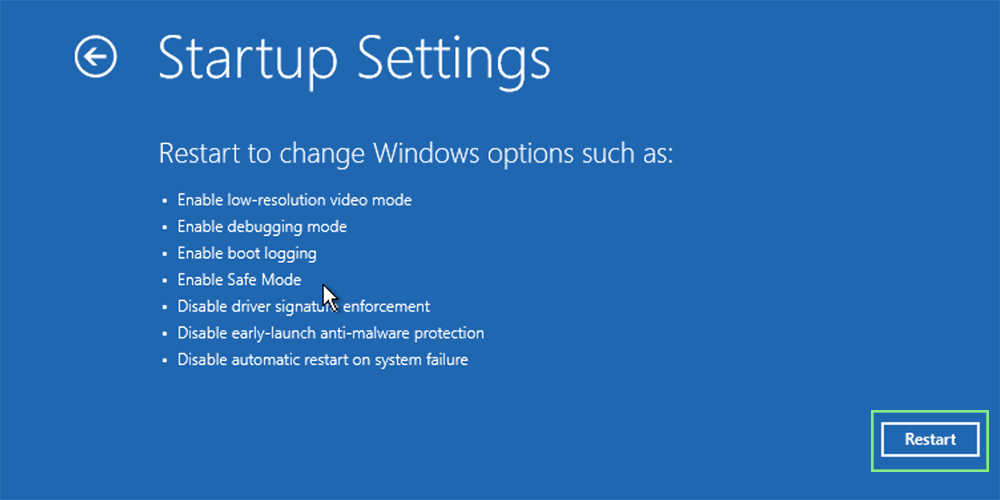
Step 7: Restart to access Safe Mode options: Click the "Restart" button to reboot your computer with the Safe Mode options.

Step 8. Choose a Safe Mode option: After the computer restarts, press the appropriate function key (F4 for Safe Mode, F5 for Safe Mode with Networking, or F6 for Safe Mode with Command Prompt).
That’s it, Windows 11 should now be up and running in the Safe Mode you selected, which should help you determine if a new driver or application was causing an issue for your laptop.


