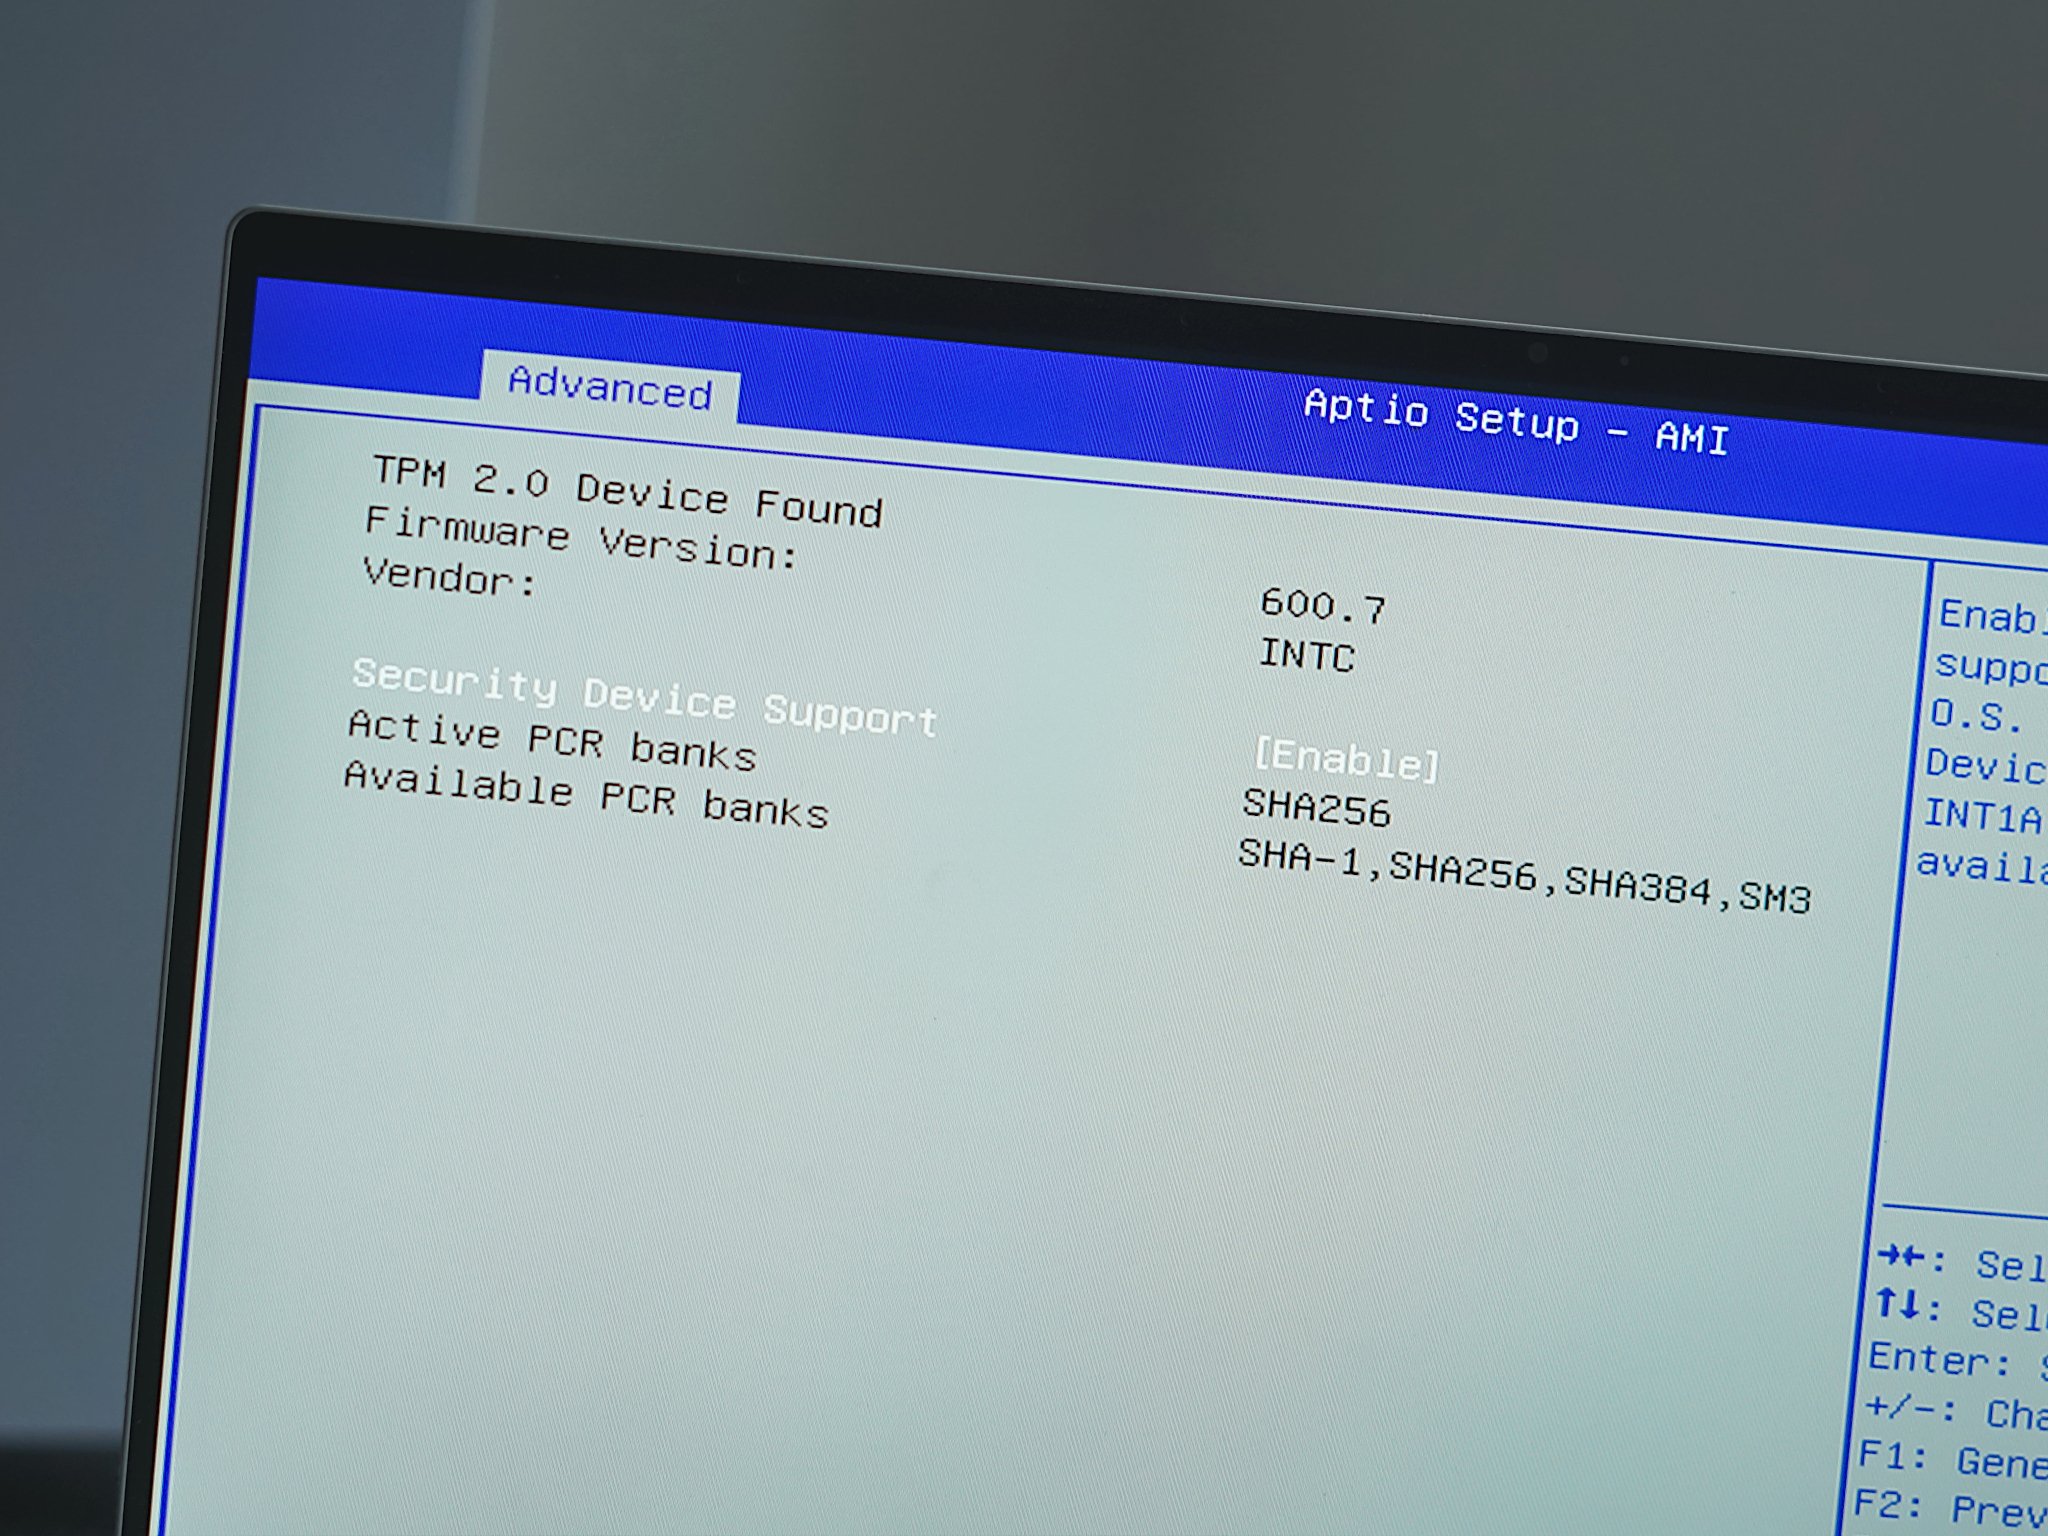
Although your device may include a Trusted Platform Module (TPM) chip, it doesn't necessarily mean that it's enabled by default. If it's not, you may need to enable it manually to use features like BitLocker on Windows 10 or perform an in-place upgrade or fresh install of Windows 11.
A Trusted Platform Module is a tamper-resistant silicon designed to generate, store, and protect encryption keys. It usually comes embedded on the motherboard, but you may also be able to get a module that you can then integrate into the system.
You wouldn't typically think about TPM on home devices since this was more of a feature designed for businesses. However, it's a requirement if you want to upgrade to Windows 11.
If you plan to install Windows 11 and the PC Health Check app tells you that your hardware isn't compatible, even when you know everything else meets the requirements, or you want to take advantage of advanced security features on Windows 10, you can quickly enable the security module from the Unified Extensible Firmware Interface (UEFI) settings.
In this how-to guide, I'll teach you the steps to enable TPM on your computer so you can install the latest version of Windows.
Warning: Changing the incorrect firmware settings can prevent your device from starting correctly. You should access the motherboard settings only when you have a good reason. It's assumed that you know what you're doing. You have been warned.
How to enable TPM through desktop environment
To enable the Trusted Platform Module (TPM) on your computer through the Windows 10 settings, use these steps:
- Open Settings.
- Click on Update & Security.
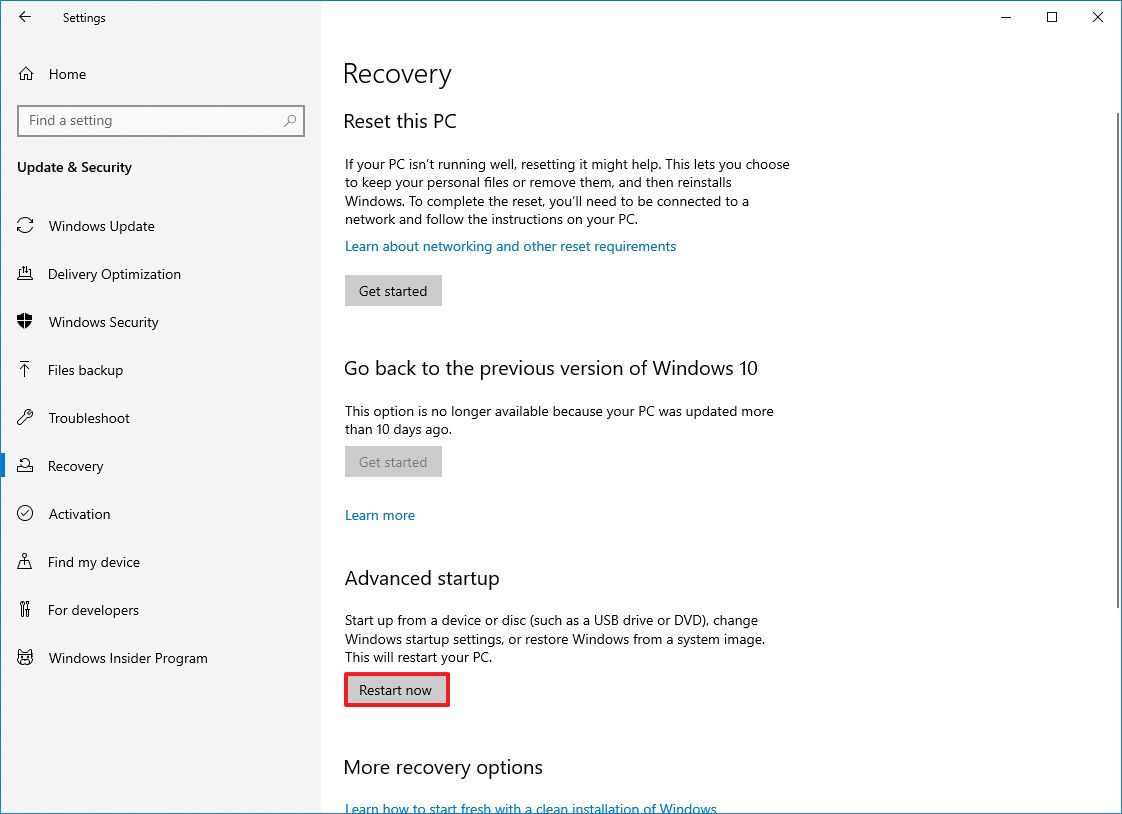
- Click on Recovery.
- Click the Restart now button under the "Advanced startup" section.
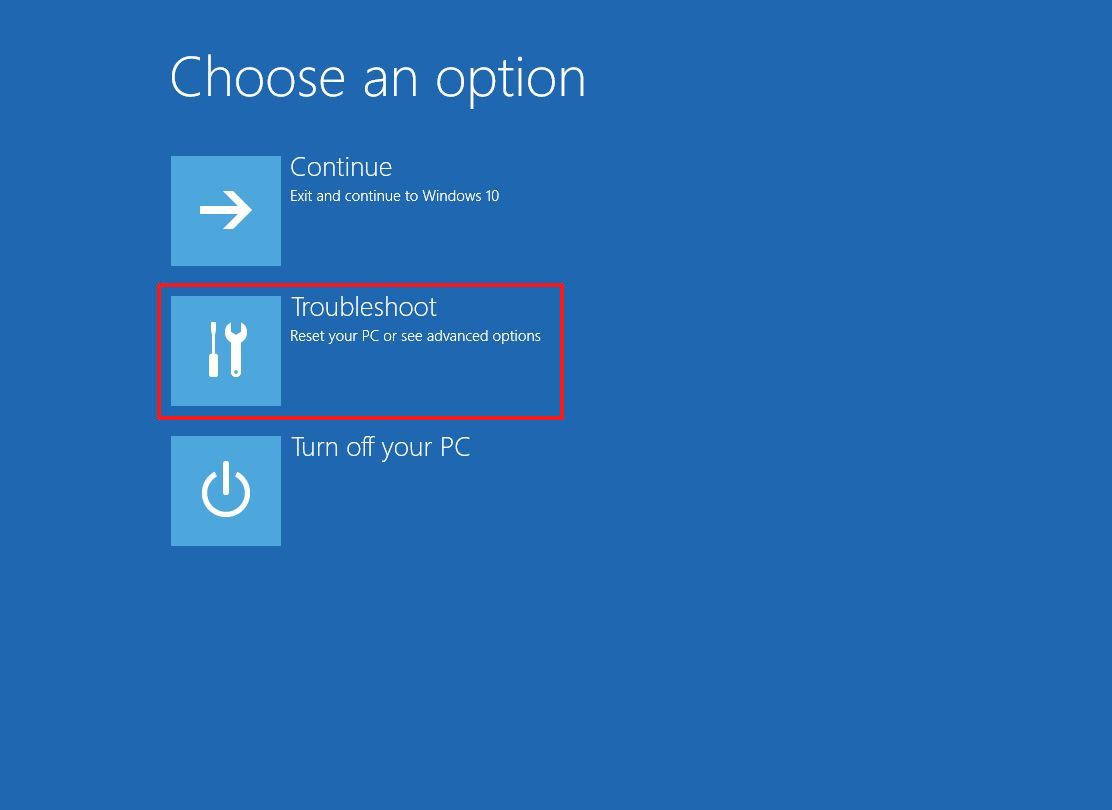
- Click on Troubleshoot.
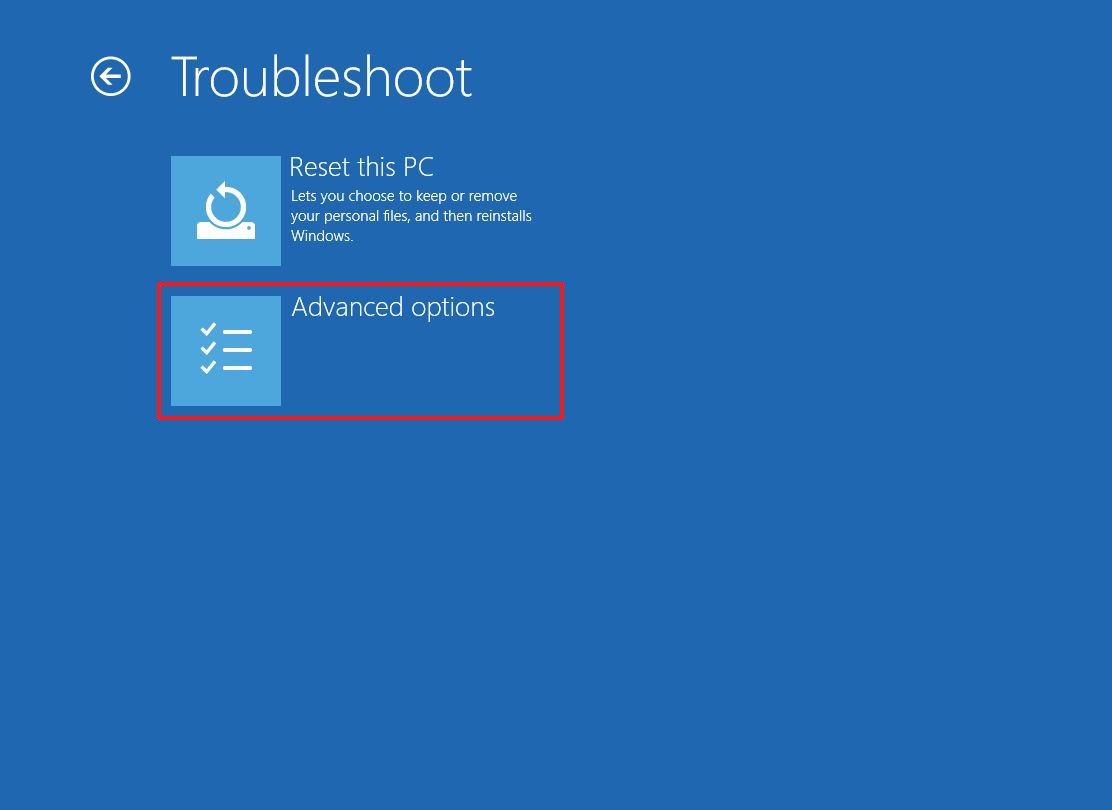
- Click on Advanced options.
- Click the "UEFI Firmware settings" option.
- Quick tip: If you have a legacy BIOS, the option will not be available.
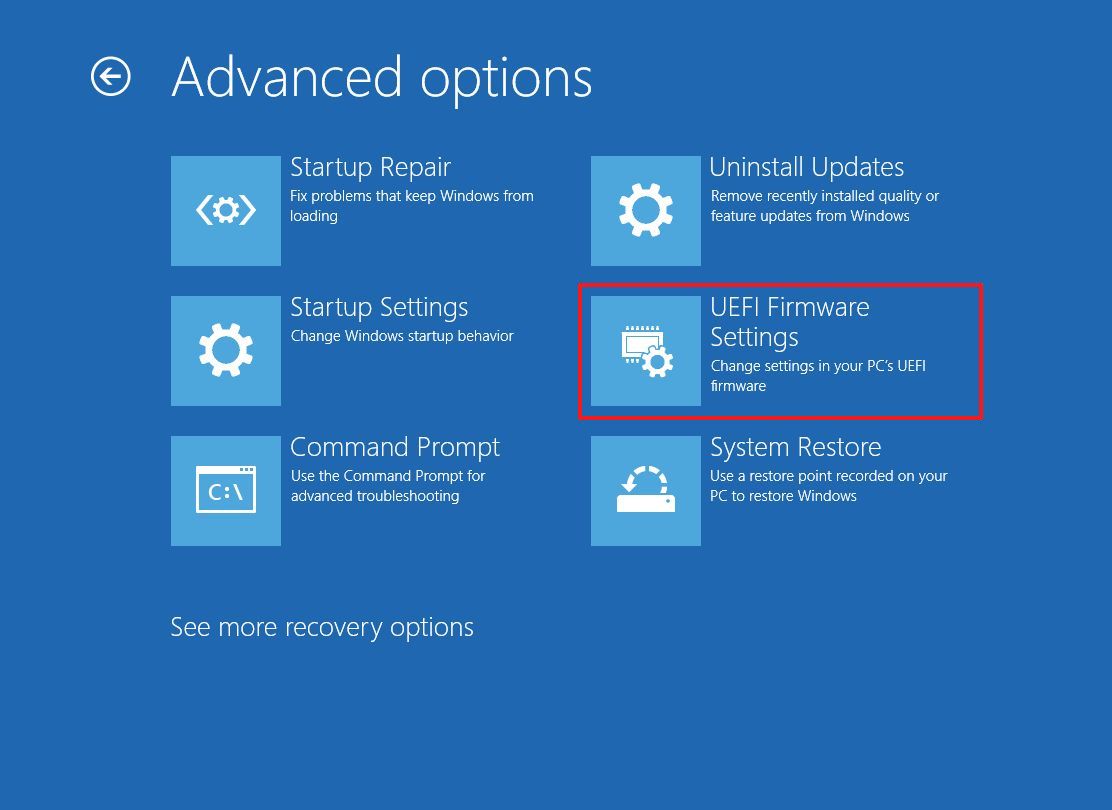
- Click the Restart button.
- Open the security settings page.
- Quick note: The UEFI settings are usually different per manufacturer and even per computer model. As a result, you may need to check your manufacturer support website for more specific details to find the security settings.
- Select the "Trusted Platform Module (TPM)" option and press Enter.
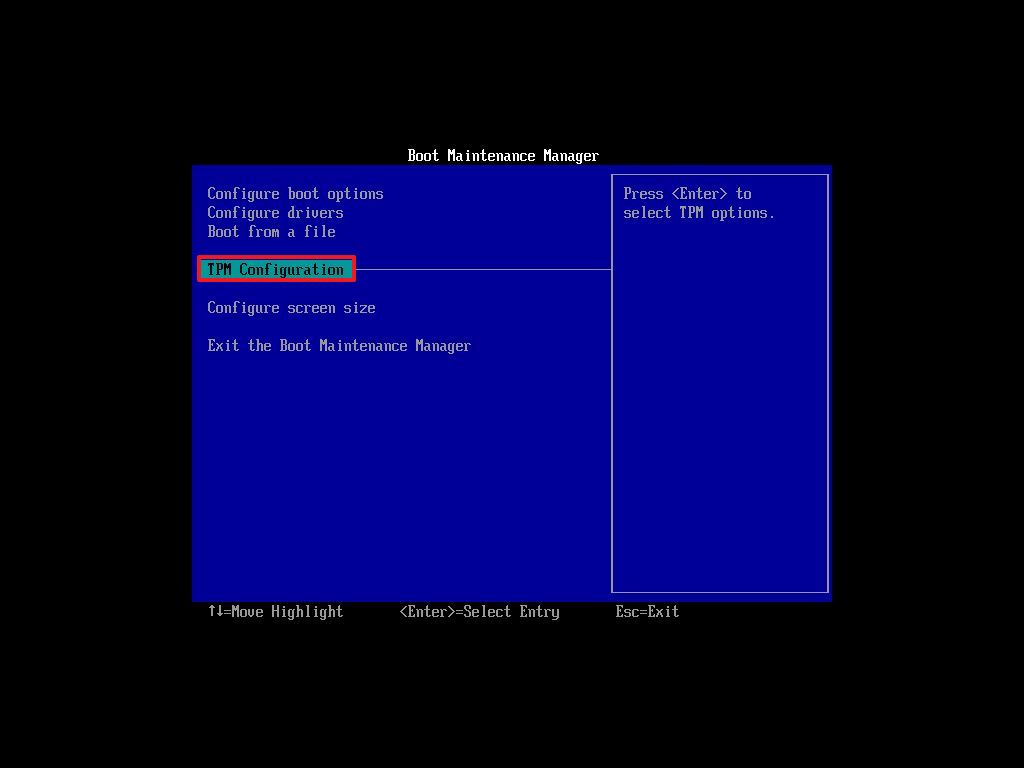
- Select the Enabled option and press Enter.
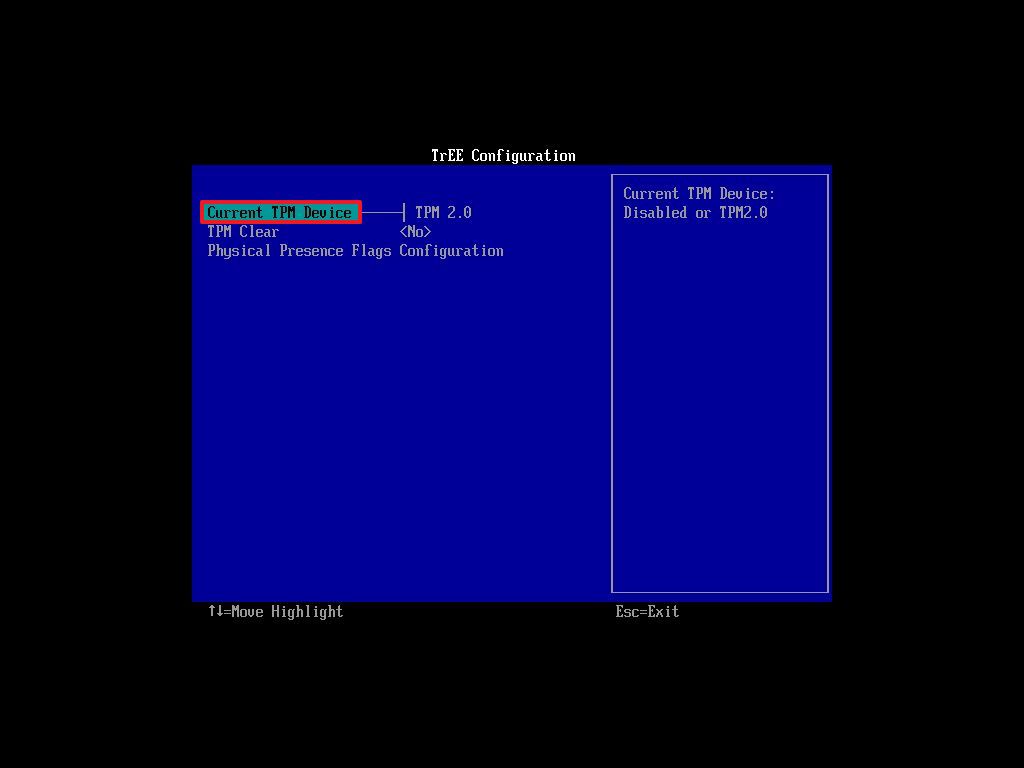
- Exit the UEFI settings.
- Confirm the changes to restart the computer.
Once you complete the steps, the security module will enable to allow you to configure and use features like BitLocker or pass the compatibility check to install Windows 11.
How to enable TPM through boot sequence
If you don't have access to the Windows 10 desktop, or this is a new computer, you can access the UEFI settings to enable a trusted platform module during the startup process.
To access the firmware settings to enable the TPM chip on your computer during the boot process, use these steps:
- Press the Power button.
- See the screen splash to identify the key you must press to enter the firmware (if applicable).
- Press the required key repeatedly until you enter the setup mode. Typically, you need to press the Esc, Delete, or one of the Function keys (F1, F2, F10, etc.).
- Open the security settings page.
- Select the "Trusted Platform Module (TPM)" option and press Enter.

- Select the Enabled option and press Enter.

- Exit the UEFI settings.
- Confirm the changes to restart the computer.
After you complete the steps, the Trusted Platform Module will be enabled on the computer.
If you don't see the information on the screen or the computer boots too fast, restart the device again, and as soon as the boot starts, press the required key multiple times quickly.
If you cannot access the firmware using the keyboard, you may need to check your manufacturer documentation to determine the key you need to press during boot. Here are some computer brands and their respective keys to access the motherboard firmware:
- Dell: F2 or F12.
- HP: Esc or F10.
- Acer: F2 or Delete.
- ASUS: F2 or Delete.
- Lenovo: F1 or F2.
- MSI: Delete.
- Toshiba: F2.
- Samsung: F2.
- Surface: Press and hold volume up button.
More resources
For more in-depth insights, troubleshooting tips, and the latest updates on Windows 11 and 10, be sure to explore these resources:


