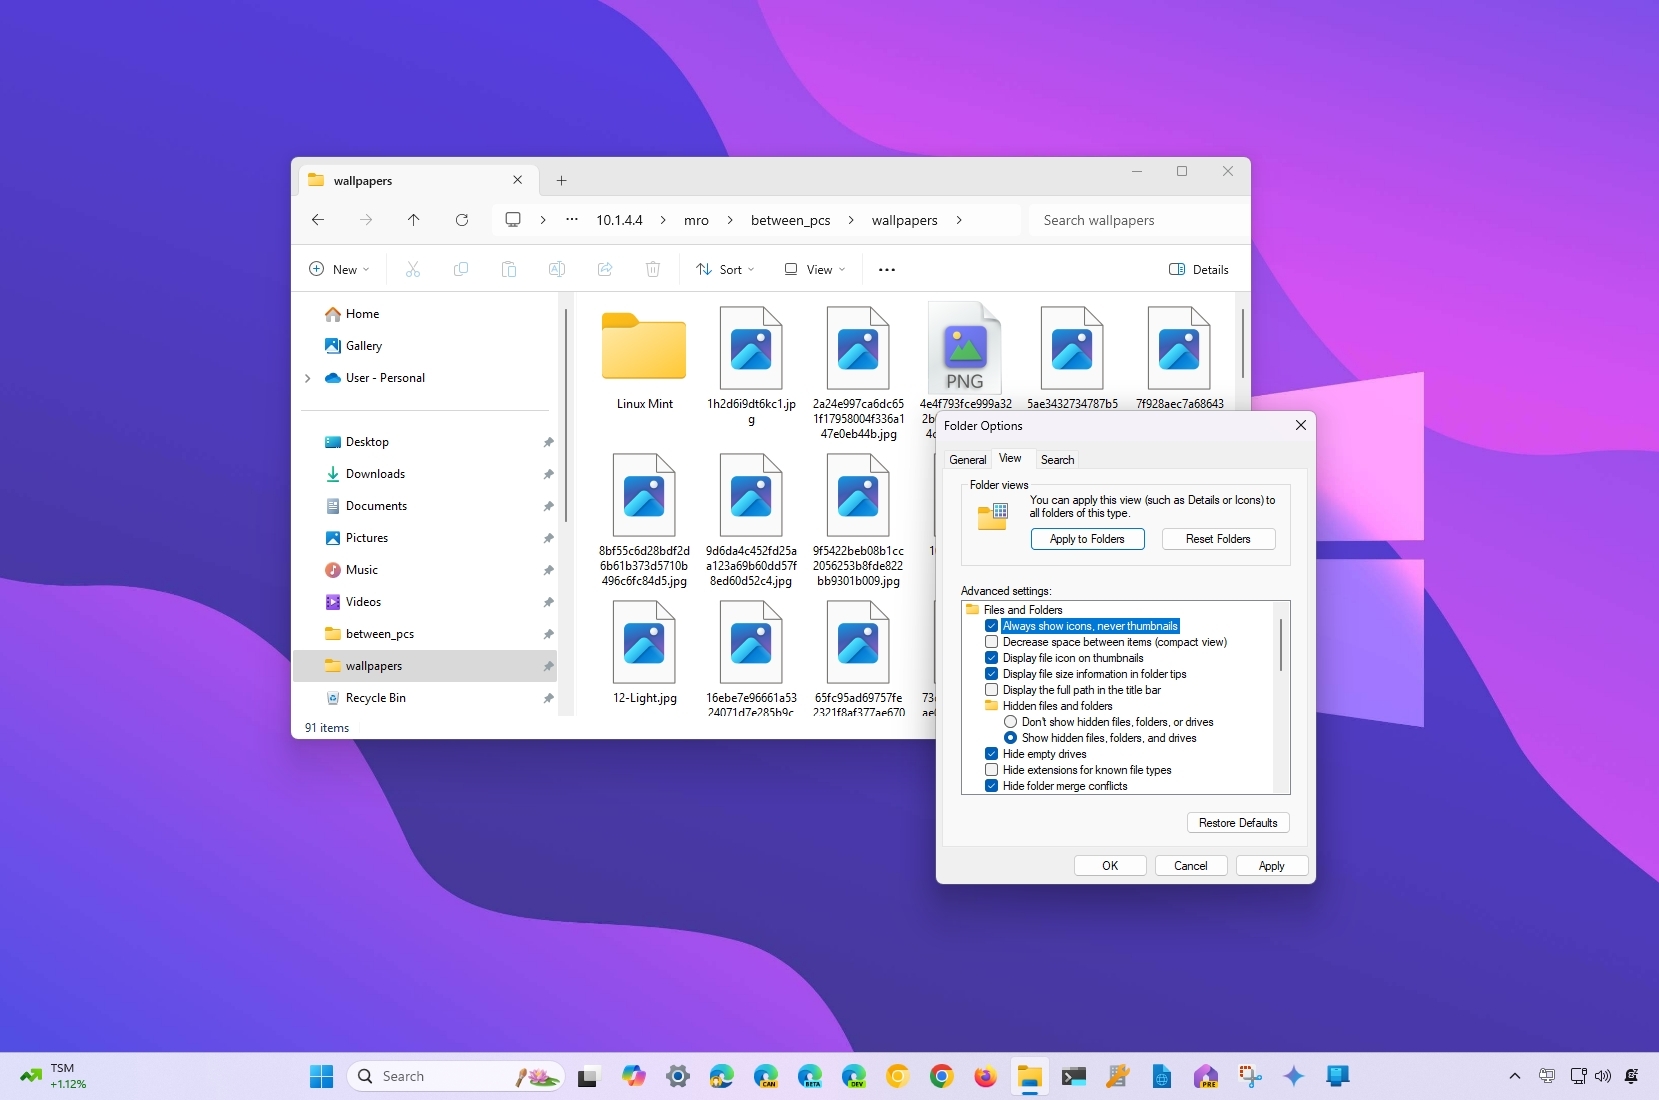
On Windows 11, the modern version of File Explorer can also show thumbnails for a quick preview of the contents of a file, folder, document, image, or video.
Although this feature can be usable to find files and folders faster without even having to open them or look at their name, it can make browsing slower and cause problems since the system has to scan and render image previews for every piece of content.
If you keep your files and folders organized, File Explorer is taking a long time to load files, or you don't want to use this feature, you can turn off thumbnail previews in more than one way on Windows 11. If you change your mind, it's possible to turn it on again.
In this how-to guide, I will explain the steps to disable (and enable) thumbnail previews in File Explorer for Windows 11.
Warning: This is a friendly reminder that editing the Registry is risky, and if you do not complete the task correctly, it can cause irreversible damage to your installation. It is recommended that you make a full backup of the device before p
How to turn thumbnail previews on or off through File Explorer
To manage thumbnail previews through File Explorer on Windows 11, use these steps:
- Open File Explorer.
- Click the "See more" menu and choose Options.
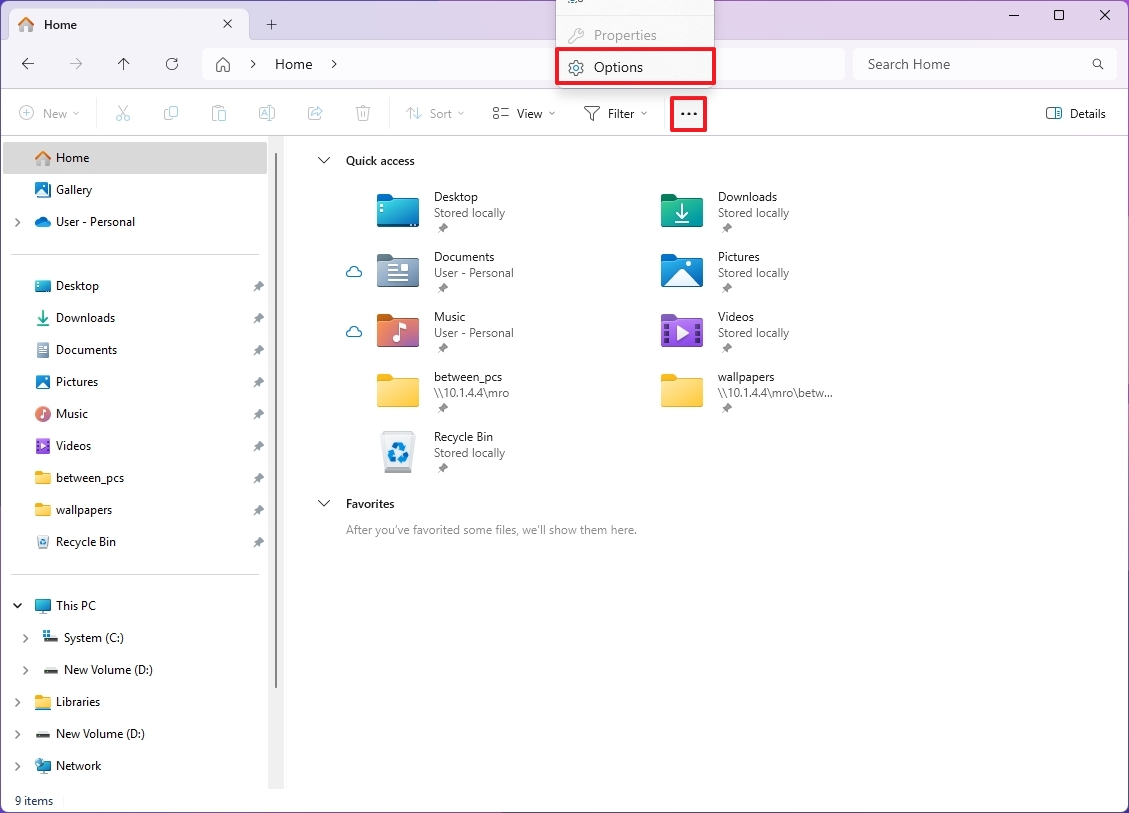
- Click the View tab.
- (Option 1) Check the "Always show icons, never thumbnails" option to turn off the feature.
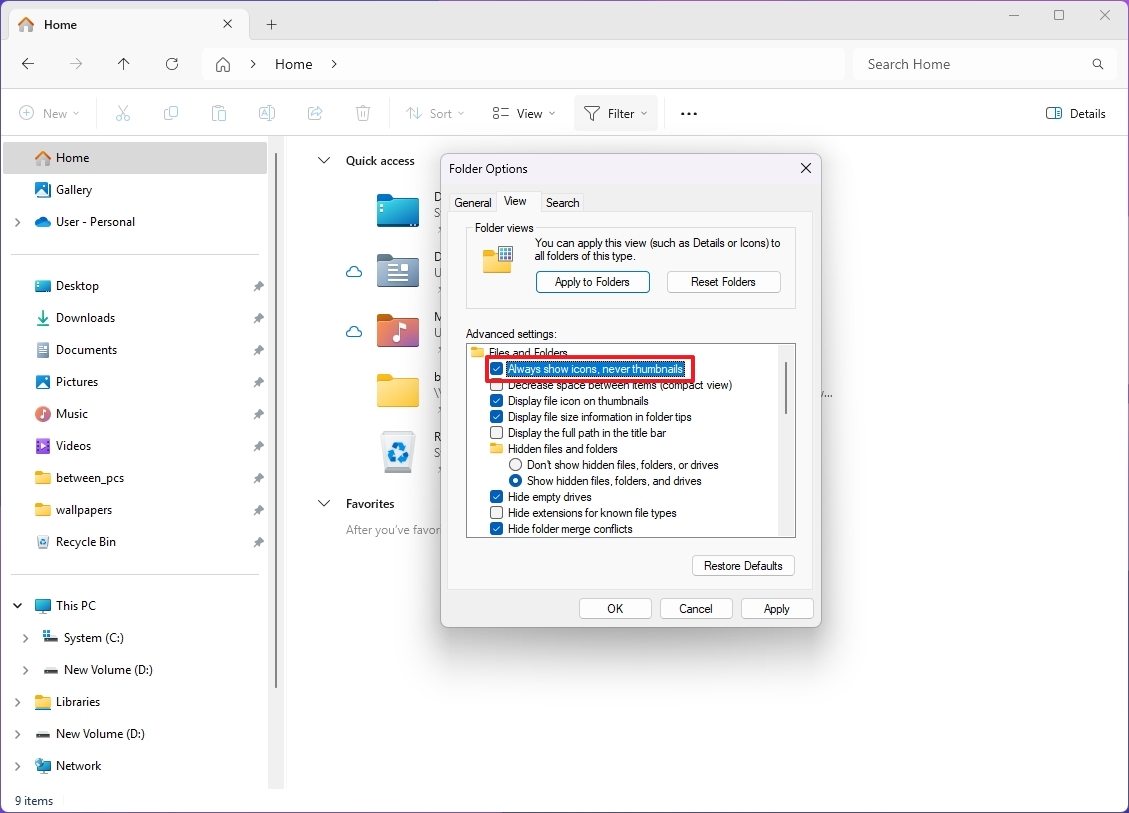
- (Option 2) Clear the "Always show icons, never thumbnails" option to turn on the feature.
- Click the Apply button.
- Click the OK button.
Once you complete the steps, the File Explorer settings will apply to turn thumbnails for files and folders on or off.
How to turn thumbnail previews on or off through Settings
To enable or disable thumbnail previews from Settings, use these steps:
- Open Settings.
- Click on System.
- Click the About page on the right side.
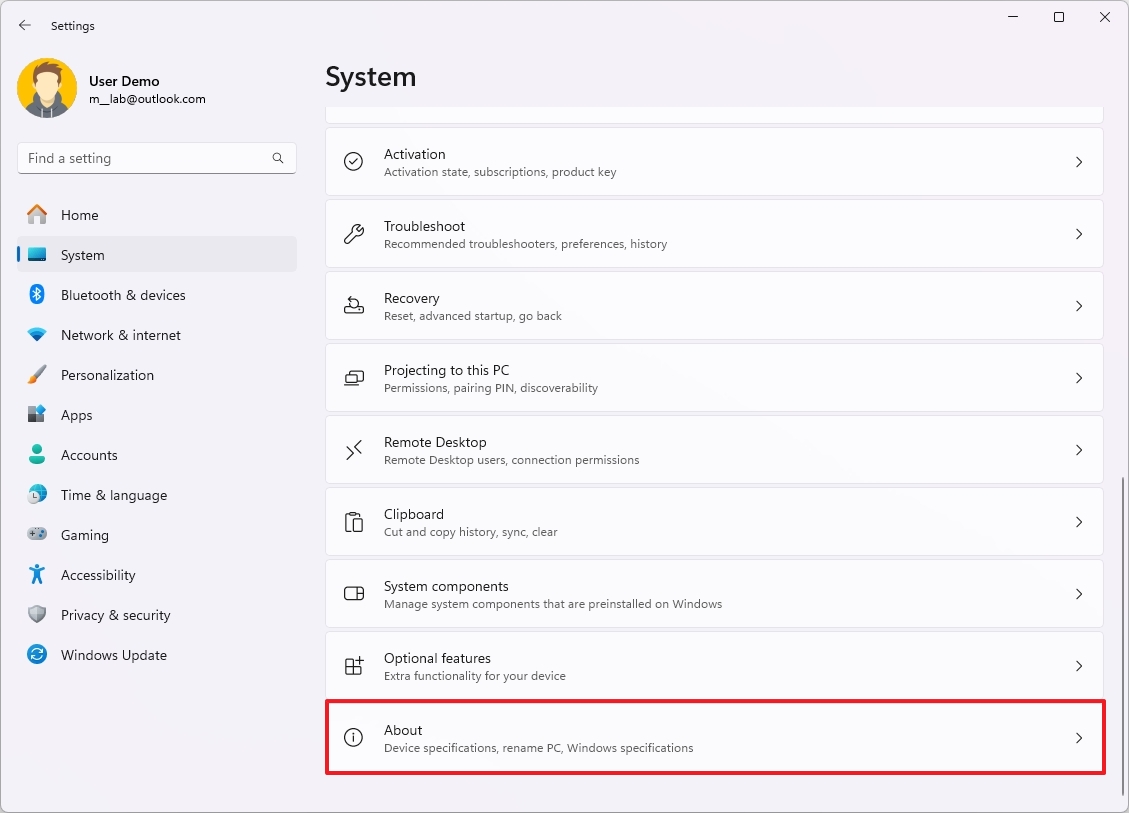
- Click the Advanced system settings option.
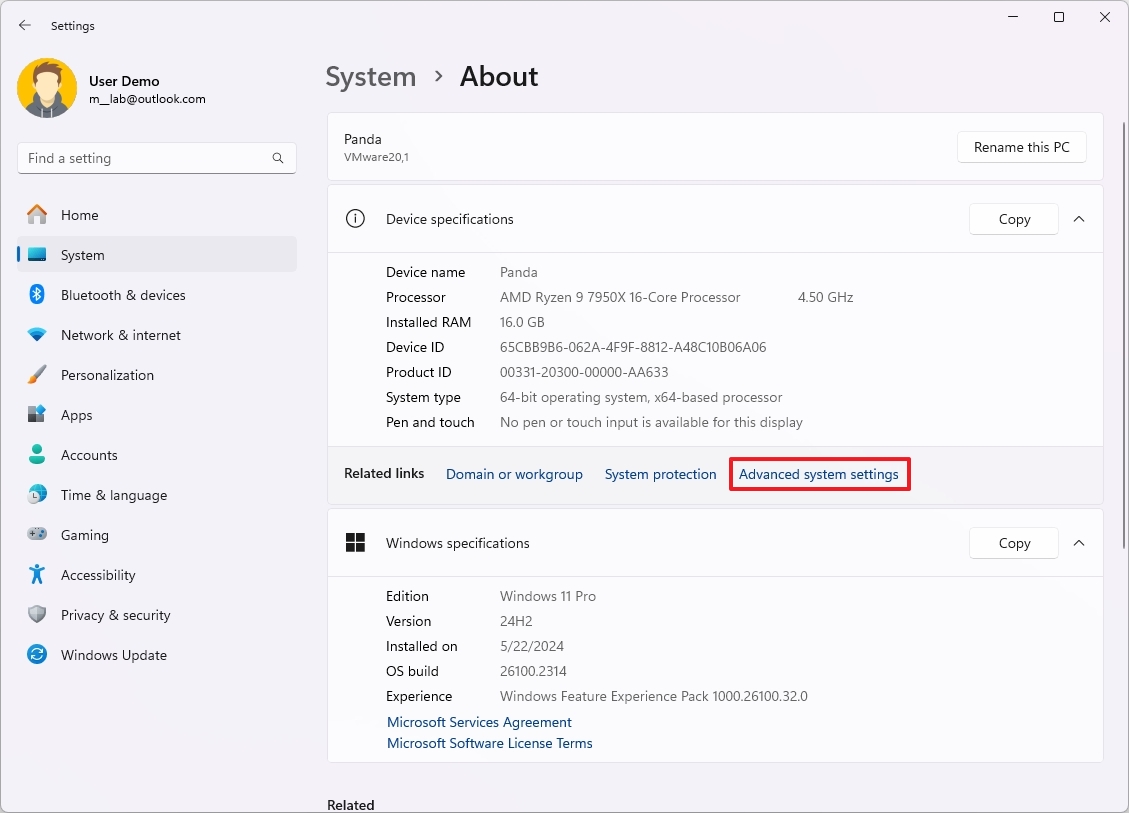
- Click the Advanced tab.
- Click the Settings button under the "Performance" section.
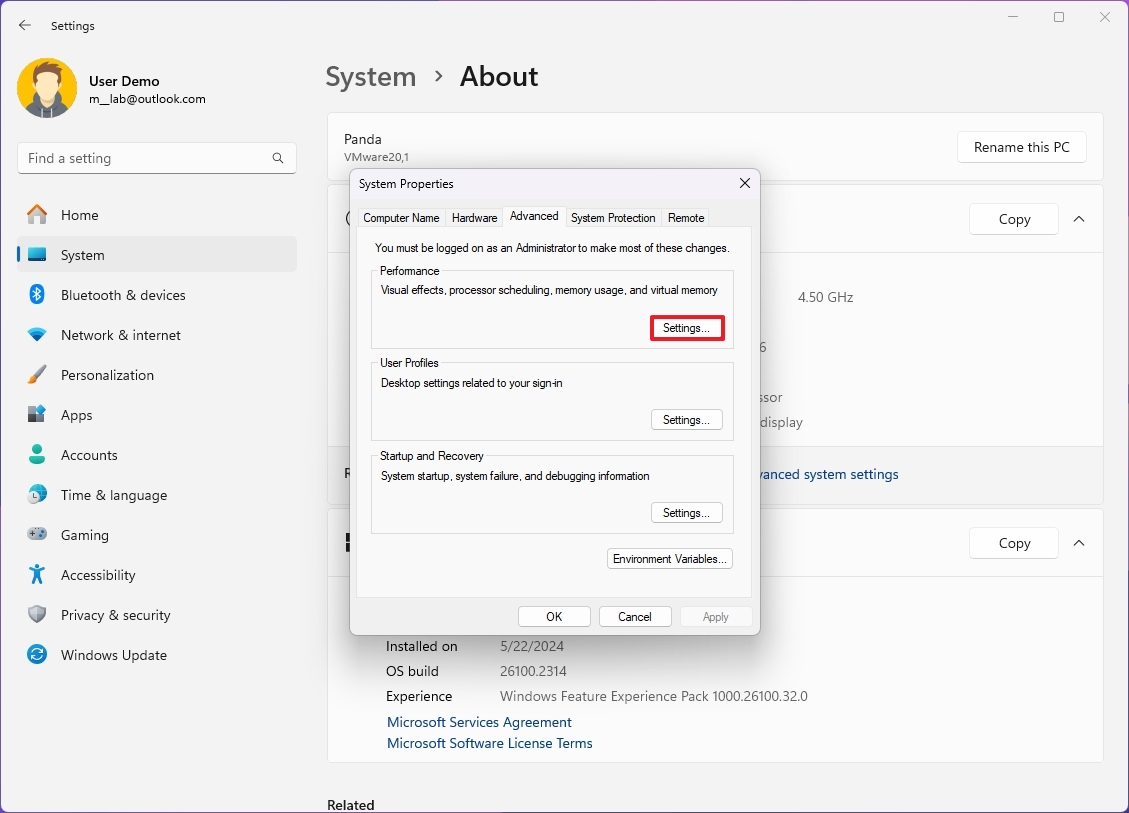
- Click the Visual Effects tab.
- (Option 1) Clear the "Show thumbnails instead of icons" option to turn off the feature.
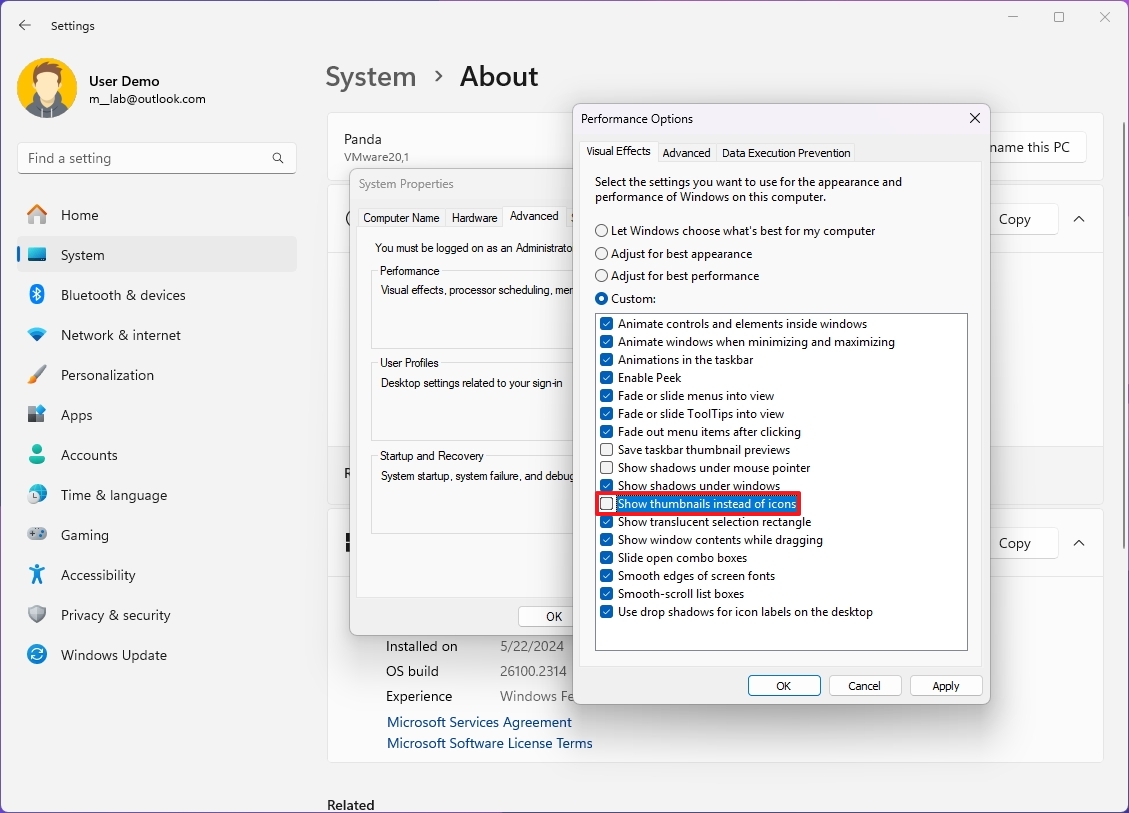
- (Option 2) Check the "Show thumbnails instead of icons " option to turn on the feature.
- Click the Apply button.
- Click the OK button.
After you complete the steps, File Explorer will no longer show previews for files and folders.
How to turn thumbnail previews on or off through Group Policy
To control thumbnail previews from Group Policy, use these steps:
- Open Start.
- Search for gpedit and click the top result to open the Group Policy Editor.
- Browse the following path: User Configuration > Administrative Templates > Windows Components > File Explorer
- Right-click the "Turn off the display of thumbnails and only display icons" policy and choose the Edit option.
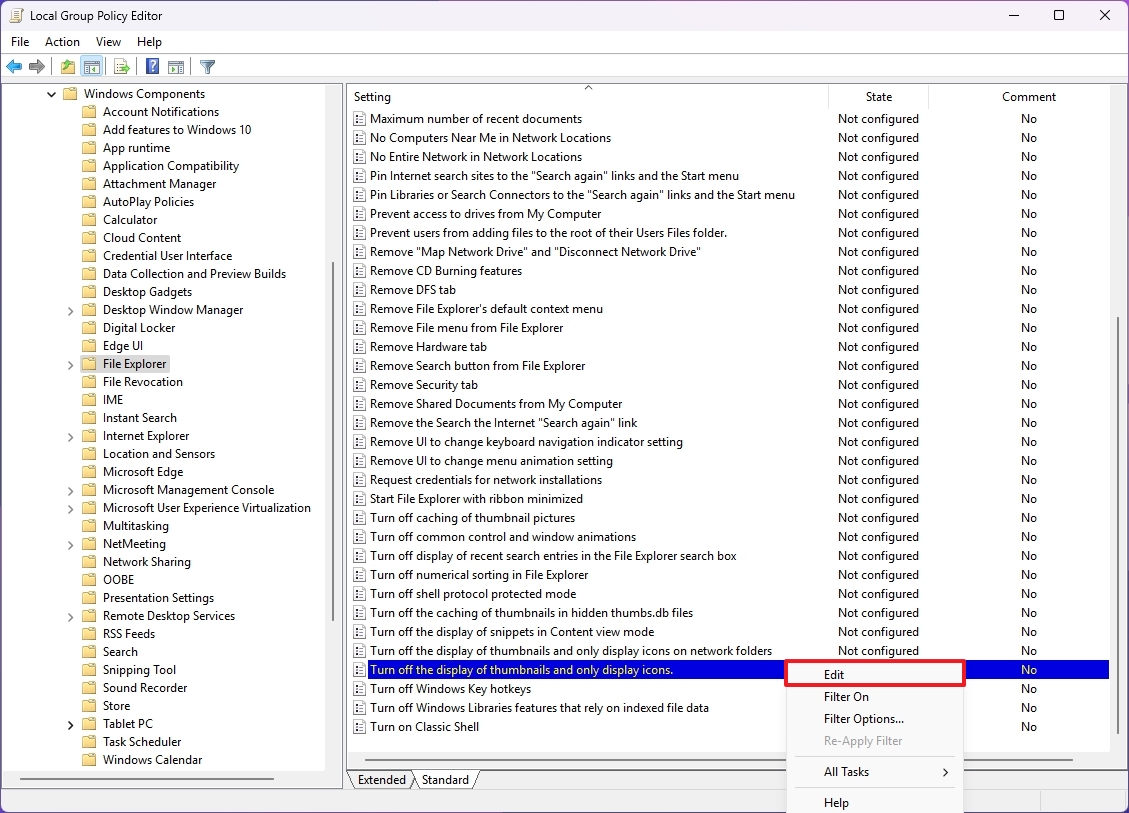
- (Option 1) Choose the Enabled option to turn off the feature.
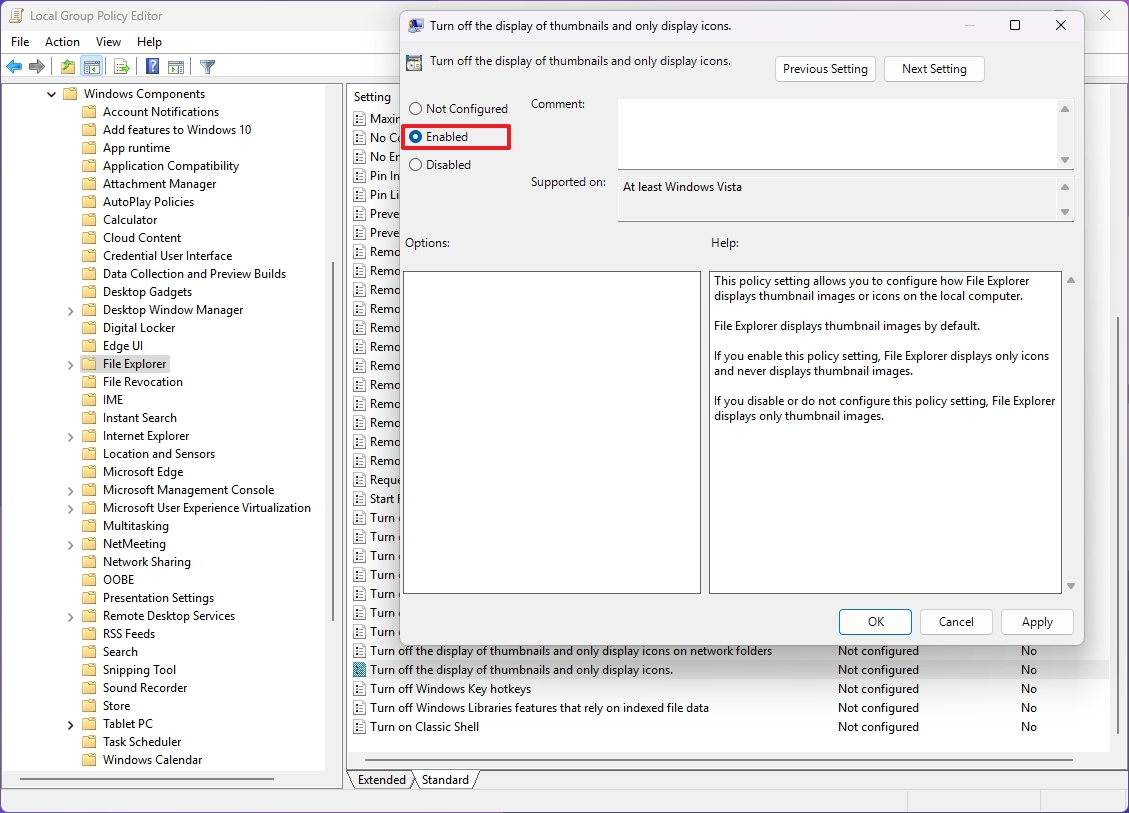
- (Option 2) Choose the Not configured option to turn on the feature.
- Click the Apply button.
- Click the OK button.
Once you complete the steps, the policy will apply the settings to your computer to show or remove thumbnail previews.
How to turn thumbnail previews on or off through Registry
To use the Registry to disable or re-enable thumbnail previews on Windows 11, use these steps:
- Open Start.
- Search for regedit and click the top result to open the Registry Editor.
- Browse the following path: HKEY_CURRENT_USER\SOFTWARE\Microsoft\Windows\CurrentVersion\Policies\Explorer
- Right-click the Explorer key, choose New, and select the DWORD (32-bit) Value option (if applicable).
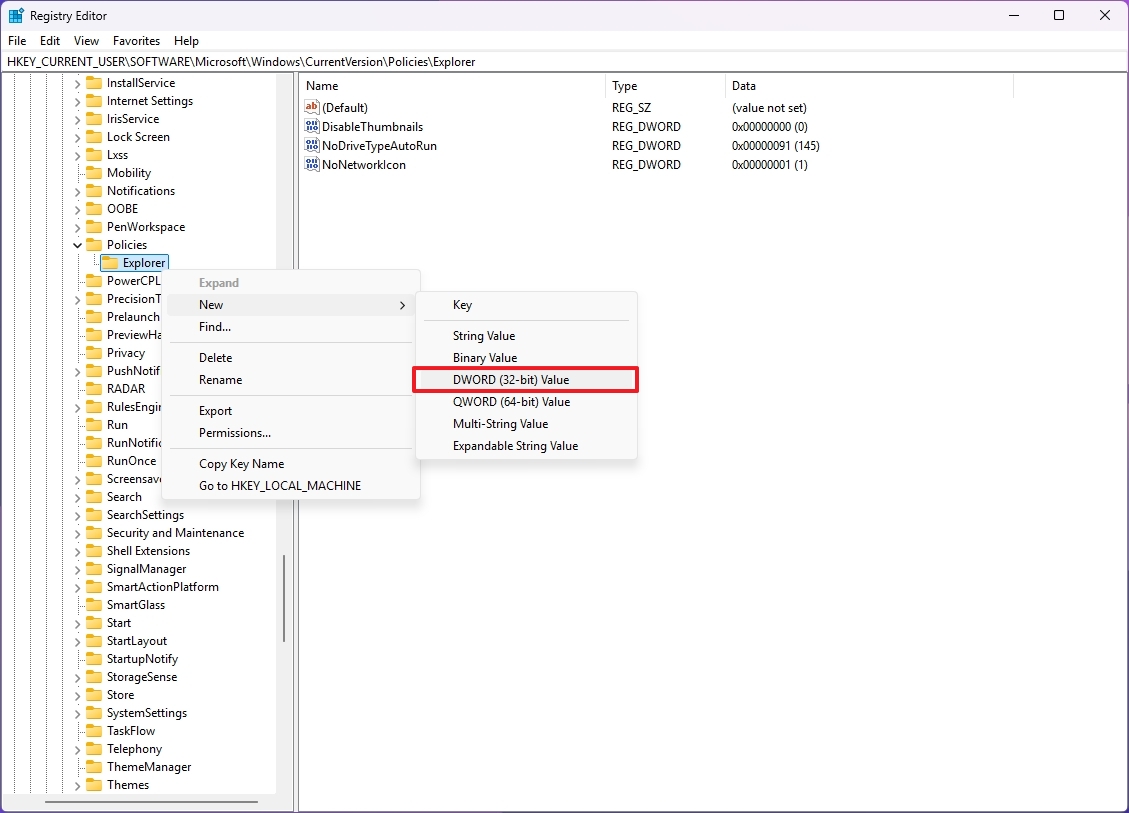
- Confirm the DisableThumbnails name for the DWORD and press Enter.
- Right-click the newly created DWORD and choose the Modify option.
- Change the value from 0 to 1.
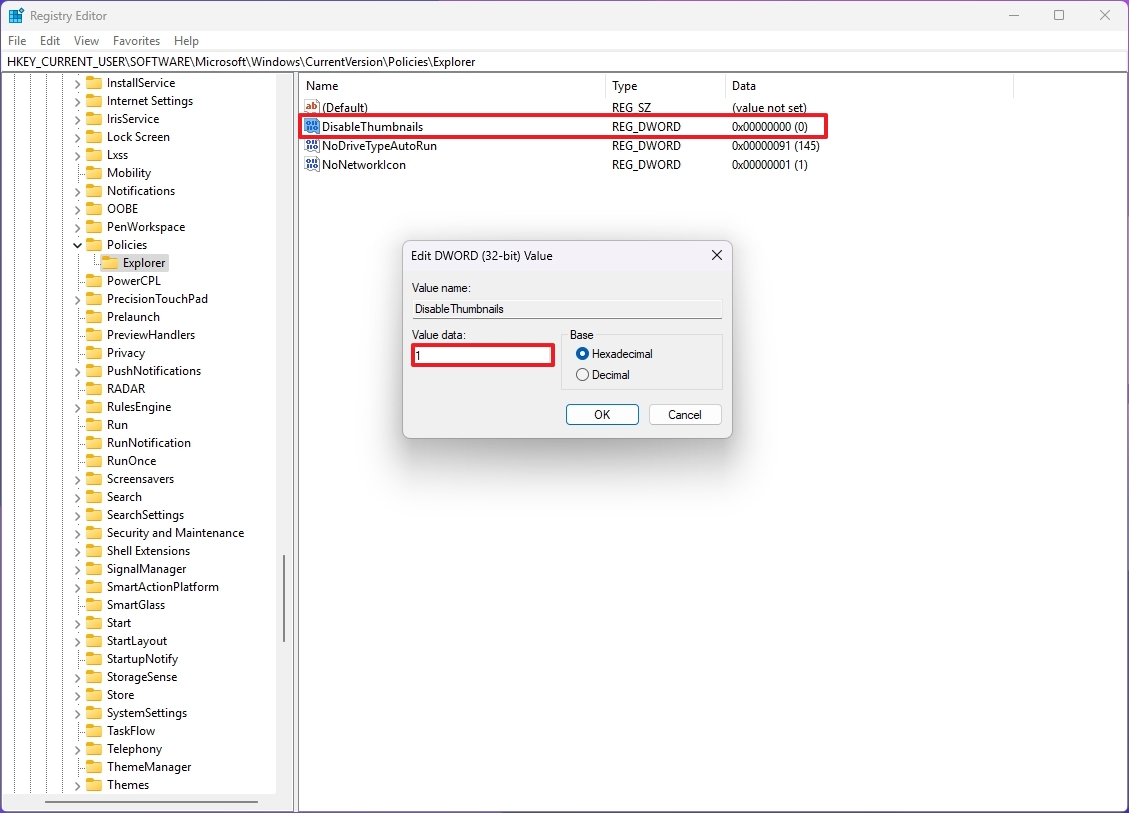
- Click the OK button.
- Browse the following path: HKEY_LOCAL_MACHINE\SOFTWARE\Microsoft\Windows\CurrentVersion\Policies\Explorer
- Right-click the Explorer key, choose New, and select the DWORD (32-bit) Value option (if applicable).
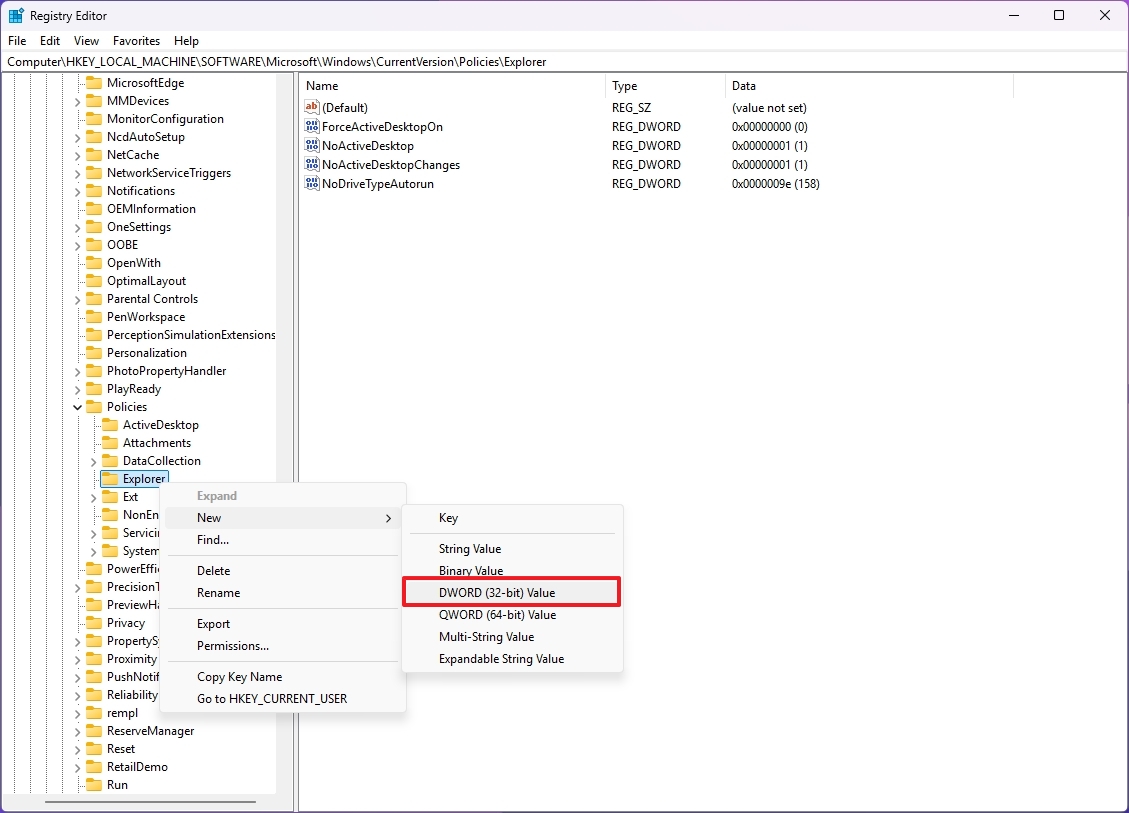
- Confirm the DisableThumbnails name for the DWORD and press Enter.
- Right-click the newly created DWORD and choose the Modify option.
- Change the value from 0 to 1.
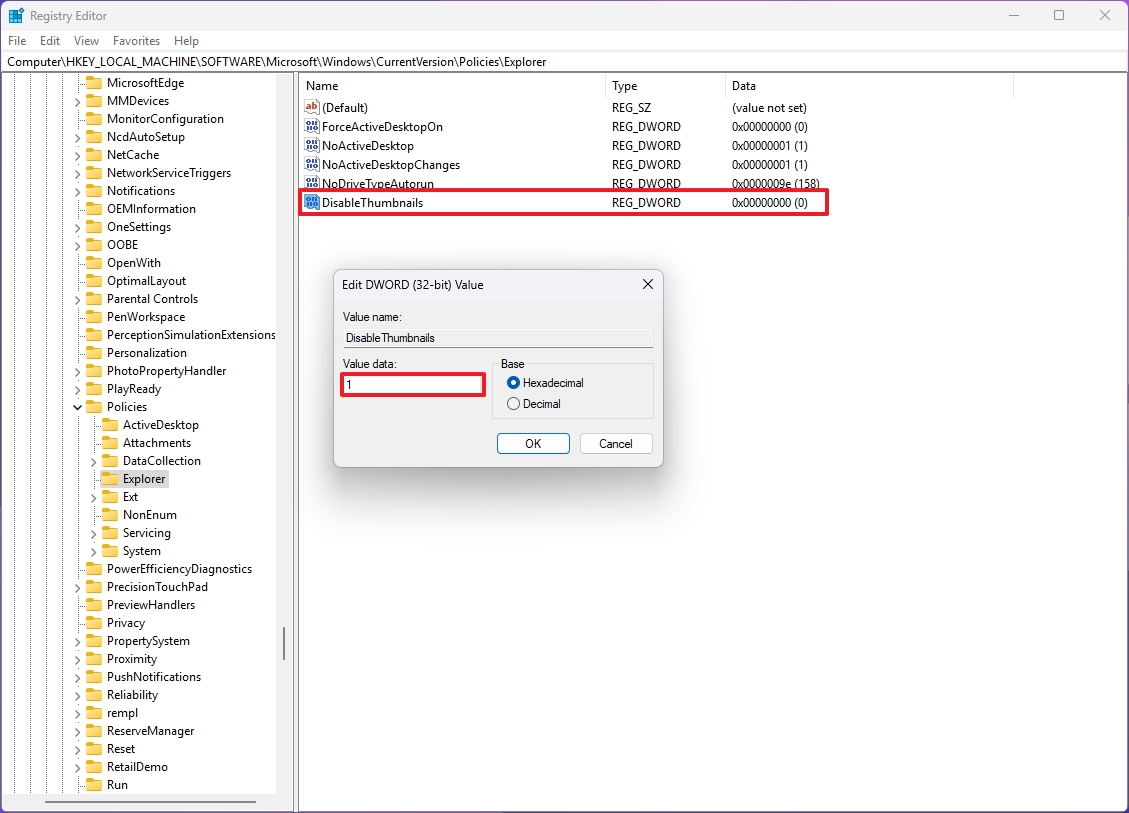
- Click the OK button.
After you complete the steps, you may still need to restart the computer to apply the settings.
If you change your mind, you can revert the changes by following the same steps, but on steps 7 and 14, change the DisableThumbnails DWORD value to 0.
More resources
For more helpful articles, coverage, and answers to common questions about Windows 10 and Windows 11, visit the following resources:


