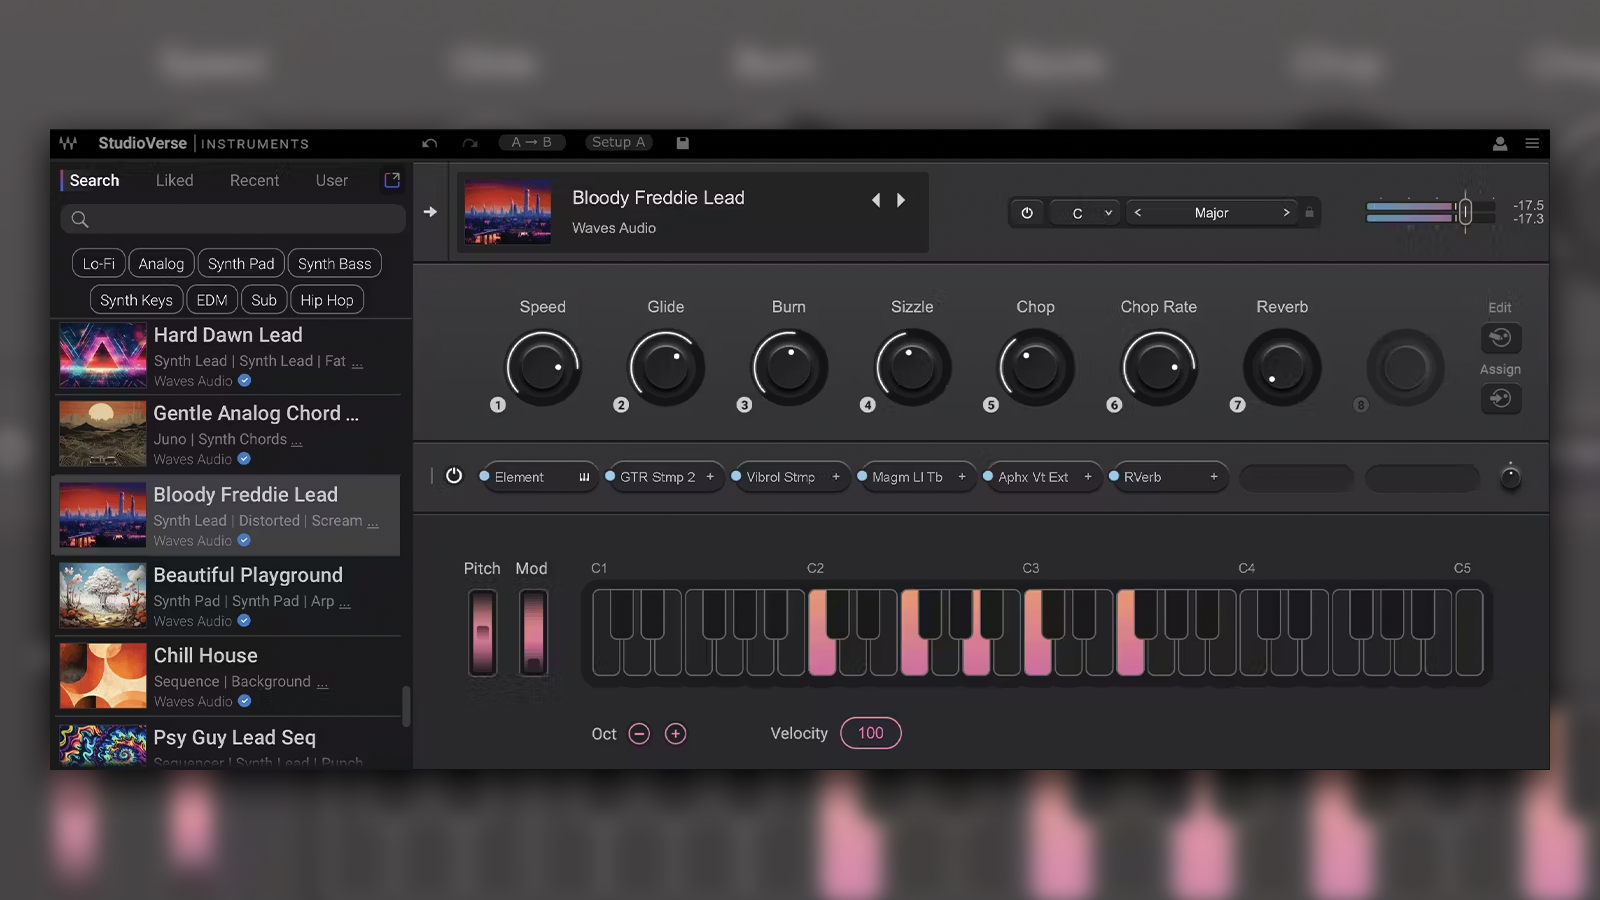
Over the coming weeks on MusicRadar, we're going to walk you through building ready-to-go mixing chains for a variety of applications in the studio, including drums, bass and the all-important master bus.
Today, we start off with one of the sounds instruments to mix perfectly - the human voice. Using EQ, compression and de-essing, this chain can help you take any vocal from amateur hour to radio-ready.
1. Building your vocal chain
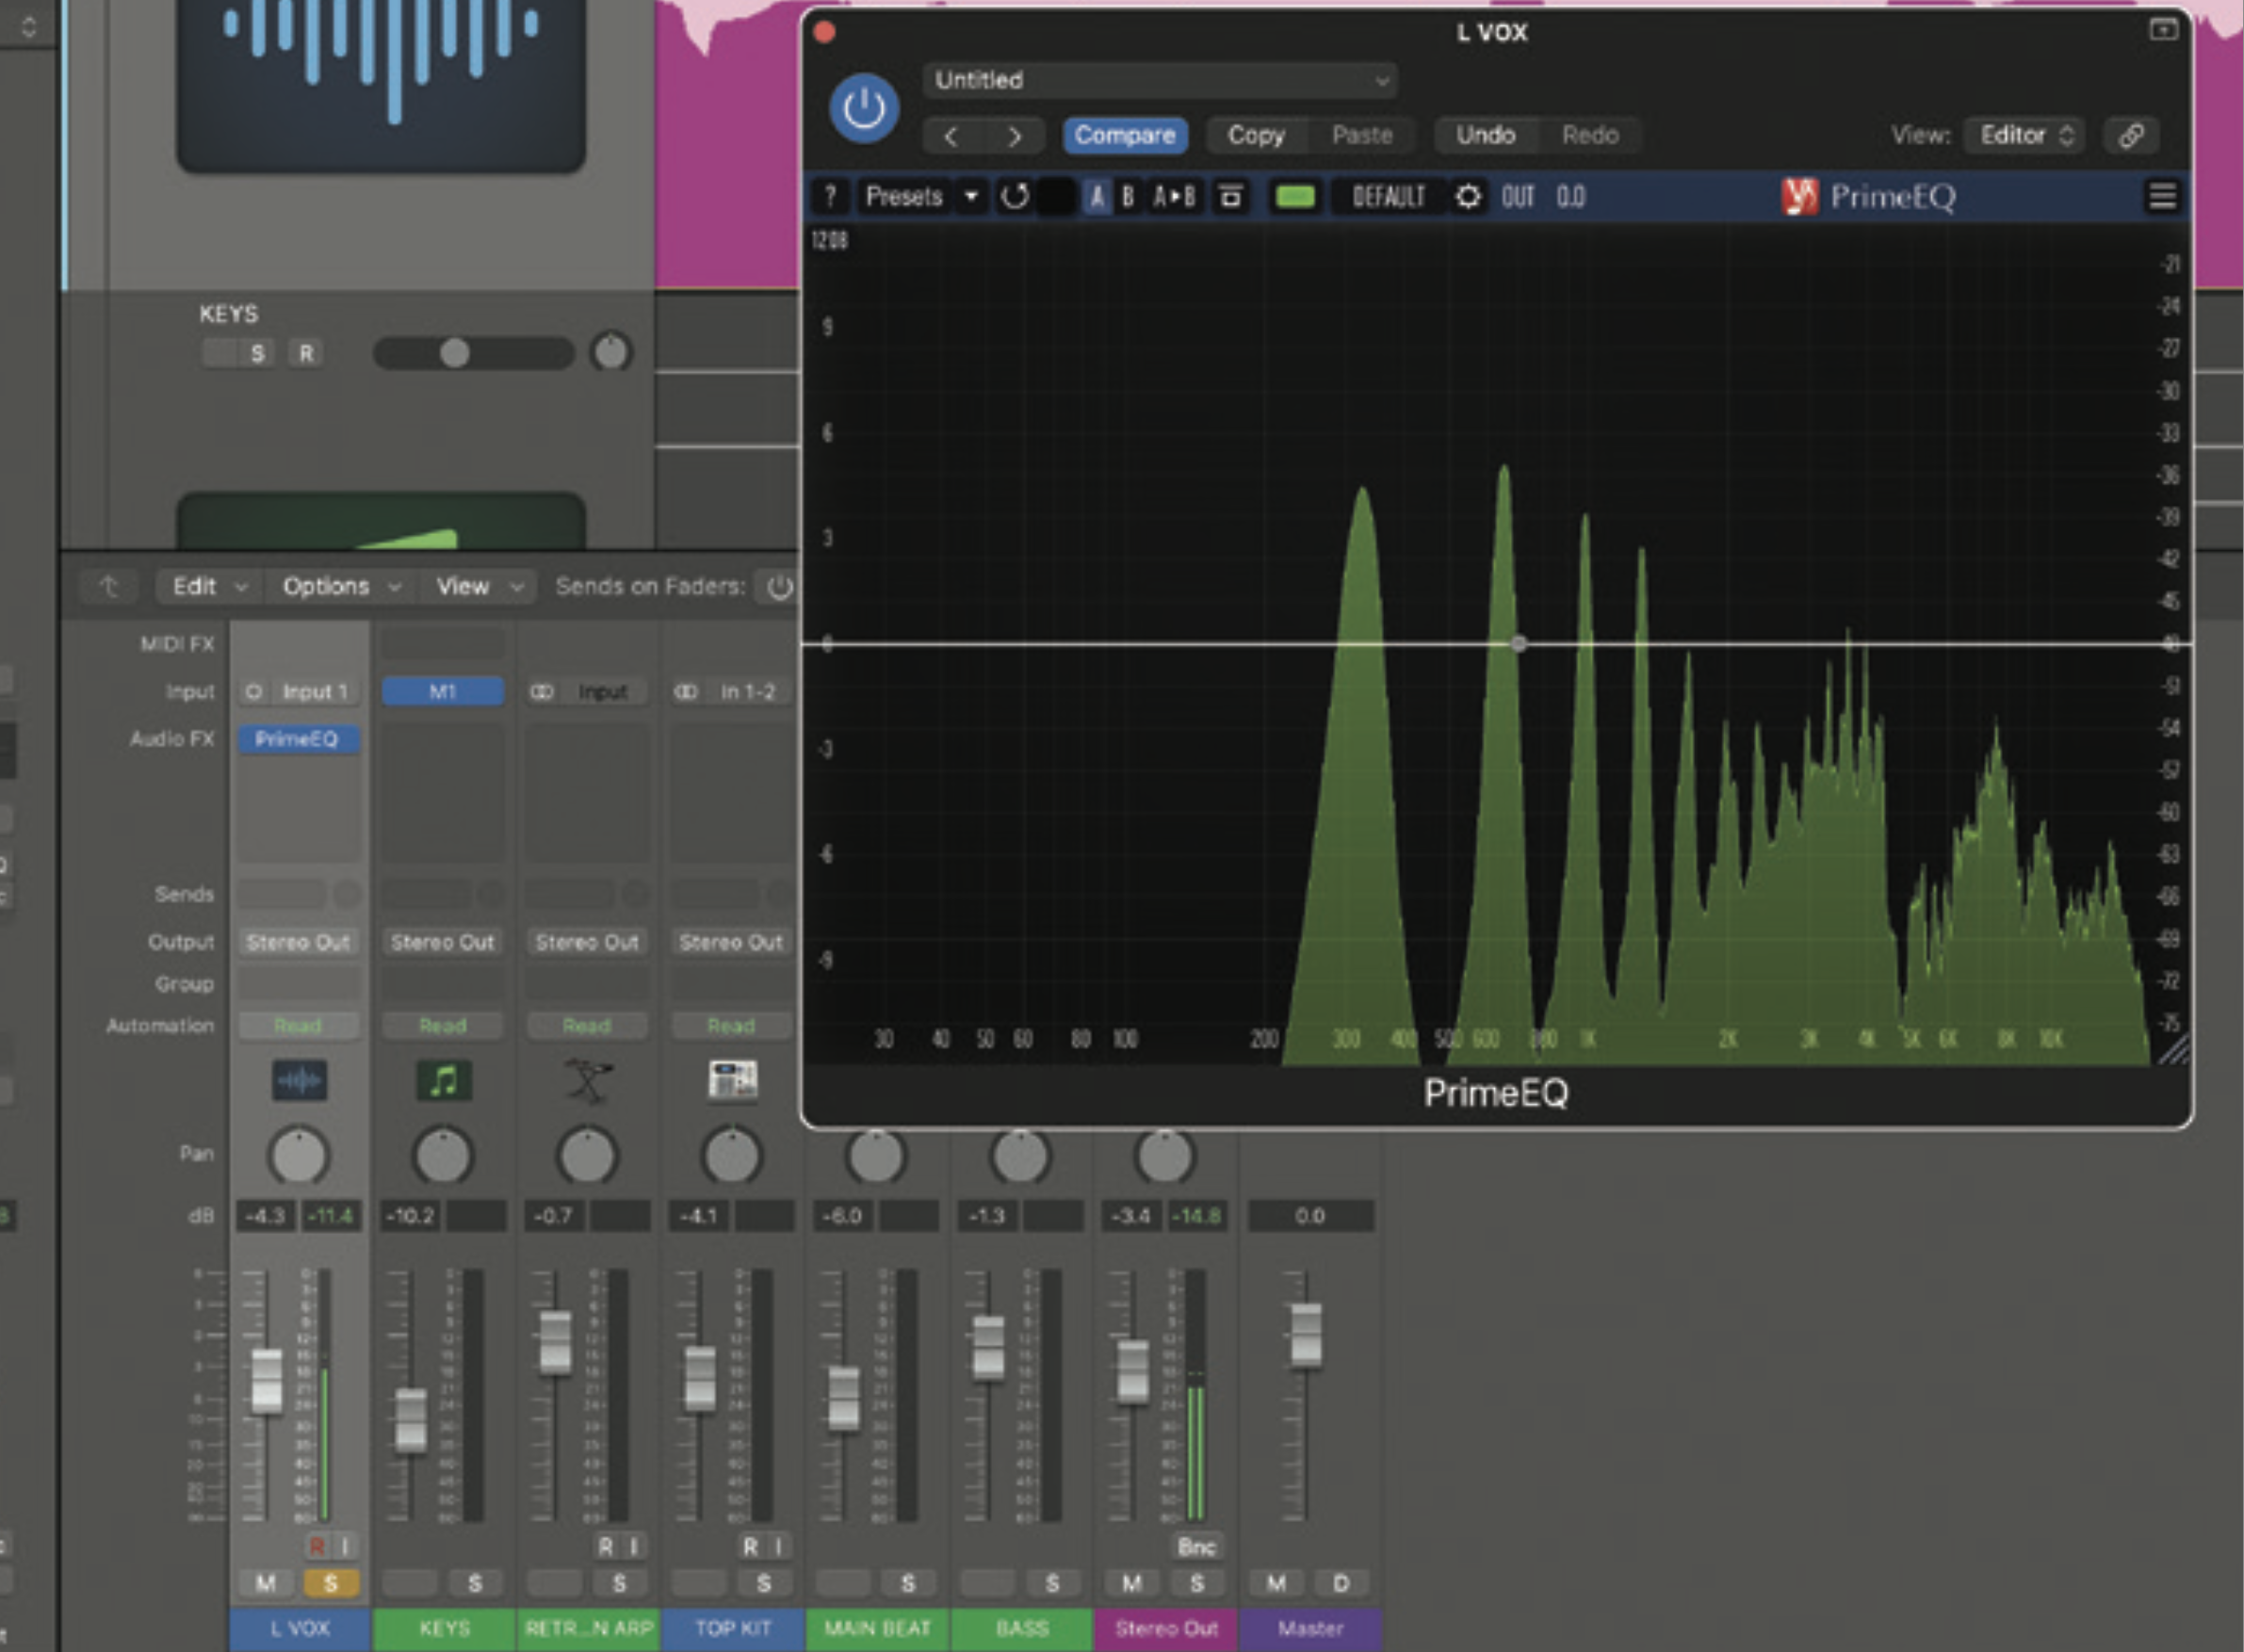
Our vocal chain will include an EQ, compressor and de-esser, in that order. That said, with plenty of plugin flexibility and options, we can be a bit more indulgent even in a basic chain (see step 6). Our first EQ is corrective so load up a flexible parametric design with high and low-pass filters.
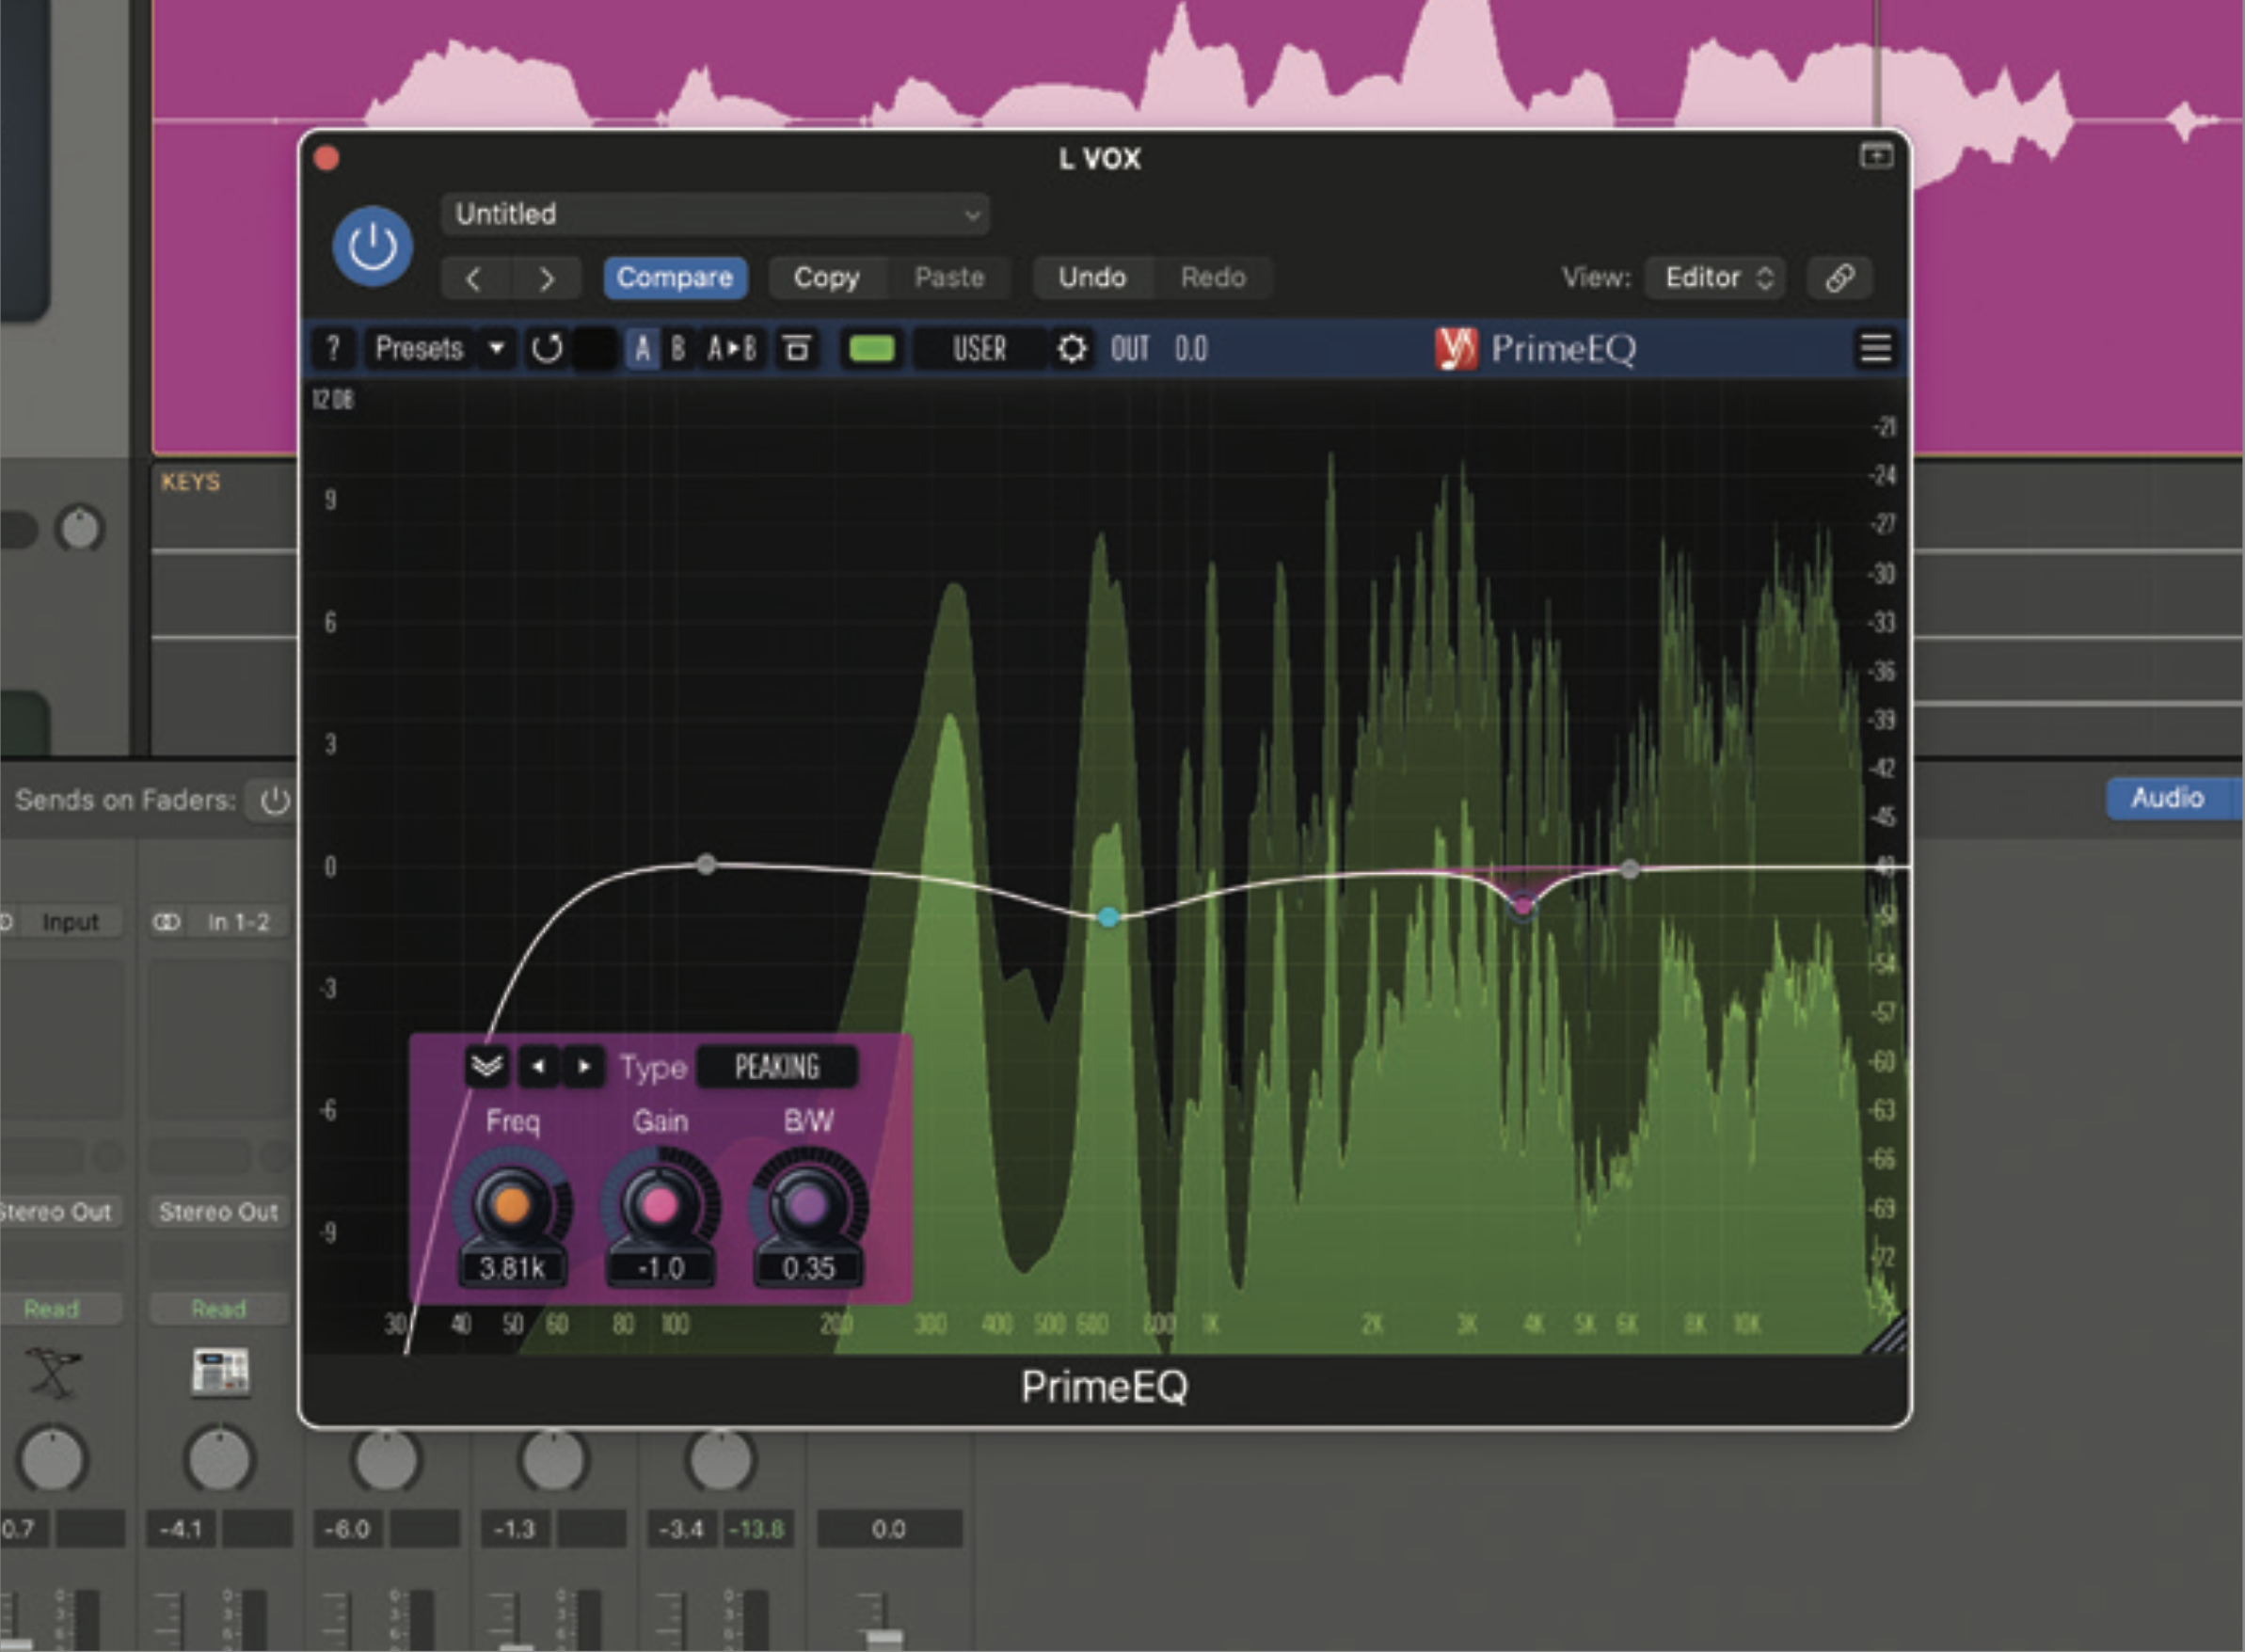
Use this EQ to correct any annoyances in the vocal. This could be notching out too much edginess in the high mids (2-6kHz region) and thinning out boxiness in the mid or low mid range (500-800Hz). Finish up using the low-cut filter (24dB/octave) to remove any floor rumble or mic stand noise.
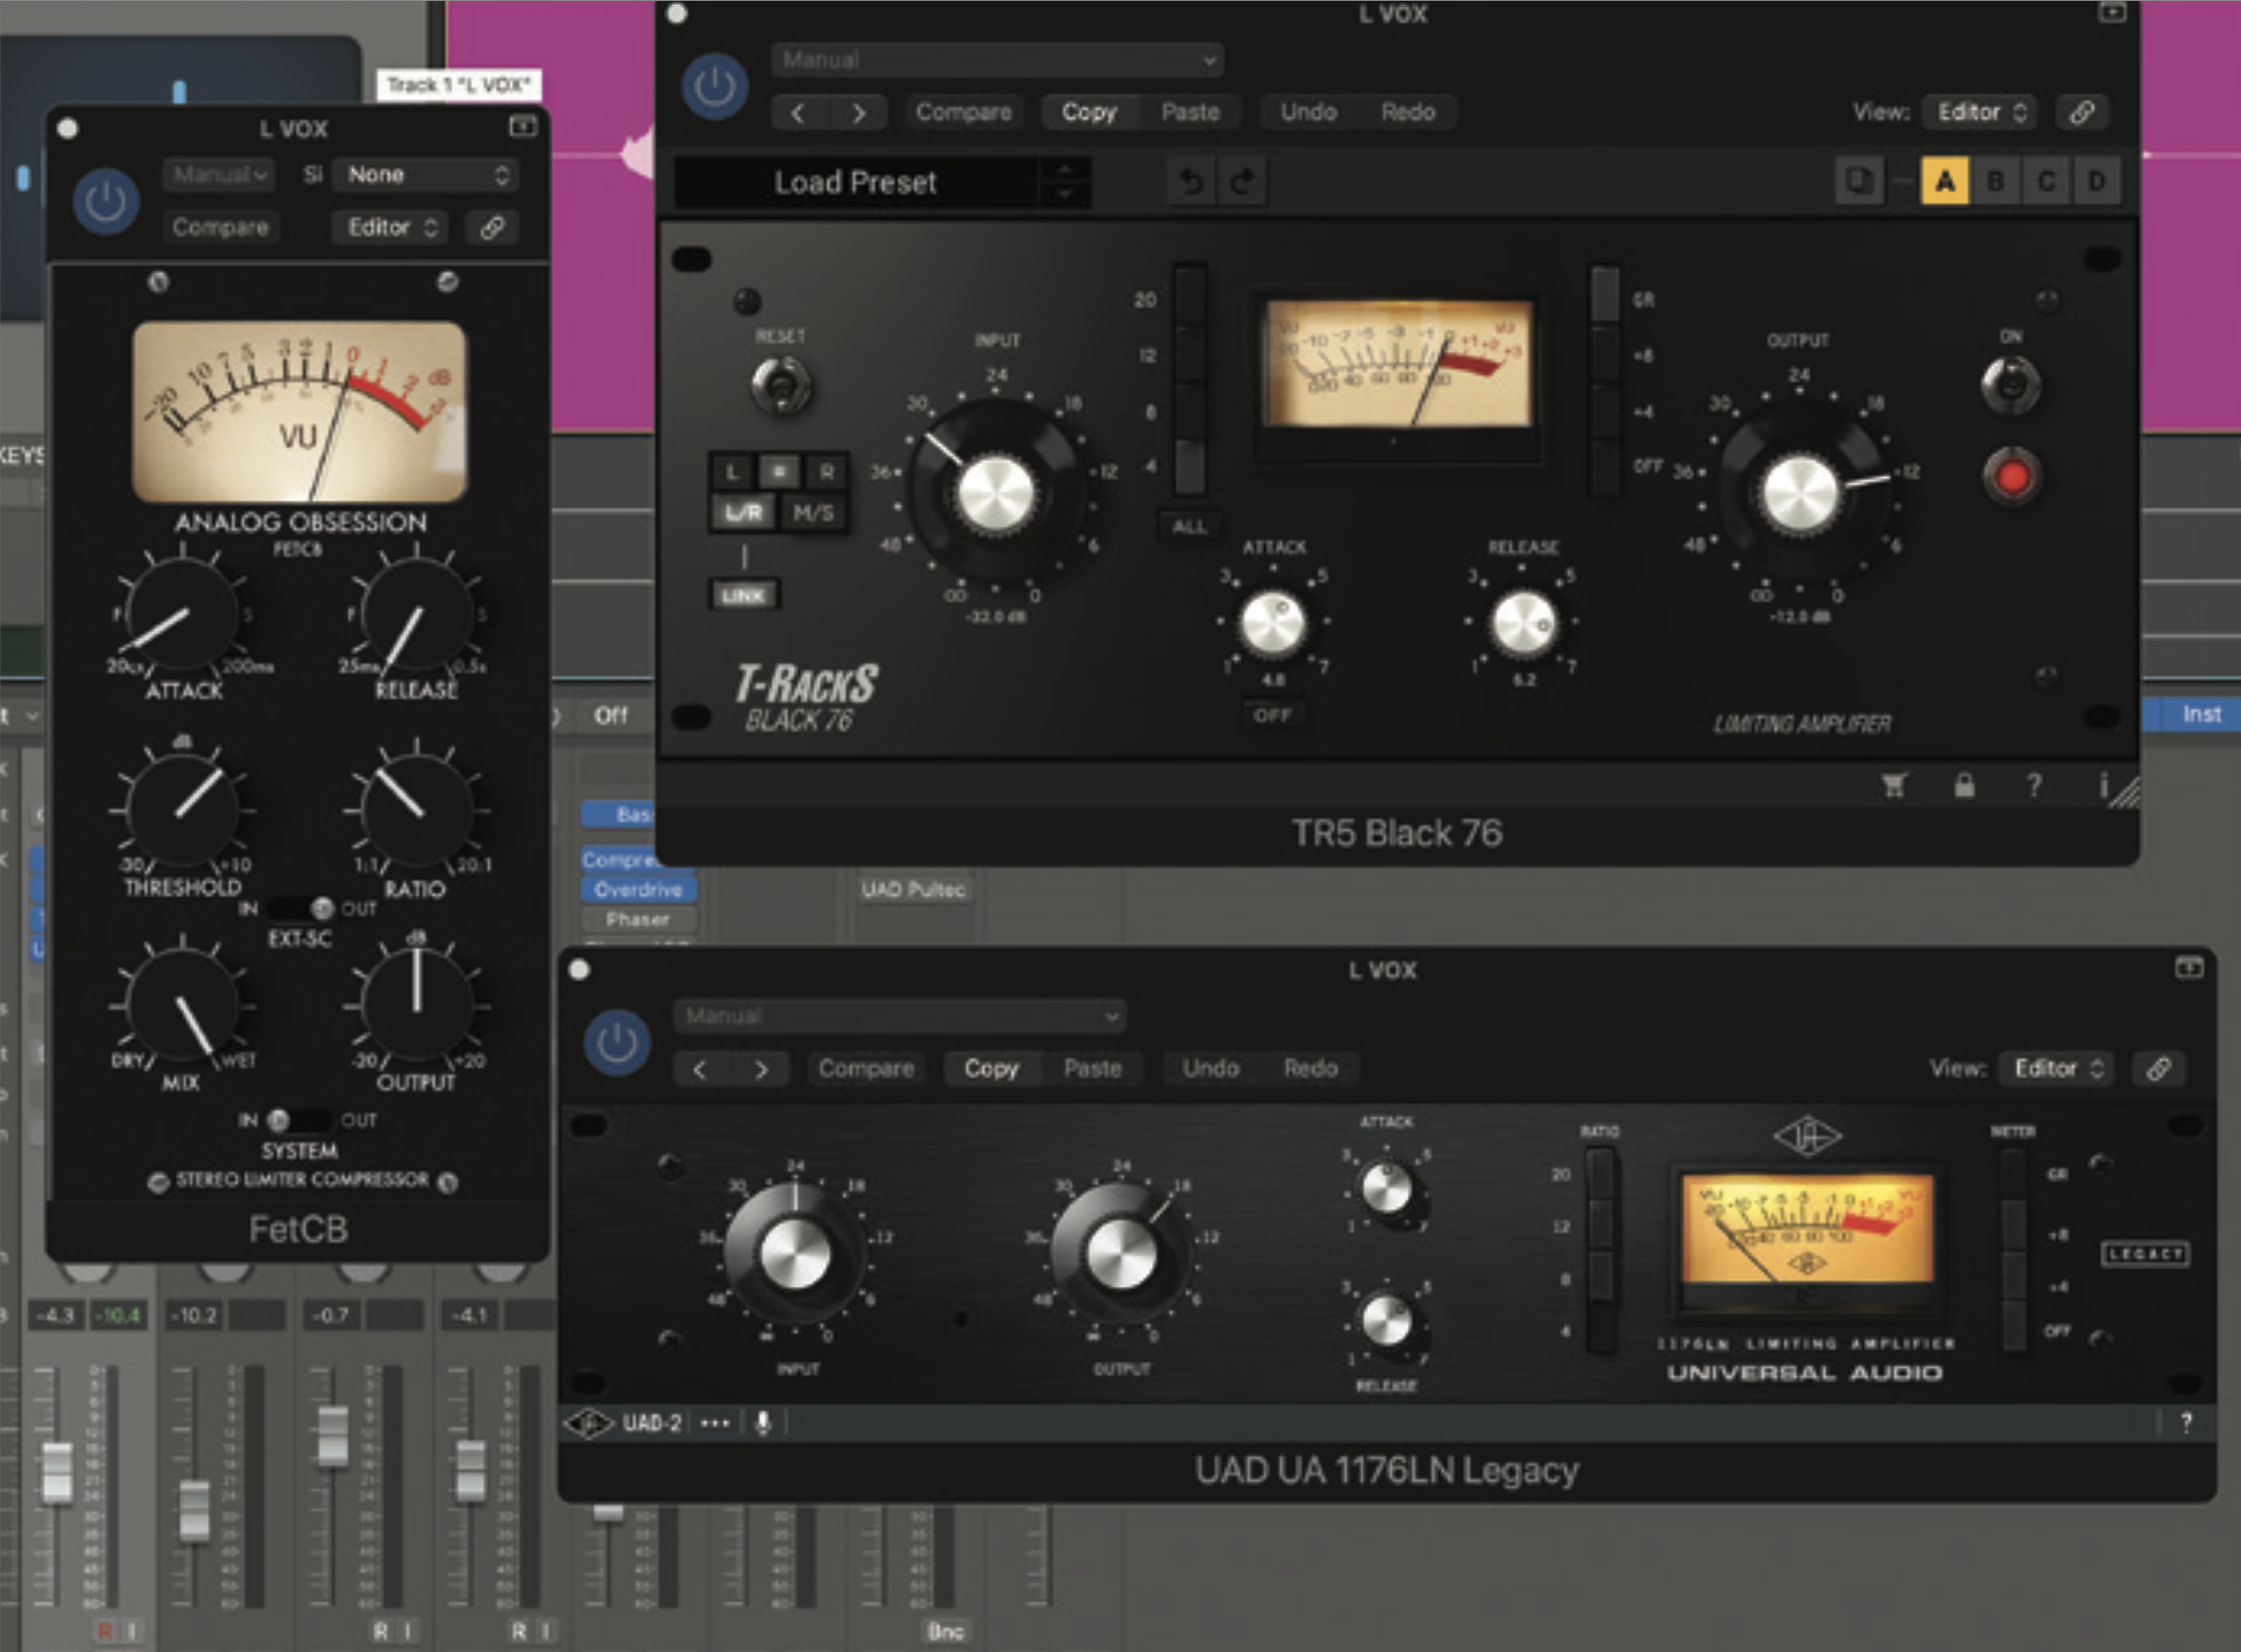
For the main vocal compressor, you need something flexible and fast. You might get by with a decent DAW compressor, but even better would be a Distressor or Urei 1176 emulation. For the latter there are many emulations to choose from (some free). Some are more faithful than others, but even a basic FET-style plugin will give some snappiness.
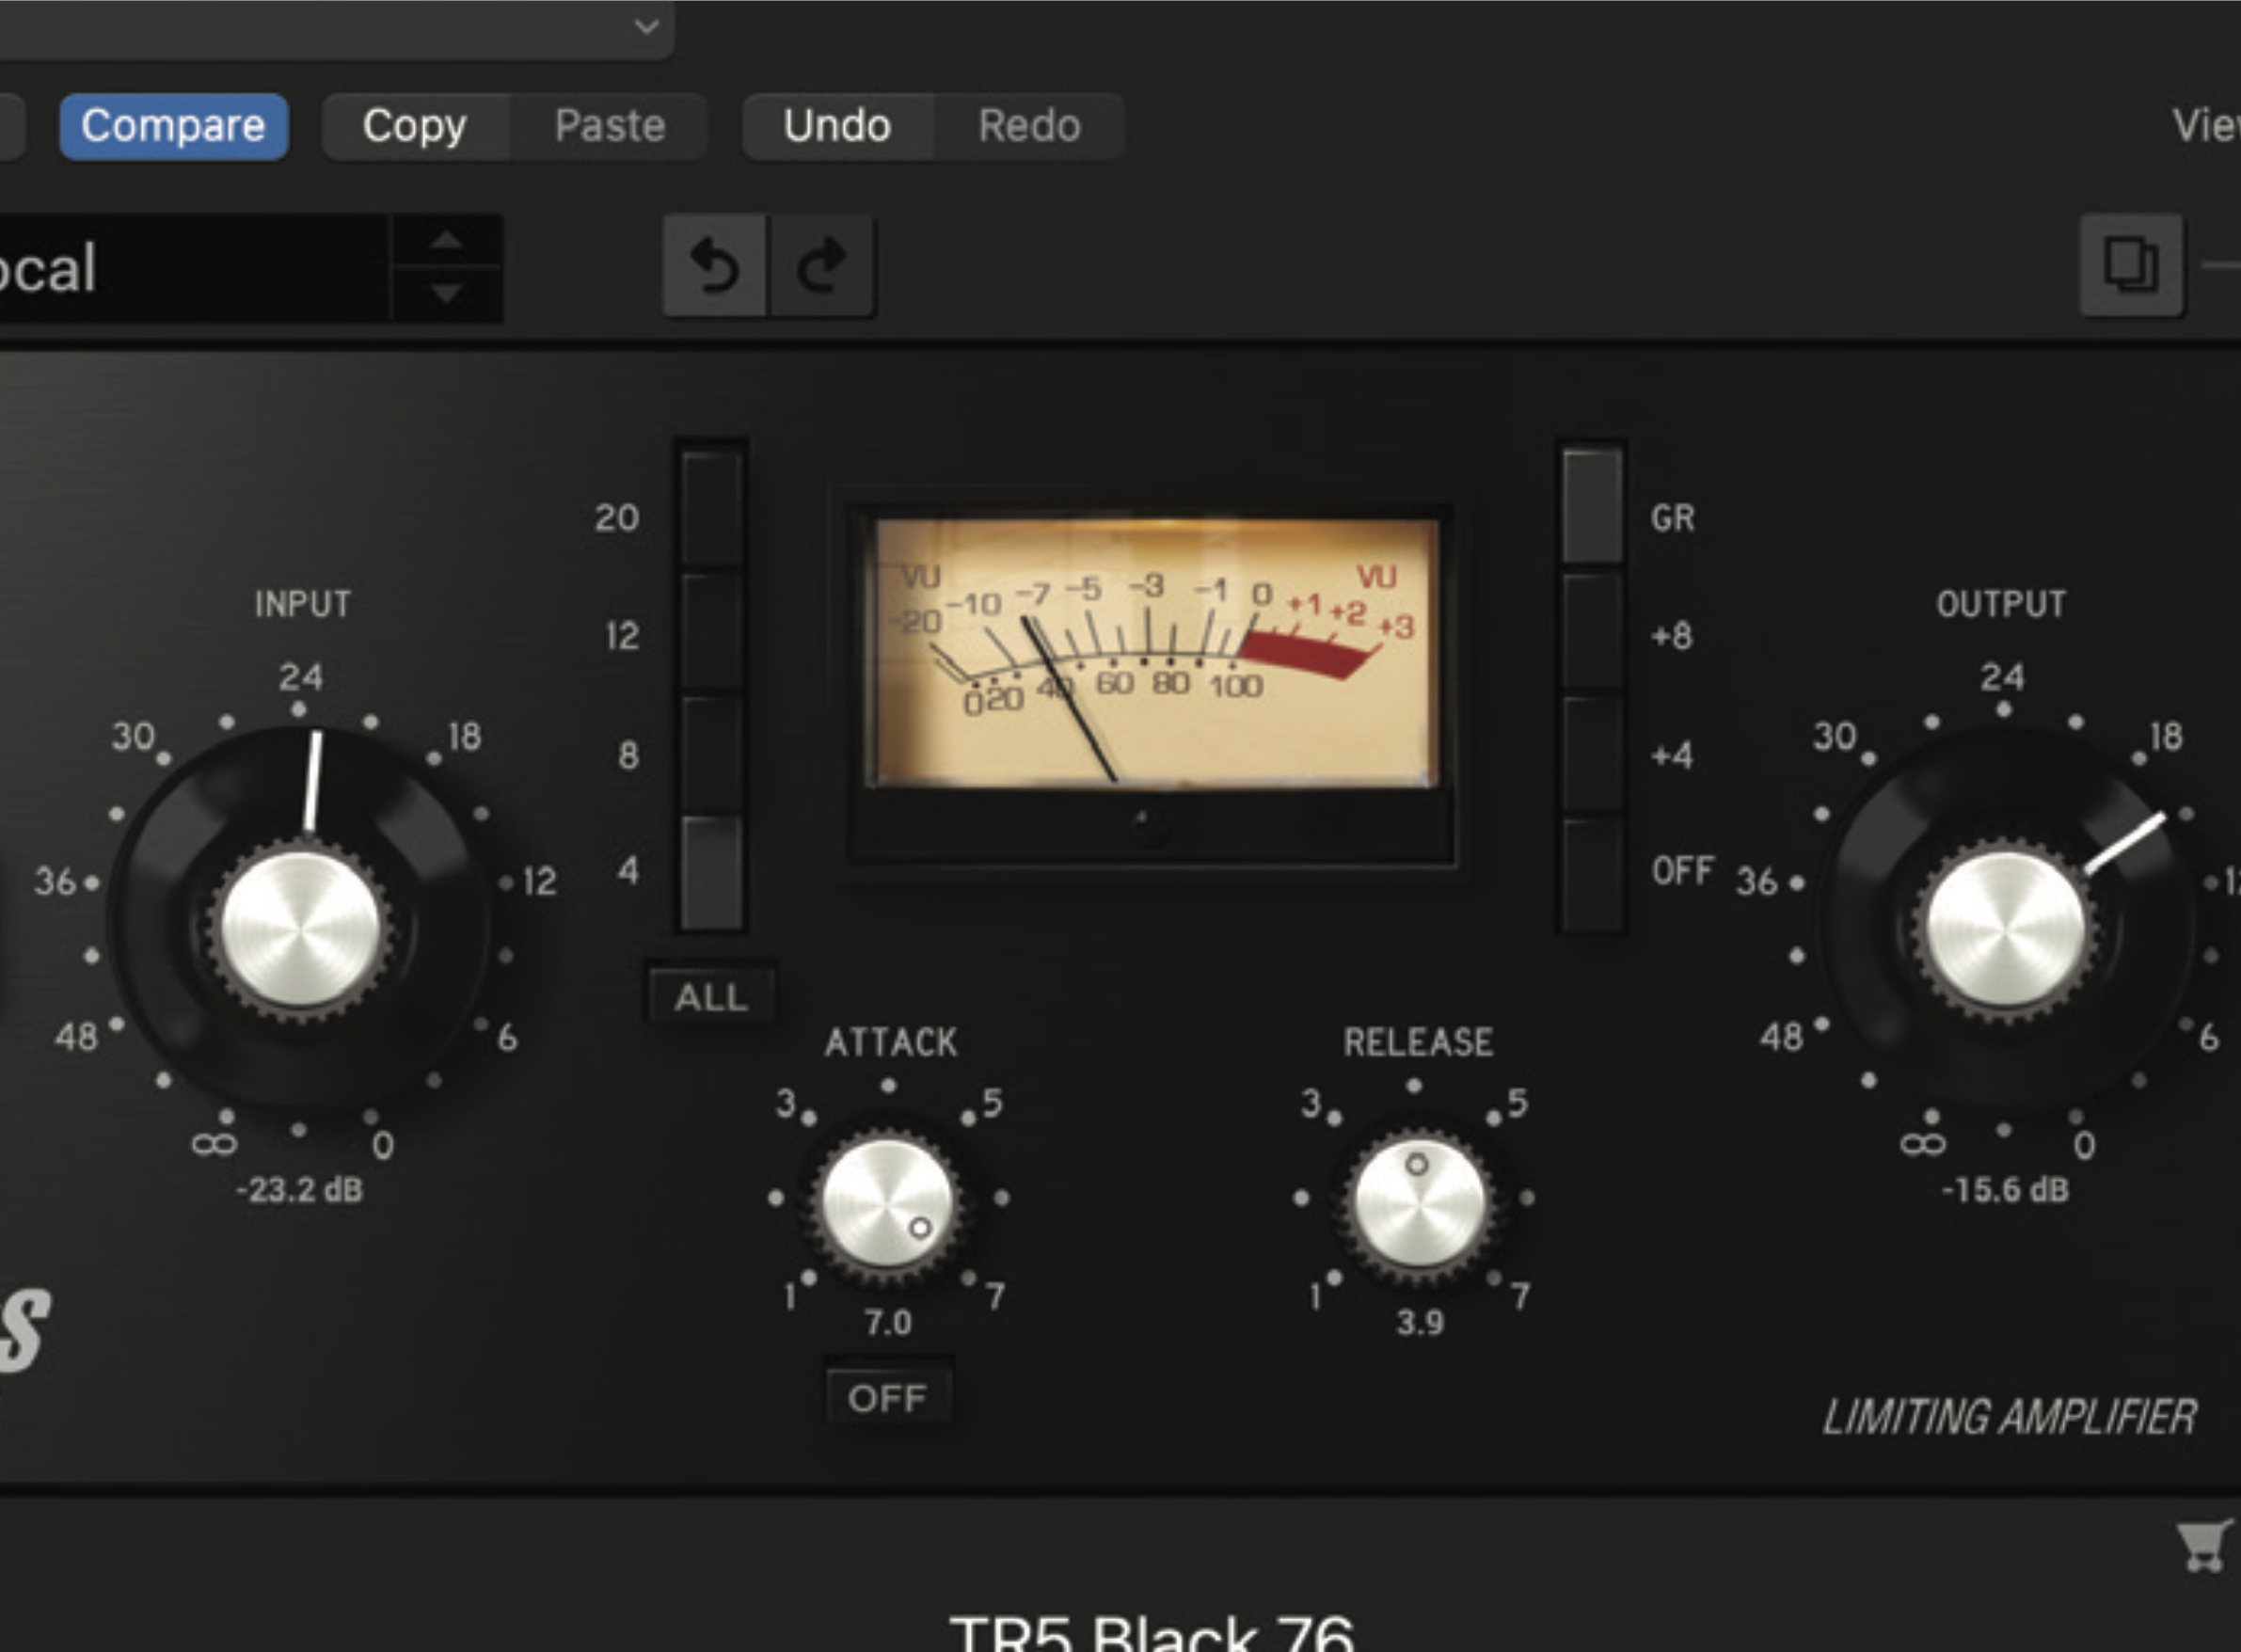
This style of fast compressor can both help level out the performance and also add some bite to the vocal sound. To achieve this, set the attack at its fastest with a medium release (settings 7 and 4 respectively on an 1176) with a ratio of 4:1. Then simply adjust the threshold (input on an 1176) for the desired gain reduction.
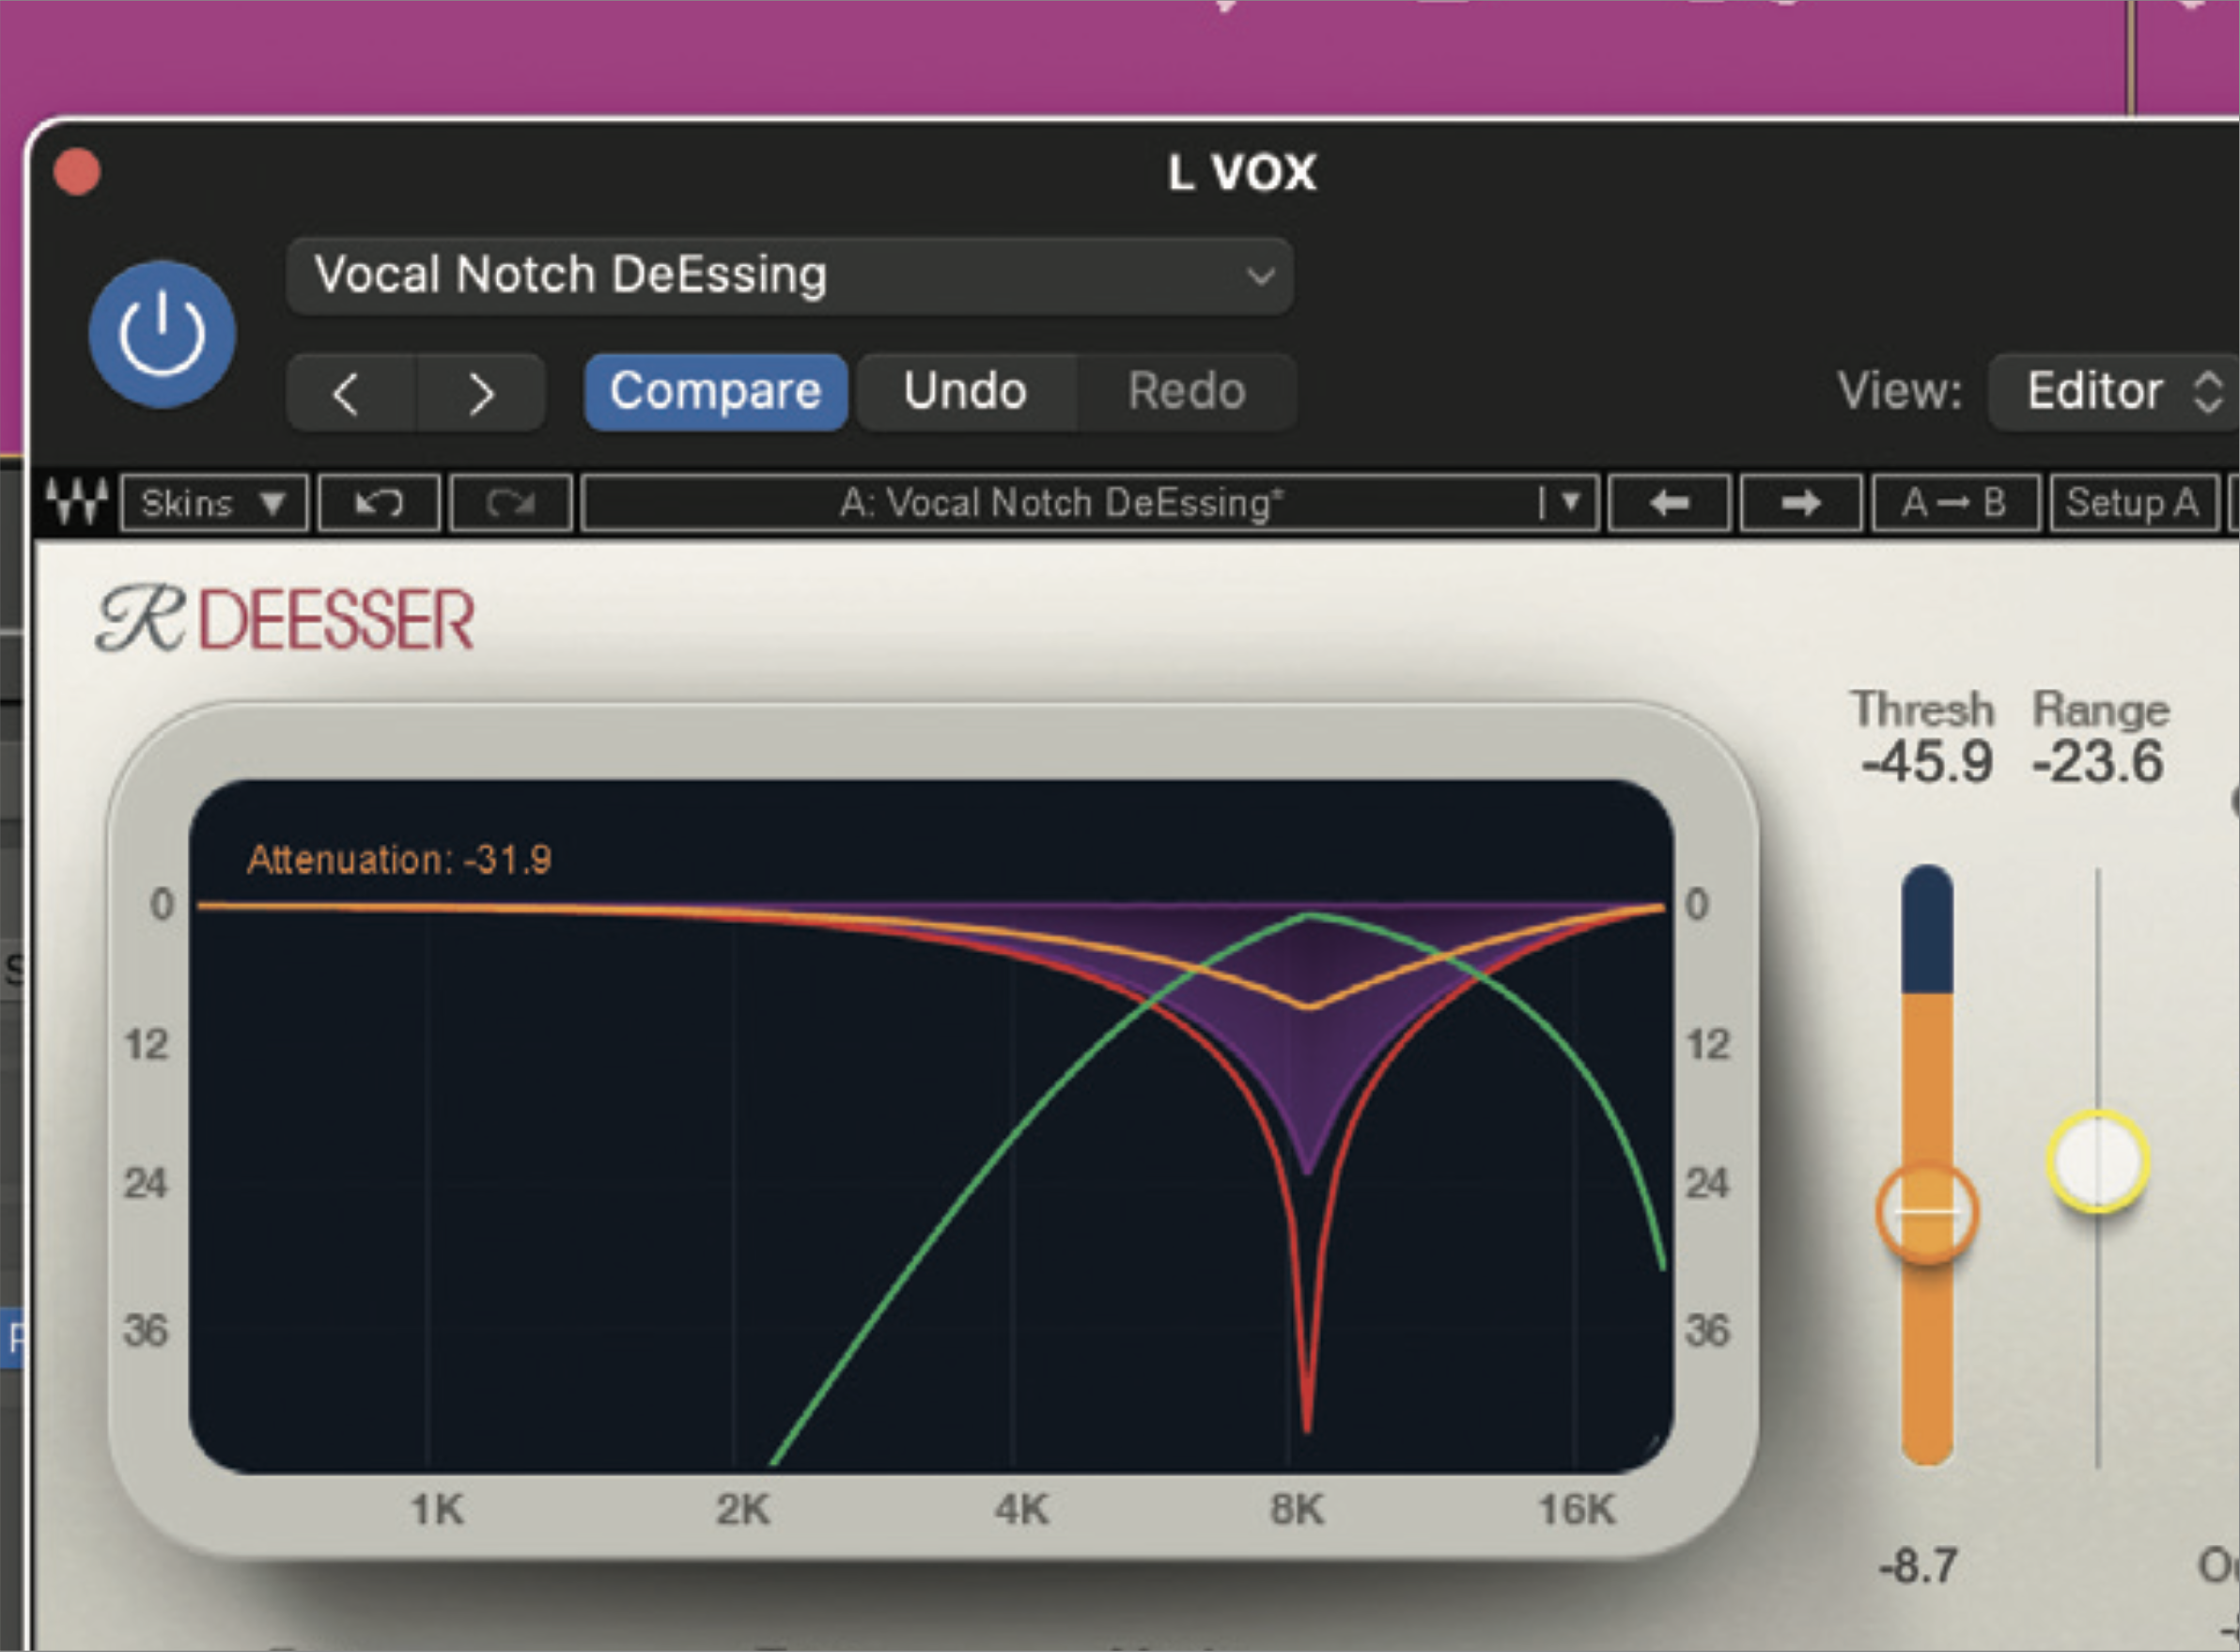
De-essing a vocal can now be done in various ways, including manually editing the sibilance levels in the audio file. That said, using a real-time de-esser plugin is still a great way to quickly reduce most of the sibilance. Whichever plugin you use, you should make sure to use the sidechain listen option in order to find the problem frequencies.
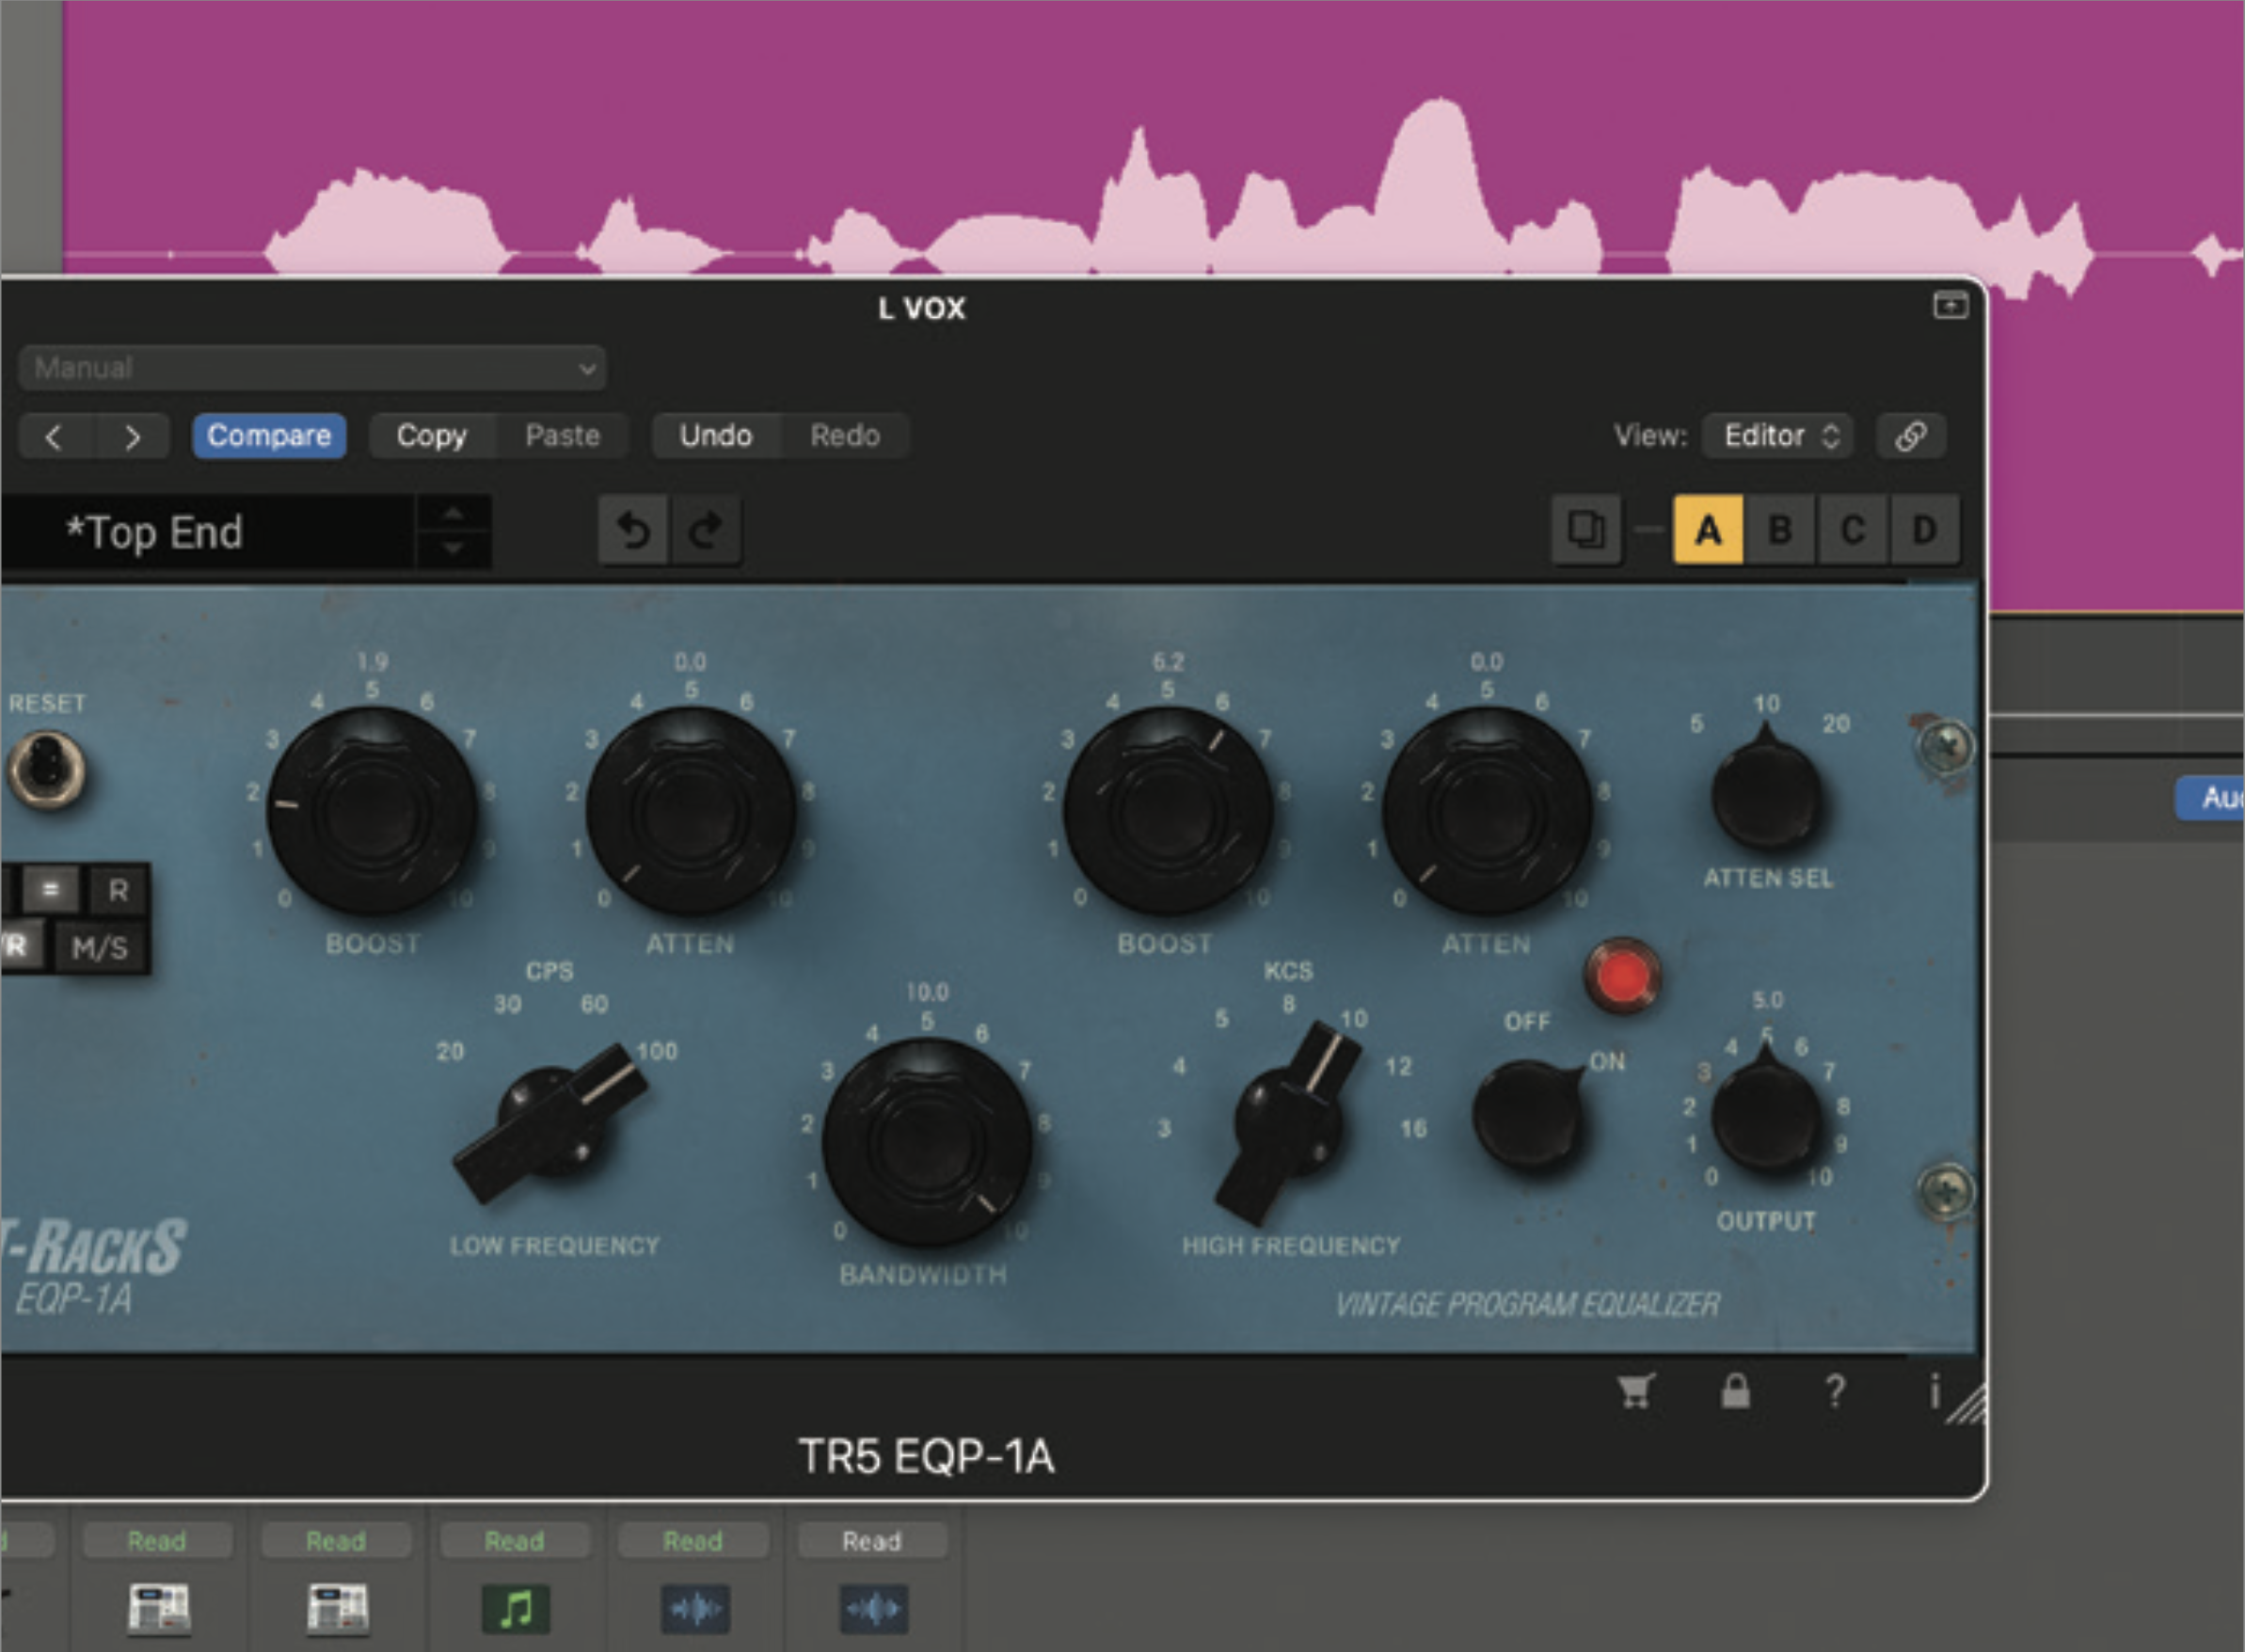
As mentioned, we can be a bit indulgent even in a basic chain, and the fourth plugin should be a finessing EQ. Choose a natural-sounding design such as an EQP-1A and use it to shape the overall sound. More than likely you’ll boost the high frequencies (8kHz or 10kHz) and even the lows (100Hz), but use cuts if the sound demands it.
Plugin chainers
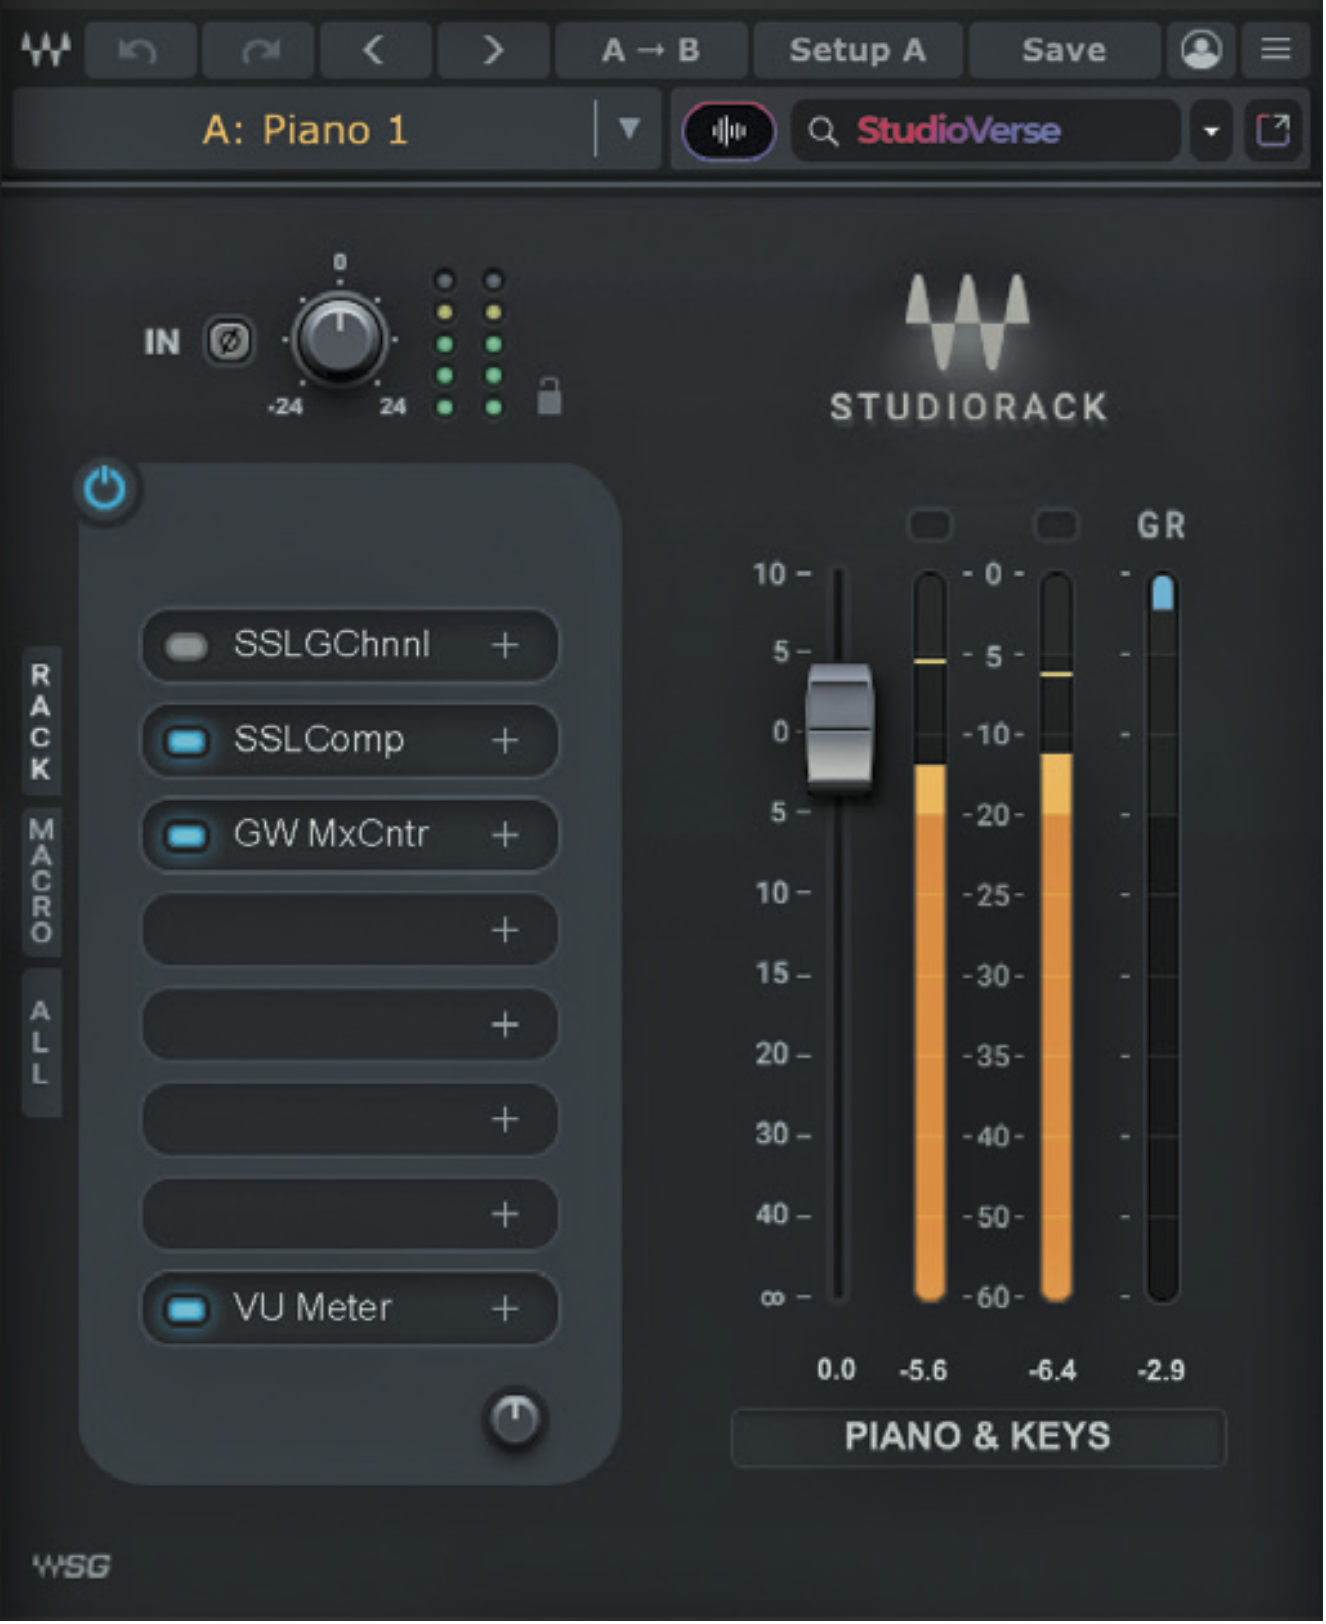
Although saving mixing chains using your DAW features is fine, if you’re using more than one DAW, or want a bit more flexibility with routing, then a third party plugin chainer could be a better solution for creating and managing your mixing chains.
Blue Cat Patchwork is a plugin that has grown in stature year on year, and now offers one of the best frameworks to build bespoke plugin chains. The plugin comes ready loaded with 30 of Blue Cat’s very own processors. But what makes it really special is it also supports VST, VST3 and AU, and can load up to 64 of these per instance. With flexible routing, up to eight parallel chains, external sidechain options and configurable macros, plus an extensive preset library, it’s well worth the €99 asking price.
Waves StudioVerse is designed solely for Waves plugins, and this does limit its appeal. But if you’re already a Waves subscriber, we can’t think of a developer with a bigger or broader choice of plugins for building every conceivable mixing chain. Cool features include slots with multiband and parallel split options, eight user-definable macro controls, and a big bank of factory and producer/mixer presets. What’s more you can access Waves’ ever growing StudioVerse database of mixing chains directly from the plugin. All told it’s an excellent system.
Excite Audio KSHMR (VST, VST3, AU, AAX) lets you create your own plugin chains, with macro controls, parallel processing, external side chaining and plugin-specific oversampling (up to x16). But it also includes a very cool leader/follower system. This clever linking system allows you to control multiple individual chains from one master (leader) chain. Excellent stuff.
2. Enhancing our vocal chain
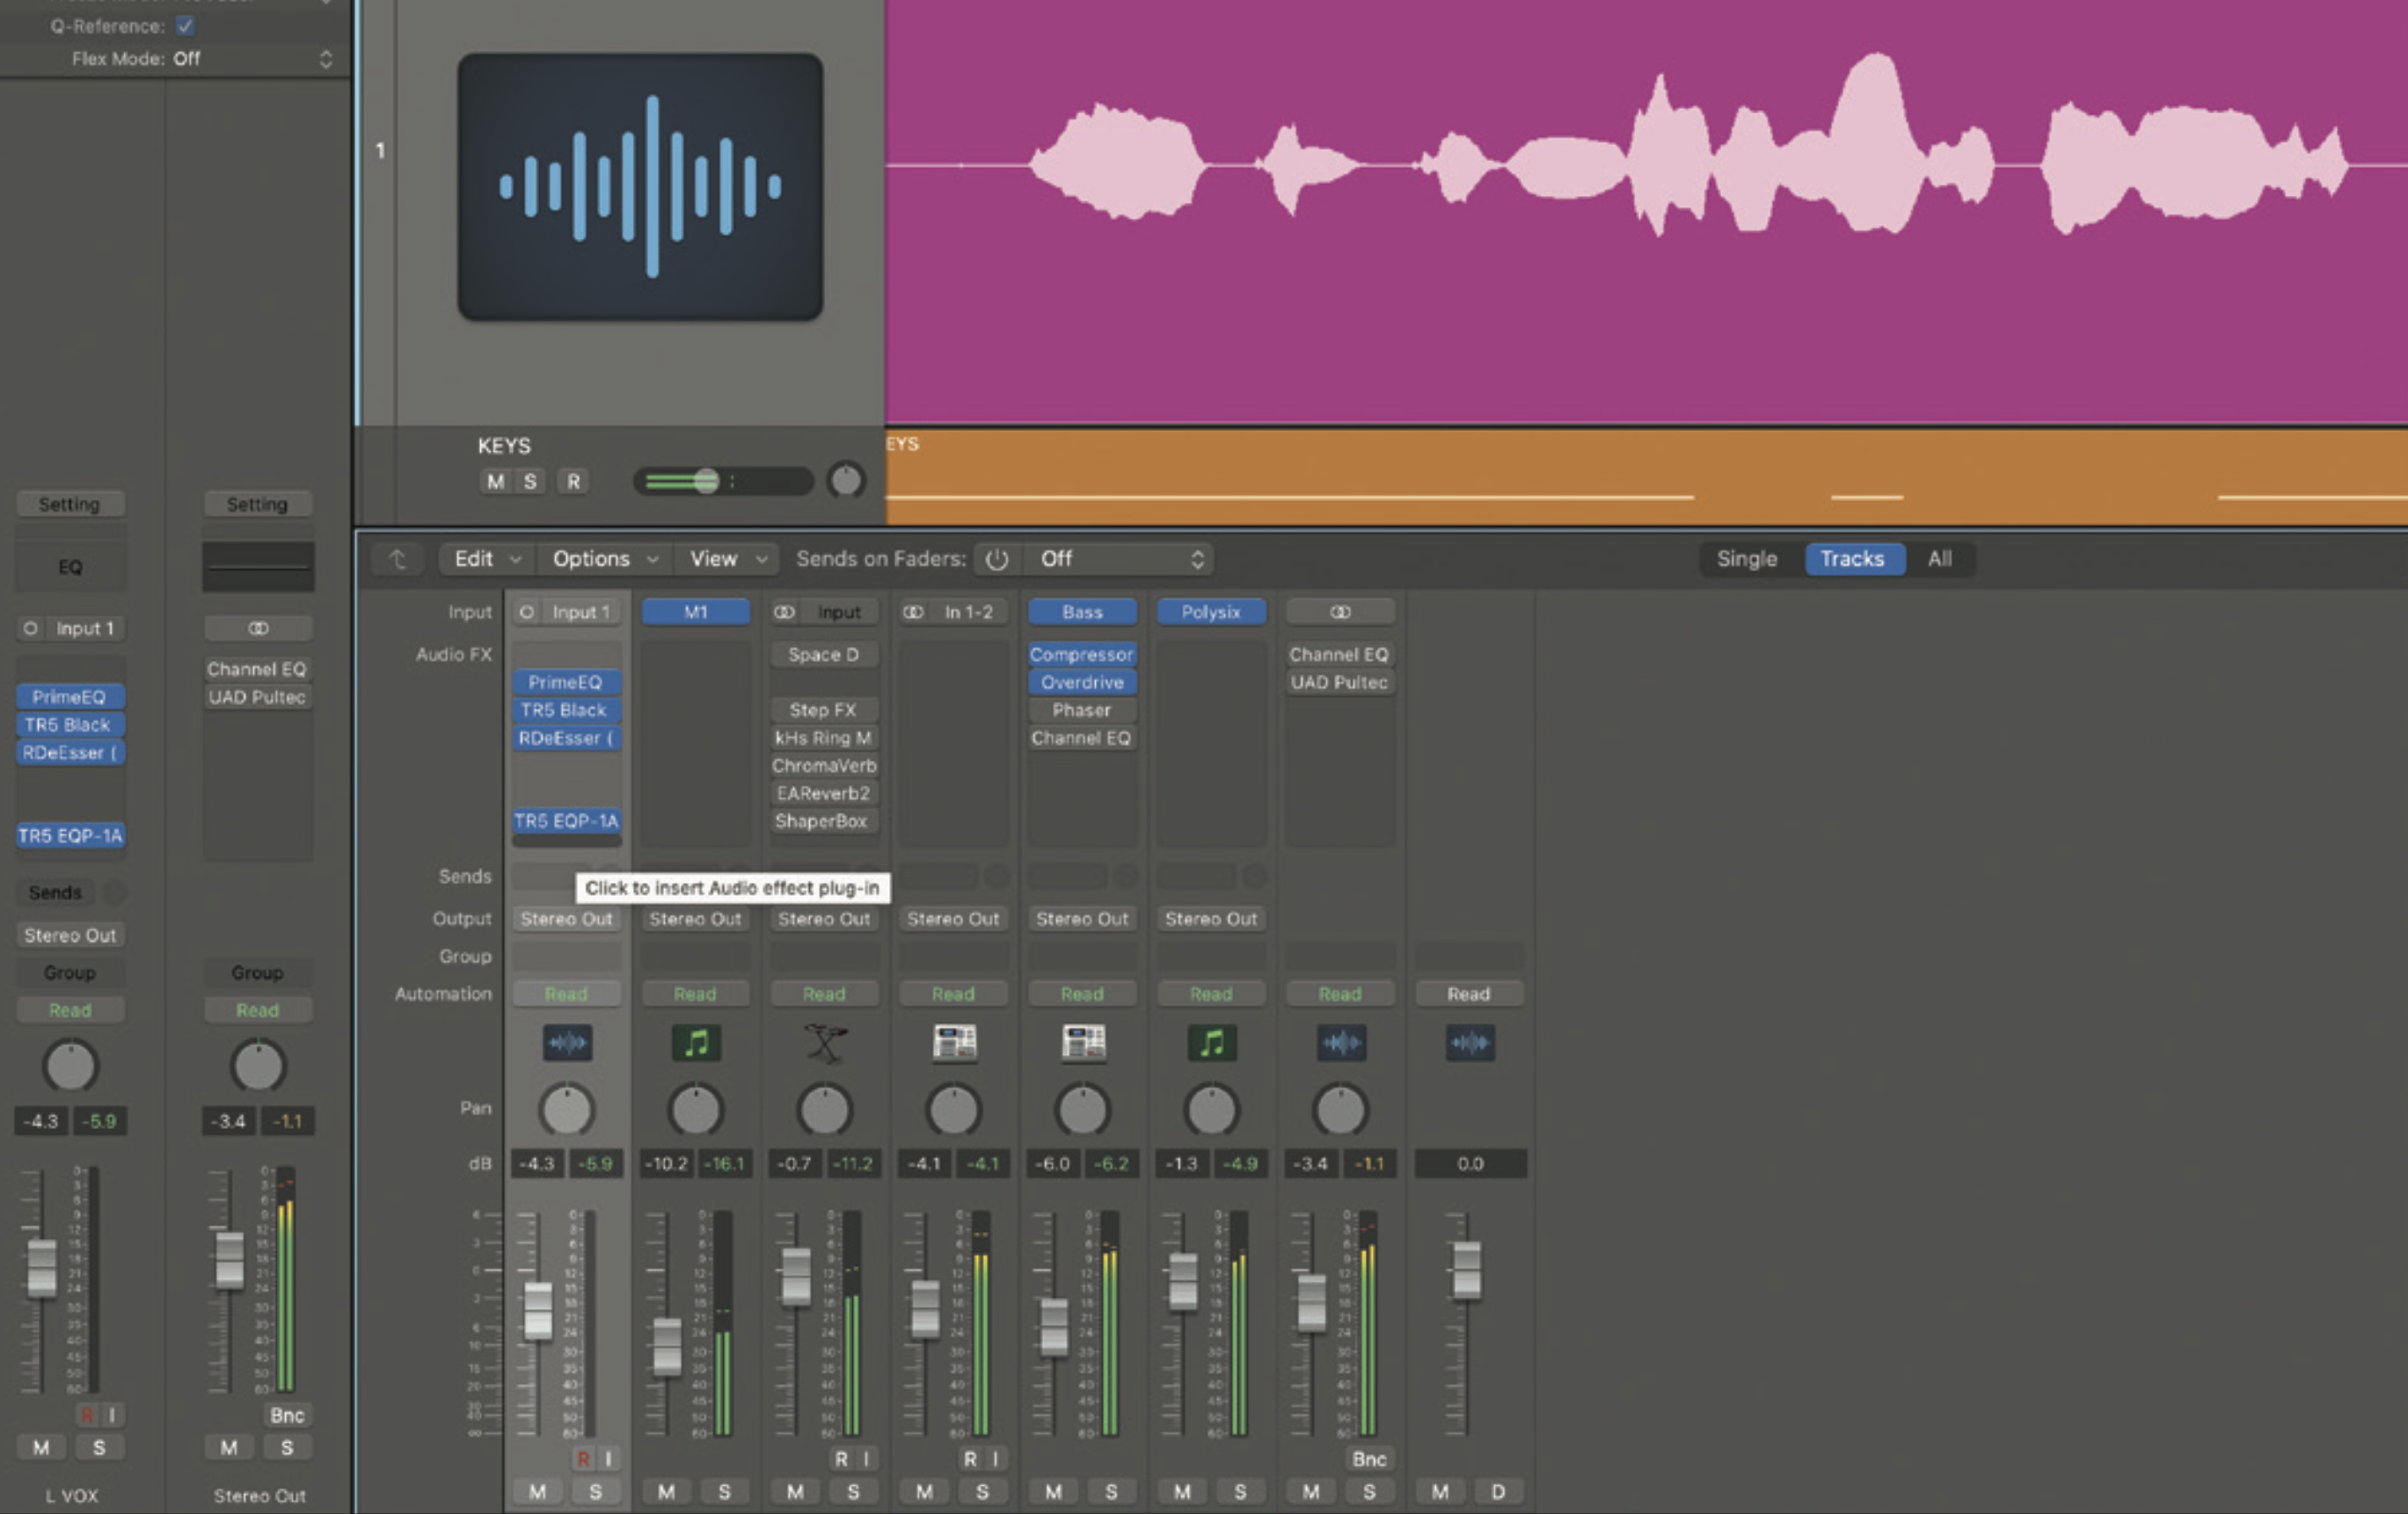
Our basic vocal chain can be enhanced in various ways to create a more complex and capable processor. We’ve reworked our basic chain to create empty slots for the additional processing. The order is not set in stone, but this signal flow is tried and tested and will work in most cases.
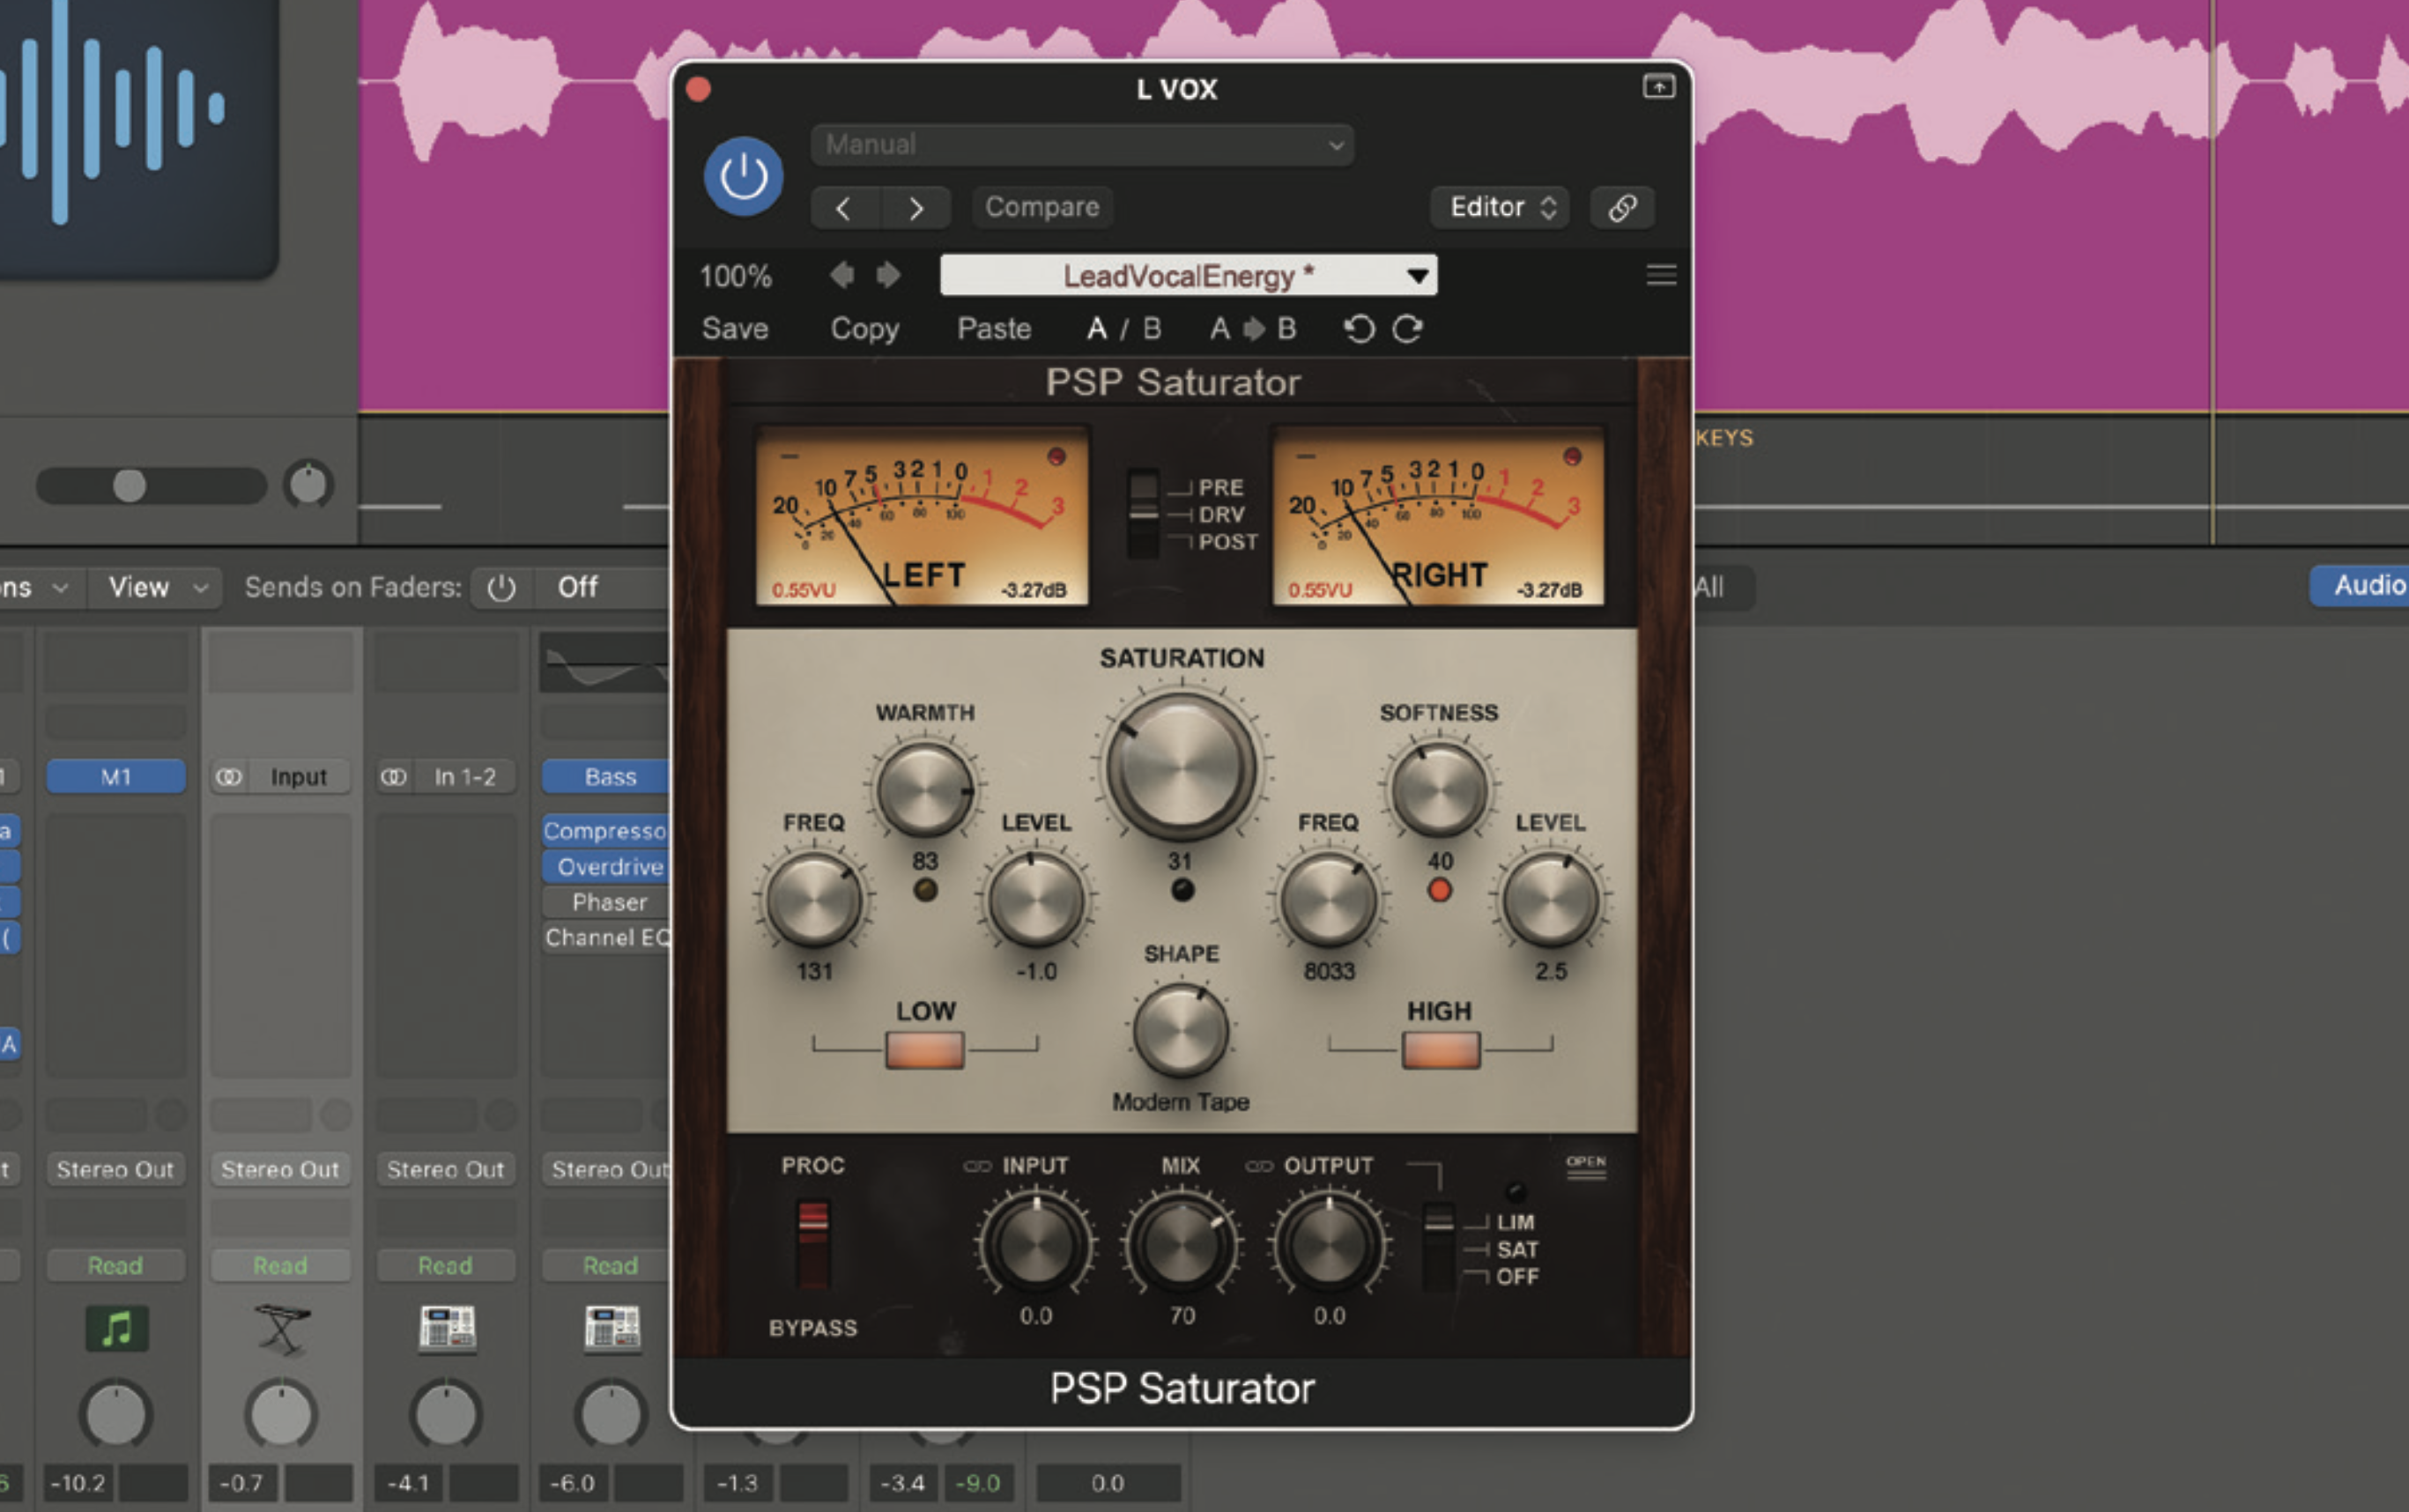
First up, we want to add some colour. We’re not really after heavy distortion but more the kind of fattening harmonics we might get by driving an analogue desk channel. Place this plugin right at the beginning of the chain, before the main corrective EQ, then adjust the drive level to taste.
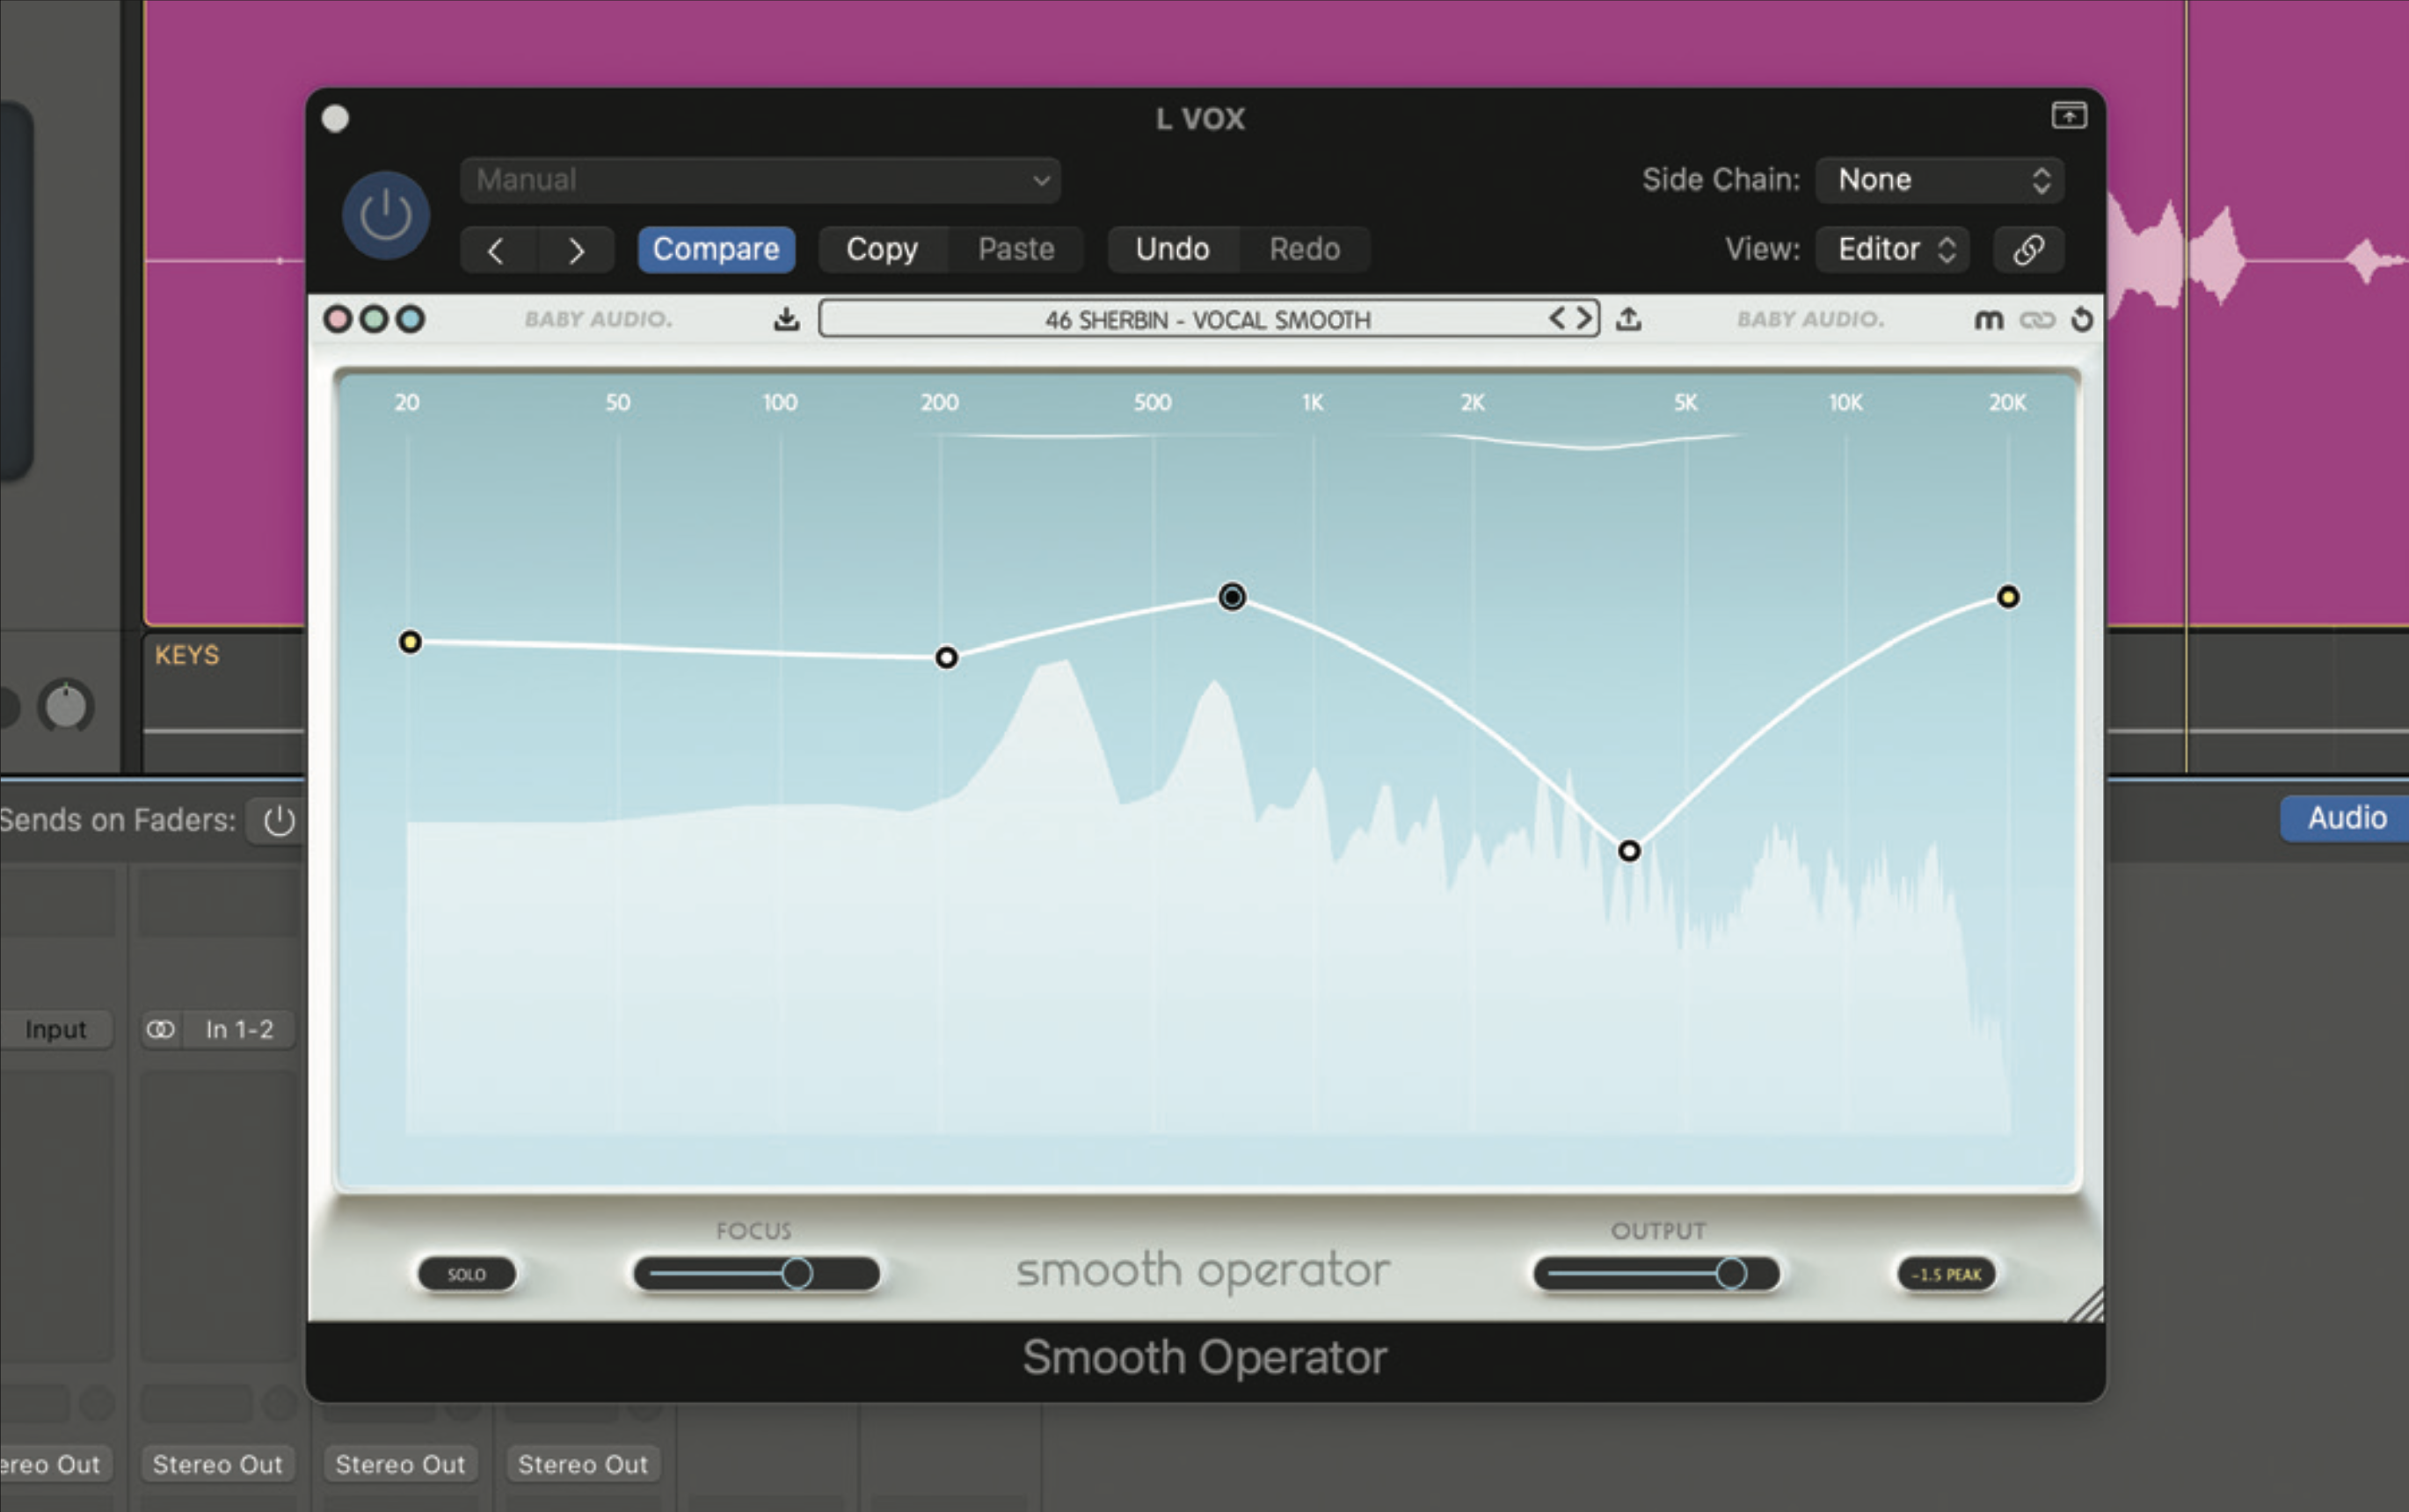
Next up, and positioned after the de-esser we have two options: either a dynamic EQ or a resonance suppressor. Both allow us to remove unpleasantness in a dynamic way. Dynamic EQ is the more traditional option, but a resonance suppressor (oeksound Soothe 2 or Baby Audio Smooth Operator, for example) is really easy to use and the preferred option if you have it.
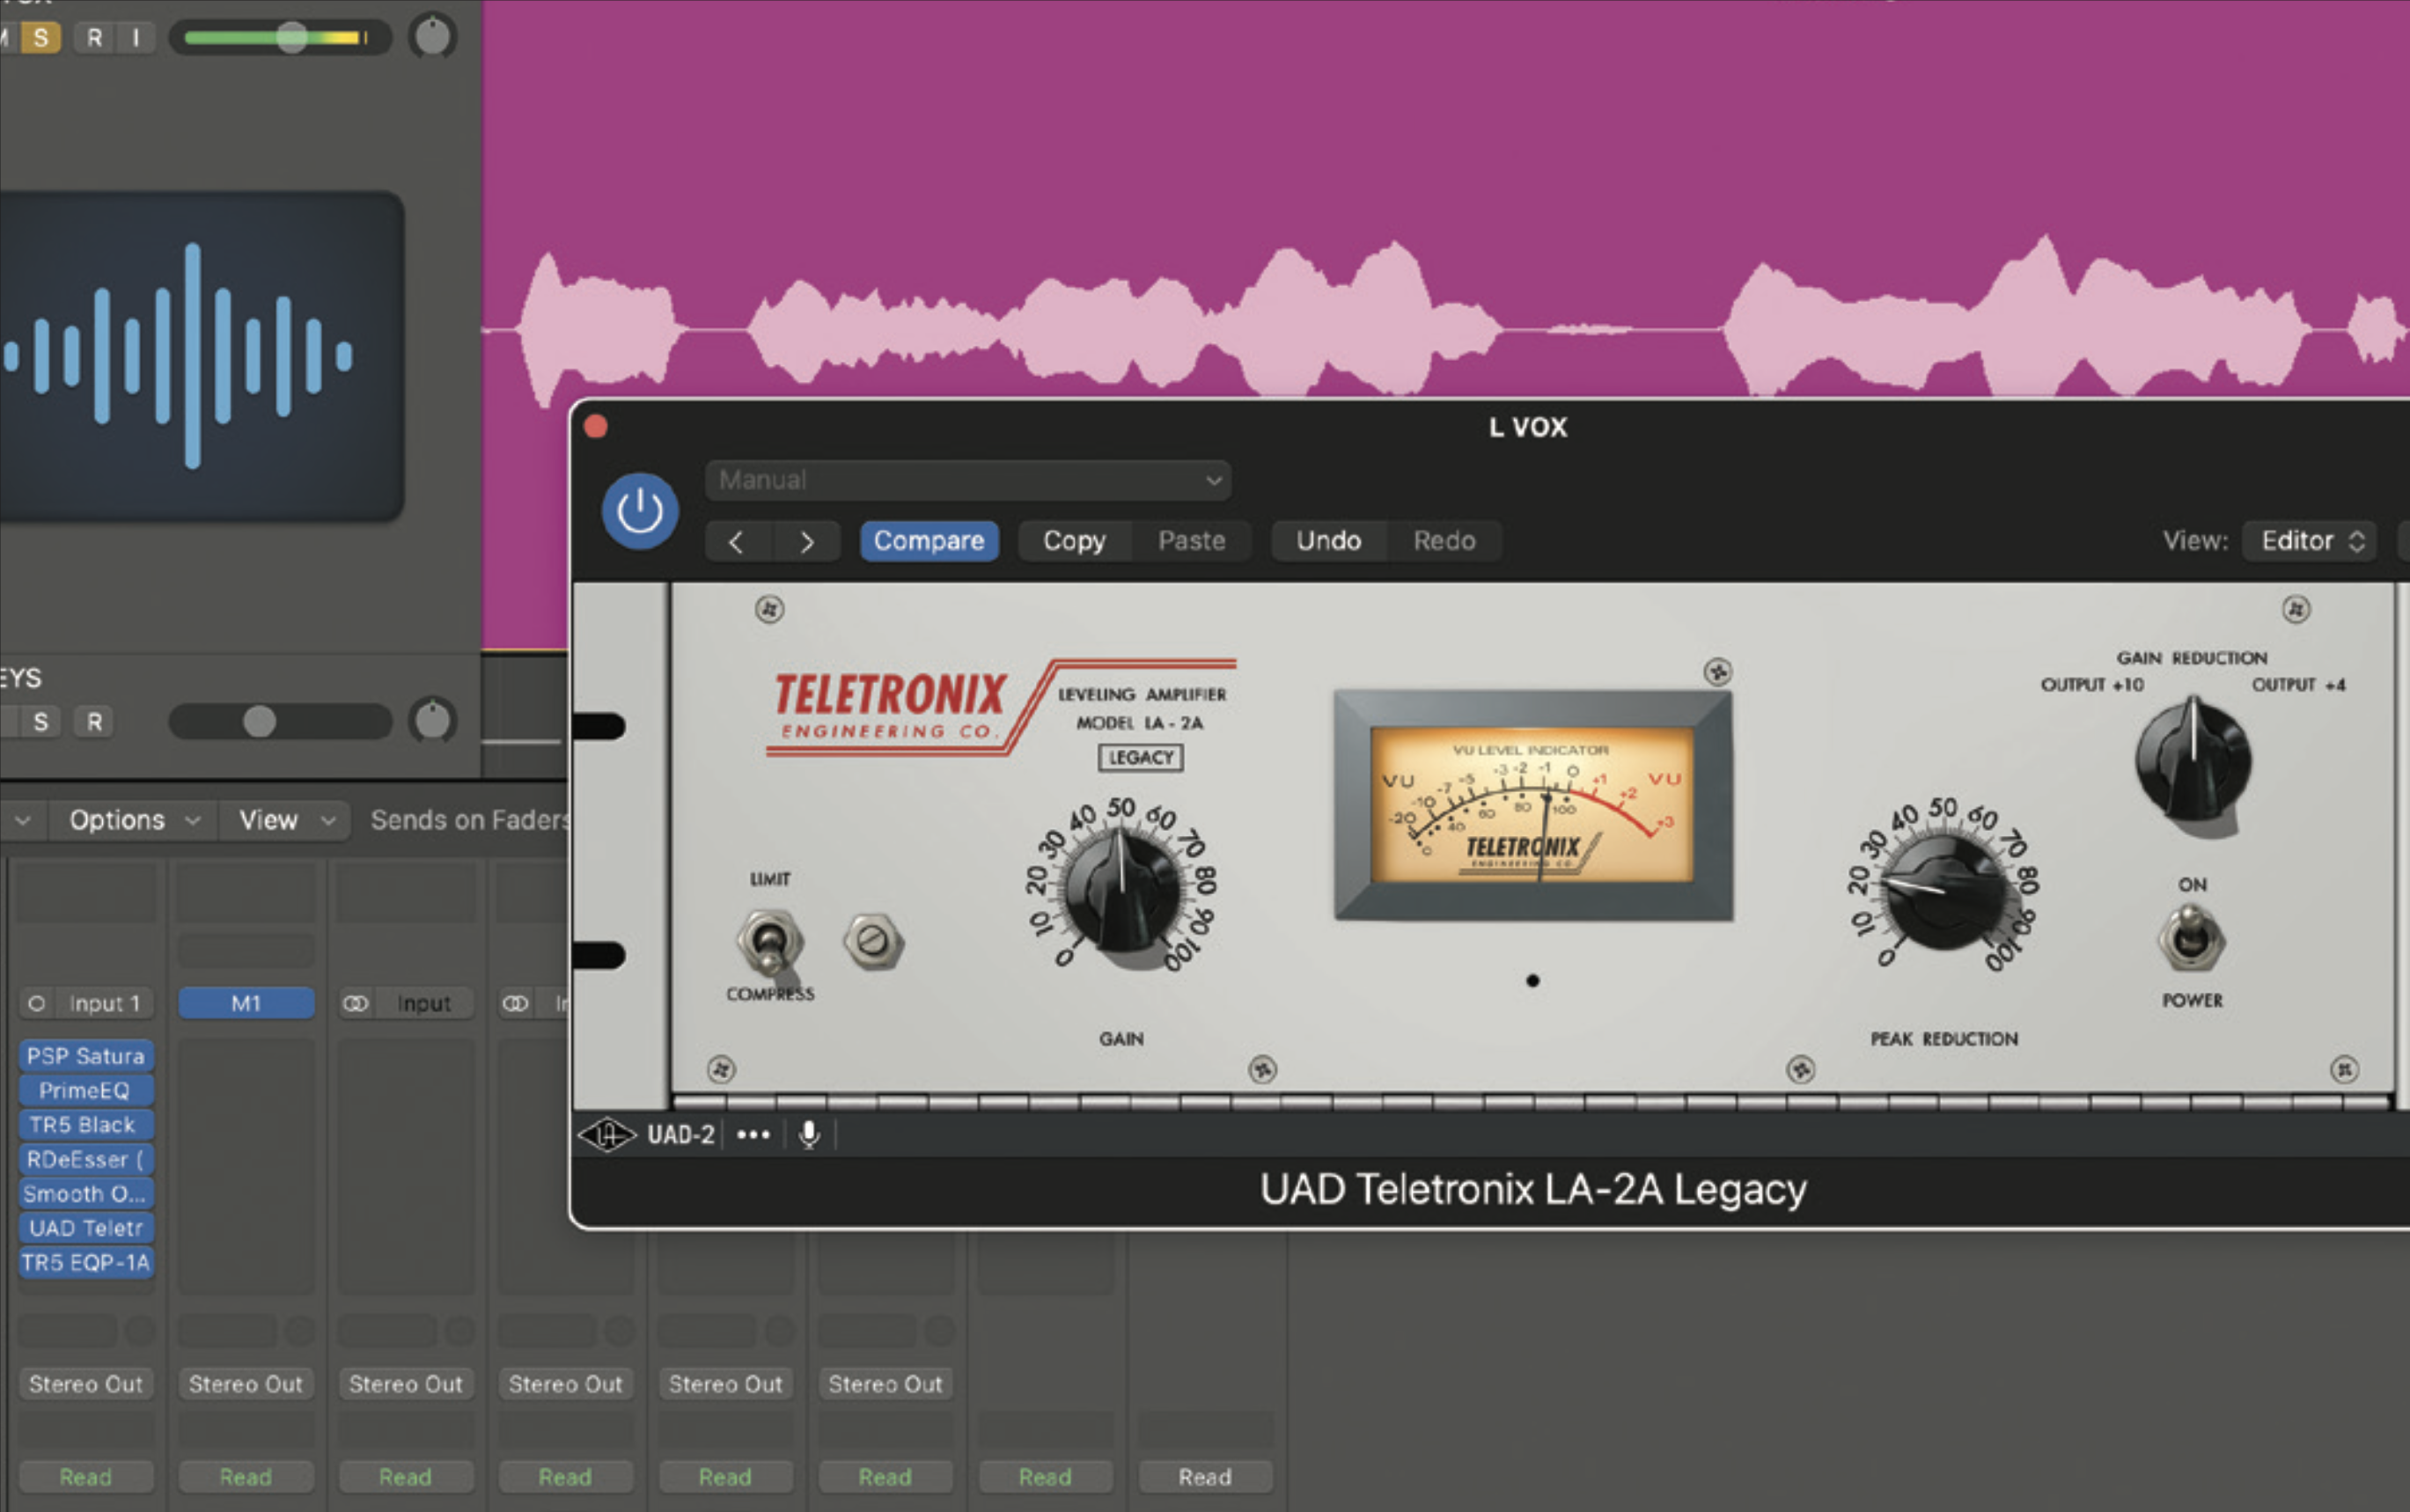
With most problem areas resolved, we can now add a finessing compressor. Place this prior to the finessing EQ. The aim here is to round out the sound, providing gentle levelling and maybe some retro harmonics. Good options include opto-based designs (Teletronix LA2-A) or for more flavour, vari-mu valve-based designs (Fairchild 670).
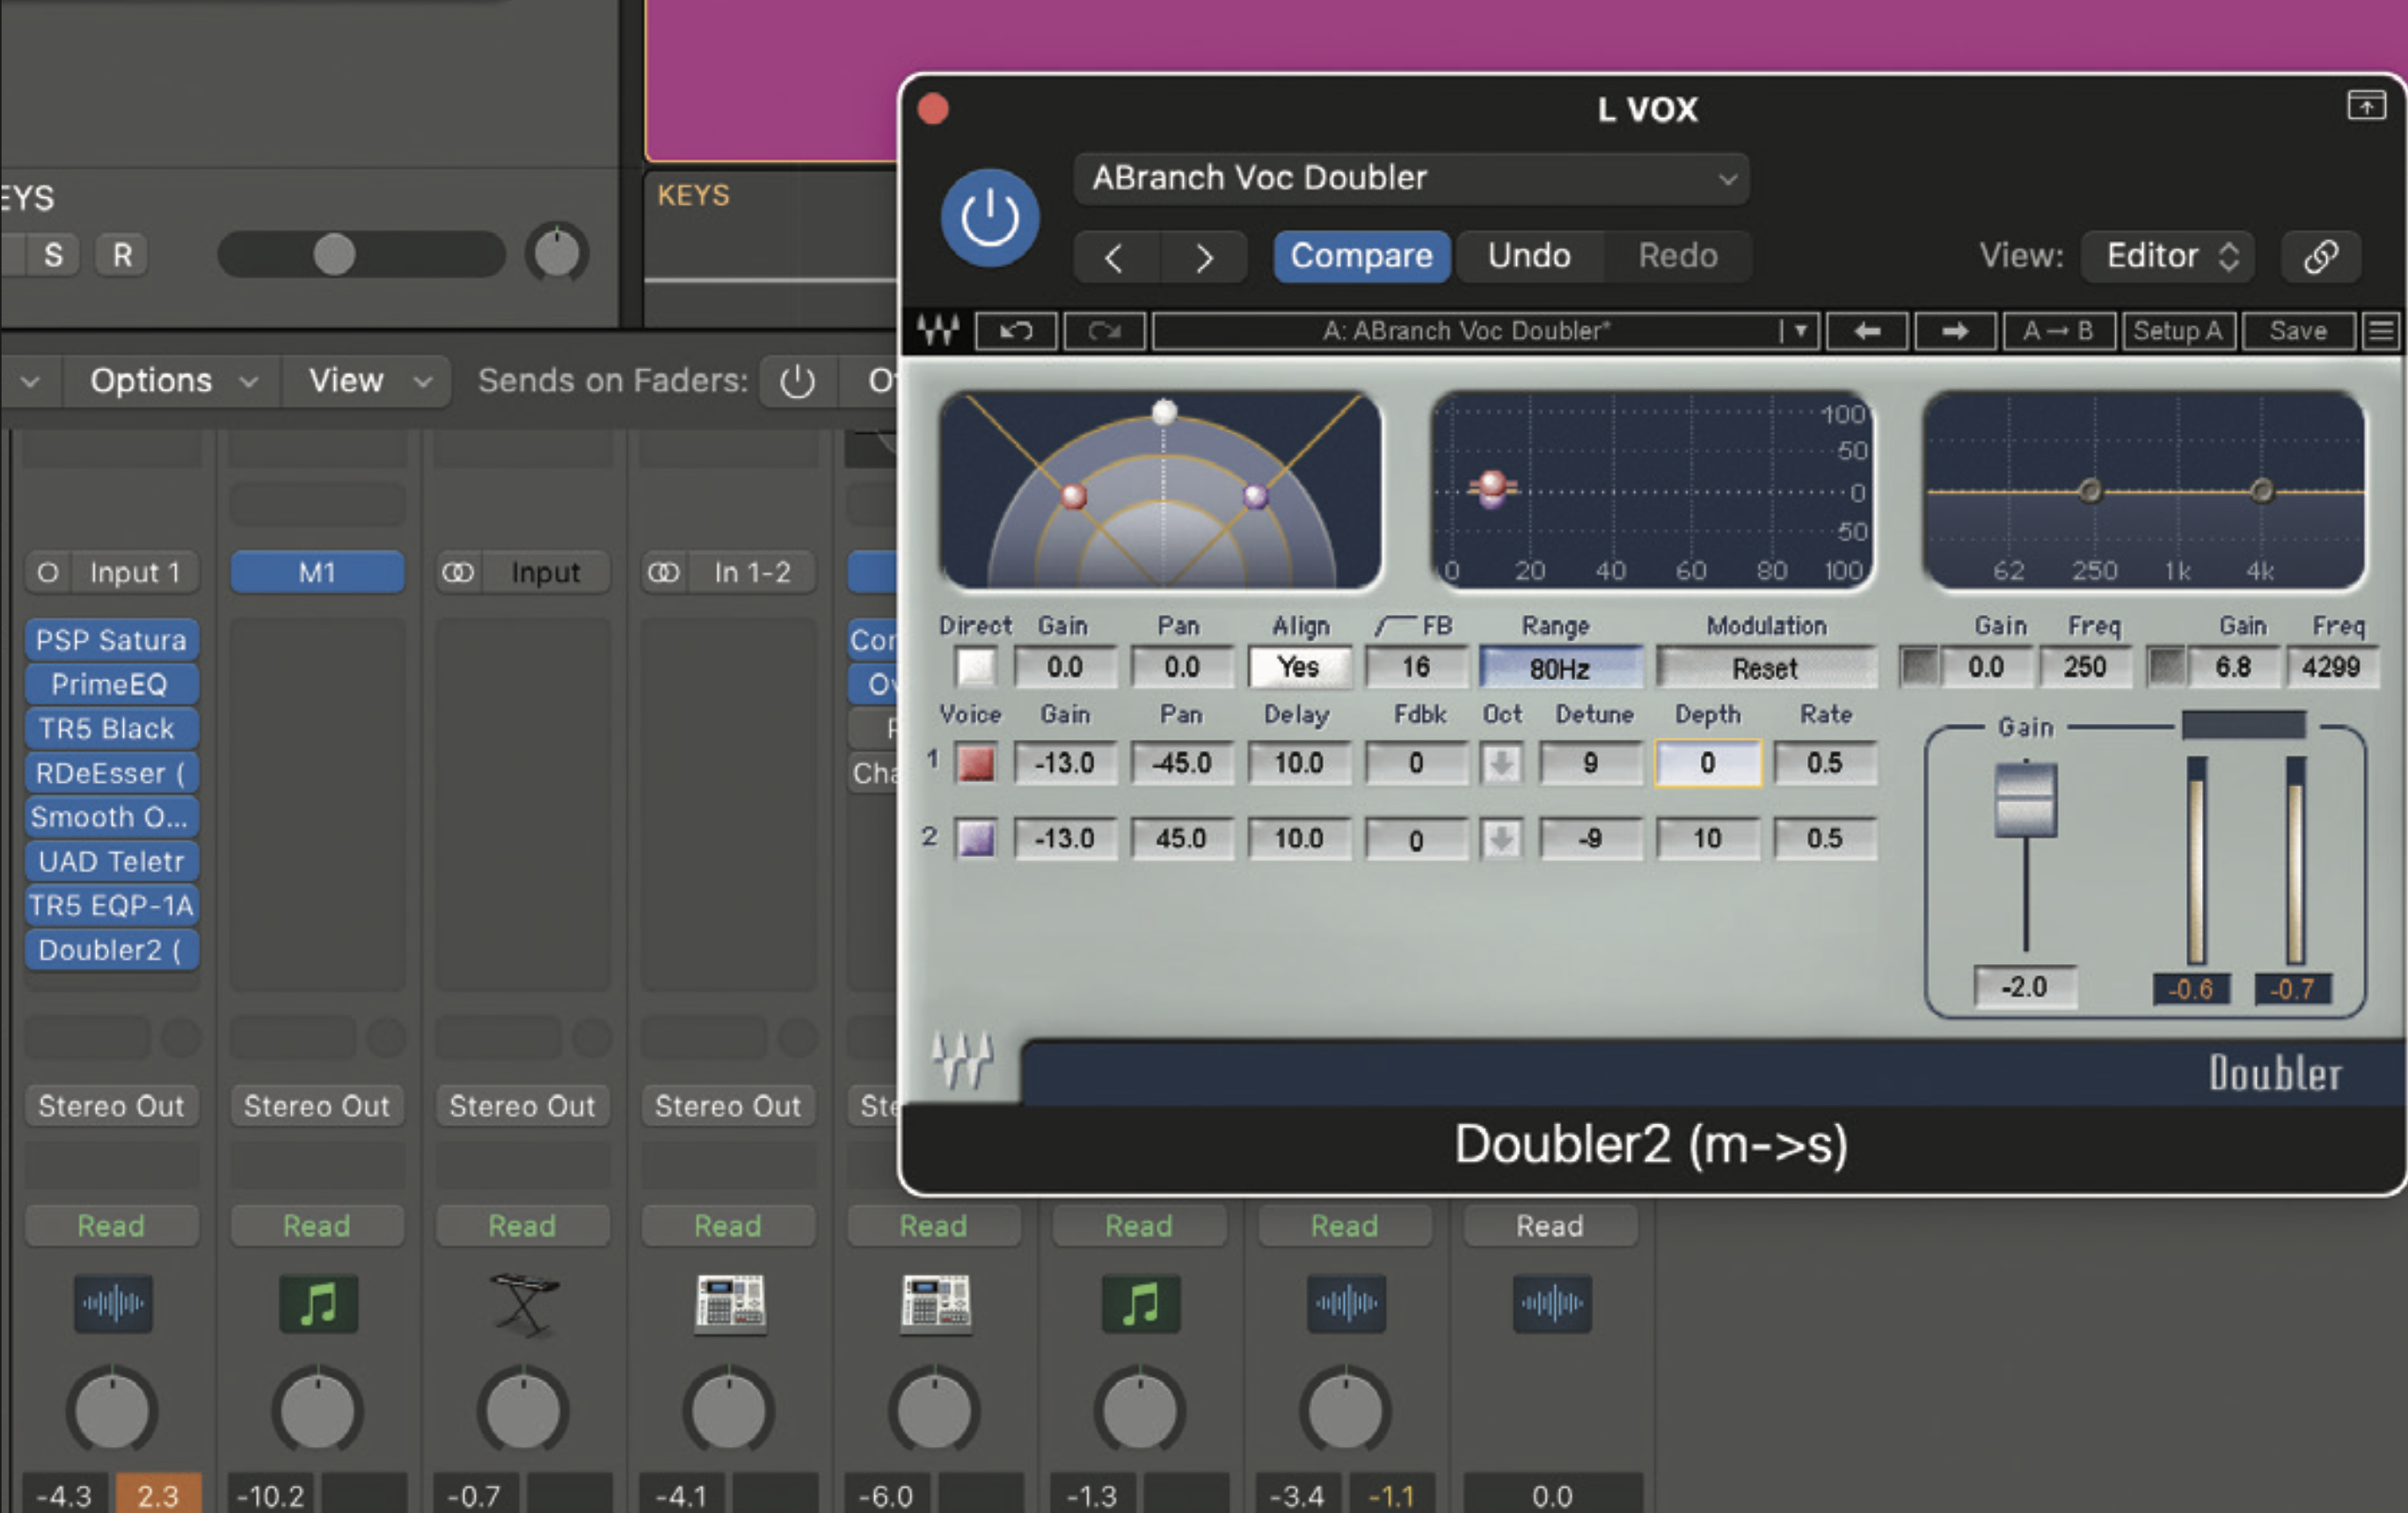
An effect that is widely used to add smoothness and finesse to a vocal is a micro pitch-shift or doubler. You can add this as an auxiliary, or simply add it as an insert after the finessing compressor. You need a subtle setting, pitching of +/-10 cents left and right is often enough. Set the mix blend very low.
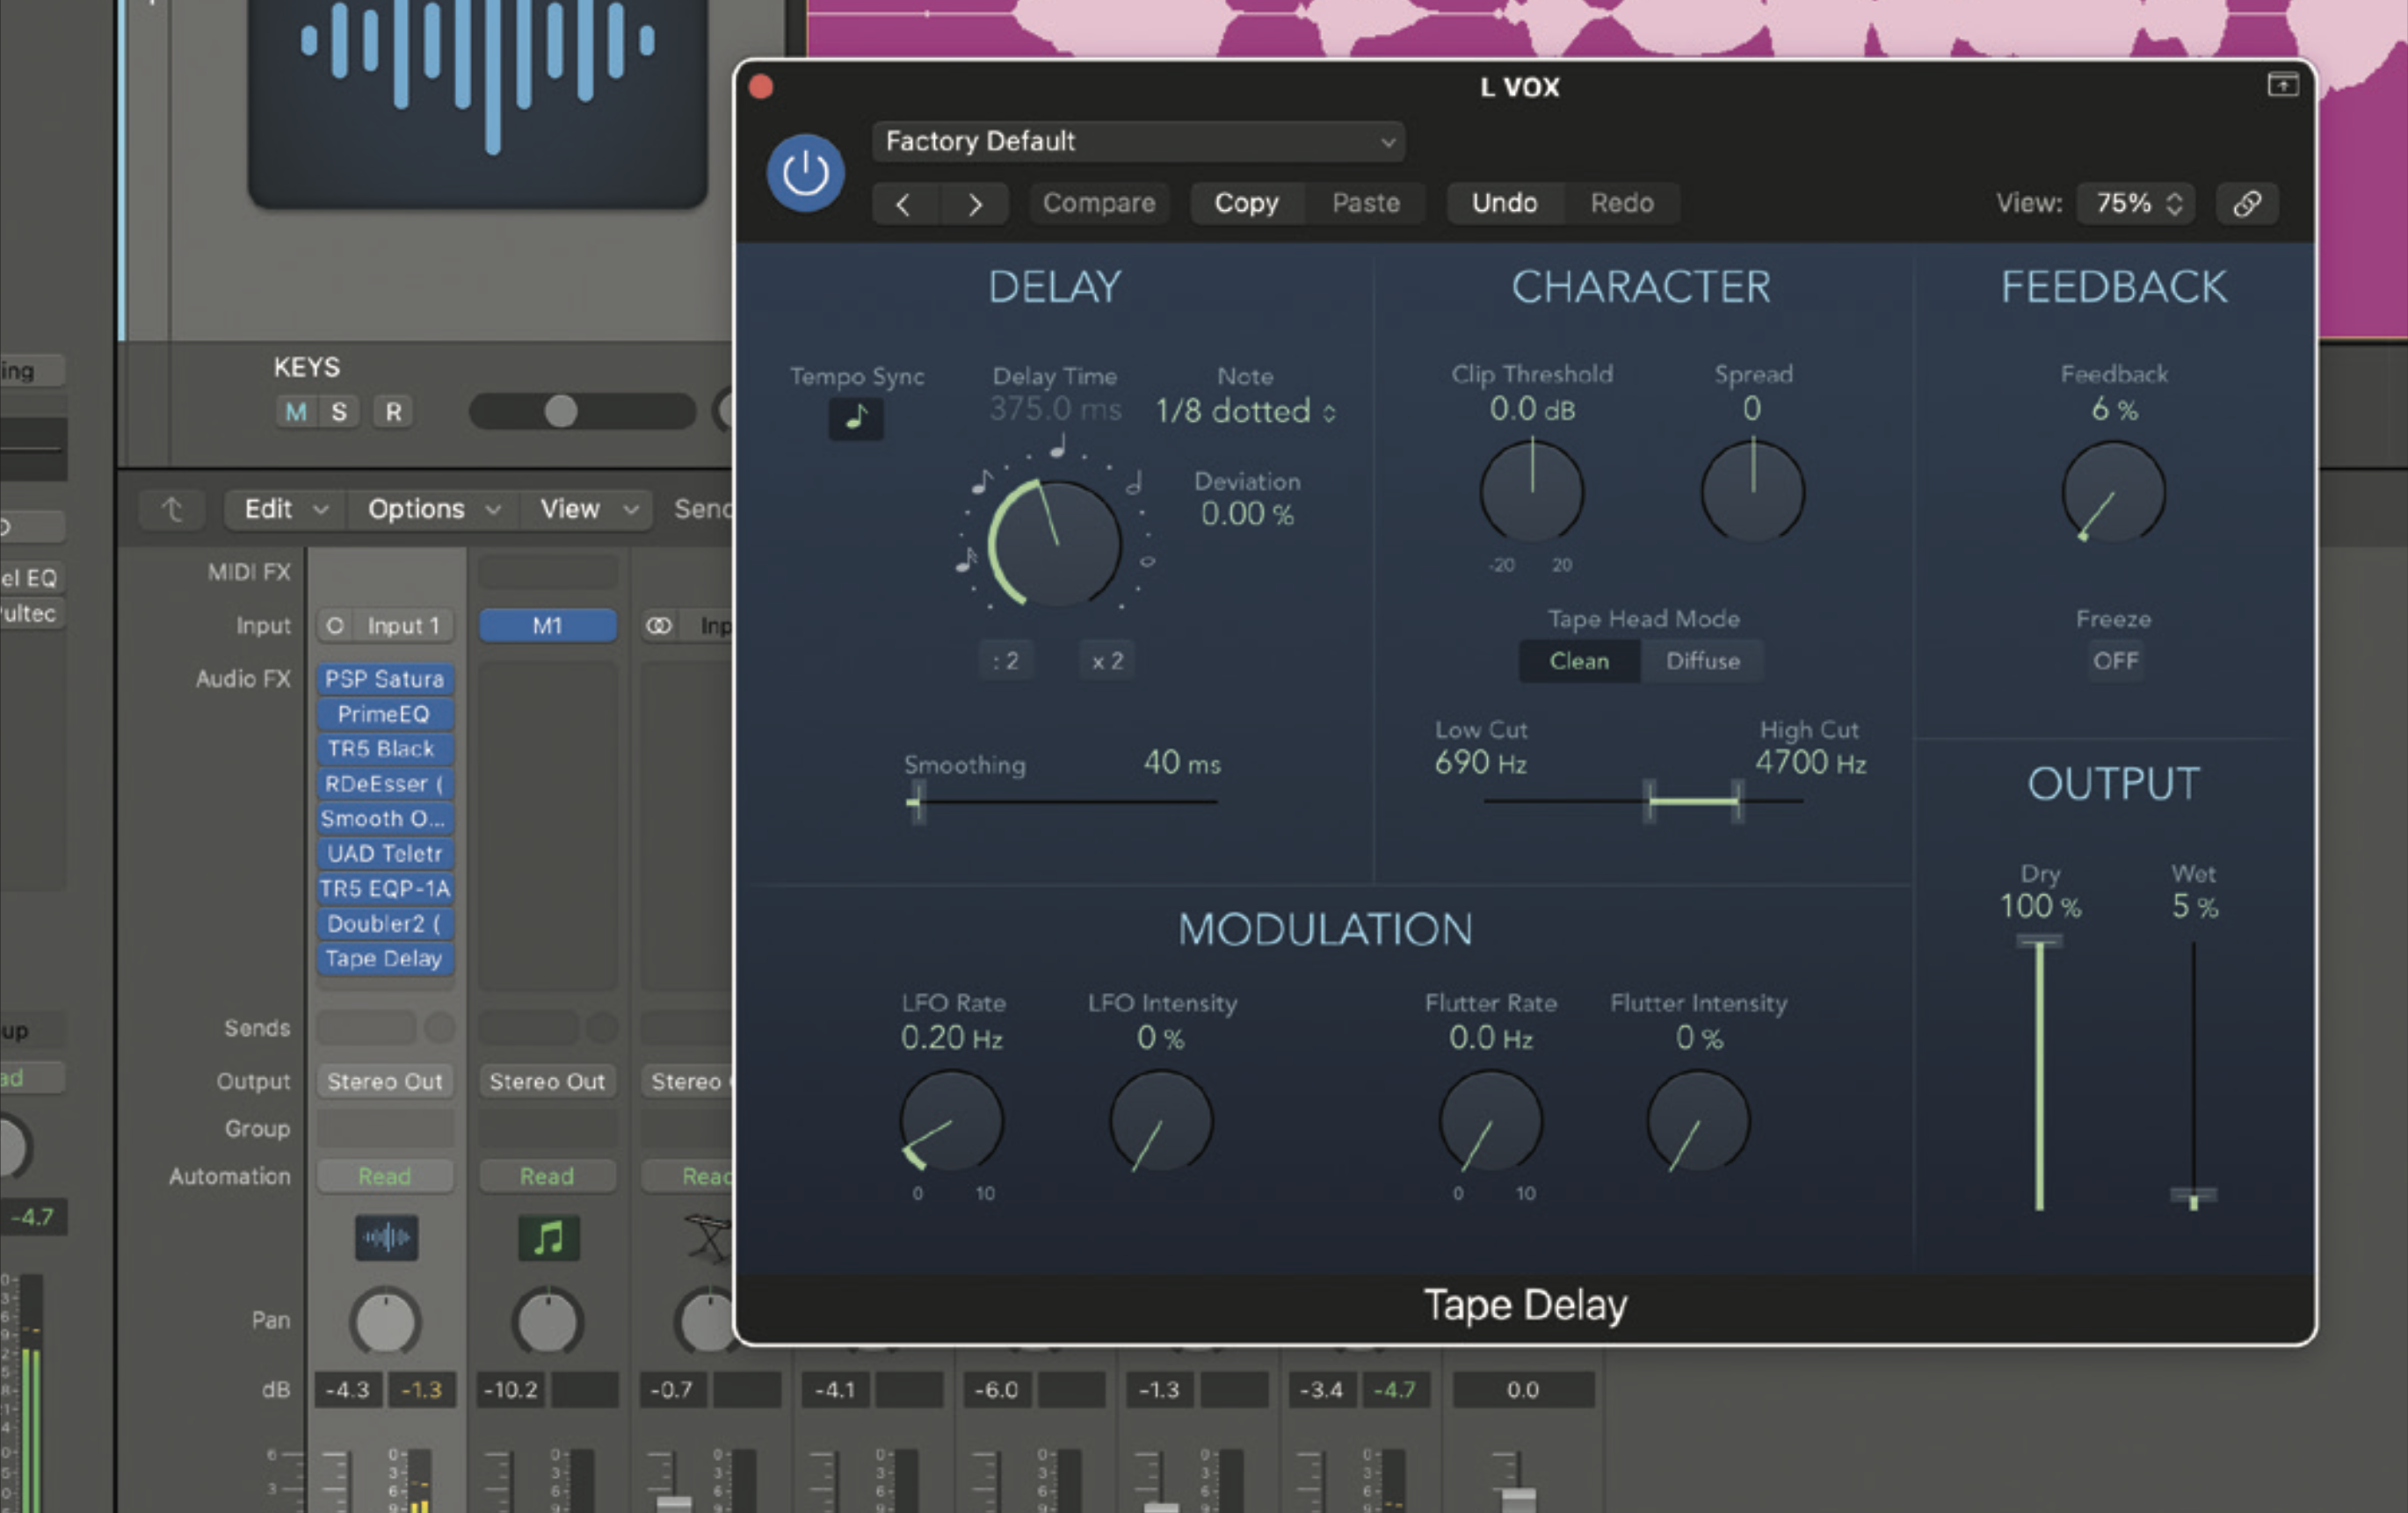
Finally, we often use delay to add space to a vocal and this sort of task-specific effect can be added as an insert if you like. Place it after the finessing compressor. Choose whatever delay works with your track – 100ms slapback or tempo-synced (1/4 or 3/16ths). Set the dry to unity gain and blend in the delay effect to taste.
