More people are using AI chatbots as their personal assistant for work and leisure as the bots’ abilities and knowledge increase. But nothing says personal like having your own custom chatbot that you’ve designed, trained, and named yourself.
That’s possible in a few easy steps thanks to the GPT builder created by OpenAI! Oh, and none of these steps require you to know how to code.
To create your own custom chatbot, called GPT, you’ll be guided through a conversation with the GPT builder in a ChatGPT-style interface. In a nutshell, you’ll describe the kind of chatbot you want to create, give it a name and a profile picture, and set the tone of voice you want your new GPT to adopt. It’s all very straightforward and simple as no technical jargon will be thrown your way. Nonetheless, we created this step-by-step guide which you can follow to create your own version of ChatGPT.
Starting to practice creating your own chatbot today rather than tomorrow might not be a bad idea since the most popular custom GPTs can become a nice revenue stream for their creators.
How to create a chatbot
- Sign in to your OpenAI account
- Click Explore in the menu on the left
- Click on Create a GPT
- Describe what chatbot you want to create
- Confirm your choice and choose a name
- Choose a profile picture
- Fine tune your bot
- Test your GPT
- Publish the chatbot
Note: This is only available to users paying for ChatGPT Plus. If you're using the free version of ChatGPT, you'll need to upgrade. Continue reading to see detailed instructions for each step.
1. Sign in to your OpenAI account
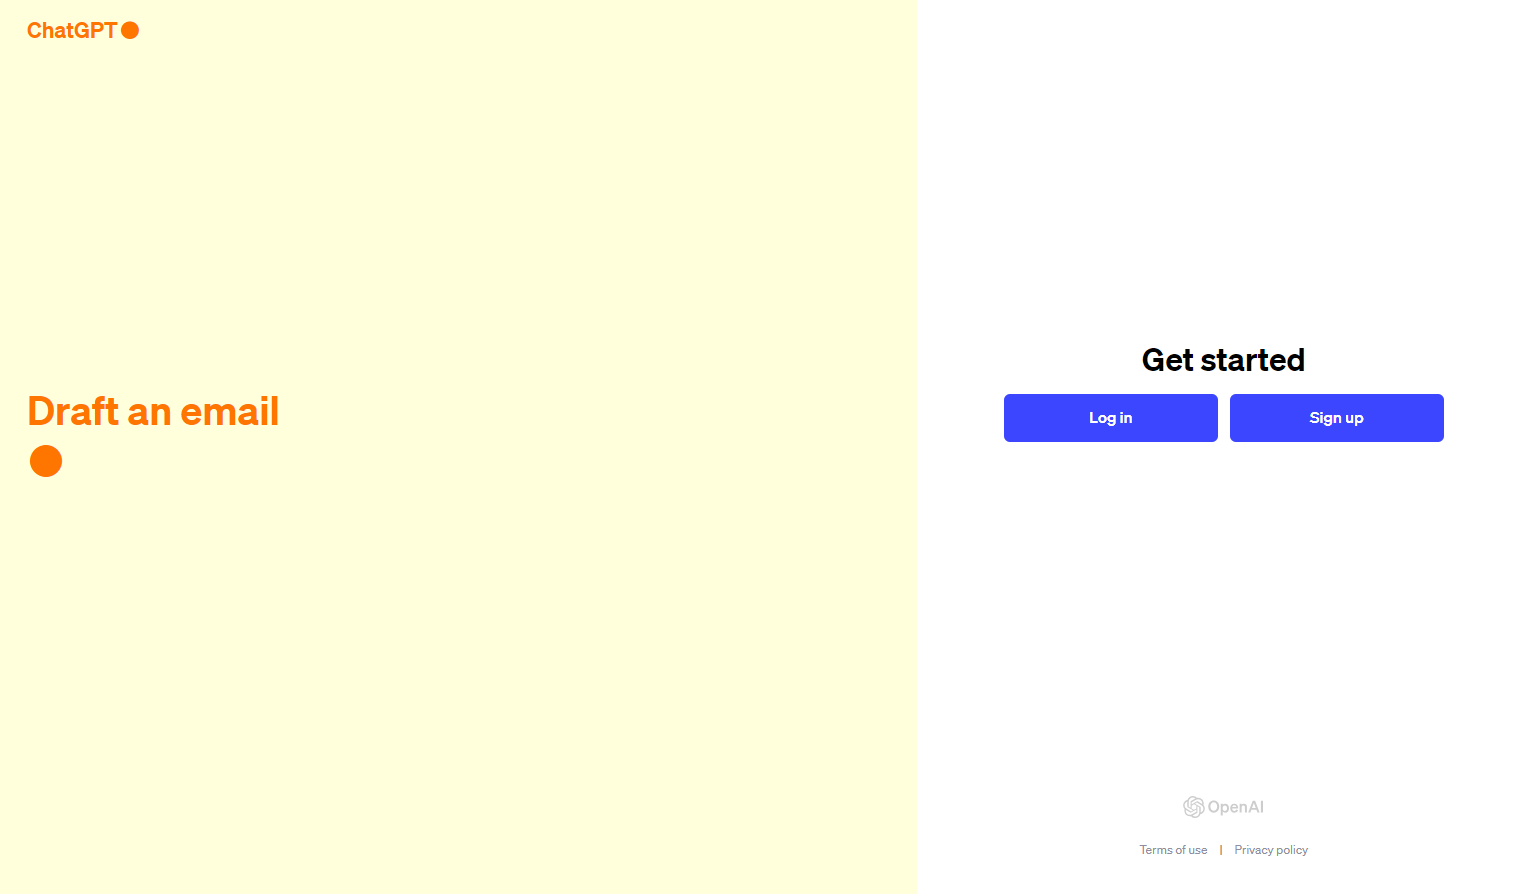
The first thing you’re going to want to do is to sign in to your Plus or Enterprise OpenAI account at chat.openai.com. If you don’t have an account yet or are using the free version of ChatGPT you’ll need to sign up for a paid plan.
2. Click on Explore
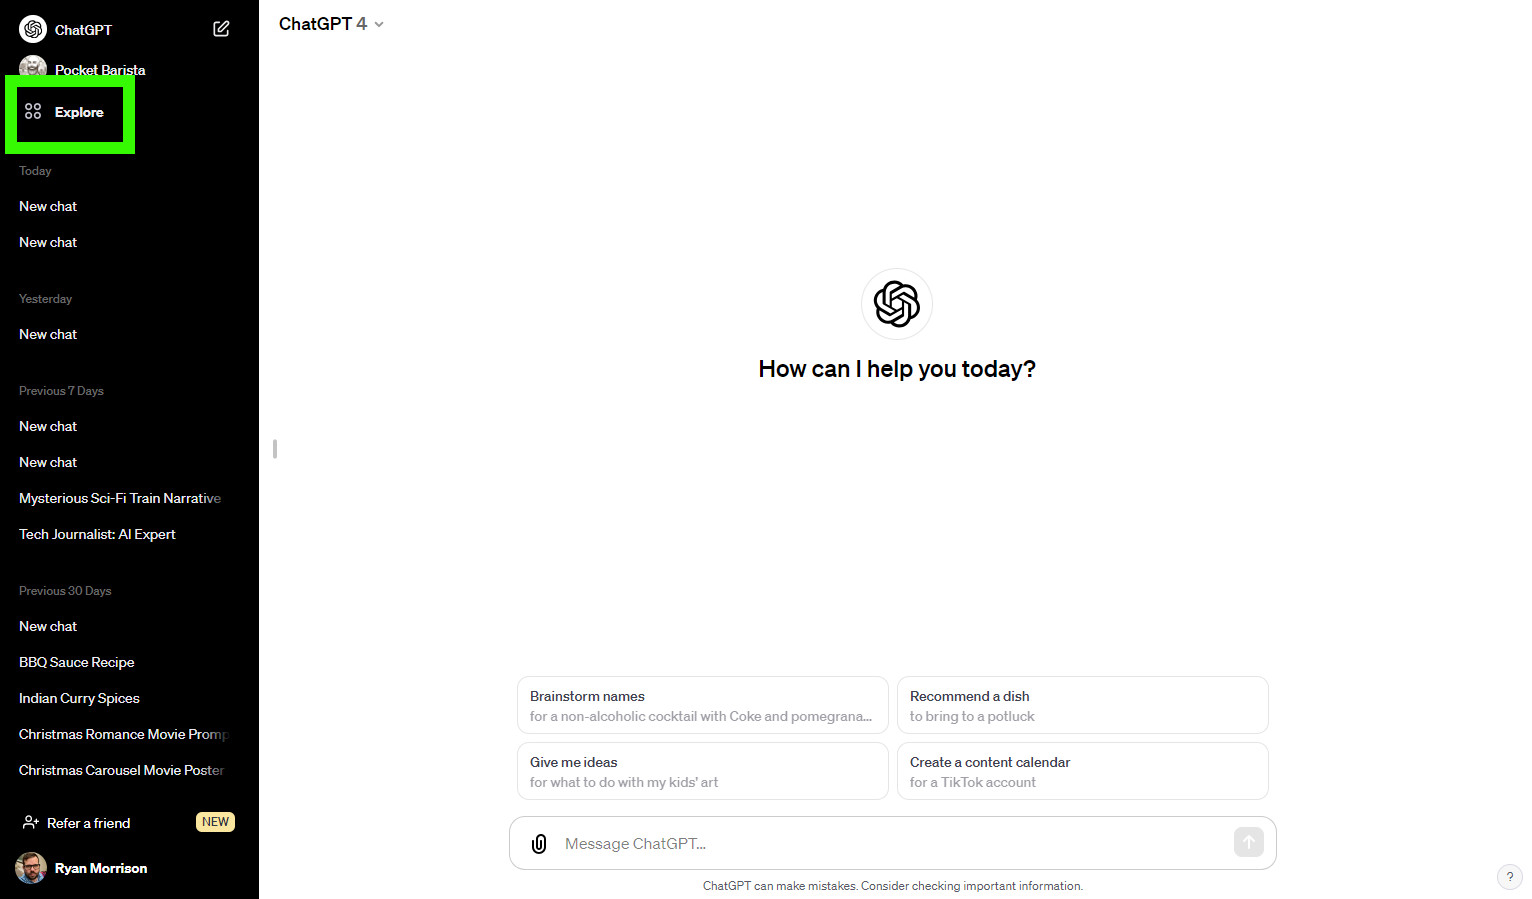
Once you’ve logged into your paid account you’ll be presented with the usual startup screen for a new ChatGPT conversation. Click the Explore button that’s at the top of your left-hand menu.
3. Create a GPT
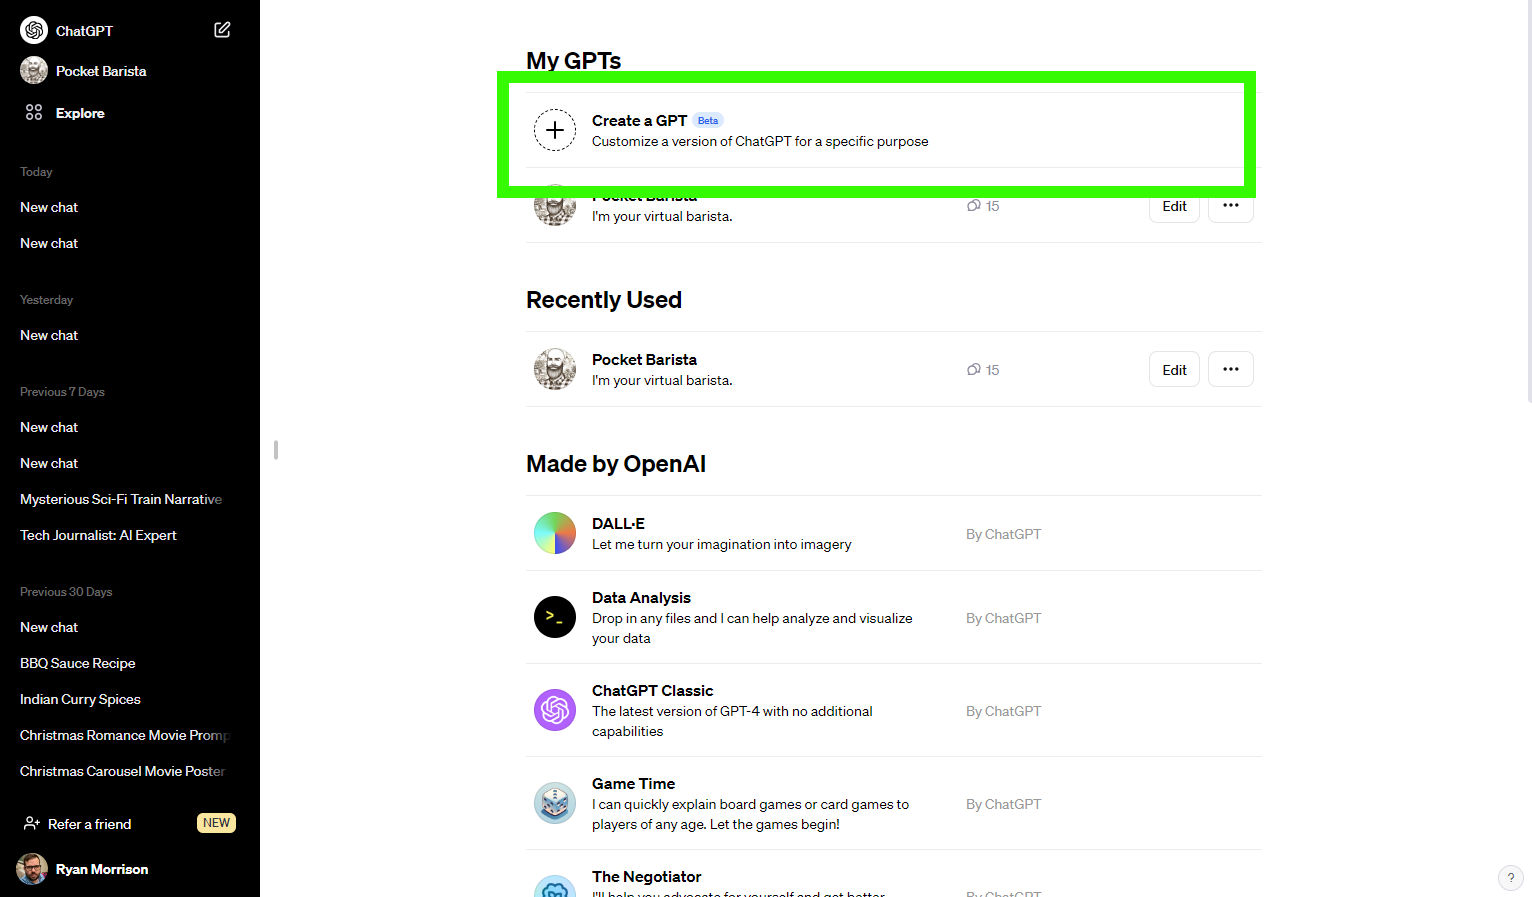
Clicking on Explore should pull up a GPT menu. To create your own GPT, click on the first option Create a GPT.
4. Describe what chatbot you want to create
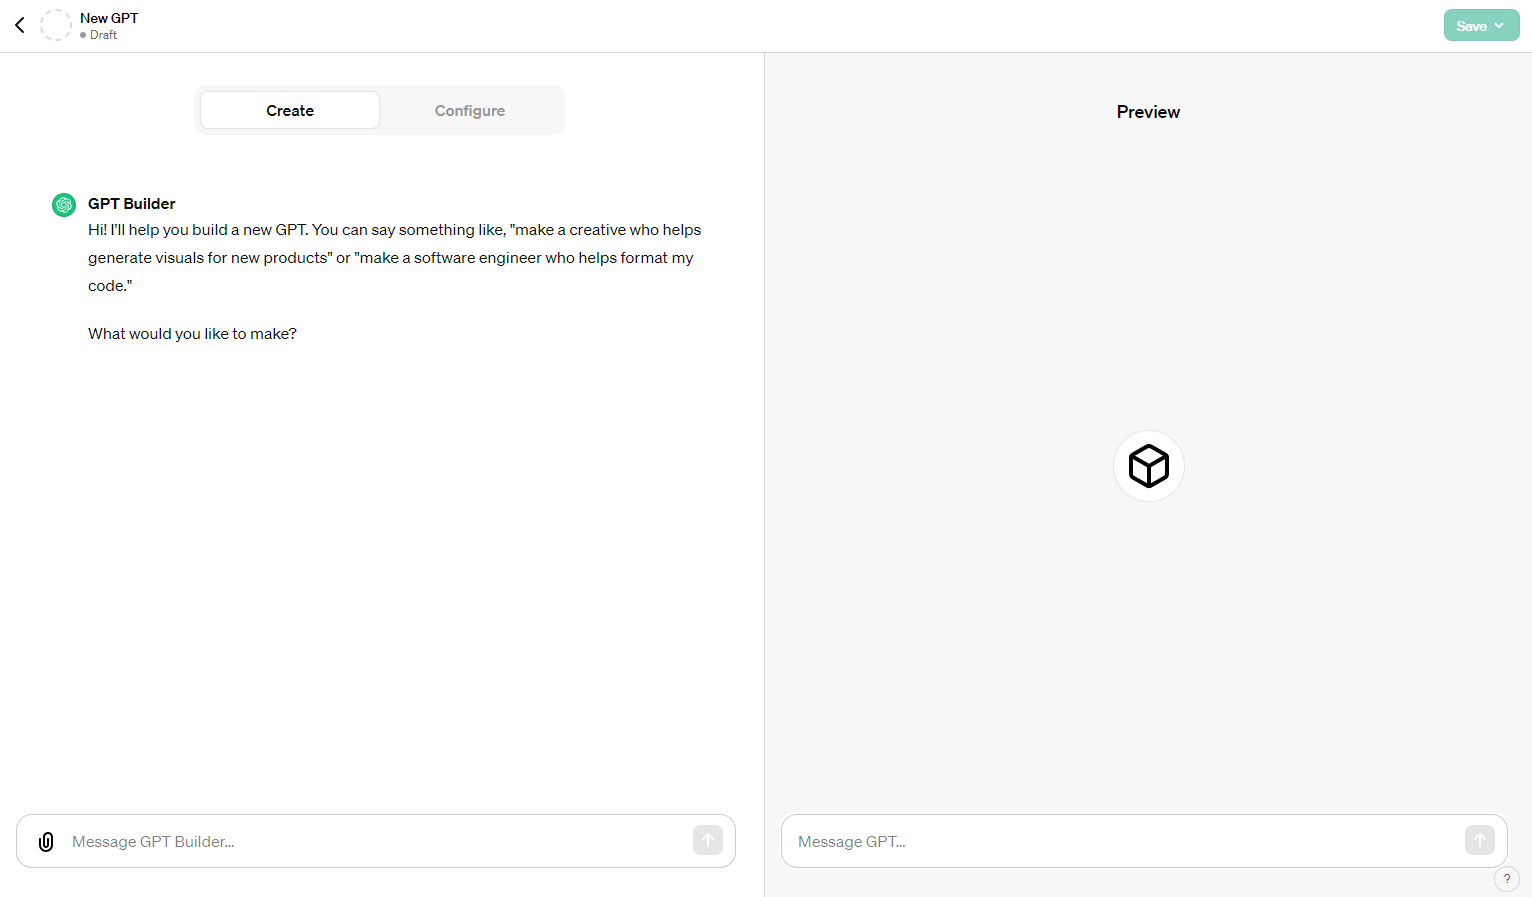
Here is where the fun begins! The GPT Builder will prompt you to describe what kind of chatbot you want to build. Type in a rough outline of what you had in mind in the message box on the bottom left of your screen.
5. Confirm your choice and choose a name
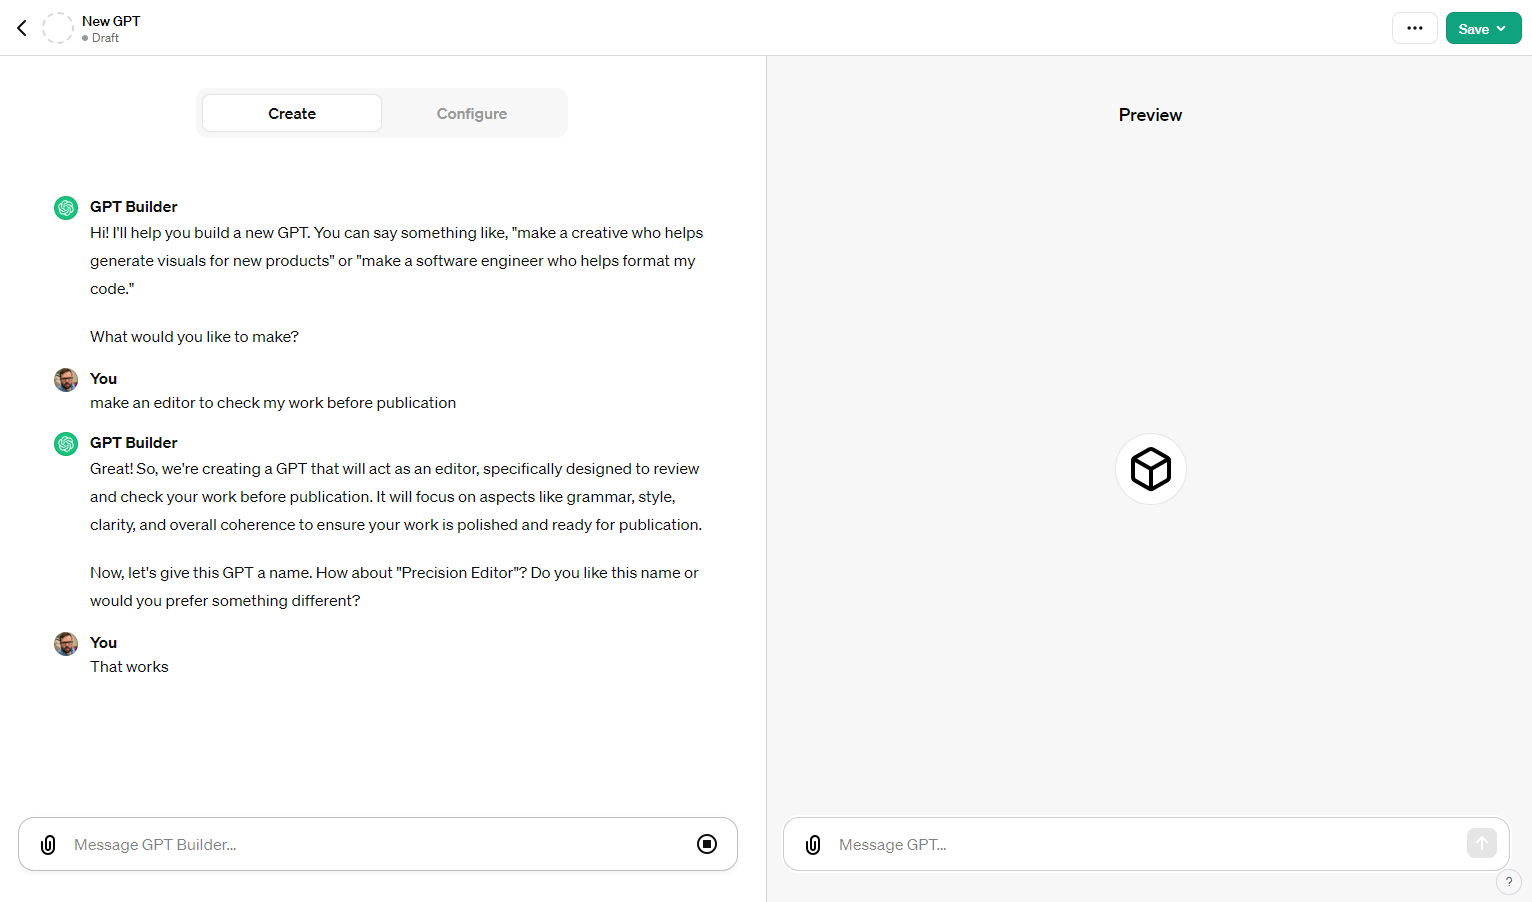
The builder will give you an overview of what it plans to build. It even suggests a name for your custom chatbot! You can carry on the conversation as though you were using ChatGPT and suggest any changes that you’d like to implement to enhance the GPT’s purpose or change its name. Once you’re happy with the results, let the AI know you’re ready to move on. We went along with its suggestion of “Precision Editor”.
6. Choose a profile picture
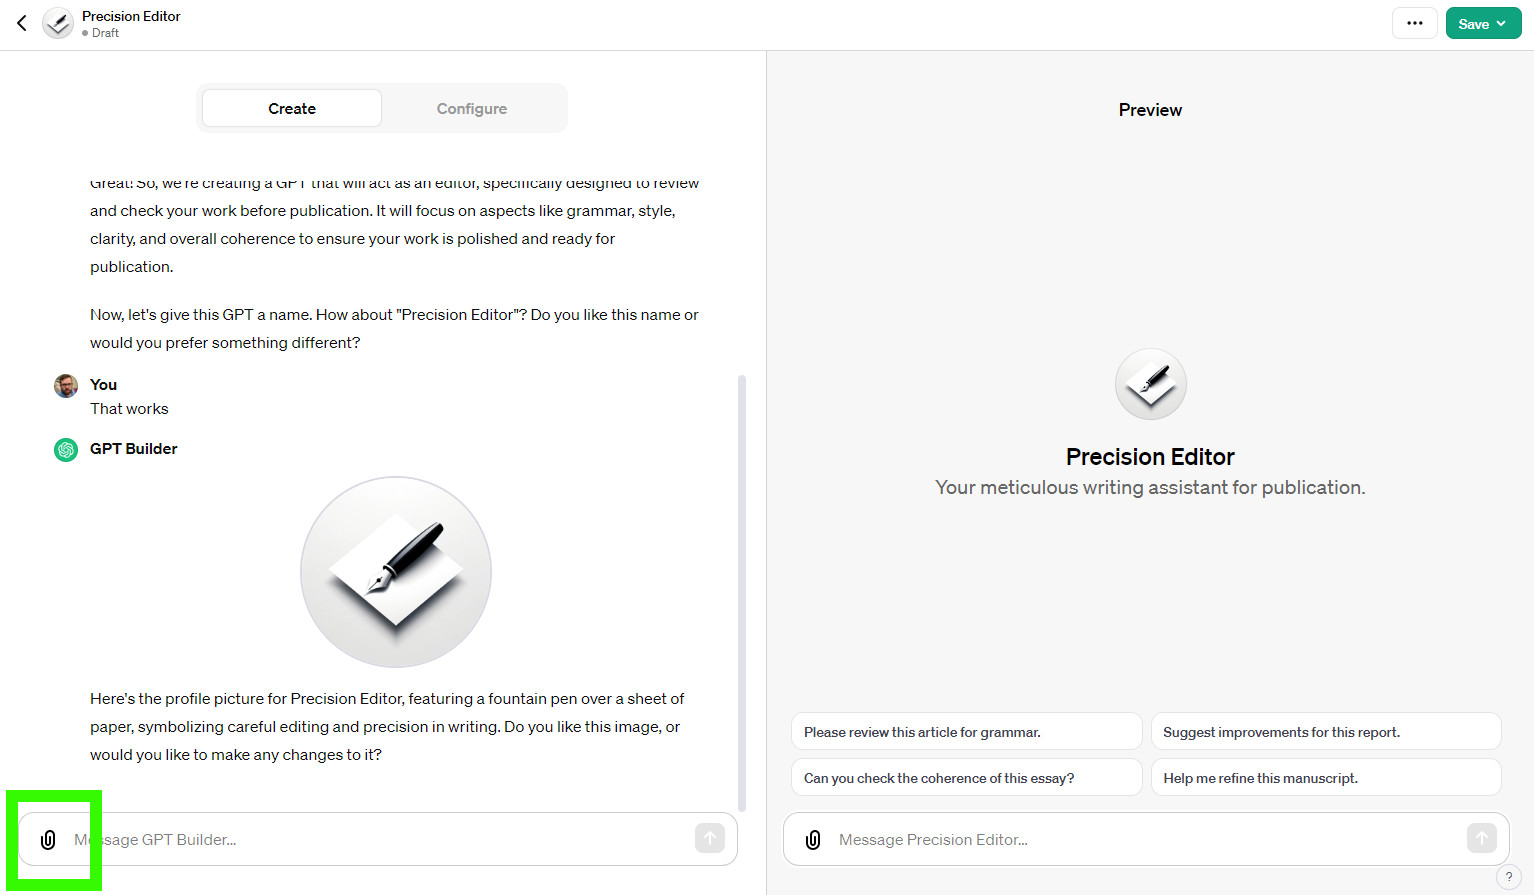
While the builder does the heavy lifting and starts preparing your GPT, your job will be to choose a fitting profile picture for the new chatbot. But don’t worry, you’ll automatically be given a first option that’s generated using DALL-E 3.
It suggested a fountain pen on a piece of paper for Precision Editor and the result was pretty decent.
Alternatively, you can upload your own image using the paperclip icon in the message bar. Or else you can ask it to make changes to the profile picture it generated for you – you do this by resuming the conversation.
Once you’re done, tell the builder that you’re ready.
7. Fine tune your 'bot
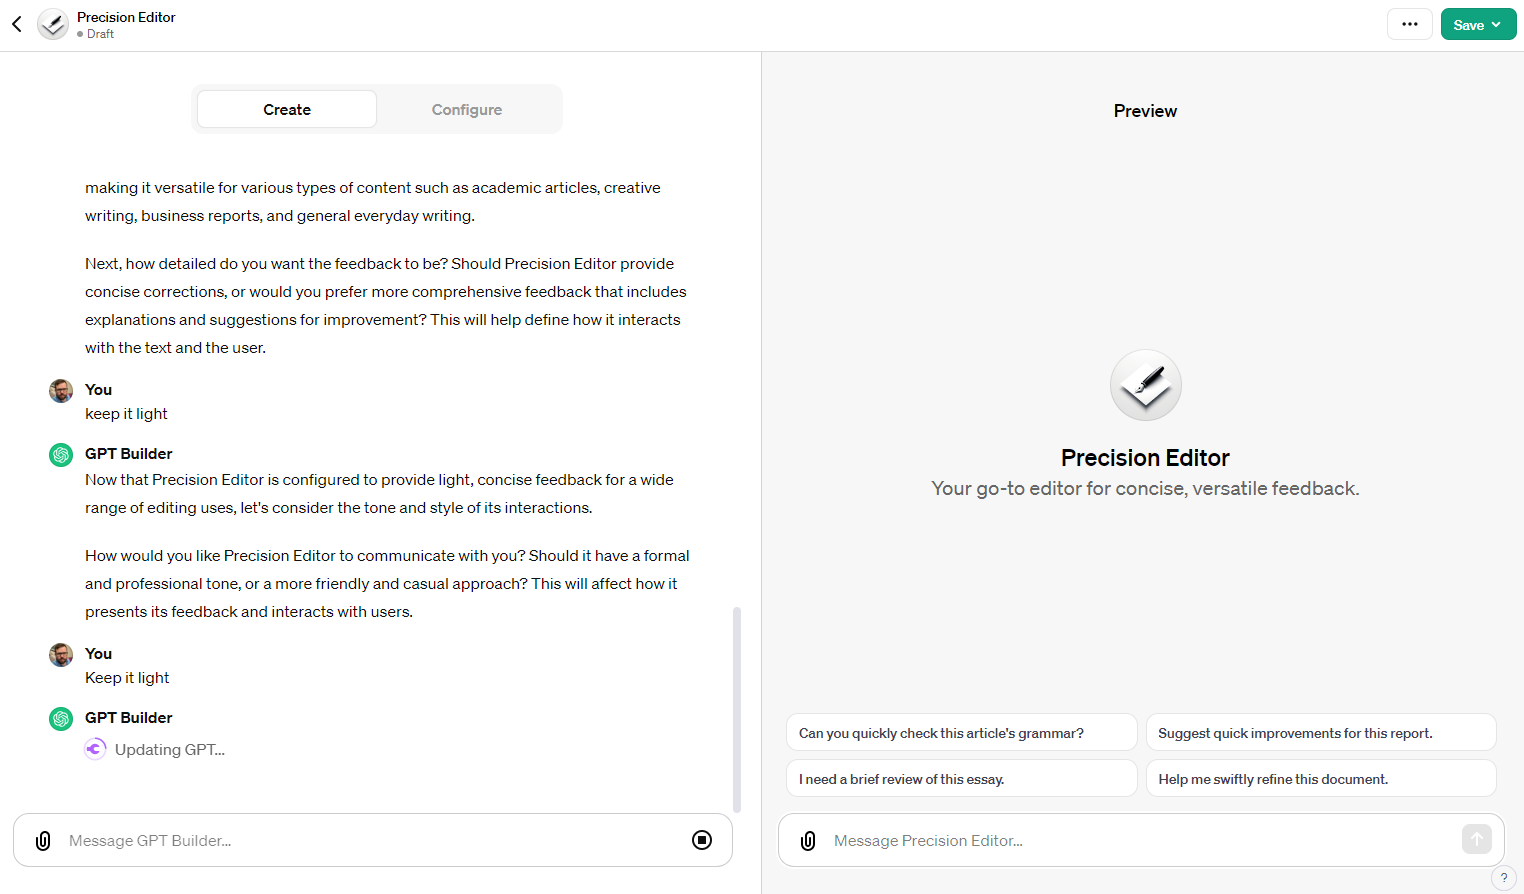
The GPT builder will ask you some questions that will enable you to fine tune your chatbot. These questions will vary depending on what you’re building. In our case it asked us how detailed the feedback for writers should be. You’ll be given a few options but, just like before, you can have a conversation with the builder to steer things in the direction you want.
You might get asked to describe the response style your new chatbot should adopt, such as if it should be formal or casual.
We asked it to tell the Precision Editor to keep things light.
8. Test your GPT
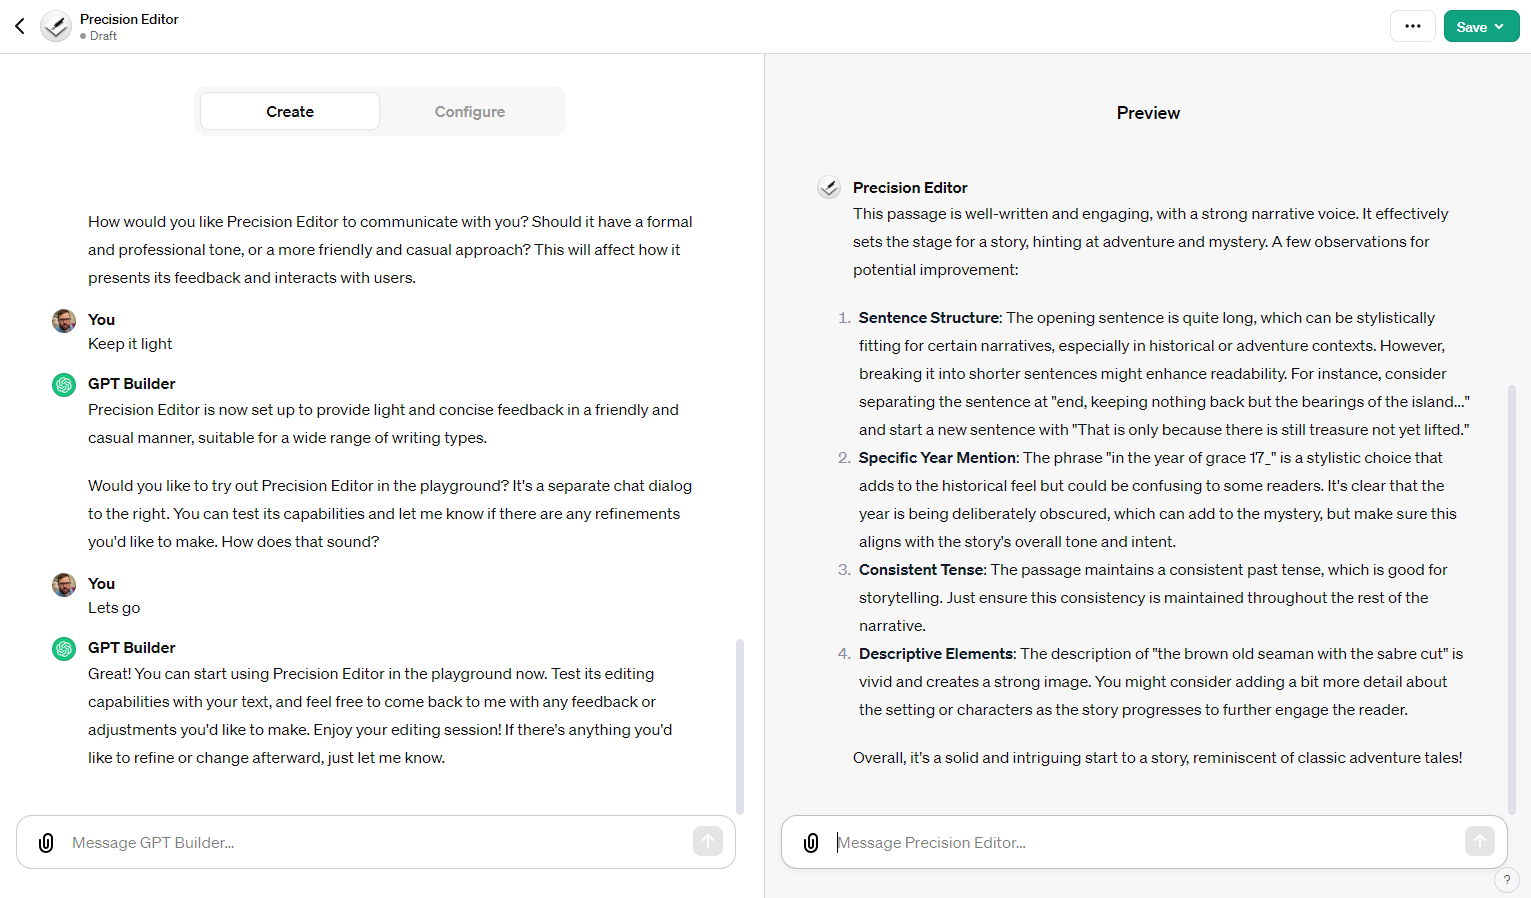
After a couple of follow up questions that will help you narrow down the tone of the bot’s responses, it’s now time to test your new chatbot to make sure everything is working just the way you want it to.
We asked Precision Editor to have a look at the first paragraph of Robert Louis Stevenson’s adventure novel Treasure Island. It thought it was well-written but some editing suggestions quickly followed. Bonus points for using the sandwich method to give us feedback though!
9. Publish the chatbot
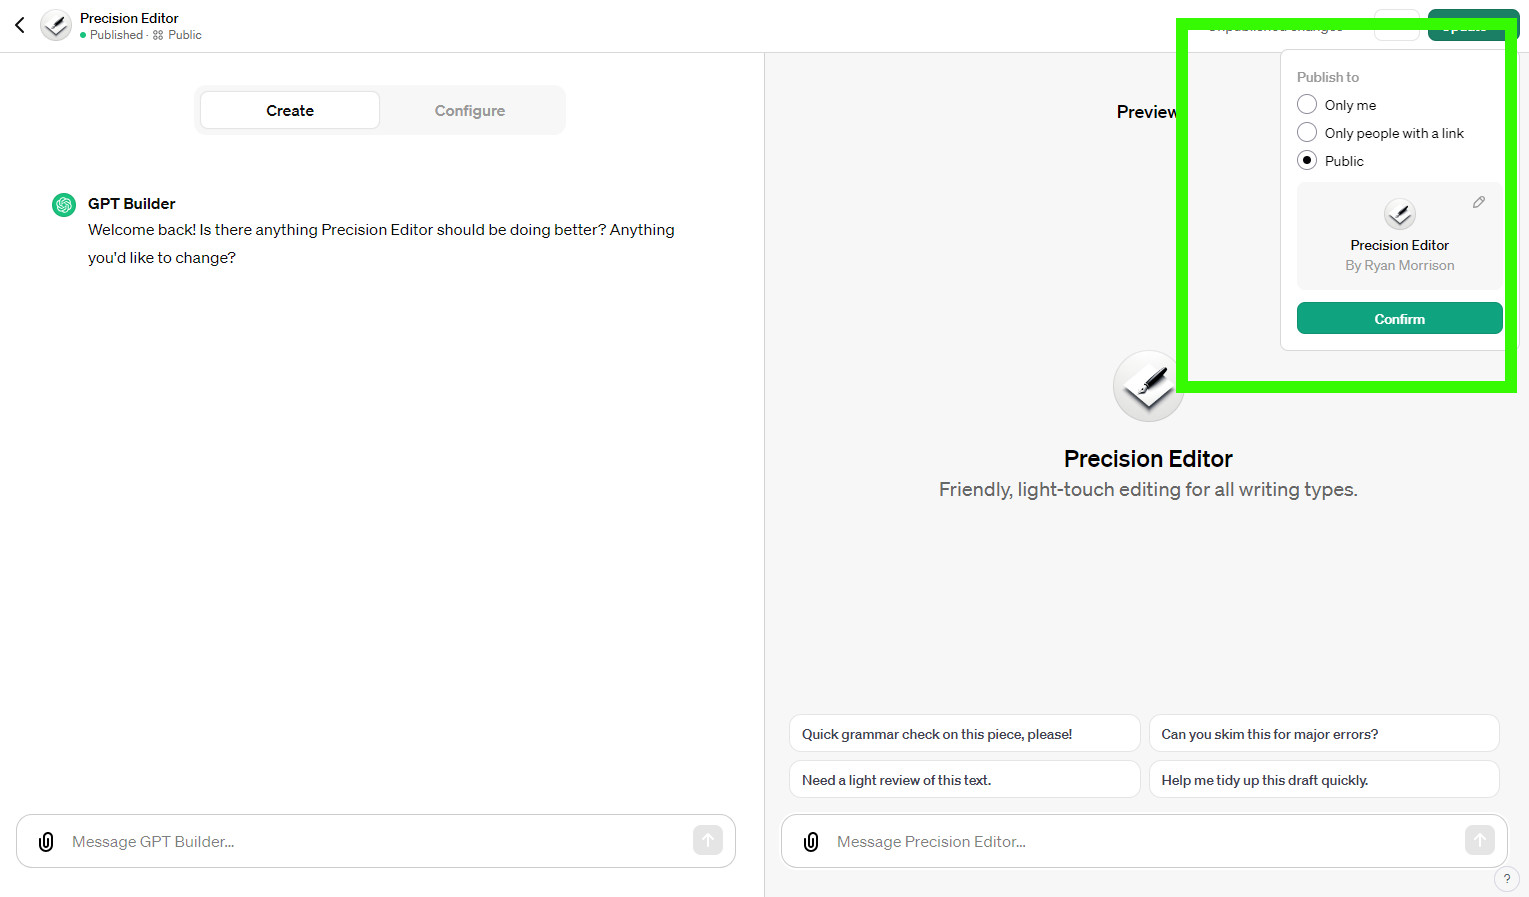
You gave the bot its job description. You picked out its profile picture. And you took it for a test drive. If you’re happy with the results click on the Save button at the top right of your screen. The final thing you need to decide is if you want to keep the chatbot private, share it with a select group of people, or take a leap of faith and publish it publicly.
The latter option is the one we chose for Precision Editor which you can visit here (assuming you’re a Plus or Enterprise user).
After selecting the privacy settings you’ll be taken to a version of ChatGPT with your new GPT selected. To change models or to go back to default ChatGPT, simply click the model of choice or ChatGPT in the left hand menu.
If you’re new to the AI chatbot scene we recommend trying out some custom GPTs or even regular chatbots like ChatGPT or Google’s Bard first before creating your own. It will help you get a feel for how you interact with them and what they’re capable of. However, as you can see from the steps in this guide, OpenAI made creating your own chatbot a simple and fun task.
Using custom chatbots isn’t a must – asking ChatGPT to help you craft the perfect LinkedIn post, put text in a table, or generate a list of name ideas for your company is still possible and works just fine. But if you find yourself typing similar prompts time and time again and you want to make your interactions with a chatbot a little bit smoother, custom GPTs may be the solution you’re looking for.
OpenAI’s move to allow you to create your own chatbot without having to know how to code means you’re just one conversation away from increased productivity.
If you're dying to try out more AI tools, make sure to check out how to use ChatGPT, how to use the new Bing with ChatGPT or how to use DALL•E 2 to test just some of the most recent artificial intelligence applications out there


