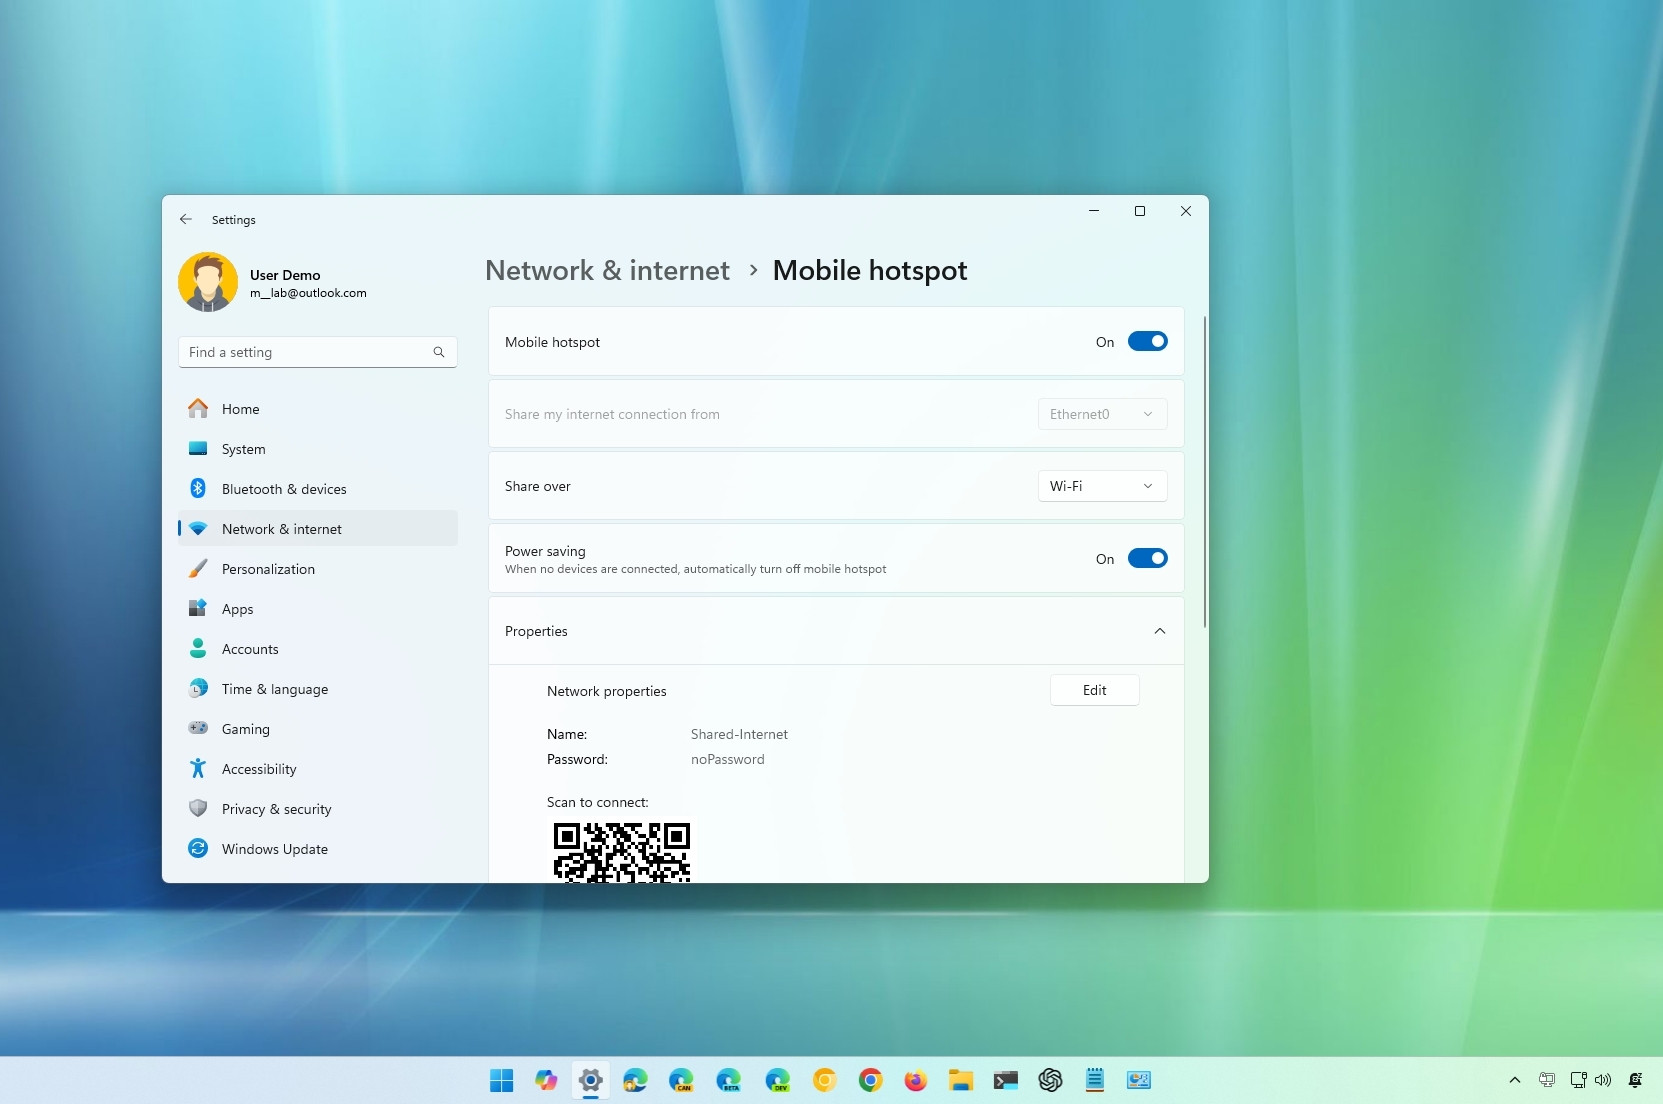
Using the mobile hotspot feature on Windows 11, you can share your internet connection with other computers and even phones without installing additional software or completing additional steps.
The ability to create a wireless hotspot can be useful in many scenarios. For example, if you are in a place with only wired connectivity and want to connect your tablet or phone to the internet. Or you are in a location where you are the only one with a cellular plan and want to share the internet with other people.
Whatever the reason, Windows 11 makes it easy to share an internet connection or access the local network with the mobile hotspot feature available through the Settings app.
In this how-to guide, I'll outline the steps to share an internet connection using the mobile hotspot feature on Windows 11.
How to configure mobile hotspot on Windows 11
On Windows 11, you can share an internet connection, which is available through an Ethernet, Wi-Fi, or cellular data plan. However, the device must have at least one wireless network adapter that will function as the access point for other computers to connect.
To create a Wi-Fi hotspot on Windows 11 to share the internet with other devices, use these steps:
- Open Settings.
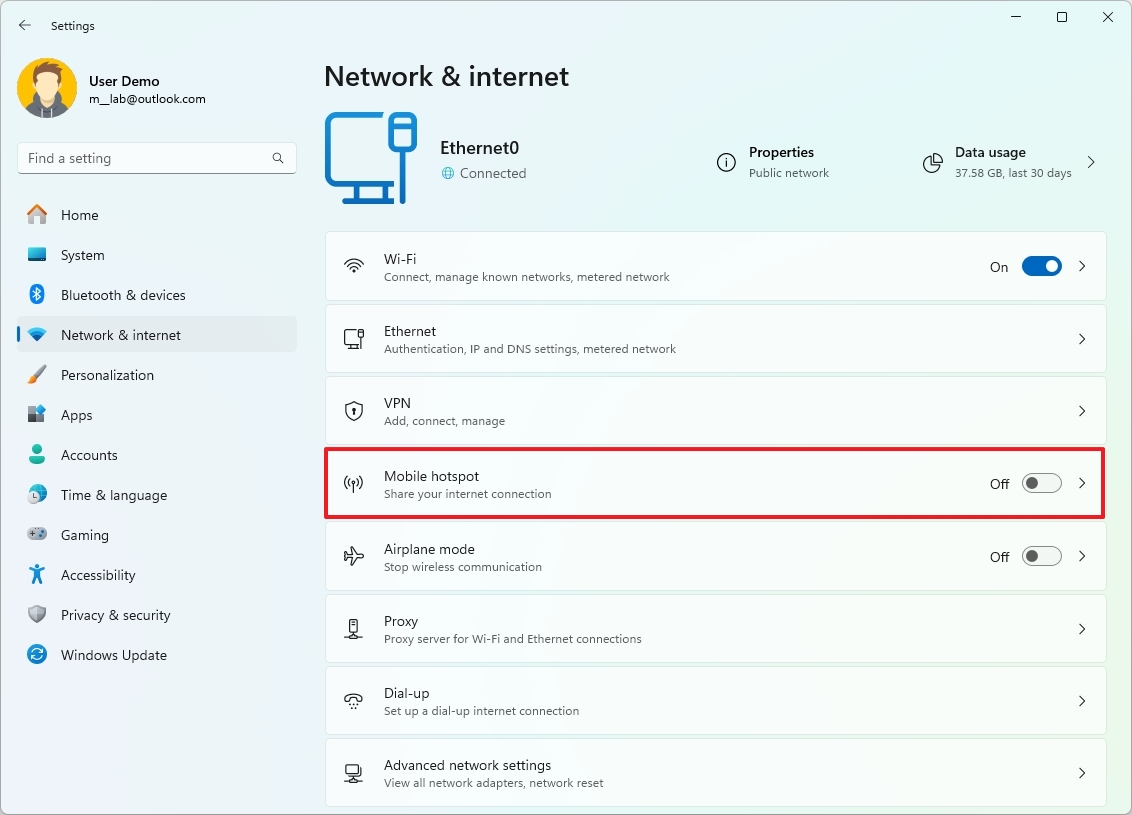
- Click on Network & internet.
- Click the Mobile hotspot page on the right side.
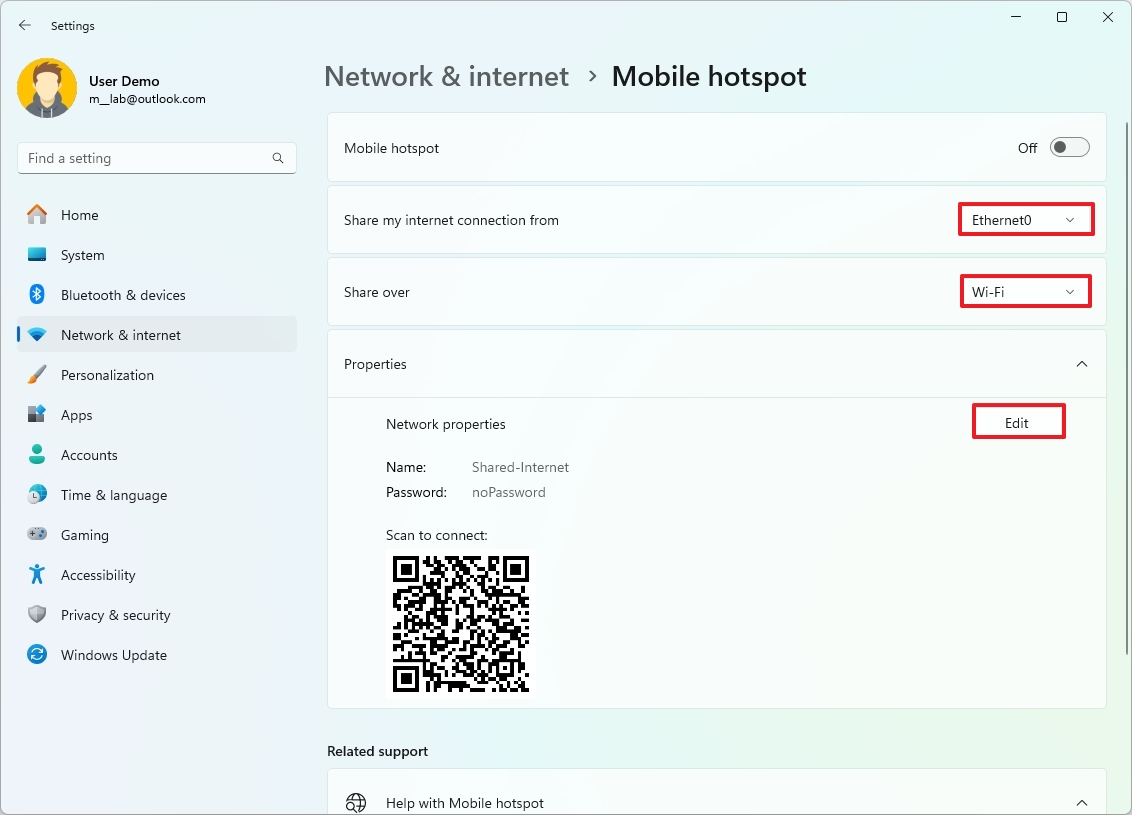
- Choose the Ethernet option in the "Share my internet connection from" setting.
- Select the Wi-Fi option in the "Start over" setting.
- Click the Edit button under the "Properties" section.
- Confirm a name for the mobile hotspot.
- Create a password that other devices will use to access the connection.
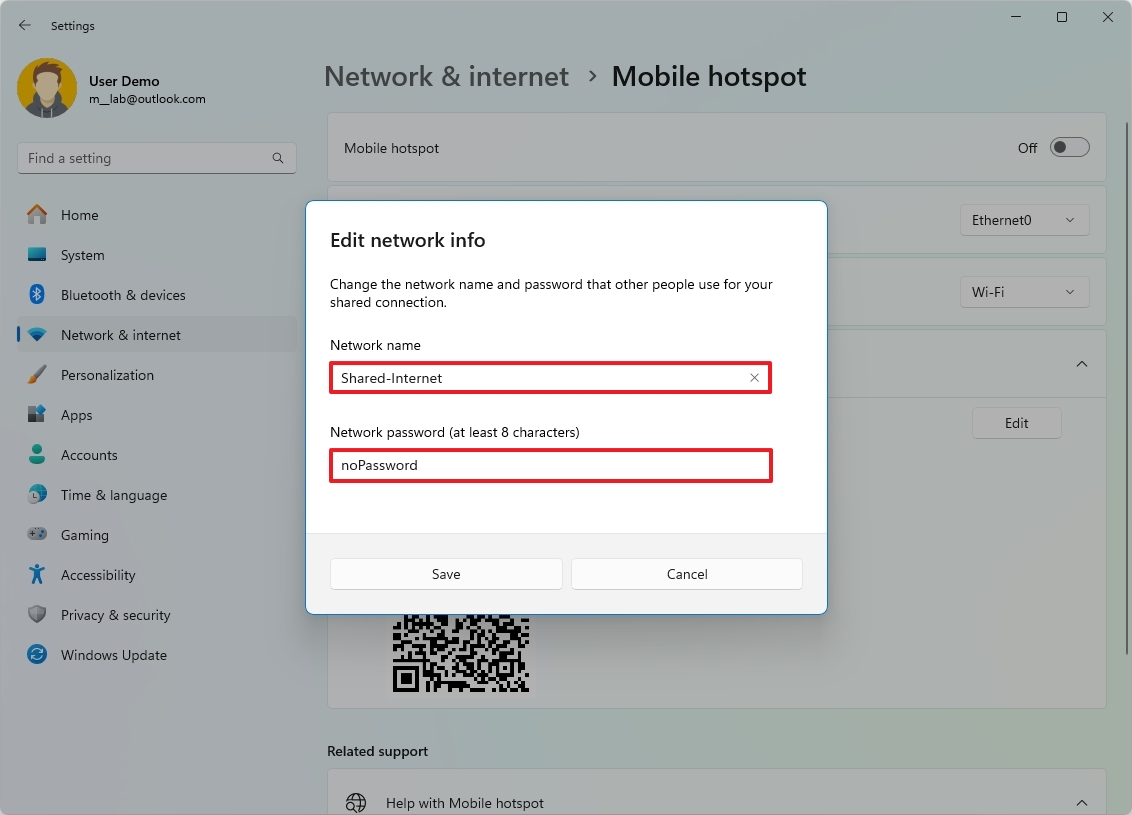
- Click the Save button.
- Turn on the Mobile hotspot toggle switch to start sharing the internet.
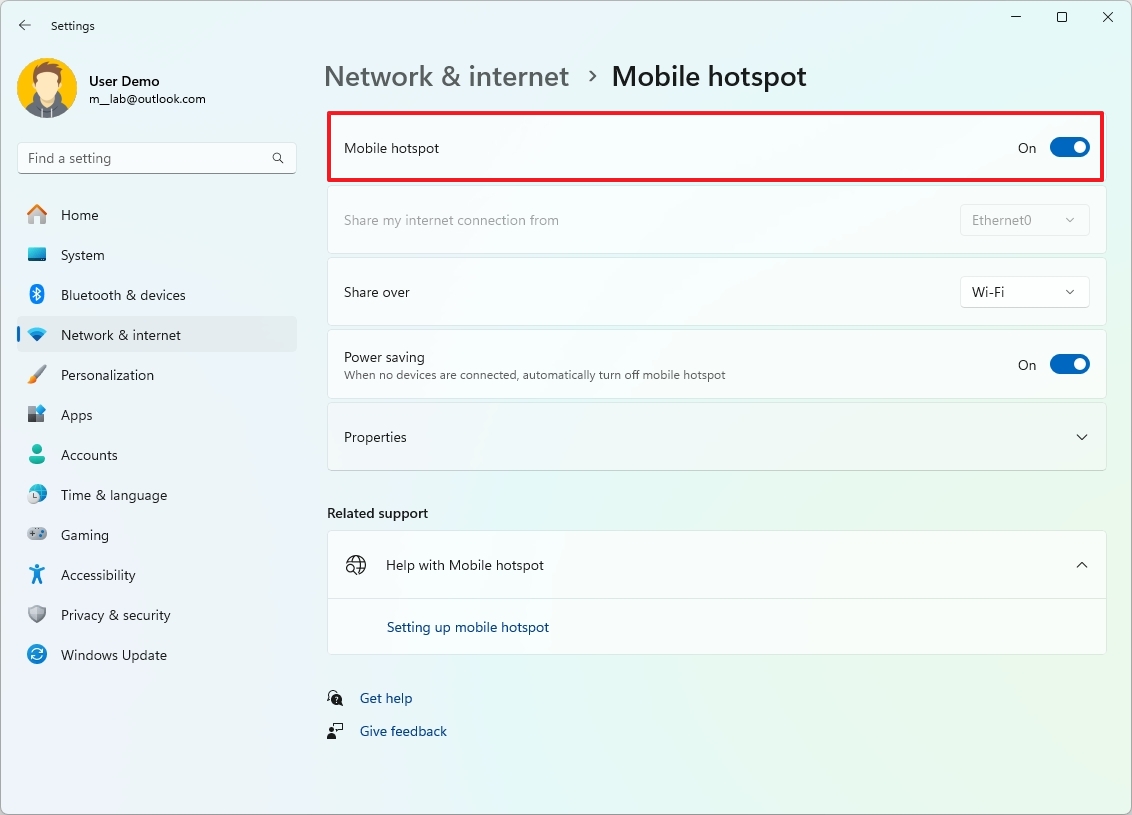
- (Optional) Turn off the Power saving option to keep broadcasting even when no device is connected. Otherwise, you will need to turn on the feature again to allow computers to connect.
Once you complete the steps, Windows 11 will allow up to eight computers or phones (Android and even iPhone) to connect to the internet.
The connection process should be the same as connecting to any access point through the Taskbar using the network flyout and selecting the wireless network on the list, Settings app, Control Panel, or Command Prompt. The devices connected through the mobile hotspot will be listed under the Properties section of the "Mobile hotspot" page.
How to enable mobile hotspot on Windows 11
Since you probably won't be sharing an internet connection all the time, you can use these steps to enable or disable the feature:
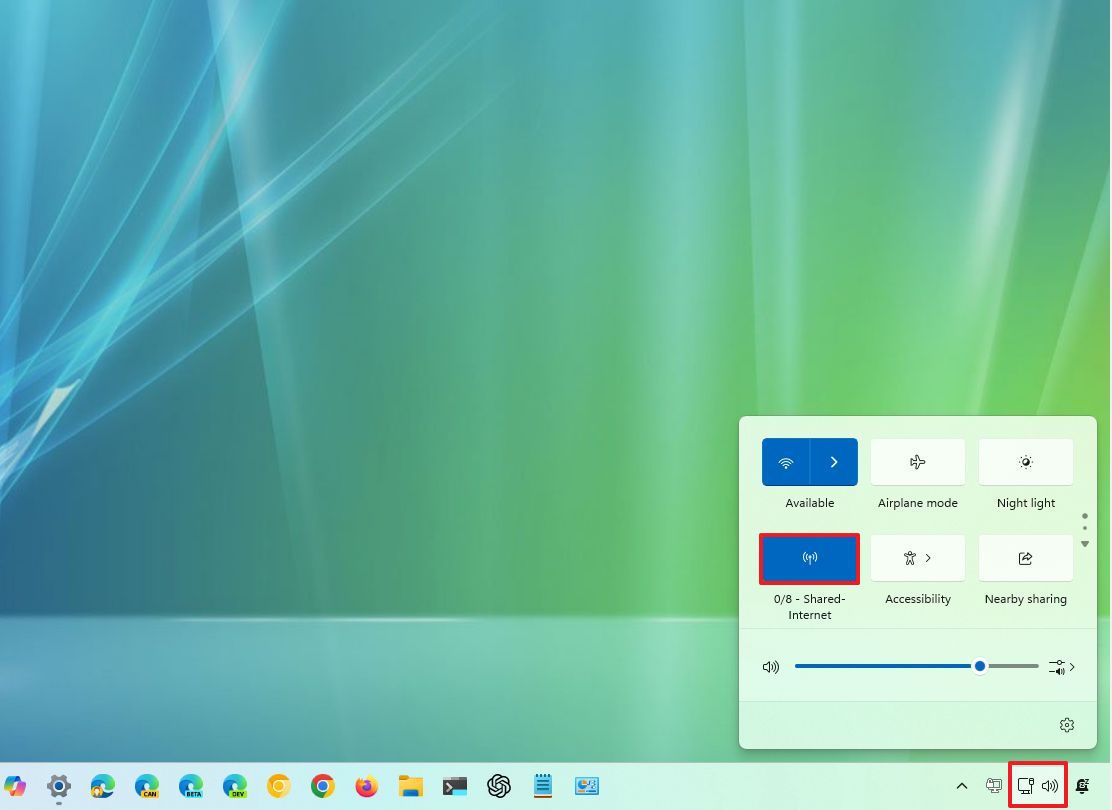
- Click the network icon in the Taskbar System Tray.
- Click the Mobile hotspot button to turn the feature on or off.
- Quick tip: You can also open Quick Settings using the "Windows key + A" keyboard shortcut.
Alternatively, you can manage the state of the mobile hotspot from the Settings app using these steps:
- Open Settings.
- Click on Network & internet.
- Turn on or turn off the Mobile hotspot toggle switch (as necessary).
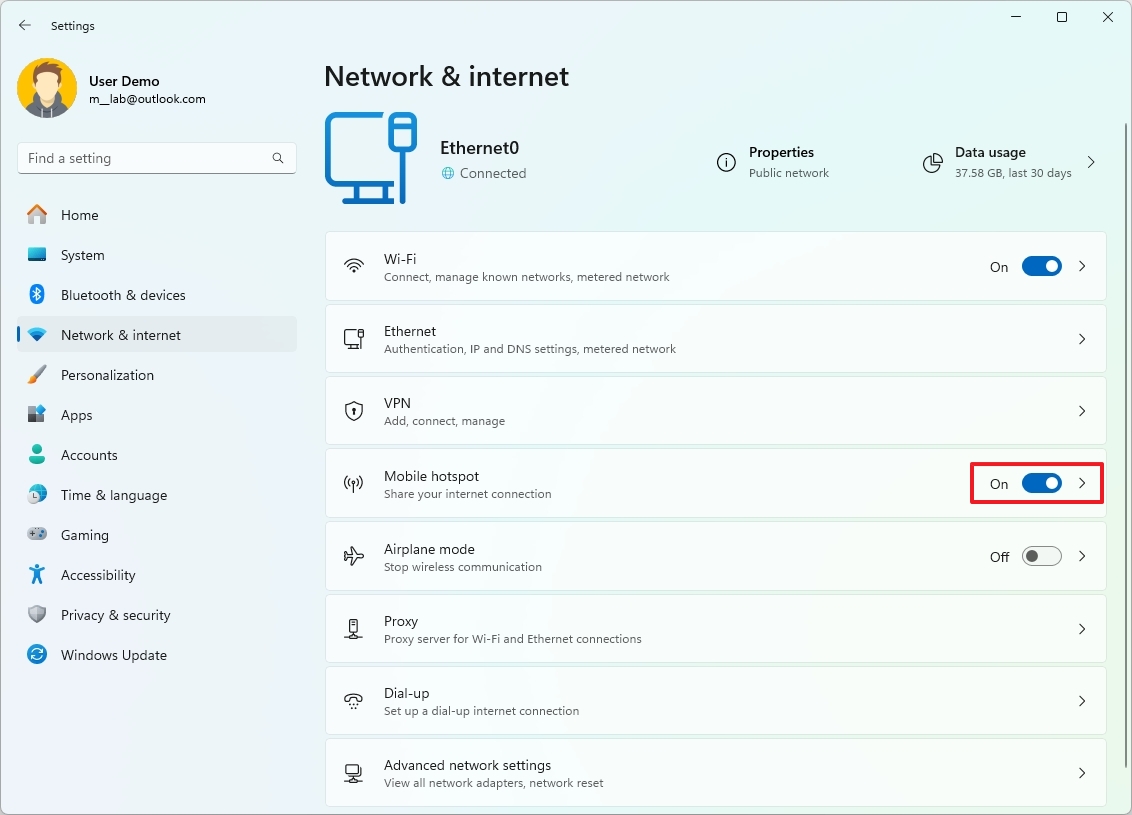
After you complete these steps, the hotspot will enable, and devices should be able to see and connect to the network.
More resources
For more in-depth insights, troubleshooting tips, and the latest updates on Windows 11 and 10, be sure to explore these resources:

