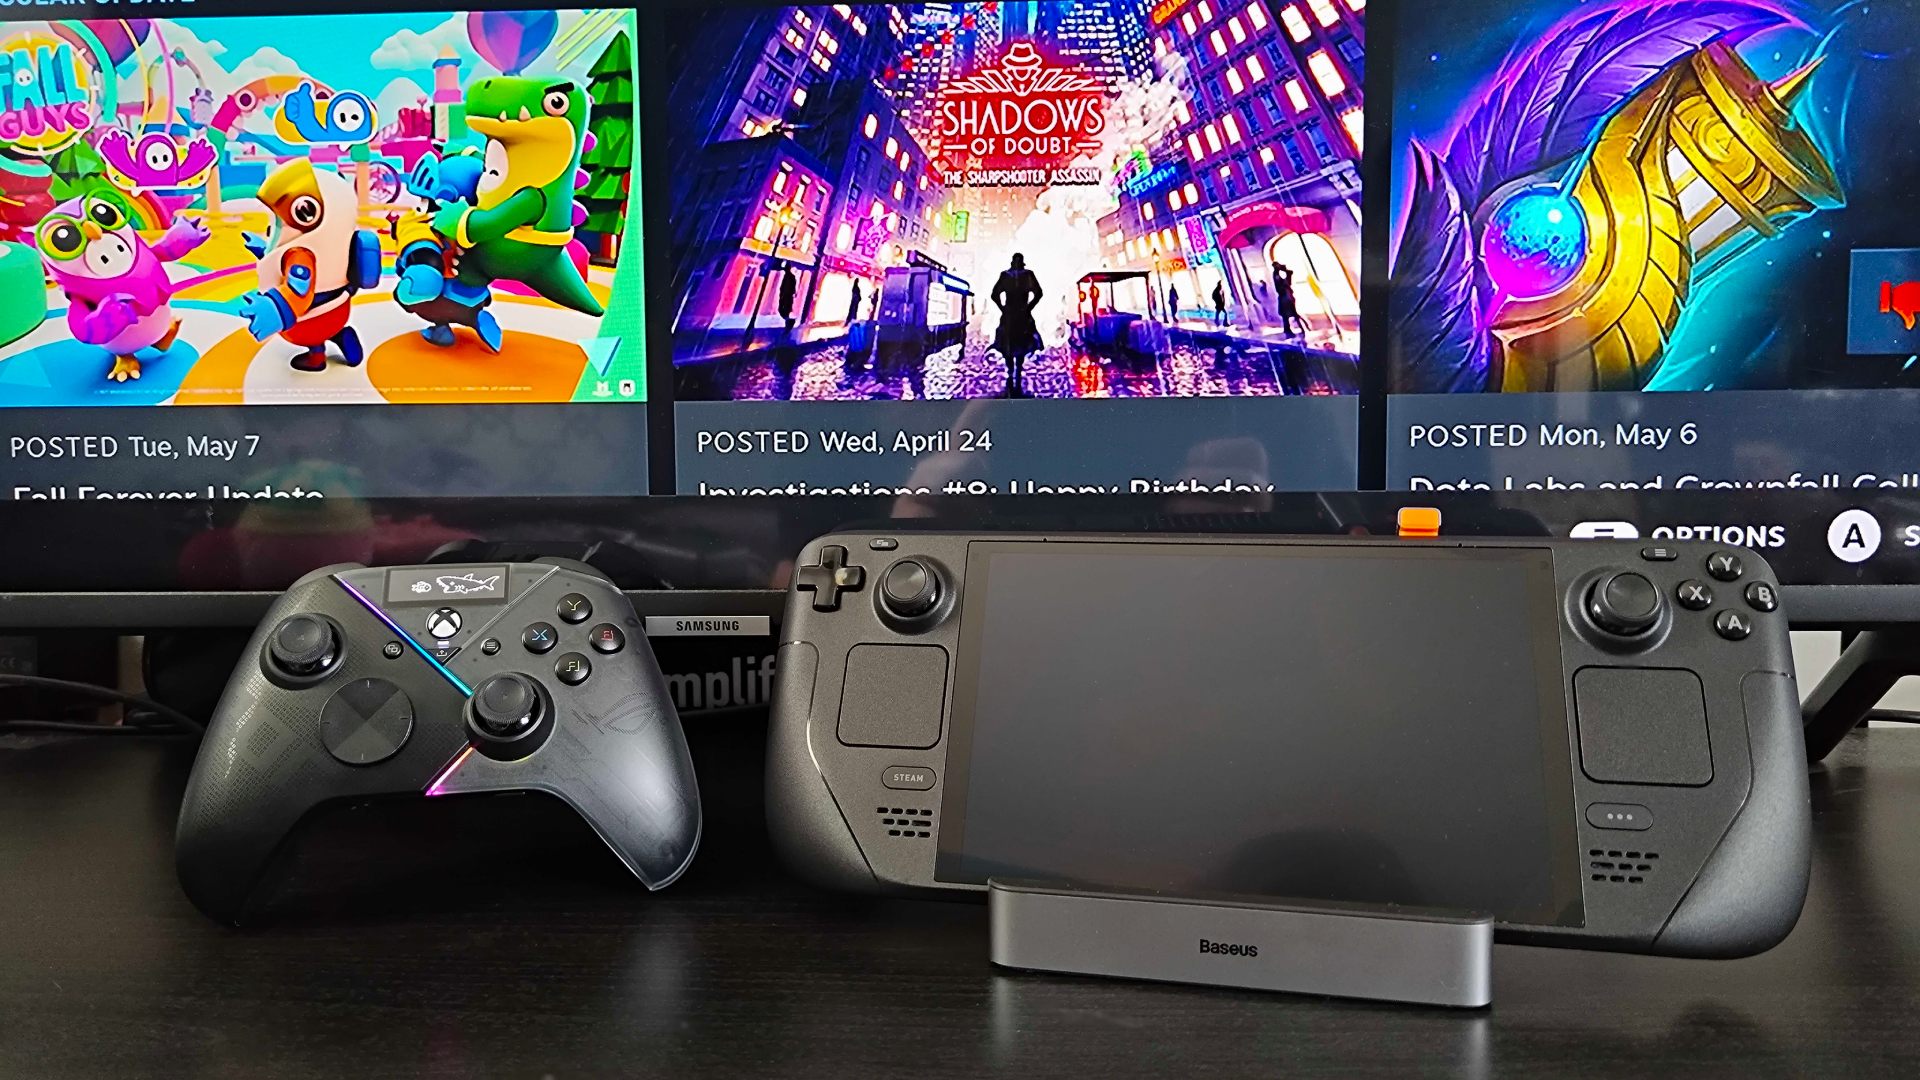
Wondering how to connect your Steam Deck to your TV? It’s a good question, especially if you want to get the most out of Valve’s portable powerhouse. Just like the Nintendo Switch, handheld gaming PCs can connect to big screens using docking stations and adapters, allowing you to consolize the portable using HDMI output, controllers, and other add-ons.
In practice, hooking up your Steam Deck OLED, or most of the other best gaming handhelds, to a gaming TV is relatively simple. In fact, I’d go as far as to describe the process as ‘plug and play’, but there are absolutely a few factors that might catch you off guard. For example, you won’t find HDMI or any other familiar video outputs on Valve’s device, and the portable doesn’t come with a Steam Deck dock. That might leave you staring at the system’s solo USB-C port wondering what you’re meant to shove in there, as there are heaps of cables and hubs out there that support the format.
Fear not, as we’re here to help you successfully connect your Steam Deck to your TV and pick up the best Steam Deck accessories for the job. While every setup will benefit from slight tweaks and different approaches, the end result will be fantastic visuals and stable connectivity when using the device as a handheld console hybrid.
What you’ll need
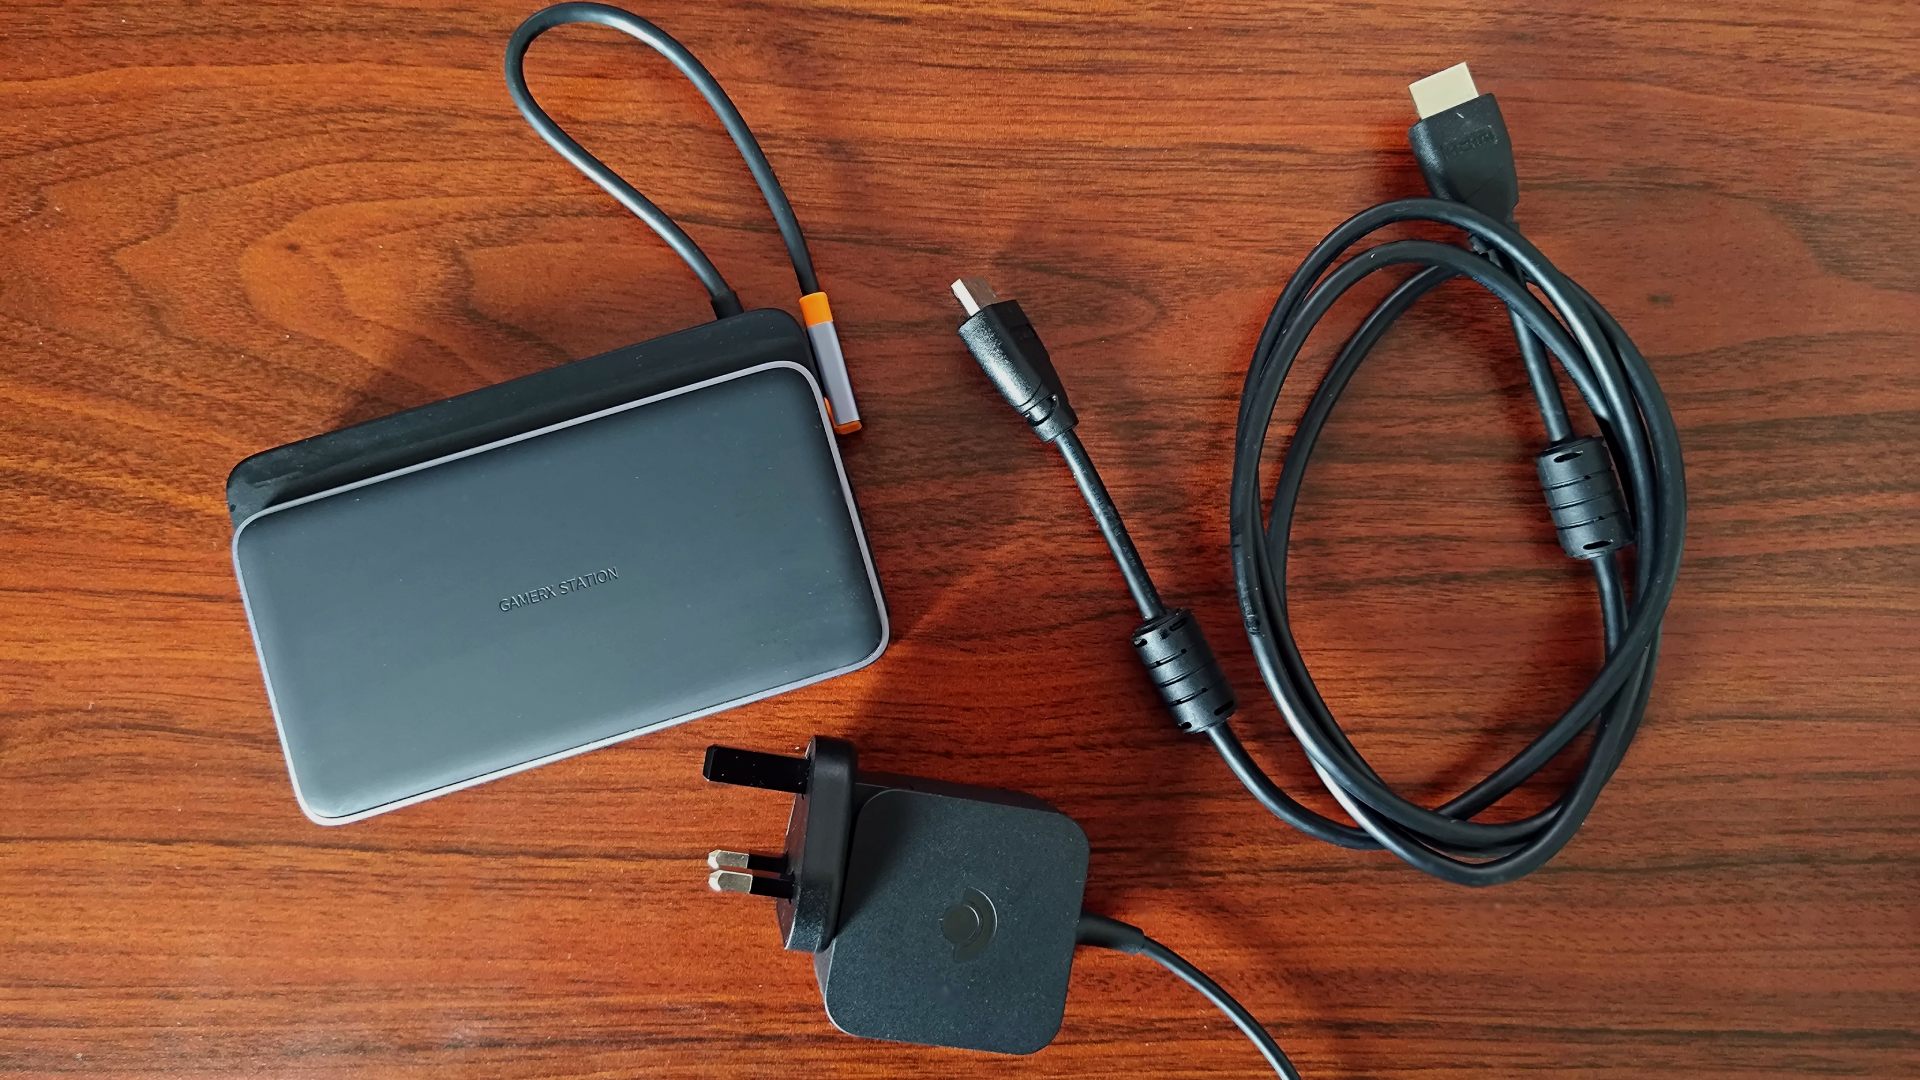
- A Steam Deck dock or USB-C to HDMI adapter
- An HDMI cable (2.0 or better)
- A USB-C charger (At least 45W)
- Your TV remote
The Steam Deck’s USB-C can output to HDMI and DisplayPort using a single cable or adapter, but doing so comes with big caveats. Keep in mind that Valve’s device uses one single port for all inputs, outputs, and charging, meaning you’ll have to choose between sending video to your TV or plugging your power adapter in. From experience, the Deck won’t last very long running a game and displaying it on a big screen, so you’ll want an additional accessory that can do both.
Ideally, you’ll want to consider picking up a Steam Deck dock, as doing so will let you use your own charger for power and output to your TV using full-sized HDMI. My favorite docking station right now is the Baseus 6-in-1, as it has plenty of ports to accommodate things like a PC controller or a gaming headset, and its cradle folds flat for a more discrete look. That said, as long as you grab a docking station designed for the handheld, you should be able to output video via a separate HDMI cable while using USB-C for power.
Connecting your Steam Deck to a TV using a docking station
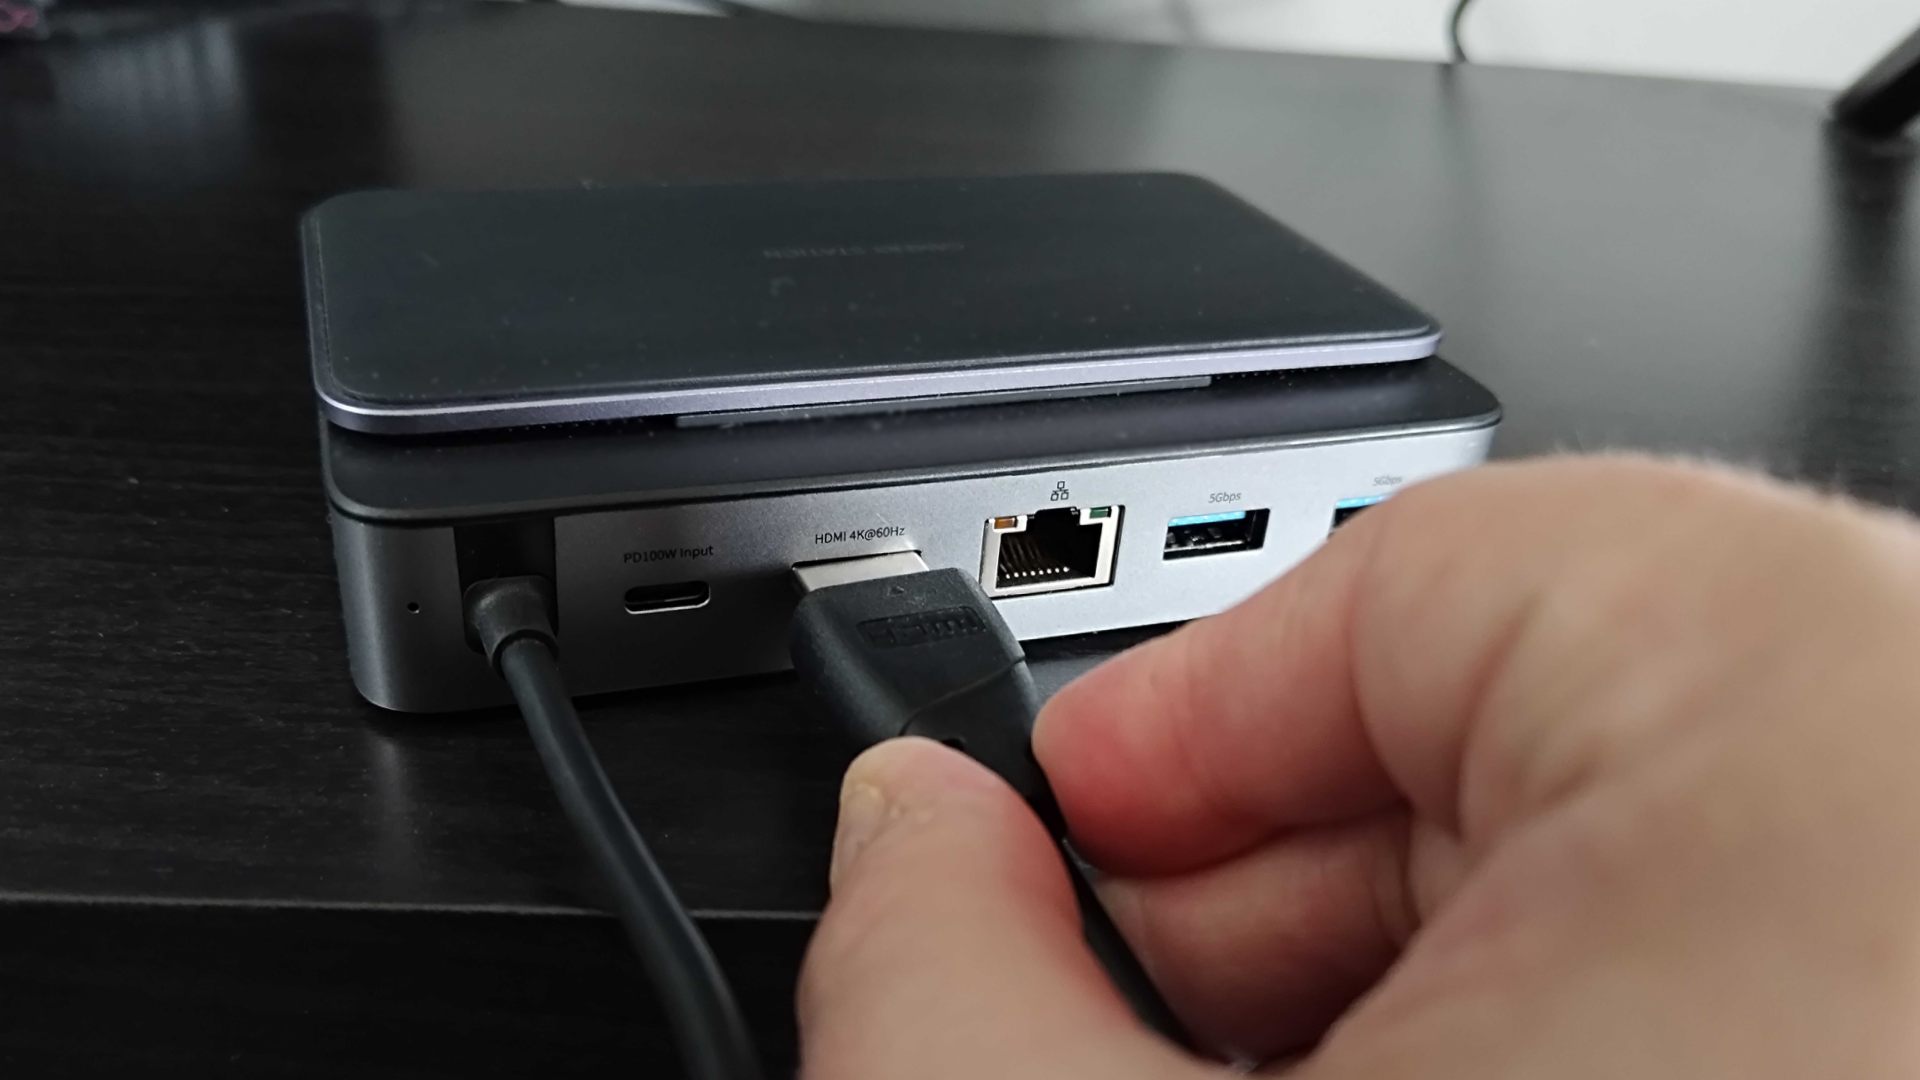
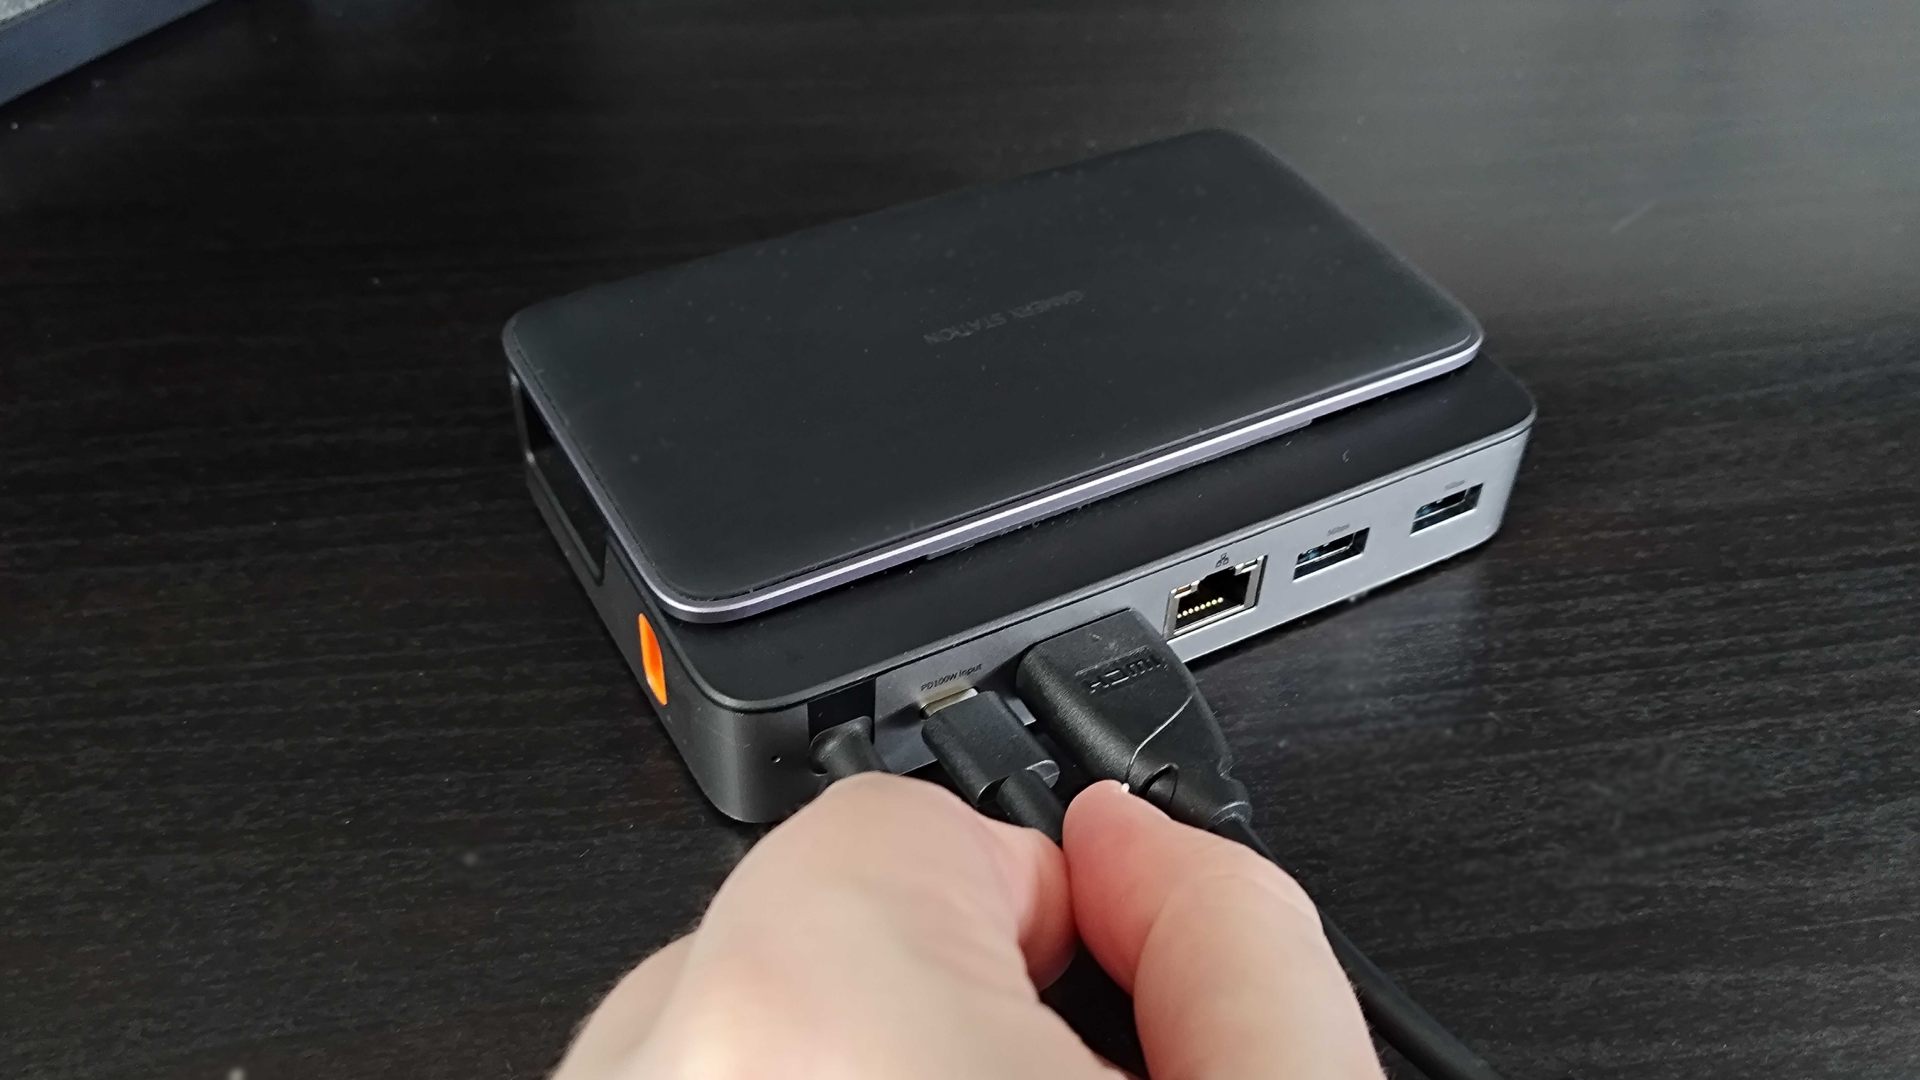
Once you’ve got everything listed above to hand, you’re ready to put together your Steam Deck TV setup. Most of the steps involved are the same as plugging in a conventional TV or console, but it’s worth running over everything to avoid that ‘no picture panic mode’ that can set in when you’ve forgotten a step.
- Pick a free HDMI output on your TV
- Connect one end of your HDMI cable to the free port
- Insert the other end of your HDMI cable into your dock
- Plug in your charger to your dock’s ‘Power Delivery’ USB port
- Sit your dock on a flat, steady surface
- Place your Steam Deck on the dock’s cradle
- Push the built-in USB-C cable into your Steam Deck’s port
After following those steps, you should have an HDMI cable leading to your TV, a USB-C cable providing power from an outlet, and your dock’s USB-C cable attached to the top of the Steam Deck. All set? If so, you’ll now want to turn your TV on and switch to the right input using your remote. Some models will let you know when a powered device is attached, which should provide some reassurance that you’ve hooked up everything correctly.
At this stage, you’ll want to press the power button at the top of the Steam Deck, which should prompt the handheld to display on your TV rather than the built-in screen by default. If your Deck is off, you’ll want to hold the power button to boot it up and wait a few seconds. With any luck, you’ll see SteamOS pop up on your big screen without a hitch.
Adjusting Steam Deck TV settings
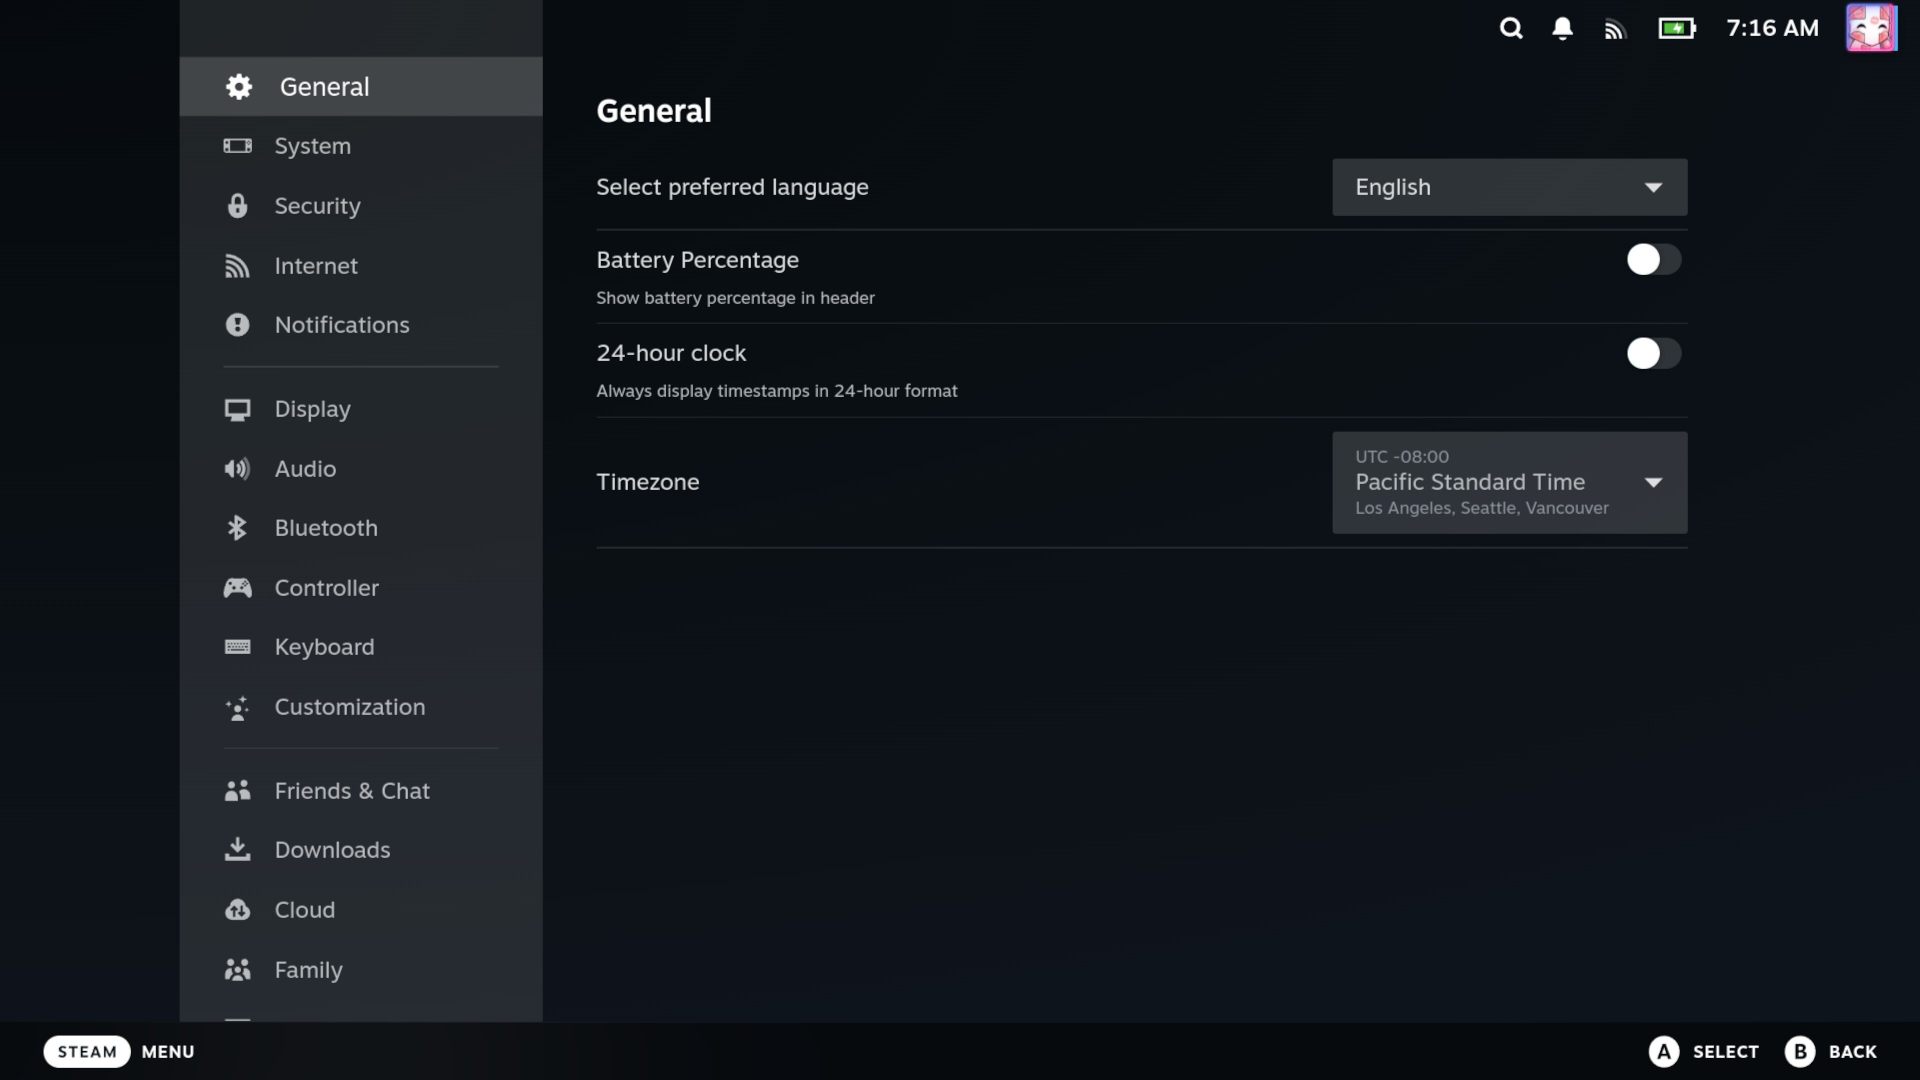
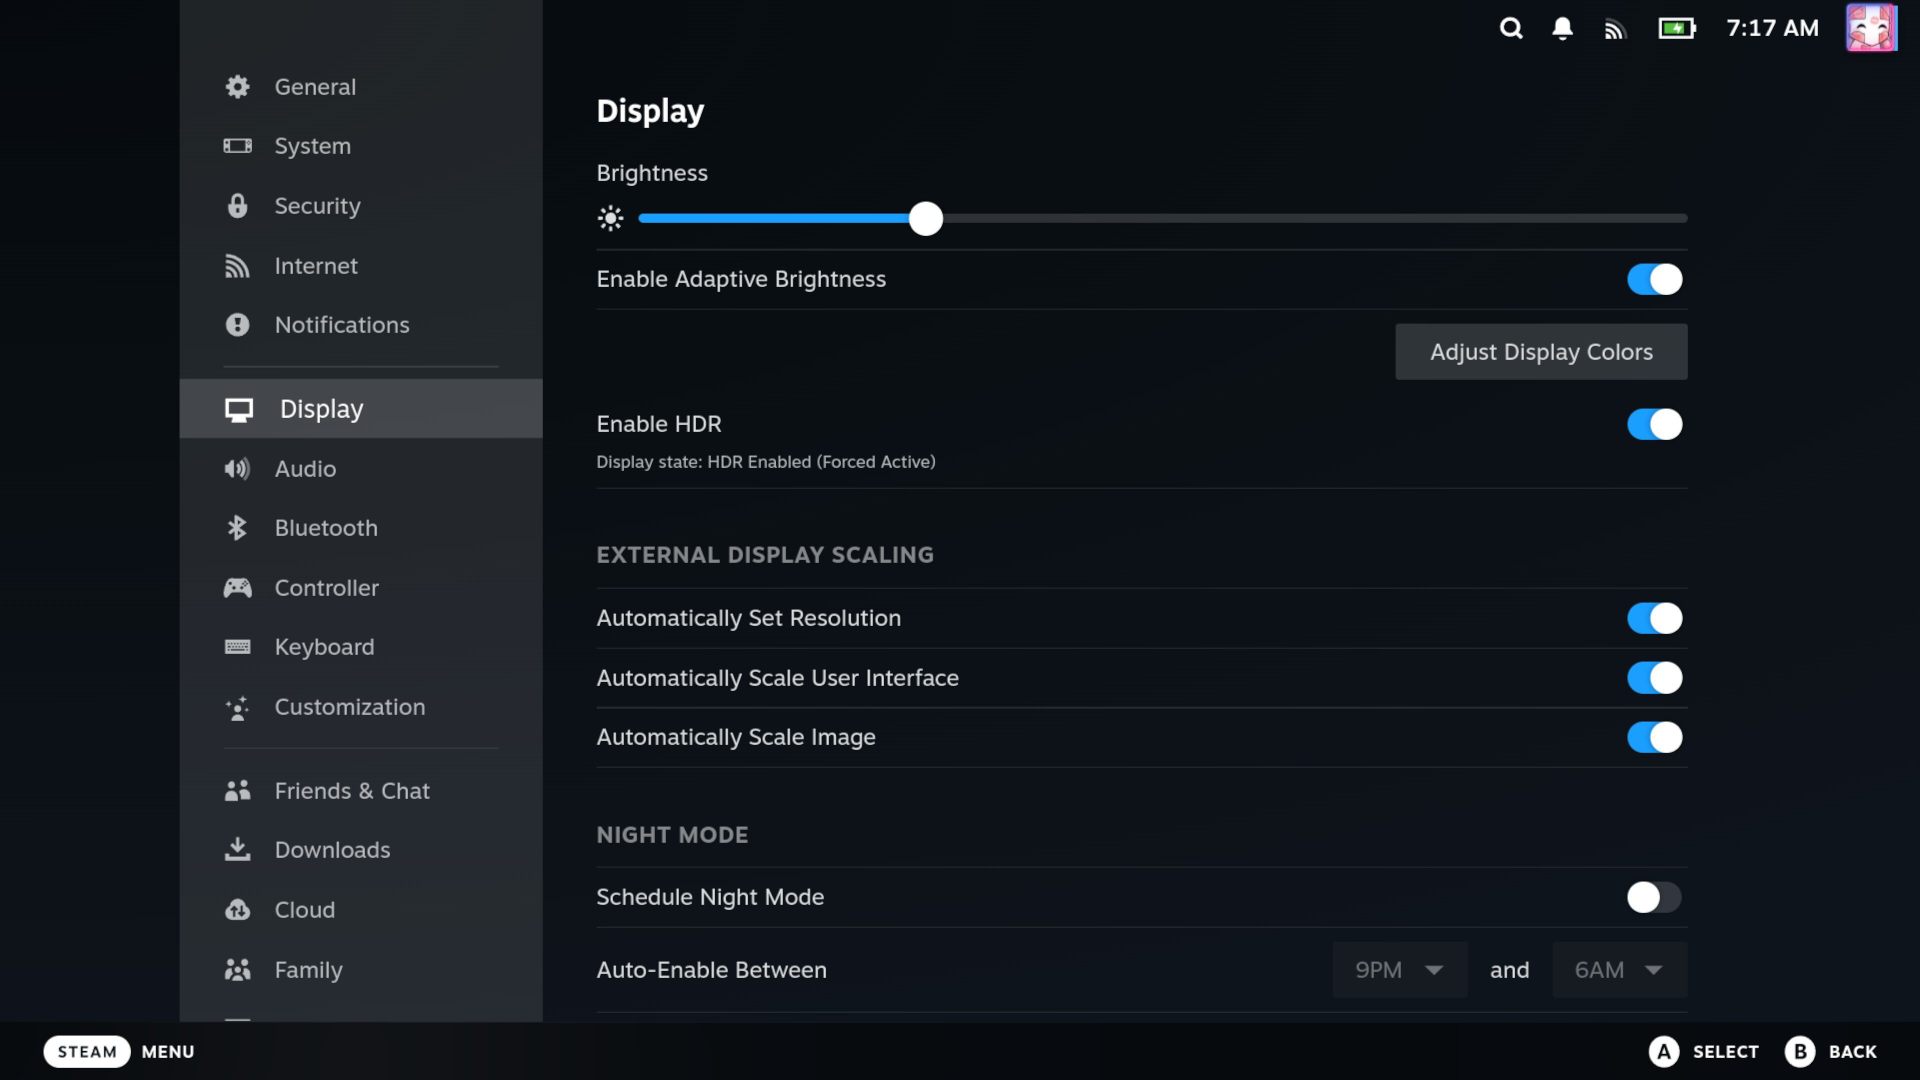
Now that you’ve successfully hooked up your Steam Deck to your TV, you’ll want to check that the handheld’s settings are in order. To make sure there’s no funny business going on, use the following steps to navigate to the right menu:
- Head to your Steam library and choose a game
- Press the right-hand ‘pause’ button
- Select ‘Properties’ from the menu
- Under ‘General’, select the ‘resolution’ dropdown
You’ll now be able to choose whether a specific game uses the Deck’s default resolution, your TV’s native settings, or an option of your choosing. Just keep in mind that your portable pal is designed to run games via its 800p screen first and foremost, so cranking things up to 4K could lead to poor performance and some toasty temps. Ideally, you’ll want to stick with 1080p, but some classics and indies will happily use UHD settings without stressing Valve’s portable out.
Selecting specific game resolution settings
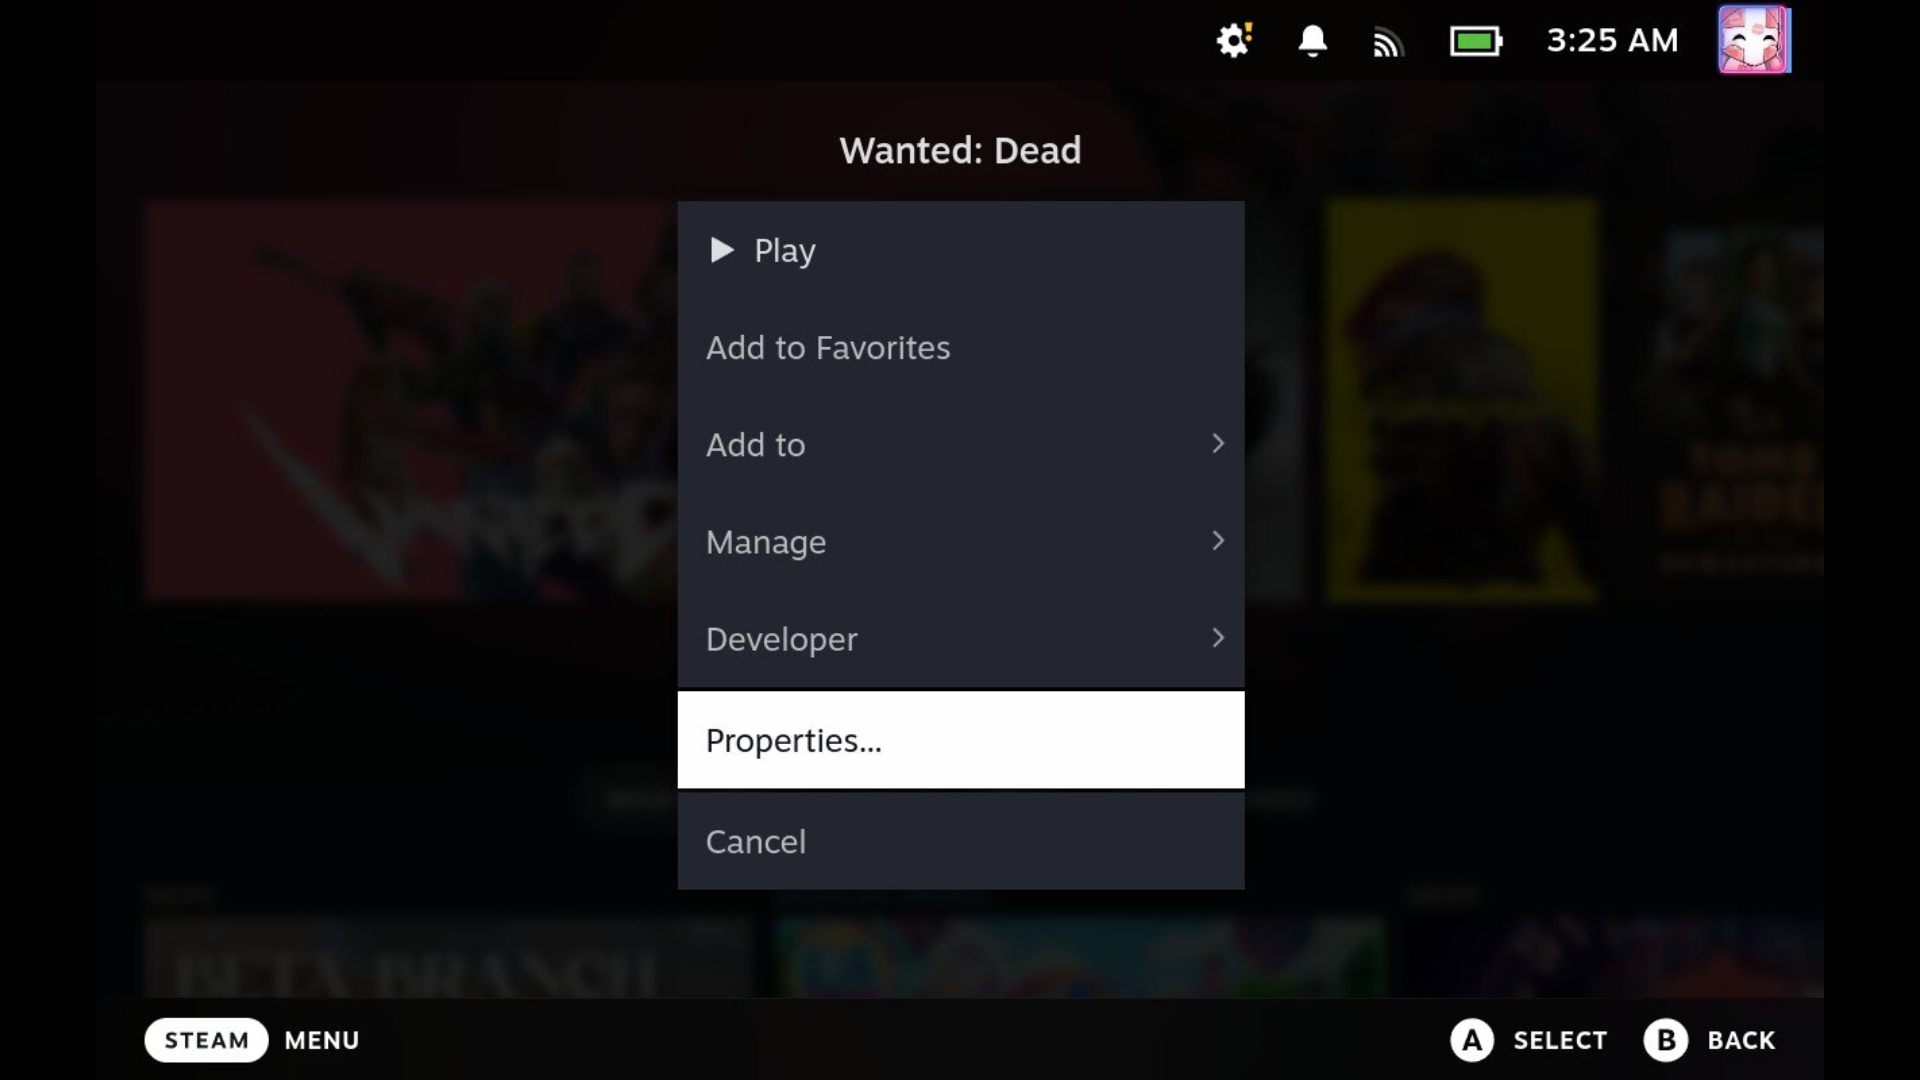
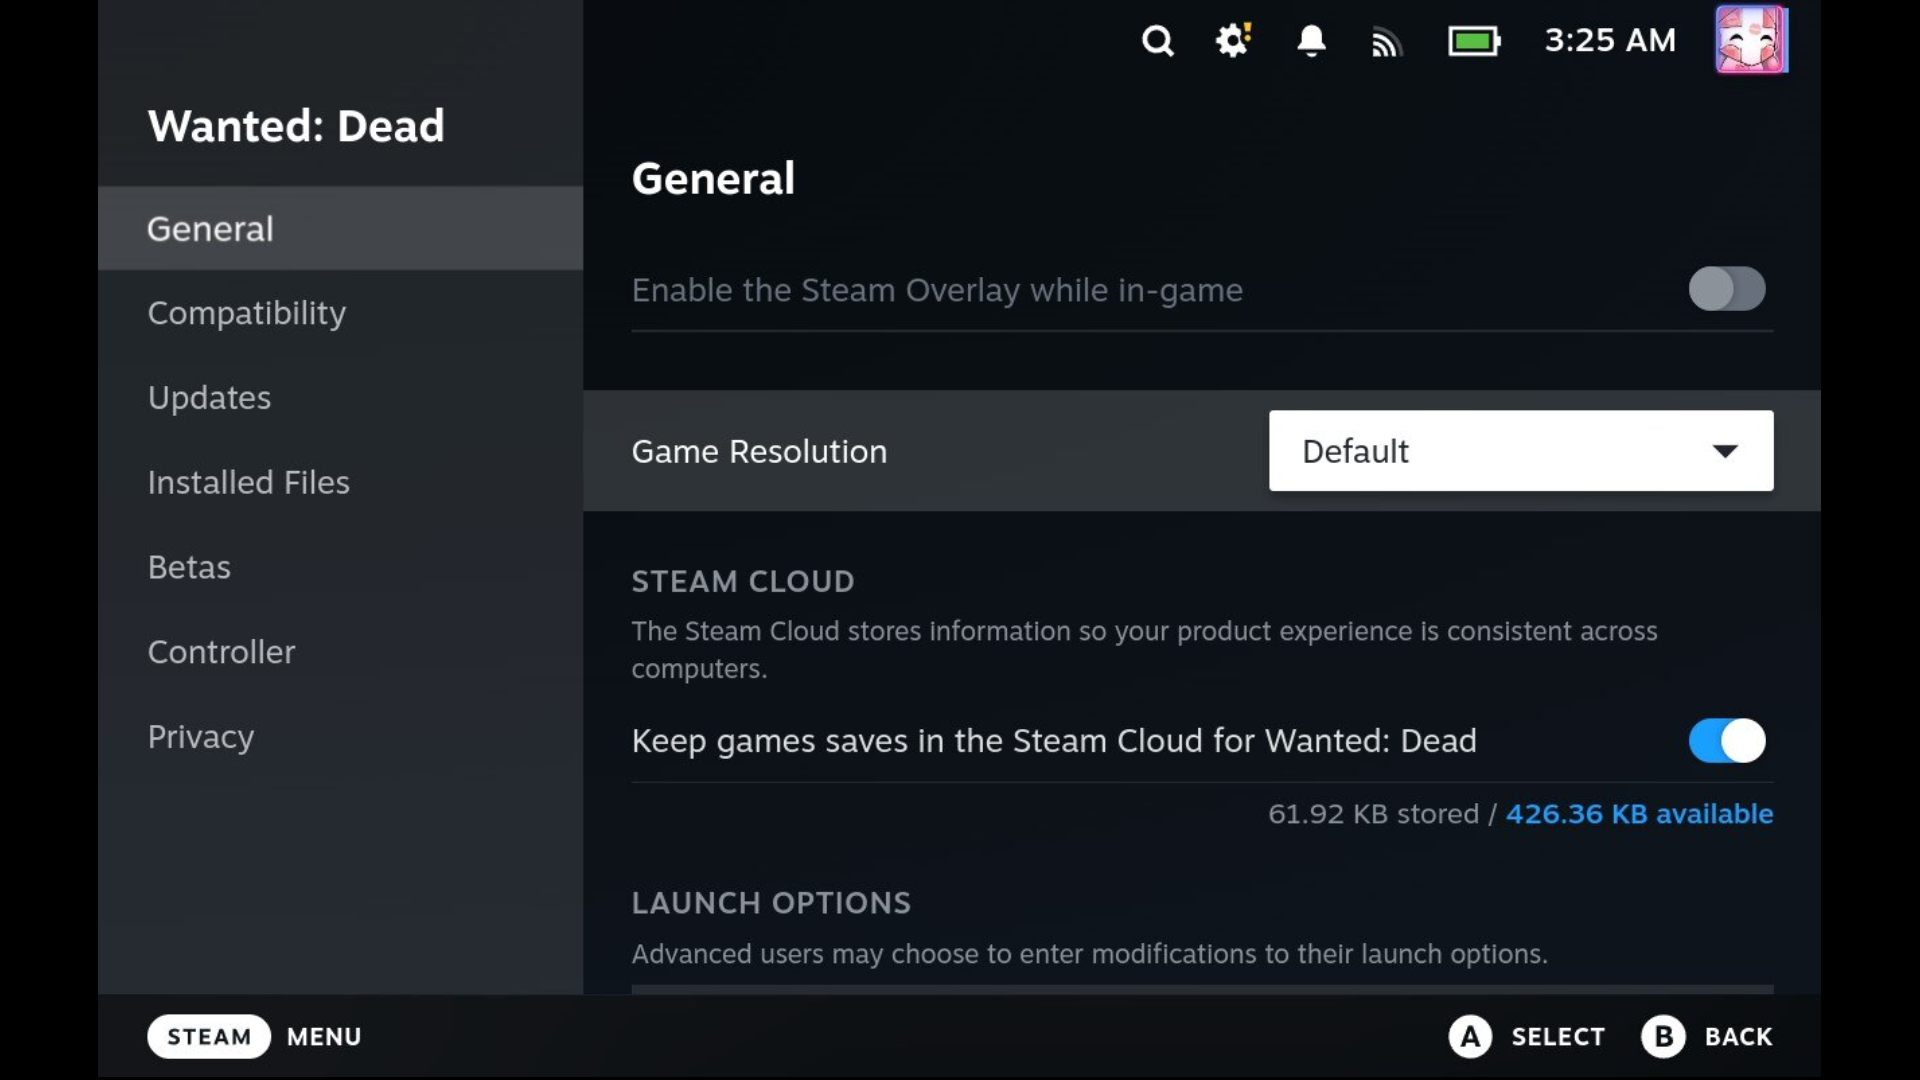
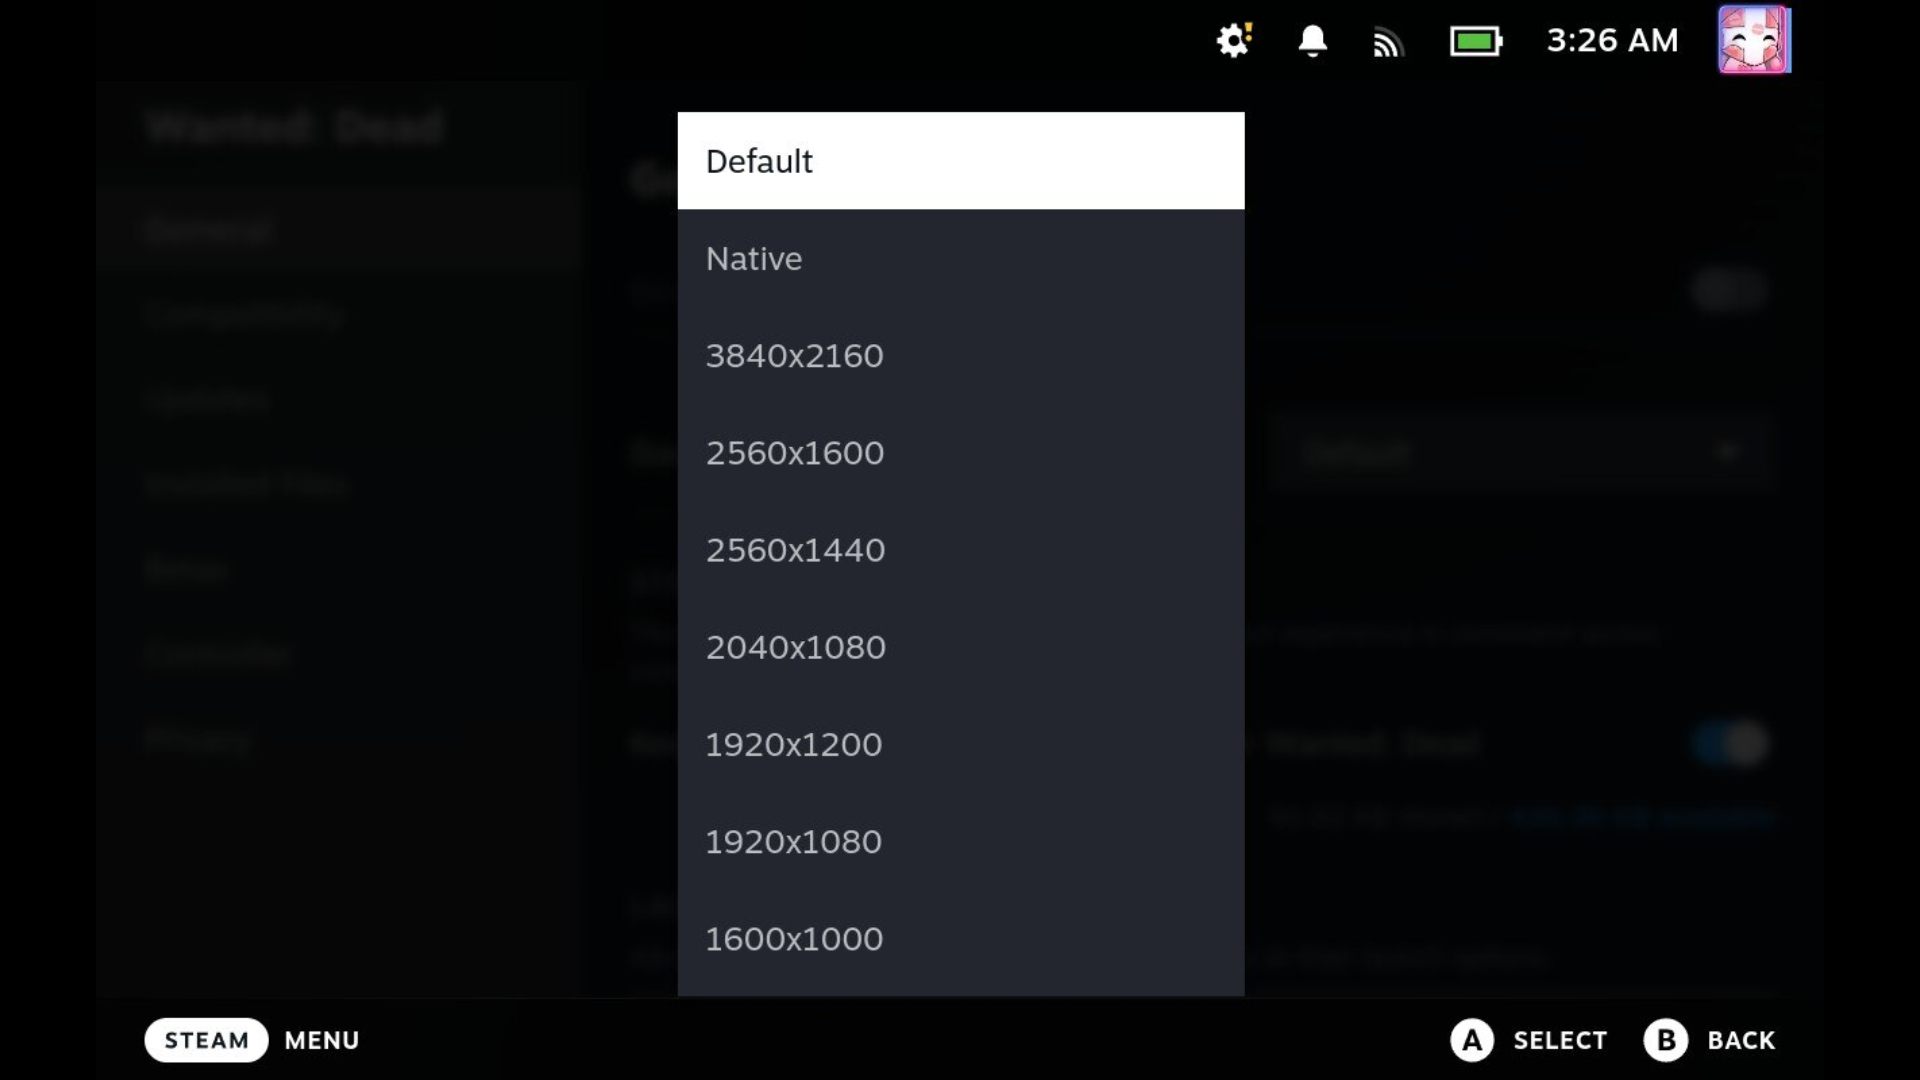
While SteamOS display options are managed via the main menu, individual game settings can be tweaked on a case-by-case basis. This effectively means you can avoid any visual shenanigans if you find a specific member of your Steam library is playing up, and it’s also handy if you need to play some adventures at a specific resolution. To access these separate settings, you’ll want to do the following:
- Head to your Steam library and choose a game
- Press the right-hand ‘pause’ button
- Select ‘Properties’ from the menu
- Under ‘General’, select the ‘resolution’ dropdown
You’ll now be able to choose whether a specific game uses the Deck’s default resolution, your TV’s native settings, or an option of your choosing. Just keep in mind that your portable pal is designed to run games via its 800p screen first and foremost, so cranking things up to 4K could lead to poor performance and some toasty temps. Ideally, you’ll want to stick with 1080p, but some classics and indies will happily use UHD settings without stressing Valve’s portable out.
Connecting accessories
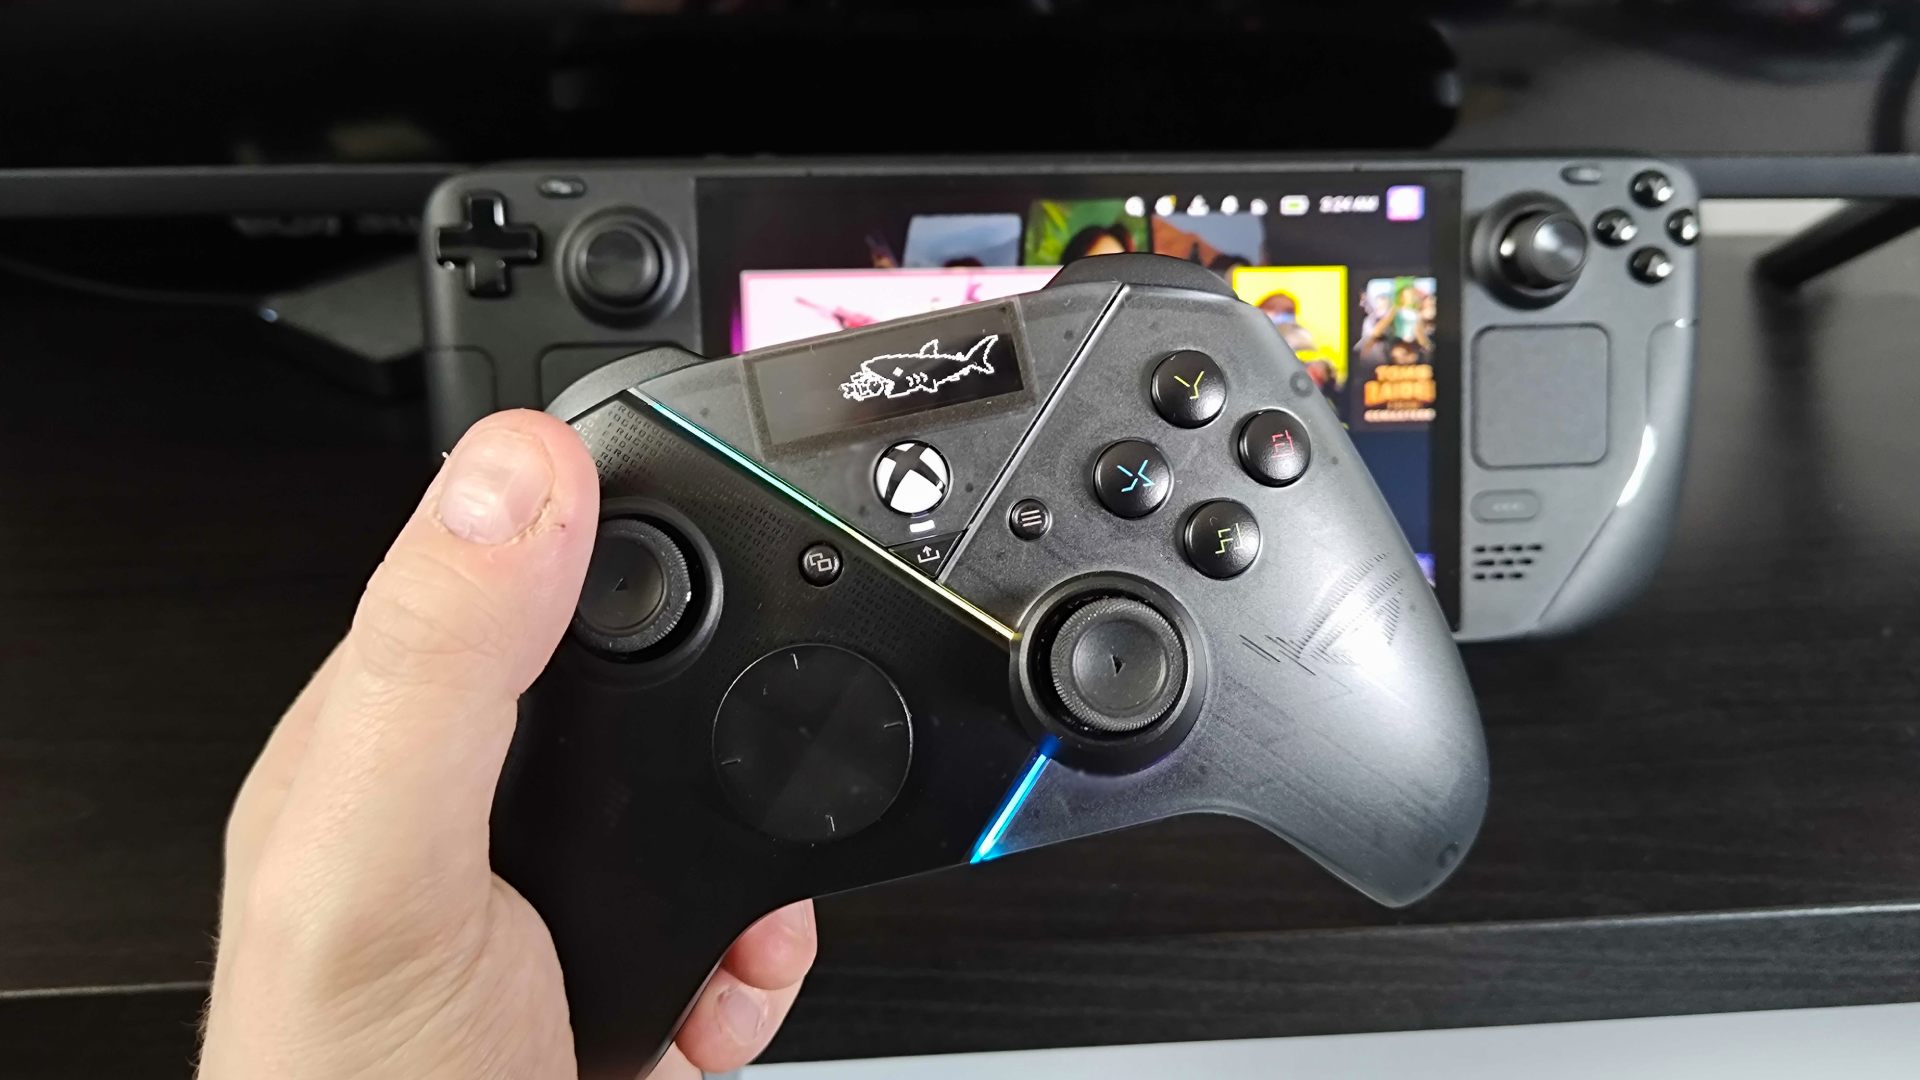
Technically, you can use the Steam Deck as its own controller for playing games on your TV. However, unless you want to relive the days of the Wii U, you’ll likely want to kick back with all the accessories you need on the couch. If you’re using a docking station, that’ll mean hooking up USB gamepads and headsets to USB ports, which works the exact same way as a conventional PC.
Preferably, you’ll want to use wireless add-ons over wired accessories, as tethering yourself to the Steam Deck while it's connected to the TV can be risky. Don’t get me wrong, if you’ve got a long enough cable and you’re careful, accidents shouldn’t be a thing, but I can’t count the number of times I’ve almost sent my connected handhelds hurdling across the room by accident yanking or tripping over wires. Perhaps none of you out there are as silly as me, but this advice is worth including regardless.
Et voila! You should now have a fully functioning Steam Deck dock TV setup that feels like a console. With everything hooked up, you’ll be able to disconnect the single USB-C cable from the top of your handheld when you feel like gaming on the go, all while preserving your couch ensemble for when you want to kick back and bash through your backlog.
Looking for a rig for your living room? Check out the best gaming PCs and best Alienware gaming PCs for a selection of powerful machines. If you’d rather keep things portable, we’ve also got you covered with the best gaming laptops for gaming on the go.


