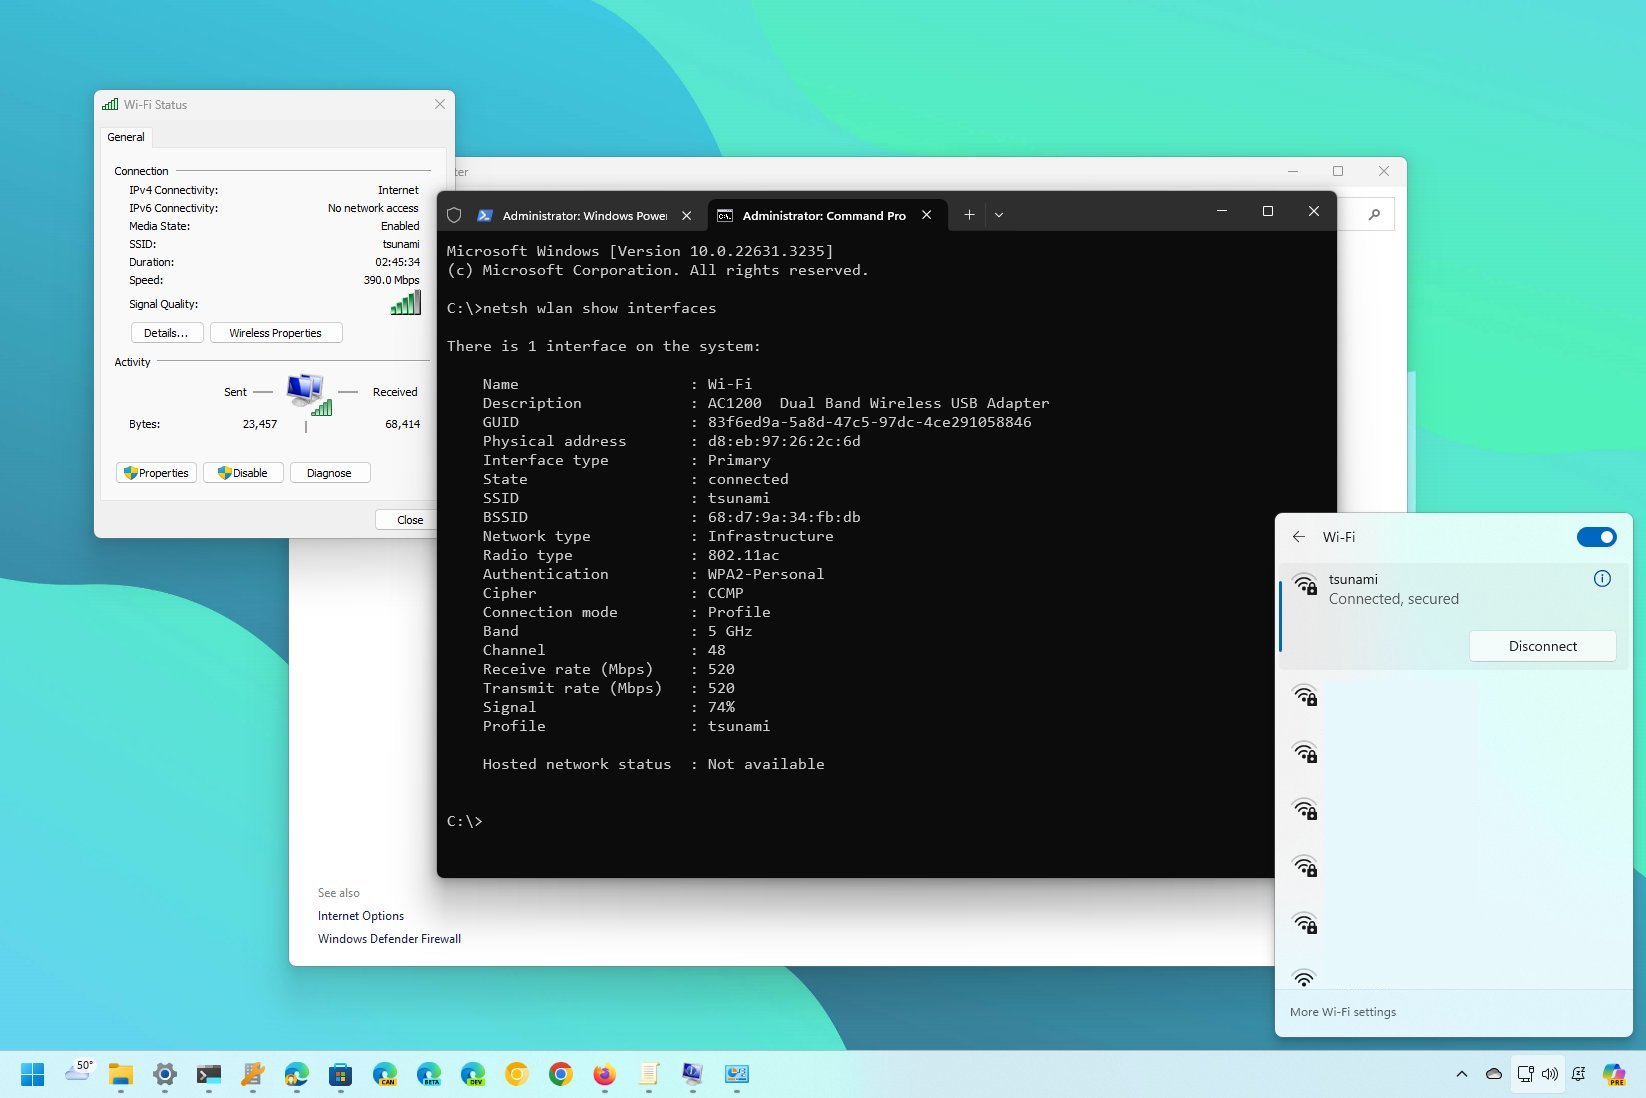
On Windows 11, you can check the Wi-Fi signal strength in multiple ways, and in this guide, I will show you how to complete this task.
When you connect your laptop or desktop computer to the network and the internet using a wireless adapter, the quality of the signal will impact the connection's performance. The main reason is that this technology uses radio waves to send and receive data, which are susceptible to interference and limited in range.
As a result, the ability to know the signal strength for a Wi-Fi connection can help you troubleshoot connectivity problems and quickly discard an issue with the Internet Service Provider (ISP).
If you must check the signal strength, Windows 11 offers at least five ways to complete this task: using the Taskbar's Quick Settings, the Settings app, the legacy Control Panel, and commands with PowerShell and Command Prompt.
In this how-to guide, I will explain the different ways to monitor the wireless signal quality on Windows 11.
How to check wireless strength from Taskbar
To determine the signal quality of your Wi-Fi connection from the Taskbar, use these steps:
- Click the network icon in the Taskbar.
- Click the "Manage Wi-Fi connections" button.
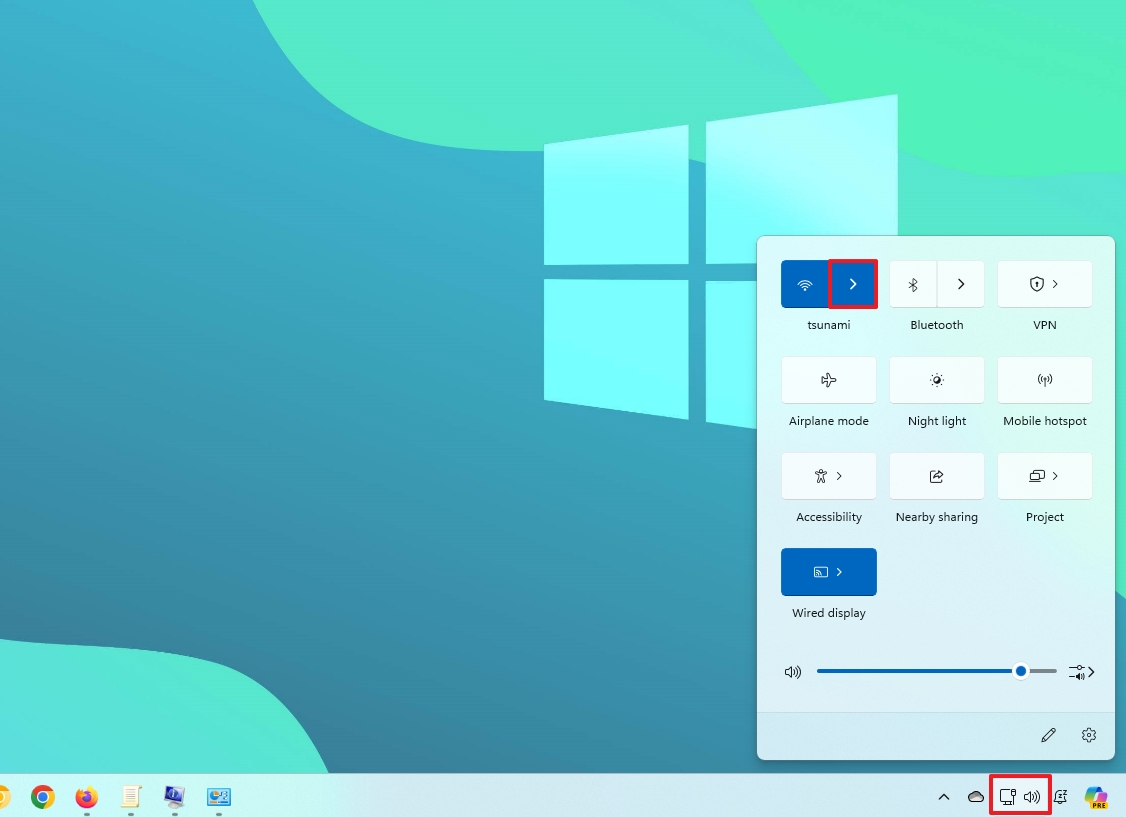
- Confirm the number of bars in the wireless icon for the active connection to determine the strength.
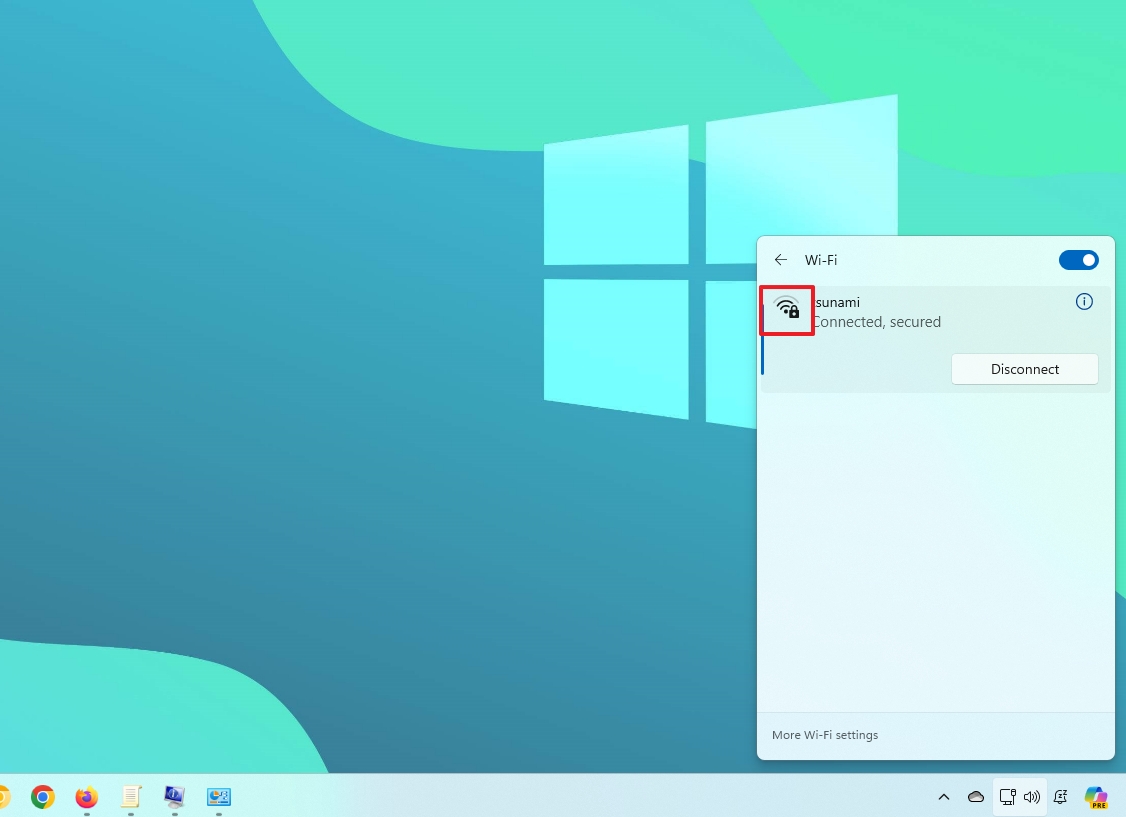
In the icon, one solid bar indicates a weak signal, two bars mean the signal is acceptable, and three and four bars represent the best signal you can get.
How to check wireless strength from Settings
To check the Wi-Fi signal strength from the Settings app, use these steps:
- Open Settings.
- Click on Network & internet.
- Click the Wi-Fi page on the right side.
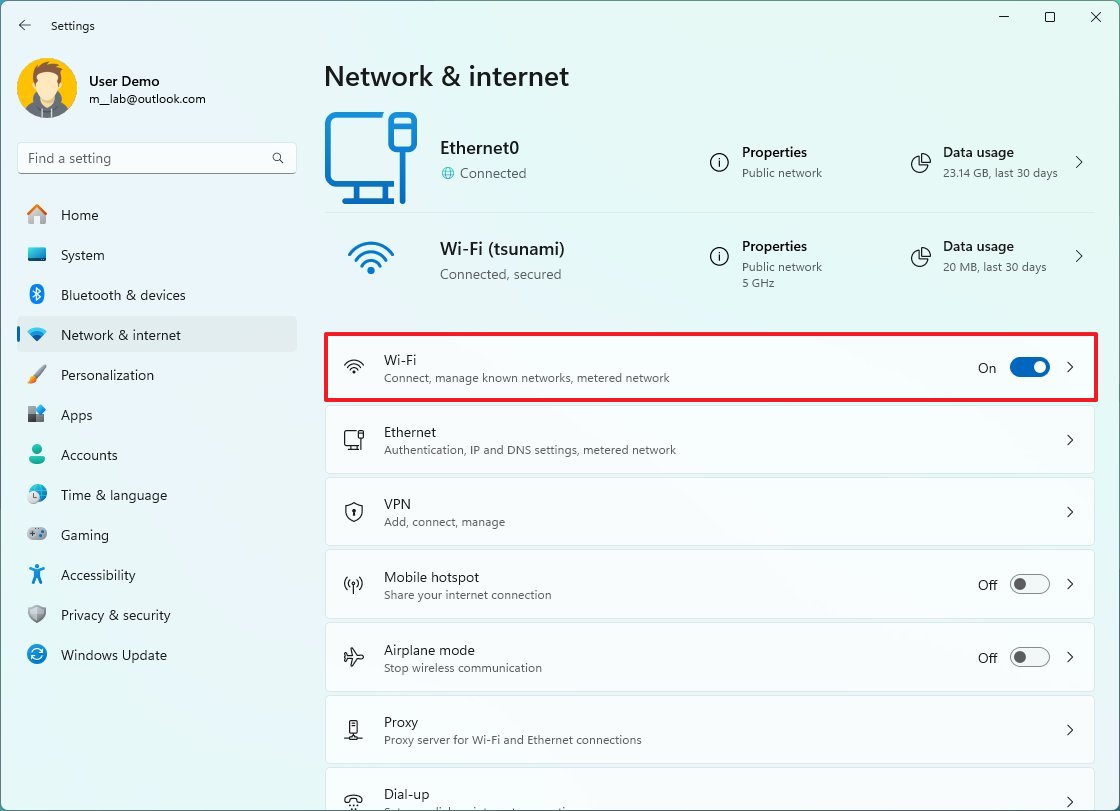
- Check the number of bars in the wireless icon for the active connection to determine how strong the signal is.
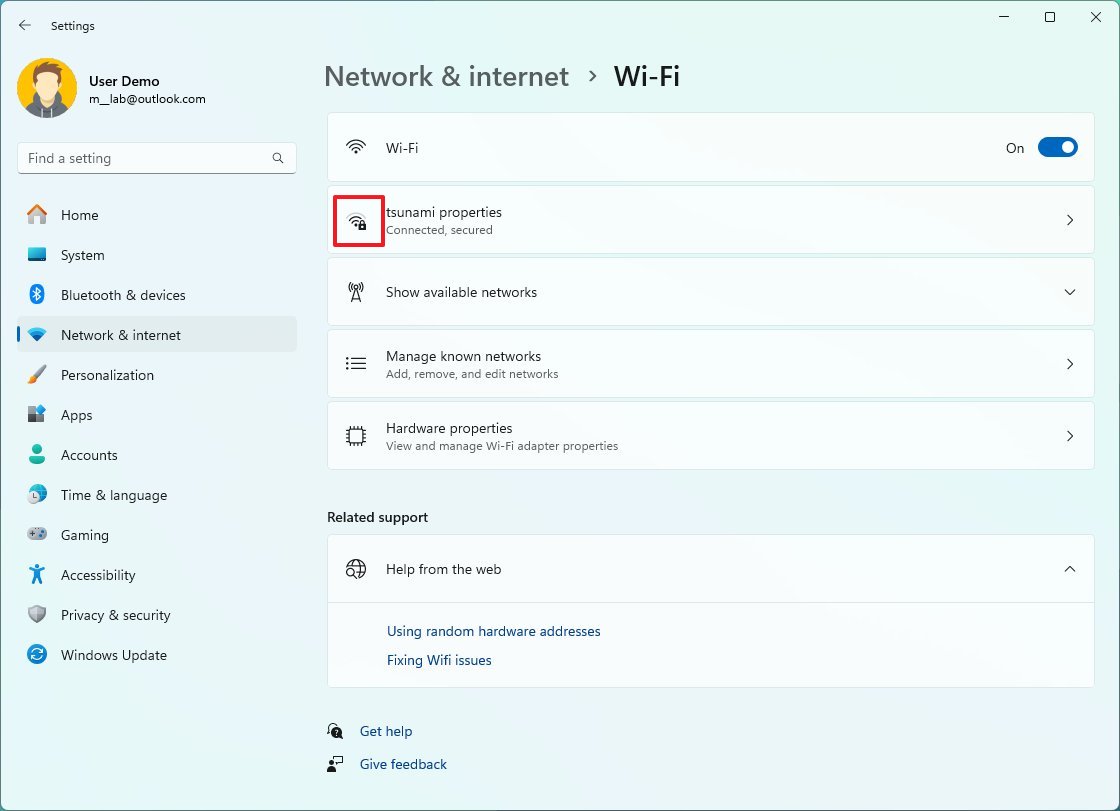
After you complete the steps, the wireless icon will give you an indication of the signal quality on Windows 11.
How to check wireless strength from Control Panel
To determine the signal quality of a wireless connection, use these steps:
- Open Control Panel.
- Click on Network and Internet.
- Click on Network and Sharing Center.
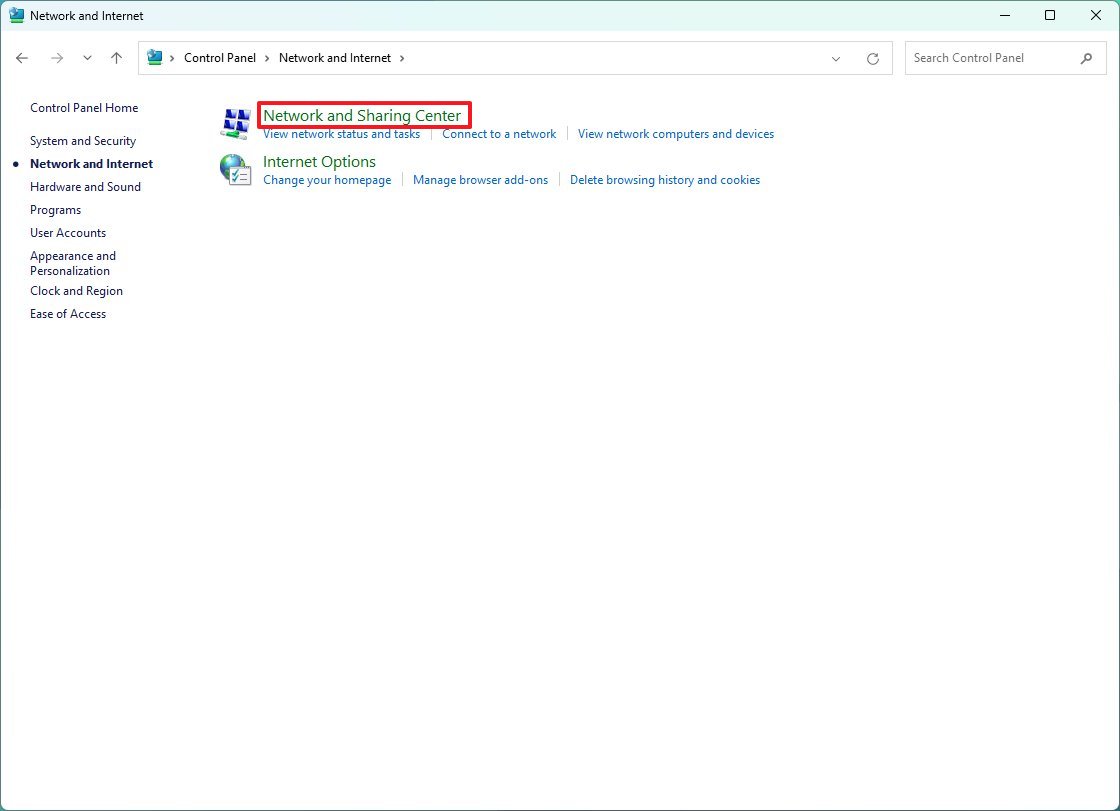
- The icon for "connections" will indicate the signal quality under the "View your active networks" section.
- (Optional) Click the connection name to check the signal strength and other information.
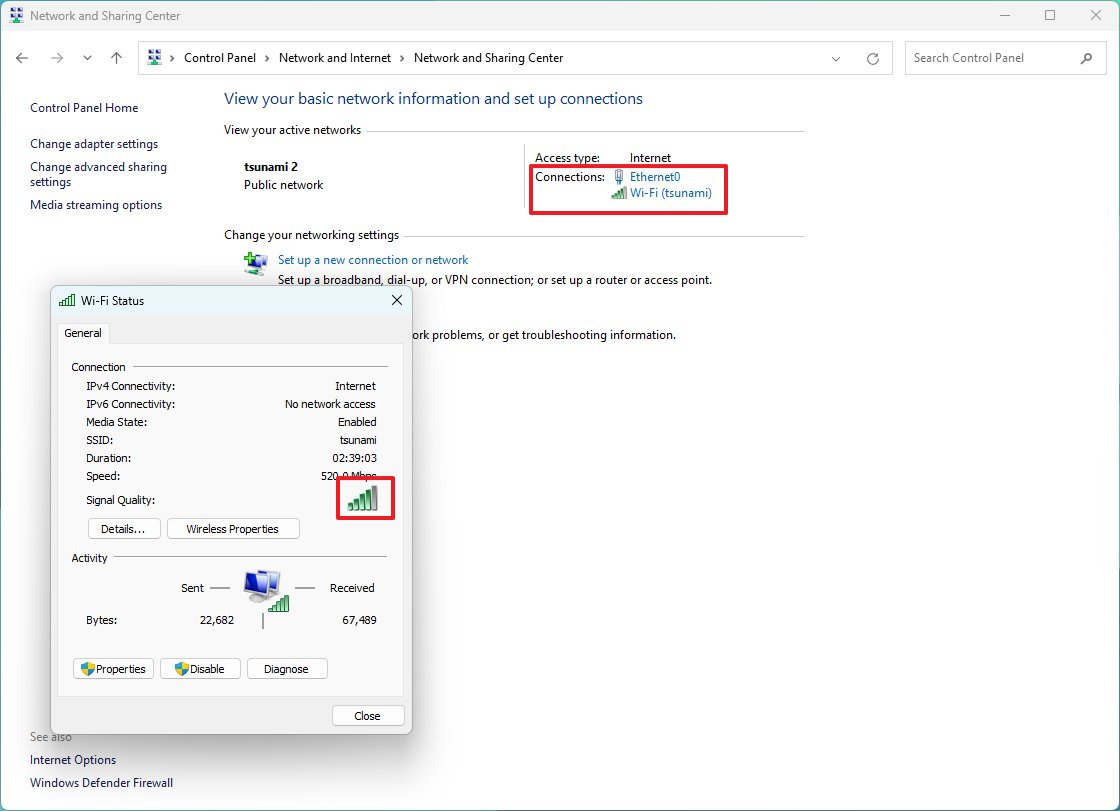
Once you complete the steps, the legacy Control Panel will reveal the connection signal quality of your computer.
How to check wireless strength from PowerShell
To find out the Wi-Fi signal strength through PowerShell, use these steps:
- Open Start.
- Search for PowerShell and click the top result to open the app.
- Type the following command to check the signal strength and press Enter: (netsh wlan show interfaces) -Match '^\s+Signal' -Replace '^\s+Signal\s+:\s+',''
- Confirm the signal quality output. (The percentage goes from 0 to 100, where 100 percent indicates excellent signal quality.)
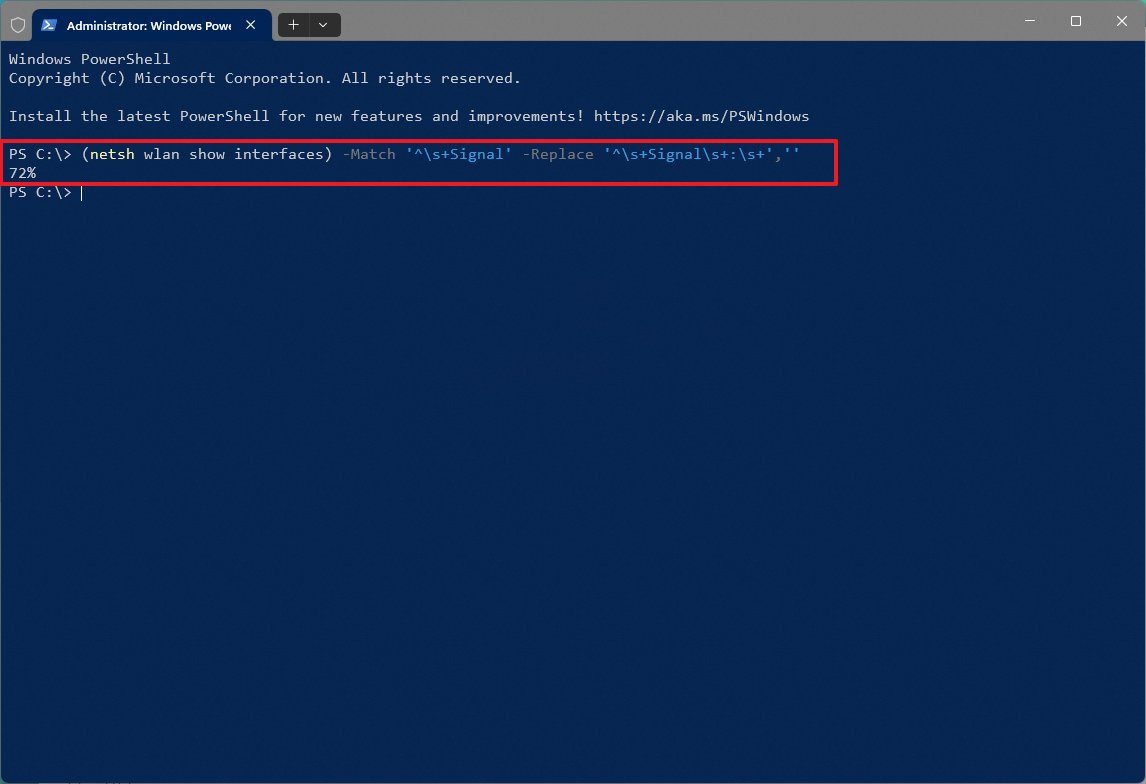
After you complete the steps, the connection is reliable if you see a signal quality between 80 and 100 percent. If the signal is above 70 percent, it's still good for light web browsing. Anything below 60 percent of the signal is weak.
How to check wireless strength from Command Prompt
To confirm the Wi-Fi signal strength from the Command Prompt, use these steps:
- Open Start.
- Search for Command Prompt and click the top result to open the app.
- Type the following command to view the Wi-Fi signal strength and press Enter: netsh wlan show interfaces
- Confirm the signal quality in the "Signal" details. (If the output number equals or exceeds 80, the signal's strength is good.)
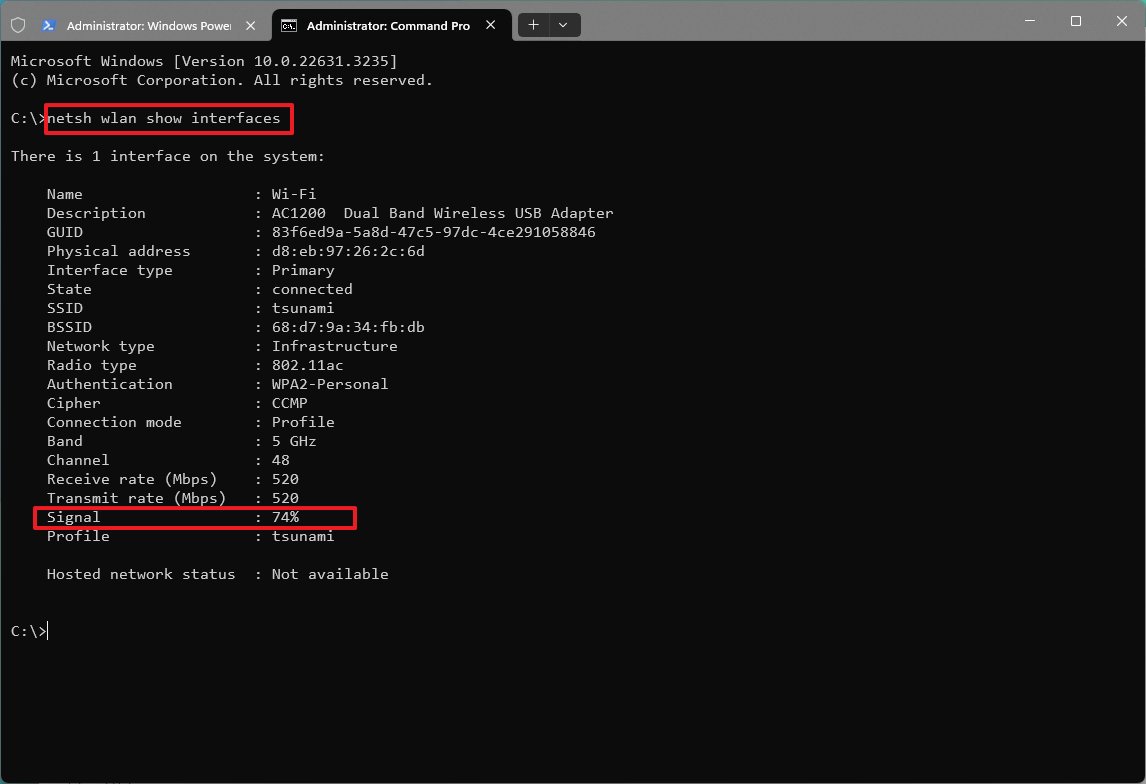
Once you complete the steps, Command Prompt will reveal the quality of the signal quality.
Consider these tips to improve signal strength
If your device has a weak wireless signal, move the computer closer to the access point or place the access point in the line of sight, such as in the middle of the room, where you can see it.
As you make physical changes to the computer or access point's location, run the Command Prompt or PowerShell commands to get more accurate results.
You can also use the dynamic wireless icon. Each bar (including the dot) represents a quarter of the signal quality. The dot is 25 percent, the second bar is 50 percent, the third is 75 percent, and the fourth is 100 percent.
You should also consider the physical environment. For example, fluorescent lights and microwaves can cause wireless signal interference, walls, and other solid objects can weaken the quality of the signal, and the position of the antennas can also play a role.
In addition, if you're in a location with many wireless signals using the channel, this can also cause problems with the connection speeds. Usually, modern access points can detect and adapt to the environment, but sometimes, you may just have to change the configuration, such as changing the wireless channel to one that is less crowded.
More resources
For more helpful articles, coverage, and answers to common questions about Windows 10 and Windows 11, visit the following resources:


