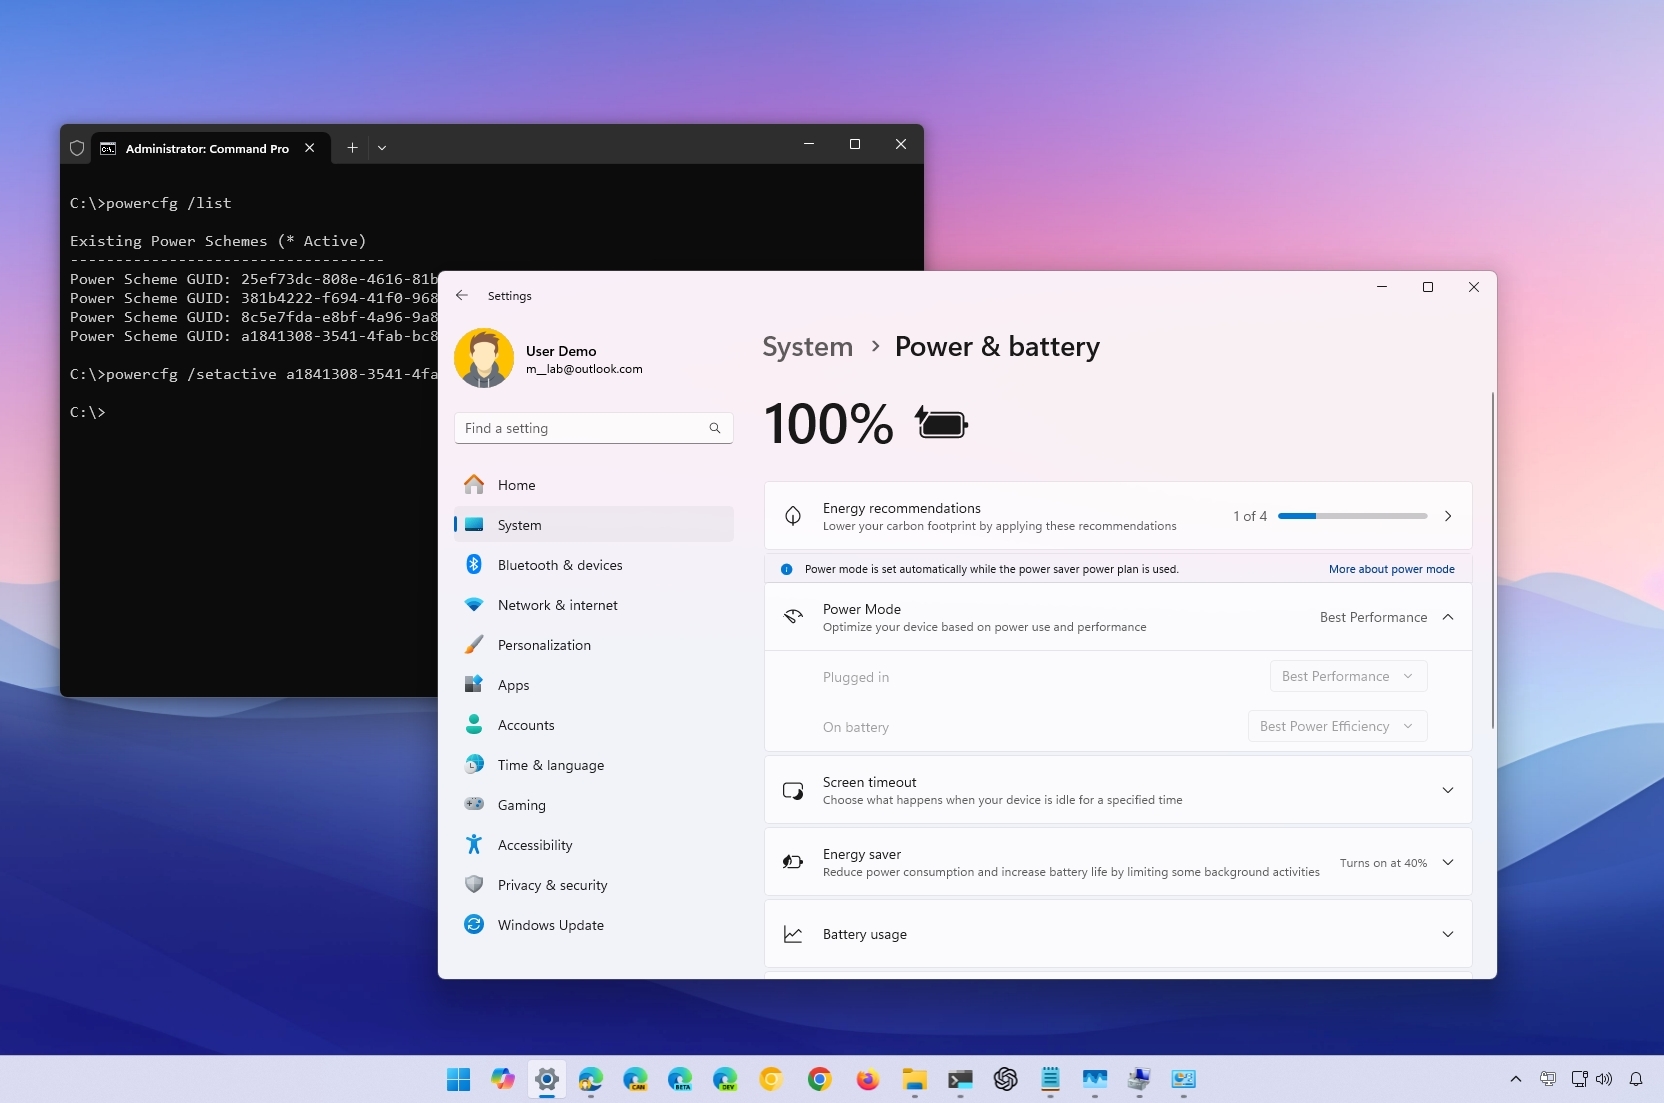
On Windows 11, power modes ("power plans" or "power schemes") are collections of settings to manage a device's power usage. The system, by default, uses the "balanced" mode, which optimizes power for performance and battery life. However, you can always change the settings to "best power efficiency" to prolong the battery life as much as possible or "best performance" to get the most out of the device while increasing power usage.
In this how-to guide, I'll explain the steps to change the power mode on your laptop or desktop computer to improve performance or battery life.
How to adjust power modes on Windows 11
To change the default power more on Windows 11, use these steps:
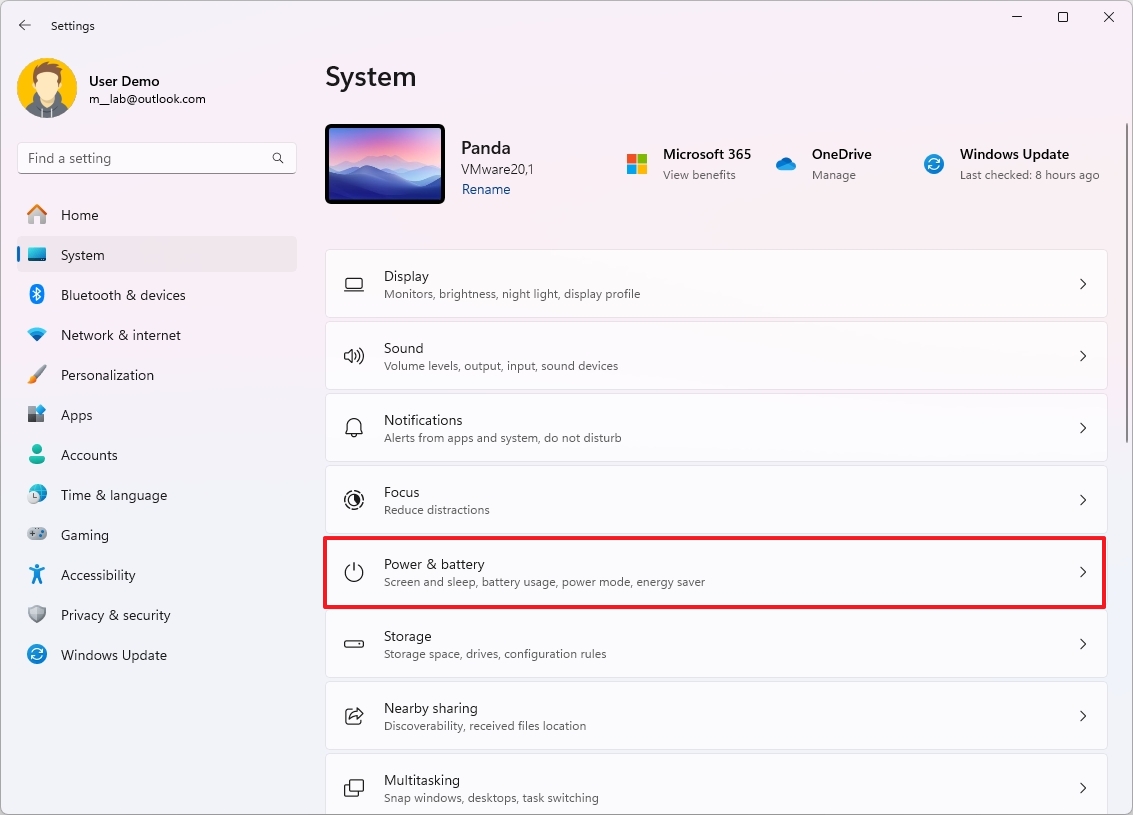
- Open Settings.
- Click on System.
- Click the Power & battery page on the right side.
- Quick tip: If the device is not connected to a battery, the page will appear as "Power."
- Click the Power Mode setting.
- Select the option for when the computer is plugged in or running on battery:
- Best Power Efficiency: This option preserves the most energy while lowering the system's performance. If you use a laptop, this option will offer the most battery life.
- Balanced: Windows 11 automatically balances energy and performance for an optimal experience.
- Best Performance: Uses the most energy to increase the system's performance.
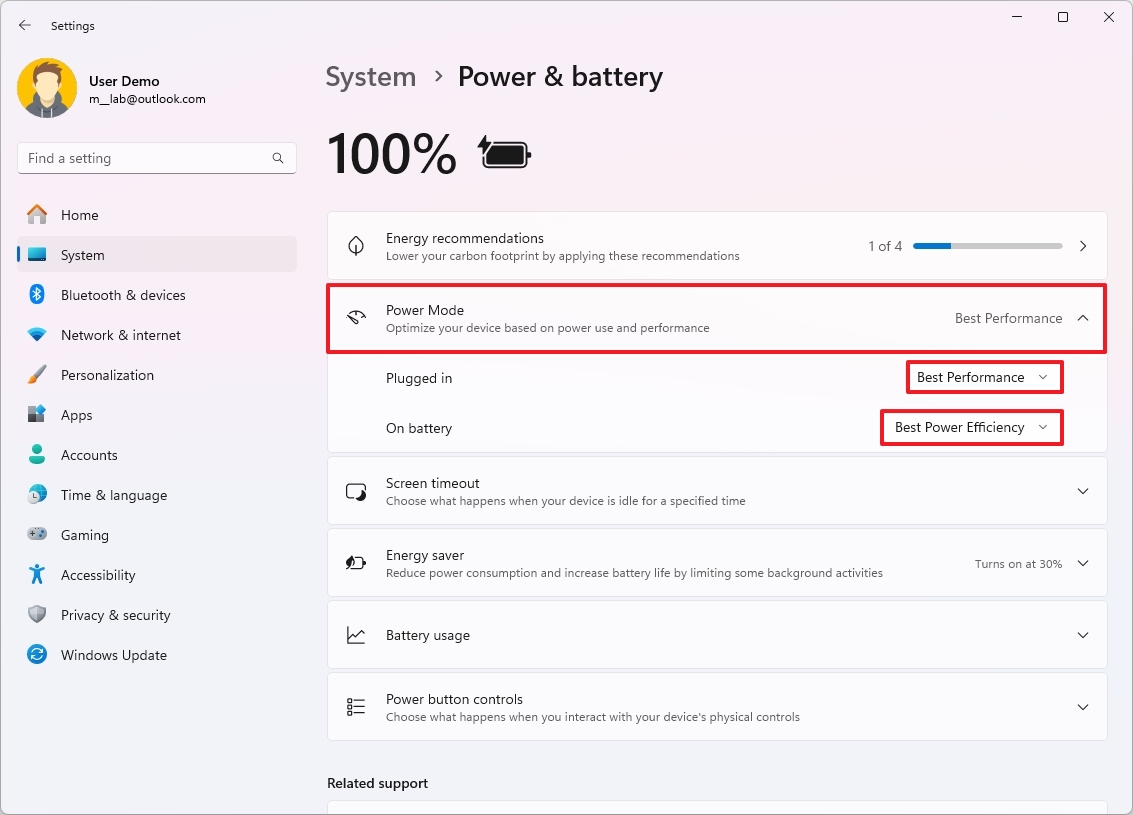
Once you complete the steps, the new power scheme will apply to the device.
On Windows 10, you could cycle through the power modes from the Taskbar, but on Windows 11, you can only do this from the "Power" settings or using the legacy settings or Command Prompt.
How to adjust power modes through Control Panel
To change the power mode for battery life or high performance, use these steps:
- Open Control Panel.
- Click on Hardware and Sound.
- Click on Power Options.
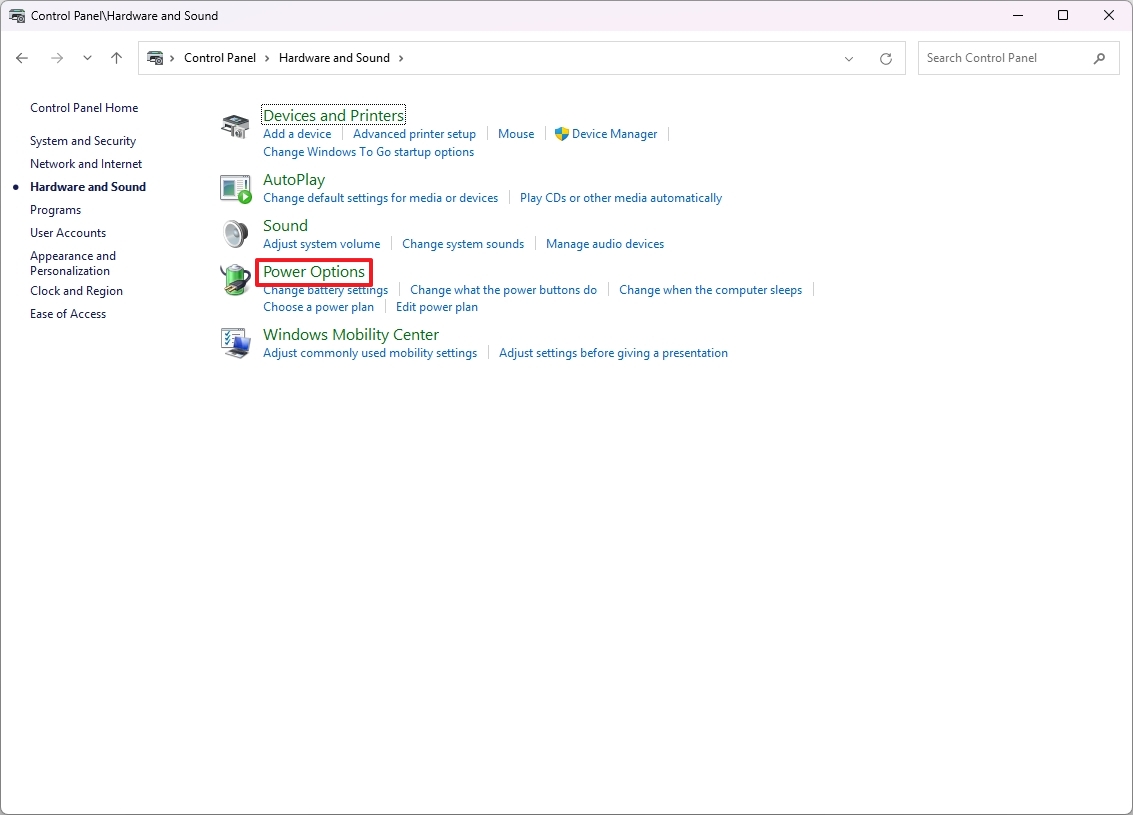
- Choose from one of the available power plans:
- Balanced: The system automatically balances power and performance for an optimal experience.
- Power Saver: This option preserves the most power while lowering the system's performance. It offers the most battery life if you use a laptop.
- High performance: It uses the most energy but offers the most performance.
- Ultimate Performance: If available on your high-end device, this option prioritizes performance over energy efficiency, even more than the "High performance" option.
- Quick note: The available power plans may differ since manufacturers can sometimes create or remove custom modes.
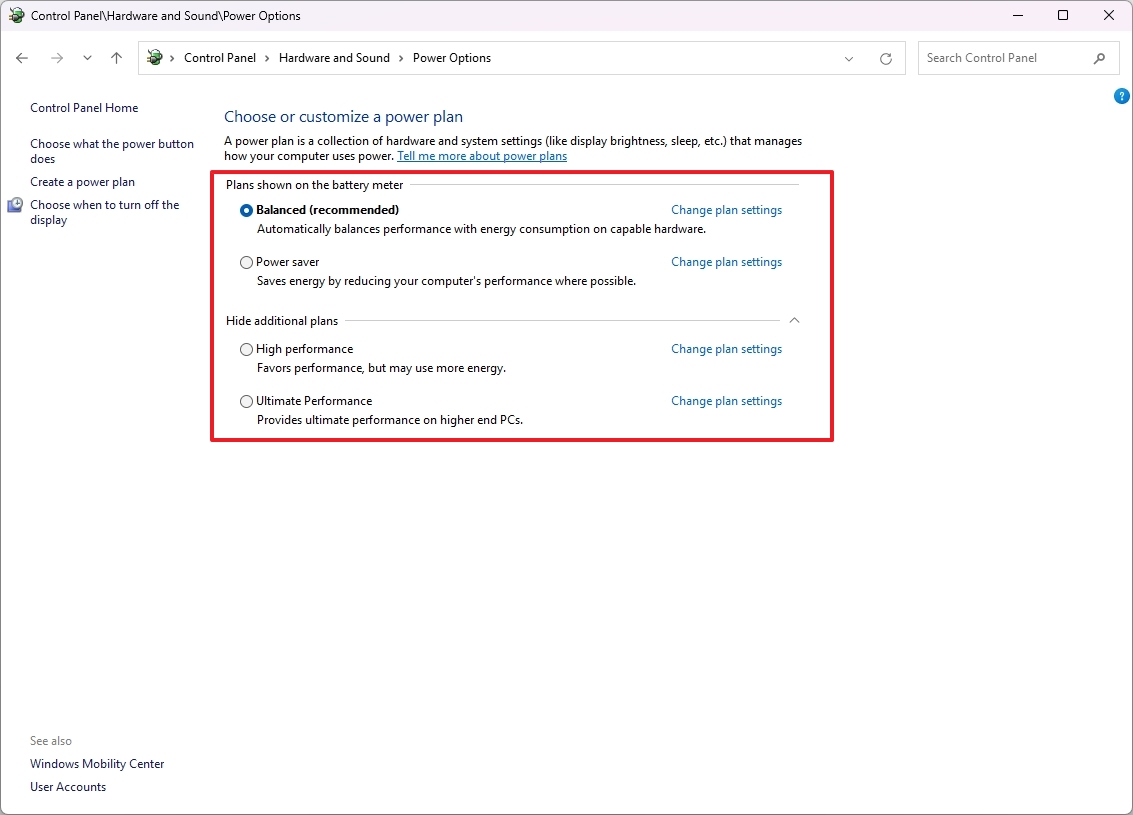
After you complete the steps, the Windows device will start using the power mode you specified to improve battery or performance.
How to adjust power modes with Command Prompt
To choose between balanced, high-performance, or power-saver modes with Command Prompt, use these steps:
- Open Start.
- Search for Command Prompt, right-click the top result, and select the Run as administrator option.
- Type the following command to identify all the power schemes and which one is active, and press Enter: powercfg /list
- Confirm the available power scheme's unique identifier (GUID).
- Quick note: The one with the asterisk (*) is the active power mode.
- Type the following command to change the power mode and press Enter: powercfg /setactive GUID
In the command, change GUID for the unique identifier that corresponds to the power mode you want to use. The number may be different on your computer. For example, this command makes the "Power Saver" the active power mode to save battery life: powercfg /setactive a1841308-3541-4fab-bc81-f71556f20b4a
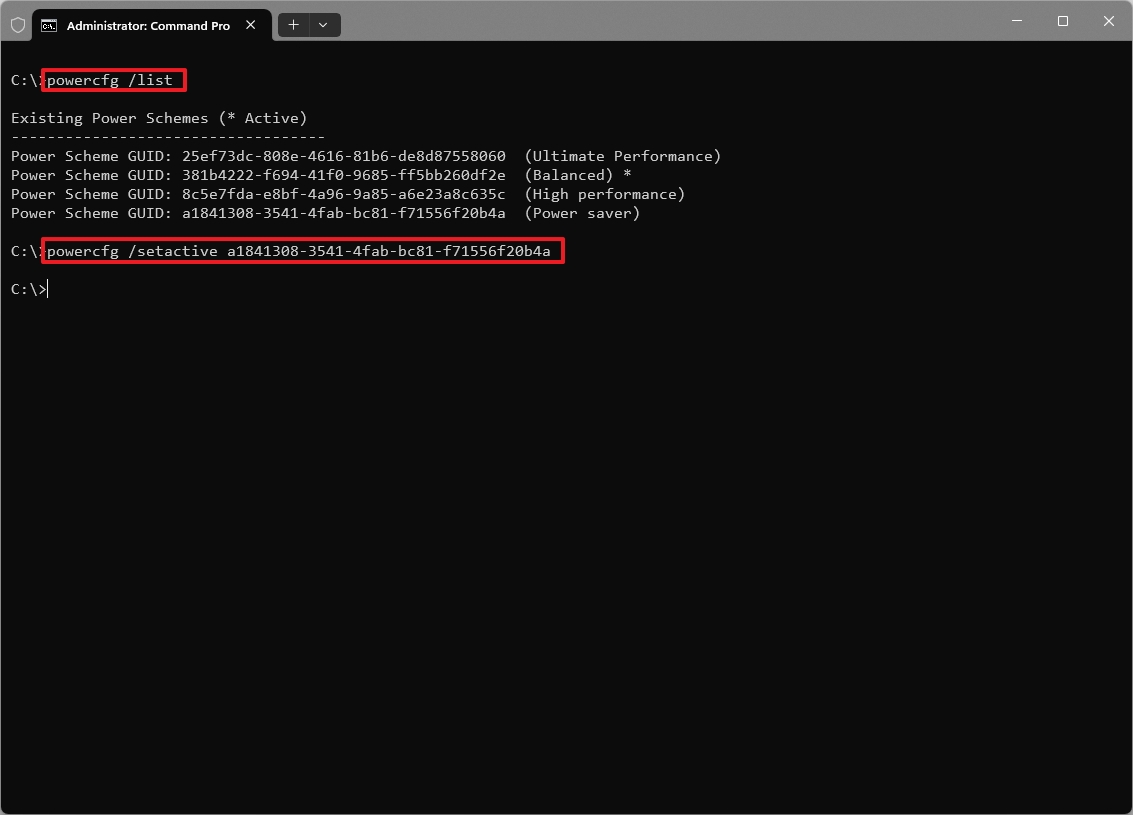
Once you complete the steps, the command will apply the new power mode on Windows 11.
While you can change the power modes in several different ways, when setting the "High performance" or "Power Saver" modes using Control Panel or Command Prompt, you won't be able to change the modes from the Settings app. If this is the case, you'll need to select the "Balanced" mode, and only then will the option be available on the Power settings page.
More resources
For more in-depth insights, troubleshooting tips, and the latest updates on Windows 11 and 10, be sure to explore these resources:


.png?w=600)


