
For those new to 3D, there are so many things to learn, but one of the most complex can be animation. Even if an artist has a background in 2D animation, working in 3D literally adds another dimension. Many professional artists learn on the job and, therefore, are looking for legitimate shortcuts to meet their client’s needs, where 3D applications like Cinema 4D from Maxon come into their own.
Cinema 4D is one of the best 3D modelling software options because it has various animation tools, from a simple and intuitive keyframe system to a powerful, internationally renowned motion graphics system, plus a full character animation suite that can create complex animation rigs for a wide range of creatures, including humans. Sometimes, too many options can get in the way of getting the work done, so it’s great that Cinema 4D also has a range of deformation systems that can create what appear to be complex animations using a straightforward system based on splines.
Splines are essentially lines in 3D space, which can be straight, curved or a mixture of the two, and they can be used for many things in Cinema 4D, from modelling to animation (especially on one of the best 3D modelling laptops). A single spline can be used for both these tasks simultaneously, but for now let’s keep things simple.
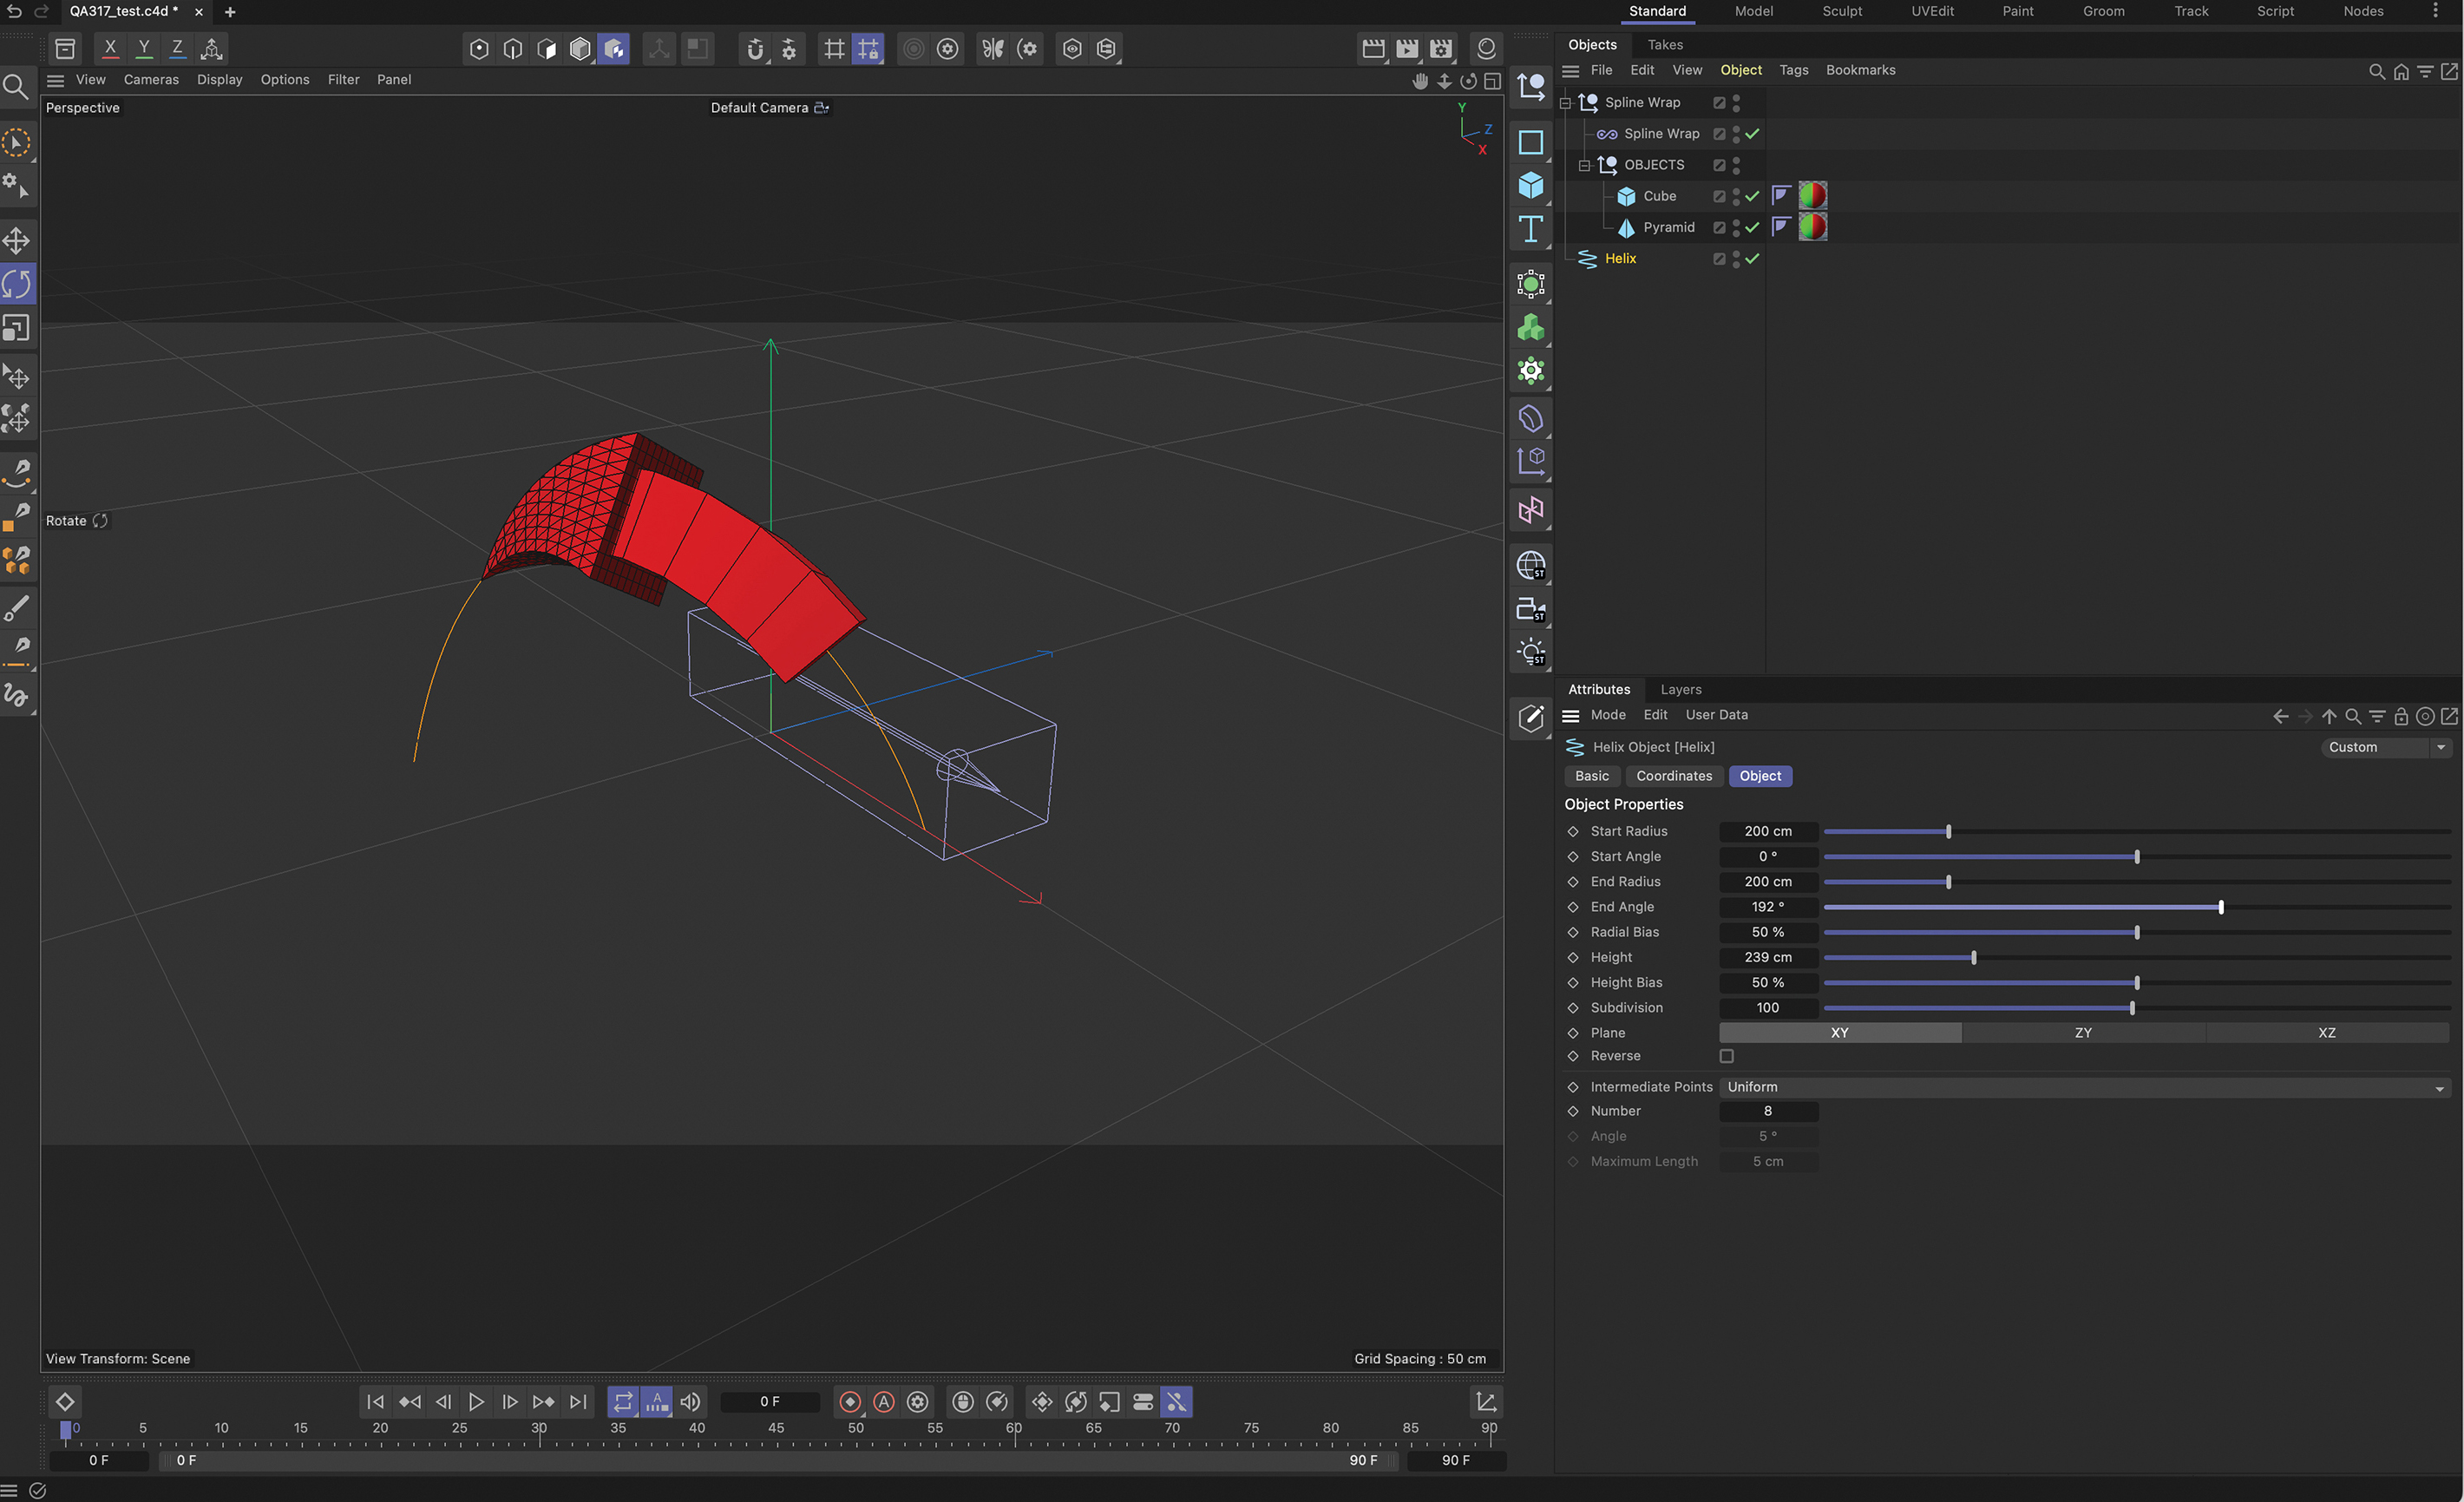
While the Spline Wrap can do a lot of the heavy lifting with just two keyframes on the Offset slider when using parametric spline objects like the helix, adjusting parameters such as the End Angle on the helix can create an extra level of sophistication for the animation.
Any object in Cinema 4D can have an ‘Align to Spline’ tag placed on it, which moves the object along the length of the spline and keeps it headed in the direction of the spline. This is great for hard-bodied objects such as a plane in flight, but when an object needs to be deformed along the spline as well as move along it, that’s where the Spline Wrap deformer comes in clutch for artists.
The deformer works with practically any element in Cinema 4D that’s placed in the same group as it, and will deform and move an object along the length of the spline. The Spline Wrap also offers a range of extra options, including the ability to resize the object along the length of the spline and interactively twist and rotate it as the object is moved along the spline. Let’s take a closer look at the Spline Wrap deformer in Cinema 4D...
01. Create a spline
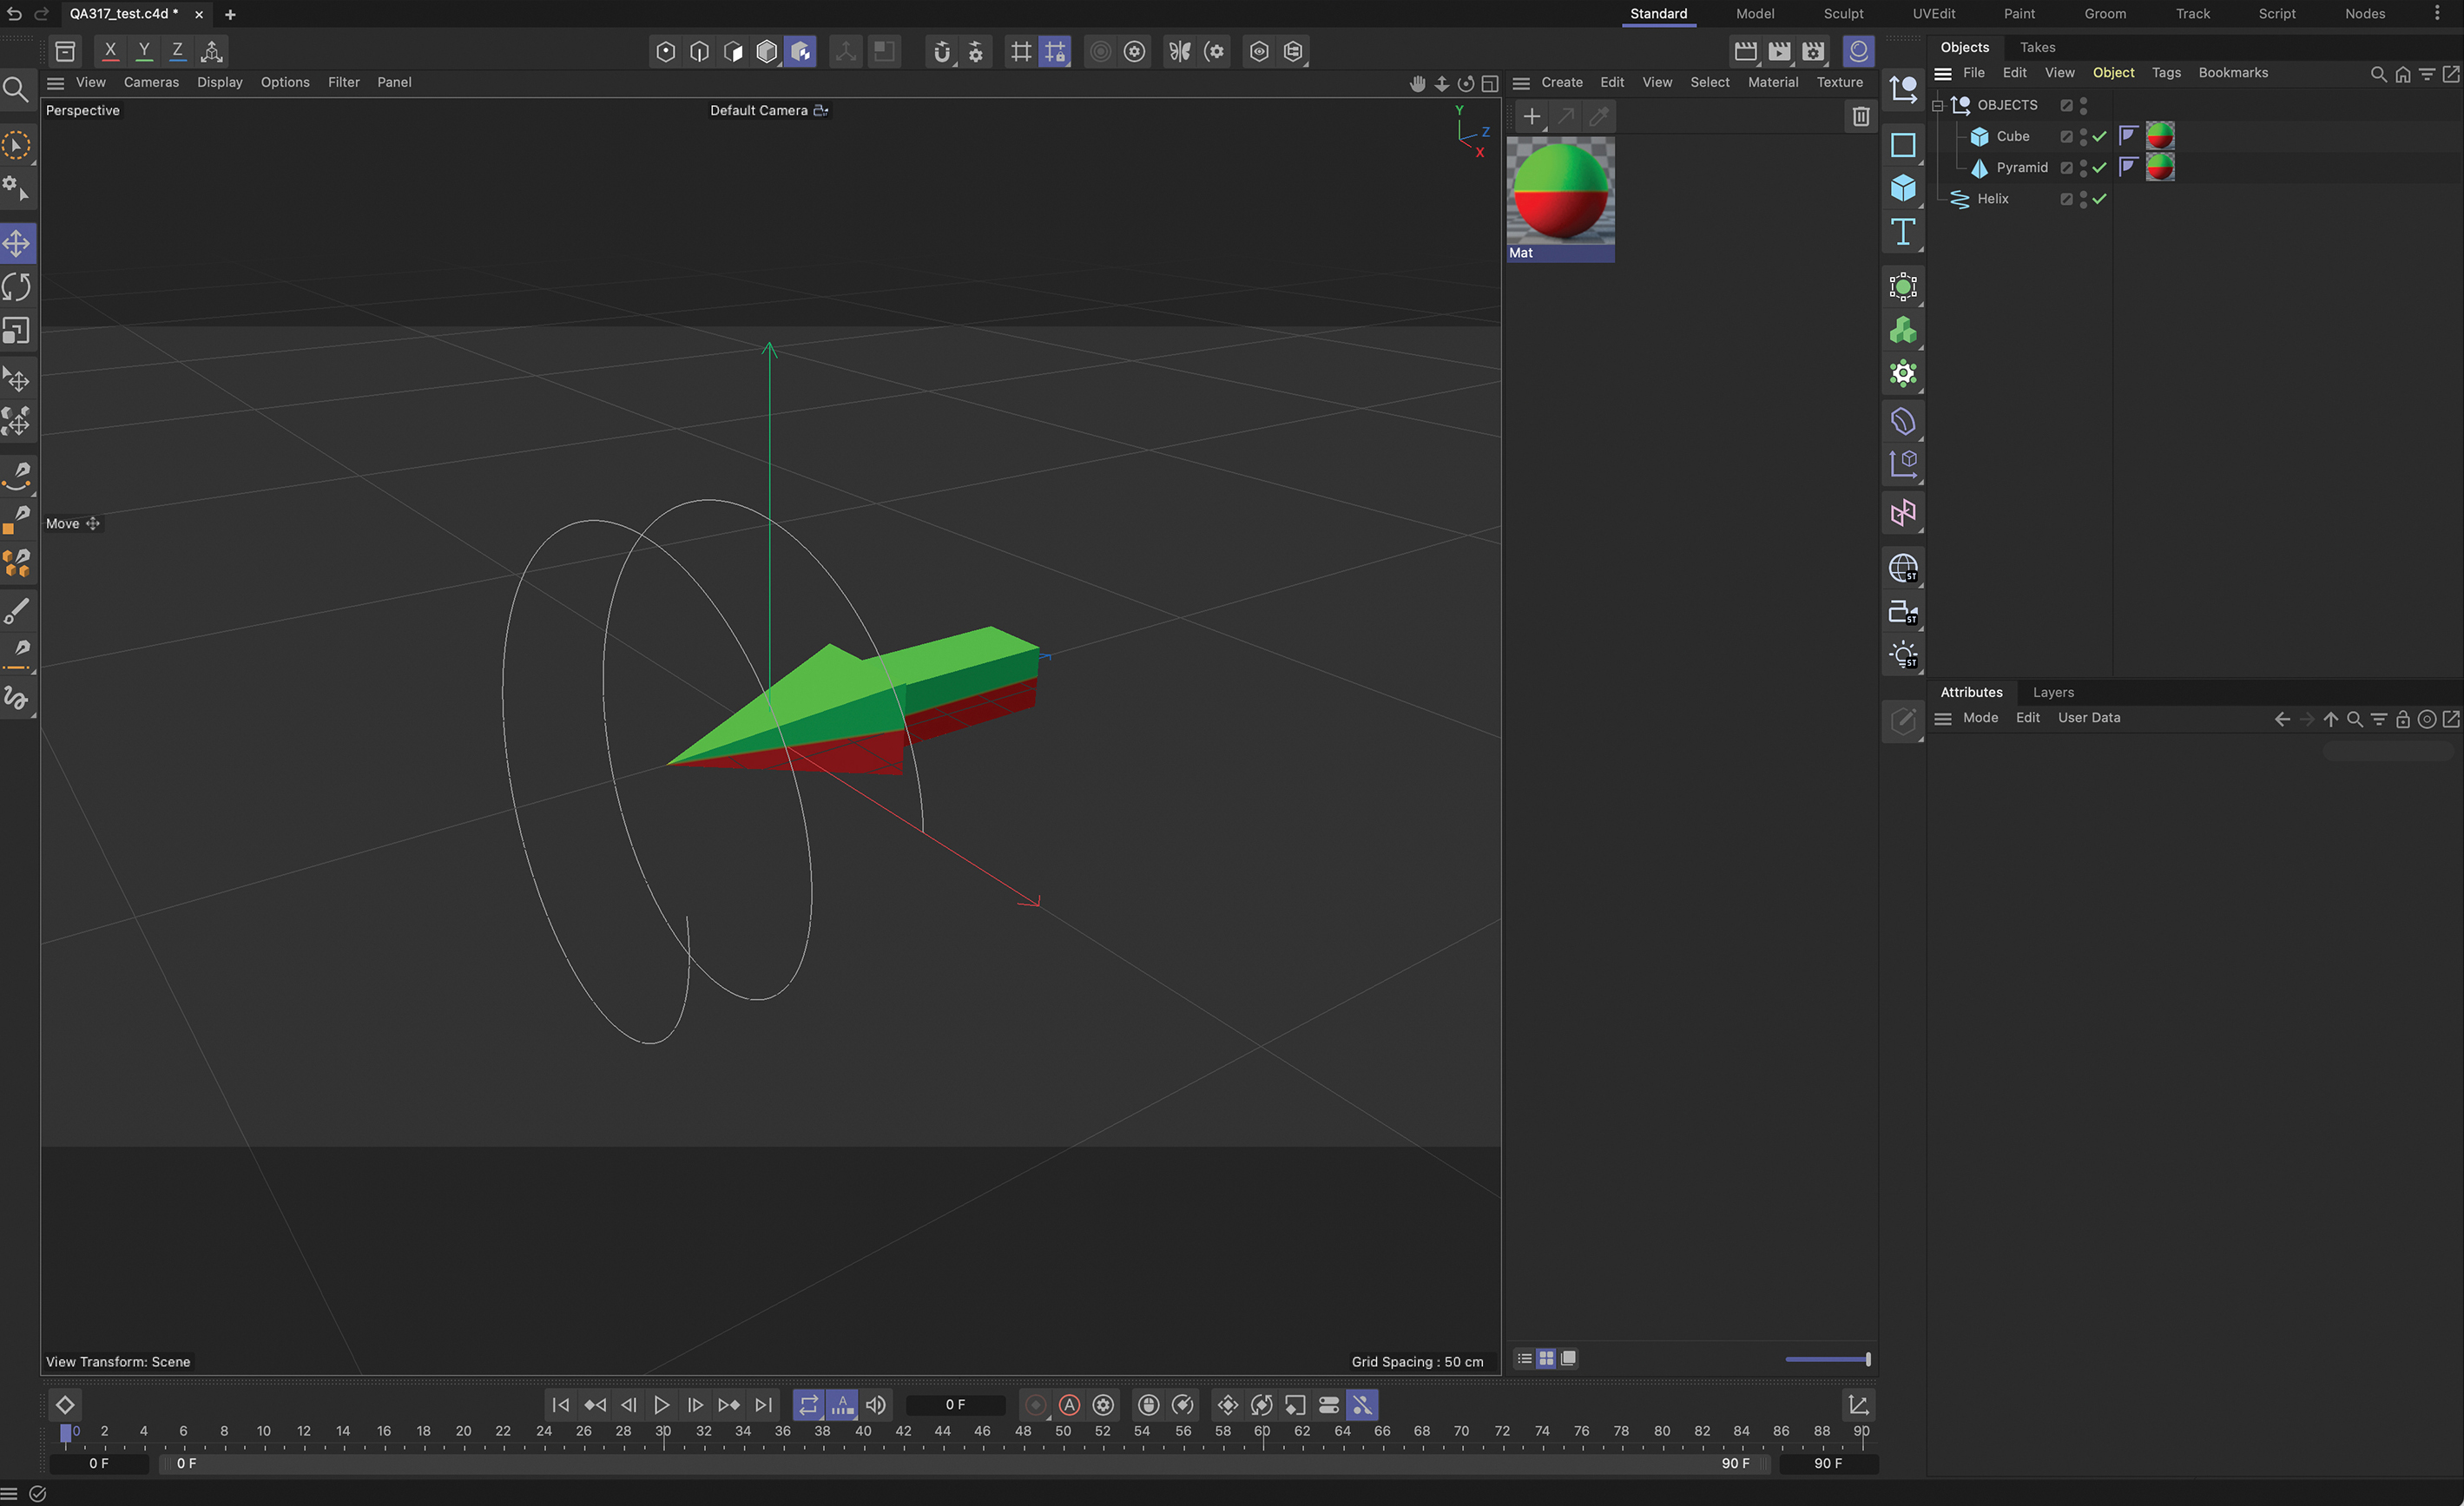
This introductory scene has been created in Cinema 4D 2024. It shows two parametric objects, a cube and a pyramid, grouped in a null and a helix object, which will act as the spline for the Spline Wrap modifier to work with. Any spline will do, whether created from a preset within Cinema 4D, drawn with the Pen tool, or imported from a vector-drawing application such as Adobe Illustrator.
02. Apply the Spline Wrap deformer
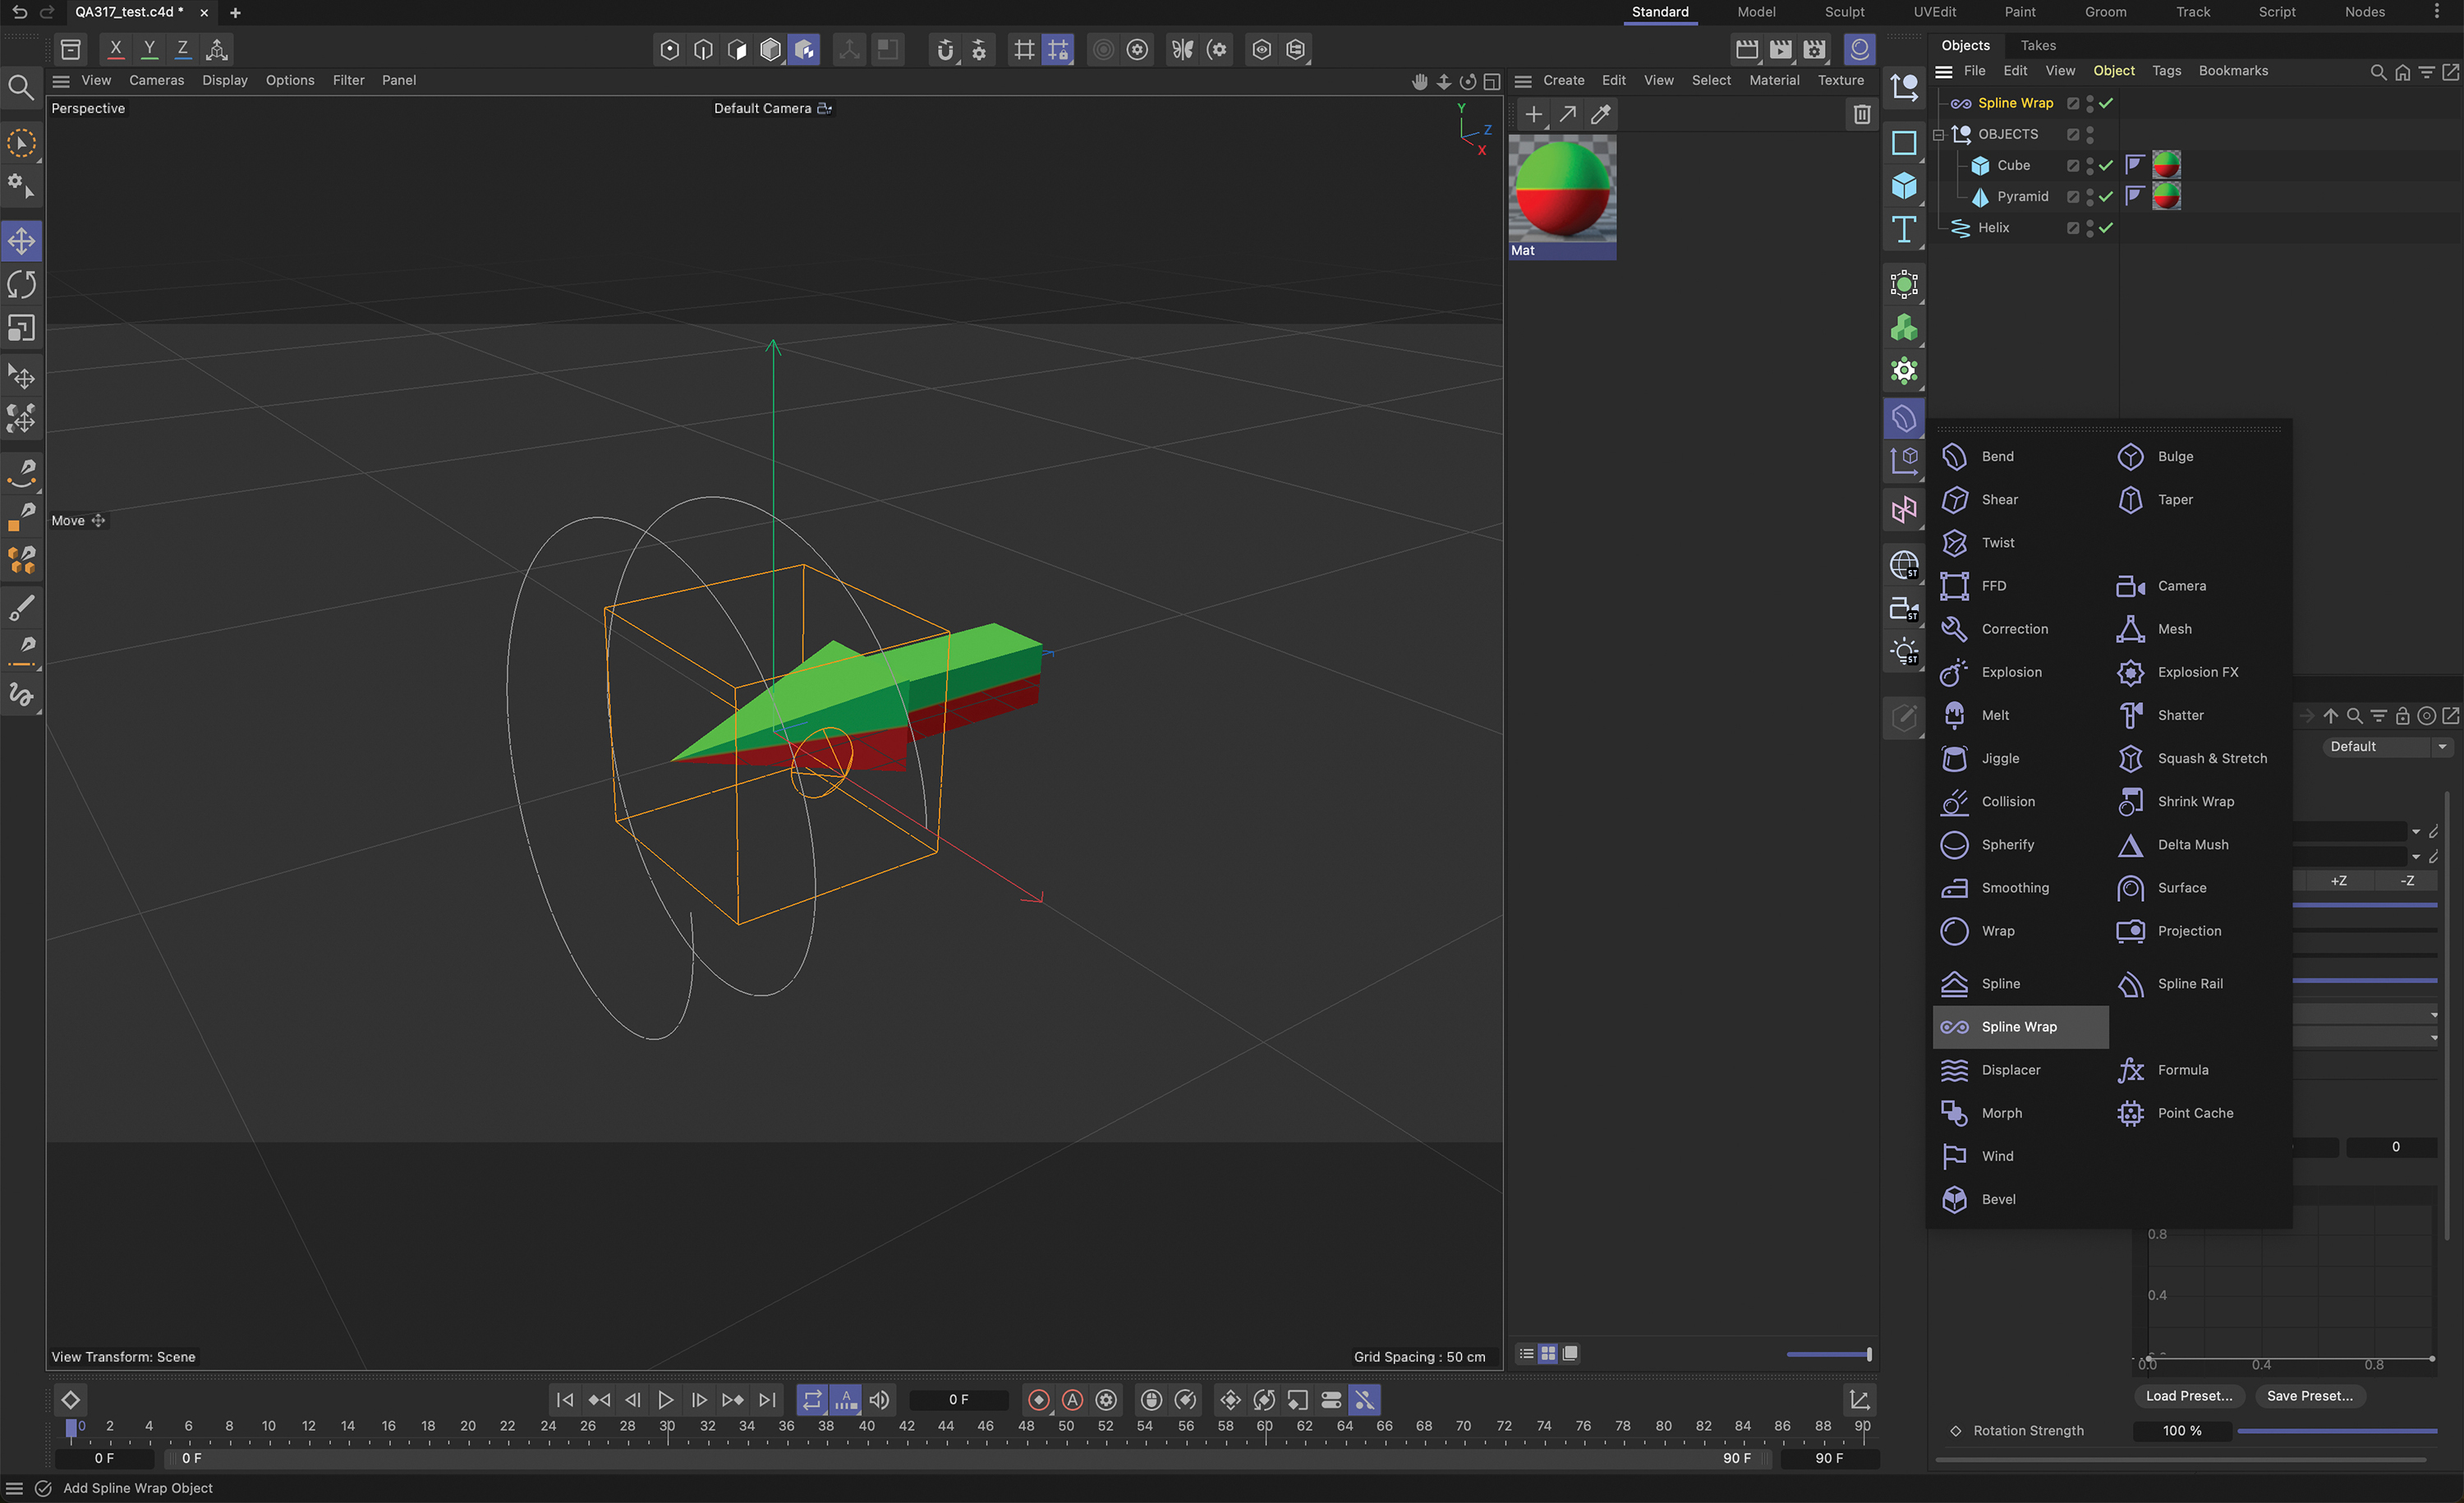
The Spline Wrap is found in the Deformers palette or under Create>Deformer in the Cinema 4D menus. It has a distinct icon like a figure of eight on its side. Nest the deformer in a new null, which will mean that when activated, the Spline Wrap will only affect the objects within the new null. Next, add the helix object in the Spline Wrap attributes.
03. Check the attributes
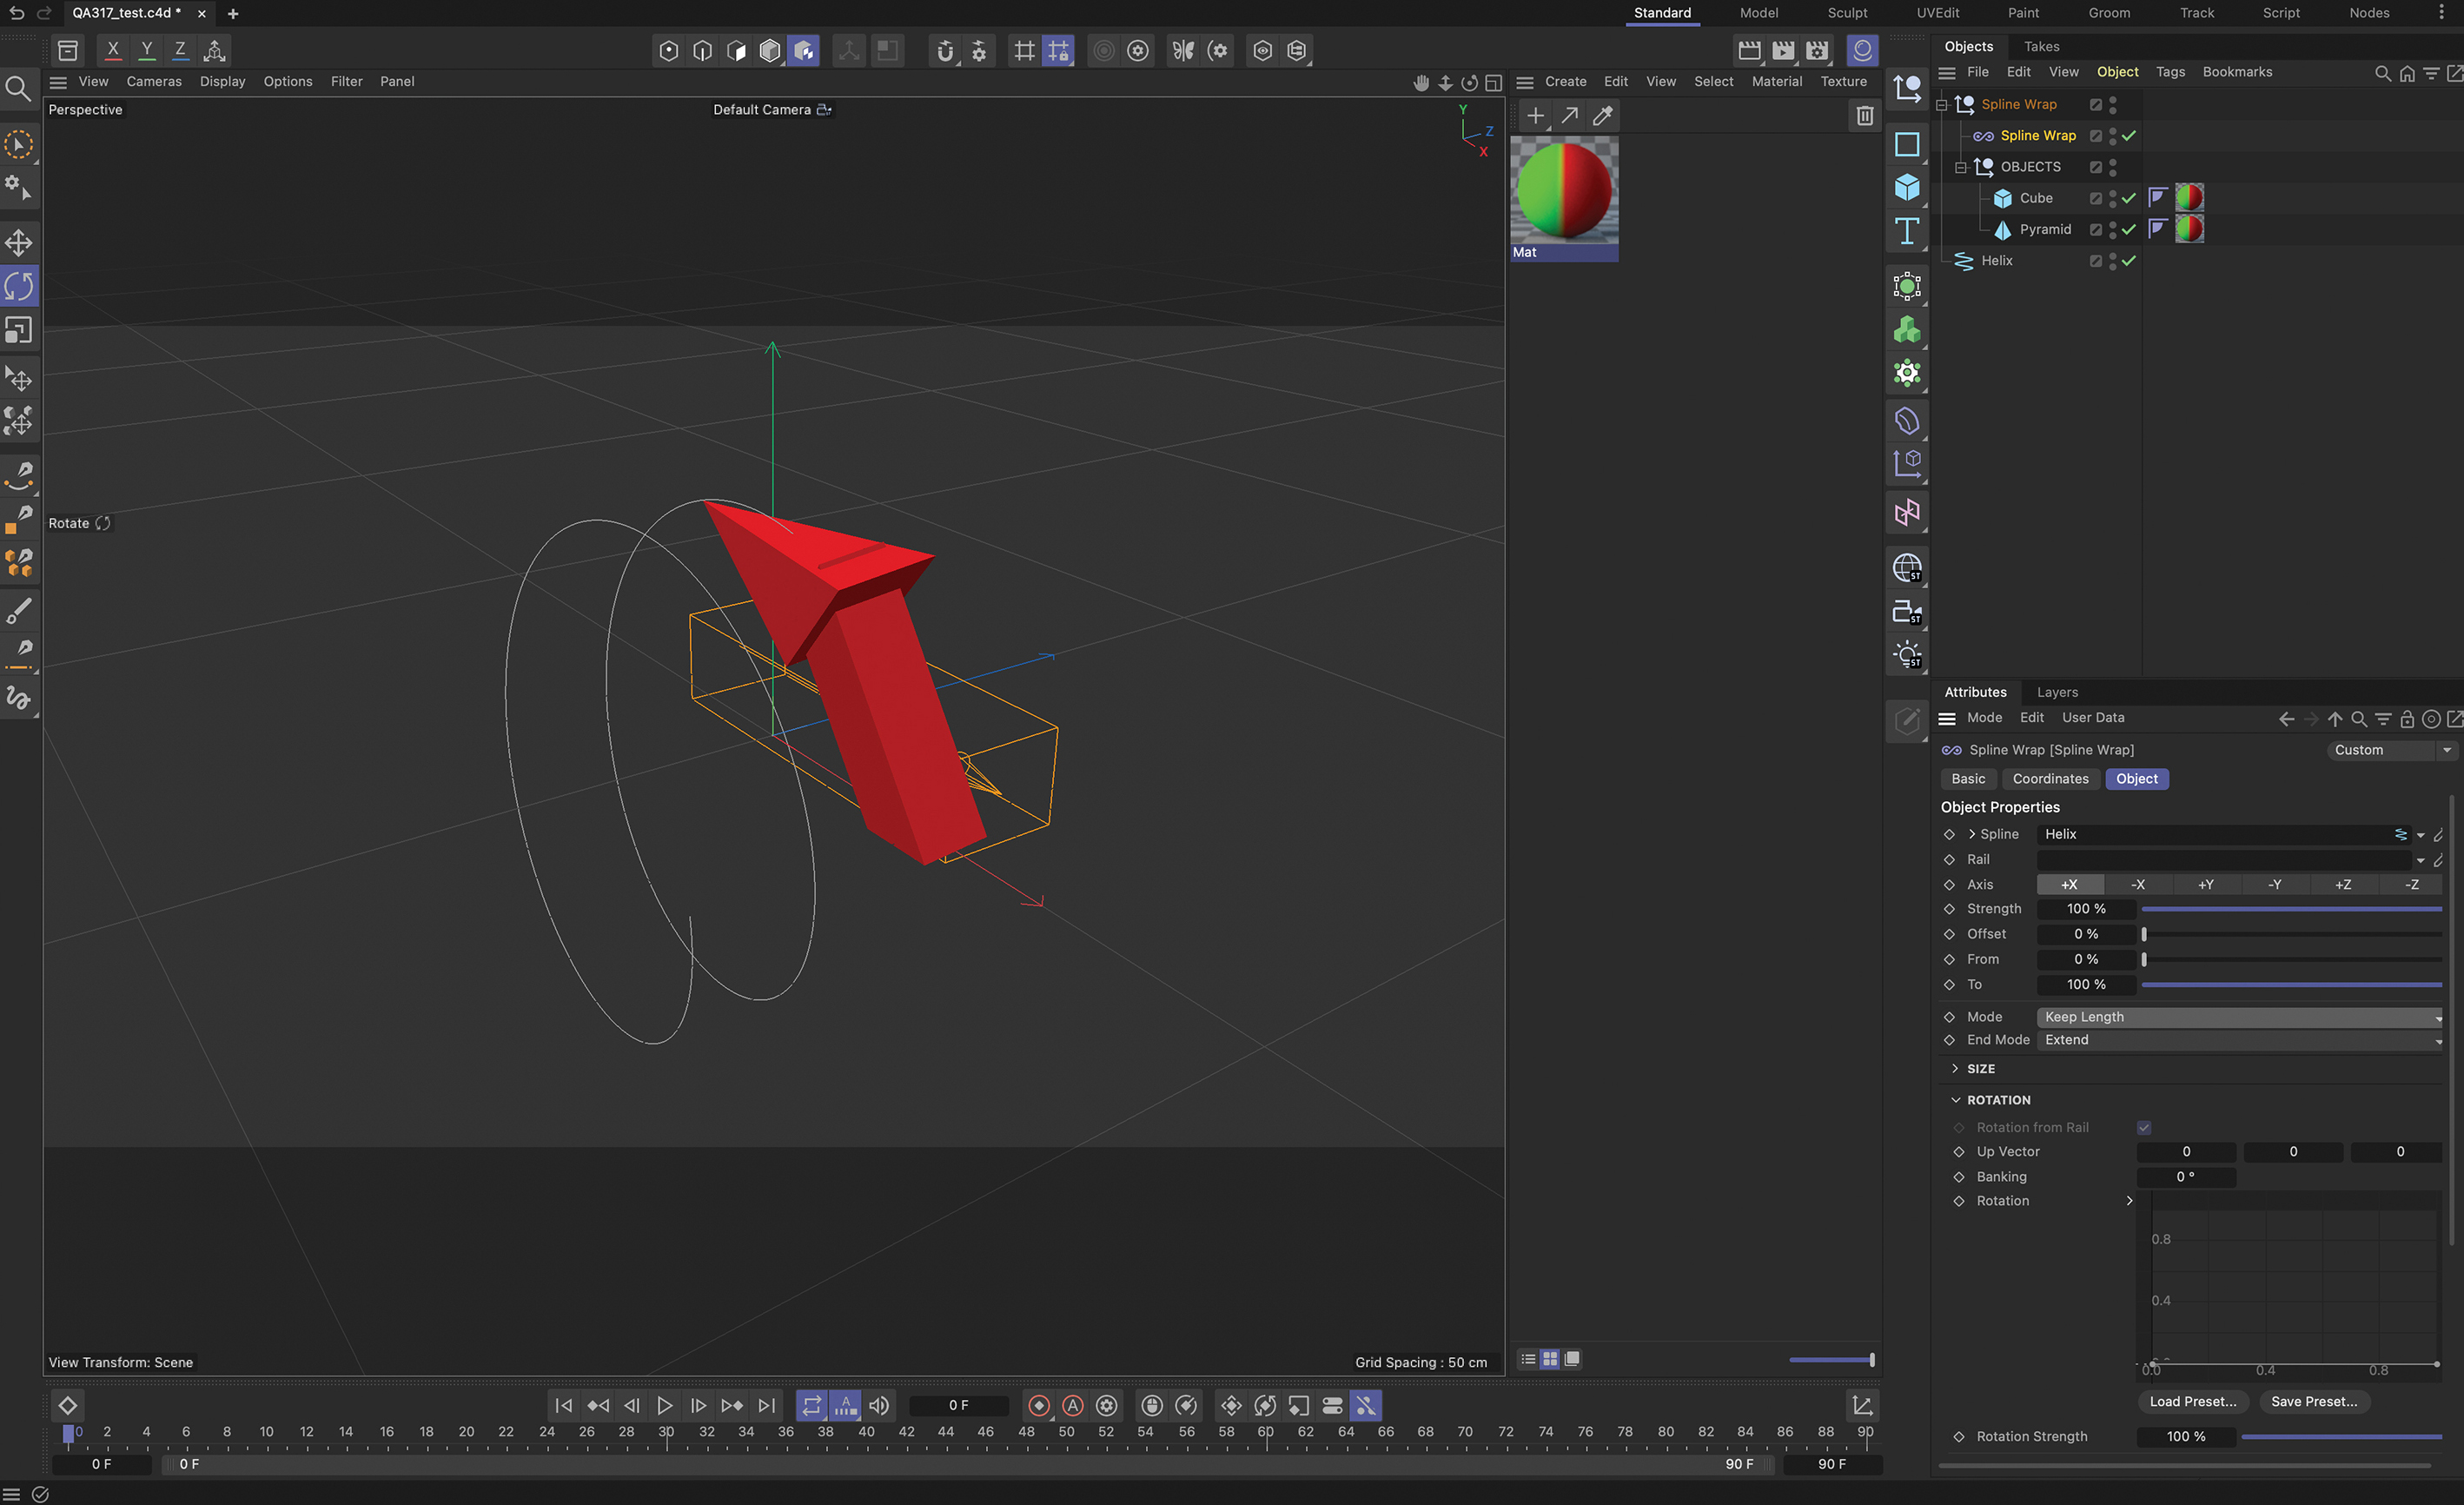
The deformer may not look like it works when first activated, or the objects look deformed. This is potentially because the default state for the Spline Wrap is to stretch the object along the whole length of the spline, or the axis of the Spline Wrap is in the wrong direction. To troubleshoot, in the Spline Wrap attributes switch the Mode dropdown to Keep Length and then orient the objects using the Axis attribute.
04. Create your animation
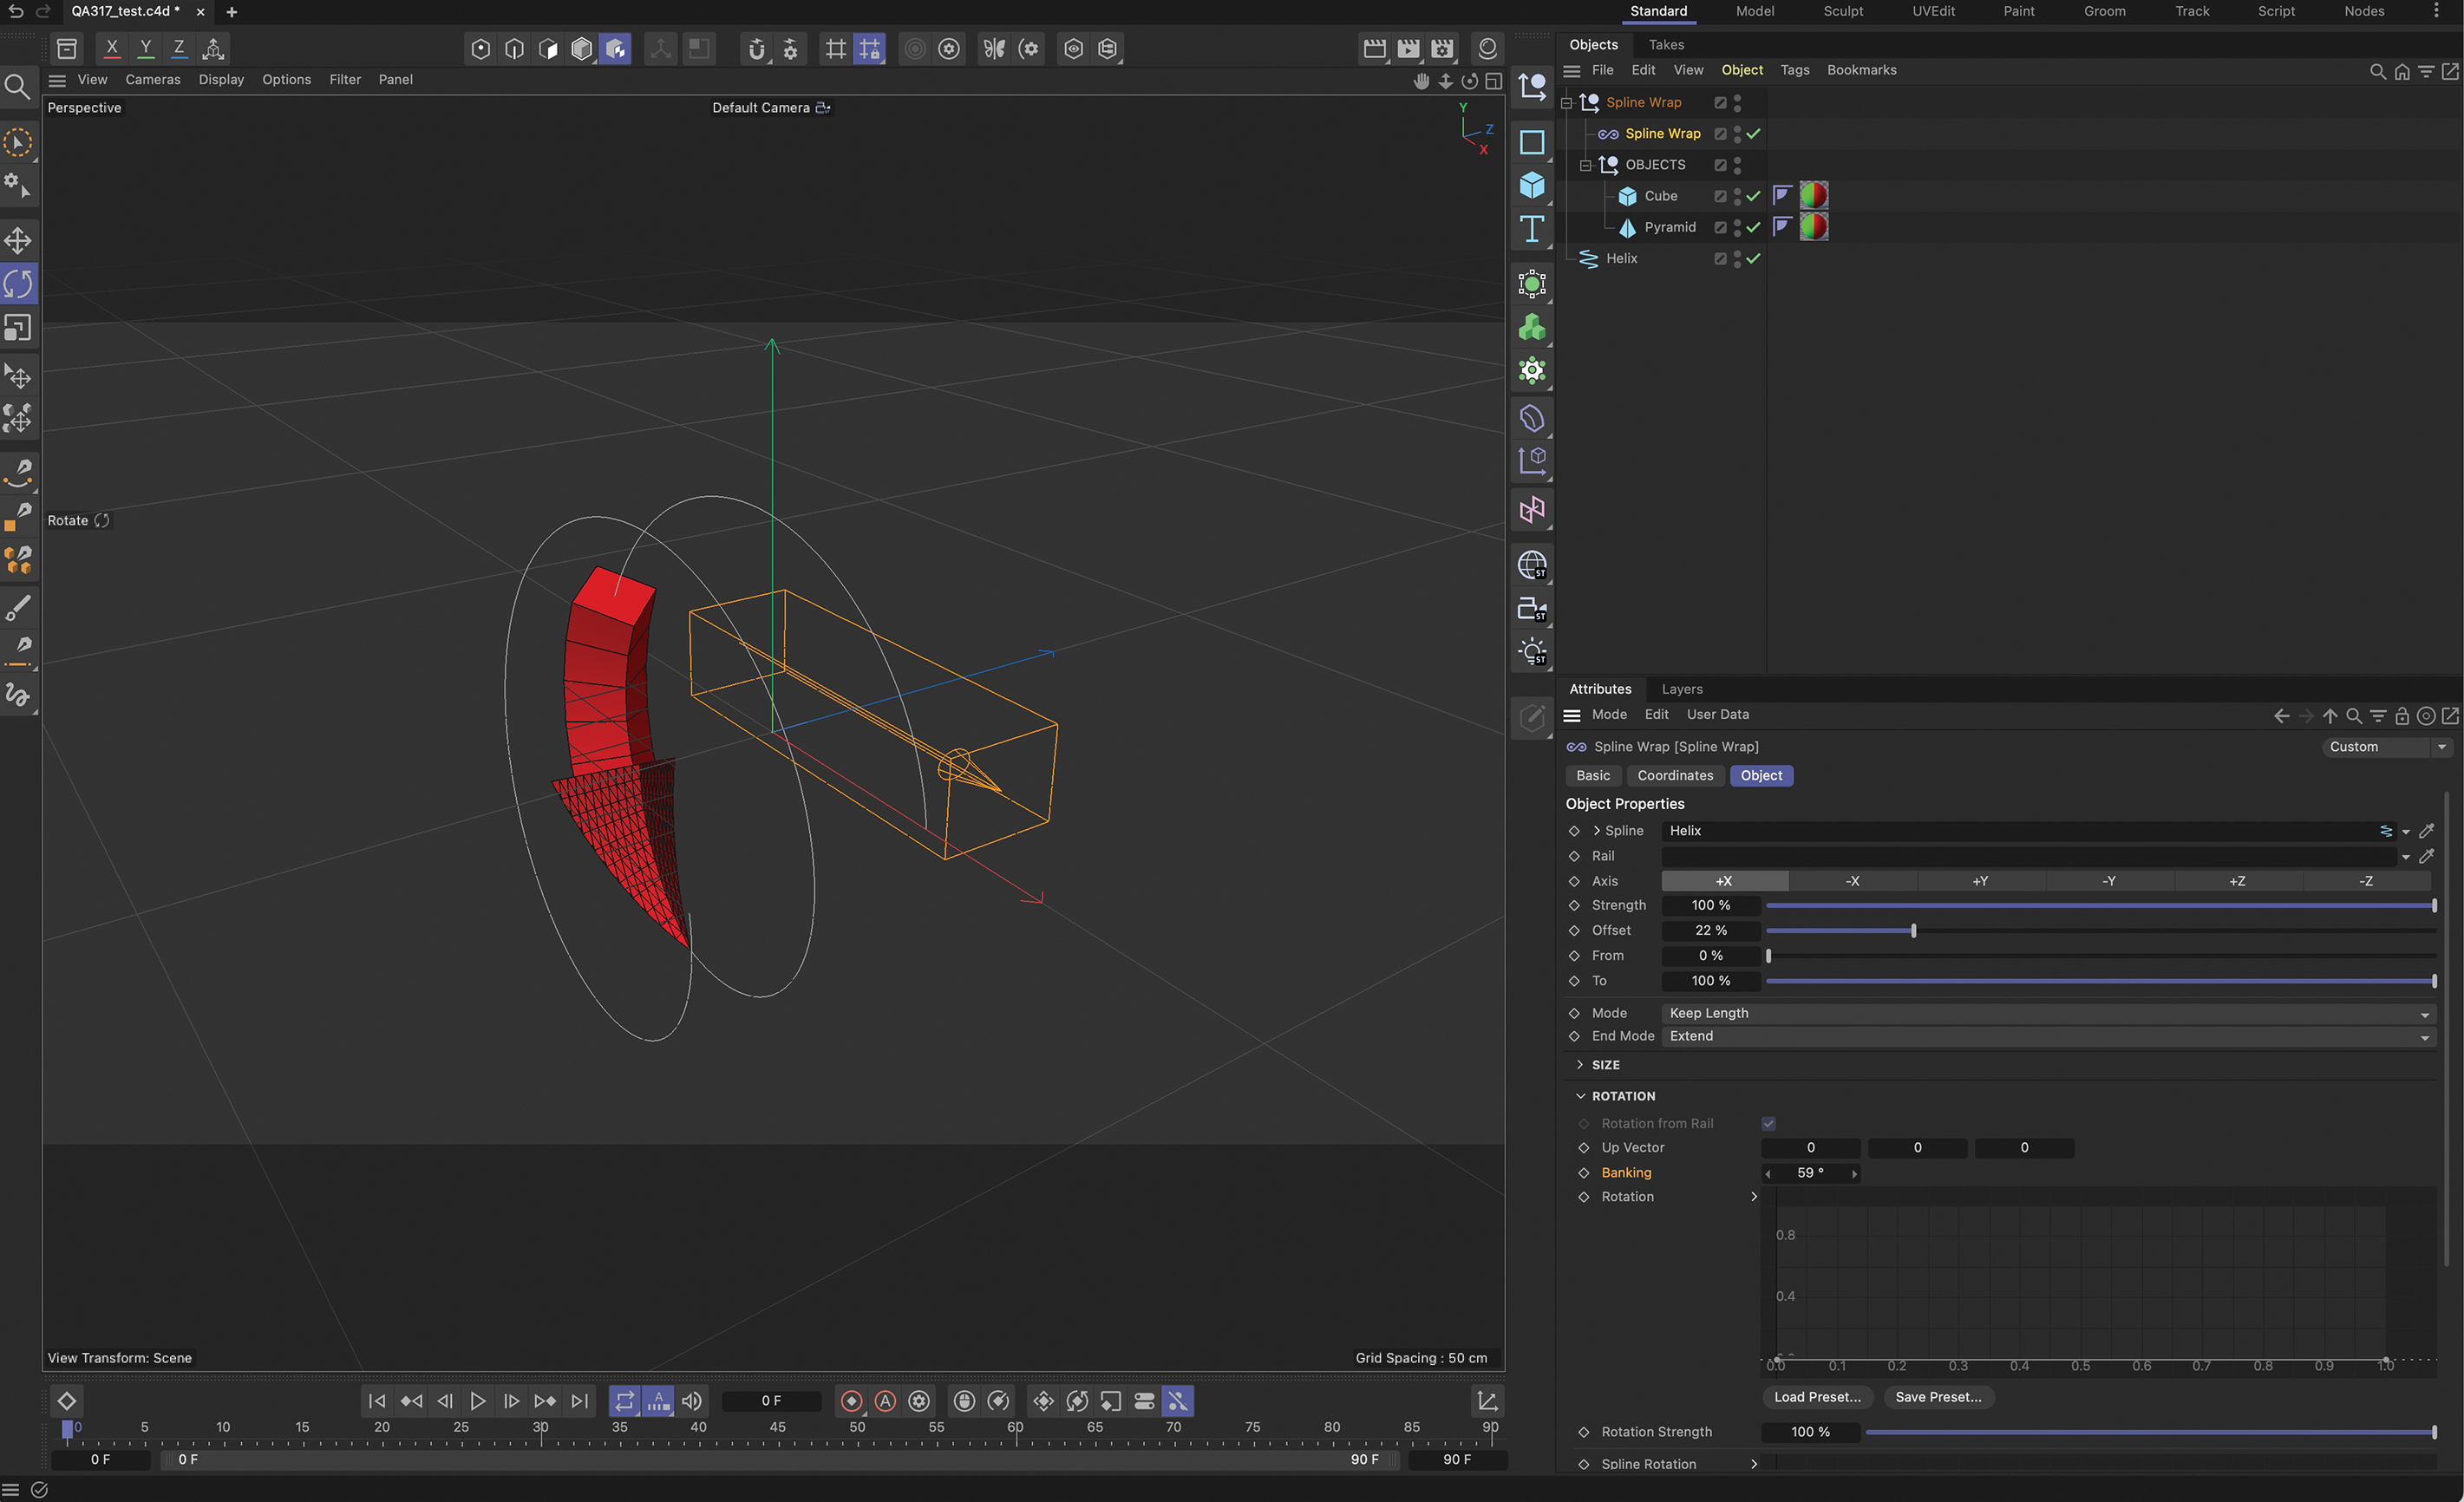
To animate the object using the Spline Wrap, use the Offset slider to move it along the line. If you’re using simple parametric objects, they may require their segments to be increased, which will give the appearance of the objects being made of a soft material rather than a hard one. The Spline Wrap Rotation parameters also allow the objects to be twisted if you need that effect for your animation.
See more Cinema 4D tutorials here.
This content originally appeared in 3D World magazine.


