In this 3ds Max tutorial, I'll be showing you how to create a realistic animation of a moving vehicle. Creating in 3D becomes more and more friendly every passing day with new tools being released, whether this is new AI filmmaking tech or plugins and new 3D software (read our guide to the best 3D modelling software).
These are incredibly helpful for working on various objects and most aid us in one important aspect: creating the most in less time. I do the majority of my work in 3ds Max, and one thing I love is that animations can be quickly modified as many times as we need, allowing us to speed up our process and add complexity.
I’ll be using a plugin called MadCar. The idea here is to create the animation in real-time, which means actually driving the car in the scene just like you would in a video game or real-time platform like Unreal Engine 5. We’ll add dummies and use some of the other tools the plugin brings, including the car’s suspension.
If you want to know about more about the software, you can check out our 3ds Max 2025 review where we run through the features and functions of its latest iteration. Otherwise, read on!
Animate a moving vehicle with 3ds Max
Here's how I used 3ds Max to animate a moving vehicle. Download the assets here to follow along with the tutorial and give it a try for yourself.
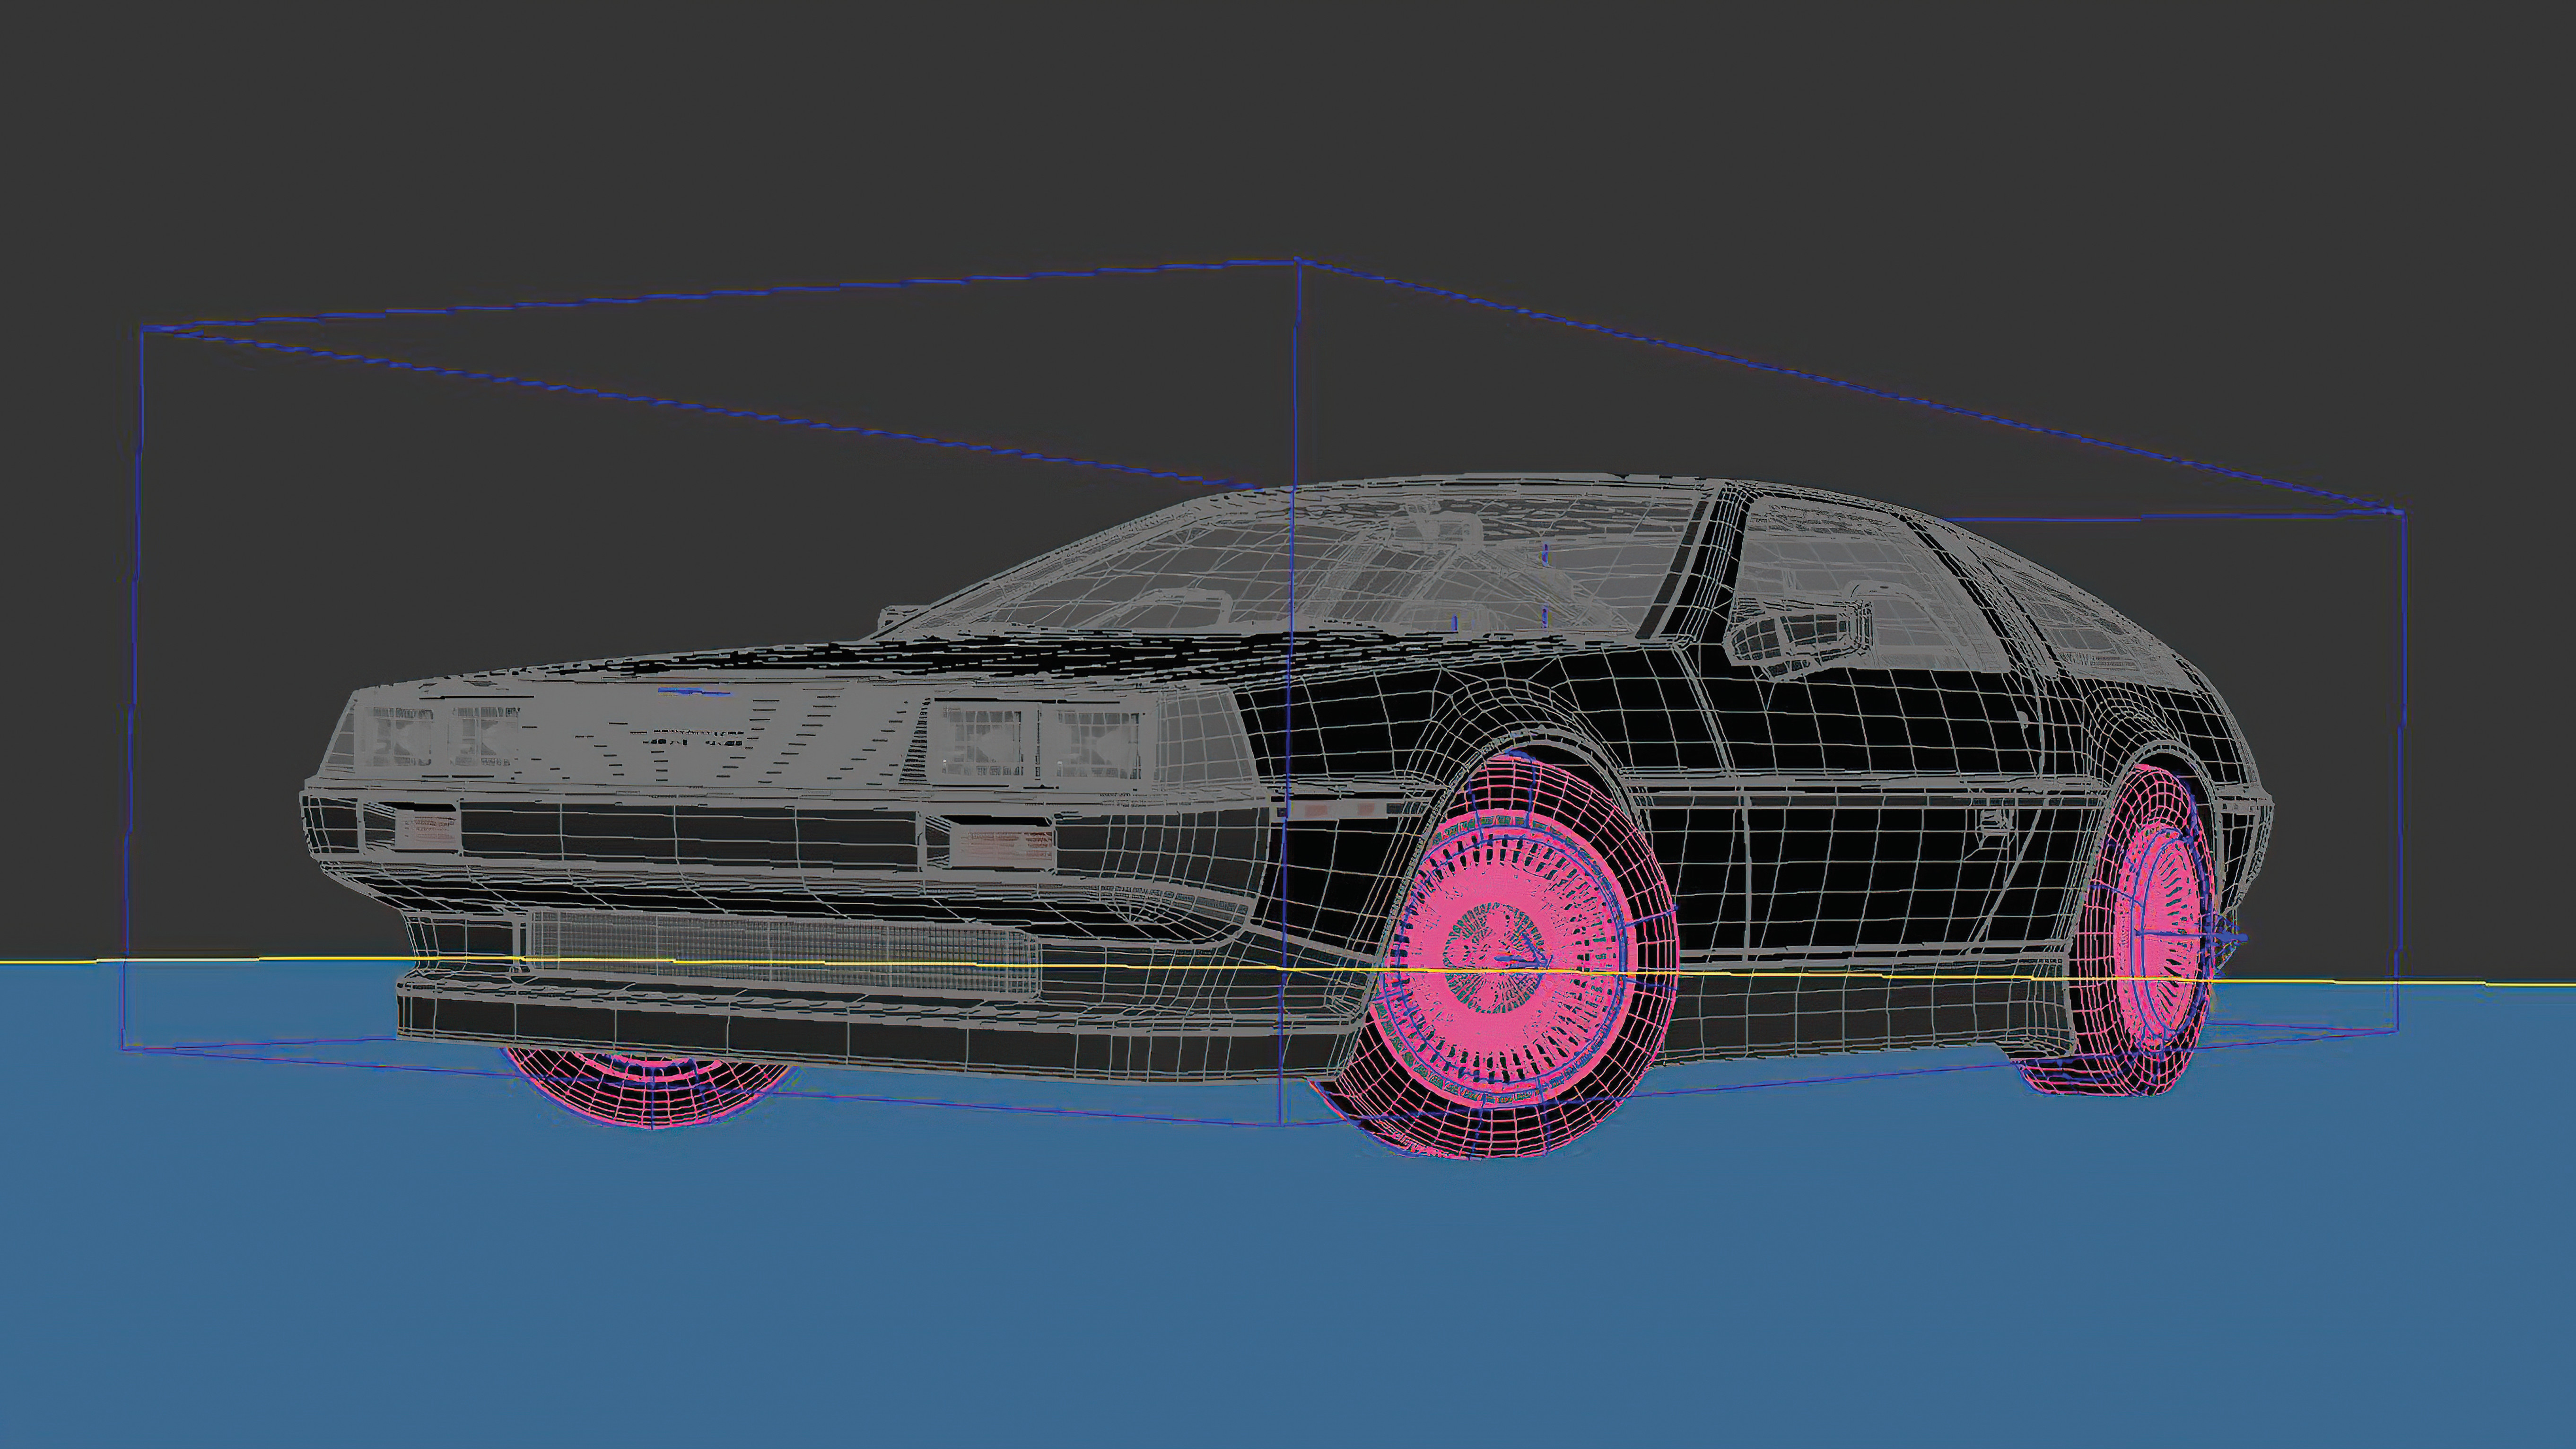
01. Splitting the wheels from the car
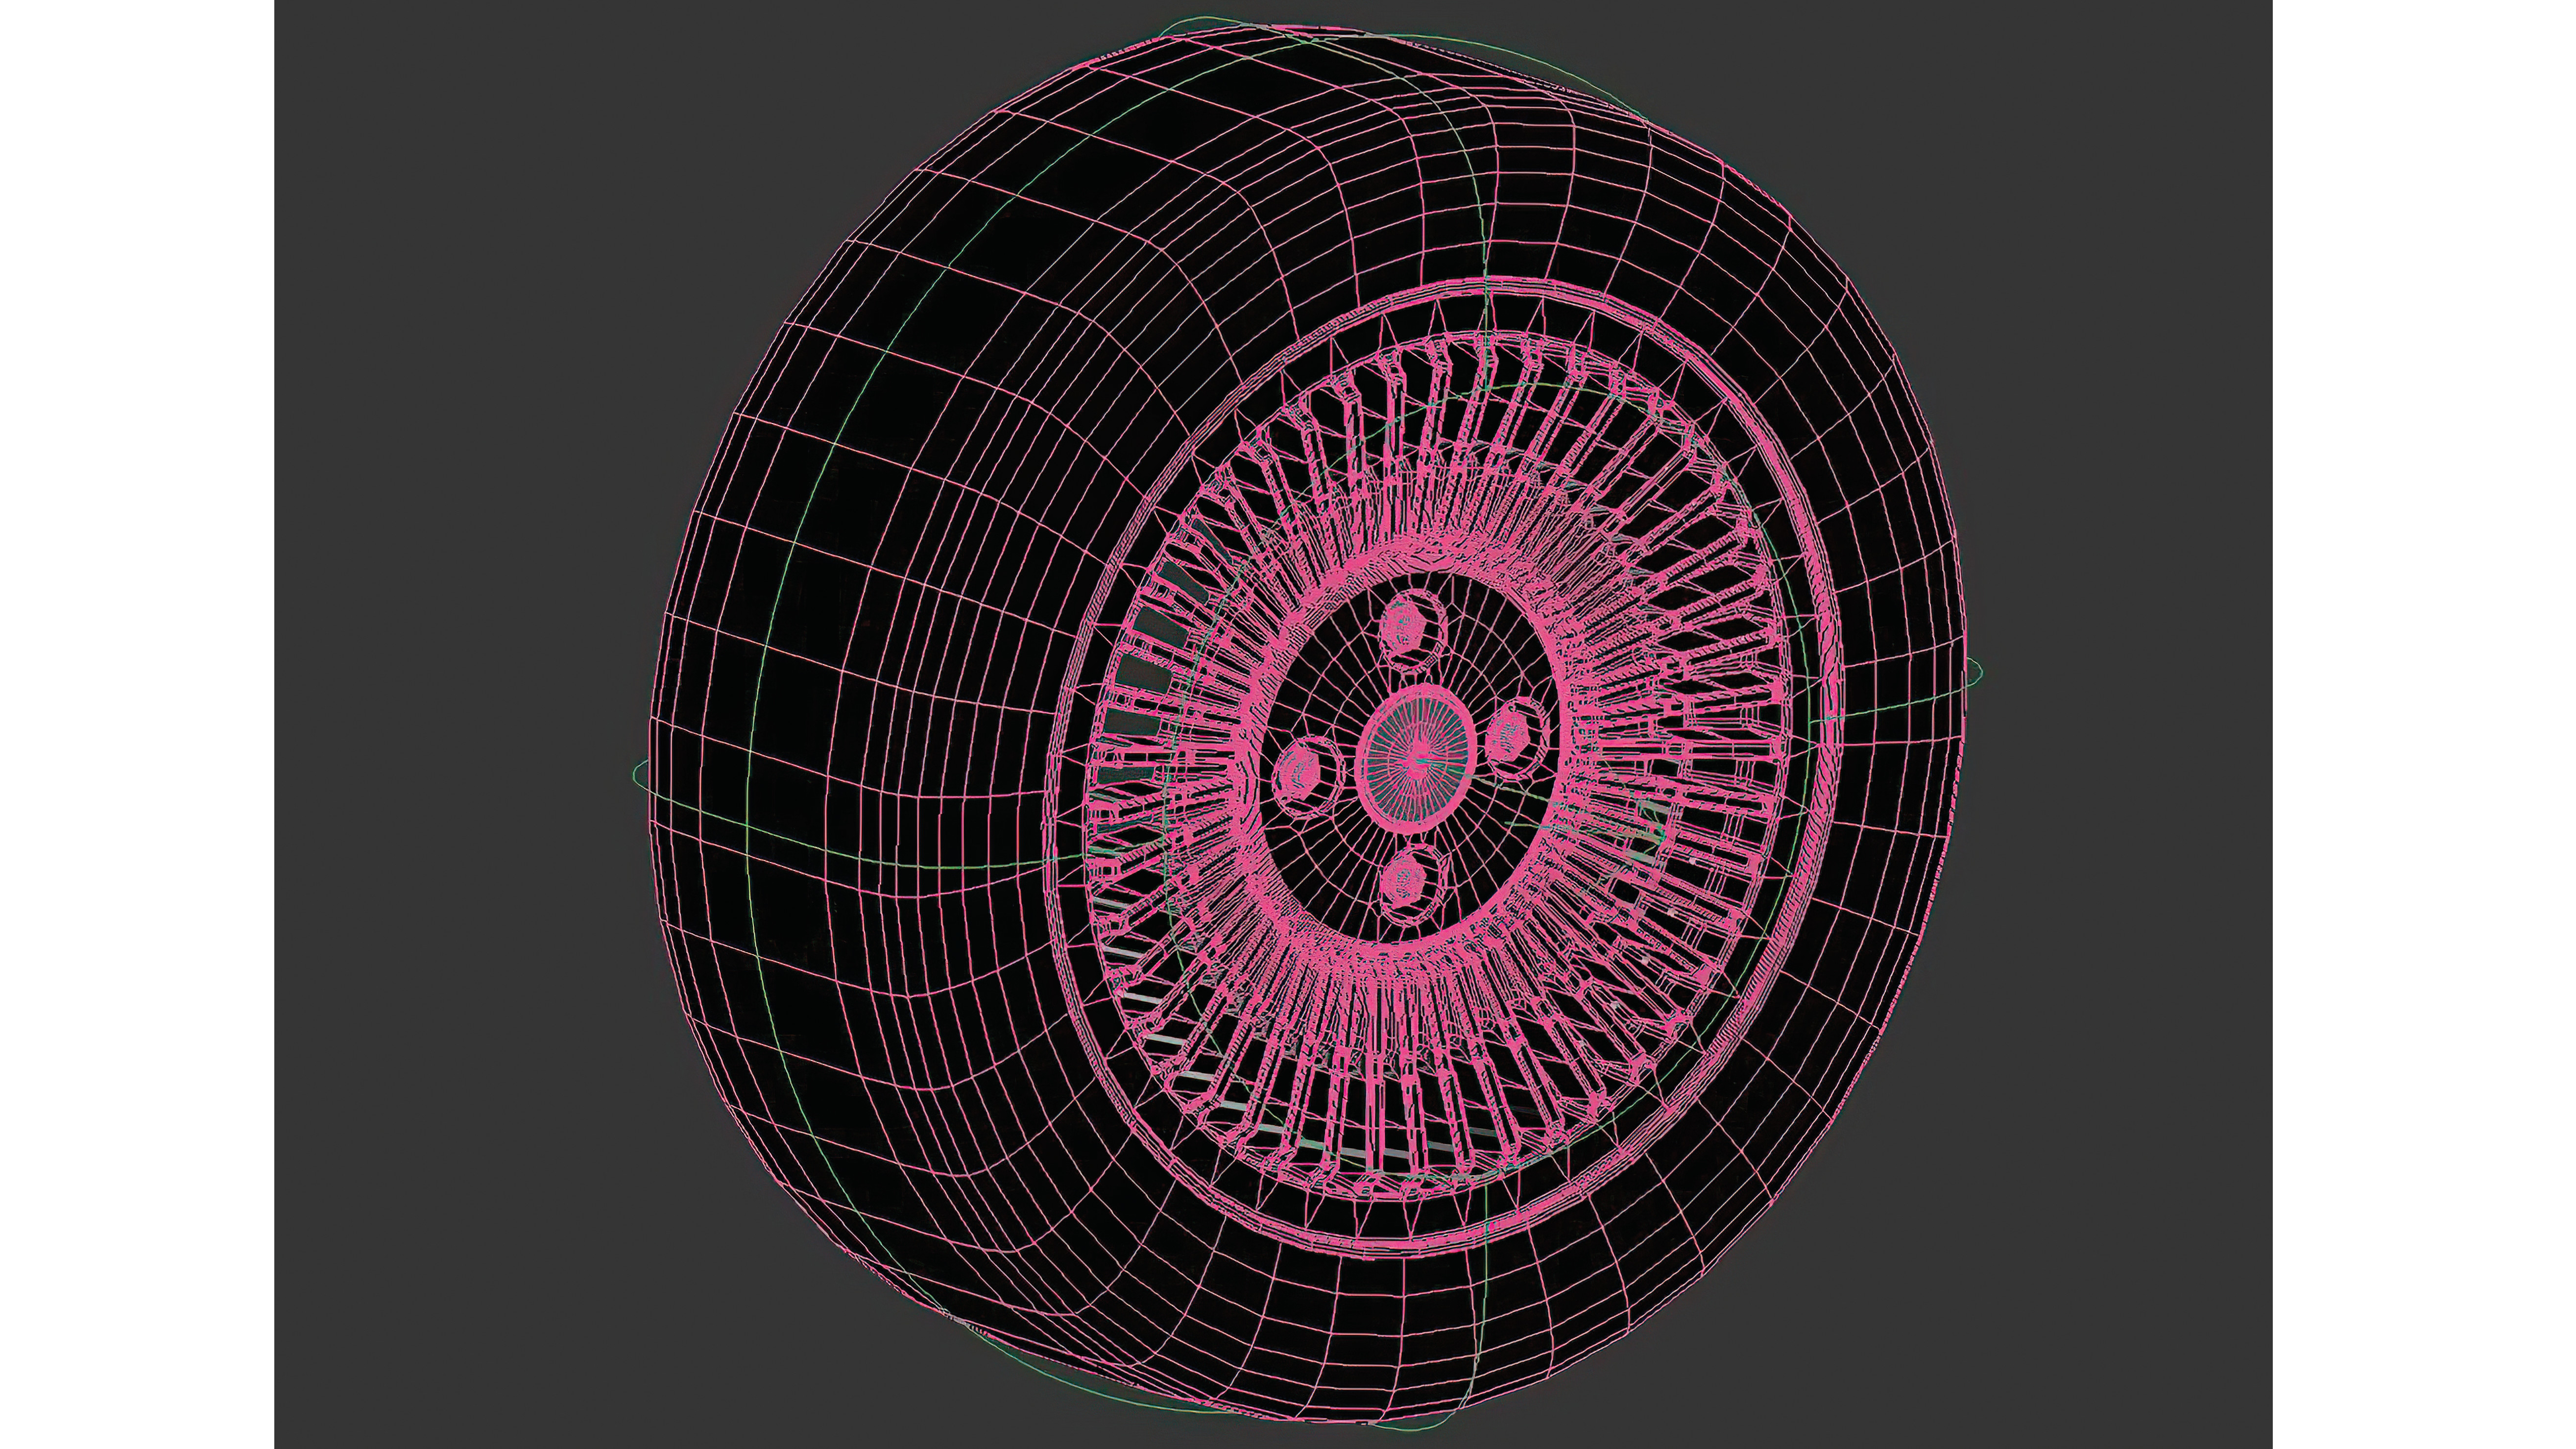
The first step is to select the right model to work with. We can have an amazing sports car with the wheels attached, but it will mean extra work splitting away the wheels and other components. Most of the time I select a model with the wheels separate from the chassis to avoid wasting the time. Once you get the full workflow down, you can use any car model and also place it in your model library.
02. Setting the main wheel dummy
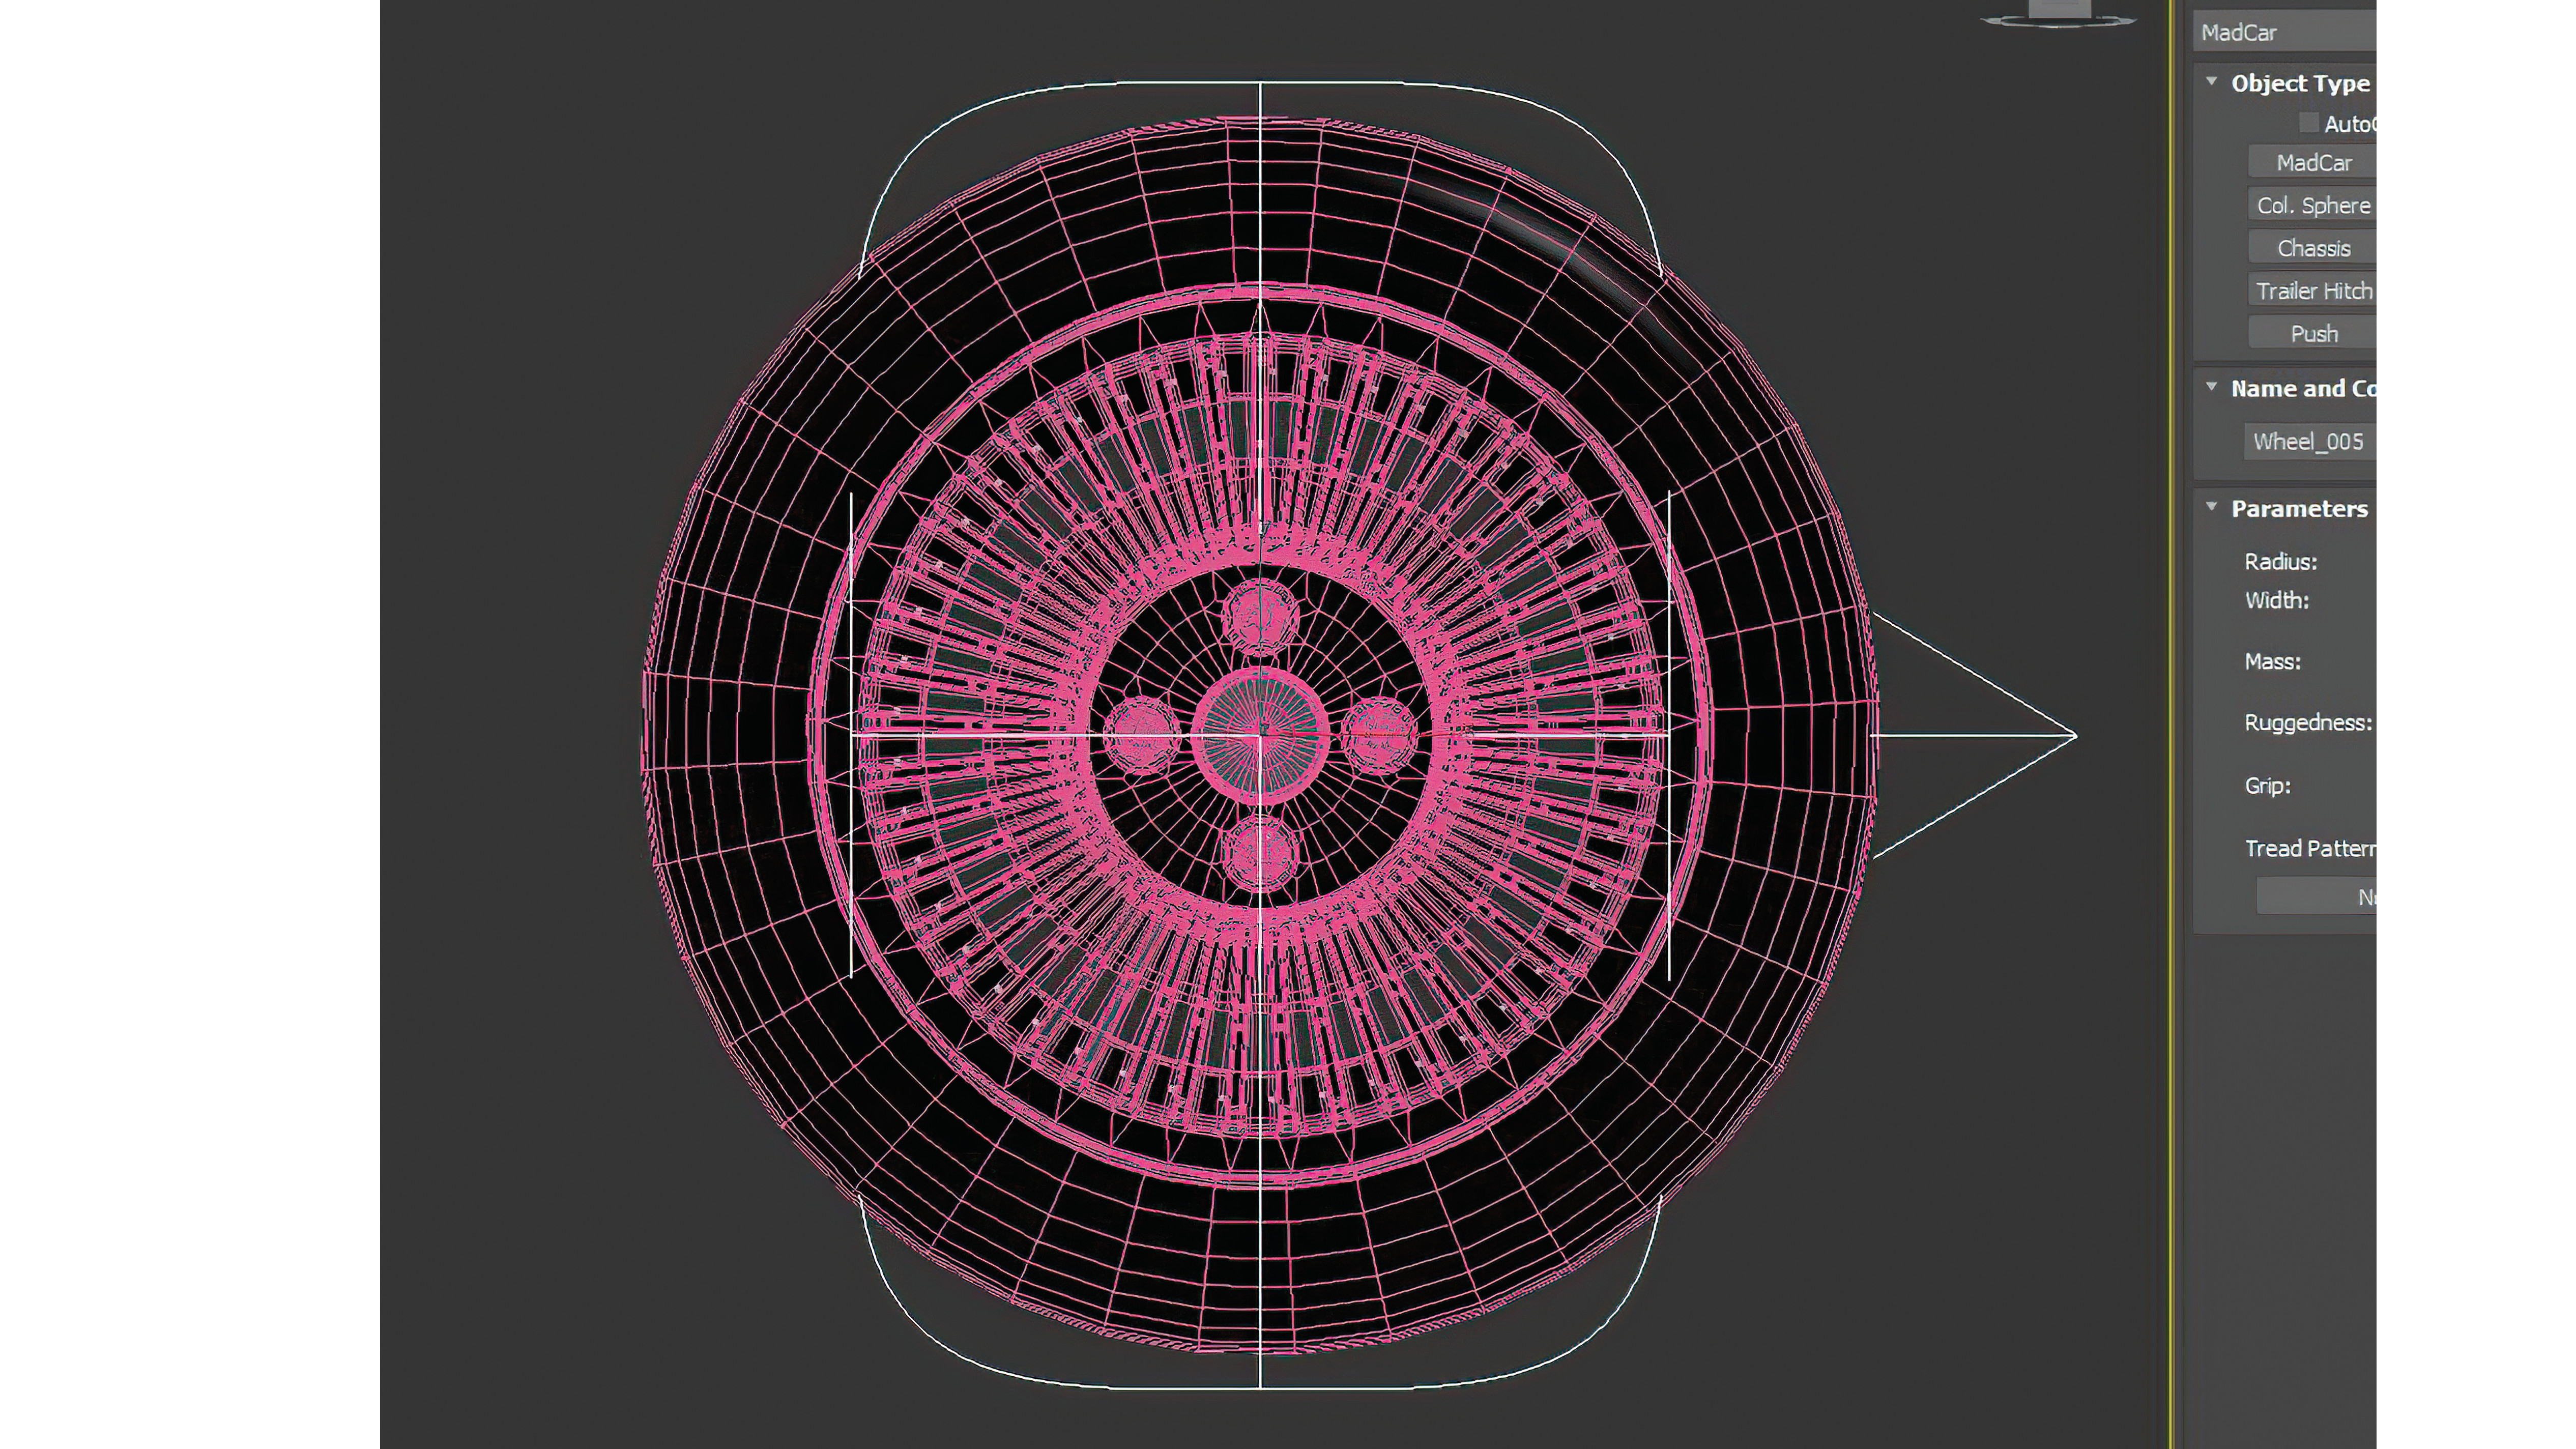
It’s time to begin the process of adding dummies for the wheels. Set the Viewport to a side view so you can see the wheels, then go to the Helpers tab in the Create menu and select MadCar. Remember to have the Snaps turned on, click on the wheel and drag it to create the dummy.
03. Adjusting the wheel dummies
The dummy is in the wheel because we had the Snap tool on, but the size isn’t right. It’s pretty easy to use the Scale tool to make it fit, but in the past I have encountered various errors when launching the animation, so I’d recommend selecting the dummy and adjusting its size to exceed the wheel a little in each axis. It’s also a good idea to use the Rotate tool to set the arrow facing the other side of the tyre.
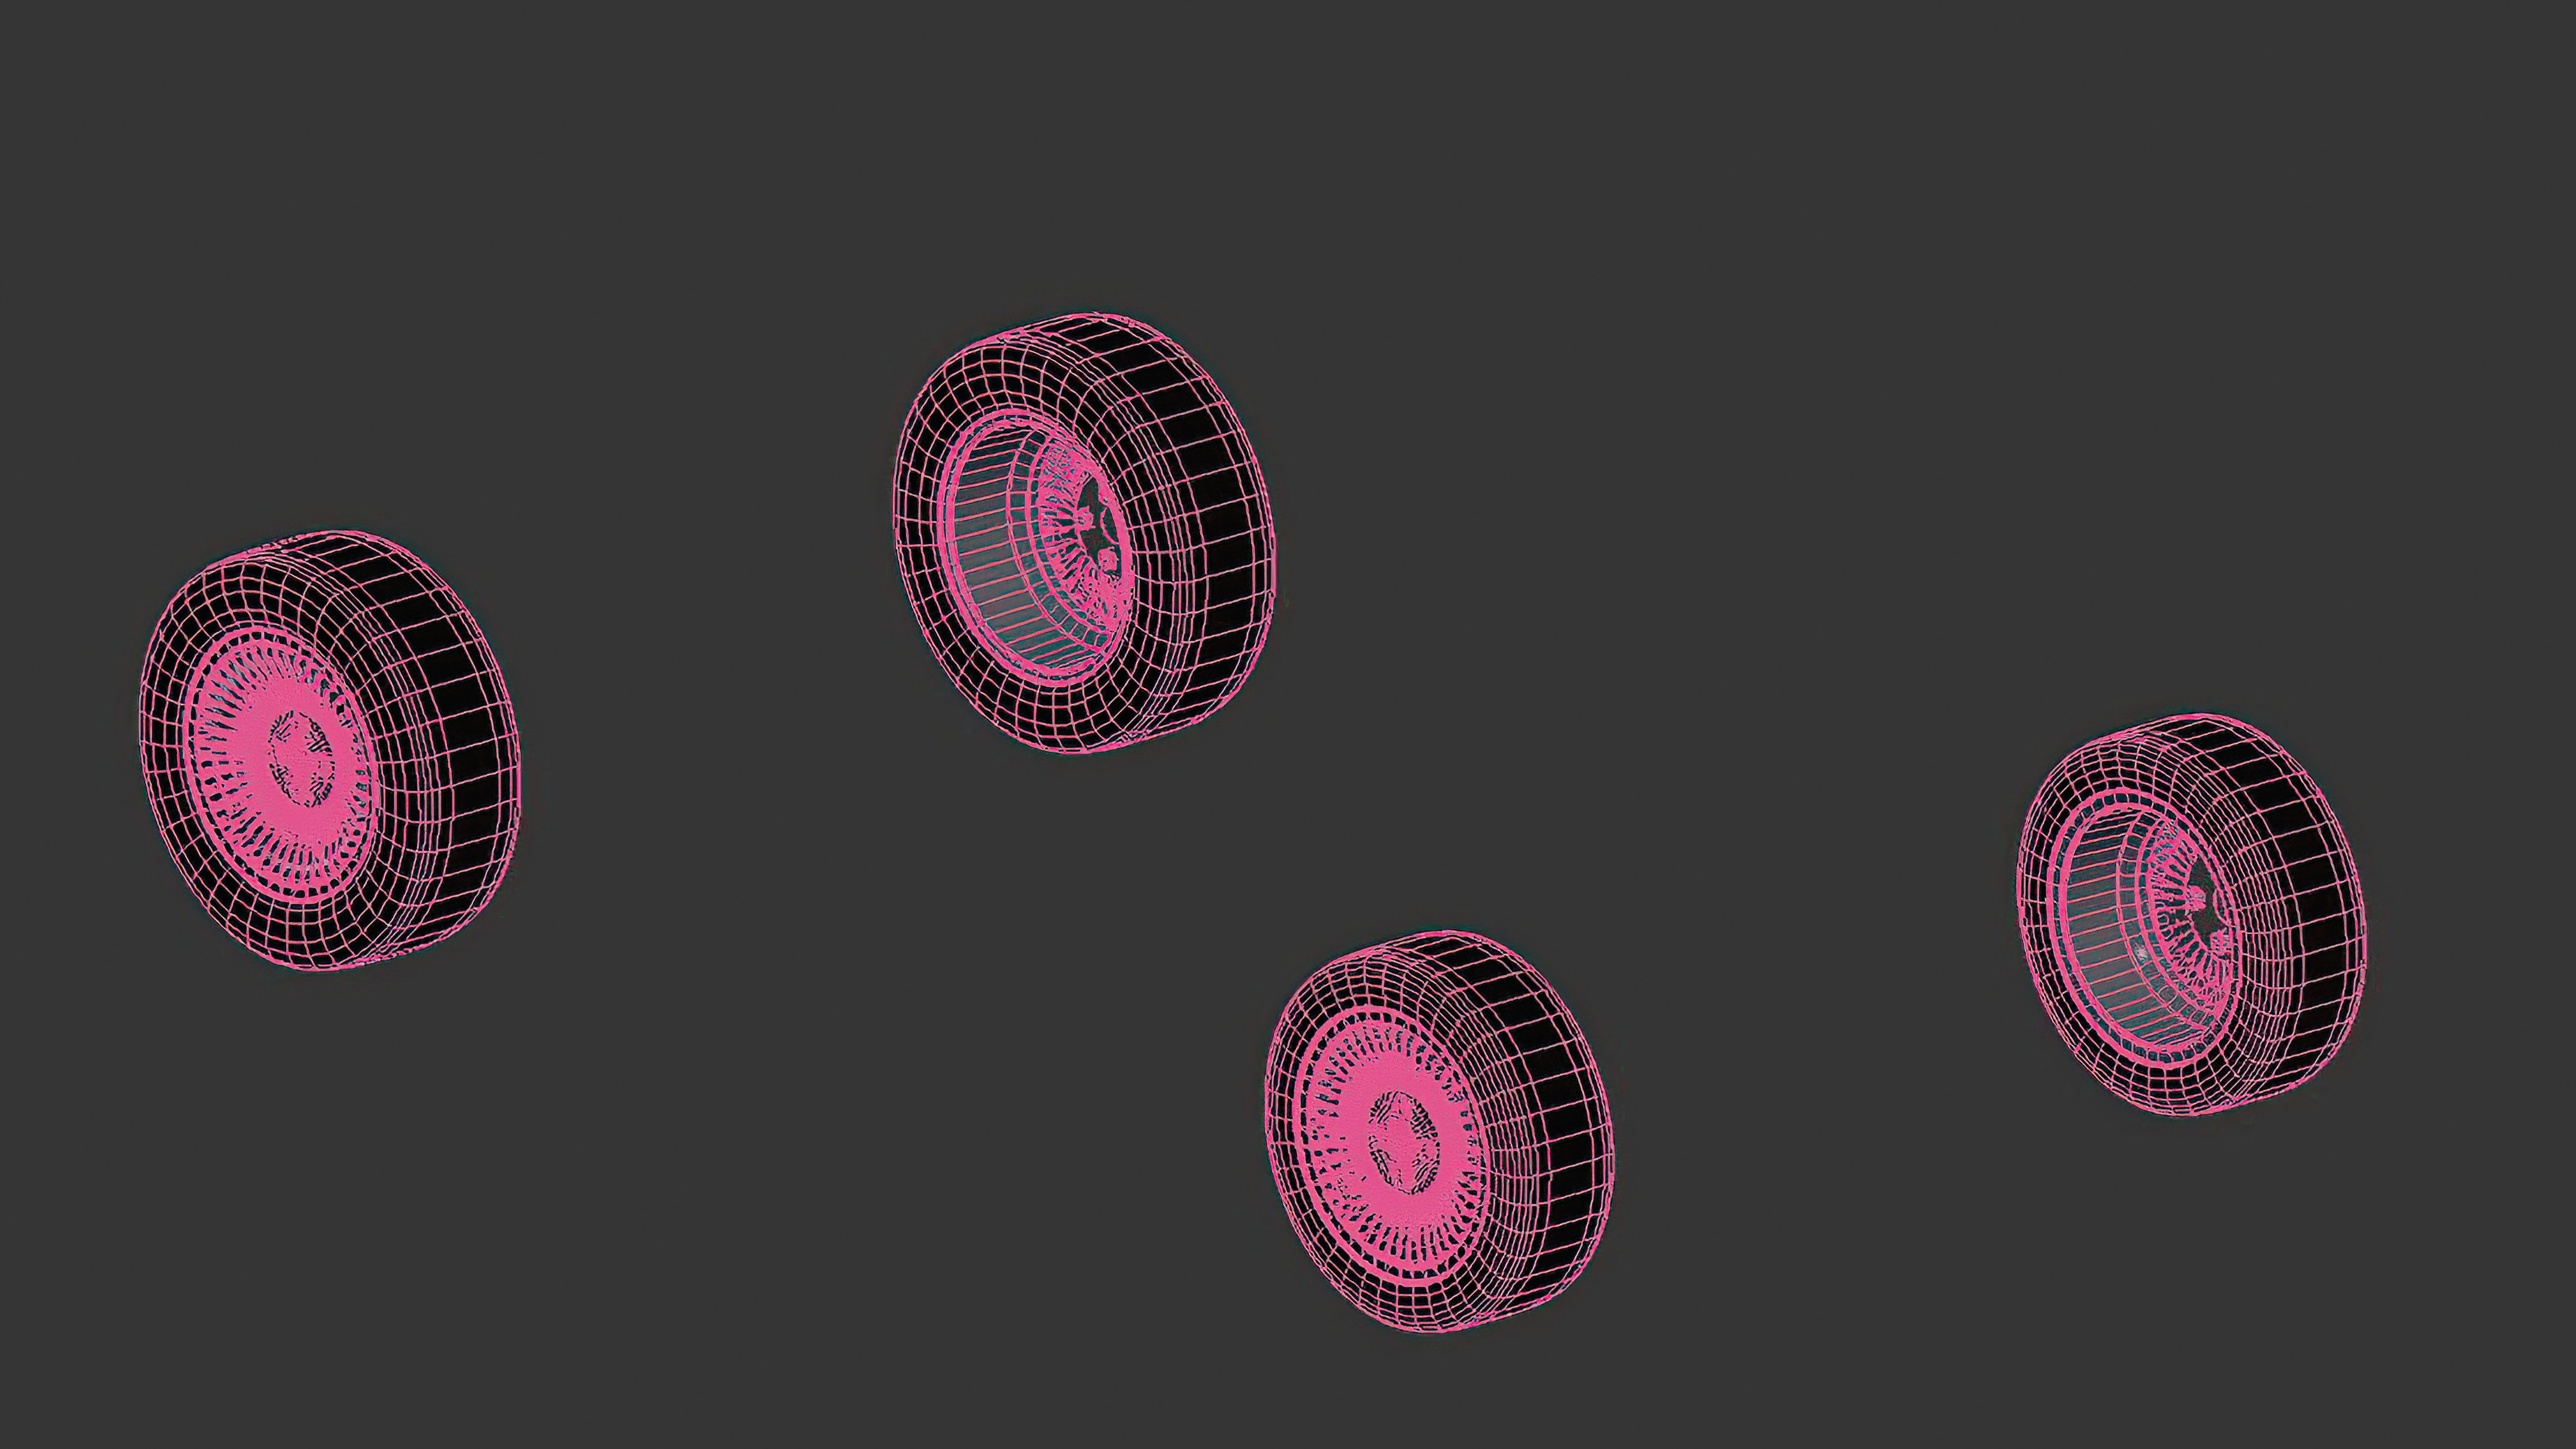
04. Copying and placing wheel dummies
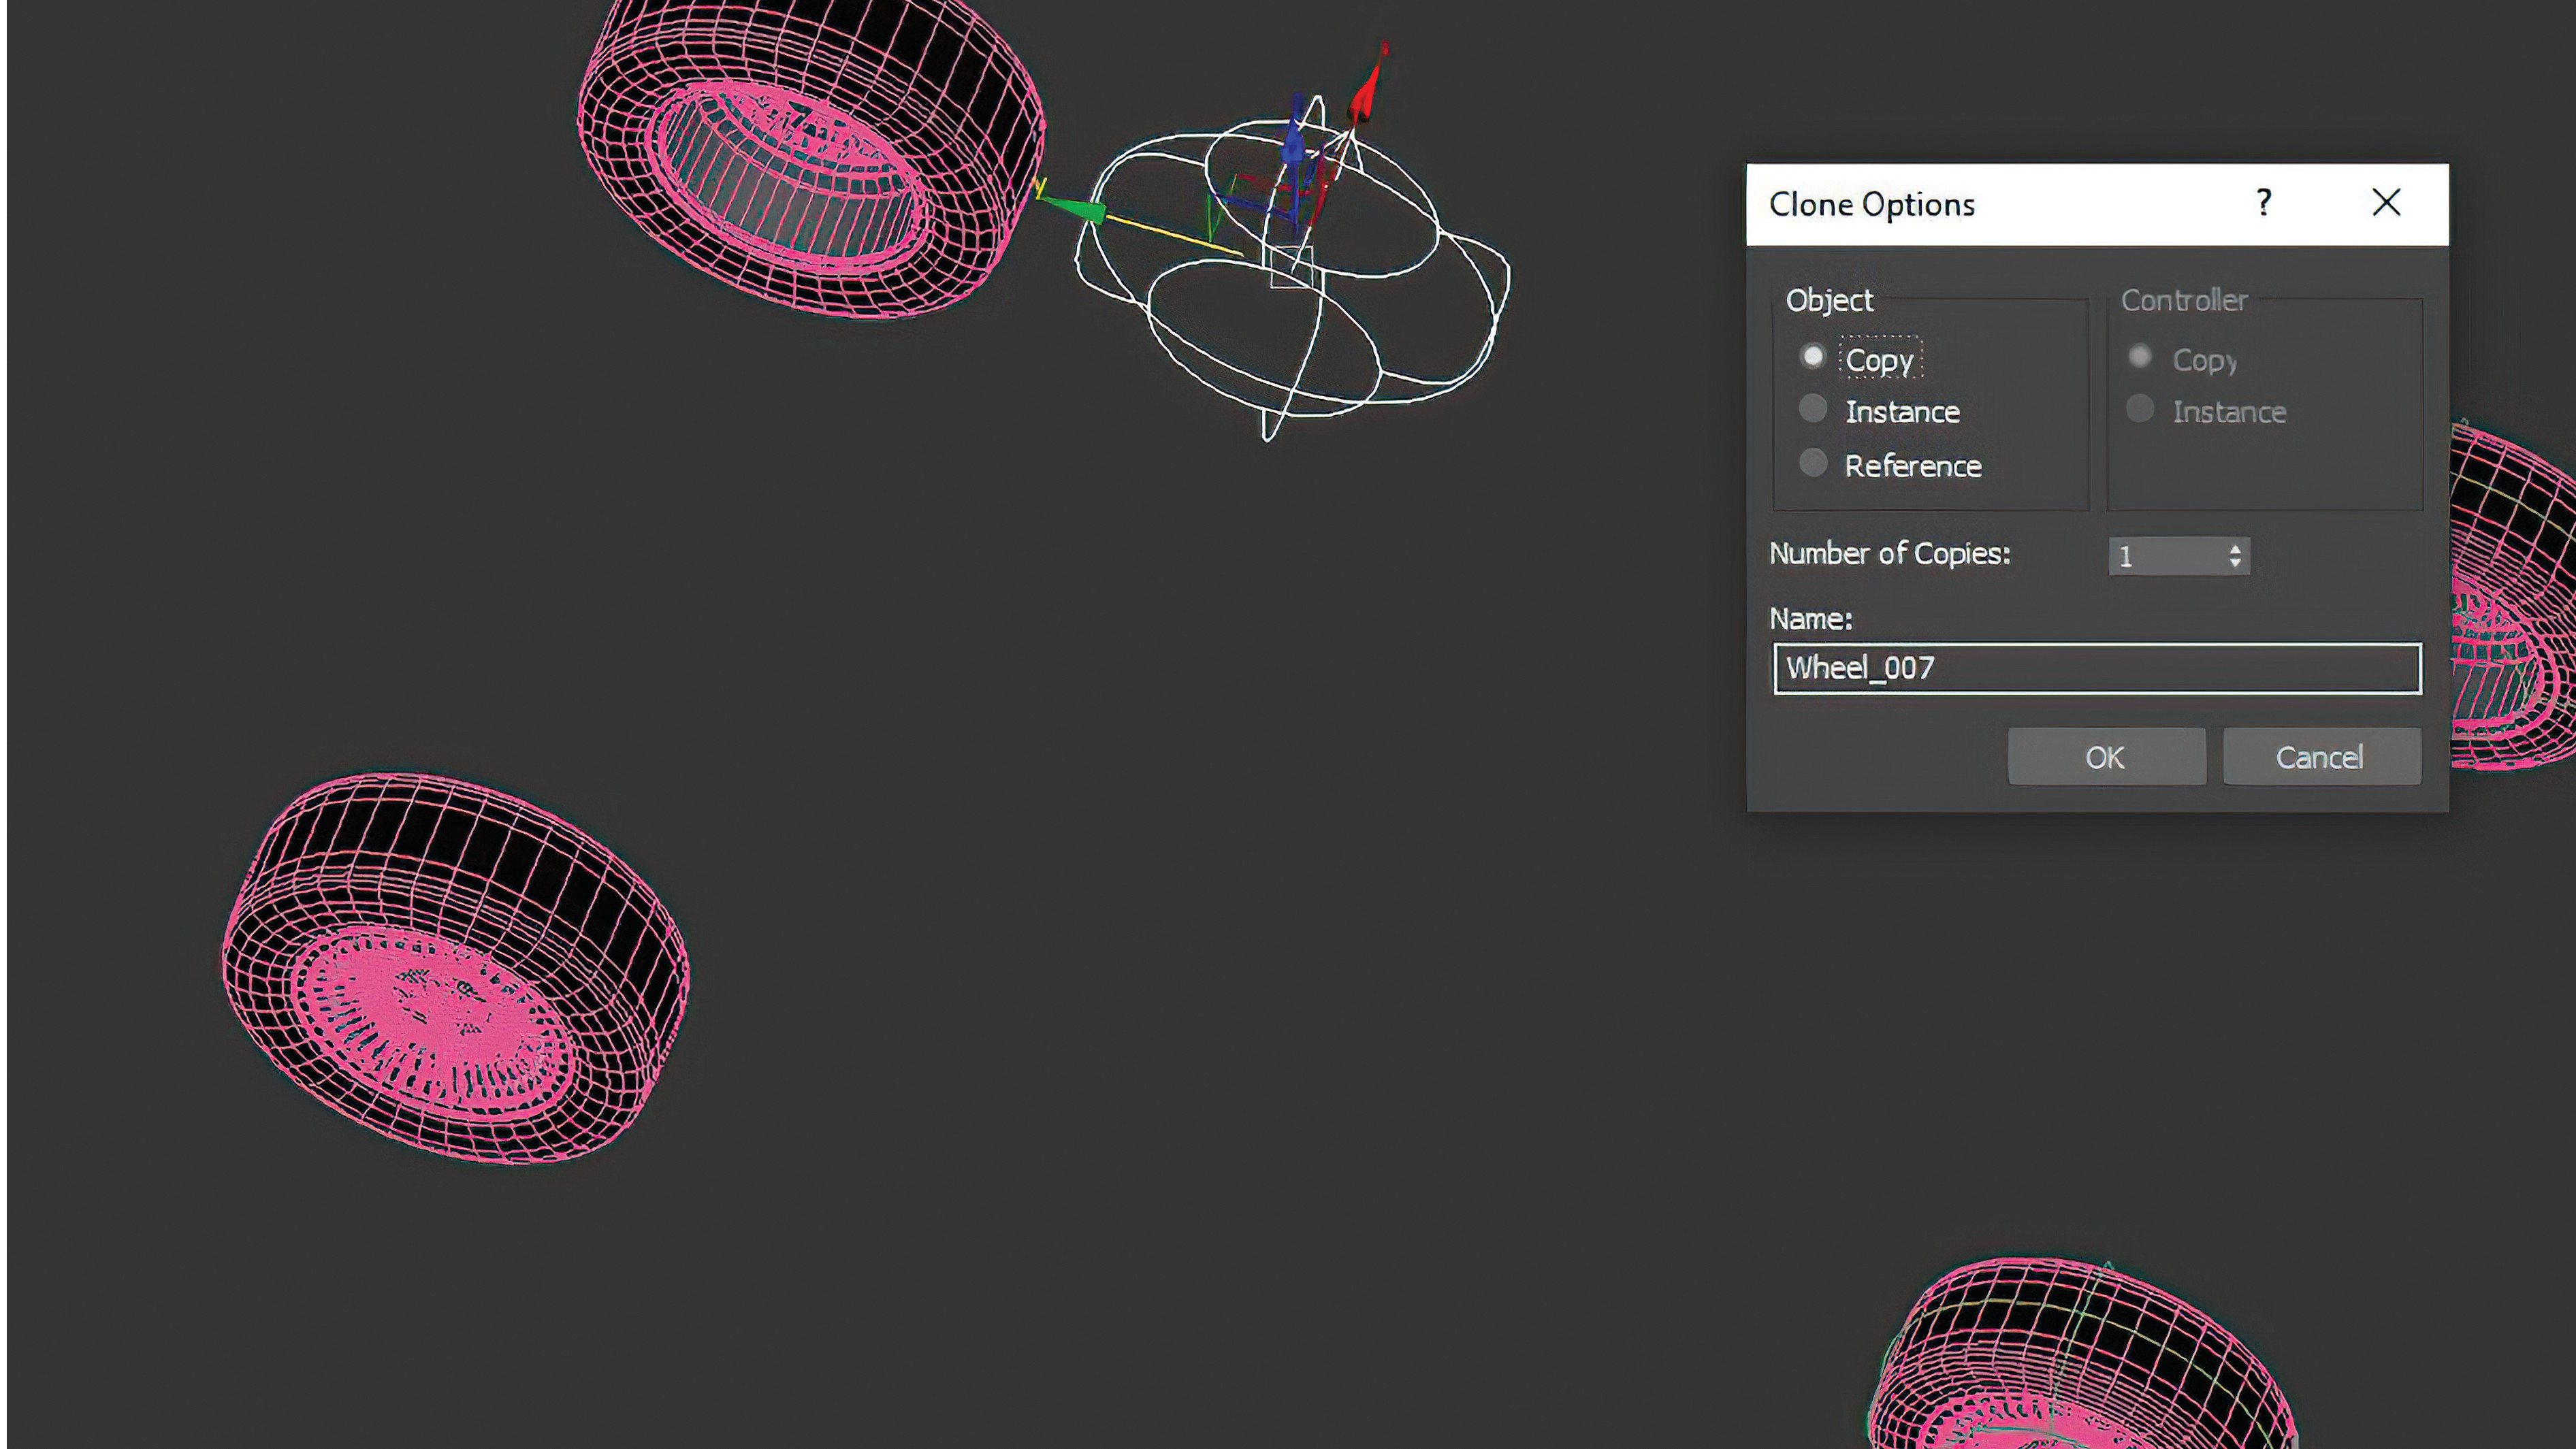
Once we have our main dummy all set up, it’s time to make copies and place them over the other wheels, starting at the front. Copy the first dummy you made as an instance and place it in the other wheel in the front; 3ds Max’s Align tool is great to get the precise position. Now copy the dummy again so we can place it in the back wheels, but this time make it a copy, and then do the same for the other rear wheel, again as an instance.
05. Placing the main suspension dummy
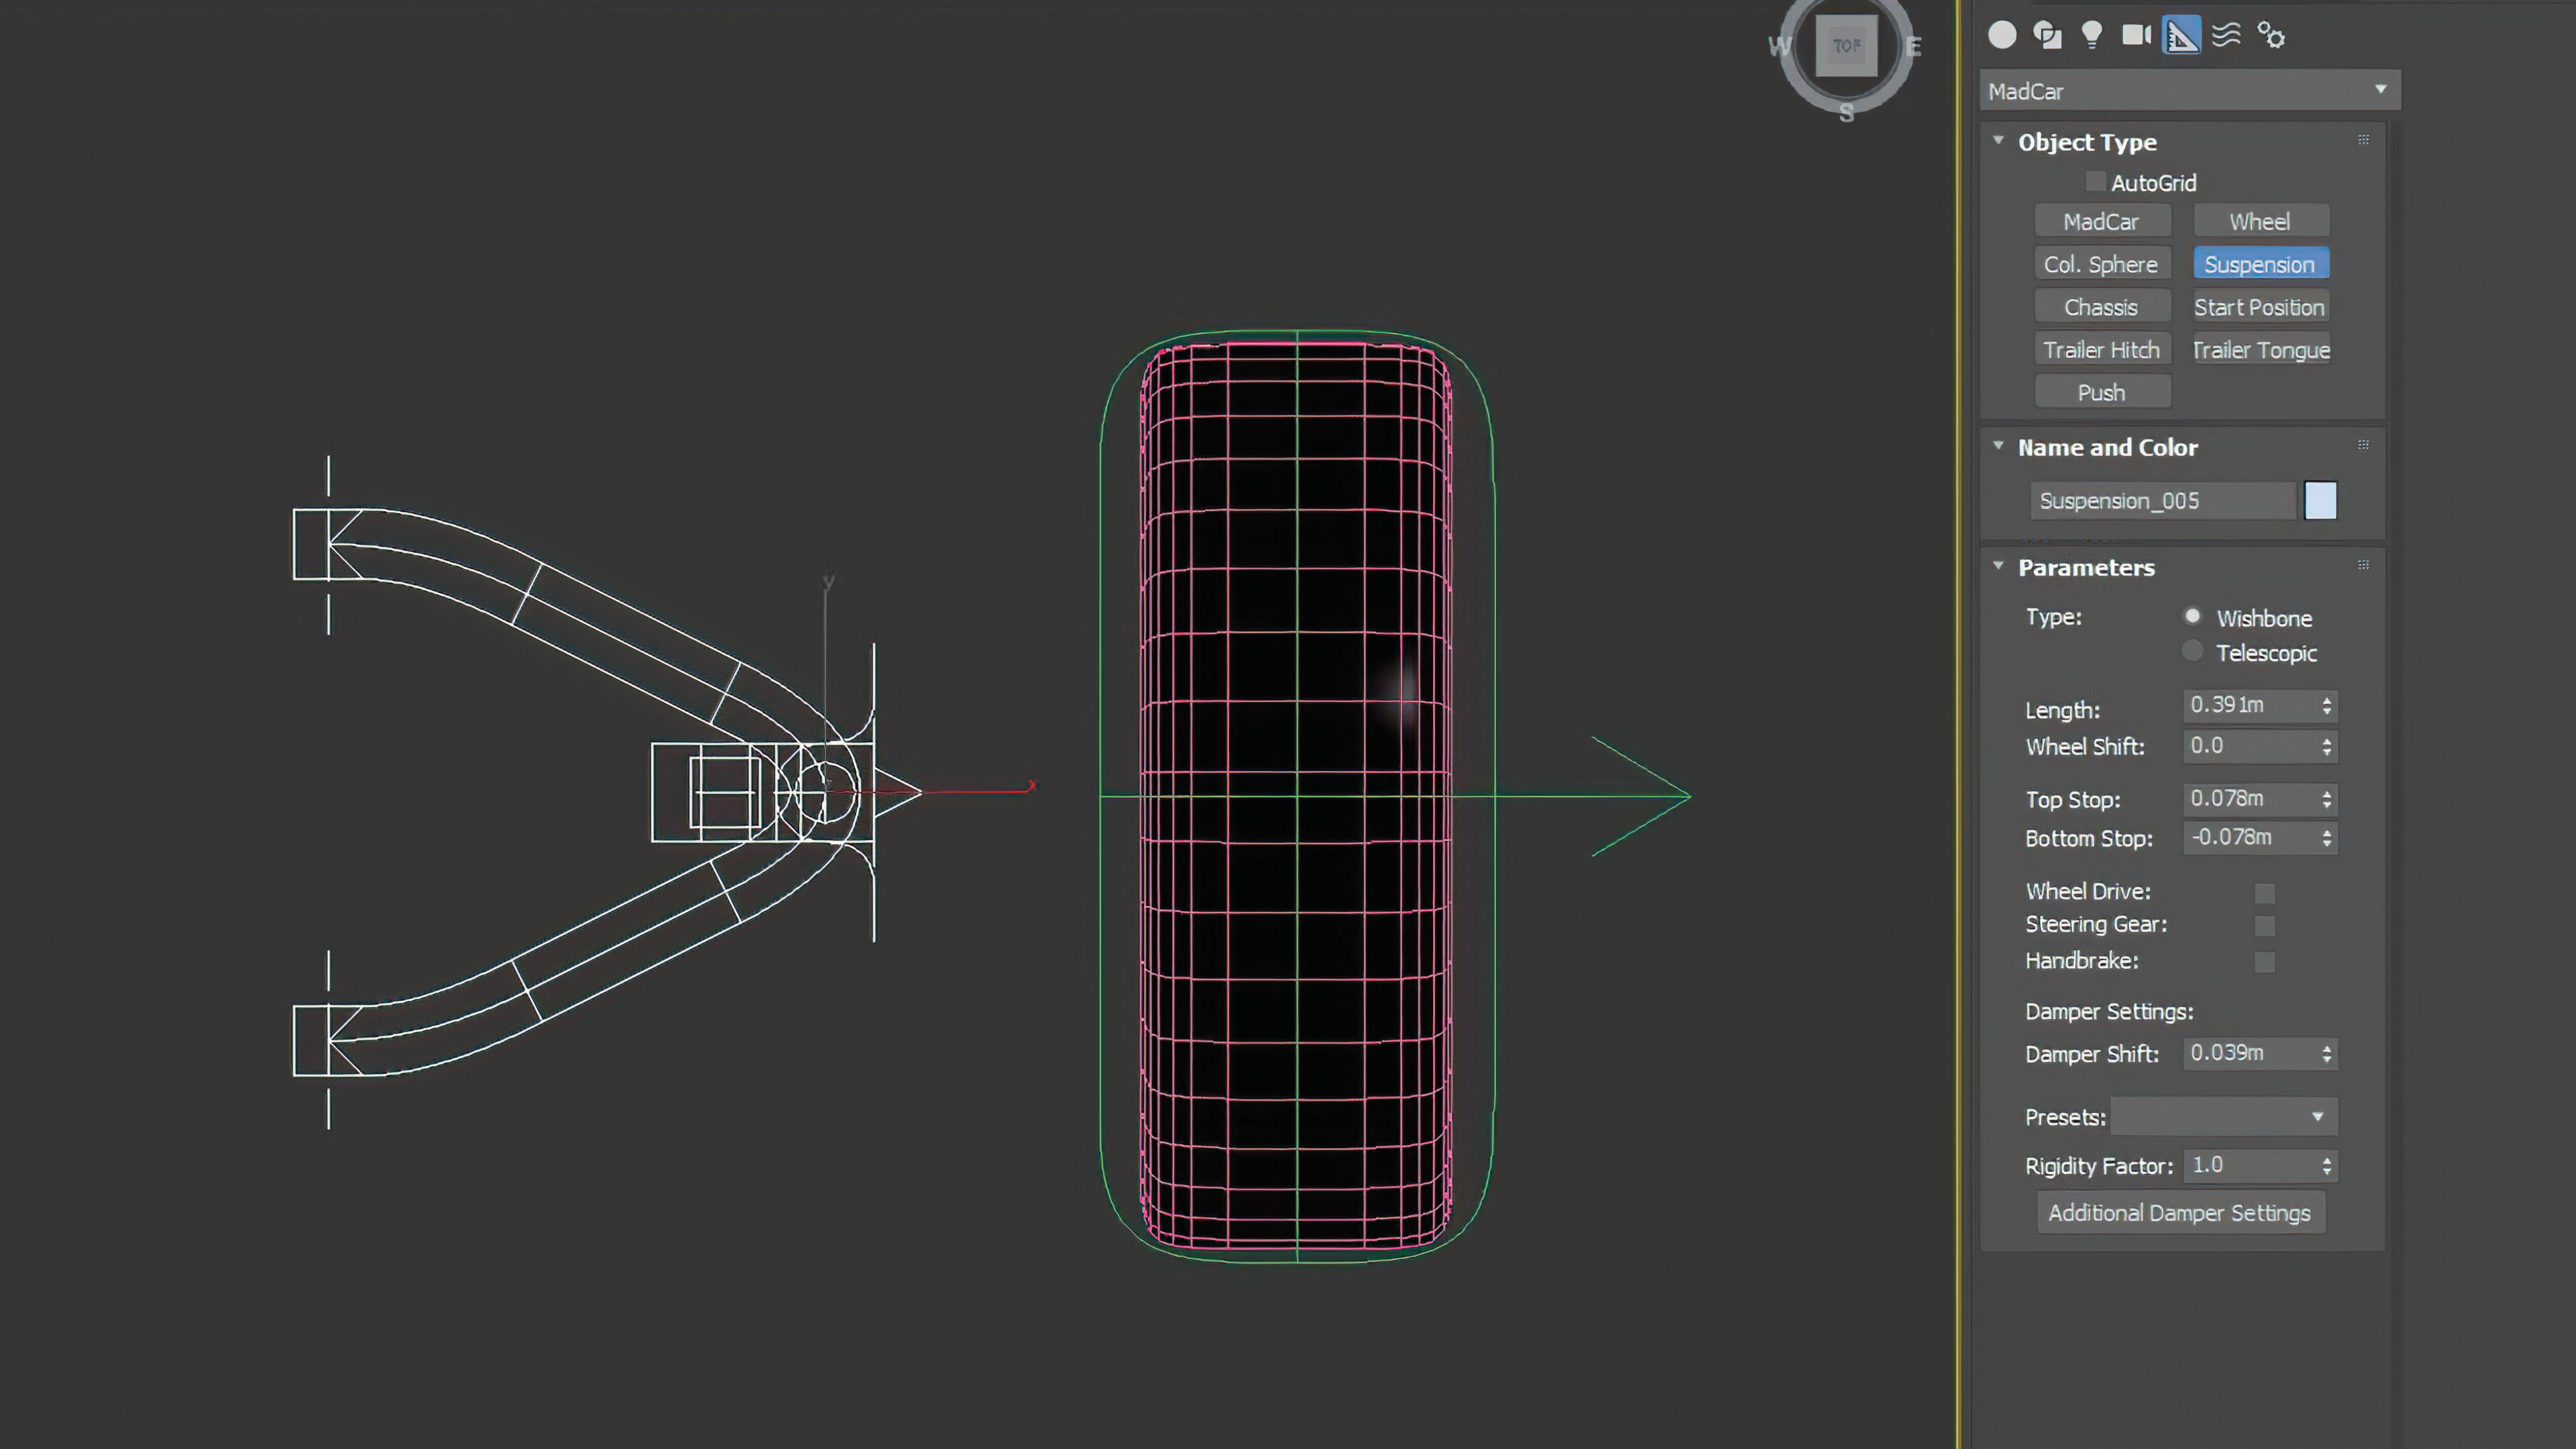
Let’s add the car’s suspension, which gives us a great effect when the animation runs. In the Helpers panel, select Suspension and set the Viewport to Top. Click and drag so you can see the suspension icon appear. Once we have it, select only the pivot, then snap the suspension to the wheel dummy pivot.
06. Creating suspension dummy copies
Just as we did for the wheel dummy, we also want to copy the suspension dummy as an instance and place it in the other wheel. In the Properties, check whether the suspension has the Wheel Drive and Steering Gear options checked. Duplicate it as a copy for the first rear wheel, and create the other back wheel as an instance with the Handbrake option checked, which means the front suspension will control the direction and the rear suspension the brakes.
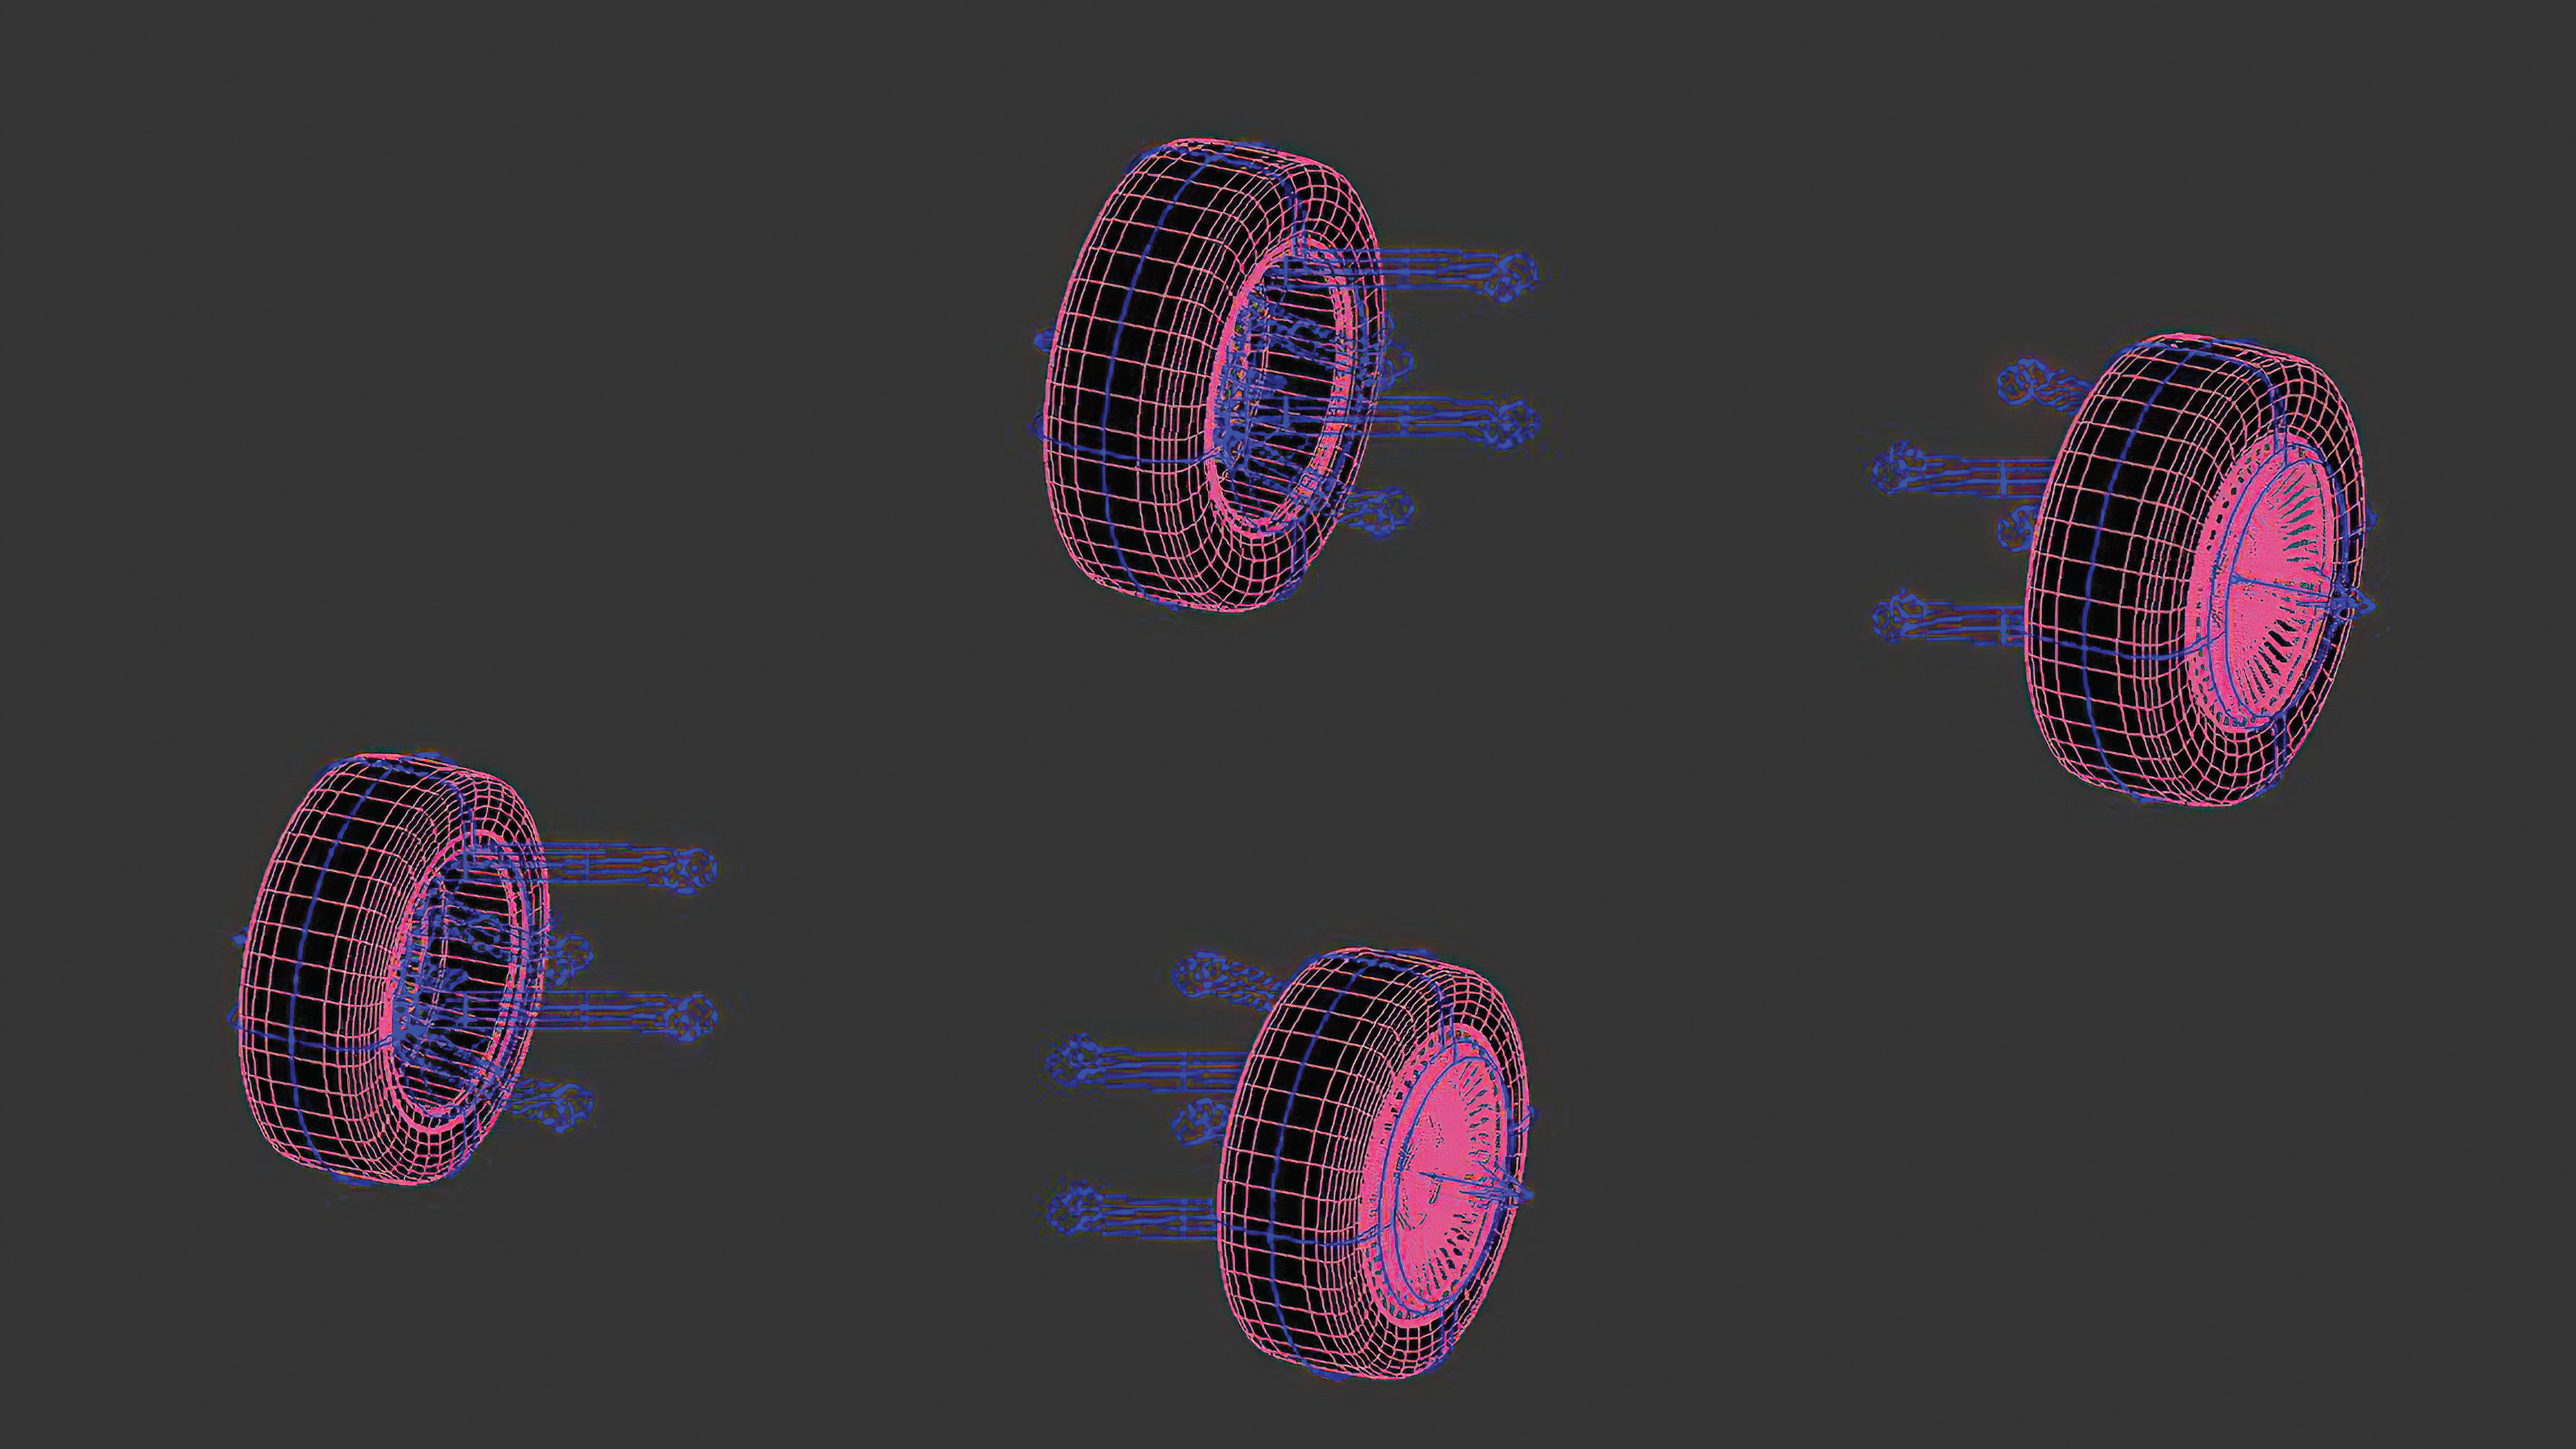
07. Adding the car chassis dummy
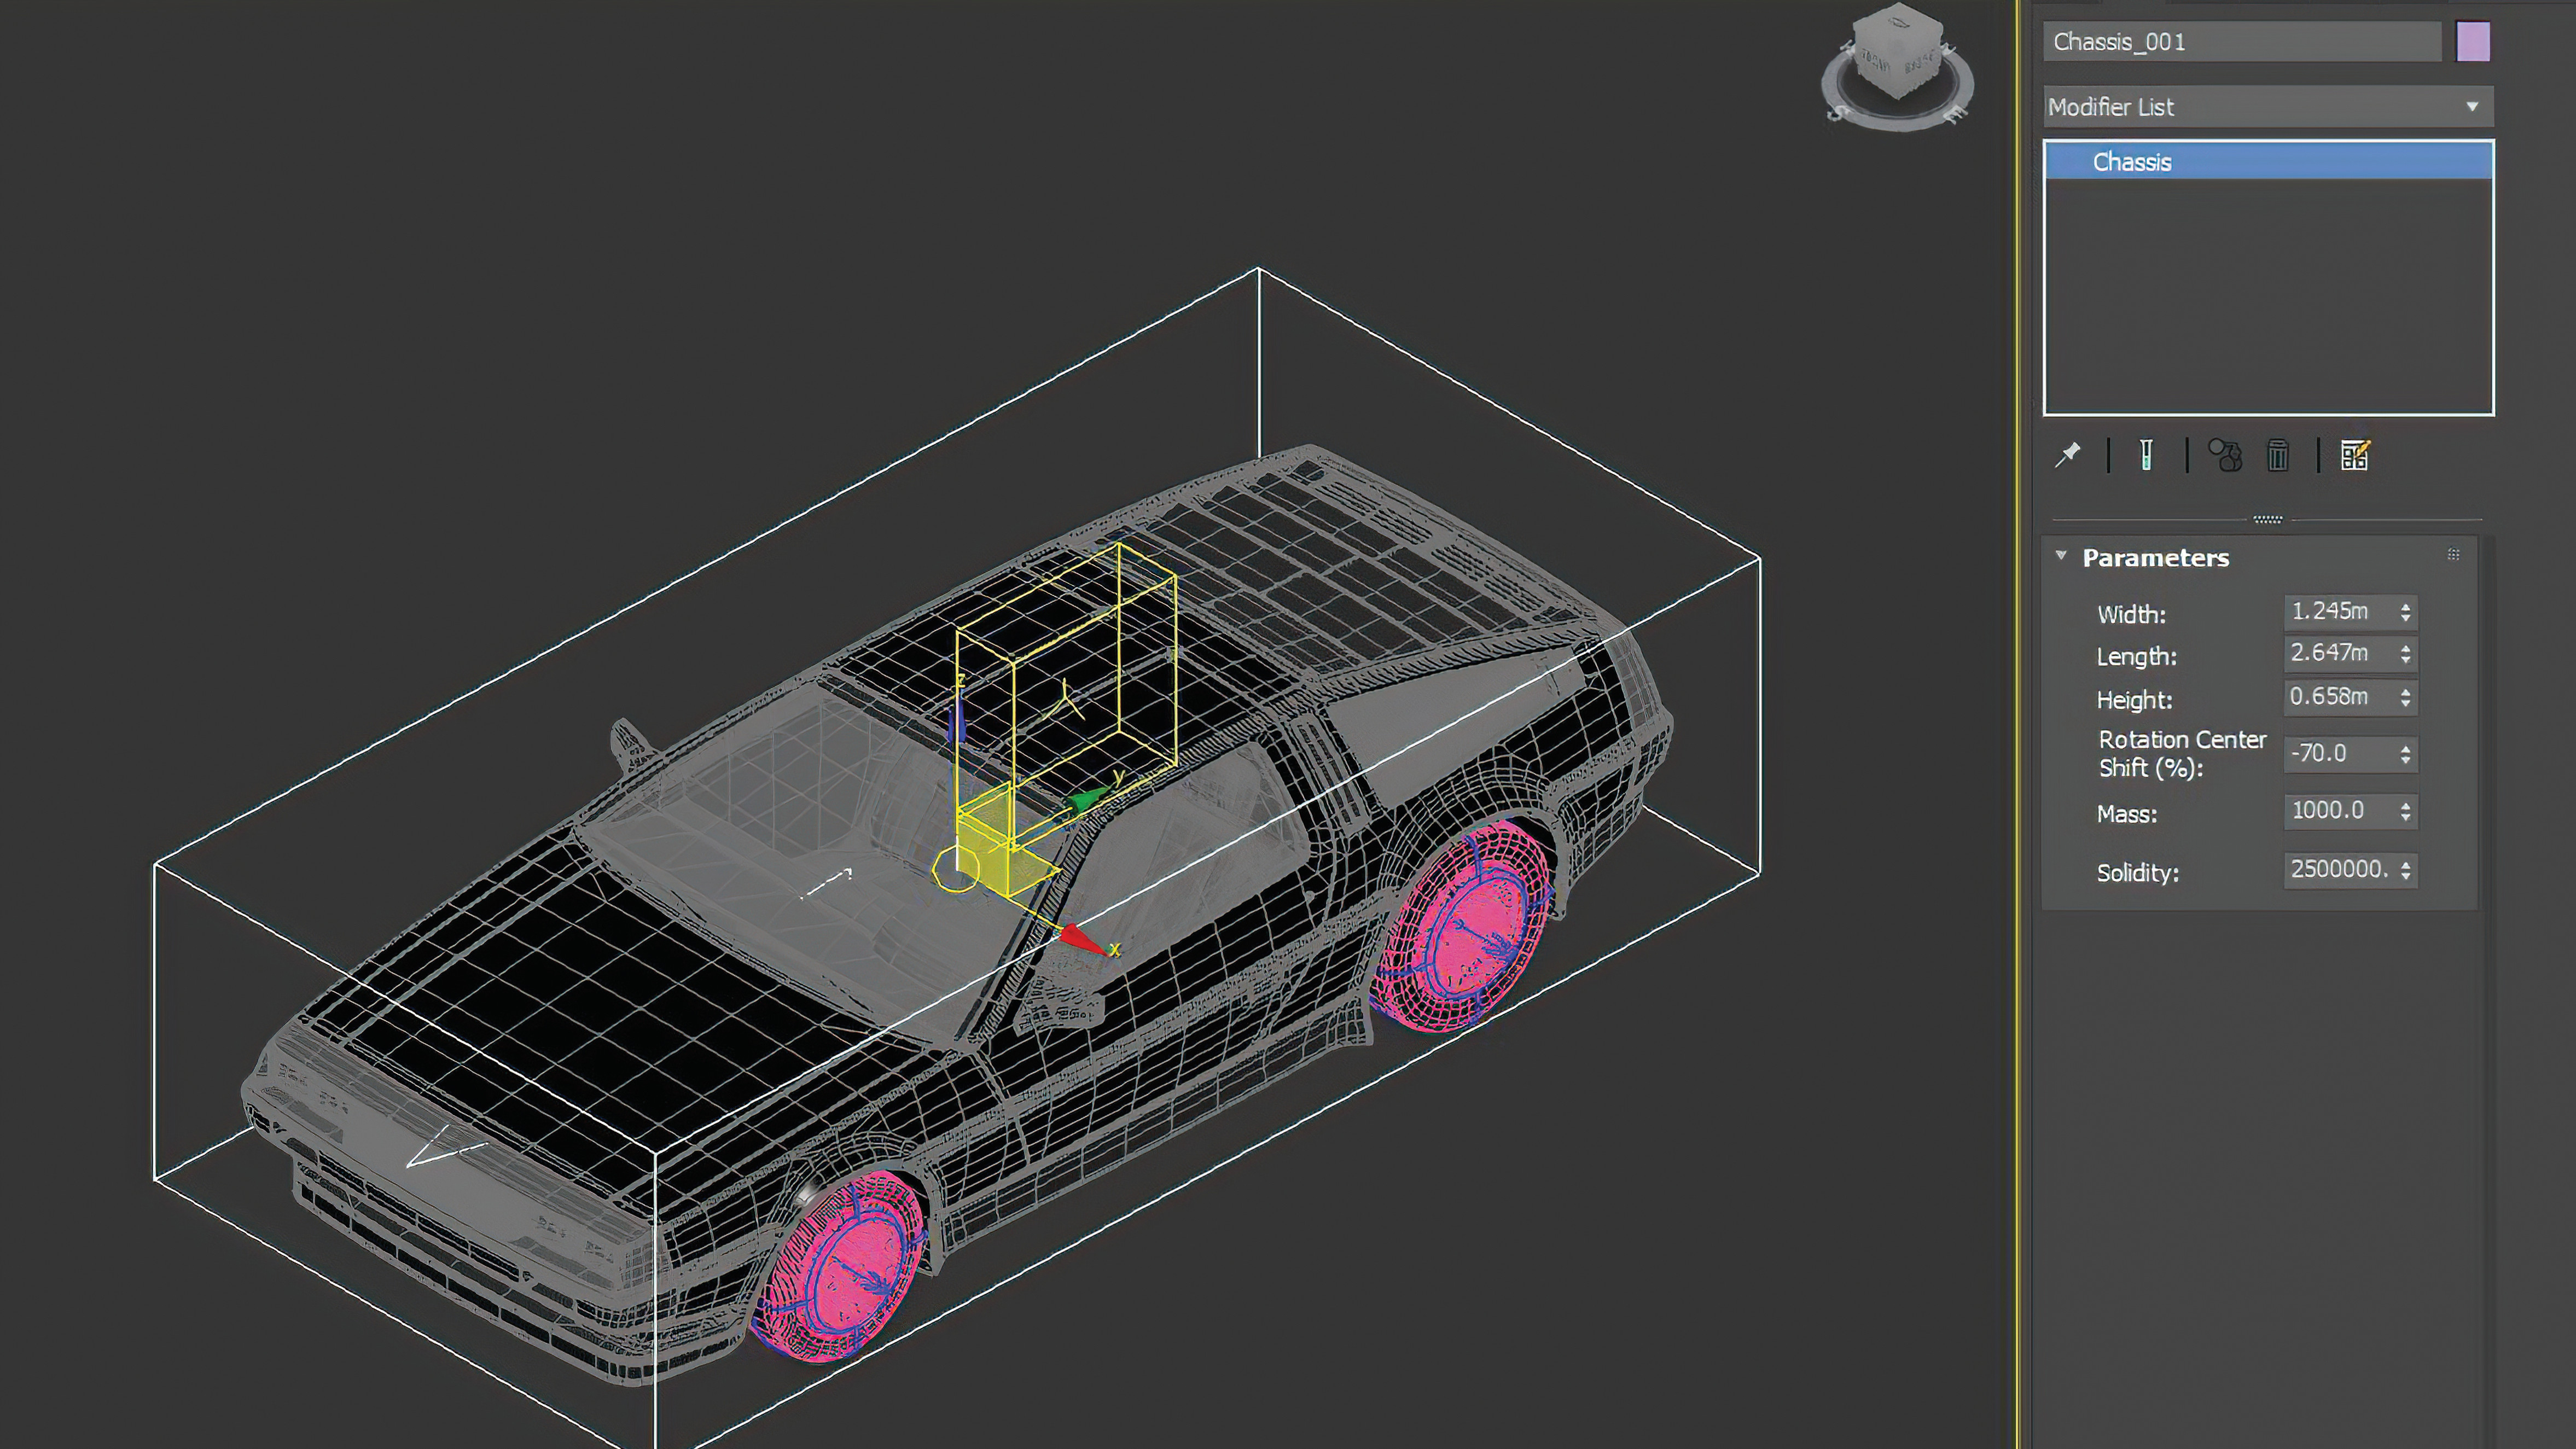
The process for the vehicle’s dummy body is perfectly straightforward, as it’s essentially the same as the wheels. Go to the Helpers tab and select Body, with the Viewport in the top view. Click and drag, and you’ll see the dummy, which will need its proportions adjusting in the Modify panel. Keep in mind that the dummy should cover the whole of the car’s chassis.
08. Connecting the dummies
We’ve now created all of our dummies, but they’re still not attached to their respective car parts. In the top bar, click ‘Select and Link’, then click in the car body, and click and drag the car body dummy across. Do the same with the wheels. This way we’ll be able to run the simulation for the car animation without any issues.
09. Making the full MadCar shell
The final element we need is the container. Again, in the Helpers tab use the MadCar option, which will give you a container housing all the elements. Click and drag in the top Viewport so it’s easier to see, and then adjust its size in the modify tab, keeping all the elements within the MadCar container.
10. Adding a plane and hit the road
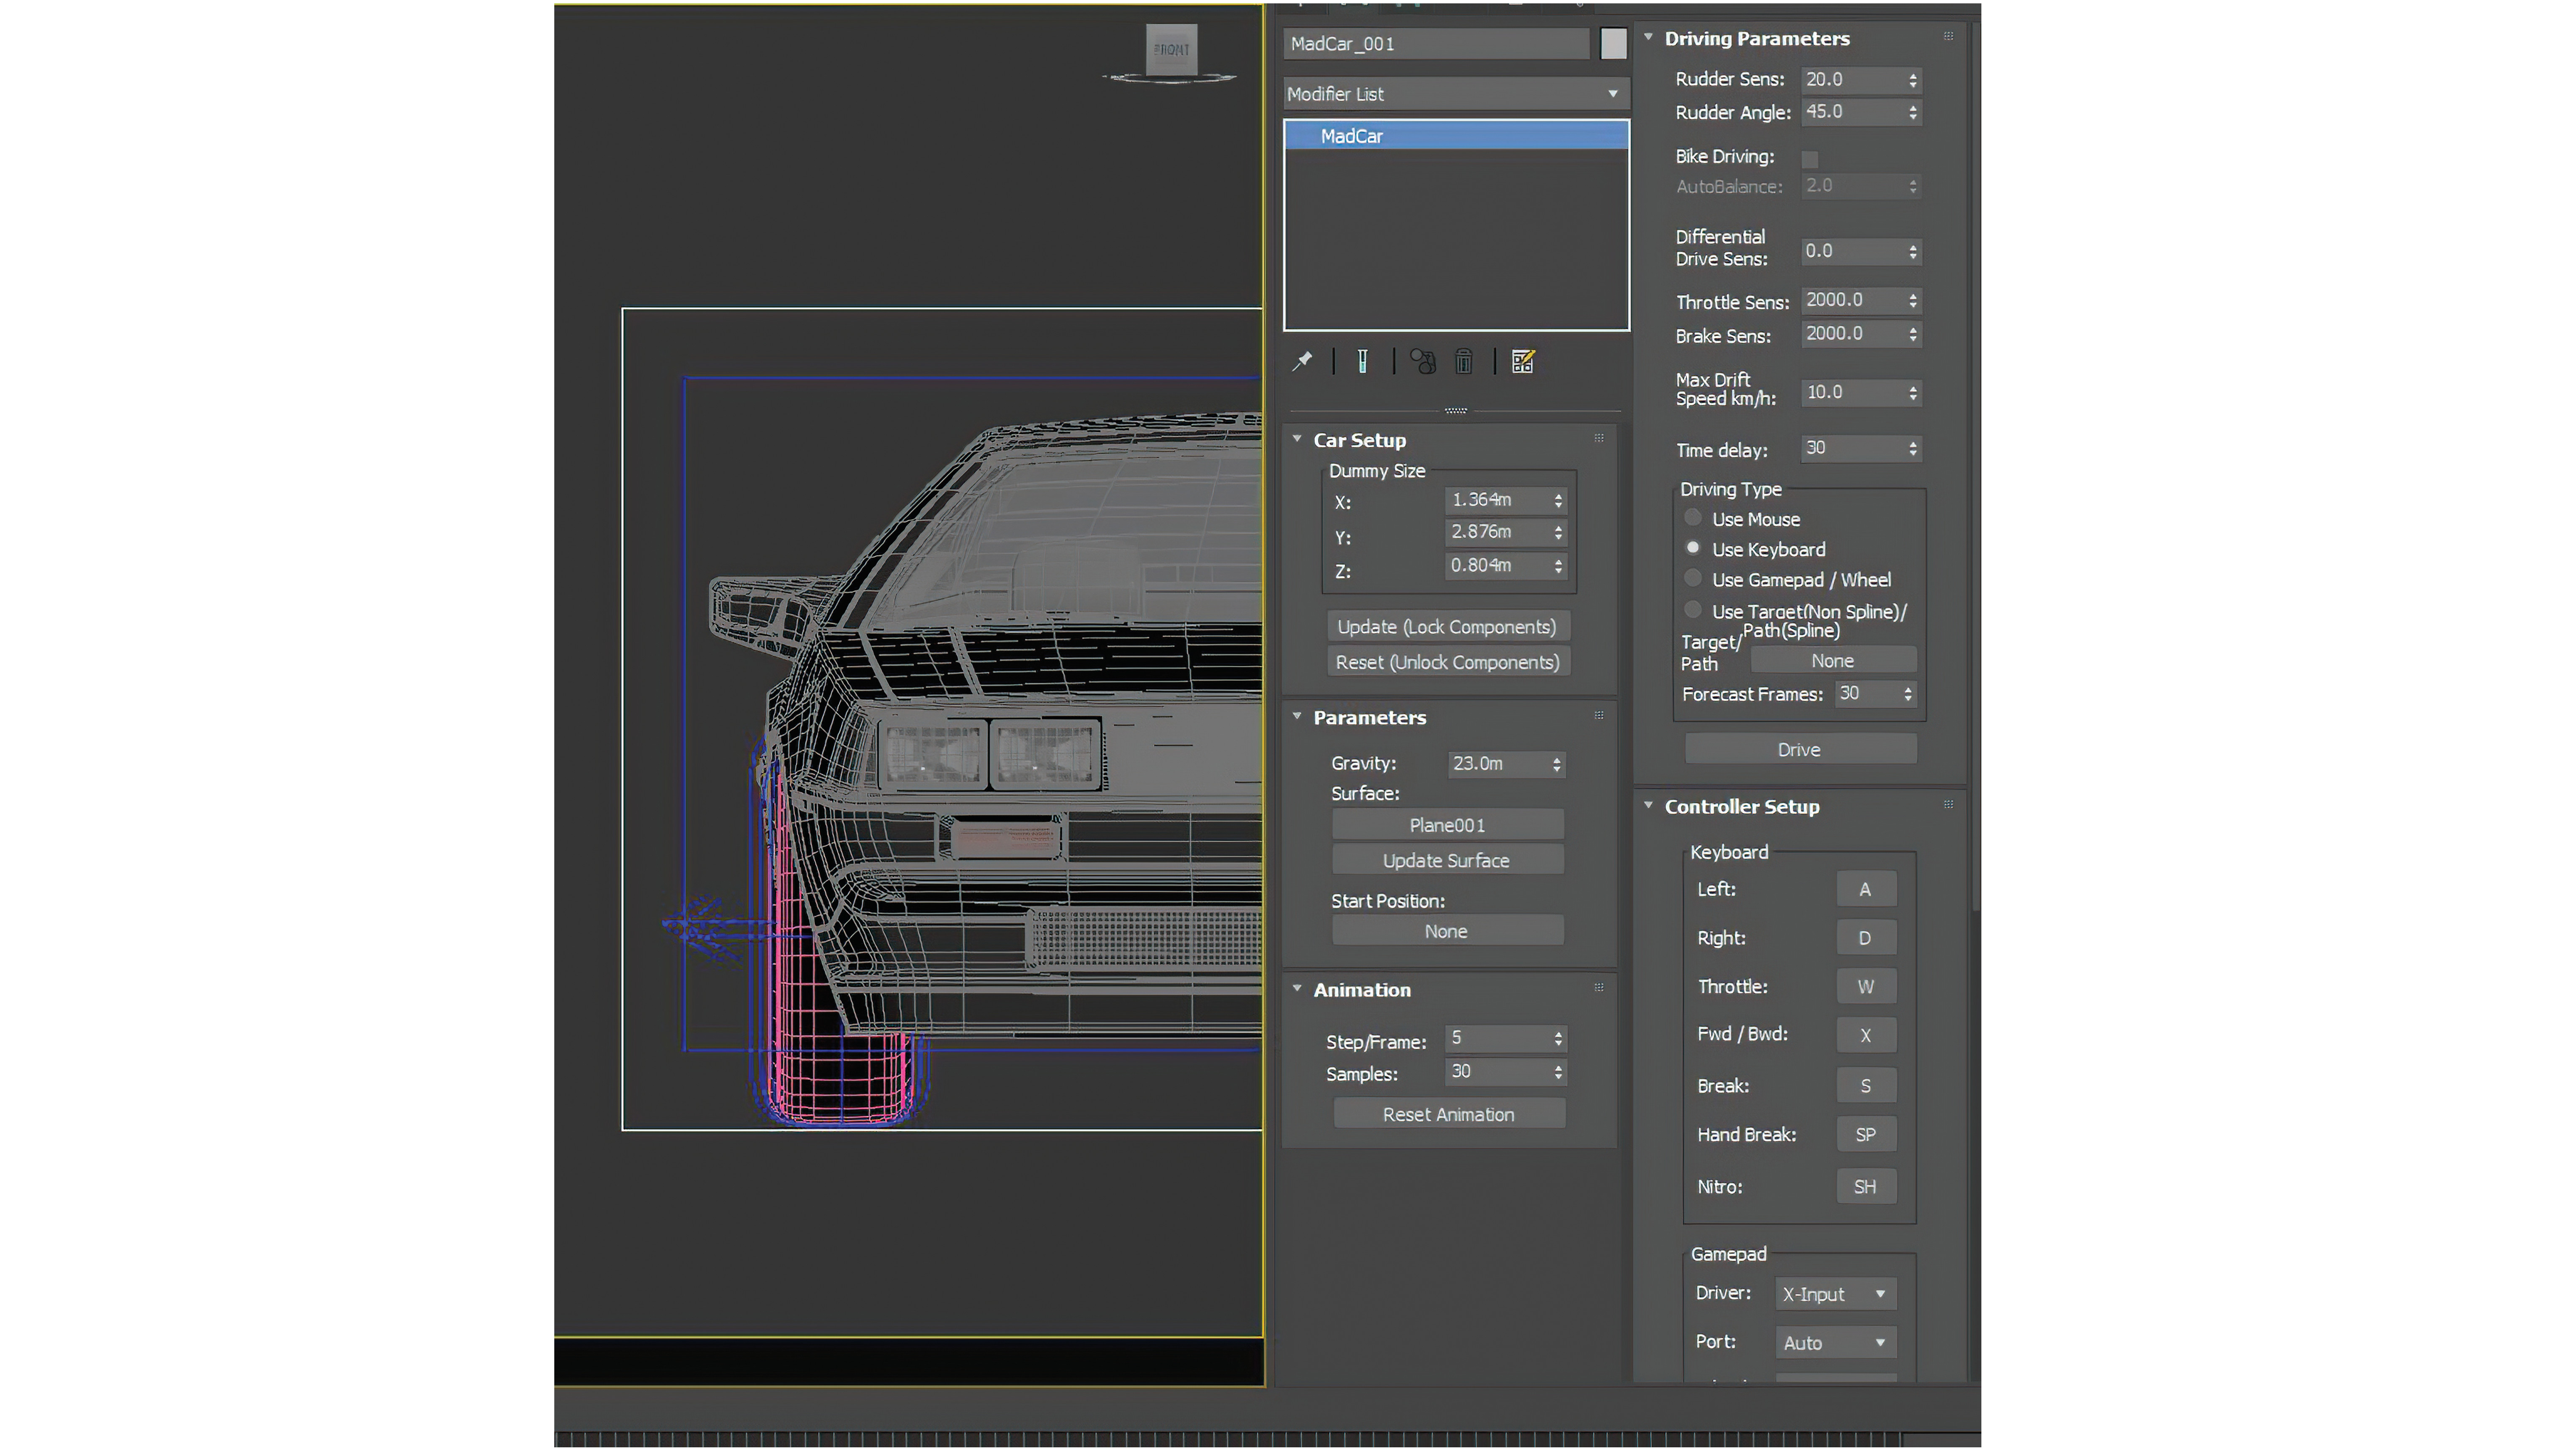
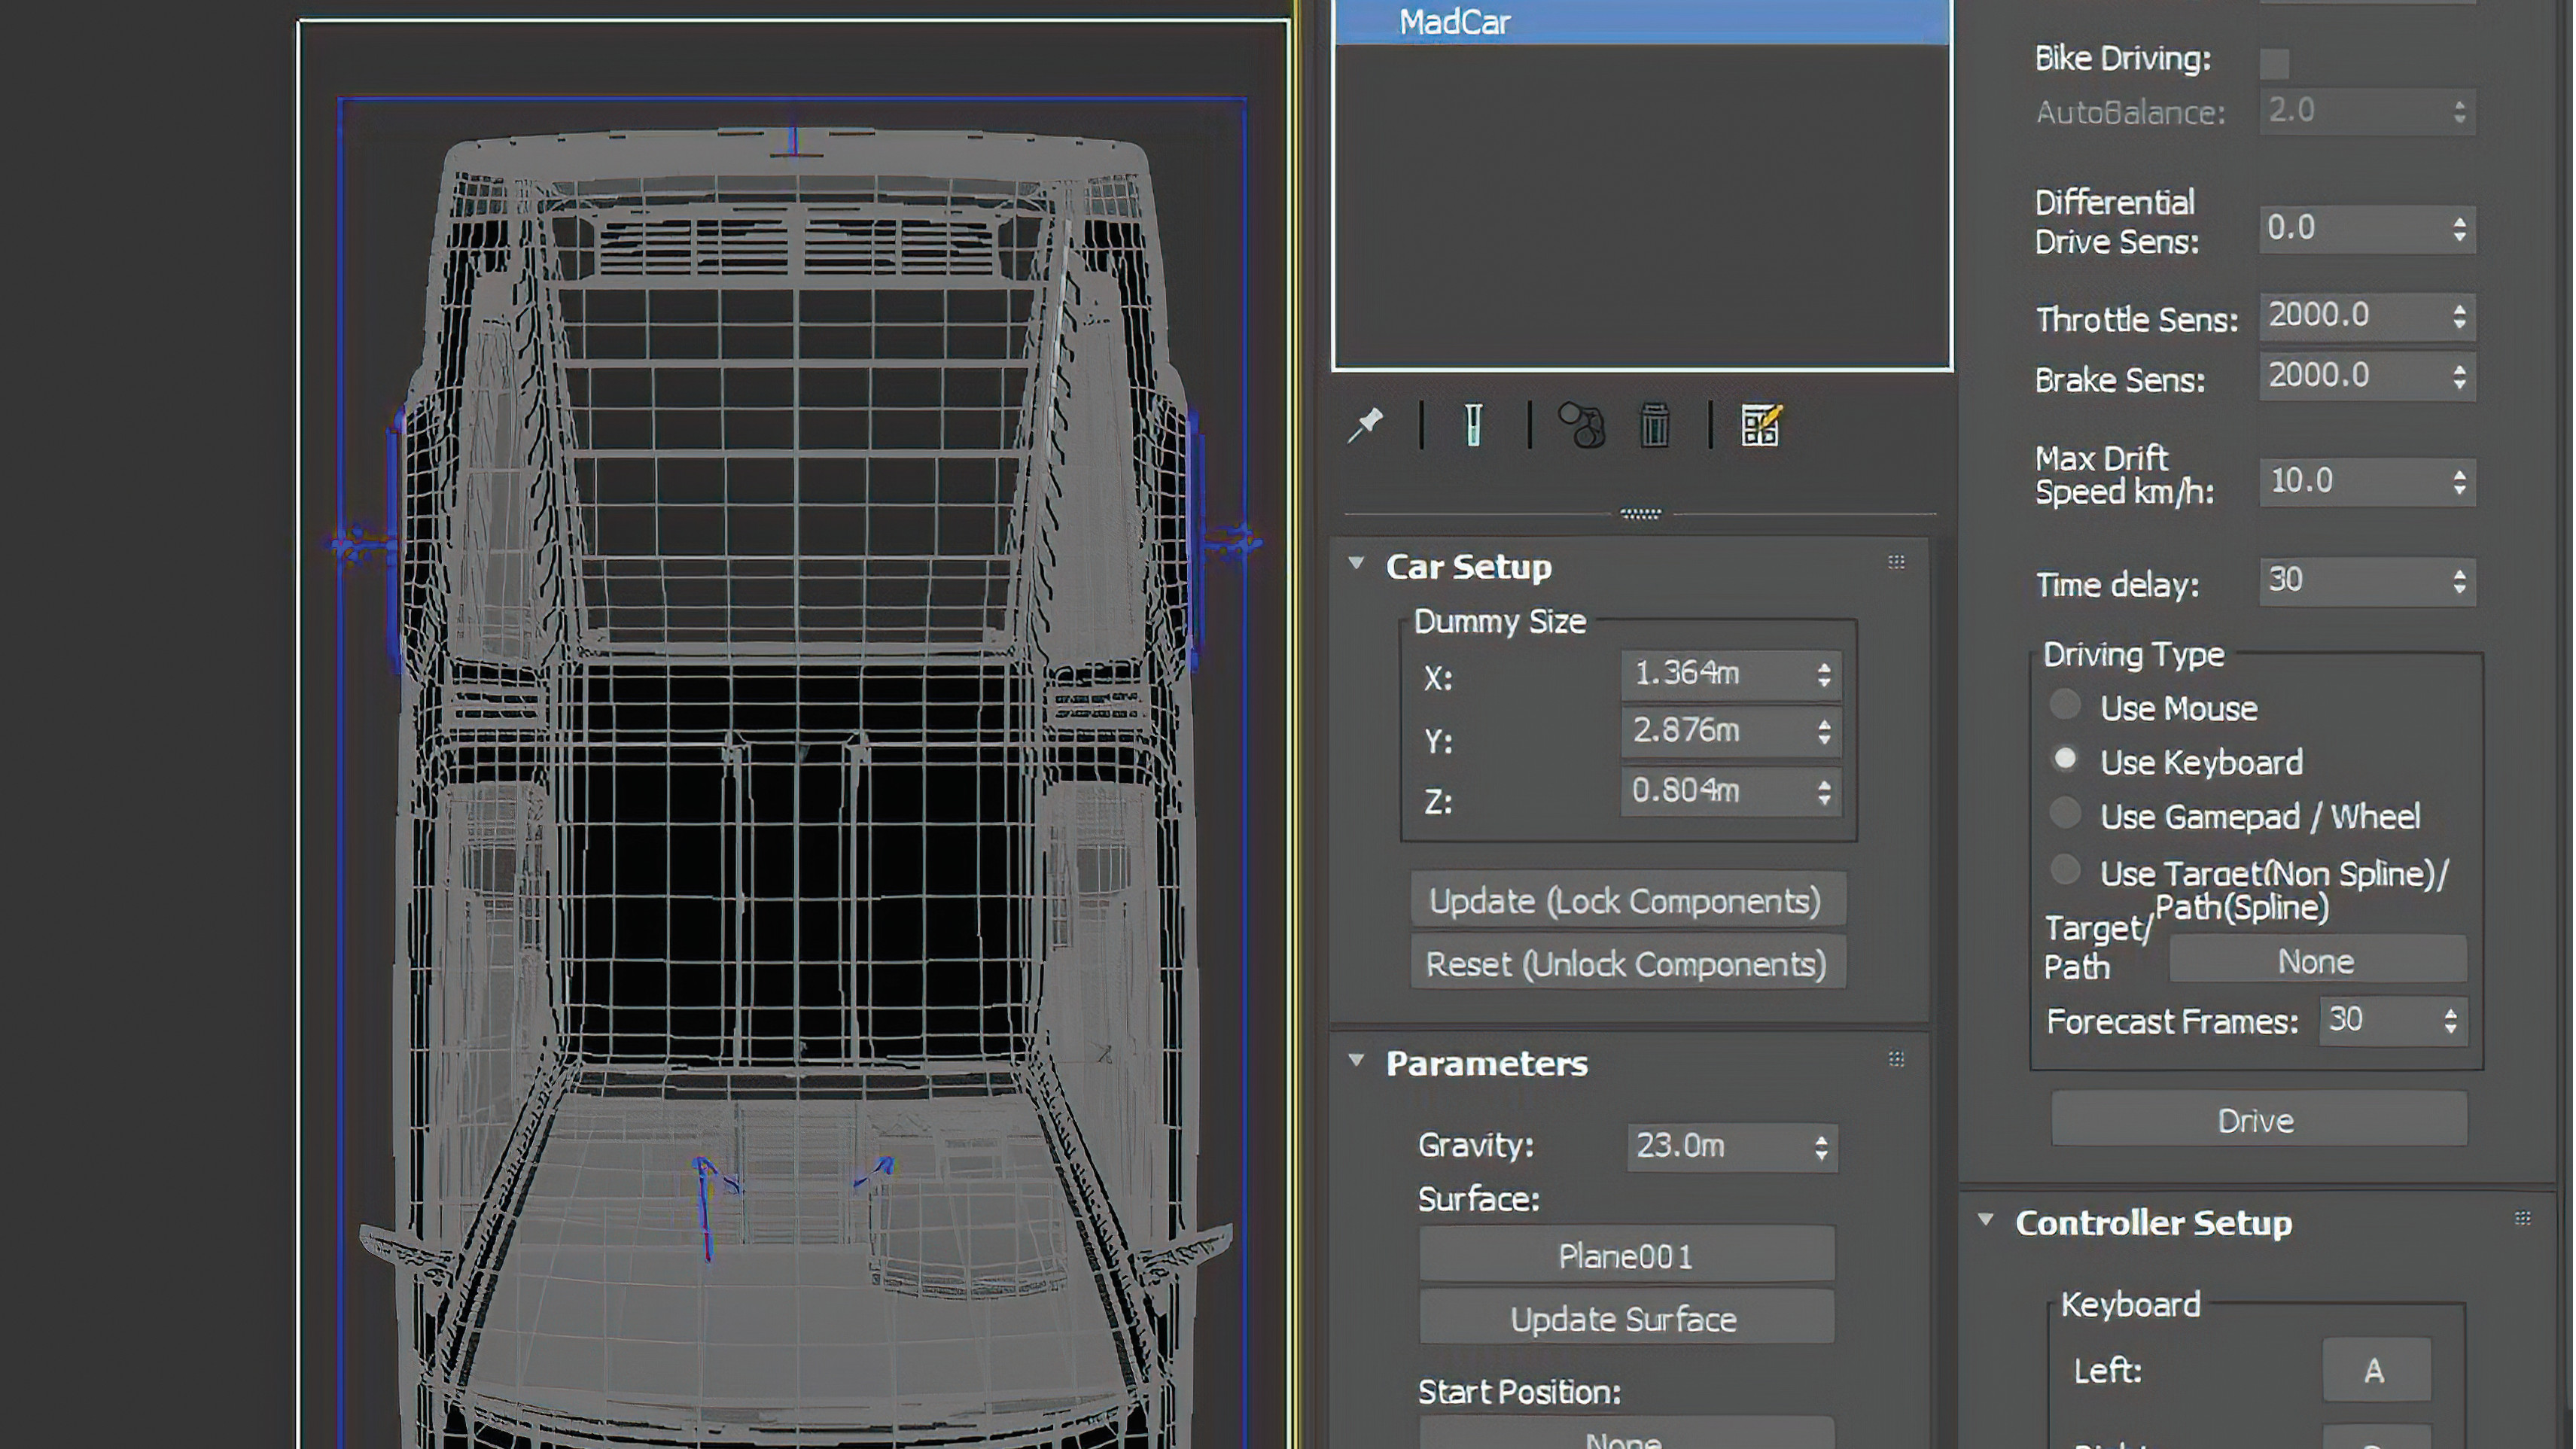
Select the MadCar container and in its Properties, click Update, which will lock all the components, essentially making them a single working object. Add in a simple plane that’s big enough for the car to drive around. I set the Gravity to 23, the Rudder Sens to 20, and the Keyframes to 1,000.
Here comes the real fun! Click the Drive button and a little window will appear. Press Enter, and you’ll now be able to drive the car around the plane you just created. The car’s controls are the same as most video games, using the ‘W’, ‘A’, ‘S’, ‘D’ and ‘X’ keys. When you reach frame 1,000, the simulation will stop and you’ll have your animation.
11. Resetting the car's animation
But what happens if you don’t like the animation you’ve created and want a different path? This one is a simple fix: just use the Reset Animation button, which will wipe the slate clean. It can take a little practice to drive the car cleanly, but keep trying and you’ll get there – it’s a fun task to play around with too!
Animating with 3ds Max: quick tips
Here are a couple of quick tips to keep in mind when you're trying this animation for yourself in 3ds Max.
Reset plugin properties
Sometimes when using the MadCar plugin, the simulation won’t work due to errors in the setup. When this happens, simply reset the properties.
Create an asset library
Most of the models we use these days come fully joined up. Each time you adjust, separate and tweak your models, save them ready for animation so they can be used again later.
Get more software tutorials at 3D World
This content originally appeared in 3D World magazine, the world's leading CG art magazine. 3D World is on sale in the UK, Europe, United States, Canada, Australia and more. Limited numbers of 3D World print editions are available for delivery from our online store (the shipping costs are included in all prices). Subscribe to 3D World at Magazines Direct.