I have a love-hate relationship with sellotape over the Christmas period. While I need it to wrap presents, there never seems to be enough of it, and it has a nasty habit of ruining my precise wrapping when I do have it.
That is why over the last couple of years I’ve committed to a clever wrapping hack, which uses just one piece of sticky tape. And I guarantee it looks like I put in a lot more effort than I actually did.
I started using the one-piece of tape hack about three years ago after finding a tutorial for how to make Christmas wrapping quicker on Instagram. The gist is that through some clever paper folding, you’ll end up with a present that needs one piece of tape to secure the loose end. I’ve found it’s not only faster, but it makes my gifts look like they've been wrapped by a professional.
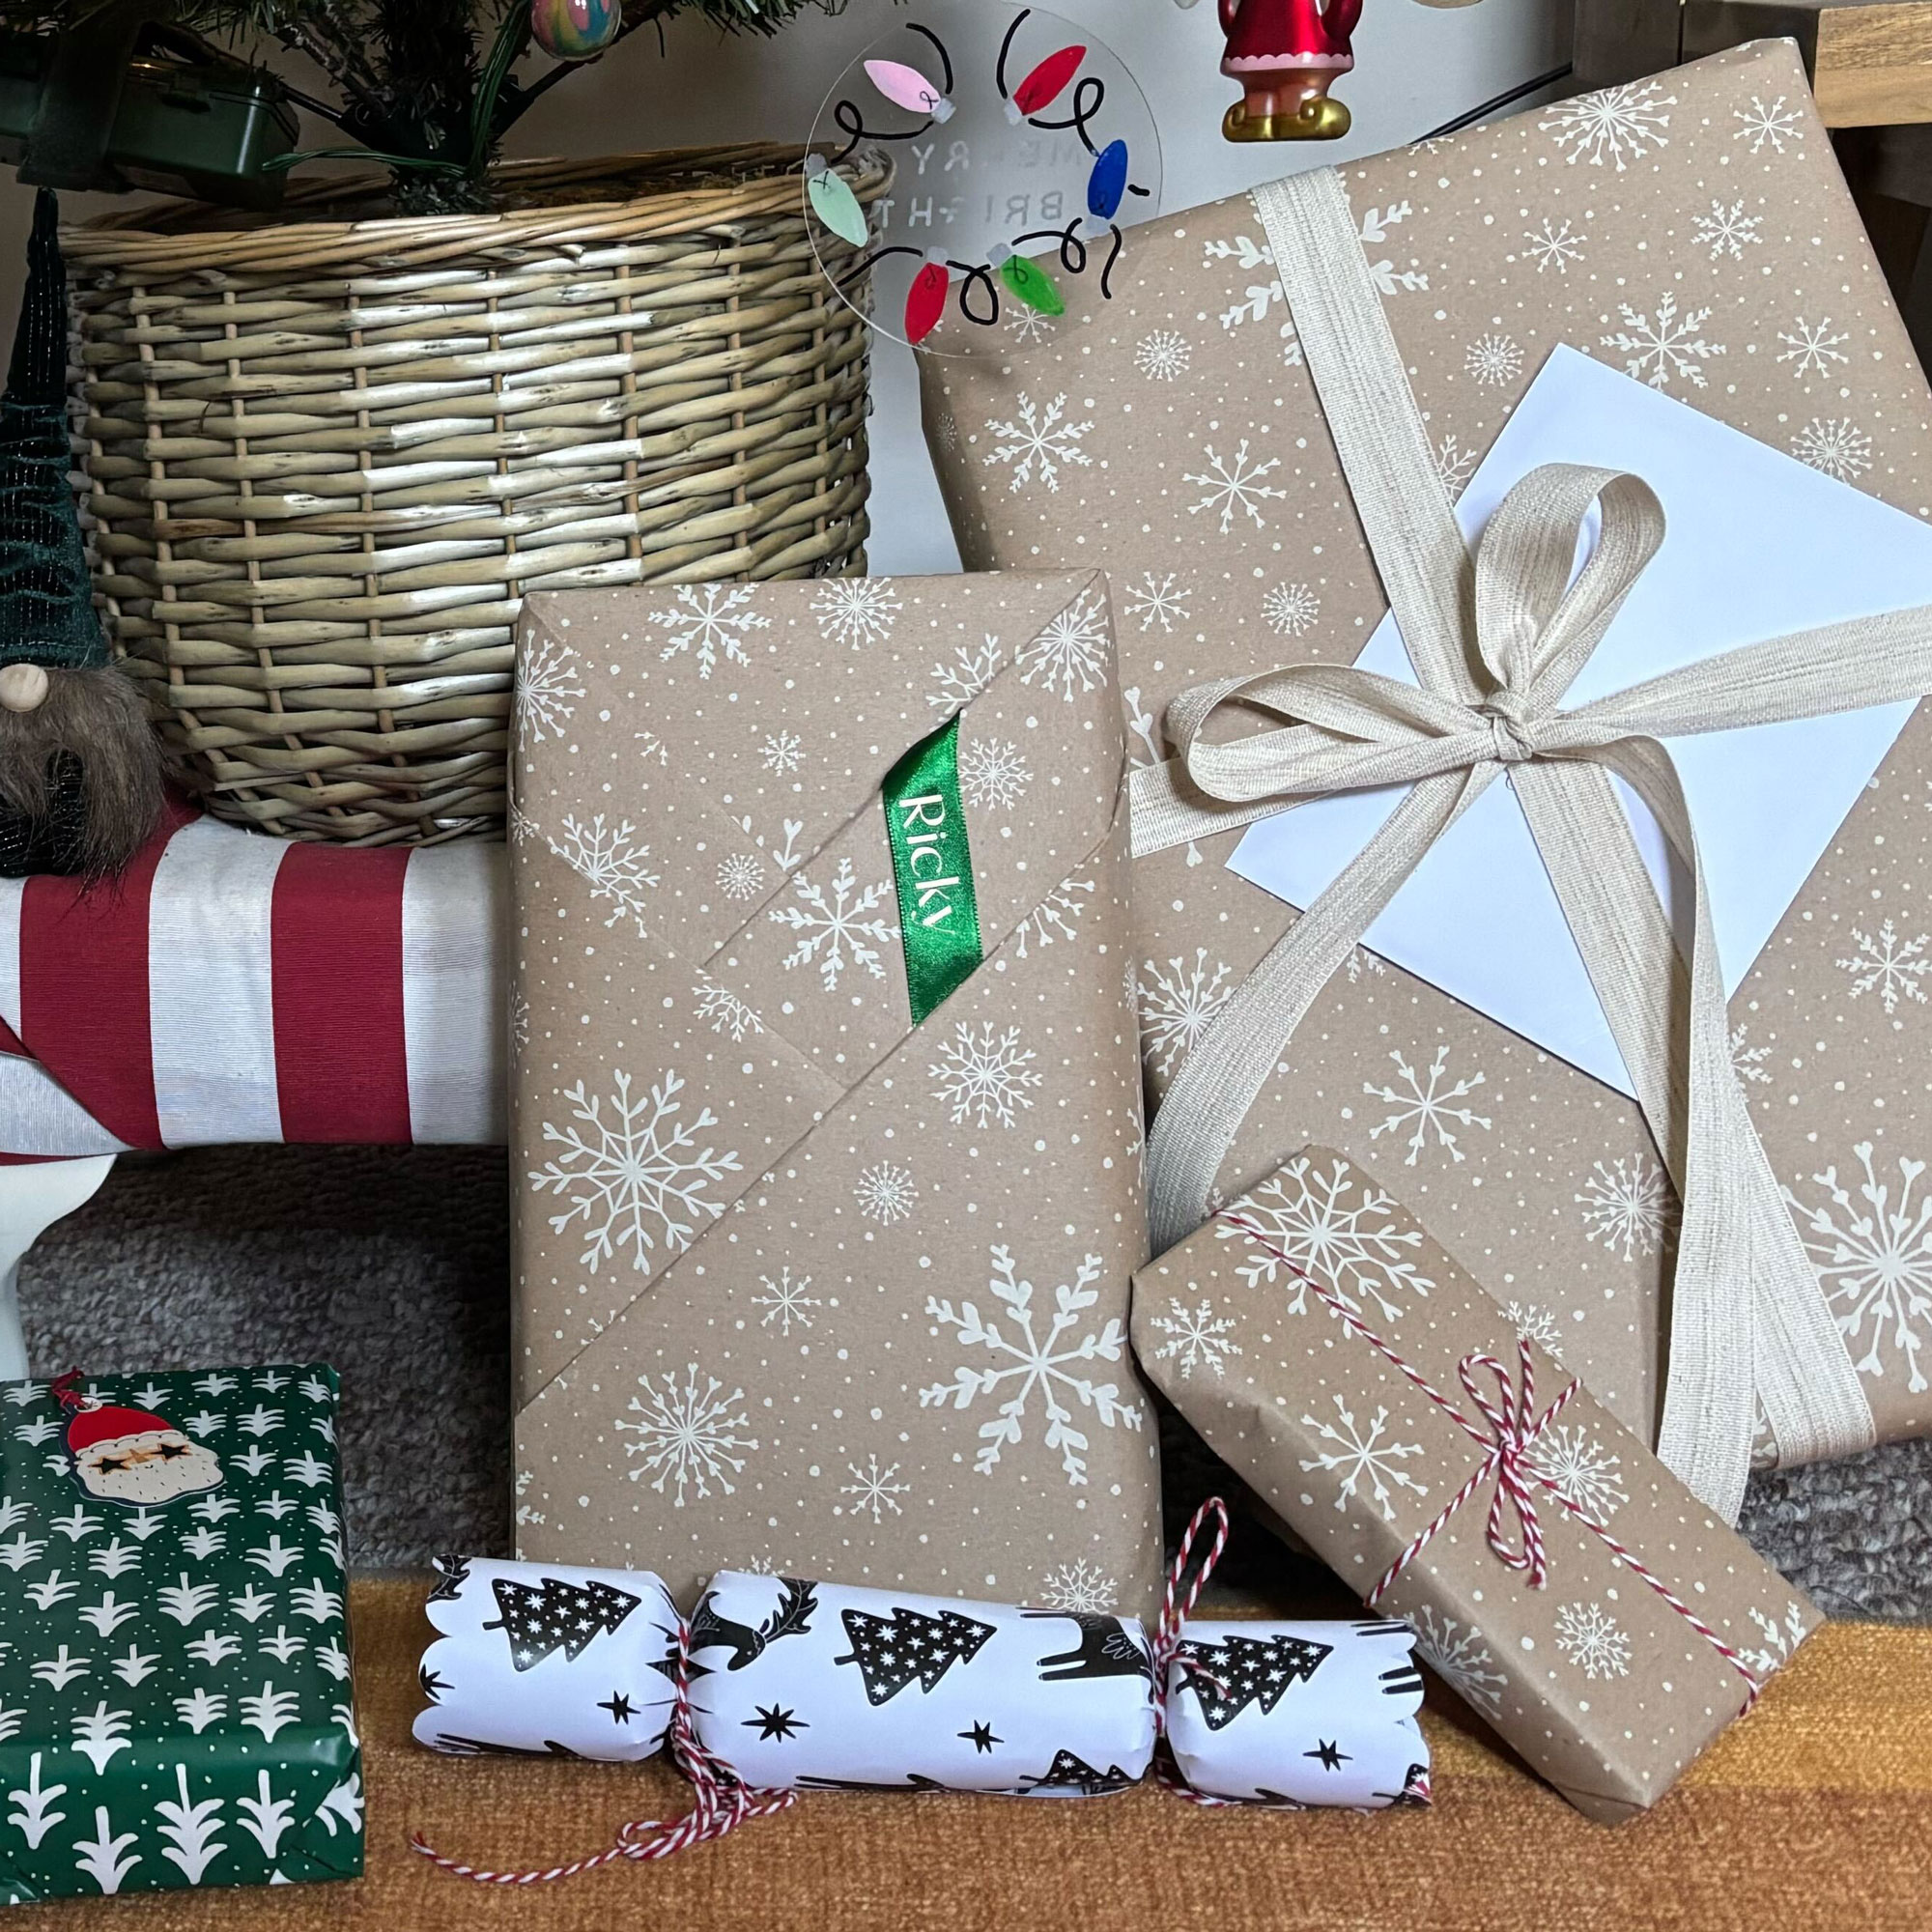
So how does it work? I’ll start by saying this hack is best for square or rectangular gifts; if you're wrapping something with curves, this is not going to work. You need to take a large piece of wrapping paper. As a guideline, if you are wrapping a book, the length and width should be three times the size of the book. For the paper, I usually keep things simple with brown paper that I can jazz up with ribbon, gift tags and even slices of dried oranges.
How it works
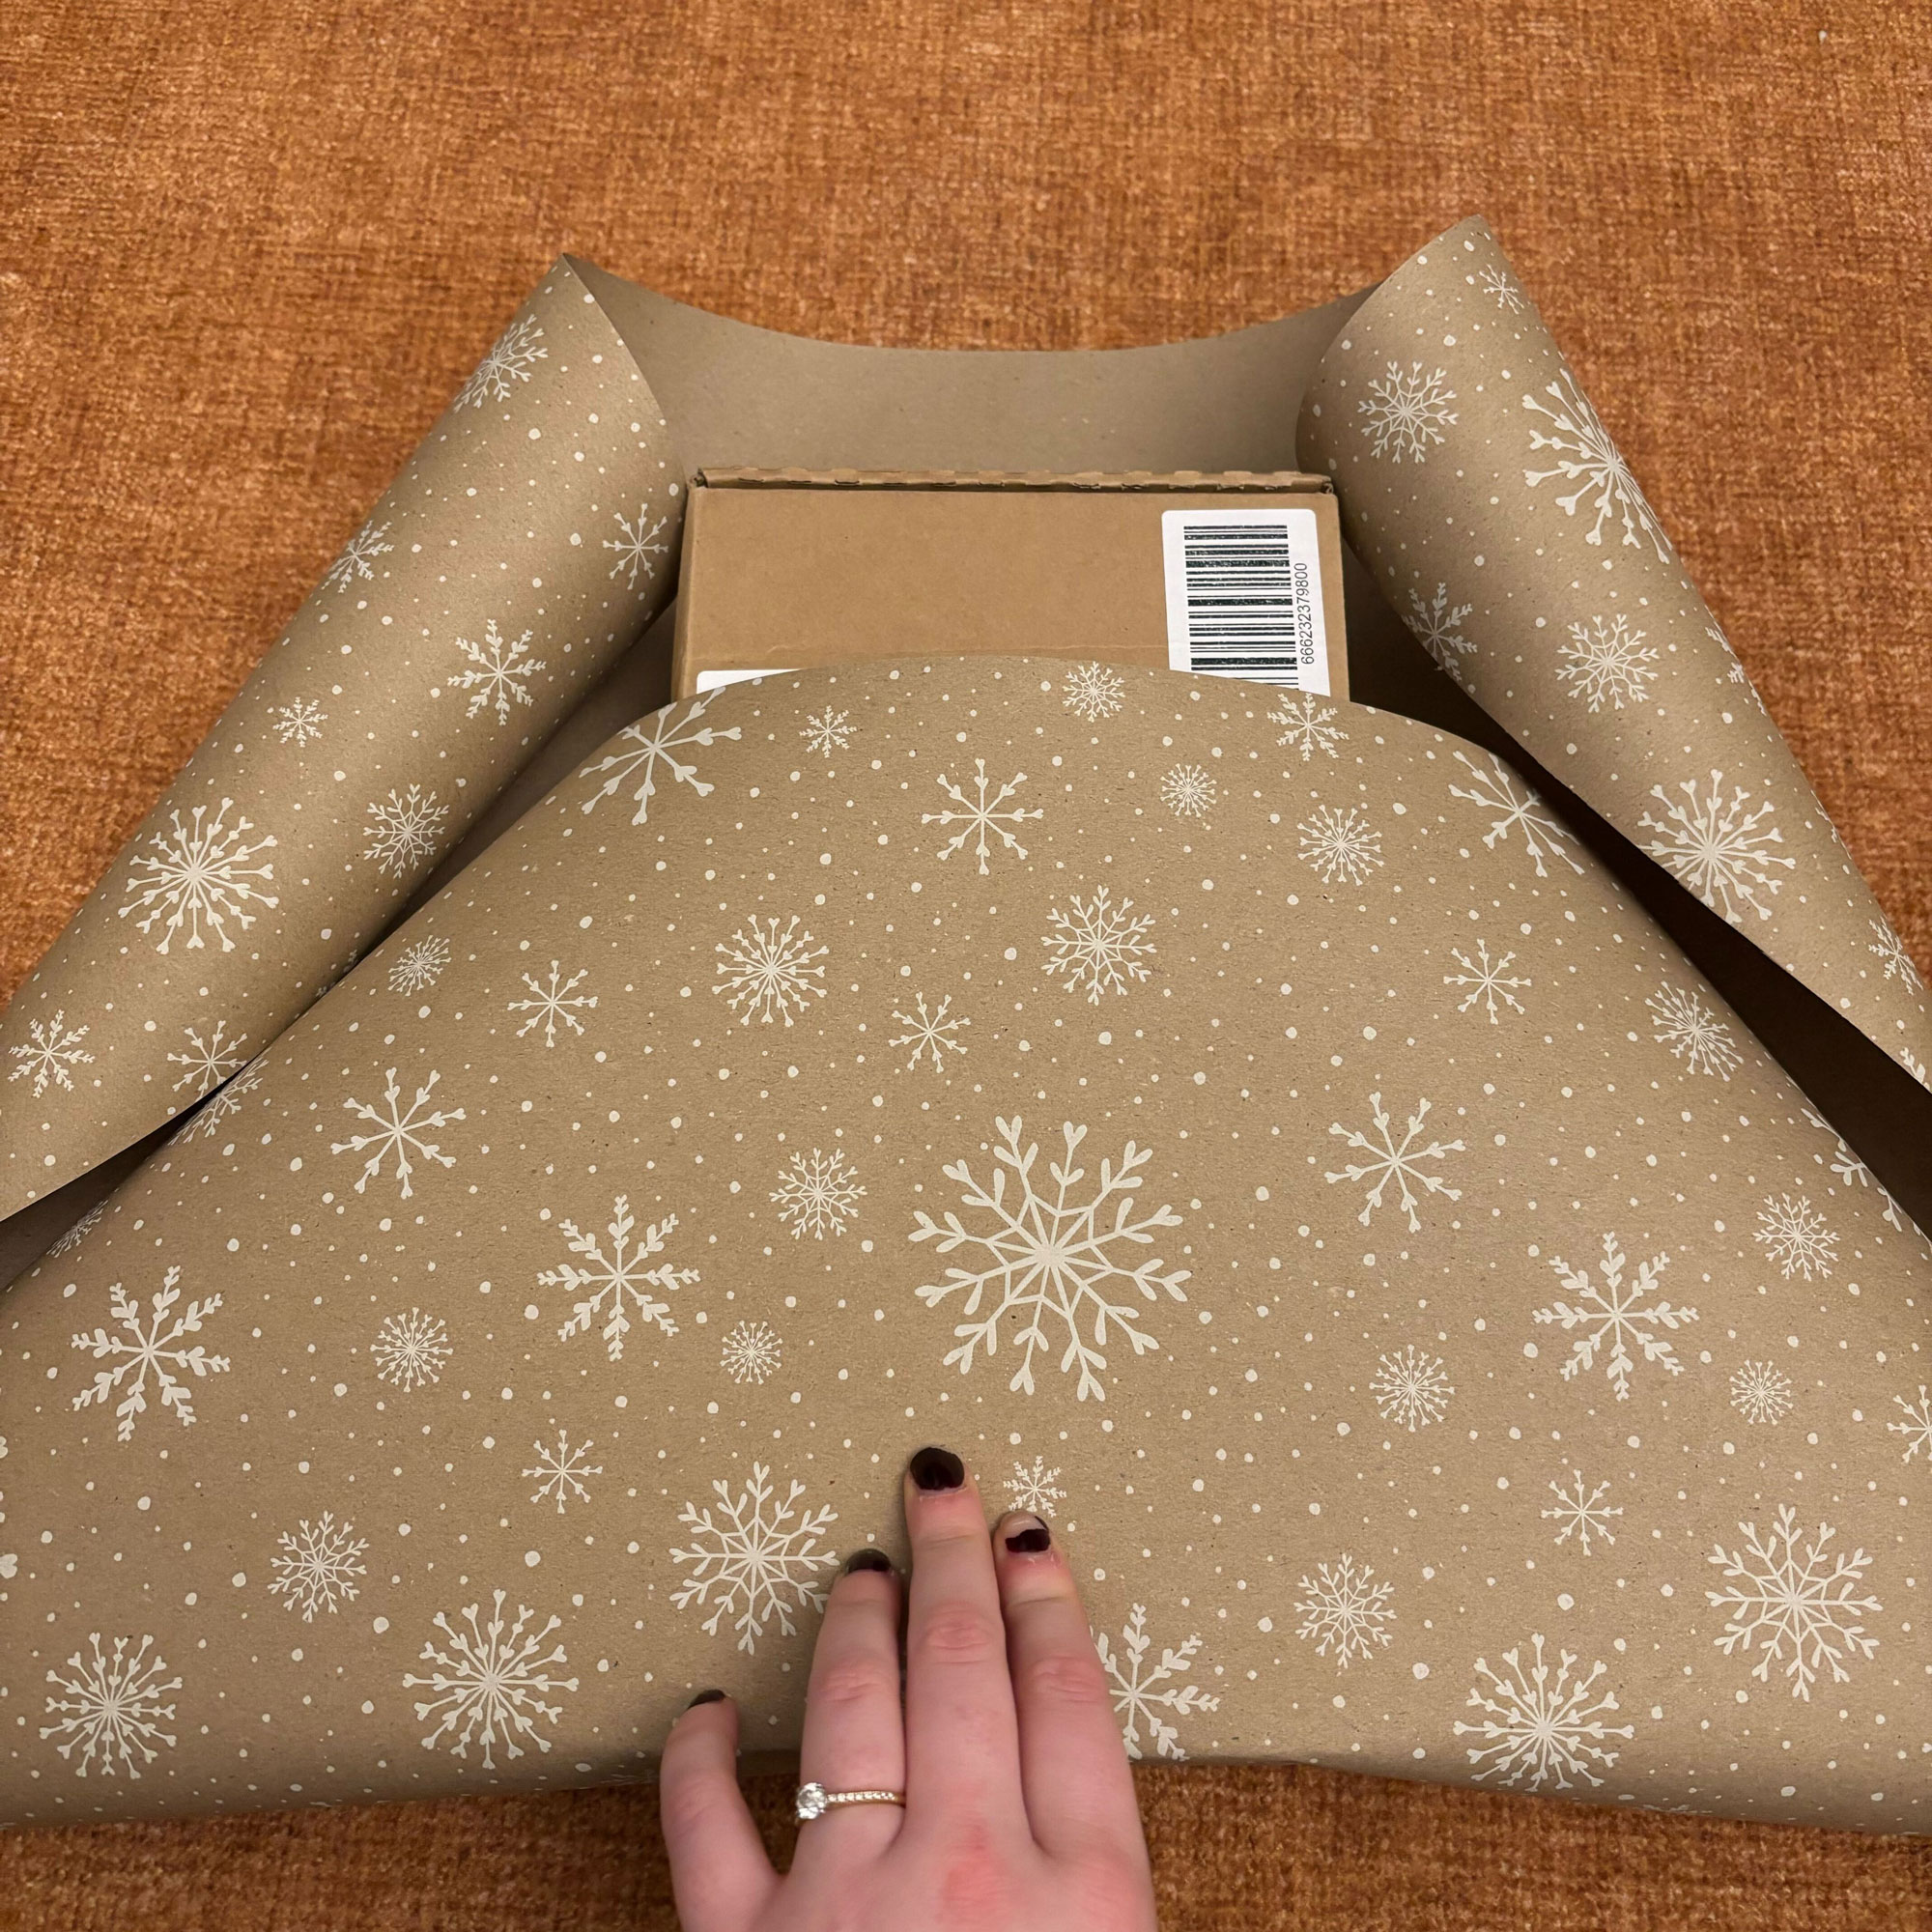
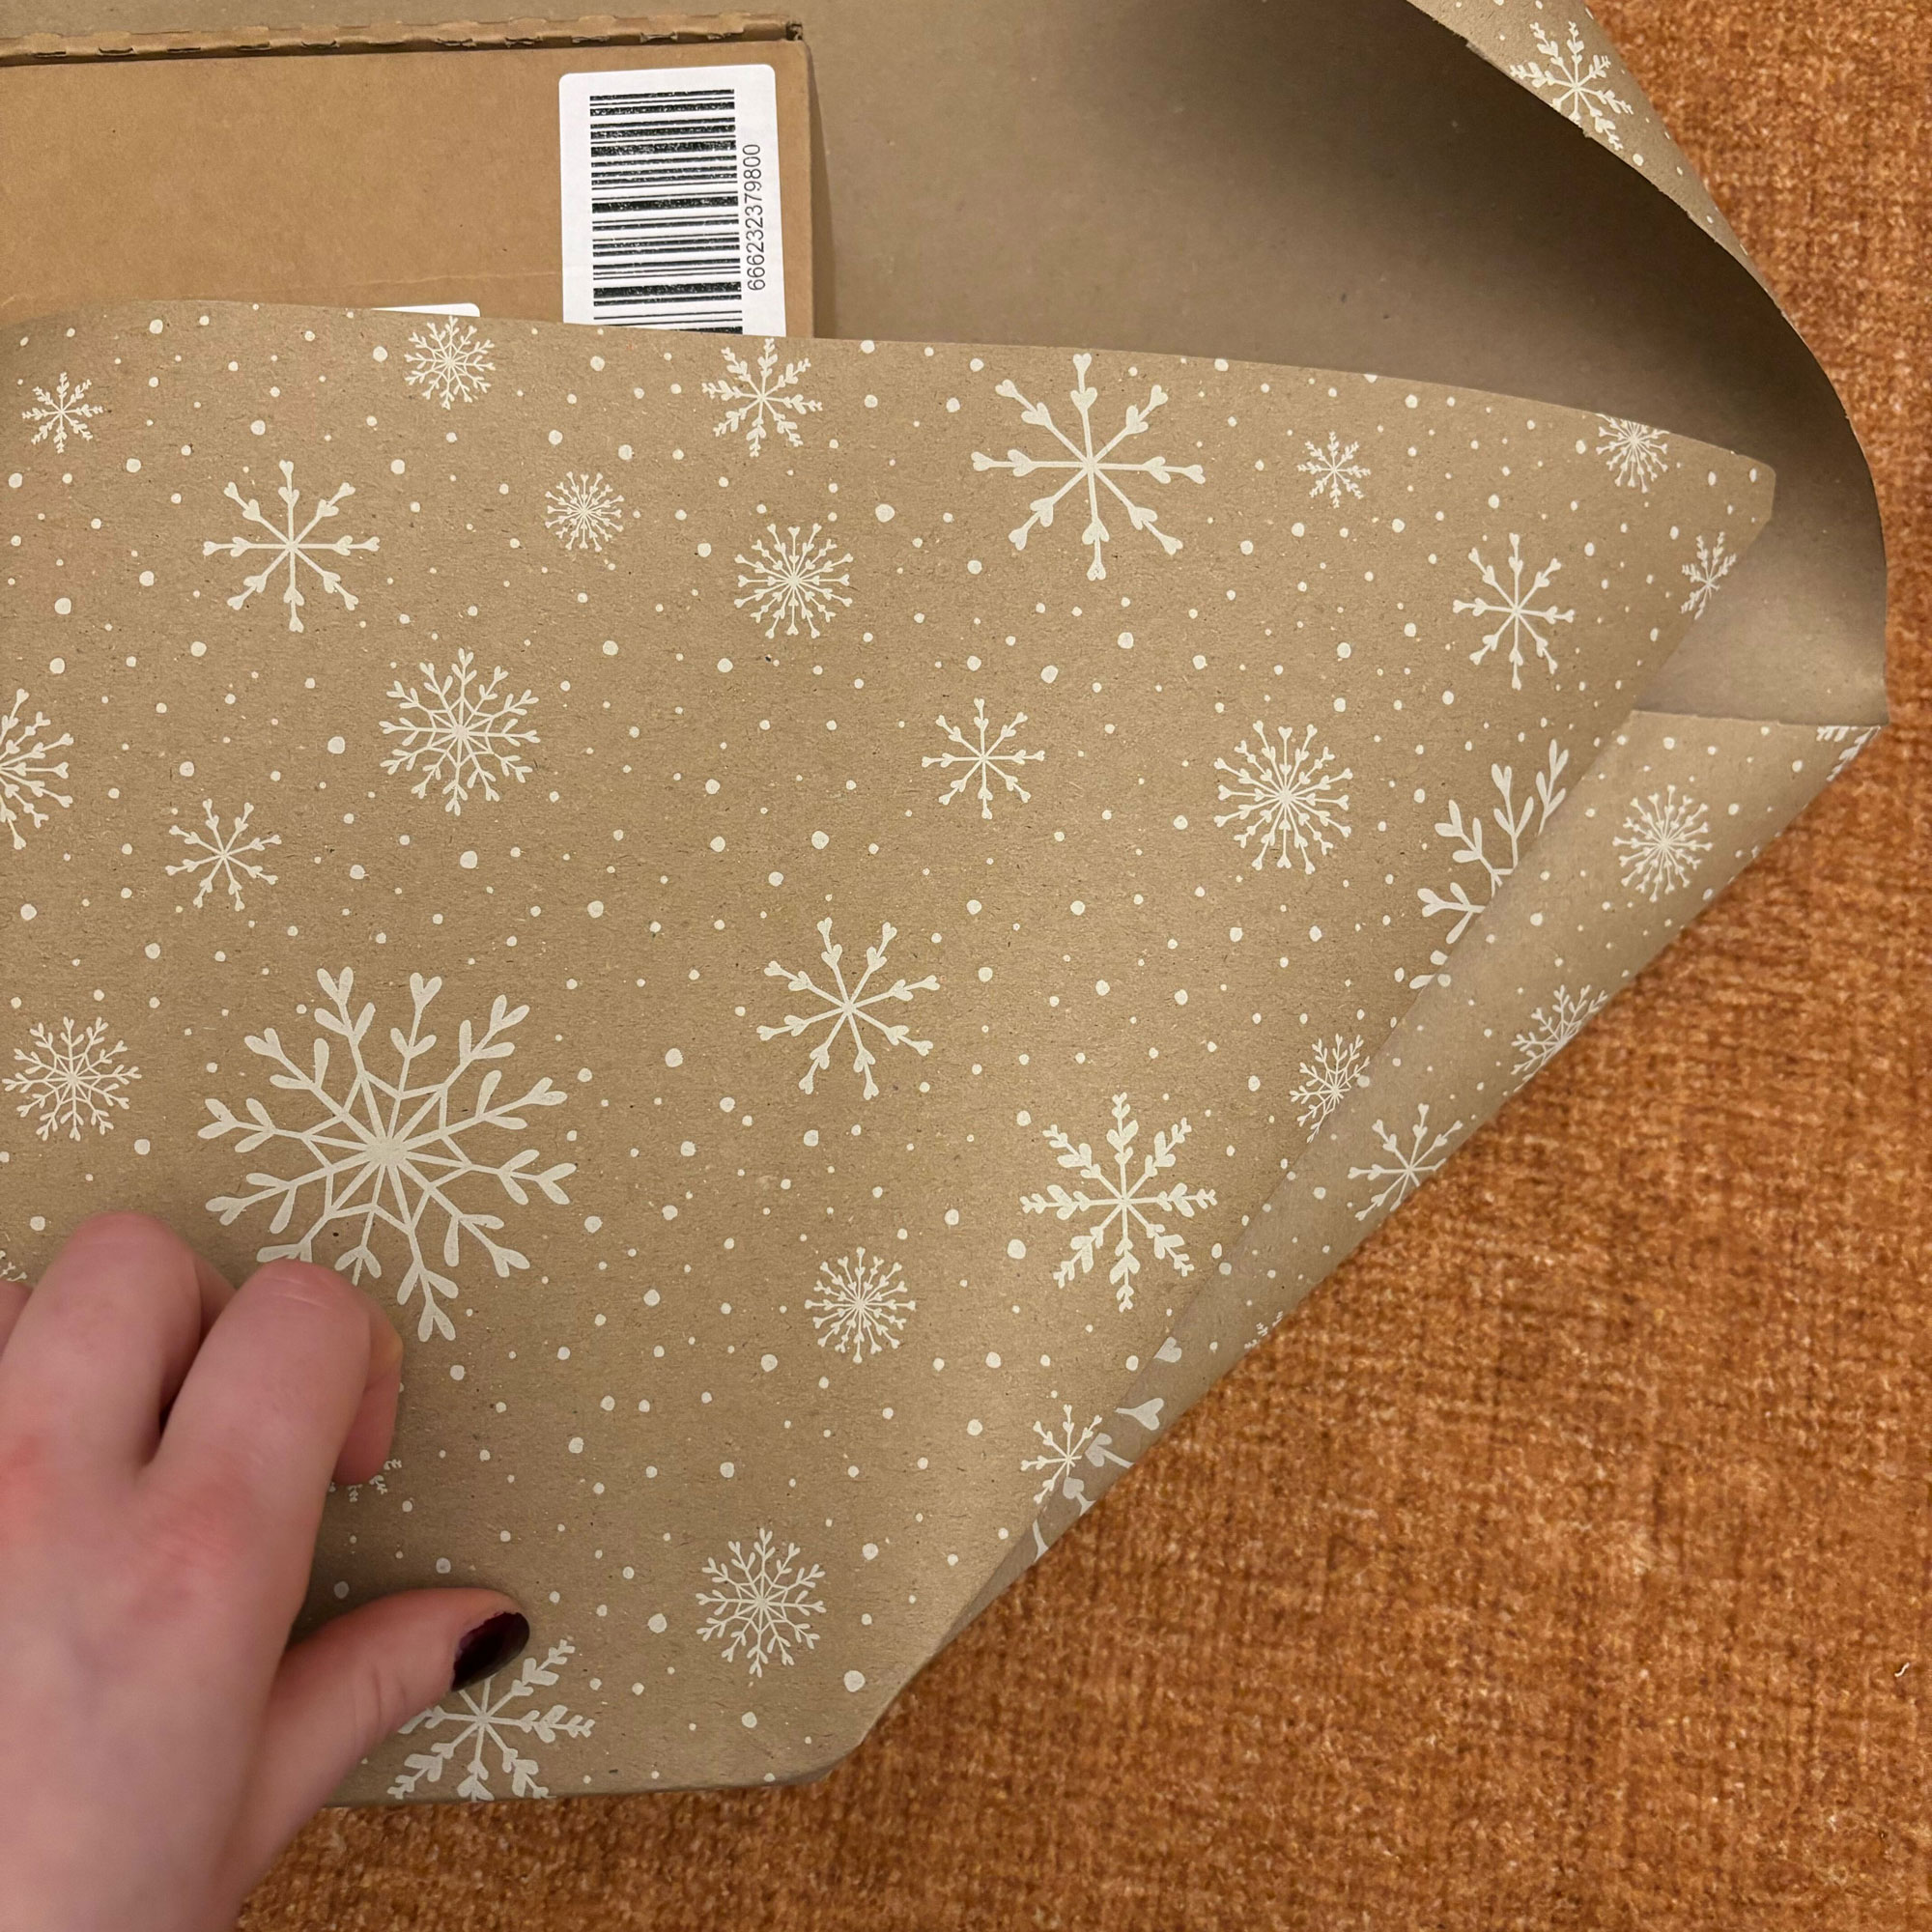

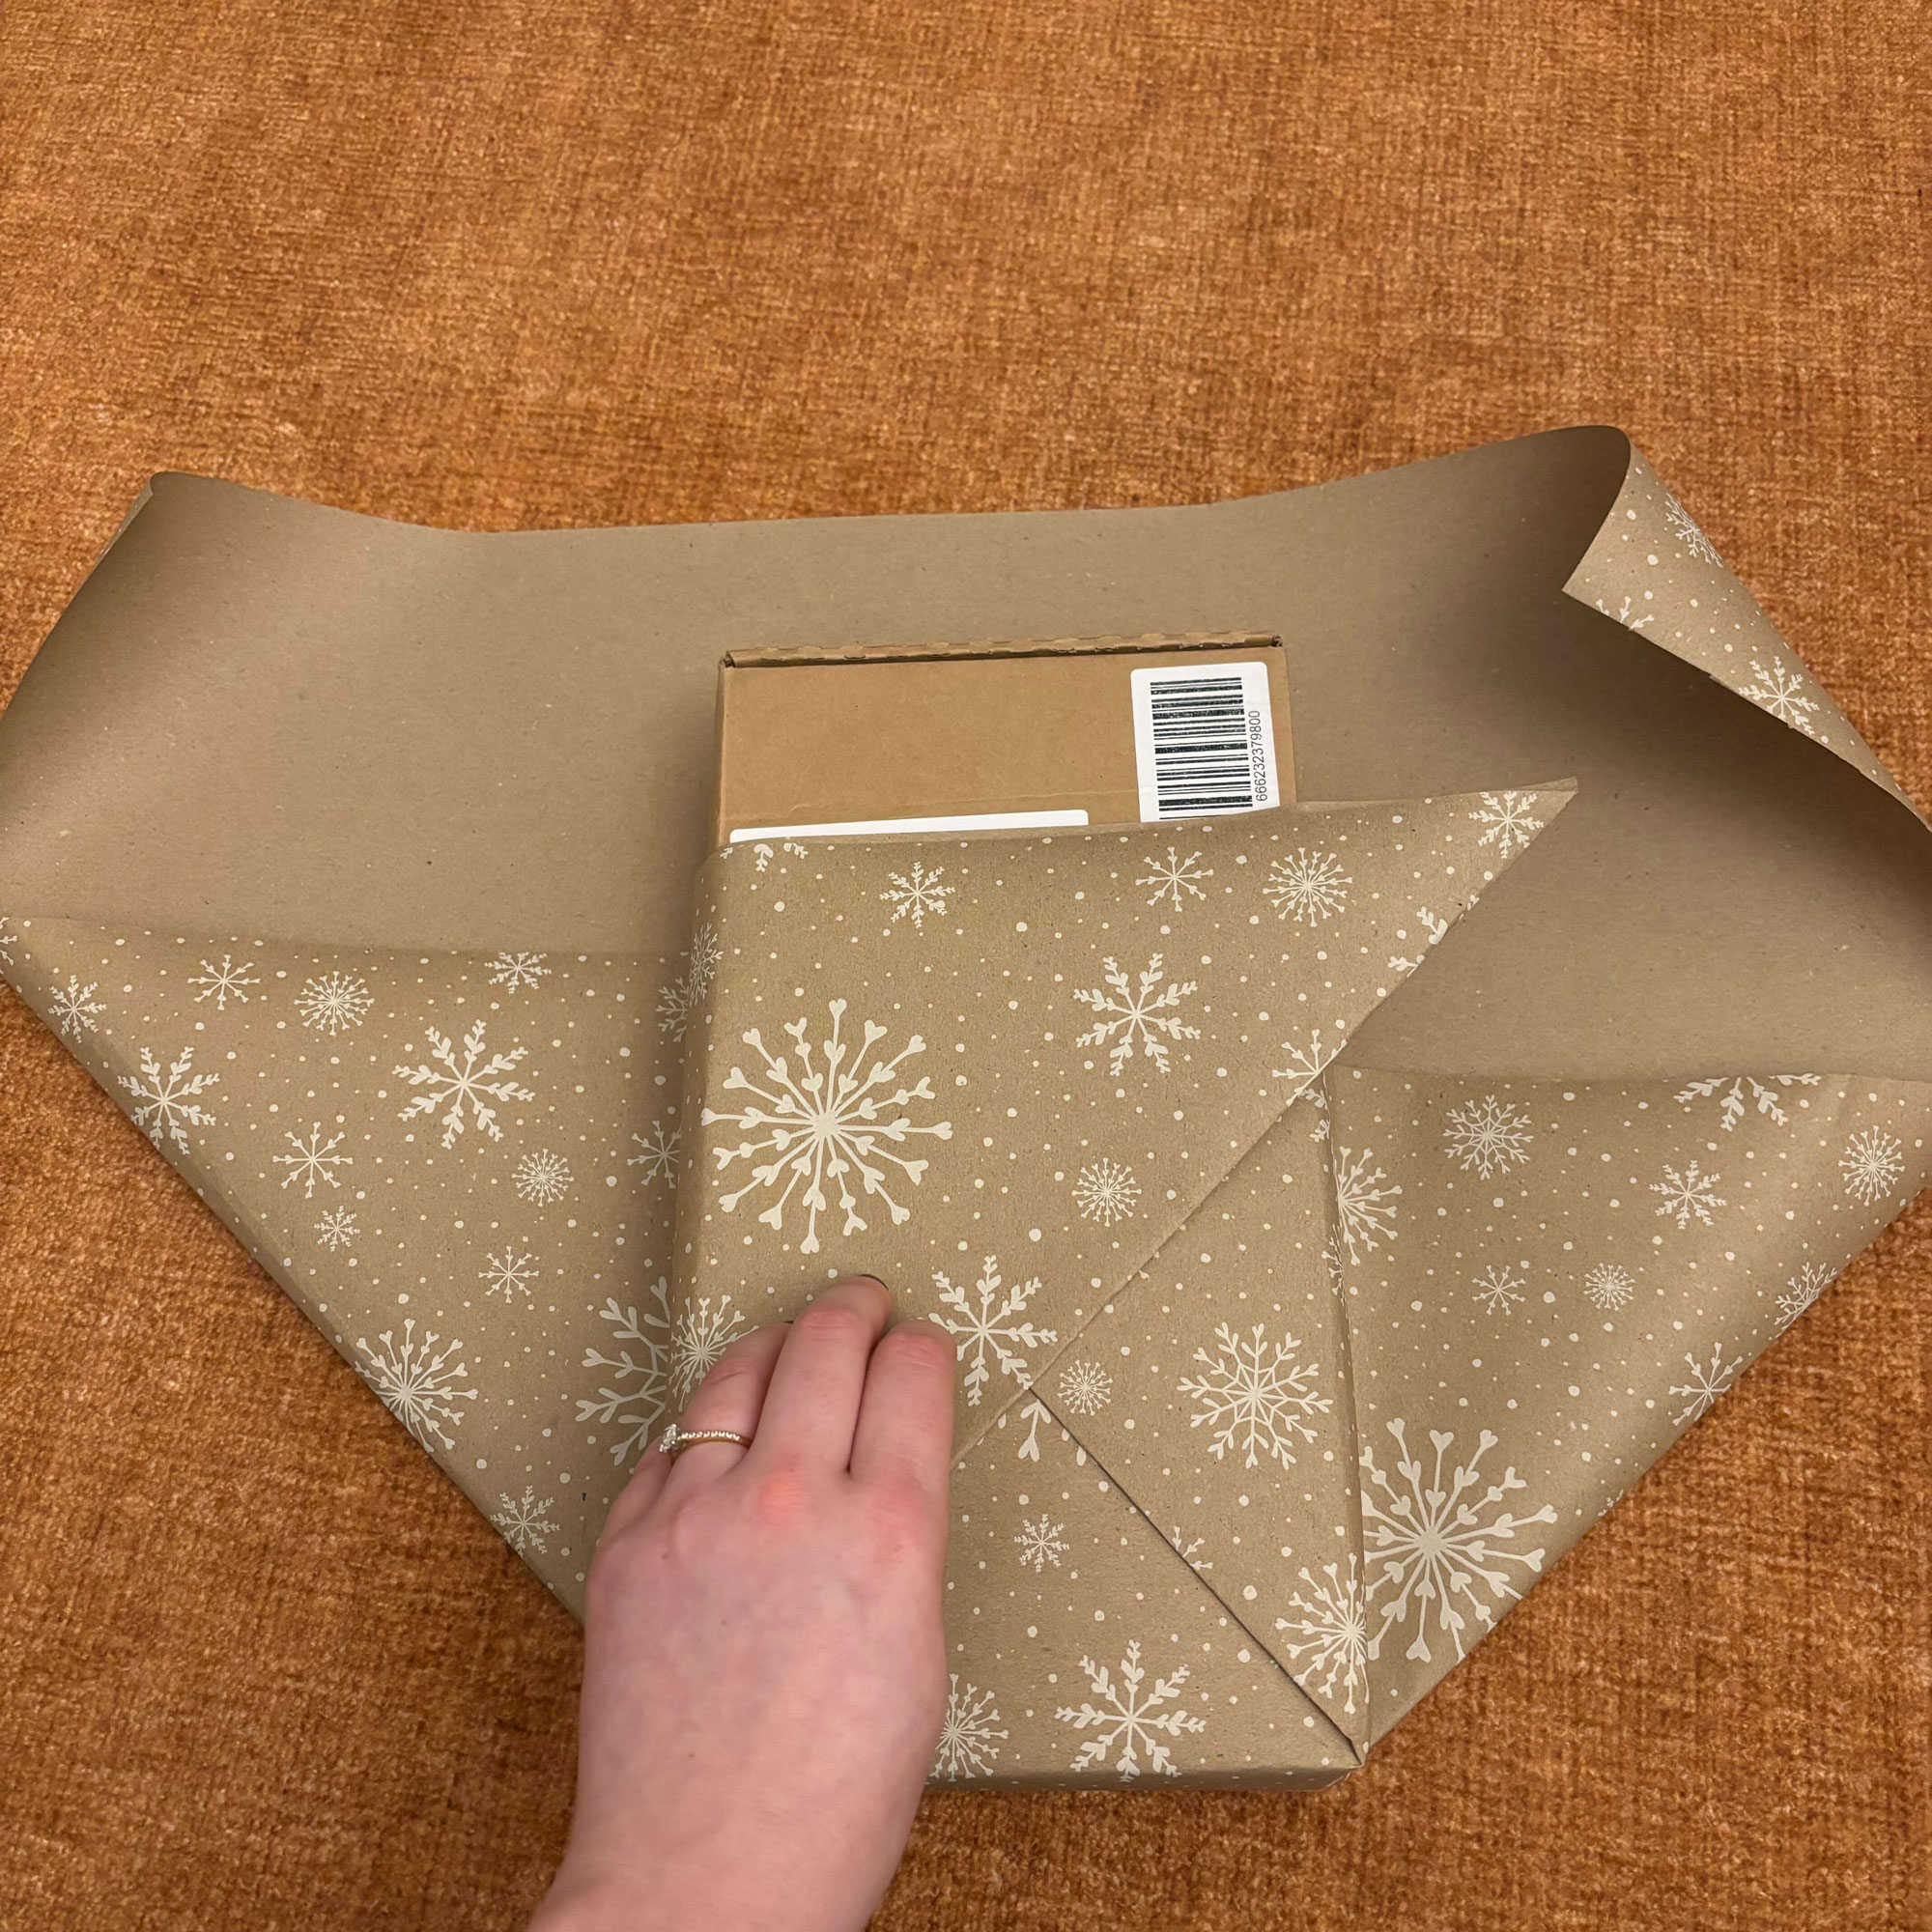

You’re going to start by folding the paper upwards to cover half of the gift. Then, starting on the right side, pull the fold of paper up so that it runs along the edge of the present, and you have two triangle-shaped flaps. Do the same to the left-hand side.
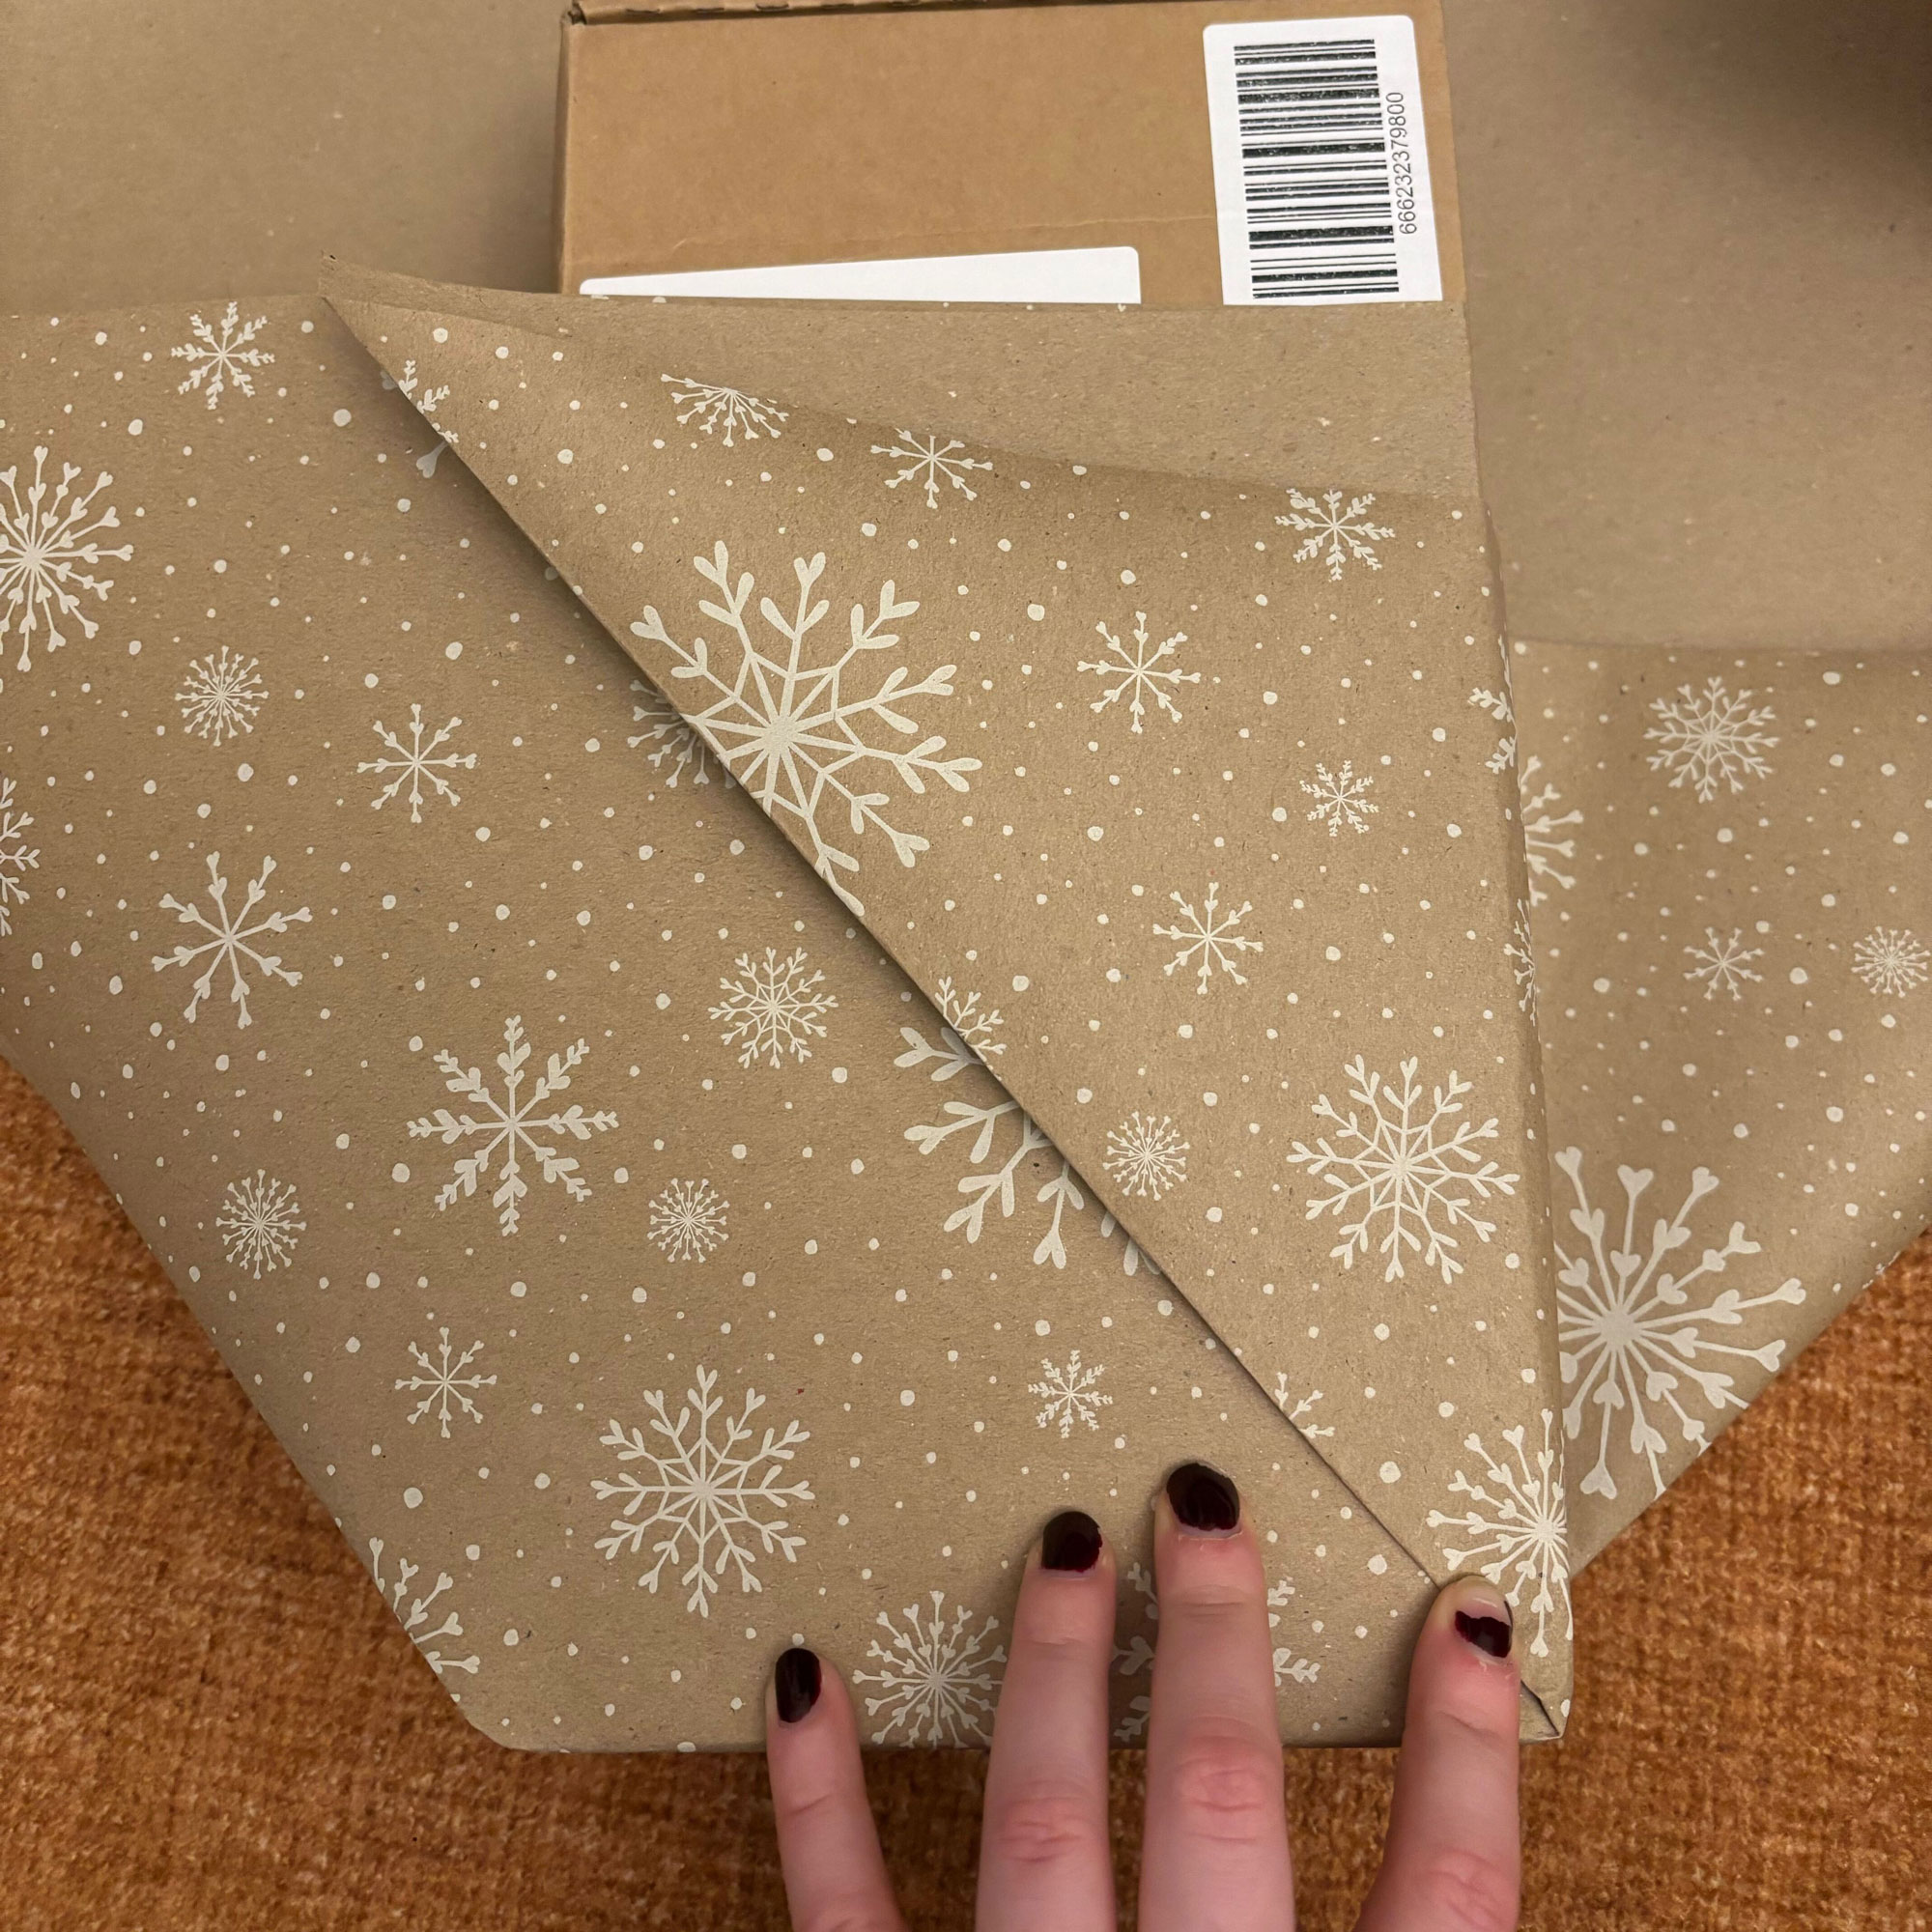
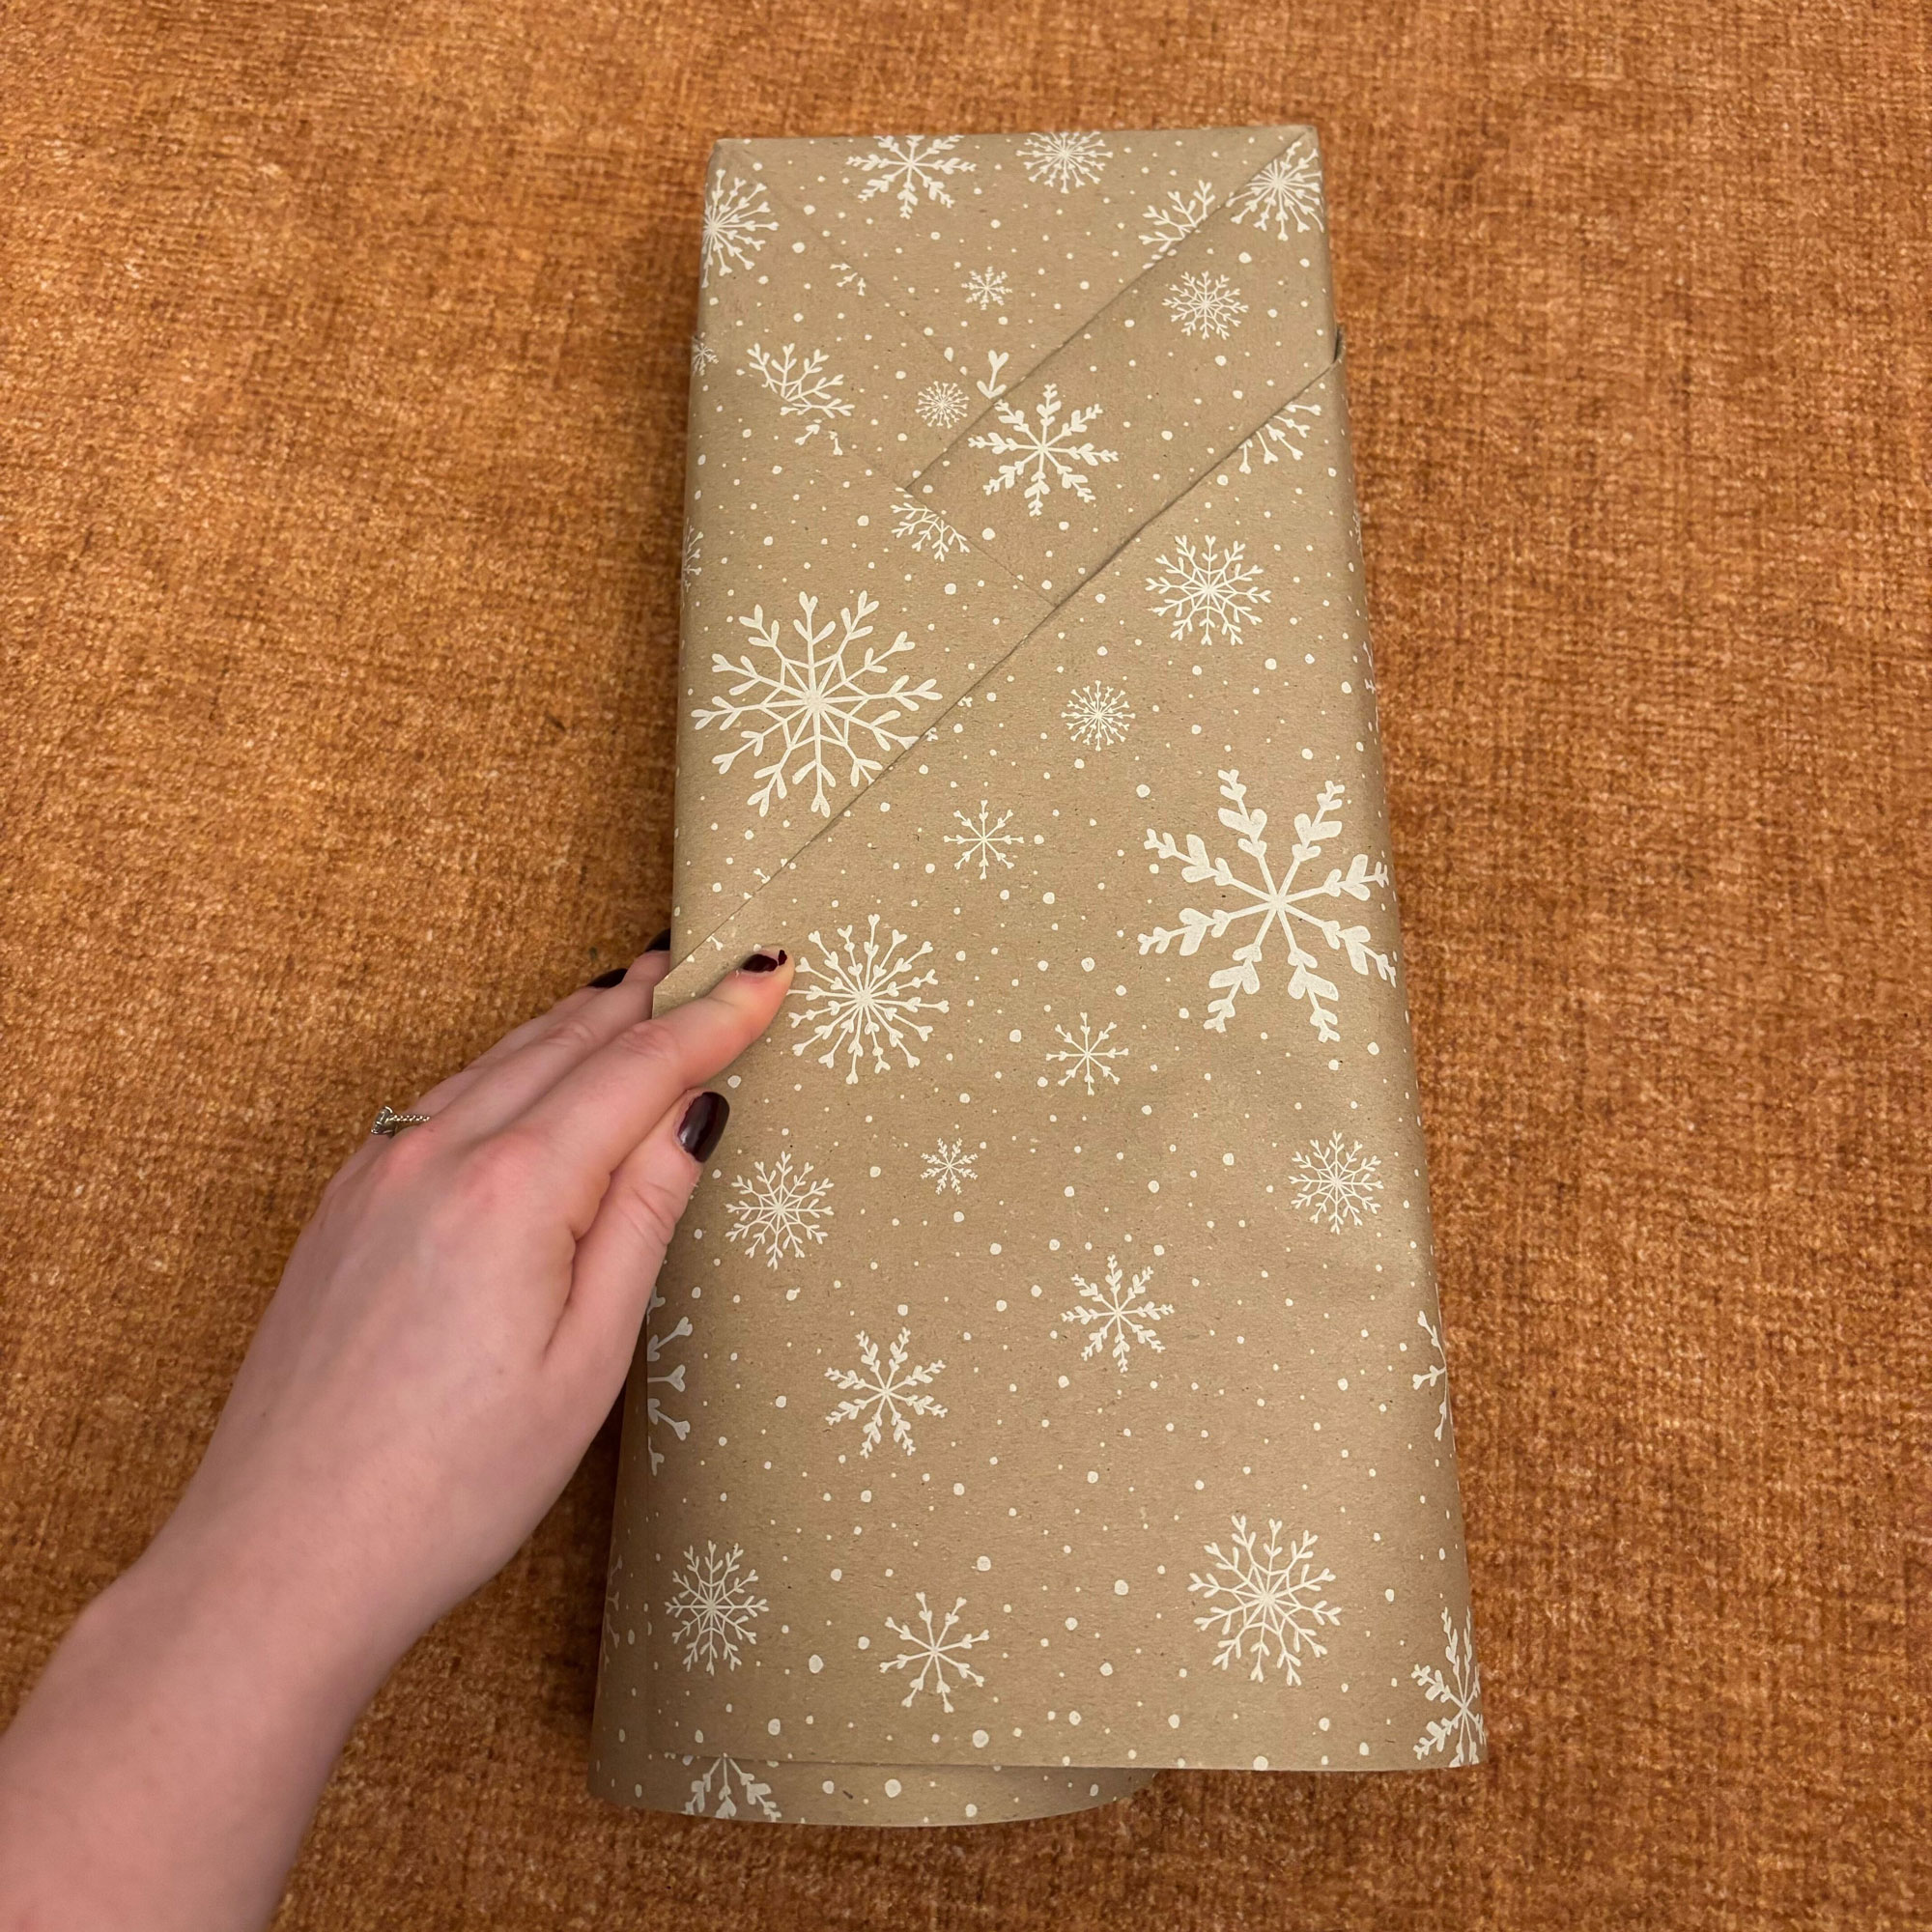
Now comes the part I call the ‘folding plait’, fold the first triangle on the right over the present, followed by the left-hand side. Then repeat with the second triangle of paper on both sides.
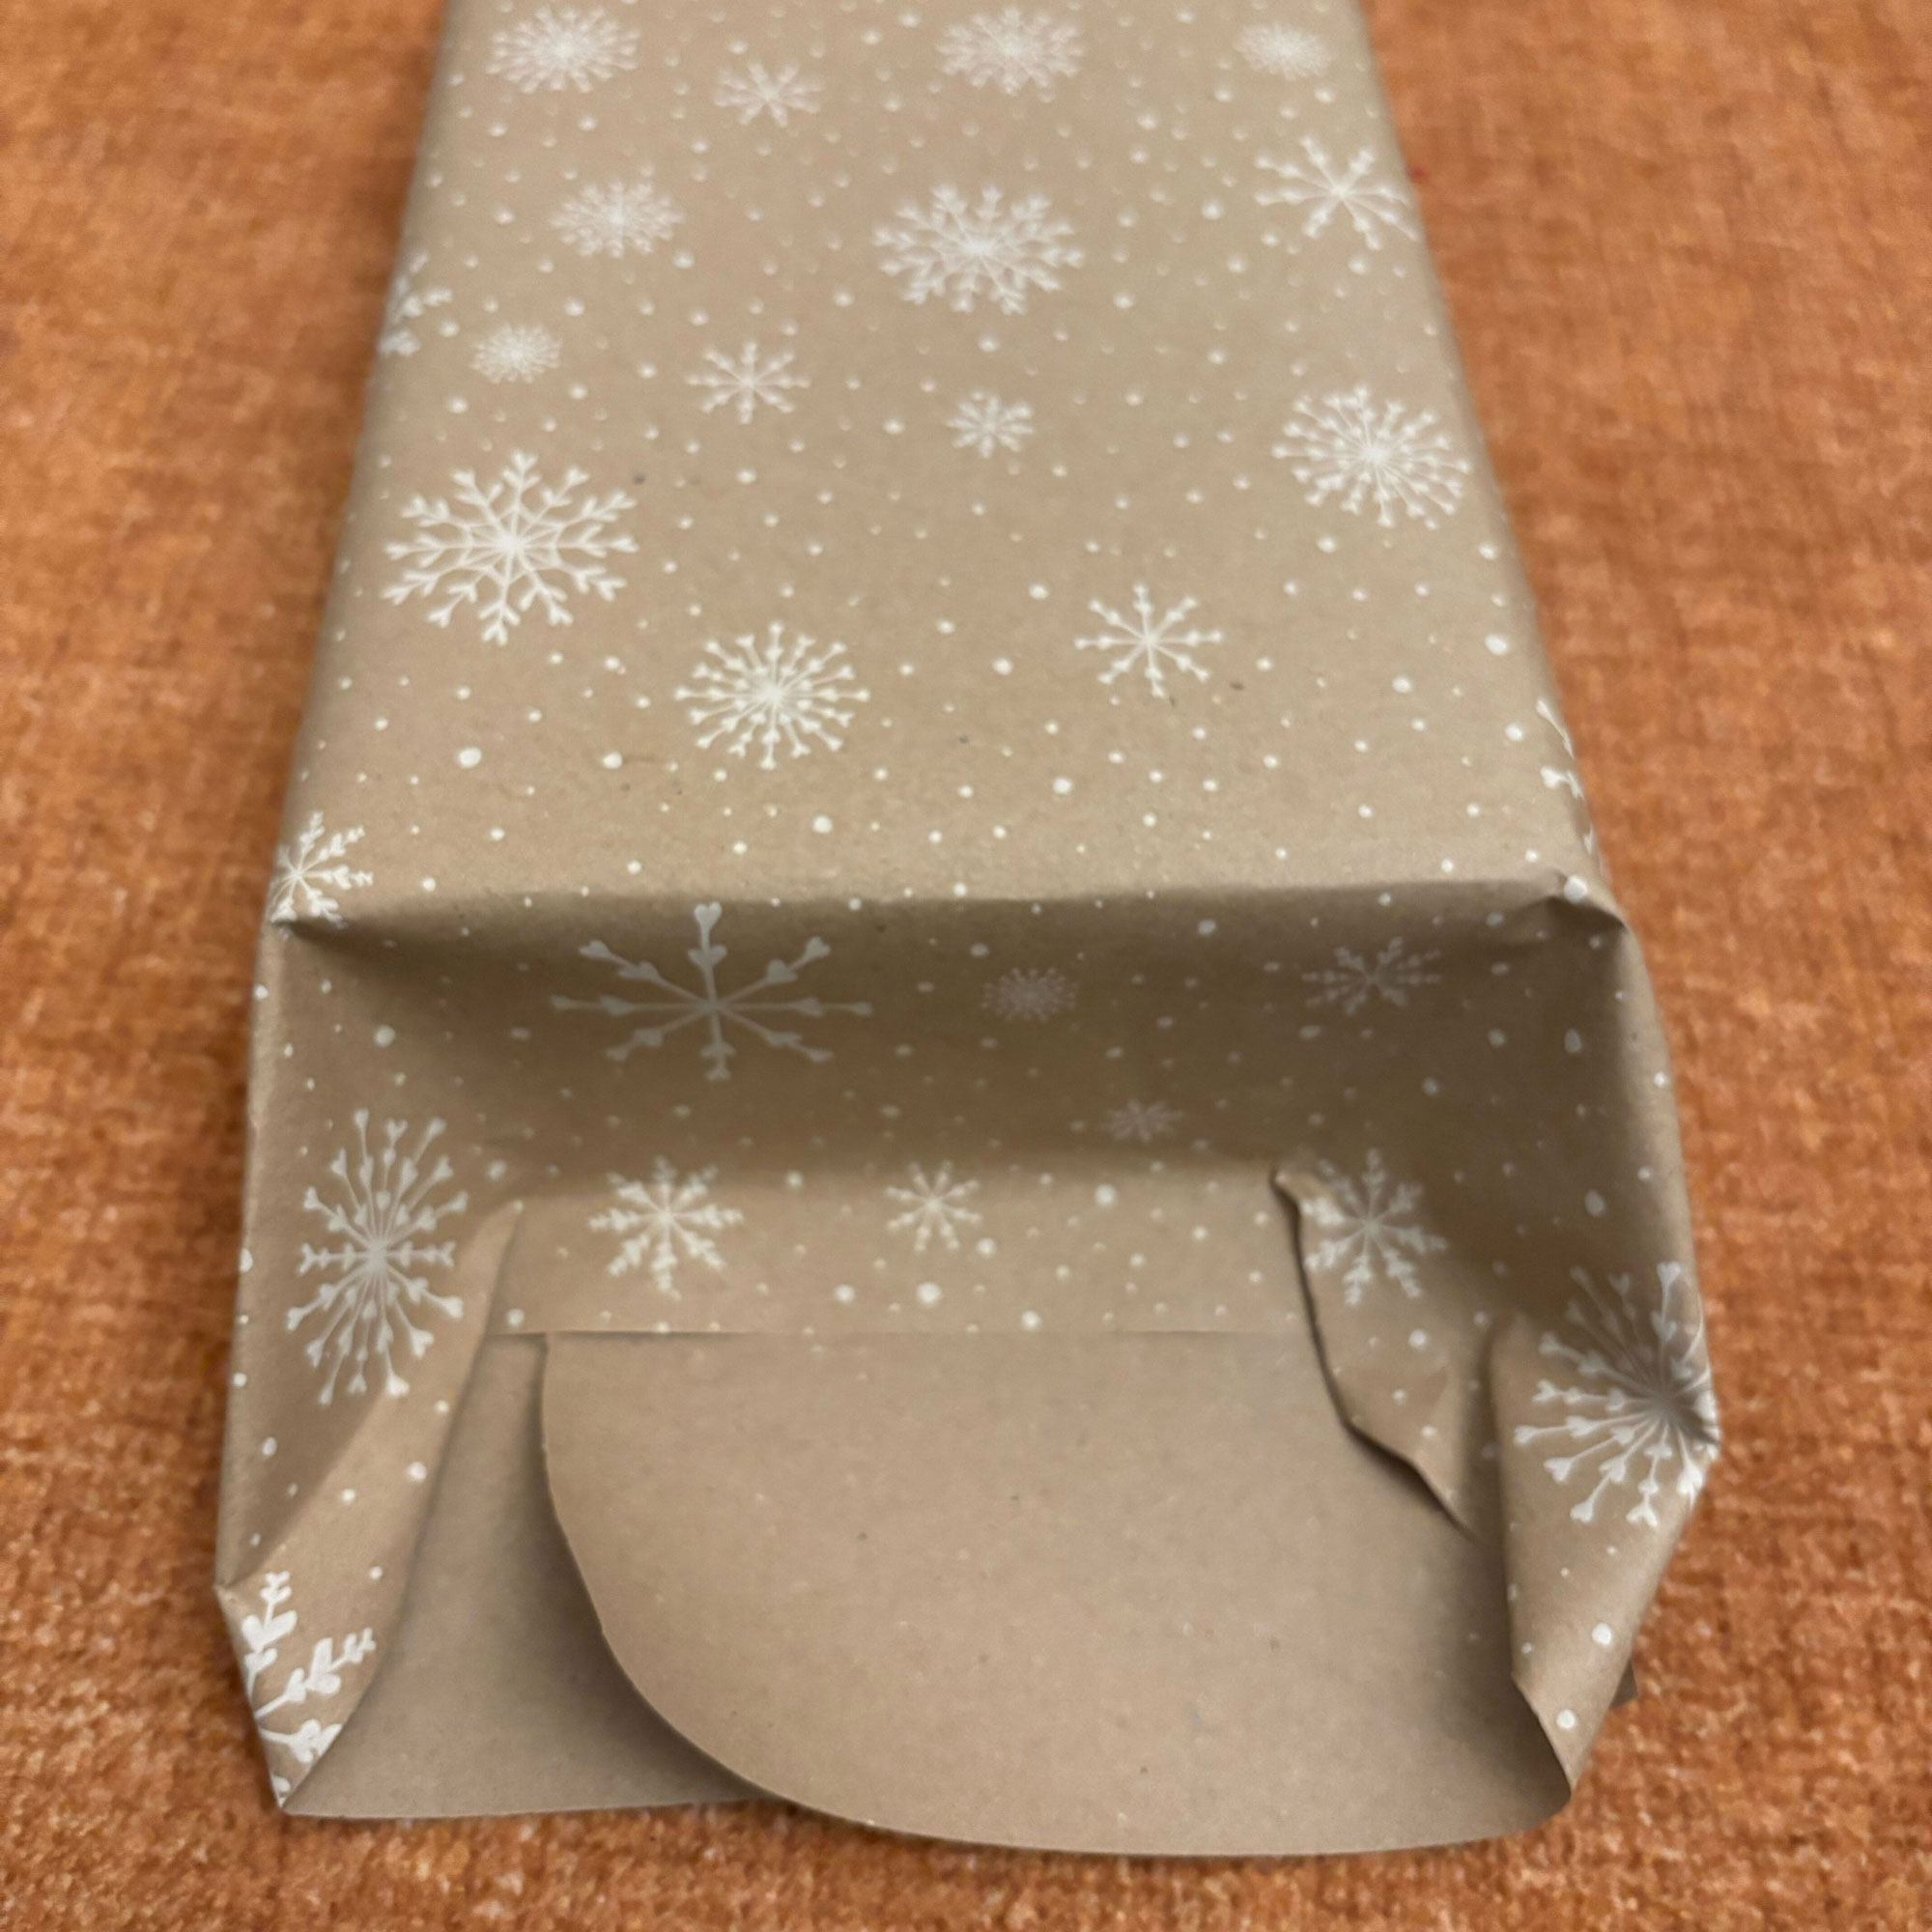
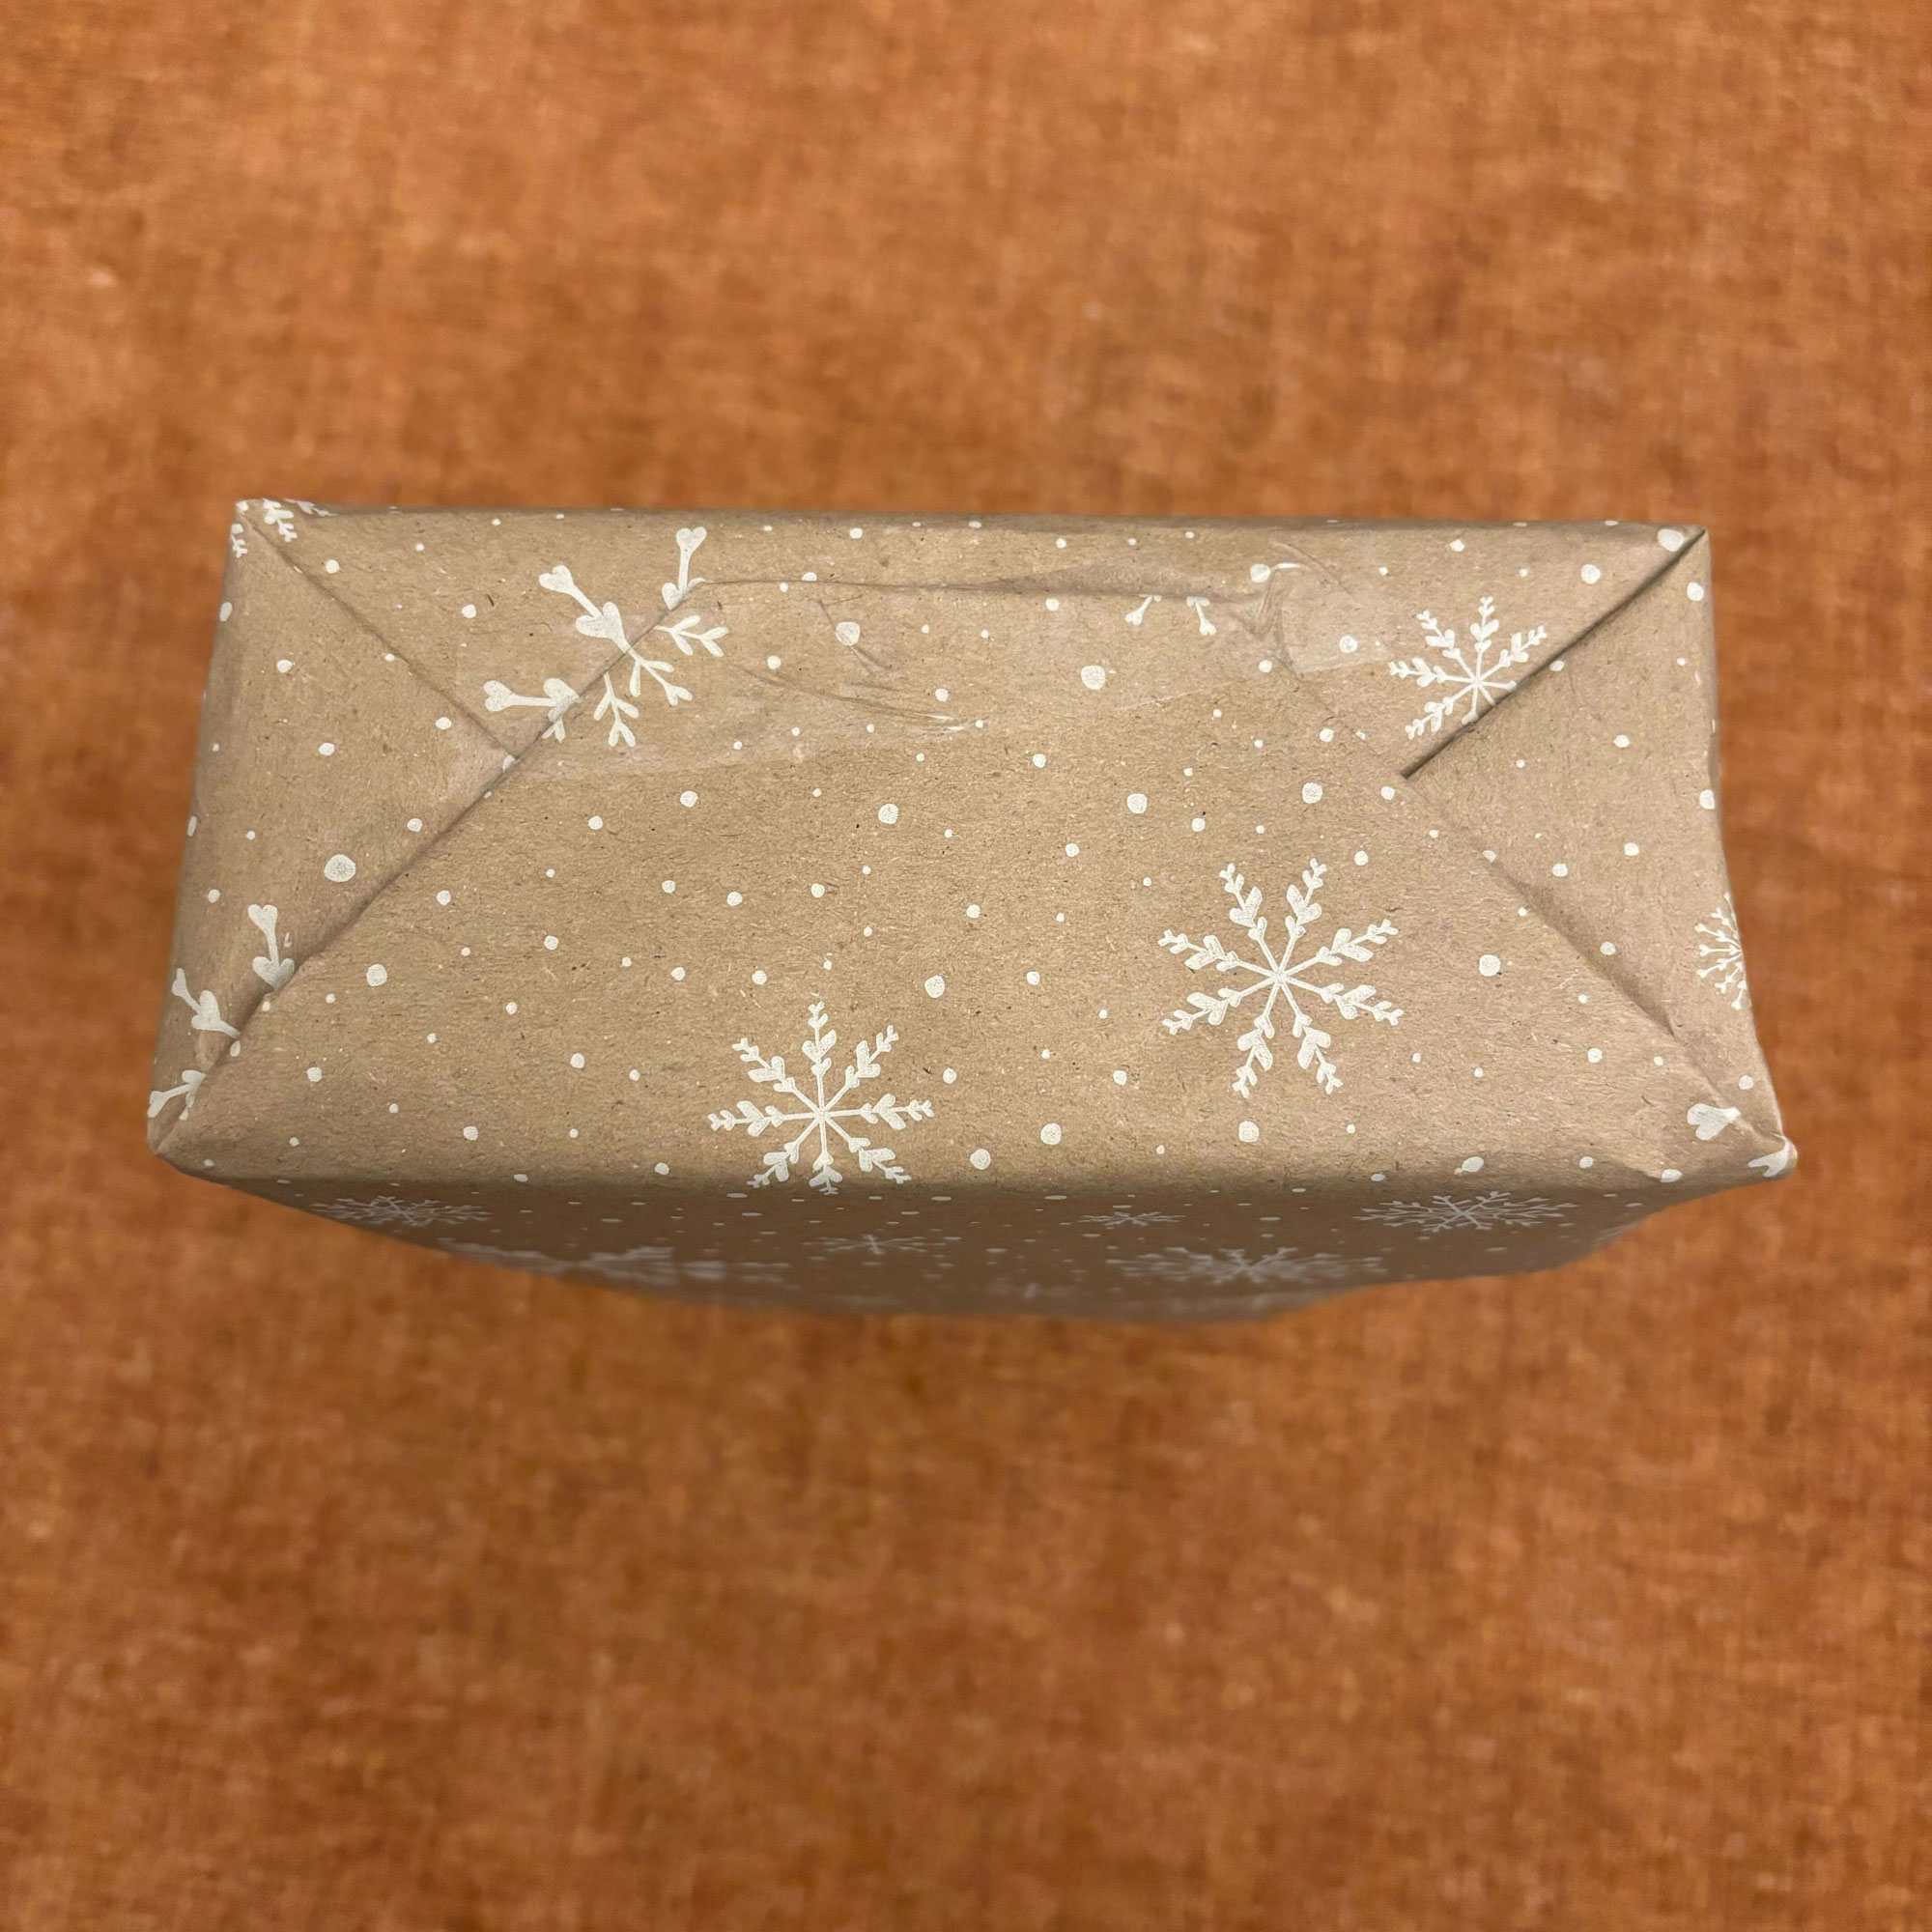
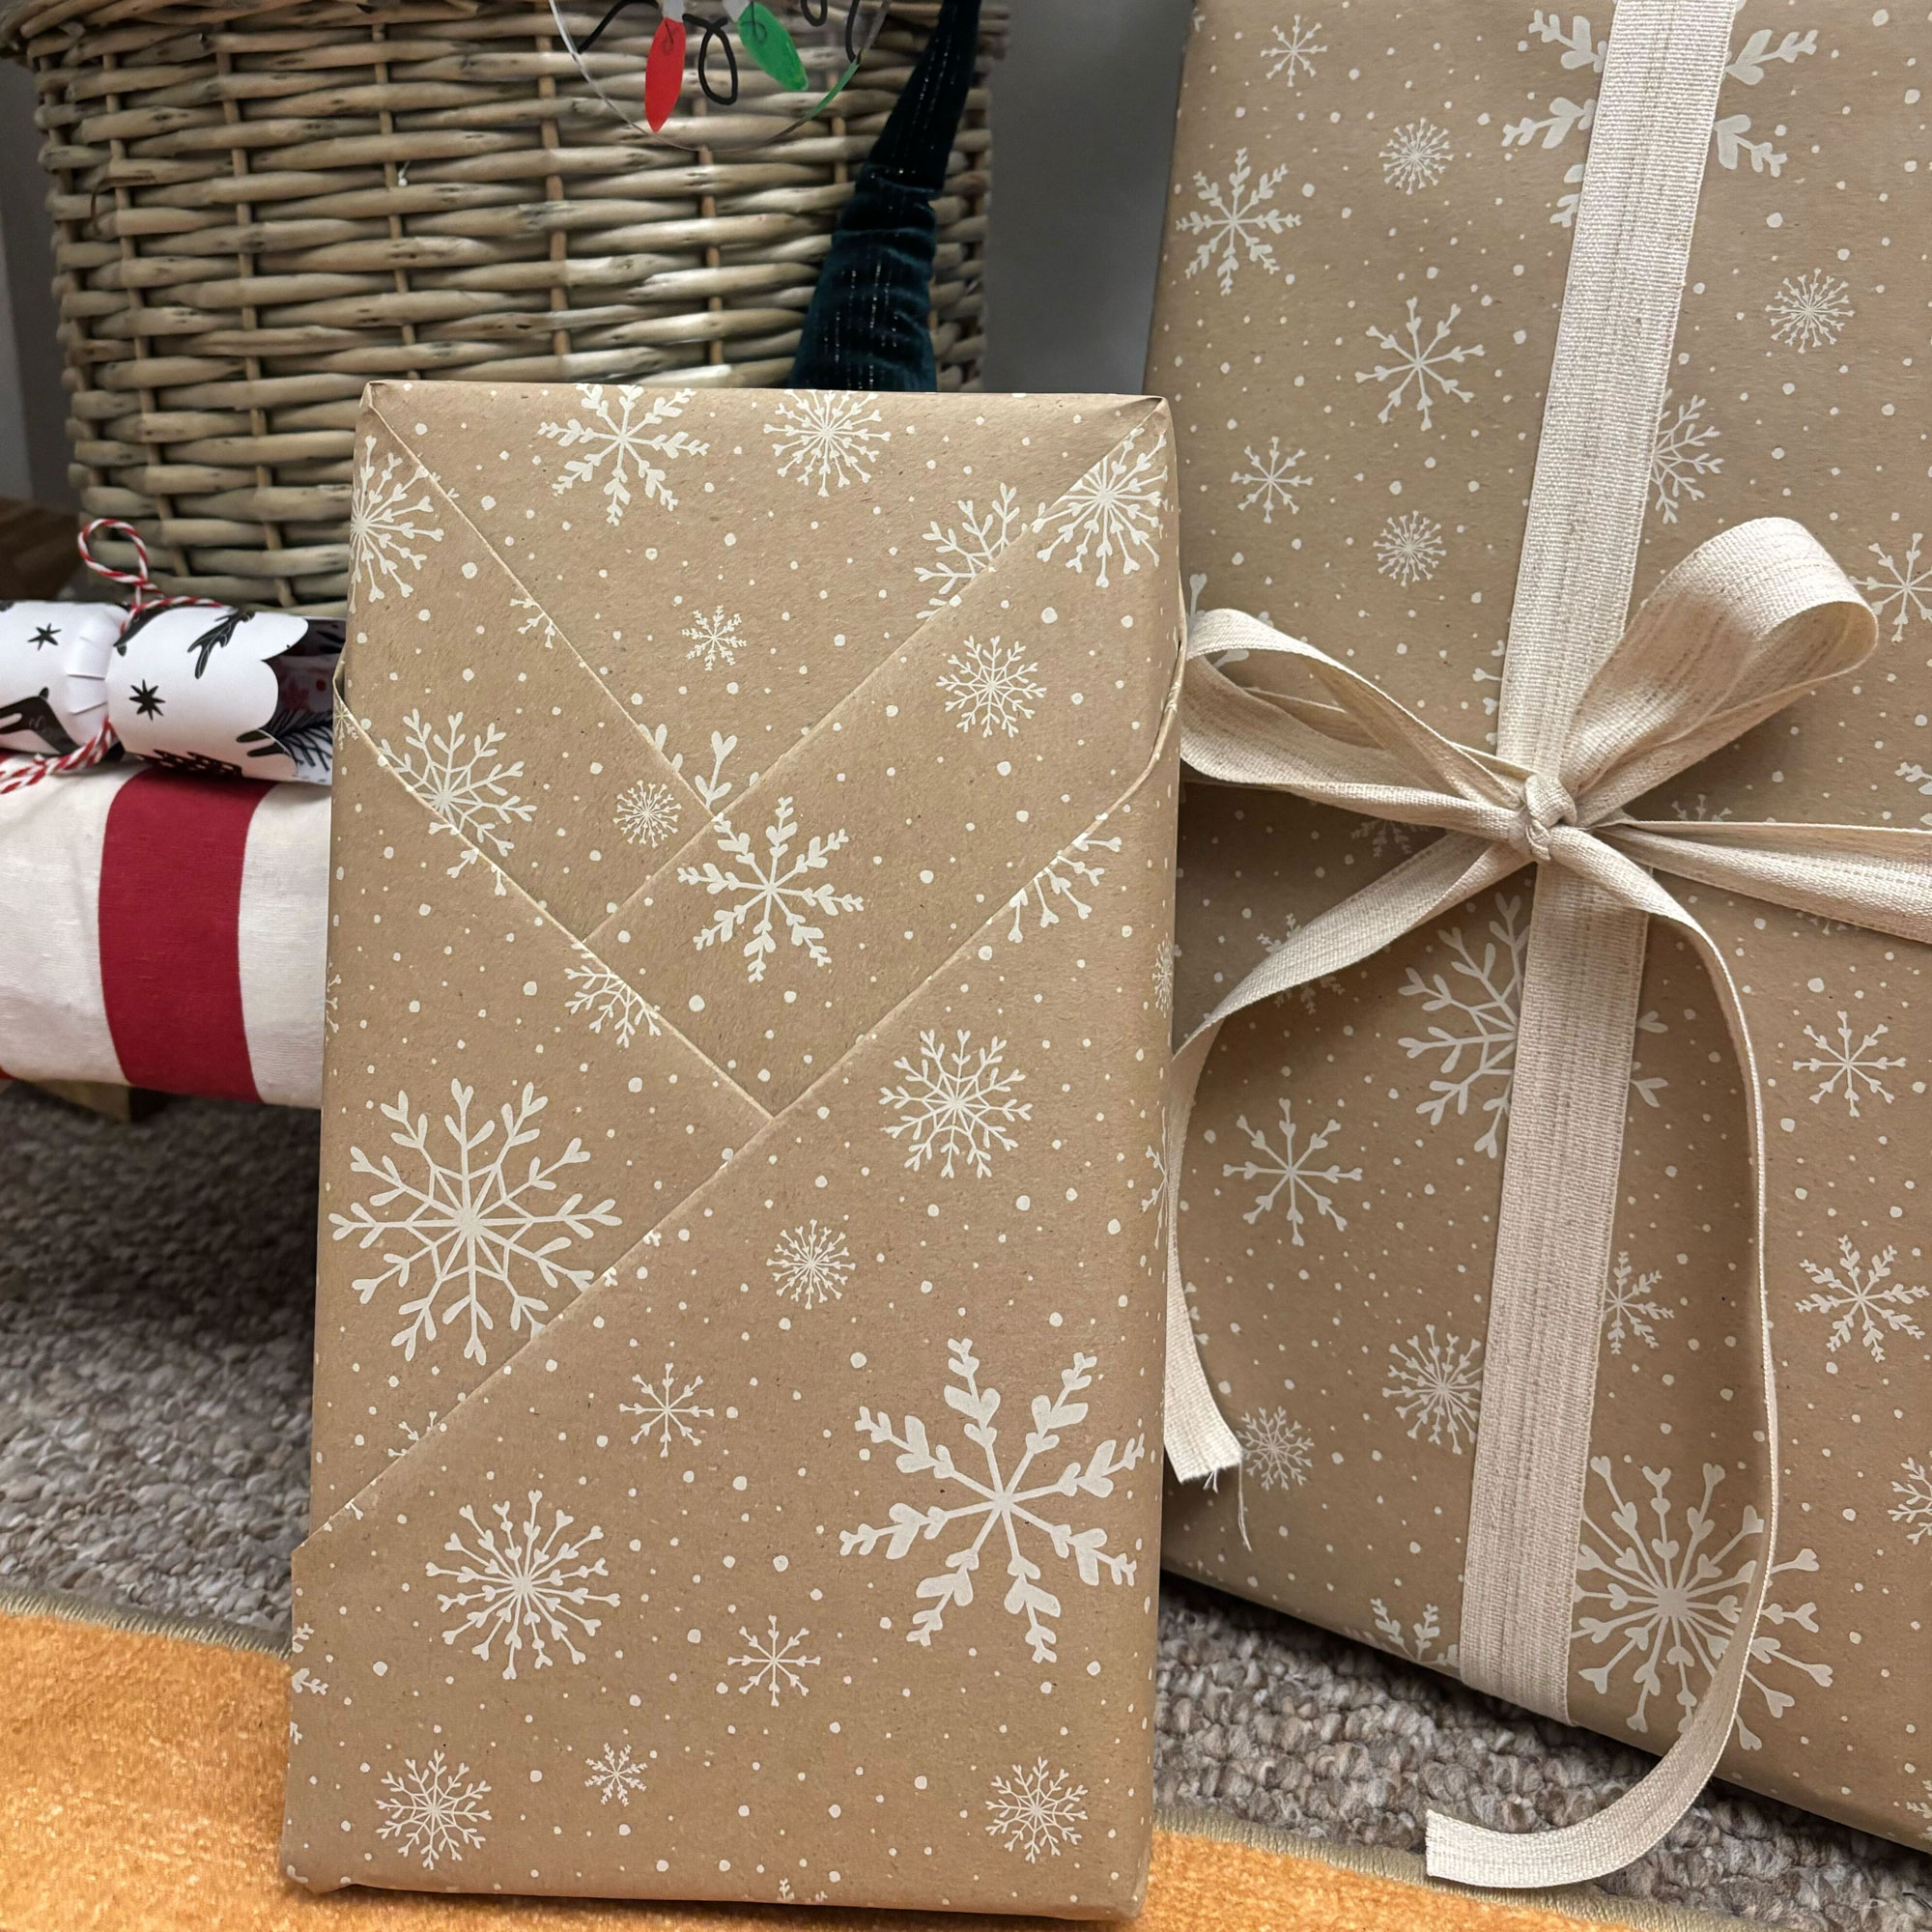
At this point, you should be left with the present fully covered, and all you have to do is fold the remaining paper to create a point and fix the loose end with your one piece of tape. I’ve recently started using a double-sided table for a completely seamless finish.
The finished result should have little pockets along the plait that you can then tuck a gift tag into, and any other bits of decoration. You can see the process step in the gallery above.
It takes a little practice, but I’ve now been using it for three years, and it’s got me out of many a tough spot on Christmas Eve.
Unfortunately, I’ve yet to find a solution for wrapping unusually shaped gifts with one piece of tape, but that’s what gift bags are for, right?
Gift wrapping essentials
Keep that precious piece of tape close to hand and don’t waste a minute with this hand dispenser.
Keep things neat and organised with this storage bag that will hold for the festive wrapping paper, tape and ribbons together in one place.
I recently discovered this clever paper cutter, it means no more awkwardly tearing through paper with scissors, it just slides through like butter in a straight line.
I used wrapping paper from Cox and Cox this year, but most years I rely on plain old brown kraft paper. It’s inexpensive, but can be made to look so impressive with a trick like this.