I’ll happily talk tiles all day, I’ve written enough about bathroom tile trends to bore even the most tile-obsessed homeowner, but grout and sealant? Absolutely not my favourite subject. They give me the ick. In every house I’ve ever lived in, the grout is the first thing to betray me. It turns a suspicious beige, then a properly grim black, usually right in the corners where I can’t reach it. Not even with my husband’s toothbrush!
Silicone is worse. Once that rubbery stuff gets grubby, there’s no hope. I’ve never found a product that truly shifts mildew out of silicone. Not once. You scrub, you bleach, you swear, and still the black spots hang on in there.
Over the years, I’ve accepted that the only real solution is to rip out the grout and silicone and start again – a job that somehow always slips to the bottom of my to-do list, below cleaning the oven and decluttering the ‘everything drawer’. It’s even worse in small shower rooms where moisture hangs around like a bad smell, and you cannot get the air to clear.
So, in this house, I’ve doubled down: better ventilation, yes, but also far less visible grout and sealant in the first place. If I can’t stop mildew from forming, maybe I can at least stop myself from seeing it. Here’s everything I’ve tried in my quest for a grout-and-sealant-lite life so far...
1. Tile trim around the basin
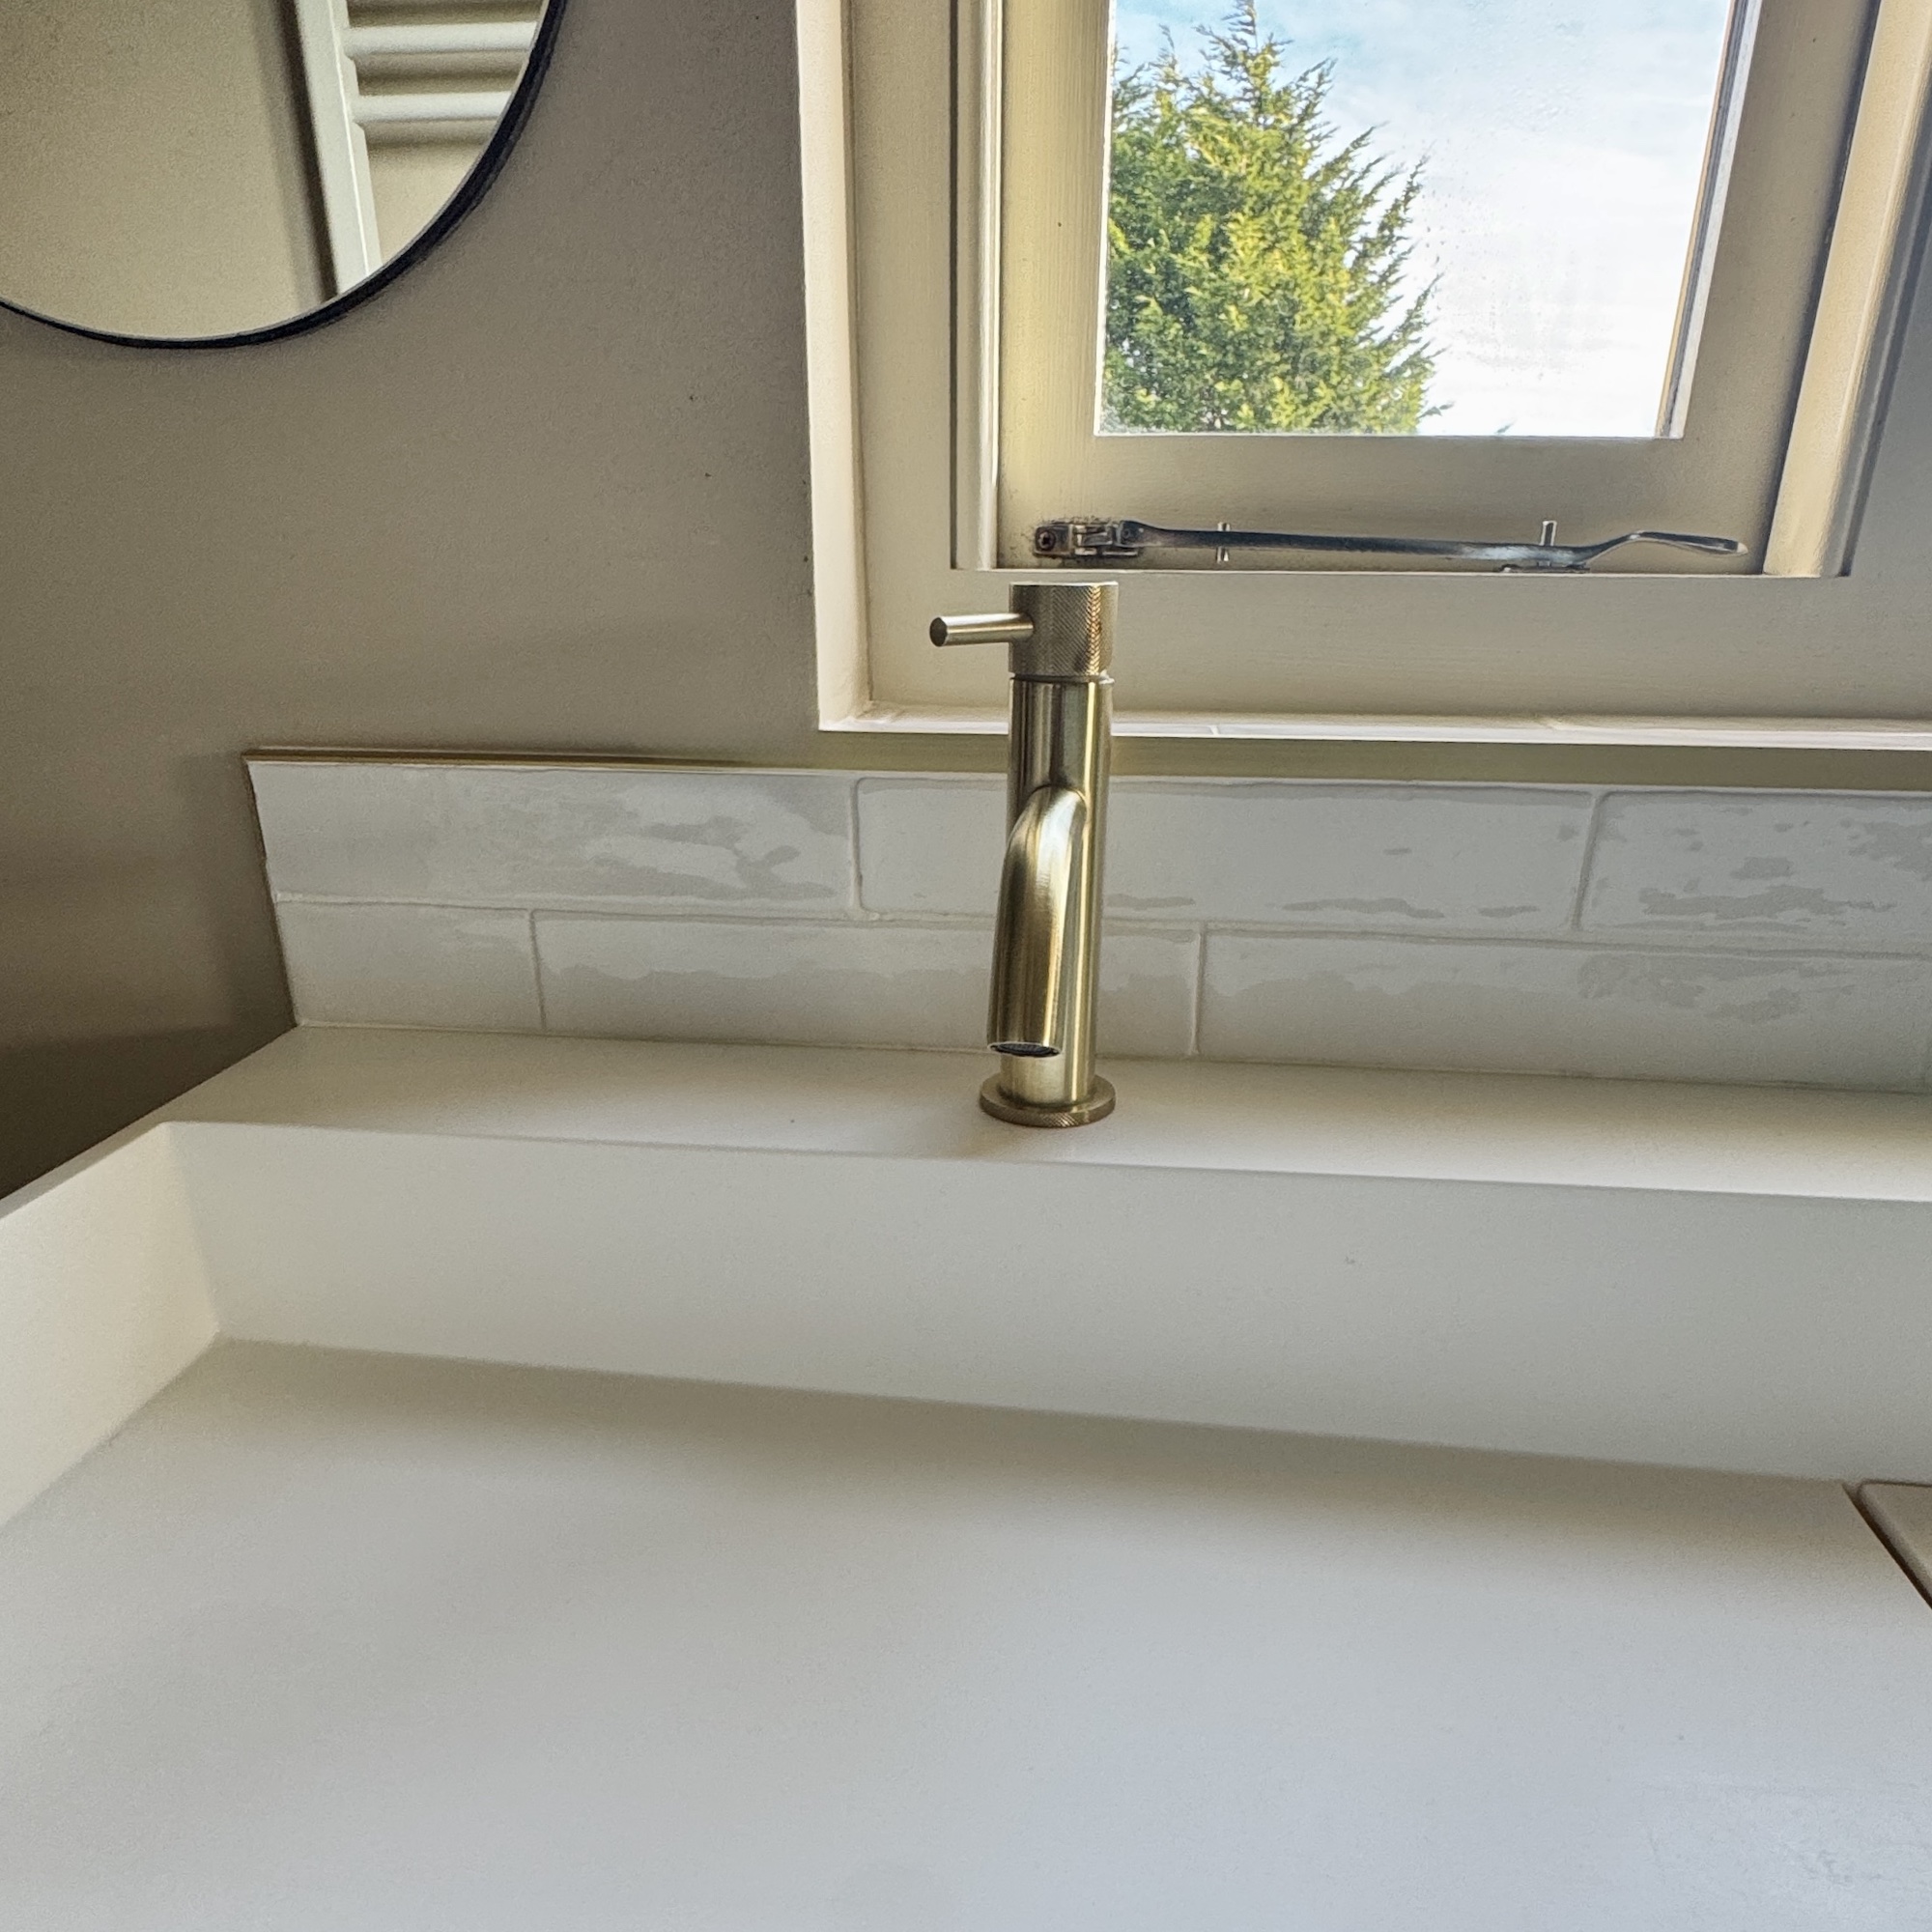
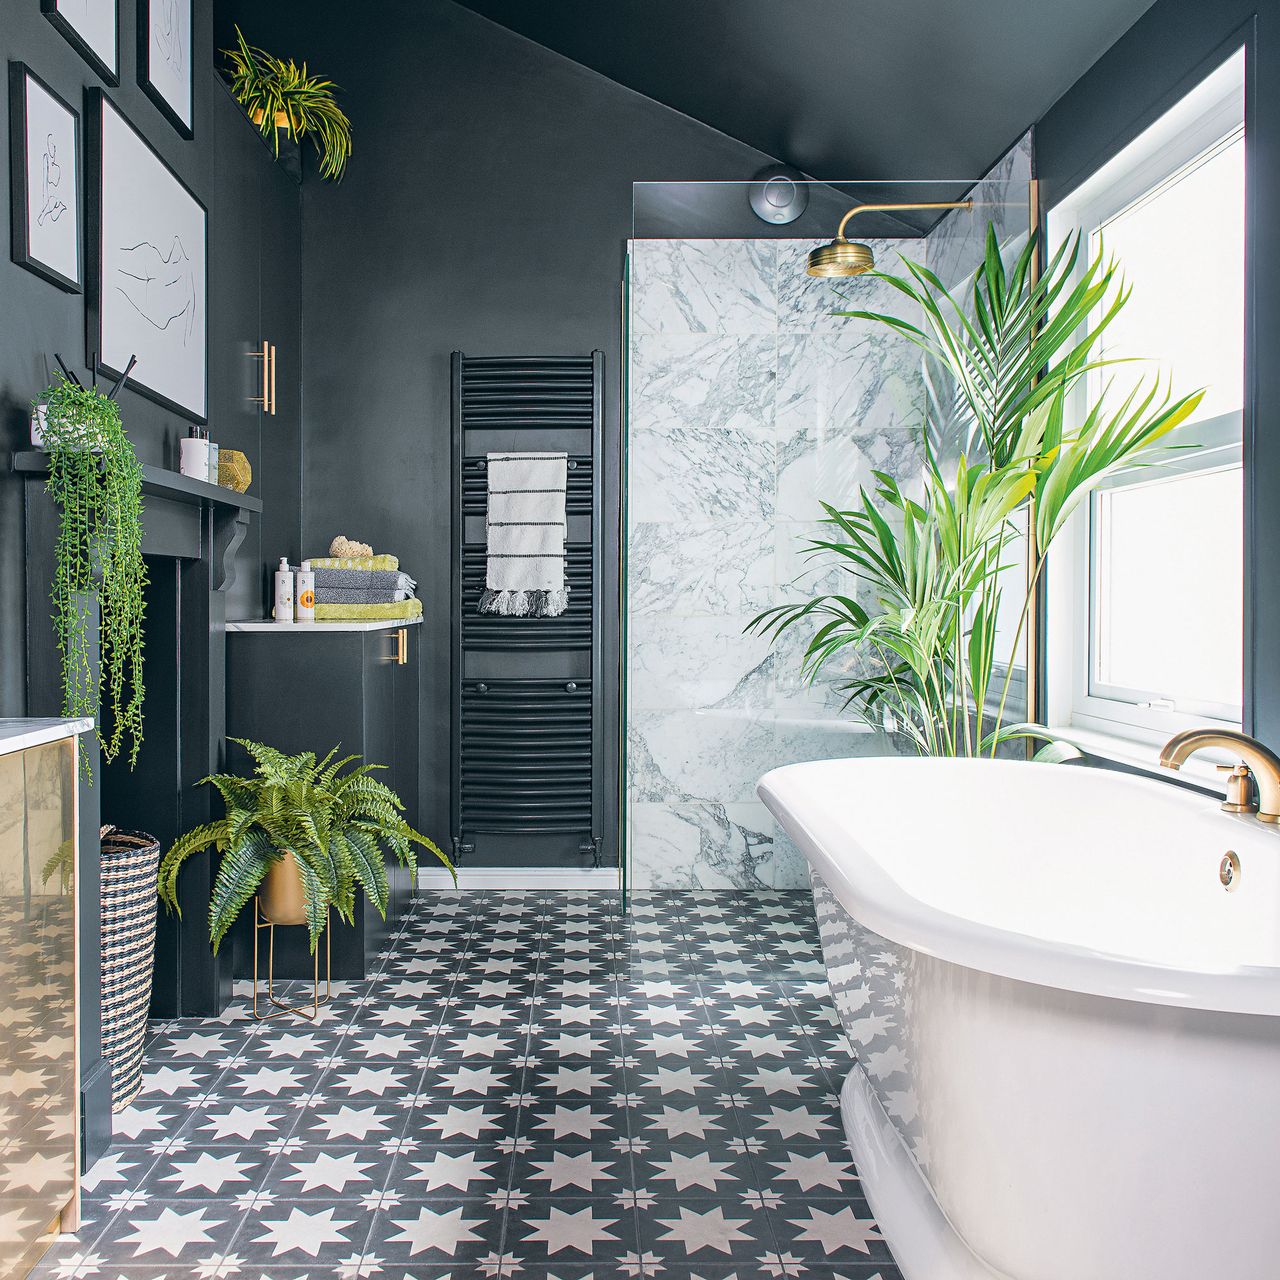
In my en-suite, I opted for a fully decorative look and used a brass tile trim around the basin area. Partly because I love a little metallic accent, but mostly because it brilliantly disguises what would otherwise be yet another bead of silicone and a neat row of grout.
The trim sits around the tile edge and creates a clean, purposeful border, so you barely need anything else to finish the junction between tile and walls. There is a thick line of silicone at the back of the basin to stop splashes getting in behind, but I tiled down over with a thin line of grout you can barely see.
Tile trim is such a simple solution; I’m not sure why I didn’t think of it sooner, and it has definitely reduced the visible grout and silicone ratios around my basin area. I’m sold.
2. Rectified tiles in the shower
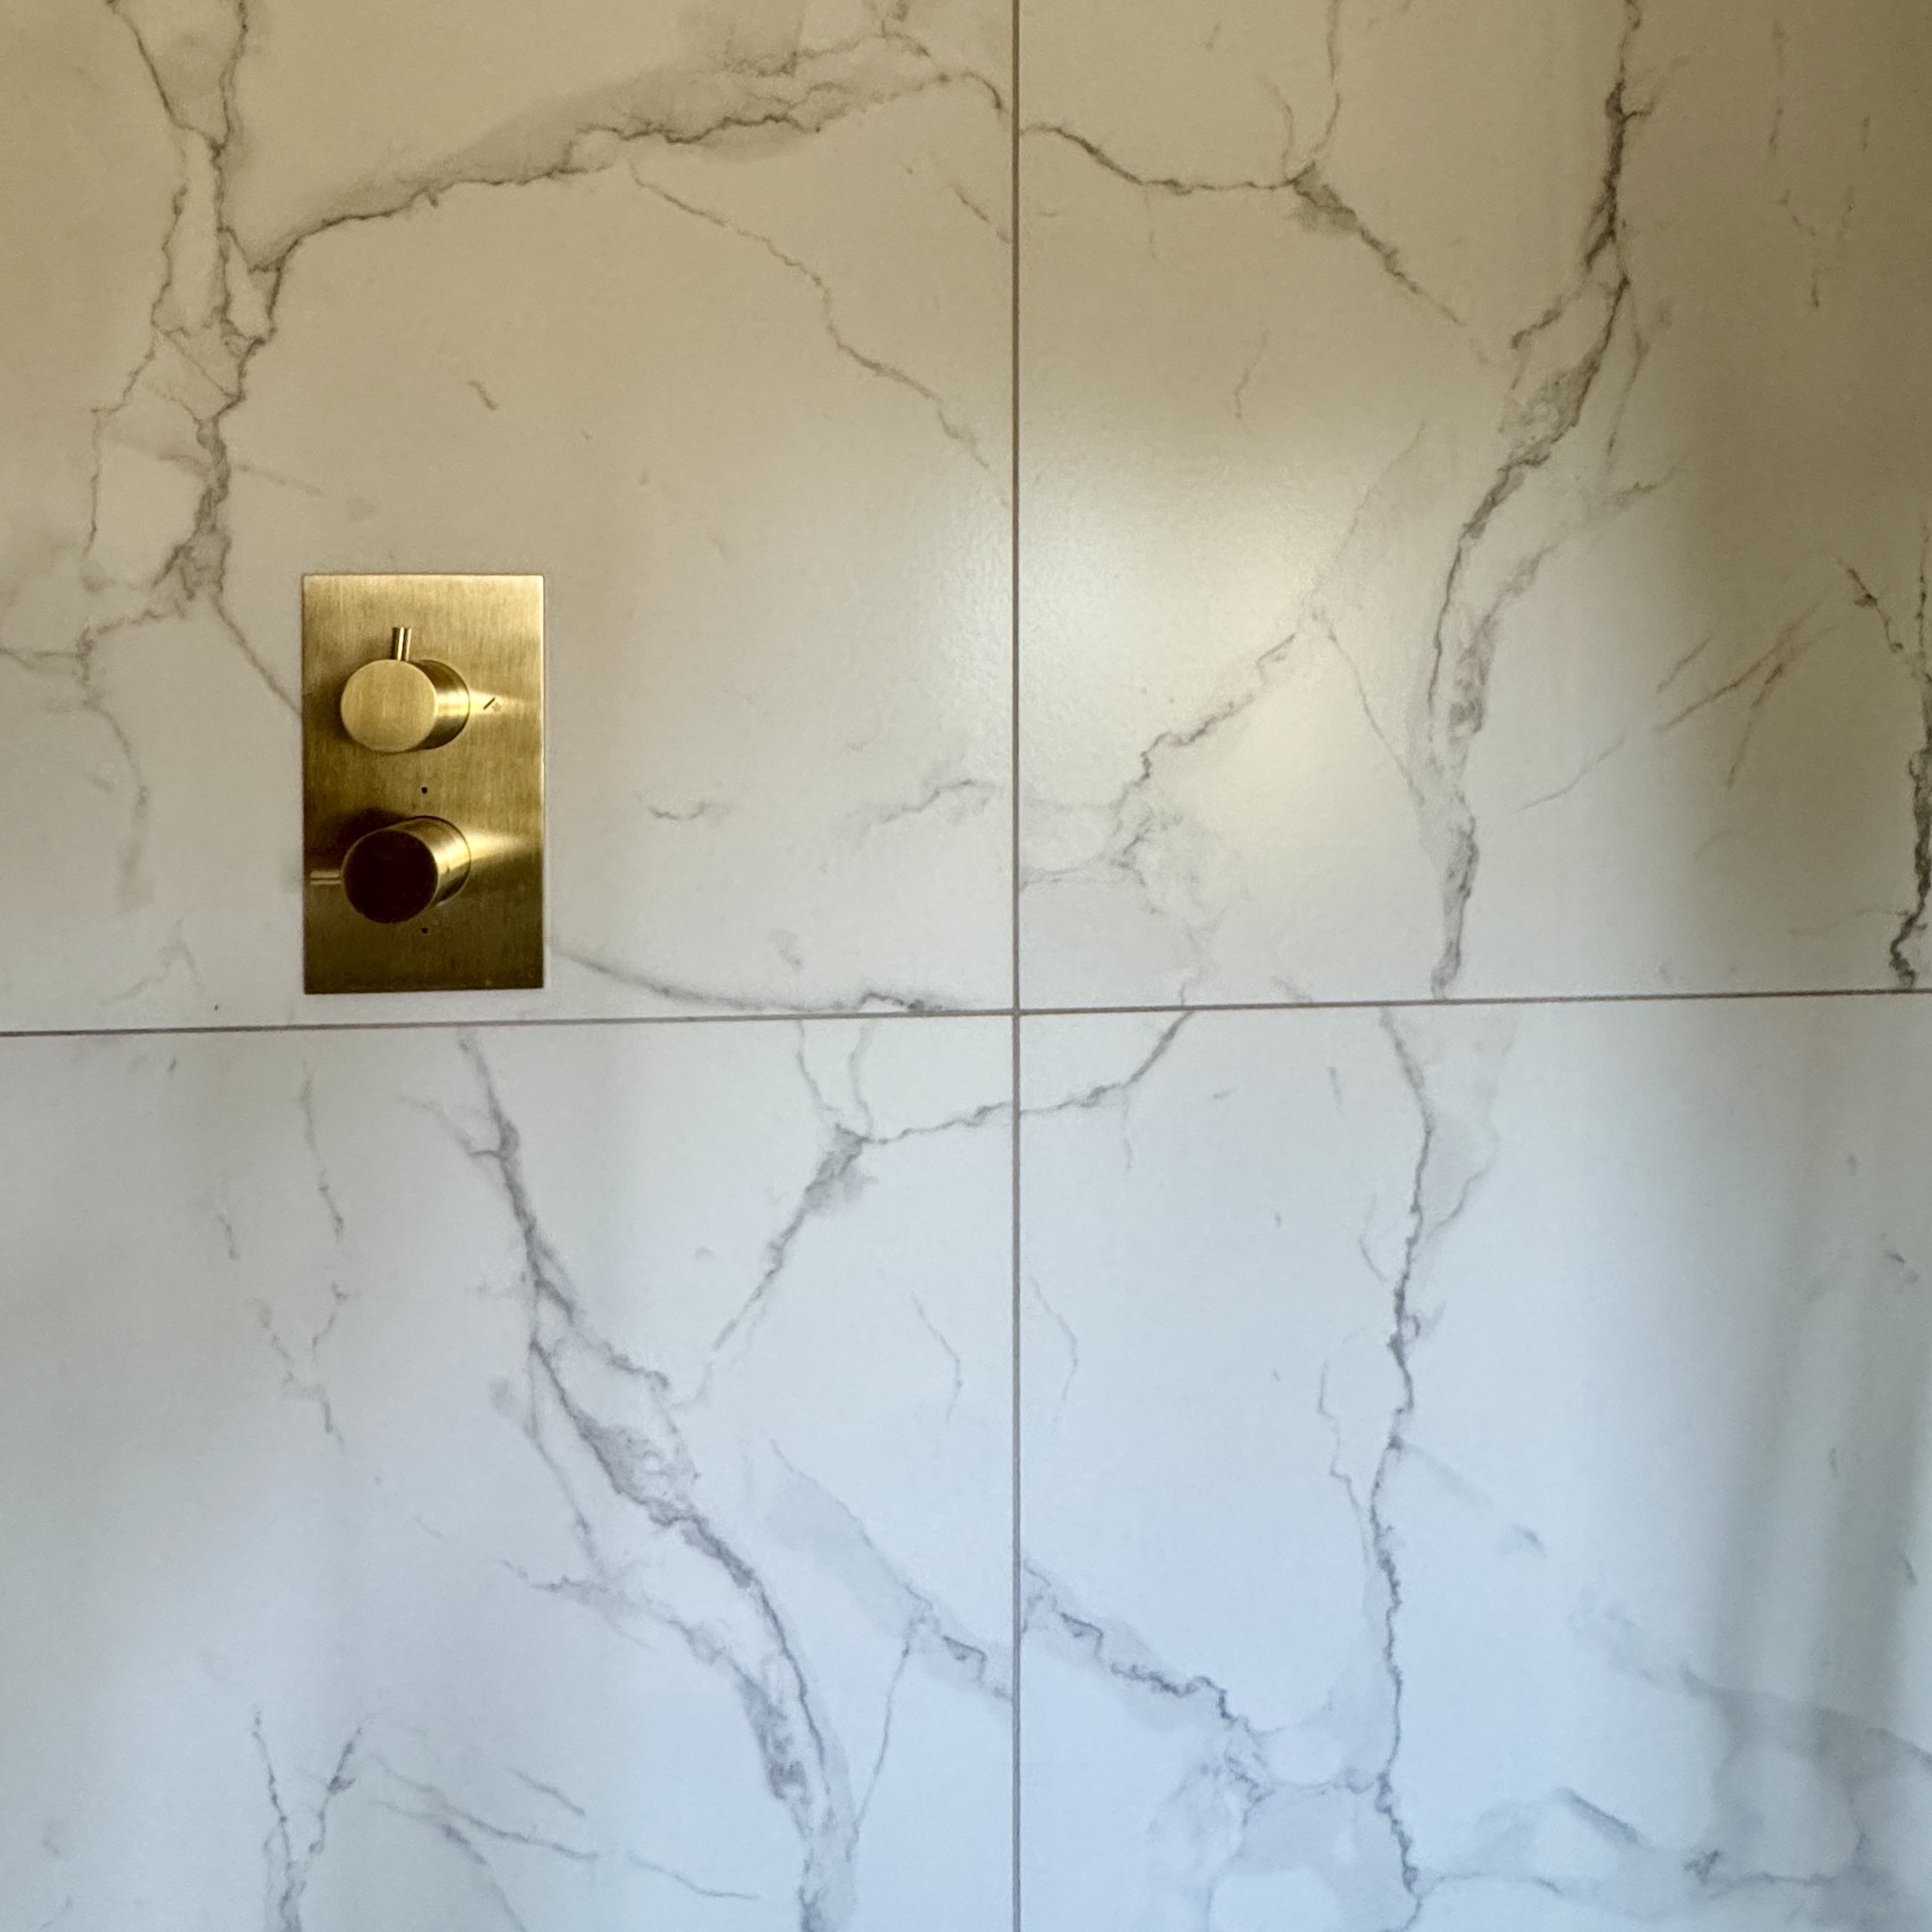
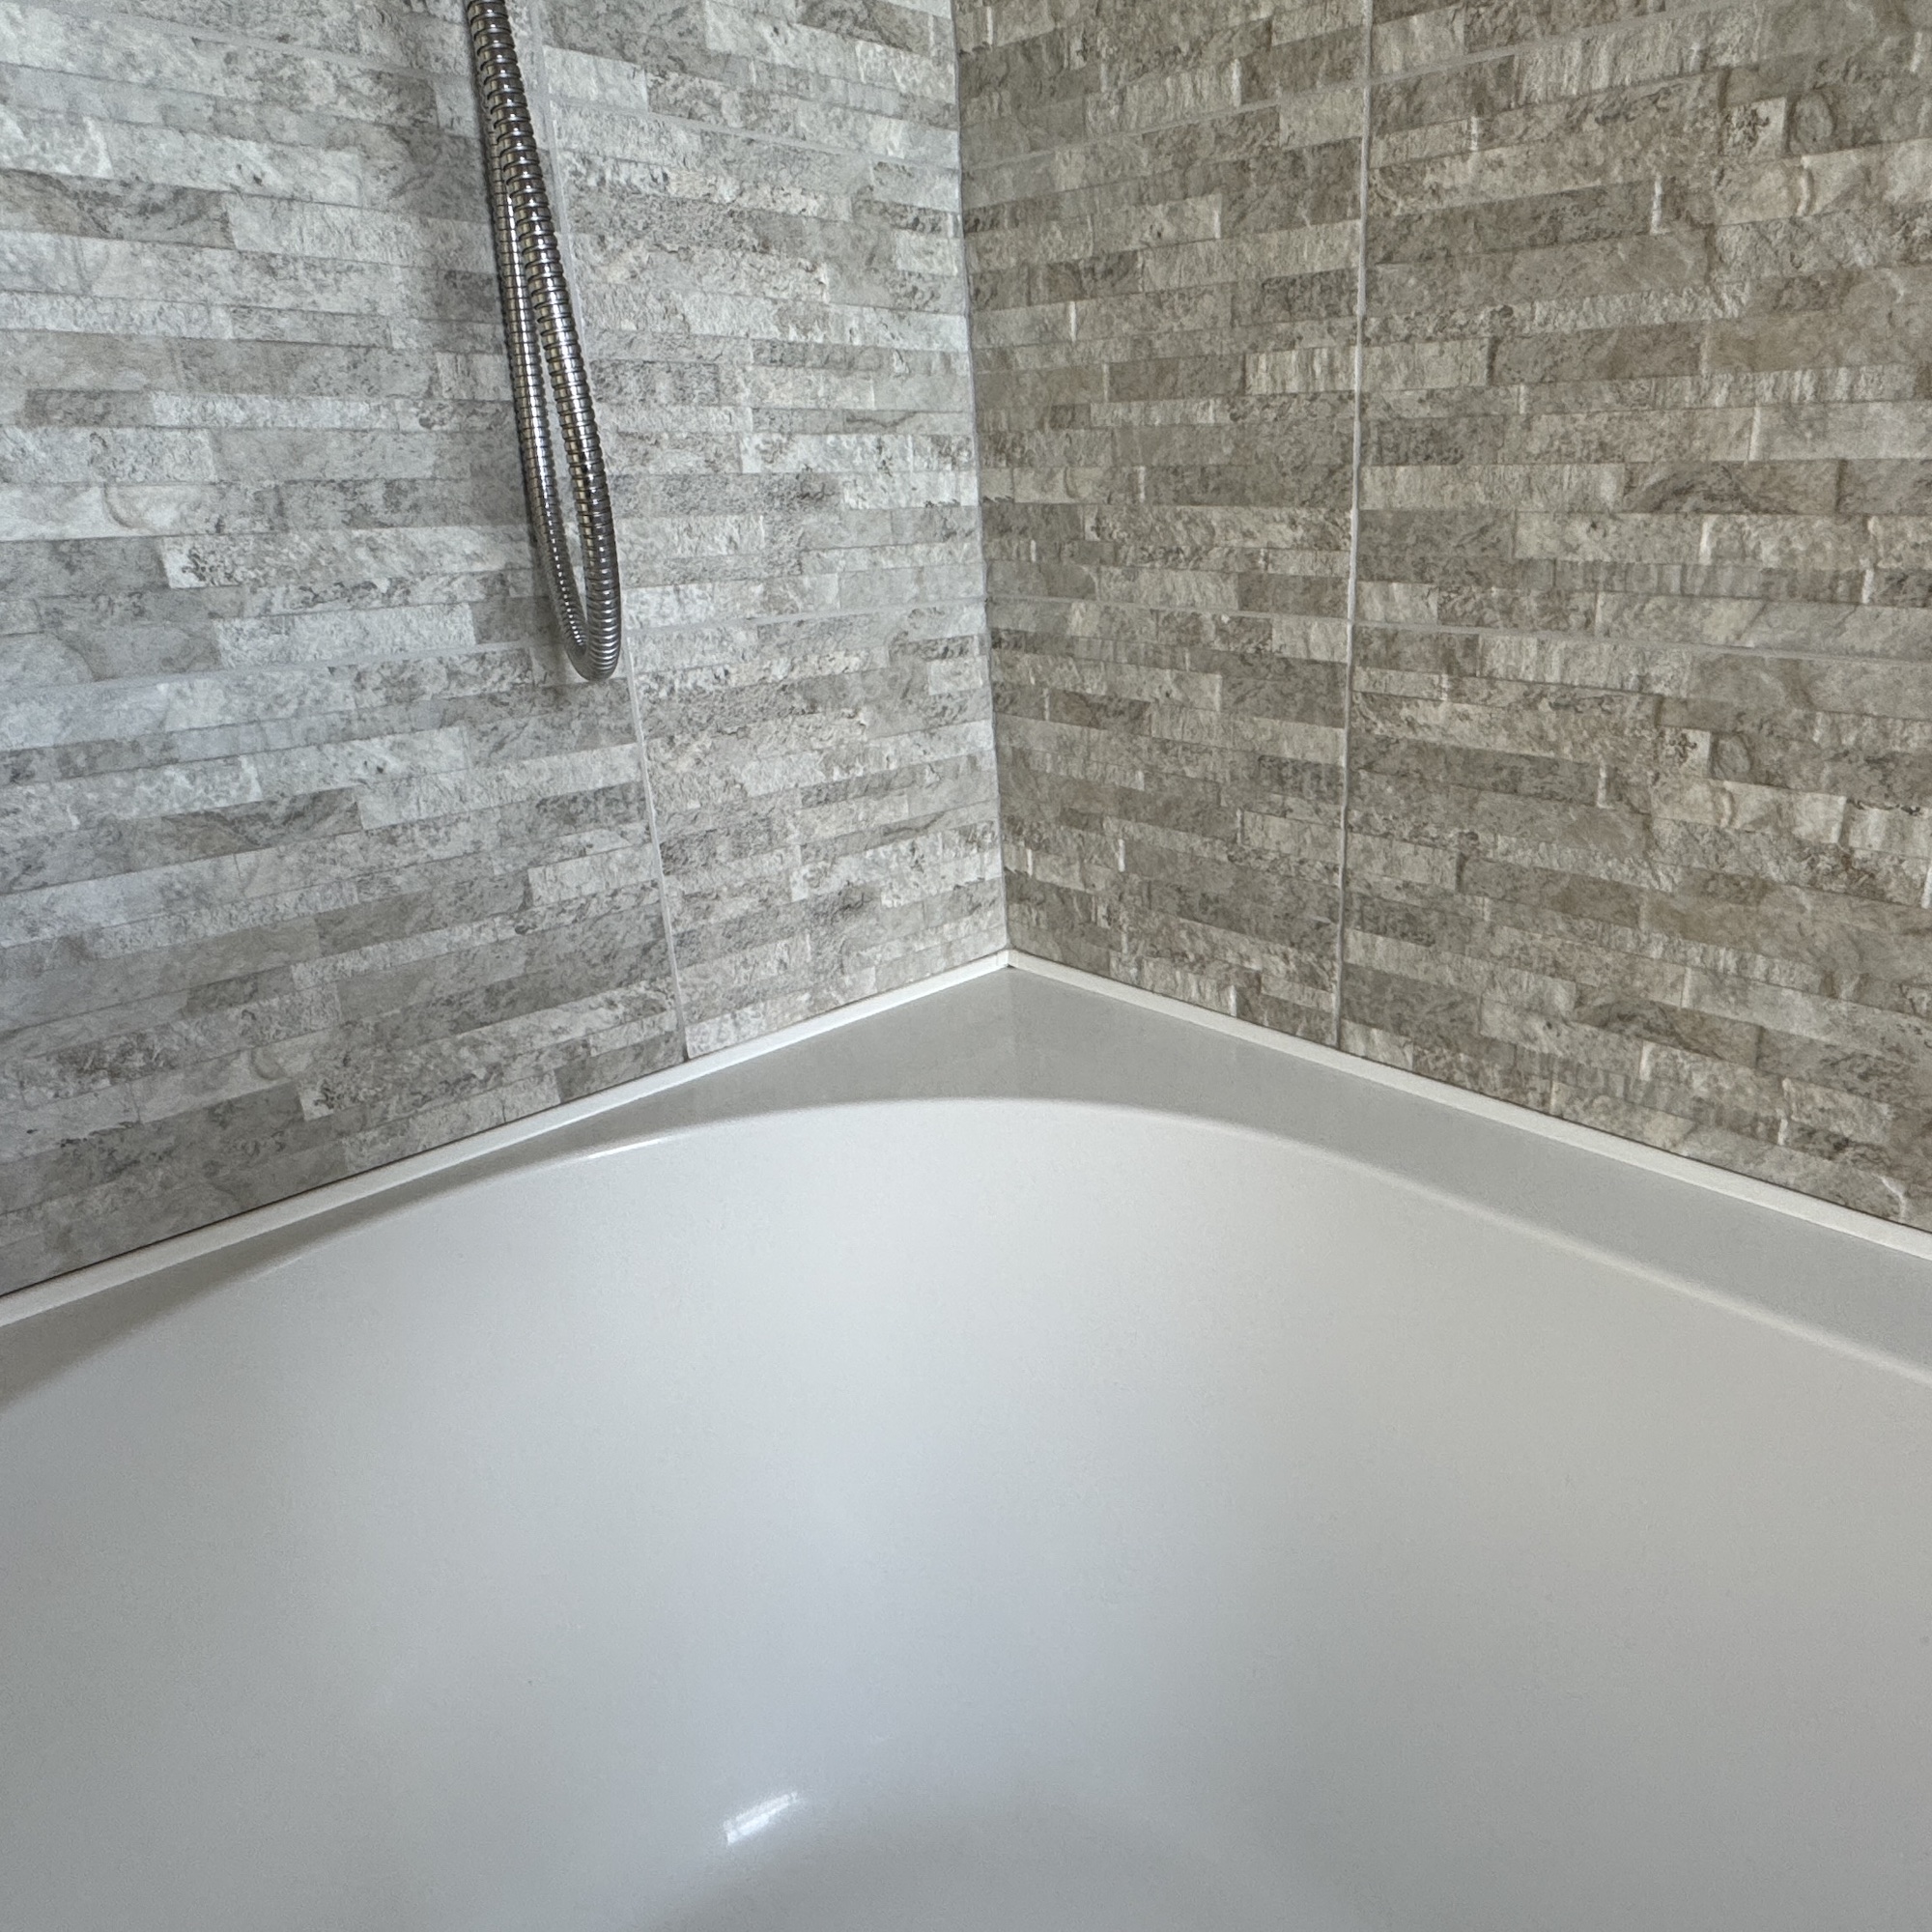
Rectified tiles are my new best friend. Unlike handmade tiles with their wobbly edges, they’re machine-cut, so the sides and corners are crisp and uniform, meaning you can install them with very tight joints. And tight joints mean less grout.
In my en-suite shower, where moisture lingers no matter what I do, this has made a huge difference. The grout lines are so minimal that they hardly register visually, which means far fewer nooks for mould to colonise. I also went for the biggest tiles I could get up the stairs, which again reduced the grout levels.
I still keep a stylish squeegee from Victorian Plumbing in there and do my half-hearted post-shower swipe, but, overall, it’s dramatically reduced the amount of visible maintenance. If you’re planning a bathroom and grout gives you the sweaty-dreads, rectified tiles are worth a punt.
3. Coloured grout
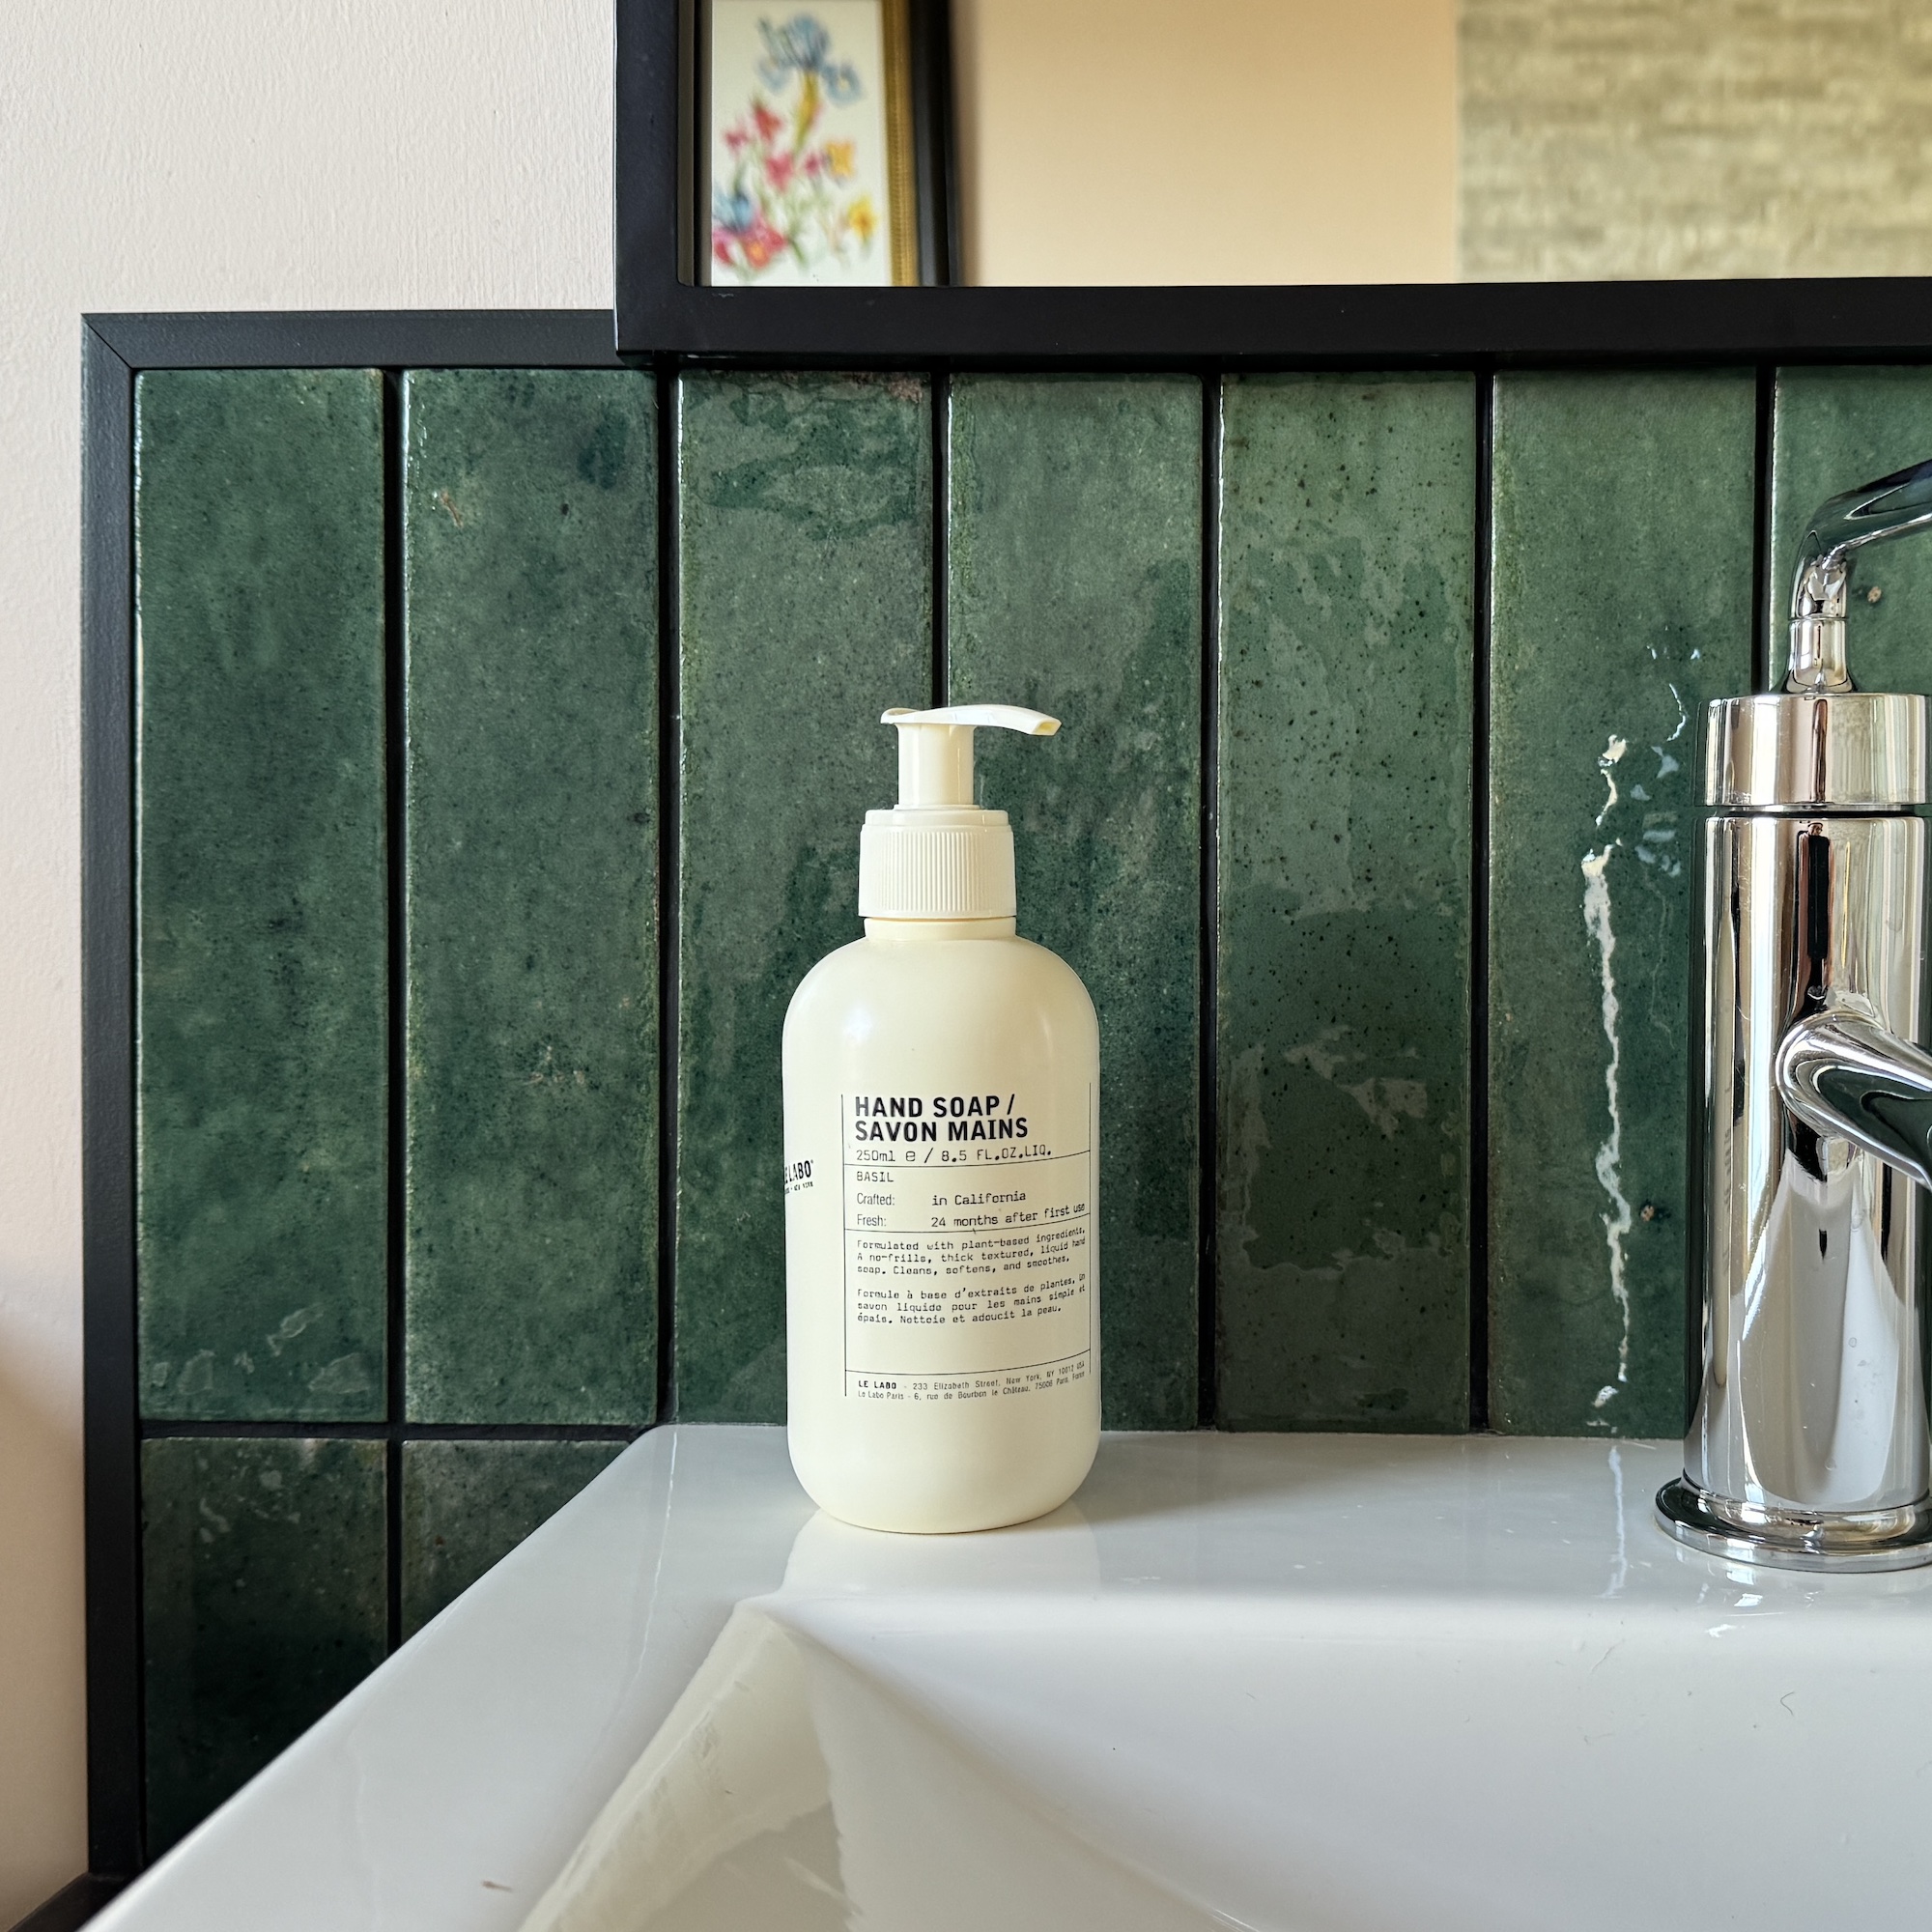
In the family bathroom, I went the opposite direction: if you can’t beat it, hide it. Above the basin, we tiled in a rich dark green, and I paired it with black grout specifically so it wouldn’t show the grime. It’s probably the most successful camouflage exercise I’ve ever pulled off in a bathroom. Black grout stays looking smart even when faced with damp-loving spores, children brushing their teeth like they’re mixing cement and the general discolouration of time.
Around the bath, which has a shower over it, I again colour-matched the grout to the tiles, this time in a pale grey, and that’s worked well, too. Any grout that isn’t Celebrity Teeth white is going to be much more forgiving if you're not great at day-to-day grout care. If you are great at it, I salute you – and direct you to how to clean grout in tiles, because clearly you’d benefit from that level of know-how.
If you don't want to go through the faff of regrouting your bathroom, an easy way to update your bathroom tile ideas on a budget is using a black grout pen, which you can buy on Amazon.
4. Under-tile silicone-covering trim
Now we get into the more experimental option – the jury is still out on this one. On the advice of my tiler, I invested in this under-tile trim from Tilerite, a product that’s designed especially to cover the silicone seal around a bath or shower tray. It’s a little more flexible than the rigid tile trim that edges tiles, so it can cope with the movement of a bath full of water and a bather.
It tucks behind the tile (you tile down onto it) and creates a neat edge that covers over silicone. In theory, it should eliminate that dreaded black mould line that forms where tiles meet baths and shower trays. In practice? It’s pretty good. We used it around the bath and along the shower tray, and while it was a bit fiddly to install – akin to wrestling a tantruming toddler into a car seat – the finish is much nicer than naked silicone.
Sadly, it doesn’t stay spotless forever. The corners do get a touch mildewy, especially in the shower, and there’s sometimes a streak of blackness seeping out (grim). But compared to traditional silicone, it’s a game-changer. Once silicone goes black, you’re screwed and need to redo it. This trim is much easier to clean. I’m not sure if it’ll hold up forever, but I feel like this trim has bought me a decent holiday from the silicone gun.
Other things that (slightly) help
As much as I want to rely entirely on clever tile hacks, general bathroom habits matter too. Ventilation is key, I have installed decent extractors that vent out through the ceiling via powerful loft-dwelling motors, but it’s hard to beat the practice of swinging the bathroom windows wide open during or right after a shower to clear the steam.
Then there’s the old “wipe your shower dry” advice. In theory, brilliant. In practice, who has time for that? I try to at least drag the squeegee over the worst bits and encourage the rest of my family to do the same, but nobody in my house is up for drying tiles after every use, especially not me!
Other maintenance bits I’ve learned to love include keeping the shower door open post-shower so air can circulate, scrubbing any visible grout every few months (ok, maybe twice a year), and dealing with small black spots when I spot them, rather than waiting until they’re visible from space and/or growing fungi.
Alternatives to tiles if you truly hate grout
If you want to swerve grout entirely, there are a few bathroom tile alternatives, and they’ve come a long way. Shower panels, for example, have massively improved in recent years, although I still get faint static-caravan vibes from some of the more plasticky designs. The newest textured and stone-look ones are better and, crucially, have far fewer joints to scrub.
Waterproof wallpaper is another route I’ve eyed up but haven’t tried yet. Conceptually, I love it. No grout, no cold tiles, loads of pattern potential. If anyone has lived with it long-term, I’d love to know how it holds up on the mildew front.
Then there’s Tadelakt, the polished Moroccan plaster you see all over Pinterest. I had a go with this in our last doer-upper and, while the finish was beautiful, the hairline cracks were not. Those tiny fissures are absolute magnets for mildew, and once it’s in there, you’re in trouble. So, while it’s technically grout-free and undeniably dreamy, it's also higher-maintenance than I’d like. Consider your tolerance for a buffing routine before committing.
Grout and sealant are necessary evils if you like tiles, but we can outsmart them. Minimise the amount you use, disguise it where you can, and give moisture fewer places to loiter.
Have I eradicated mildew from my life? Sadly not. But have I reduced the number of times I need to put “bleach the bathrooms” on my to-do list? Yes, I have, and that’s enough for me. On the plus side, I generally take my glasses off when I bathe or shower, which means if there’s a tiny bit of mildew lurking, at least I can’t see it – being blind as a bat has some advantages.