Watch video (above): Get the retro look in Affinity Photo
Modern cameras can produce images of staggering clarity and pixel-perfect detail, but these defectless digital depictions of scenes and people can sometimes feel a little cold. It’s no surprise, then, that we feel nostalgia for a time when photography was more difficult, and imperfections the norm. There’s a certain charm to old photos tainted by color casts, light leaks, blurry edges and grainy details. What they lack in crispness they make up for in fuzzy old-school feels.
This perhaps goes some way to explaining the trend for adding analog effects to digital photos. It lends them some retro charm, and enables us to create photos that evoke a feeling of time and place.
In this project, we’re looking at how to add a range of vintage effects to our photos with simple layer skills in Affinity Photo. To help you out, we’ve supplied a set of 15 textures and light leak images (download here). You can copy these onto any photo you like, or try them on our film.jpg start image and retro-fy your photos in seconds.
We’ll begin by using the Noise filter to add a film grain effect, as though our photo was taken on an old roll of high-ISO film. Next, we fade the colors with a simple Curves adjustment. From here we can add a light leak effect of the sort you might see in old cameras, where a sliver of light has snuck in and fogged the edges of the film roll. Finally, we blend a texture to rough up the image and give it a dusty, scratchy finish.
1. Create grain
Open your image in Affinity Photo and go to the Photo Persona. Go to Layer > New Live Filter Layer > Noise > Add Noise. Zoom in close and use the slider to add a grainy effect to the photo. Once done, close the box (you can tweak it at any time by double-clicking the live filter in the Layers panel).
2. Get the matte look
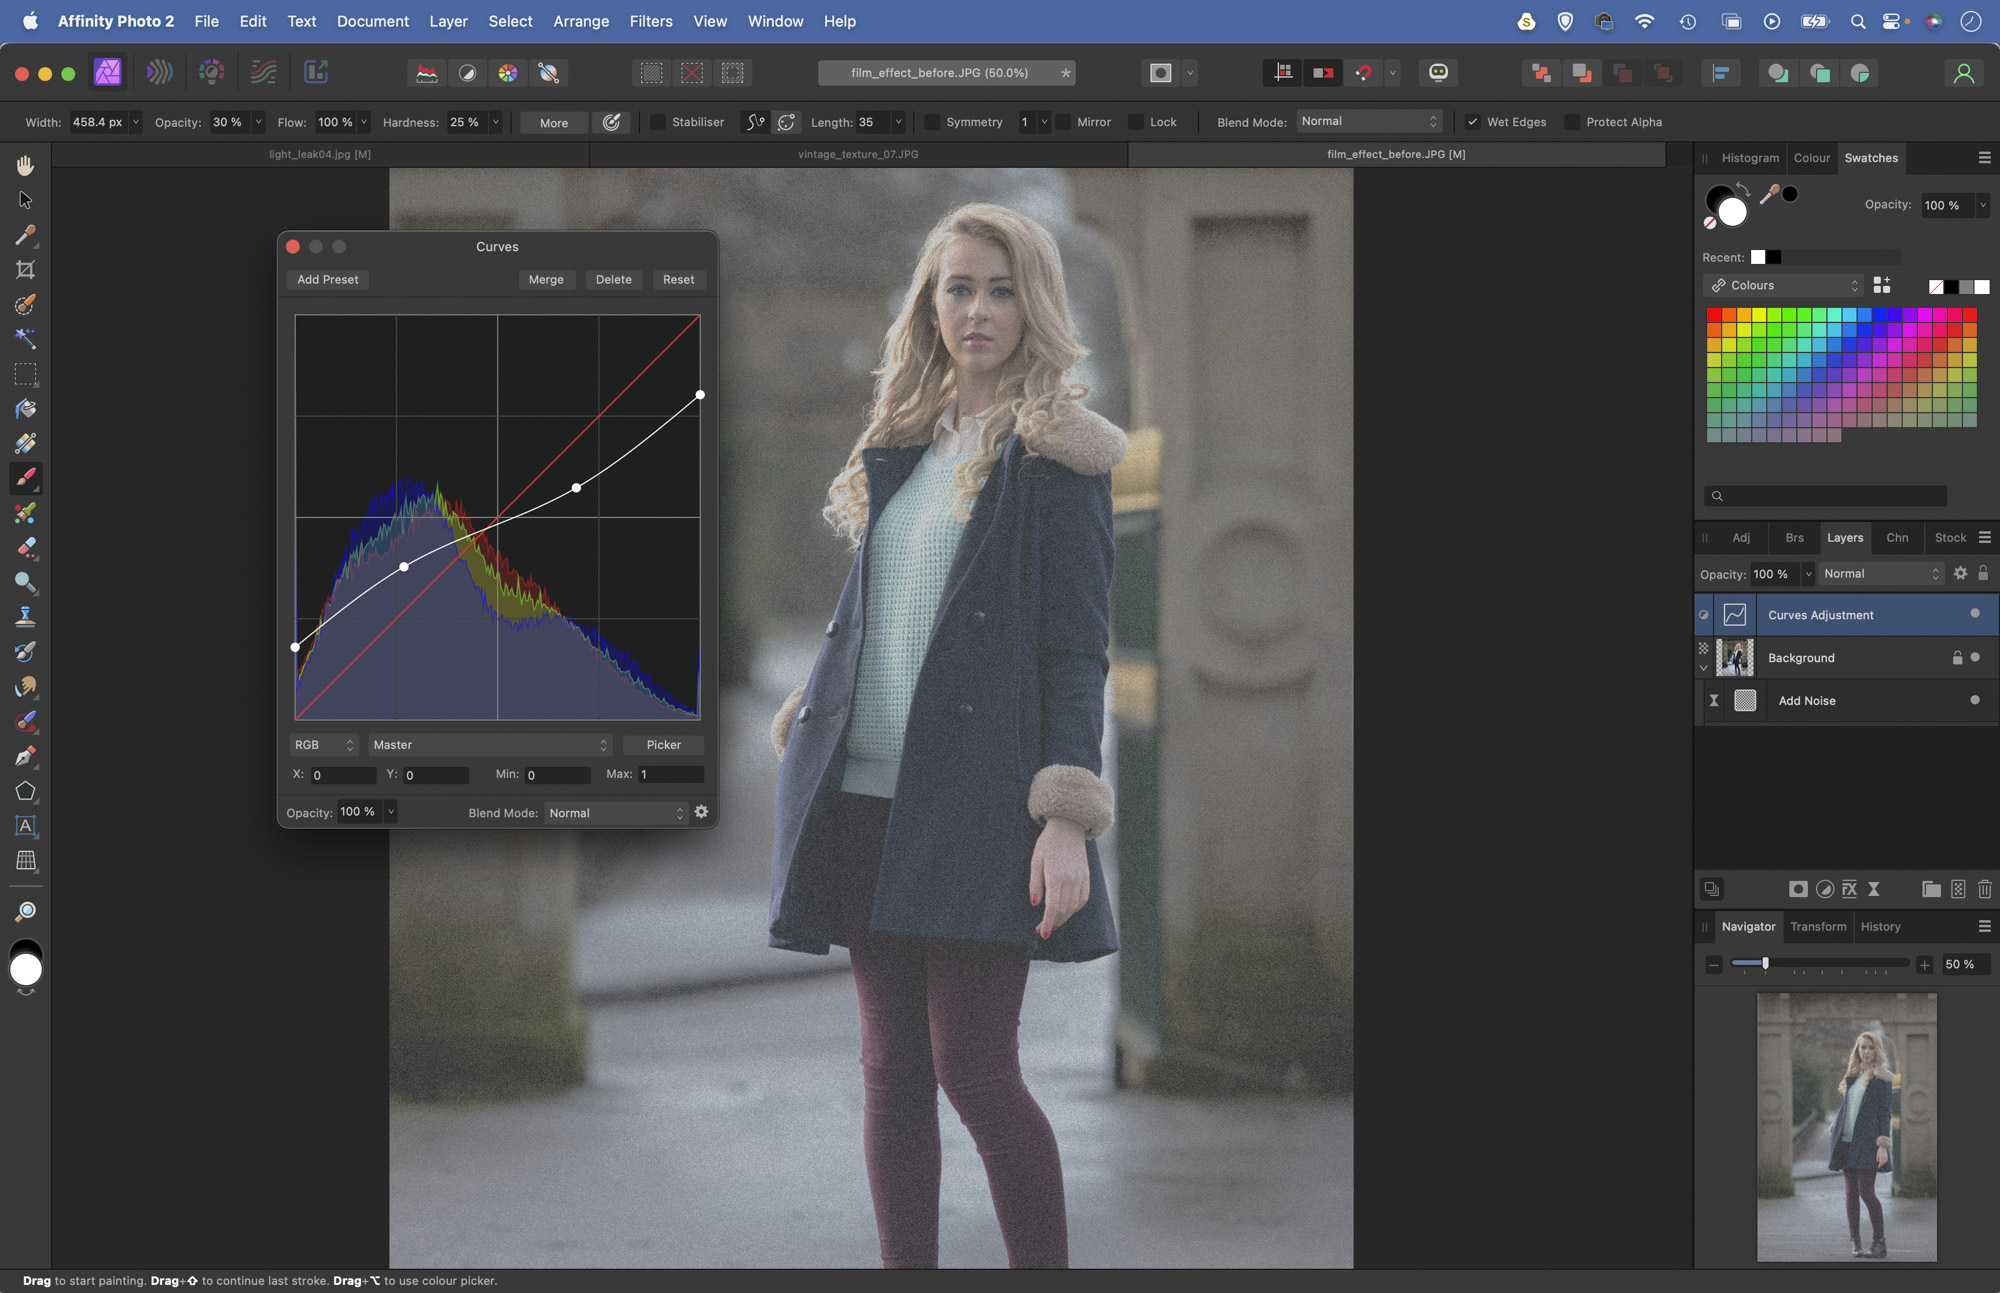
Click the Adjustment icon in the Layers panel and choose Curves (or press Cmd / Ctrl+M). Drag the bottom-left point up to fade out the black point and the top-right point down to fade the white point for a matte effect. We can reduce contrast more by adding two points to plot an inverted S shape, as shown.
3. Skew the colors
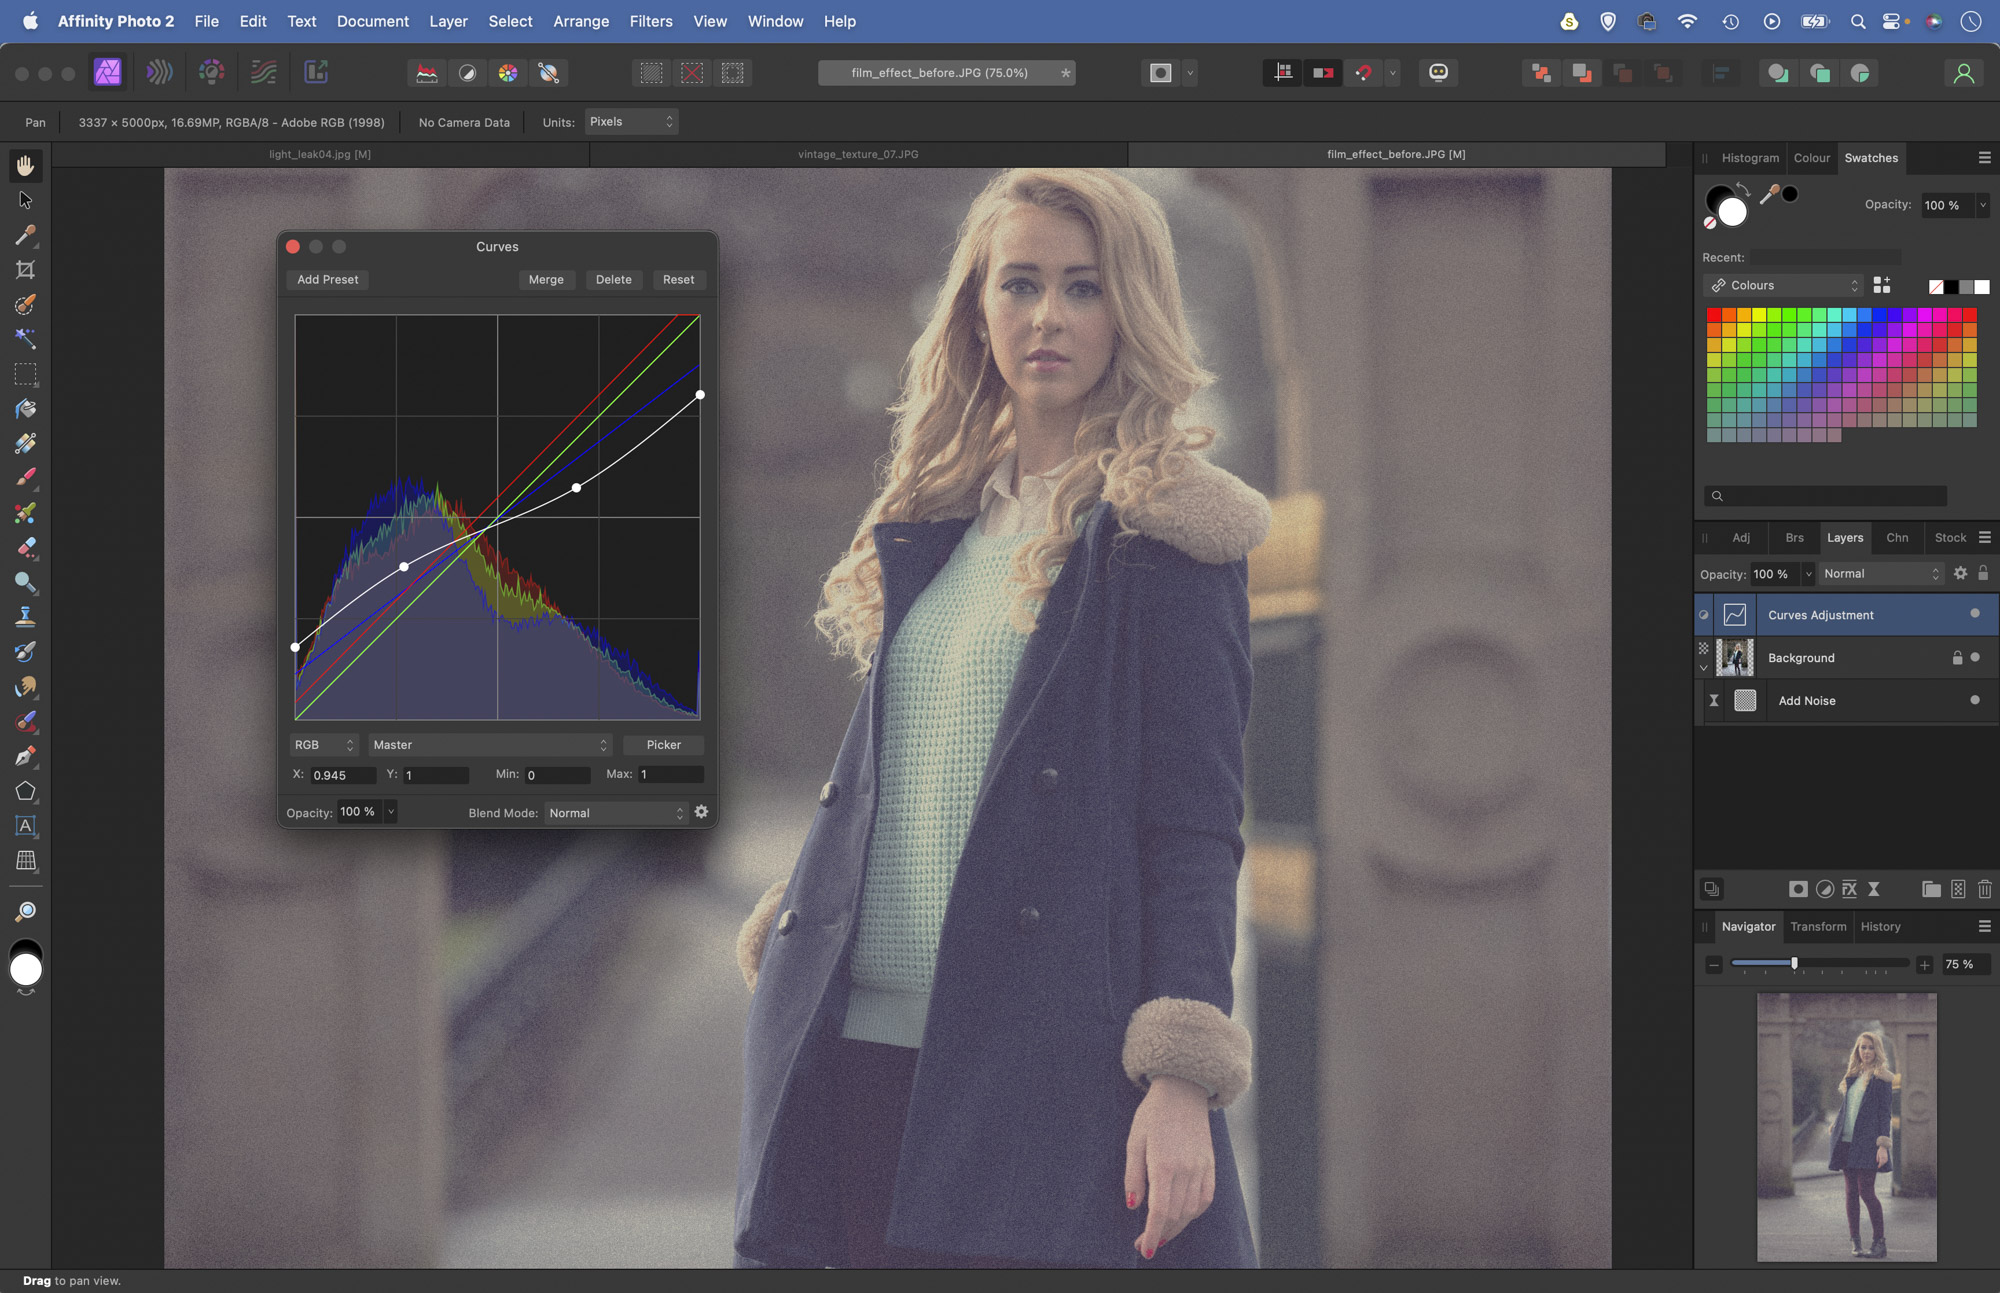
Click Master in the Curves settings and change it to Blue. Drag the bottom-left point upwards to tint the shadows blue, then drag the top-right point down to tint the highlights yellow. Switch to Red and drag the bottom point up and the top point left to add a red tint. Experiment with other subtle color shifts.
4. Add a light leak
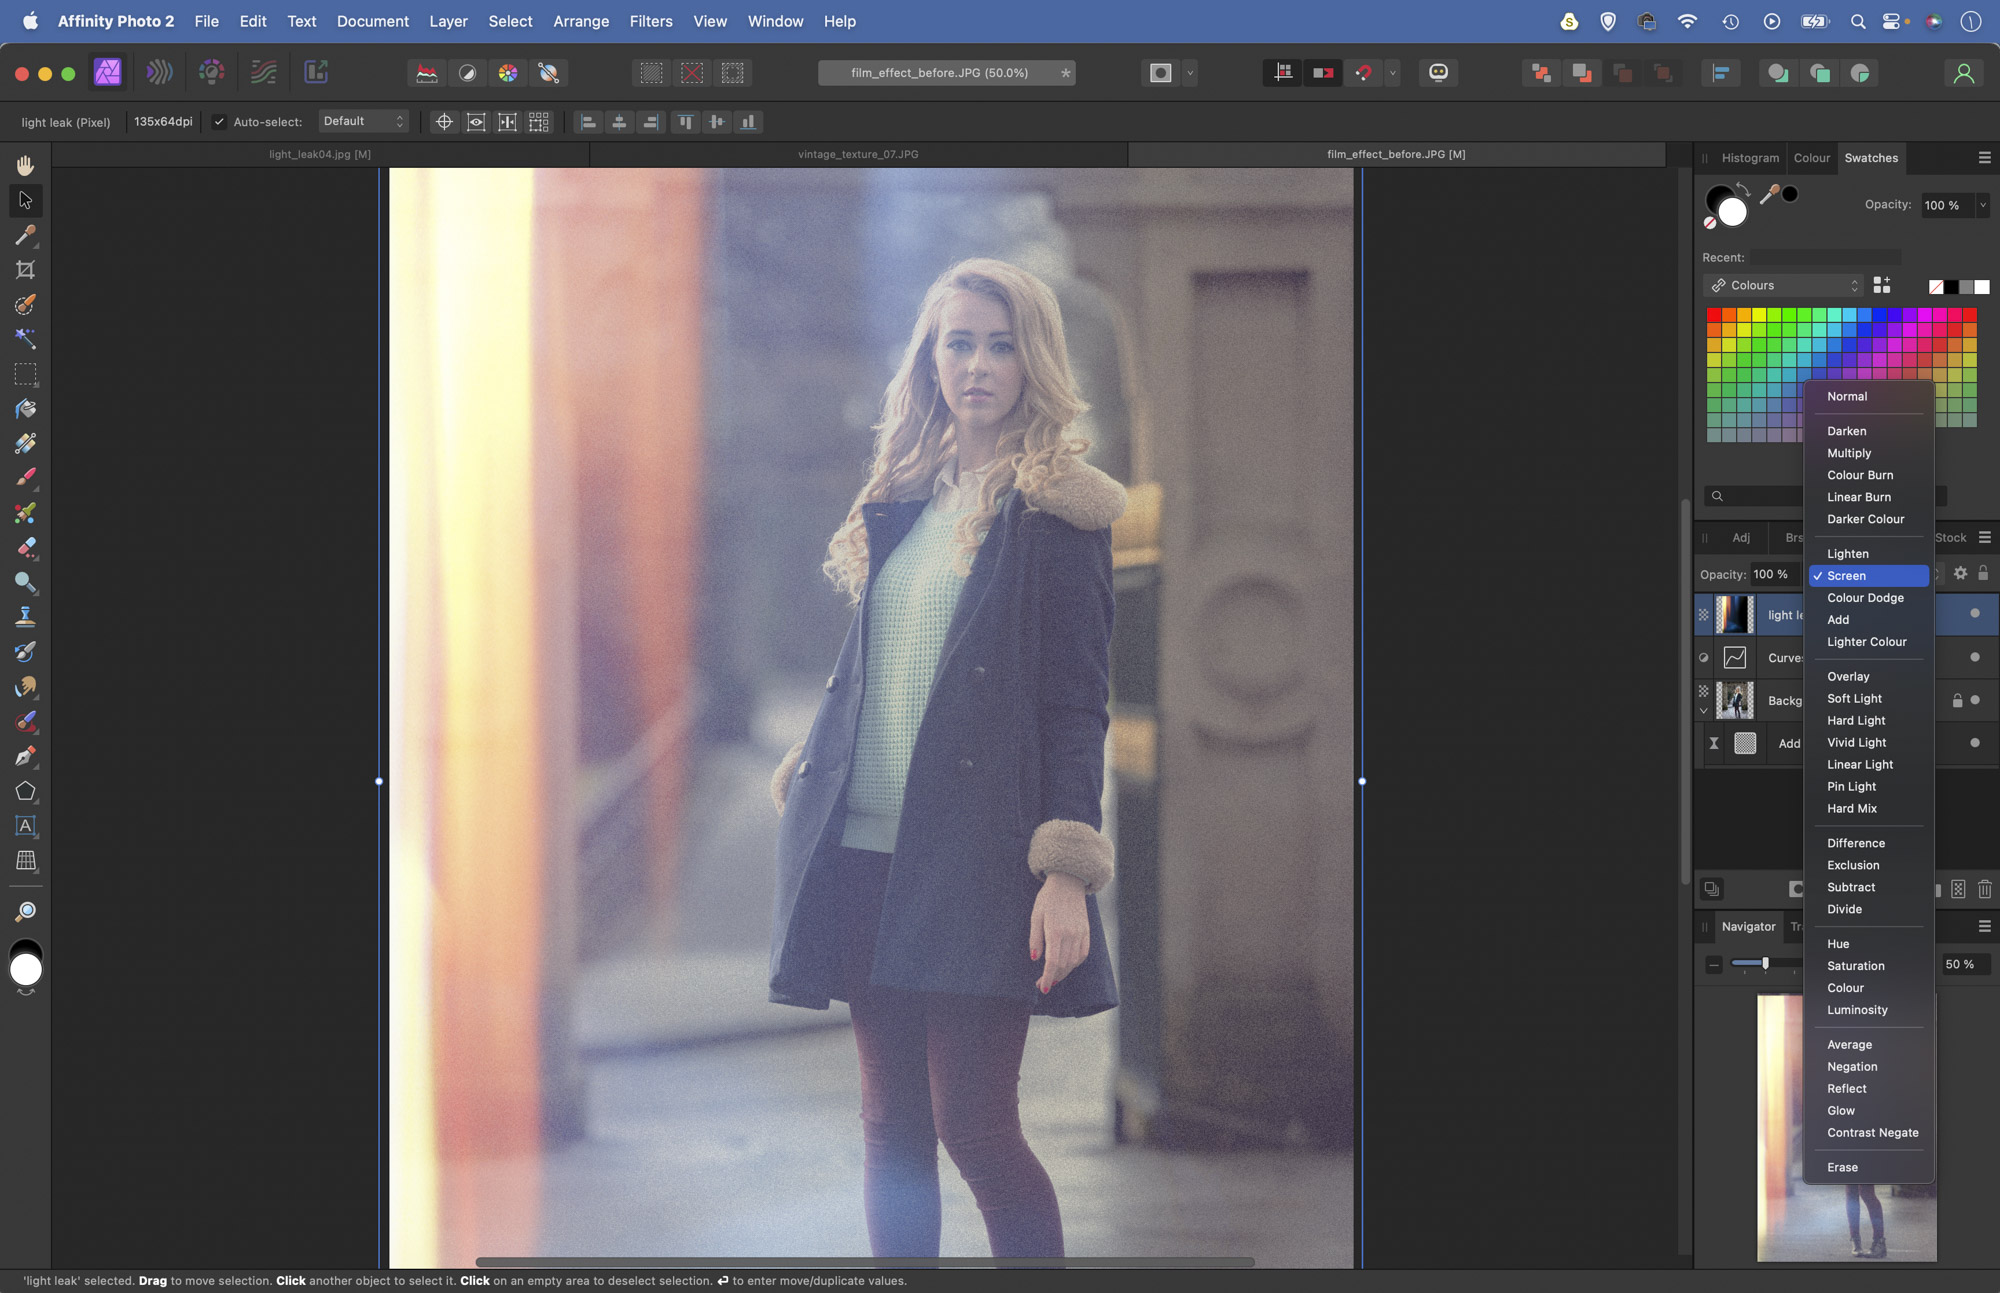
Open one of the supplied light leak images such as the light_leak_04.jpg we used (download here). Hit Cmd / Ctrl+C to copy. Go to your other image and hit Cmd/Ctrl+V to paste. Go to the Layers panel and change the layer’s Blend mode to Screen. Grab the Move tool and use the bounding box to resize and position the light leak effect.
5. Blend a texture
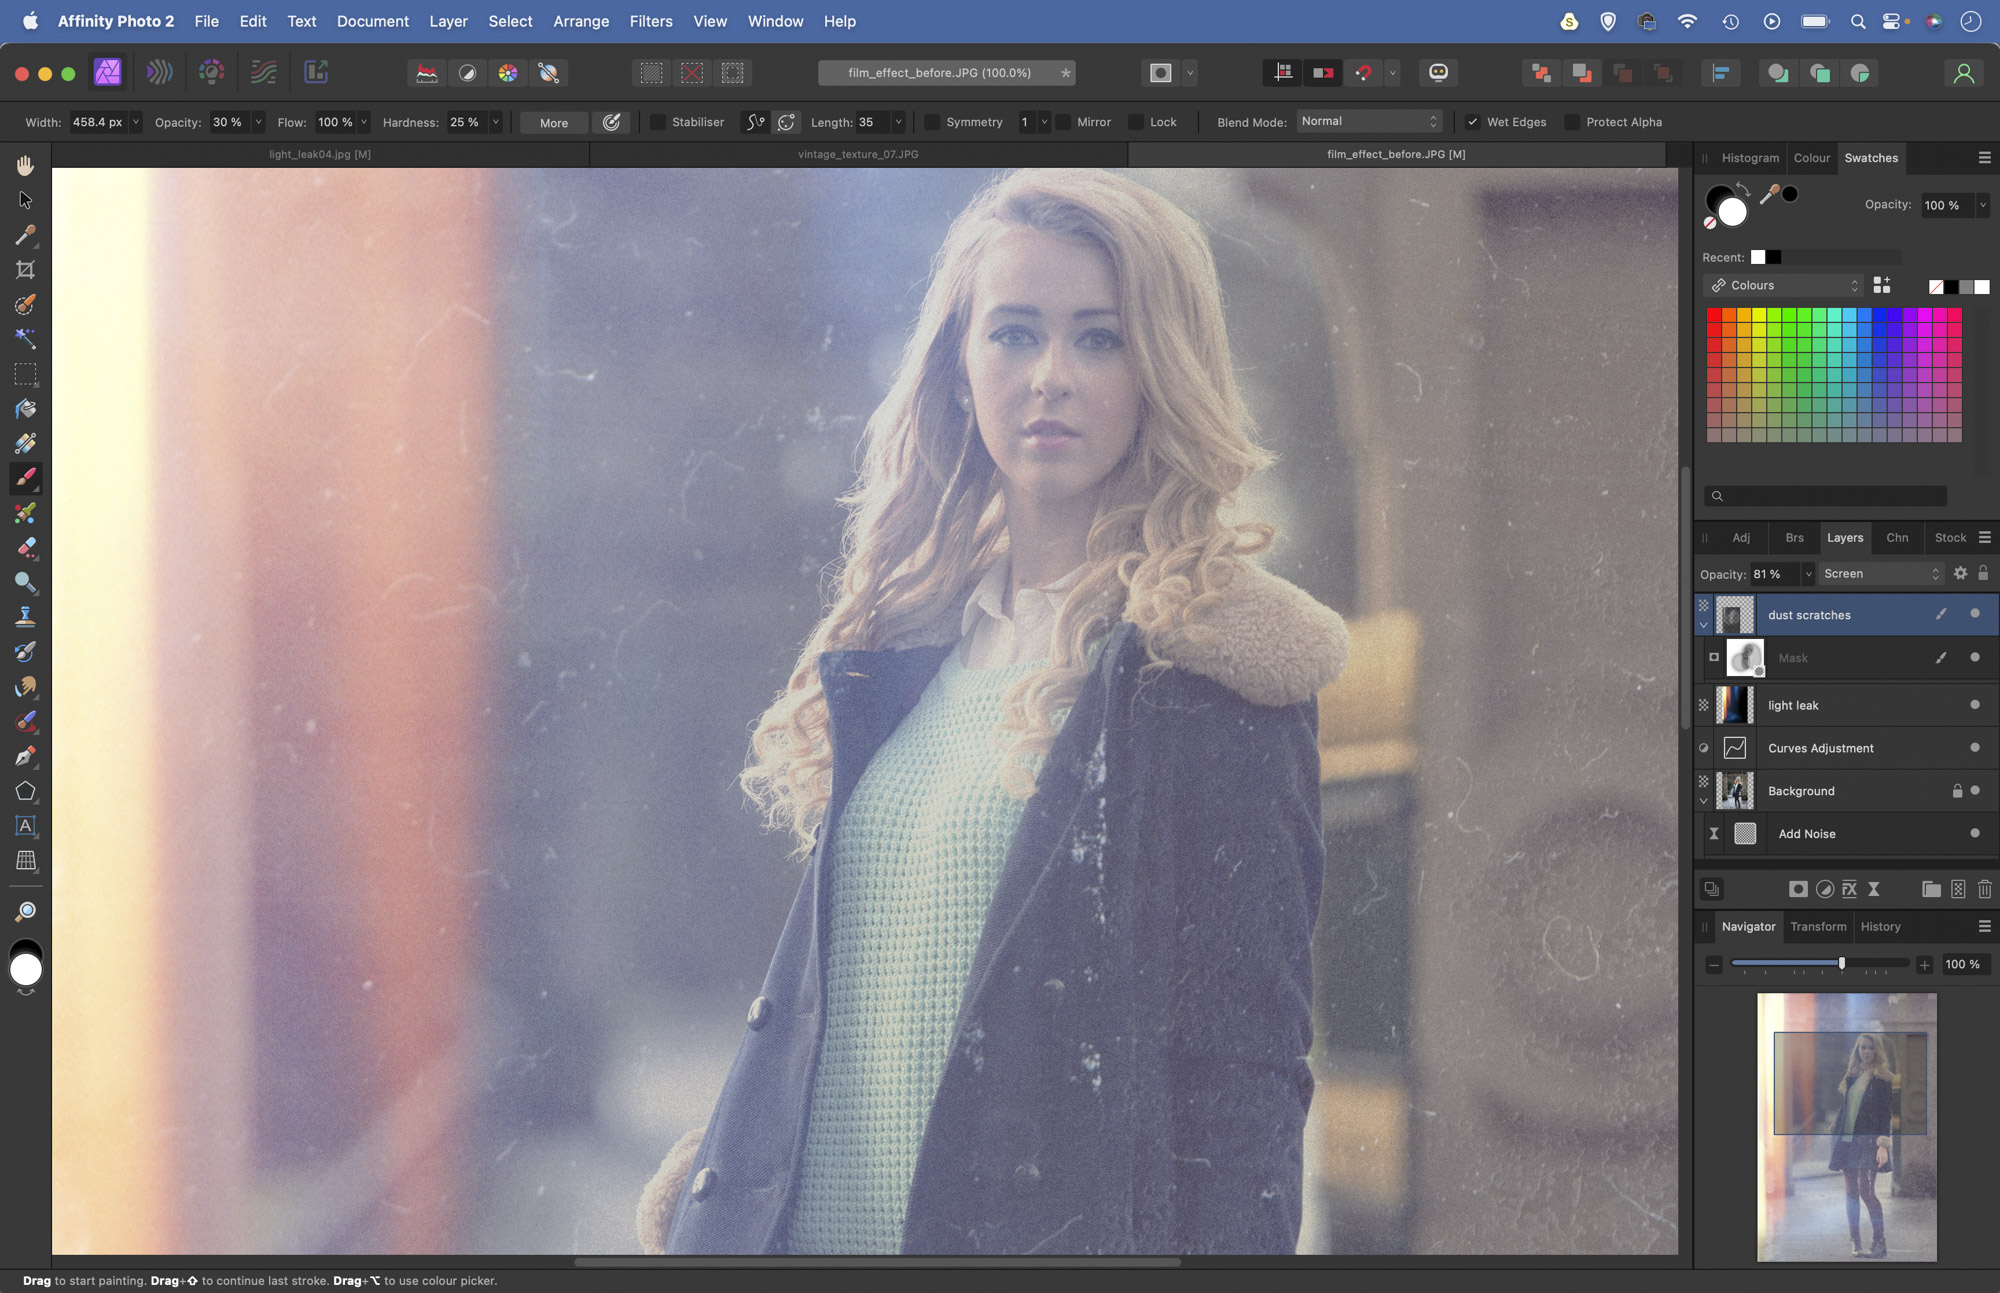
Choose one of the supplied texture images (vintage_texture_07 here). As before, copy and paste the image in, set the Blend mode to Screen, then use the Move tool to position it. If it’s too strong, lower the layer opacity. If you want to fade it out in parts of the image, add a layer mask and paint with black.
6. Blur the corners

Highlight the background layer, then go to Layer > New Live Filter Layer > Colors > Vignette. Use the sliders to darken down the corners of the image. Next go to Layer > New Live Filter Layer > Blur > Depth Of Field. Finally, set Mode: Elliptical and use the settings to blur the corners.
If you enjoyed this tutorial but want a bit more power from your laptop, why not look at the best photo-editing laptops? If you're really keen to improve your skills further then online photography courses could be the way to go.