Combining multiple images into a single PDF file can be a convenient way to organize, share, or archive your images. With Windows 11, you don't need to install any additional software to accomplish this task. The built-in Microsoft Print to PDF feature can be used to combine multiple images into one PDF file quickly and efficiently.
In this guide, we will walk you through the process of combining multiple images into one PDF on Windows 11. This step-by-step guide is designed to be approachable and authoritative, ensuring that users of all skill levels can successfully create a PDF file containing their images.
Follow these action steps to combine multiple images into one PDF on Windows 11.
How to combine images into one PDF
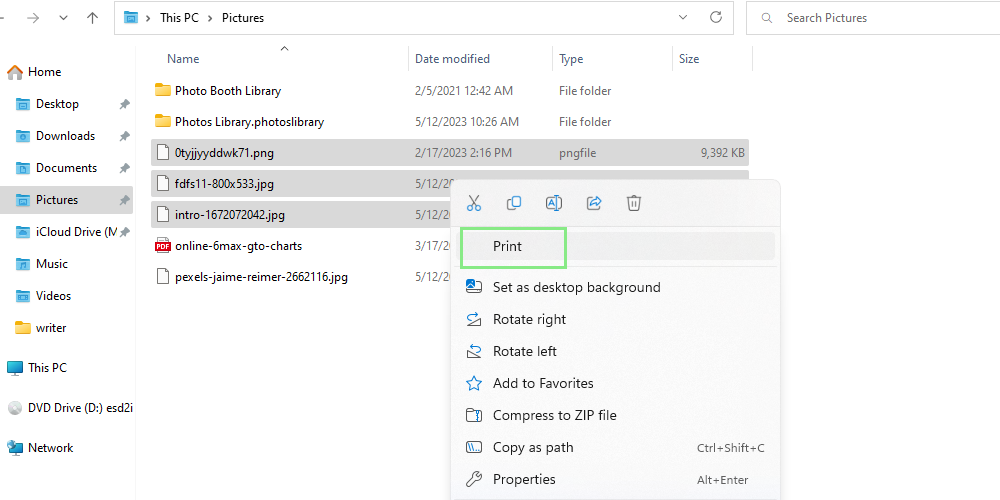
Step 1. Select your images: Open File Explorer and navigate to the folder containing the images you want to combine. Select all the images by holding down the Ctrl key and clicking on each image.
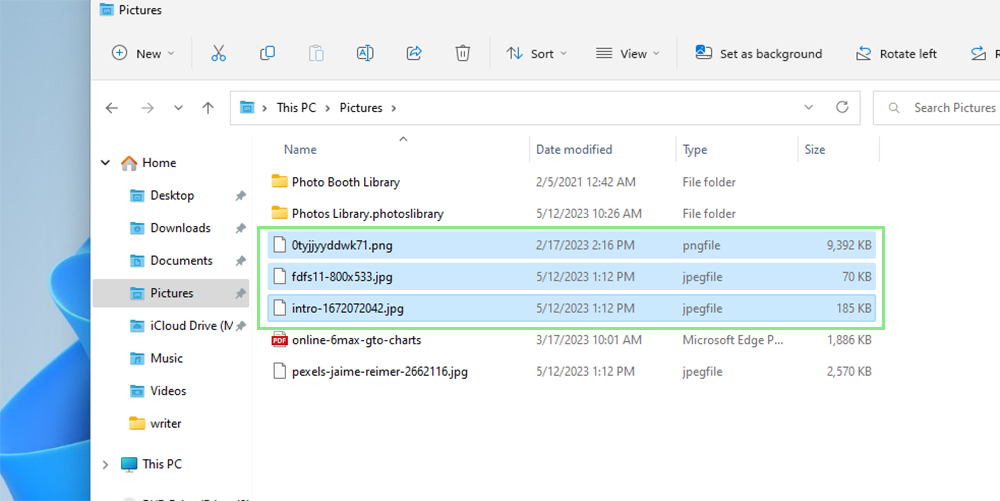
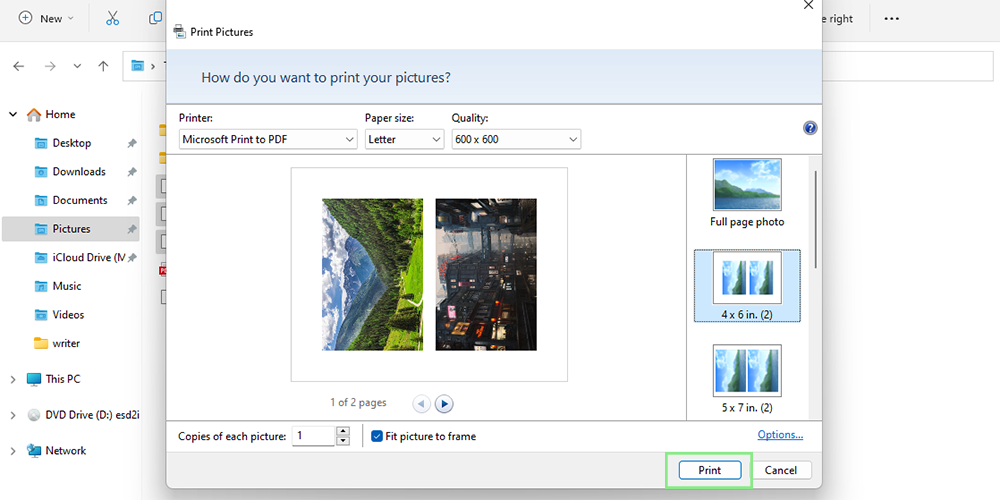
Step 2. Open the Print dialog: With all the images selected, right-click on one of them and choose "Print" from the context menu. This will open the Print Pictures dialog.
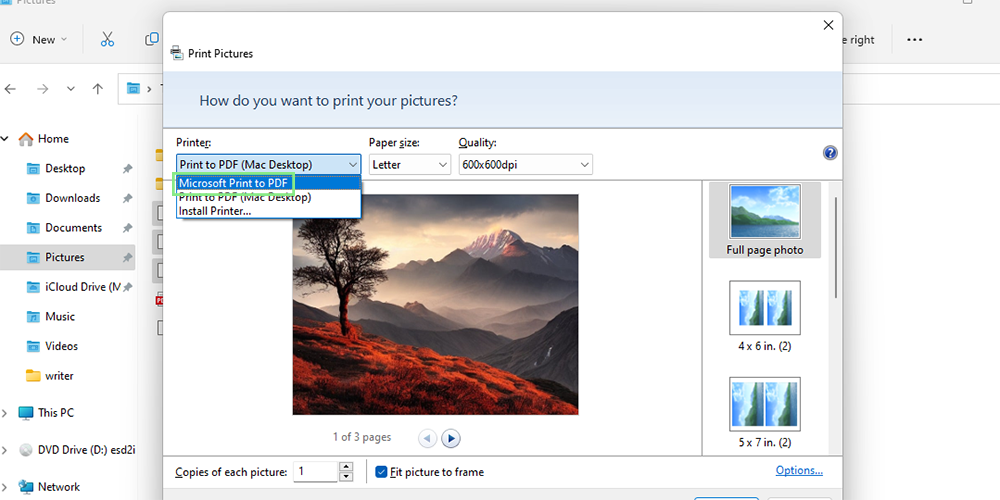
Step 3. Choose Microsoft Print to PDF: In the Print Pictures dialog, click on the "Printer" dropdown menu and select "Microsoft Print to PDF" as your printer.
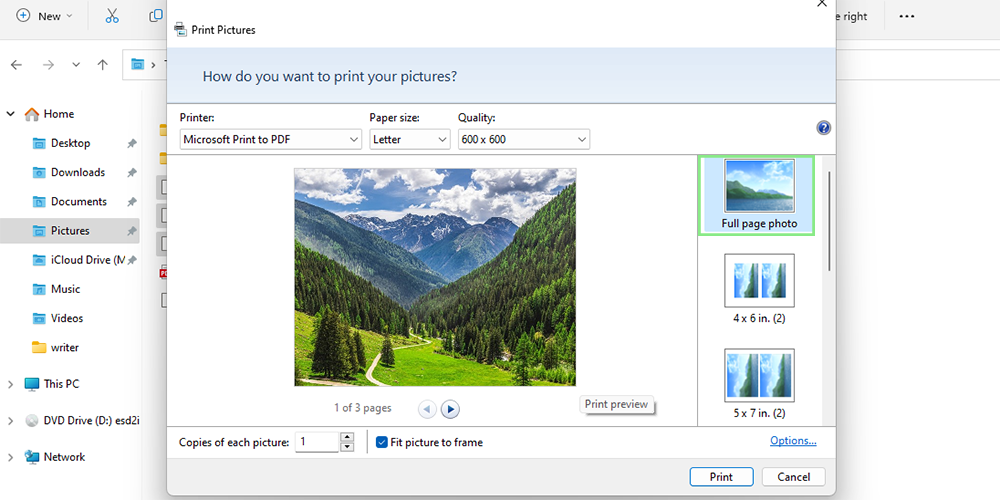
Step 4. Select your layout: Under "Layout," choose your desired layout for the PDF. Options include Full page, Wallet size, 3.5 x 5 in, 4 x 6 in, 5 x 7 in, 8 x 10 in, and Contact sheet. Depending on the layout, you can also select the number of images to be displayed per page.
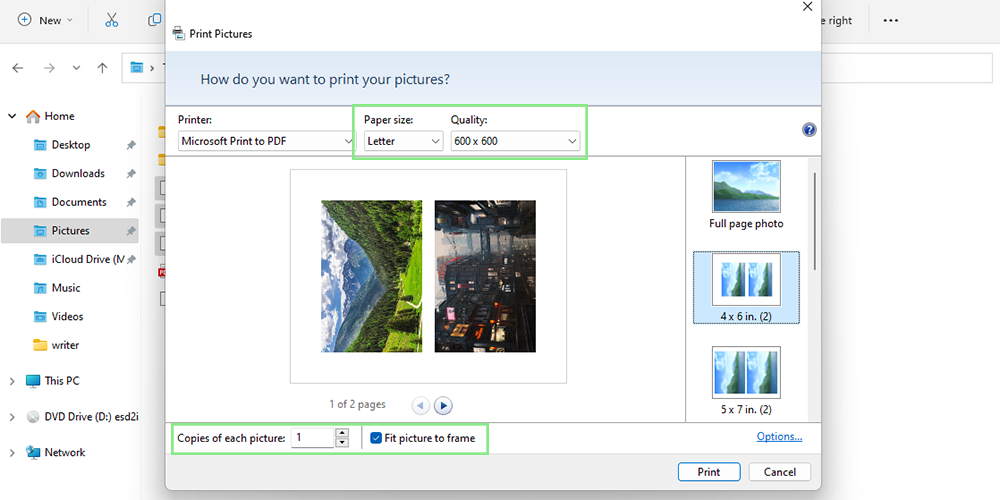
Step 5. Adjust other print settings: Configure additional settings as needed, such as paper size, quality, and the number of copies of each image.
Step 6. Print to PDF: Click on the "Print" button to create the PDF file. A "Save Print Output As" dialog will appear.
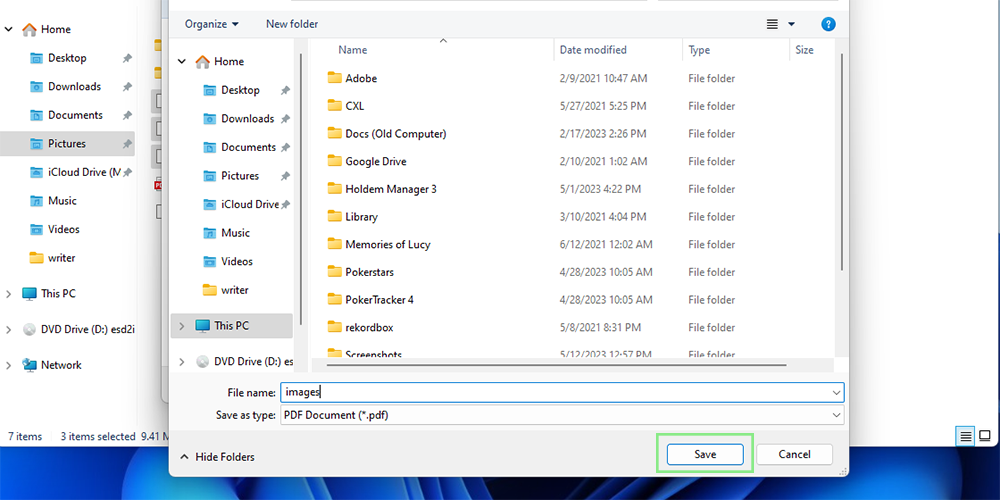
Step 7. Save the PDF file: Choose a location to save the PDF file, enter a file name, and click on the "Save" button. Your images will now be combined into a single PDF file.
