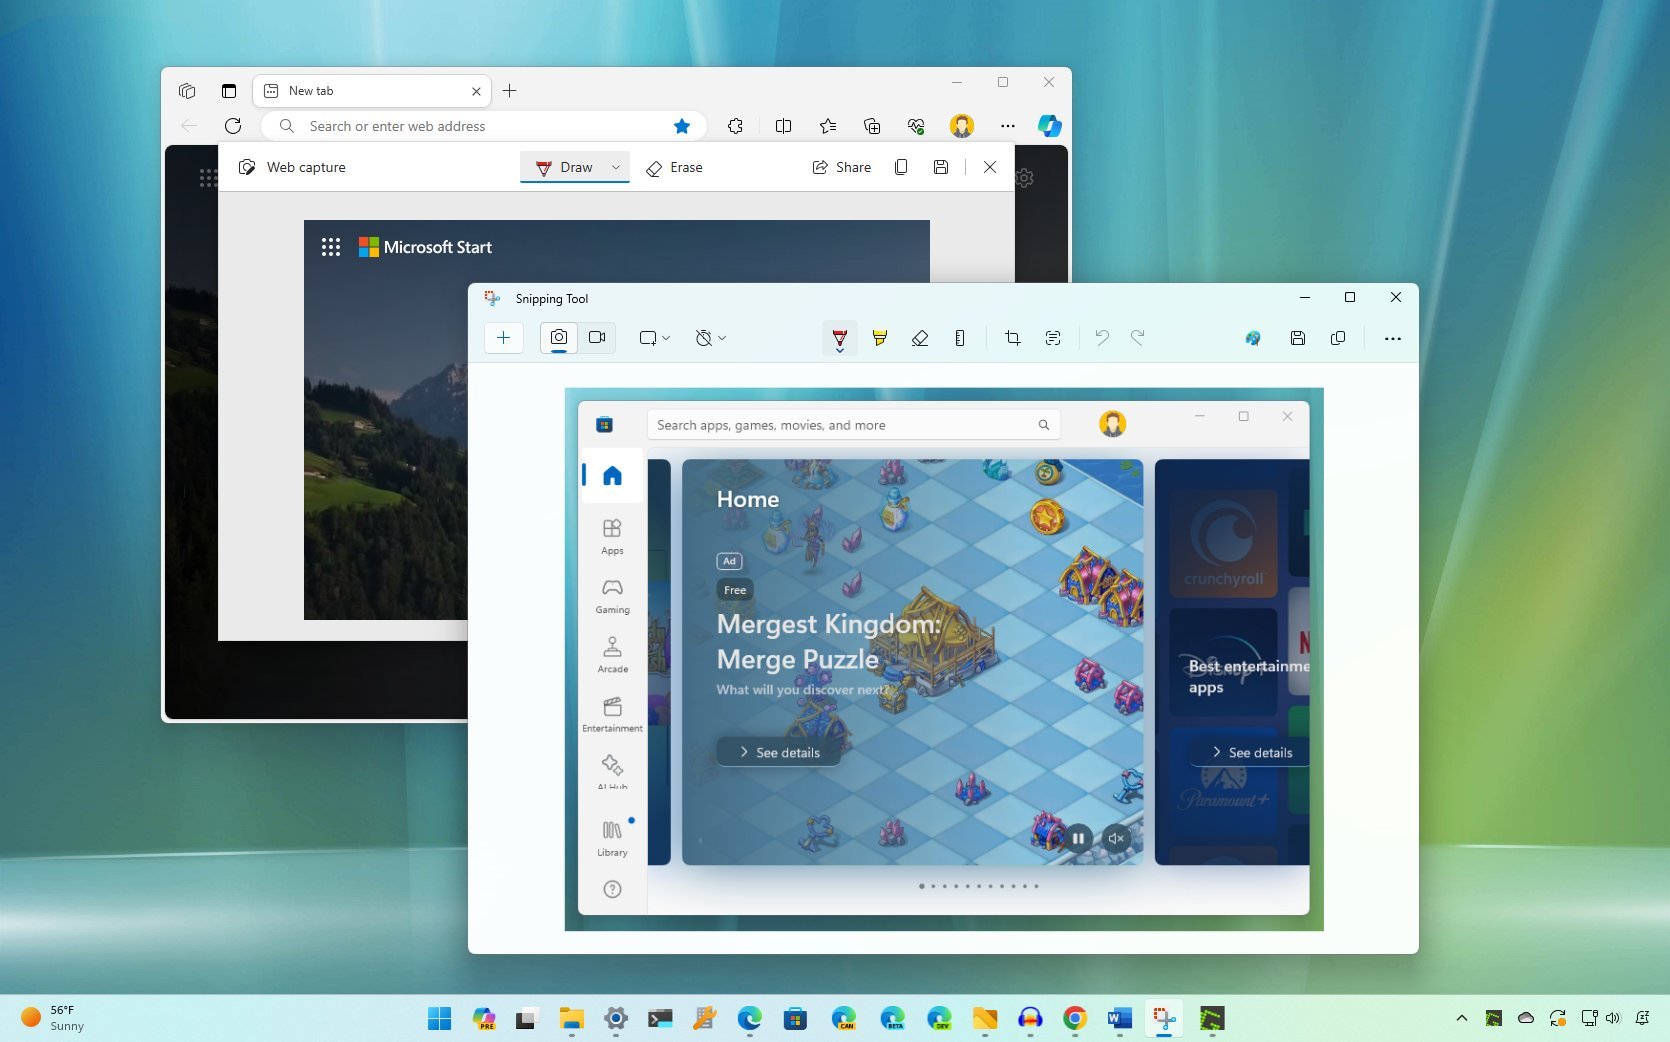
On Windows 11, you can take screenshots from any window, web page, or the entire screen, and in this guide, I will show you the best ways to complete this task.
In the digital age, screenshots have become essential for communication and documentation, whether you need to capture a funny meme, a winning game score, or a vital piece of information.
Whatever the reason you may have to create a screenshot, Windows 11 offers more than one way to capture the precise area of your screen with ease with the built-in tools, such as the default screenshot capabilities using the keyboard, the Snipping Tool, Game Bar, Microsoft Edge, hardware features, and through the use of third-party apps.
In this guide, I'll outline the different ways to take screenshots on Windows 11 with and without third-party tools.
How to capture screenshots on Windows 11
These are the best methods to take screenshots on a Windows 11 computer.
Take screenshots from Windows 11
On Windows 11, you technically don't need another application since the system includes a few ways to take screenshots of the entire desktop or active window.
Capture to clipboard
You have two ways to snap a shot of the desktop directly to the clipboard, and here's how.
Entire screen
To take a screenshot of the entire screen to the clipboard, use the "PrtScrn" or "Ctrl + PrtScrn" keyboard shortcut.
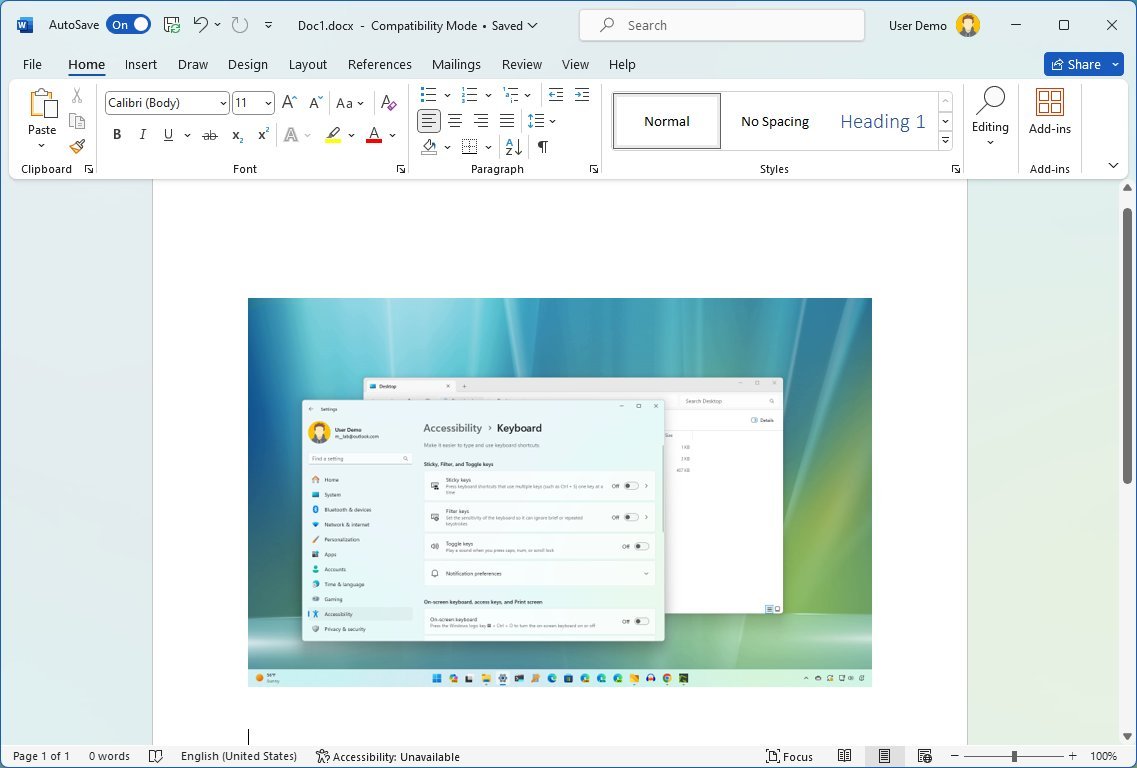
Once you have activated the shortcut, you can paste the image into any application. These shortcuts work whether you're using one or multiple displays.
If the shortcuts open the Snipping Tool, you can change this behavior from Settings > Keyboard and turn off the "Use the Print screen key to open screen capture" toggle switch.
Active Windows
To take a screenshot of the active window to the clipboard, use the "Alt+ PrtScrn" keyboard shortcut.
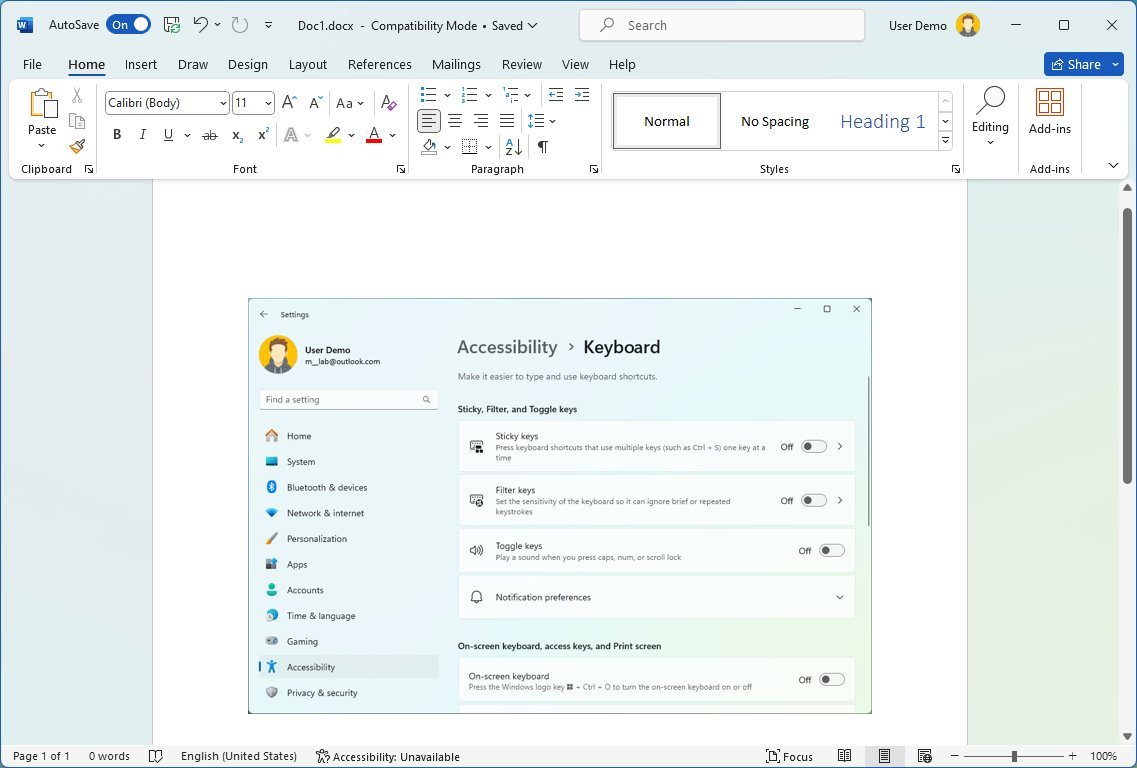
After you have activated the shortcut, you can paste the image into any application.
Capture to file
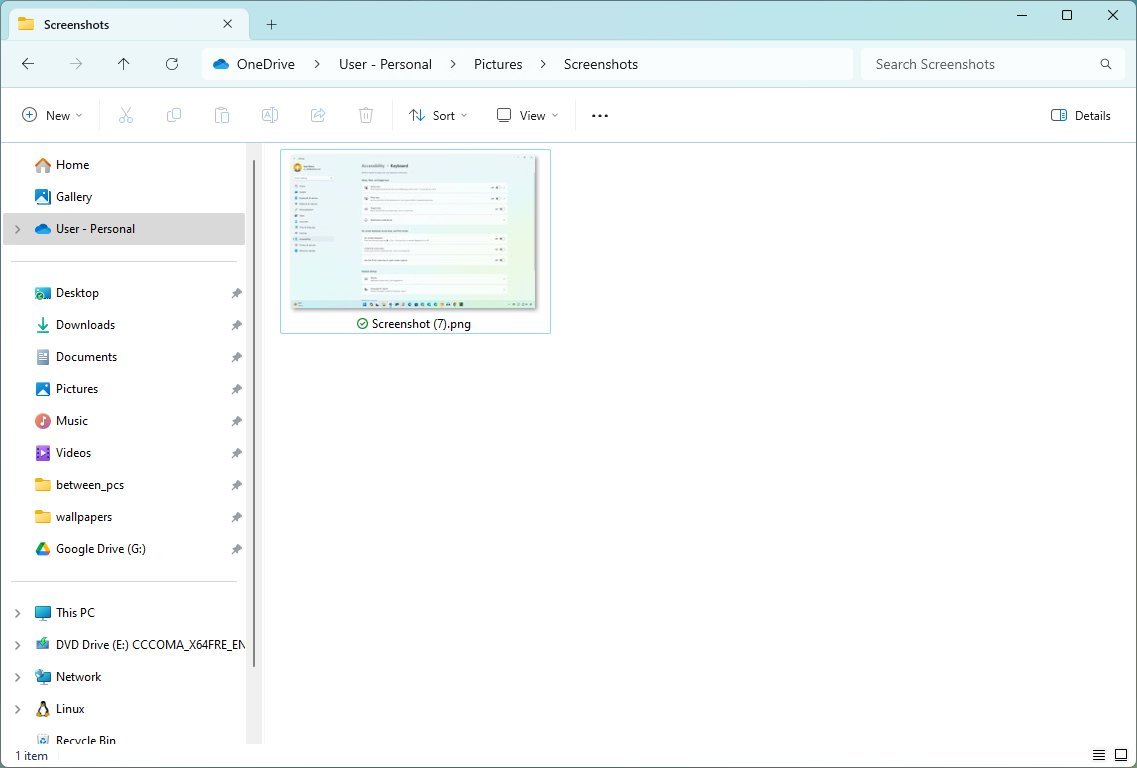
To take a screenshot of the entire screen and save it to a file, use the "Windows key + PrtScrn" keyboard shortcut. Using this method will save the capture into the "Screenshots" folder inside the "Pictures" folder.
Take screenshots from Snipping Tool
In addition to the system's shortcuts, Windows 11 also includes the Snipping Tool app, which gives you more control over taking screenshots.
Screen capture from app
To take a screenshot from the Snipping Tool app, use these steps:
- Open Start.
- Search for Snipping Tool and click the top result to open the app.
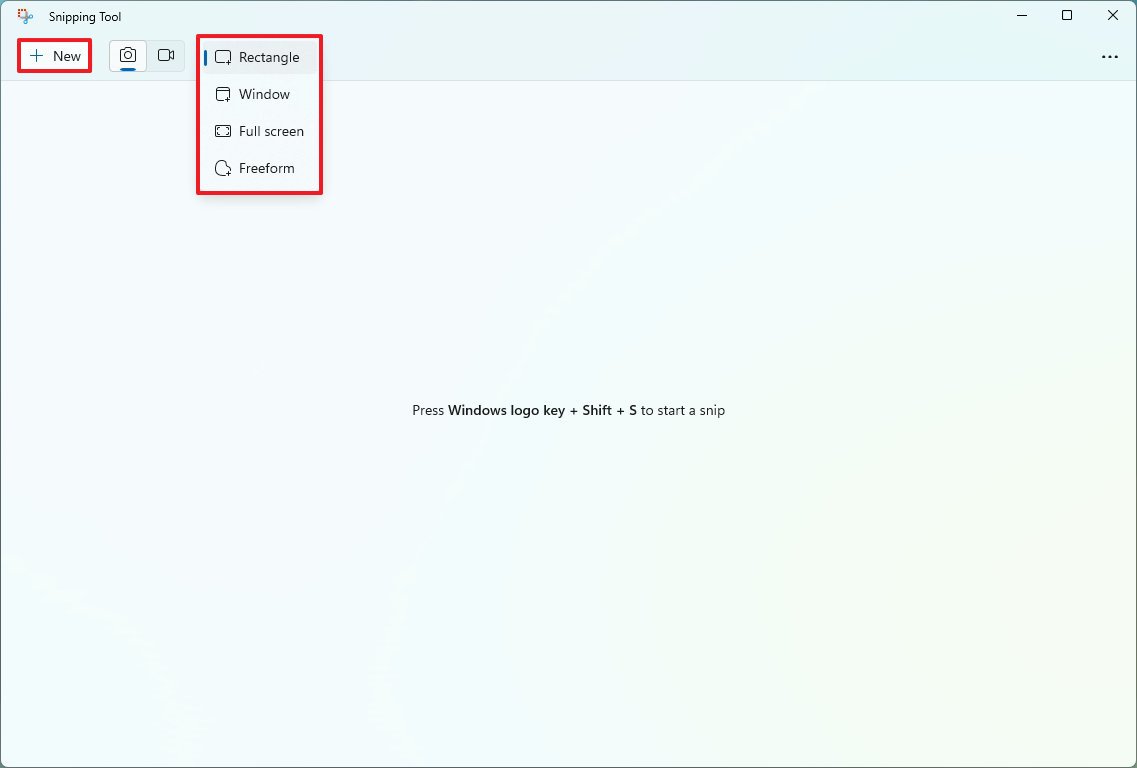
- Click the Snipping mode drop-down menu.
- Select one of the available capture modes, including:
- Rectangle— creates a rectangle screenshot using the mouse.
- Window — saves a screenshot of a window.
- Full screen — takes a screenshot of the entire screen.
- Freeform— allows you to use the mouse to choose any form to create a capture.
- (Optional) Click the Delay snip drop-down menu to change the capture delay for up to 10 seconds.
- Quick note: This option can be useful when capturing a particular action.
- Click the New button.
- Create the screenshot with the mode you selected.
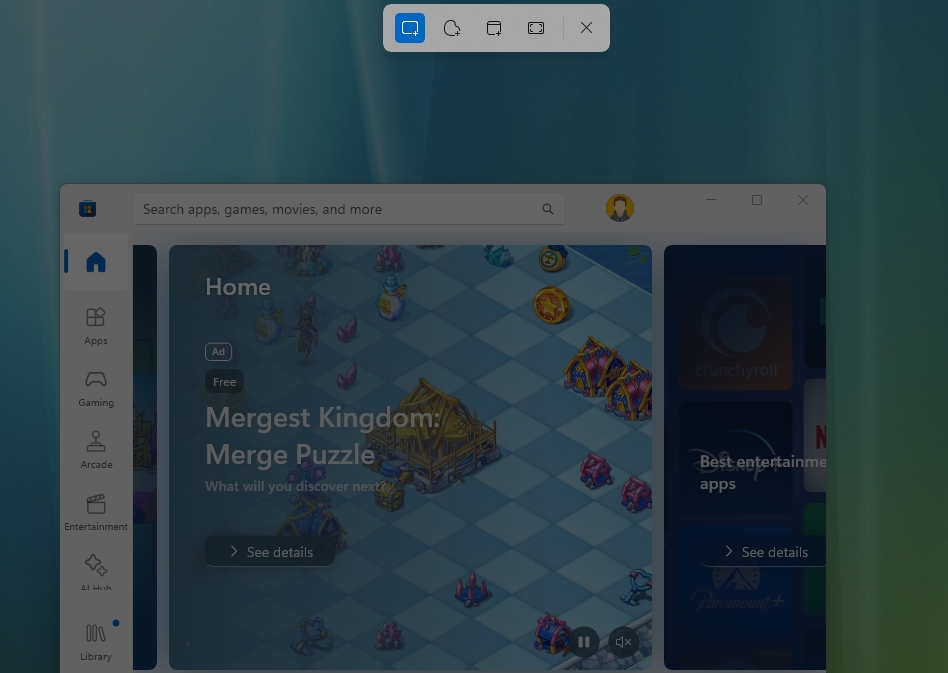
Once you complete the steps, the image will open in the editor, where you can annotate and save it for sharing.
Screen capture from keyboard
Alternatively, you can use a keyboard shortcut to quickly bring up the tools to take a screenshot on Windows 11. Here's how:
- Use the "Windows key + Shift + S" keyboard shortcut.
- Select one of the screen capture modes:
- Rectangle.
- Window.
- Full screen.
- Freeform.
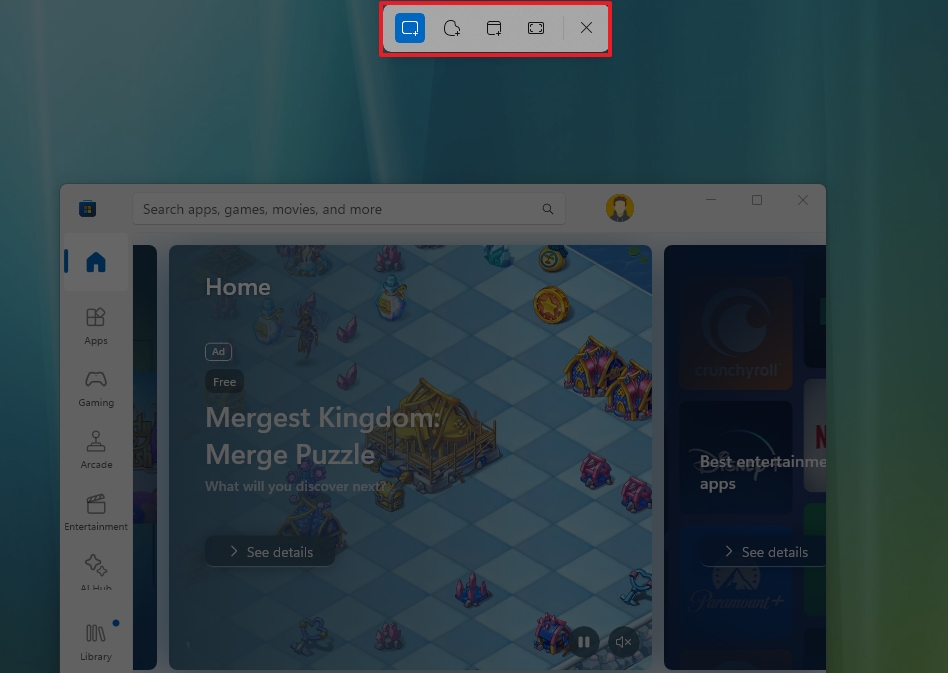
- Create the screenshot with the selected option.
After you complete the steps, the screenshot will open with the Snipping Tool editor.
The editor experience includes various tools to edit the image, such as ballpoint pen, highlighter, and crop. In addition, you can use the "Text actions" feature to extract and redact text from images. You can learn more with this guide, and to extract or redact text, you can use these instructions.
Take screenshots from Game Bar
To capture a screenshot during gameplay, use these steps:
- Open Start.
- Search for Game Bar, and click the top result to open the experience.
- Quick tip: You can also use the "Windows key + G" keyboard shortcut to open the Game Bar.
- In the "Capture" widget, click the Camera button to take the screenshot.
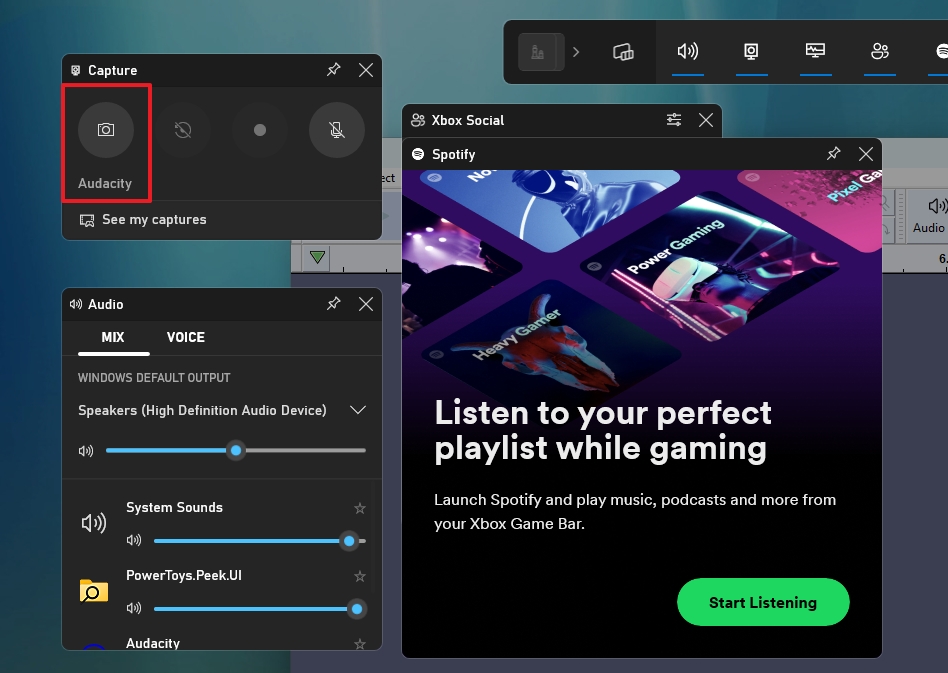
- Quick tip: You can also use the "Windows key + Alt + PrtScrn" keyboard shortcut to screenshot the entire screen.
Once you complete the steps, the screenshot will be saved as a ".png" file in the Screenshots folder.
This screen capturing feature is limited to games as some apps like Microsoft Edge, but this feature may not work to take screenshots of File Explorer or desktop.
Take screenshots from Microsoft Edge
Microsoft Edge also includes a feature that enables you to take screenshots of any web page. This feature is handy to capture the entire page without having to scroll or take multiple screenshots of the same page.
To take a screenshot of a website, use these steps:
- Open Microsoft Edge.
- Open the web page.
- Right-click on the page and choose the Web capture option.
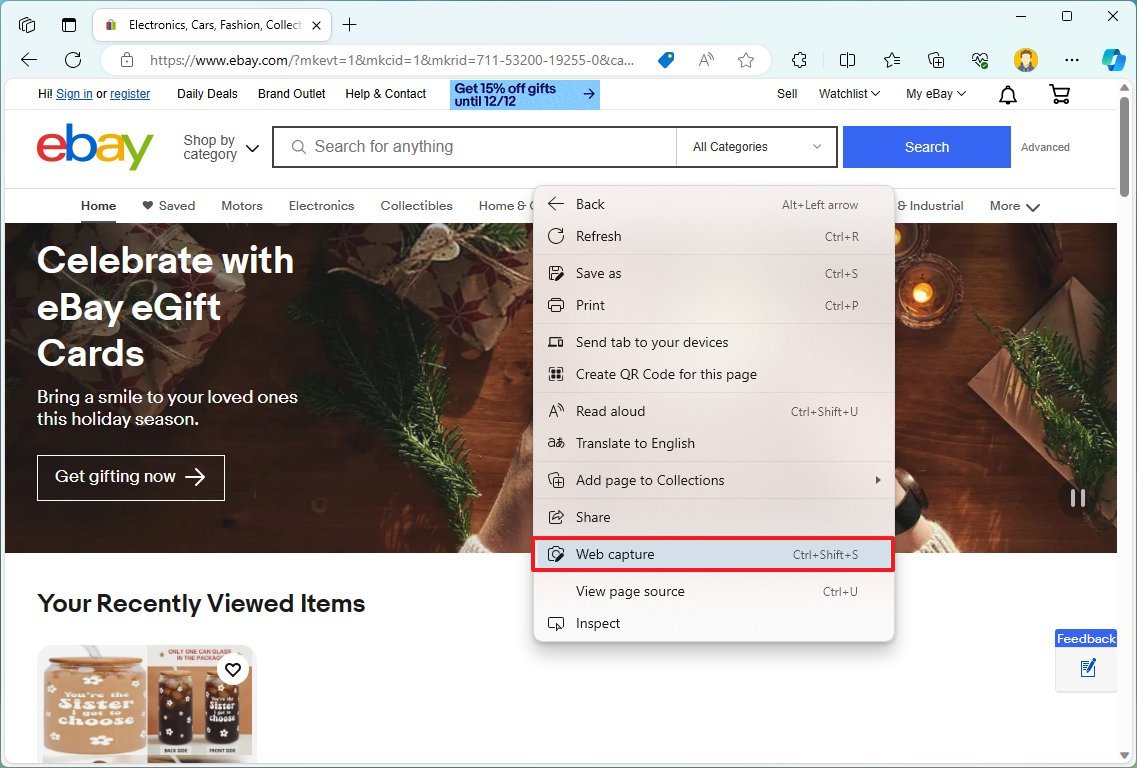
- Quick tip: You can also use the "Ctrl + Shift + S" keyboard shortcut.
- Click the "Capture" area or "Capture full page" button.
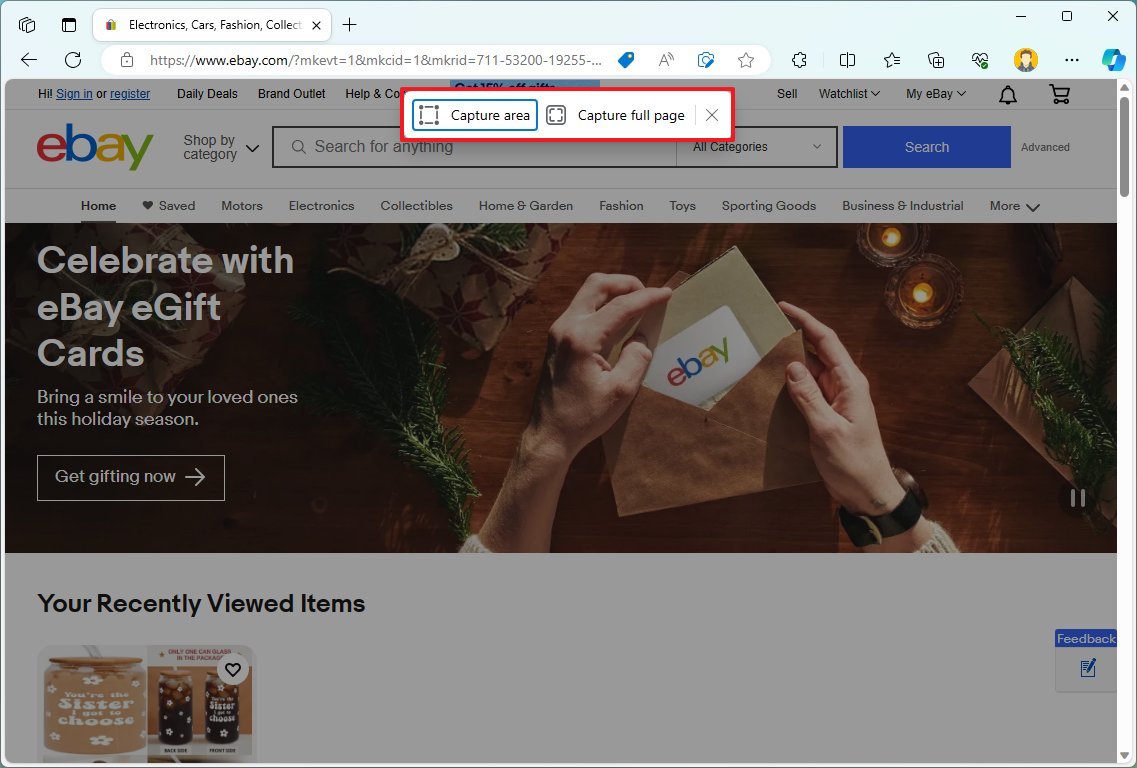
- Quick note: If you use the "Capture" option, you will have the option to copy the image to the clipboard, markup the capture, or perform a visual search.
- (Optional) Use the available tools to annotate the image.
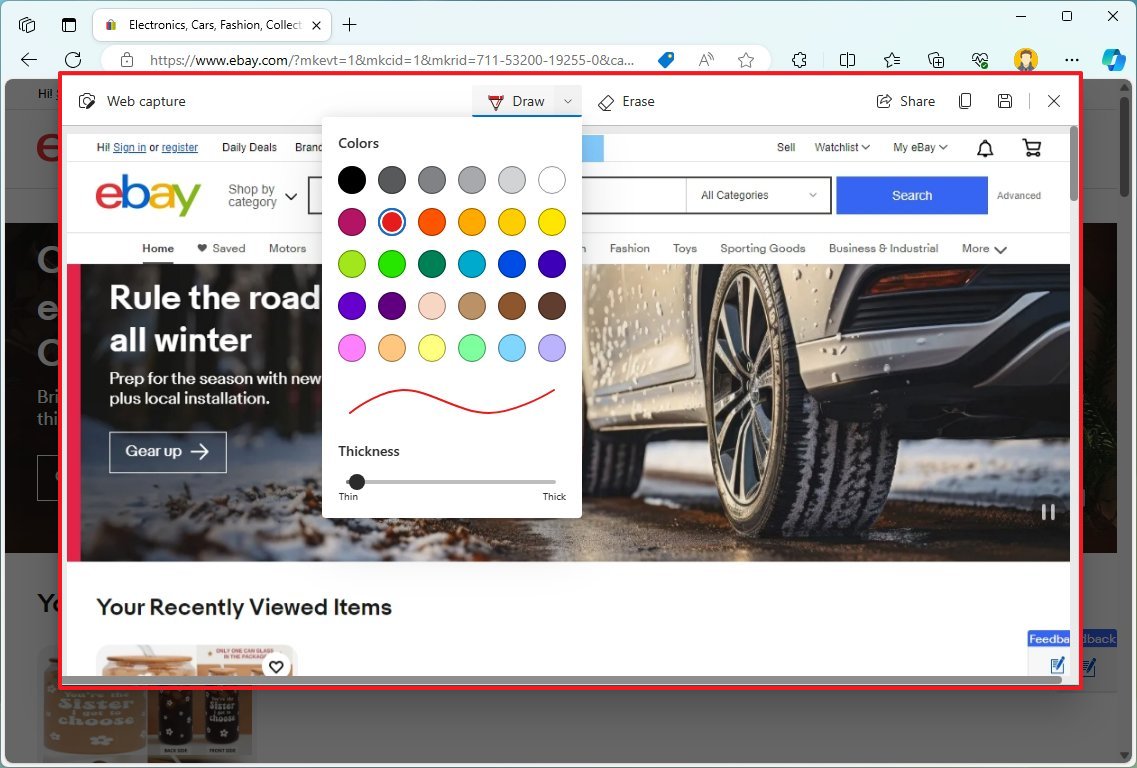
- Click the Save button.
After you complete the steps, the web capture will be saved on your computer.
Take screenshots from portable PCs
On laptops and Surface devices, you will also find that you can take screenshots using the function key, and here's how.
Laptops
To capture screenshots using the function keys on your laptop, use these steps:
- Fn + Windows key + PrtScrn: Captures everything on the screen and saves the image in the "Pictures" folder inside the "Screenshots" folder.
- Fn + PrtScrn (or Fn + Ctrl + PrtScrn): Sends the screenshot to the clipboard, which you can then paste on any application.
- Fn + Alt + PrtScrn: Takes screenshots of an active window and copies the image to the clipboard, which you can paste on any application.
Surface
To capture screenshots using the function keys on your Surface, use these steps:
- Fn + Windows key + Spacebar: This shortcut captures and saves the image in the "Pictures" folder inside the "Screenshots" folder.
- Fn + Spacebar: Stores the image capture of the entire screen in the clipboard, which you can then paste on any app.
- Fn + Alt + Spacebar: Takes a screenshot of a window to the clipboard, which you can then paste on any application.
- Power button + volume down: Screenshots the entire screen and saves the image to the "Screenshots" folder.
Take screenshots from other apps
Windows 11 provides several ways to take screenshots without additional tools. However, you can always use free and premium third-party apps that offer additional features and editing tools, such as Greenshot (Free) and SnagIT (Paid with a free trial).
If you choose to install the Greenshot app, these are the basic steps to take screenshots:
- Open Start.
- Search for Greenshot and click the top result to open the app.
- Quick note: If the app doesn't open, it may be running in the Taskbar's System Tray.
- Choose one of the modes to take a screenshot:
- Capture region.
- Capture last region.
- Capture window.
- Capture full screen.
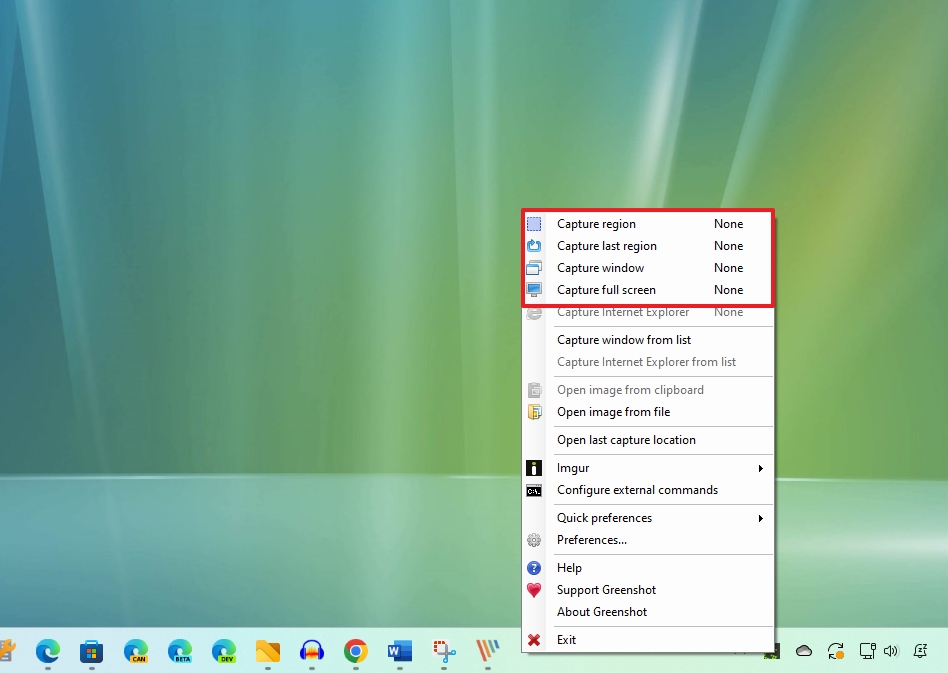
- Create the screen capture with the selected option.
- Select the "Open in image editor" option if you want to markup the capture. Otherwise, choose the "Save as" or "Save directly" option. It's also possible to send the capture to the clipboard, Paint, or one of the Microsoft 365 apps.
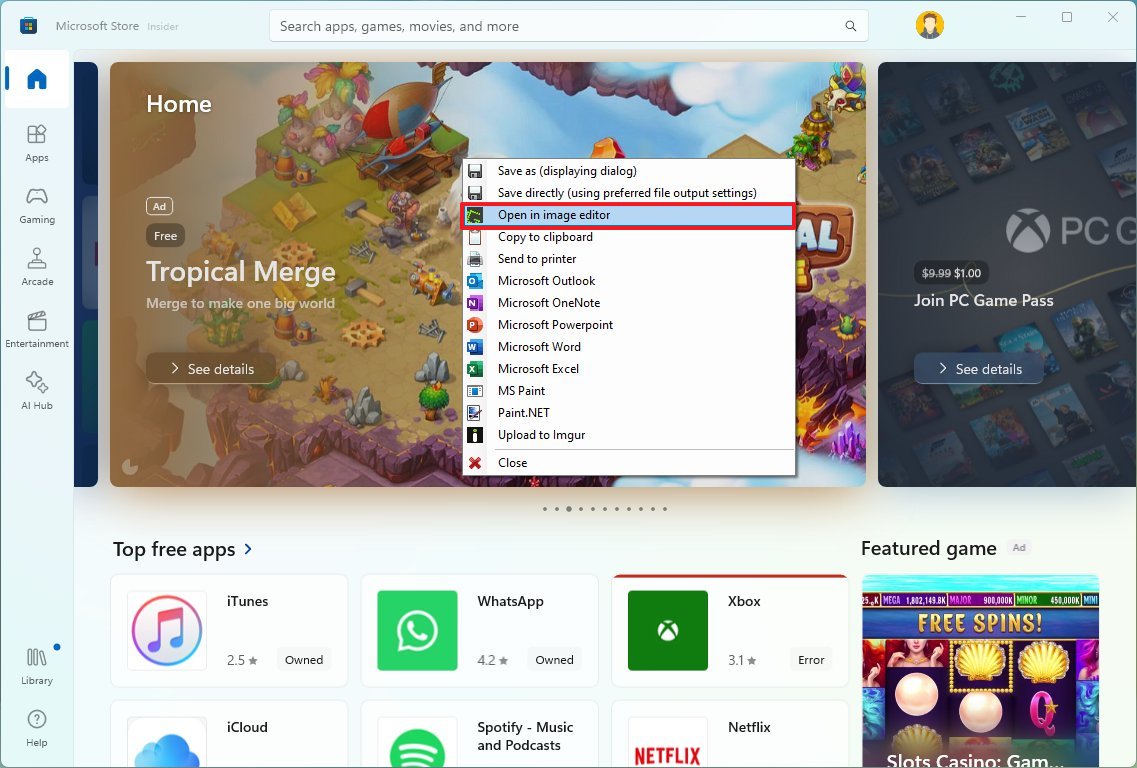
- If you're using the editor, you can use the tools available from the left pane to draw different shapes, add text, counter, highlight, crop, rotate, and more.
Once you complete the steps, you can save the image from the editor to the computer, or from the toolbar at the top, choose the "Copy image to clipboard" option.
Greenshot also supports keyboard shortcuts. You must configure them manually in the "General" tab from the settings page.


