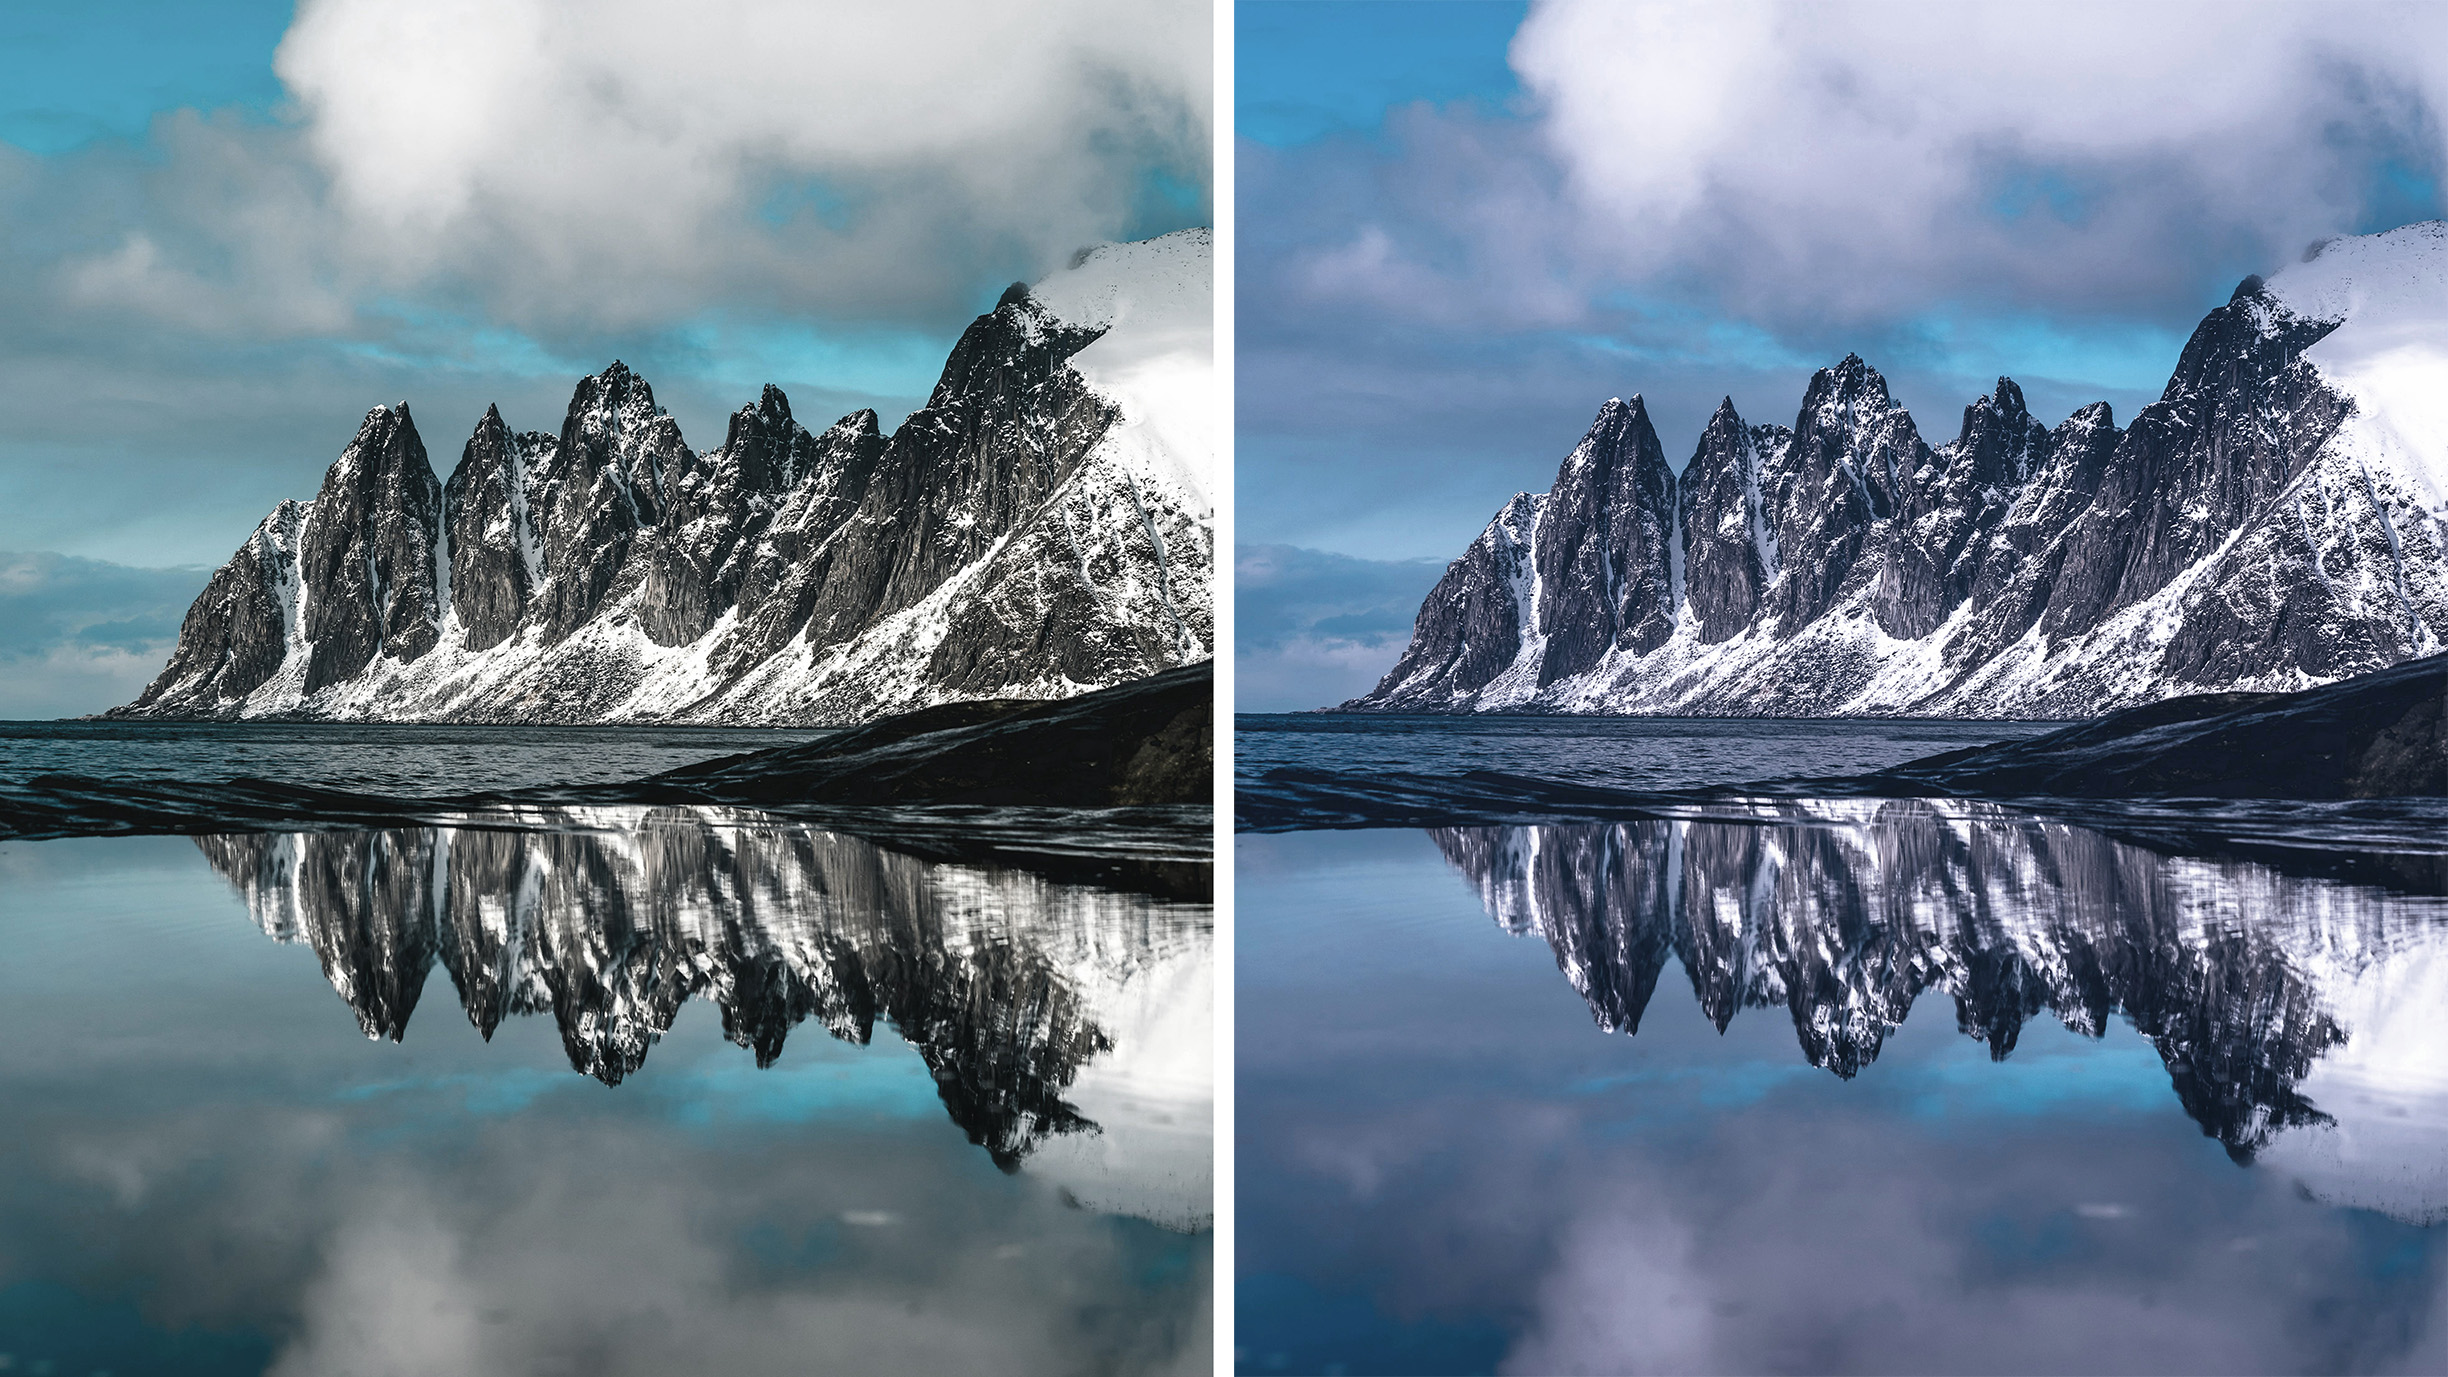
Color grading is a powerful technique used in photography and videography to enhance the mood of a scene. However, it can be challenging for beginners to apply color grading effectively.
Affinity Photo 2 provides a range of features that allow us to apply color-grading styles to our own images. This is helpful when first learning this editing technique, as the settings can be easily adjusted to create your own unique style.
What you'll be using:
- Create Palette From Image option
- Gradient Map Adjustment
- Color codes
- Blend Modes
Before and after


Editing steps
1. Add images

If you don’t already have a reference image with color grading applied, then search for a suitable frame online. Here, consider what types of hues could enhance the mood of your photo. Popular color schemes from movies or a scheme from the blue or golden hours could work.
2. Start the process
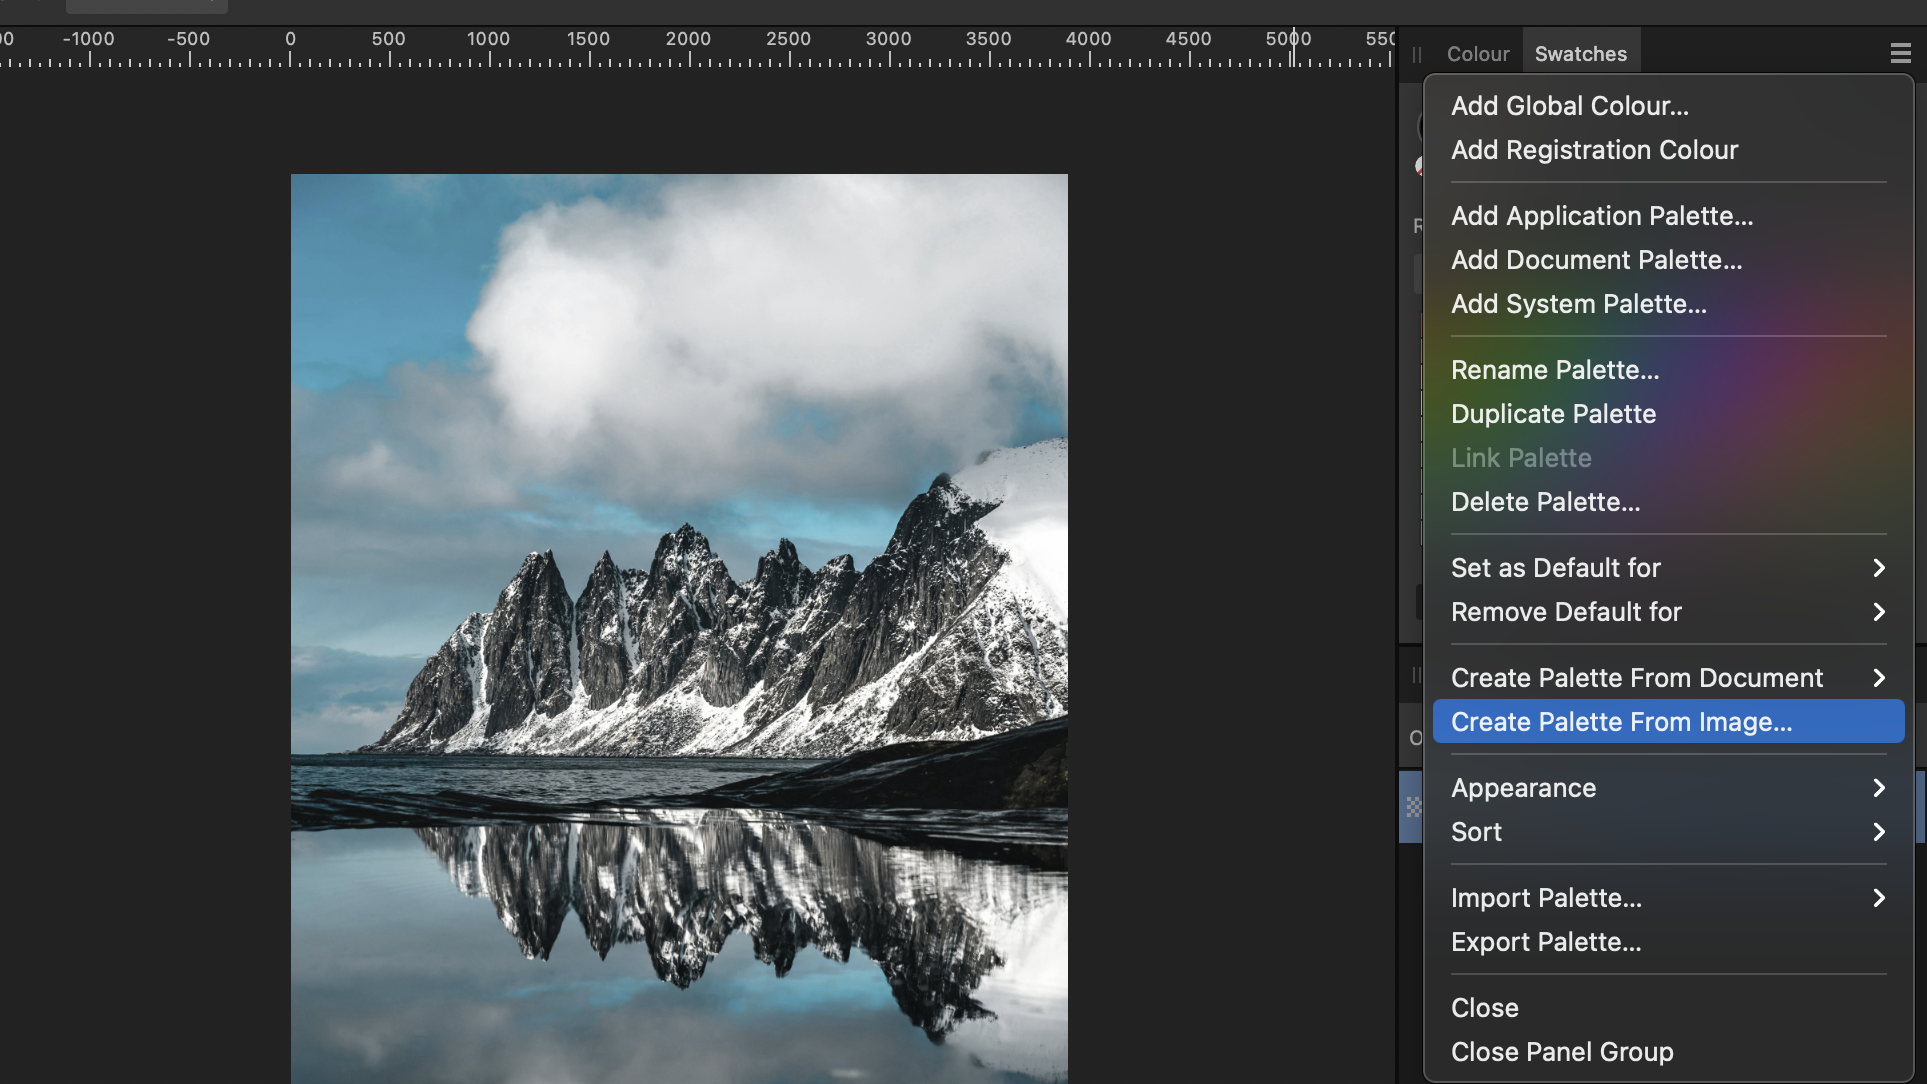
Upload your own image to Affinity Photo 2.0. Open the Swatches panel, found under Window > Swatches. The panel pops up next to the Color panel and then, in the Swatches menu, click on Create Palette From Image... when the window opens, click on Select to upload your image.
3. Sample colors
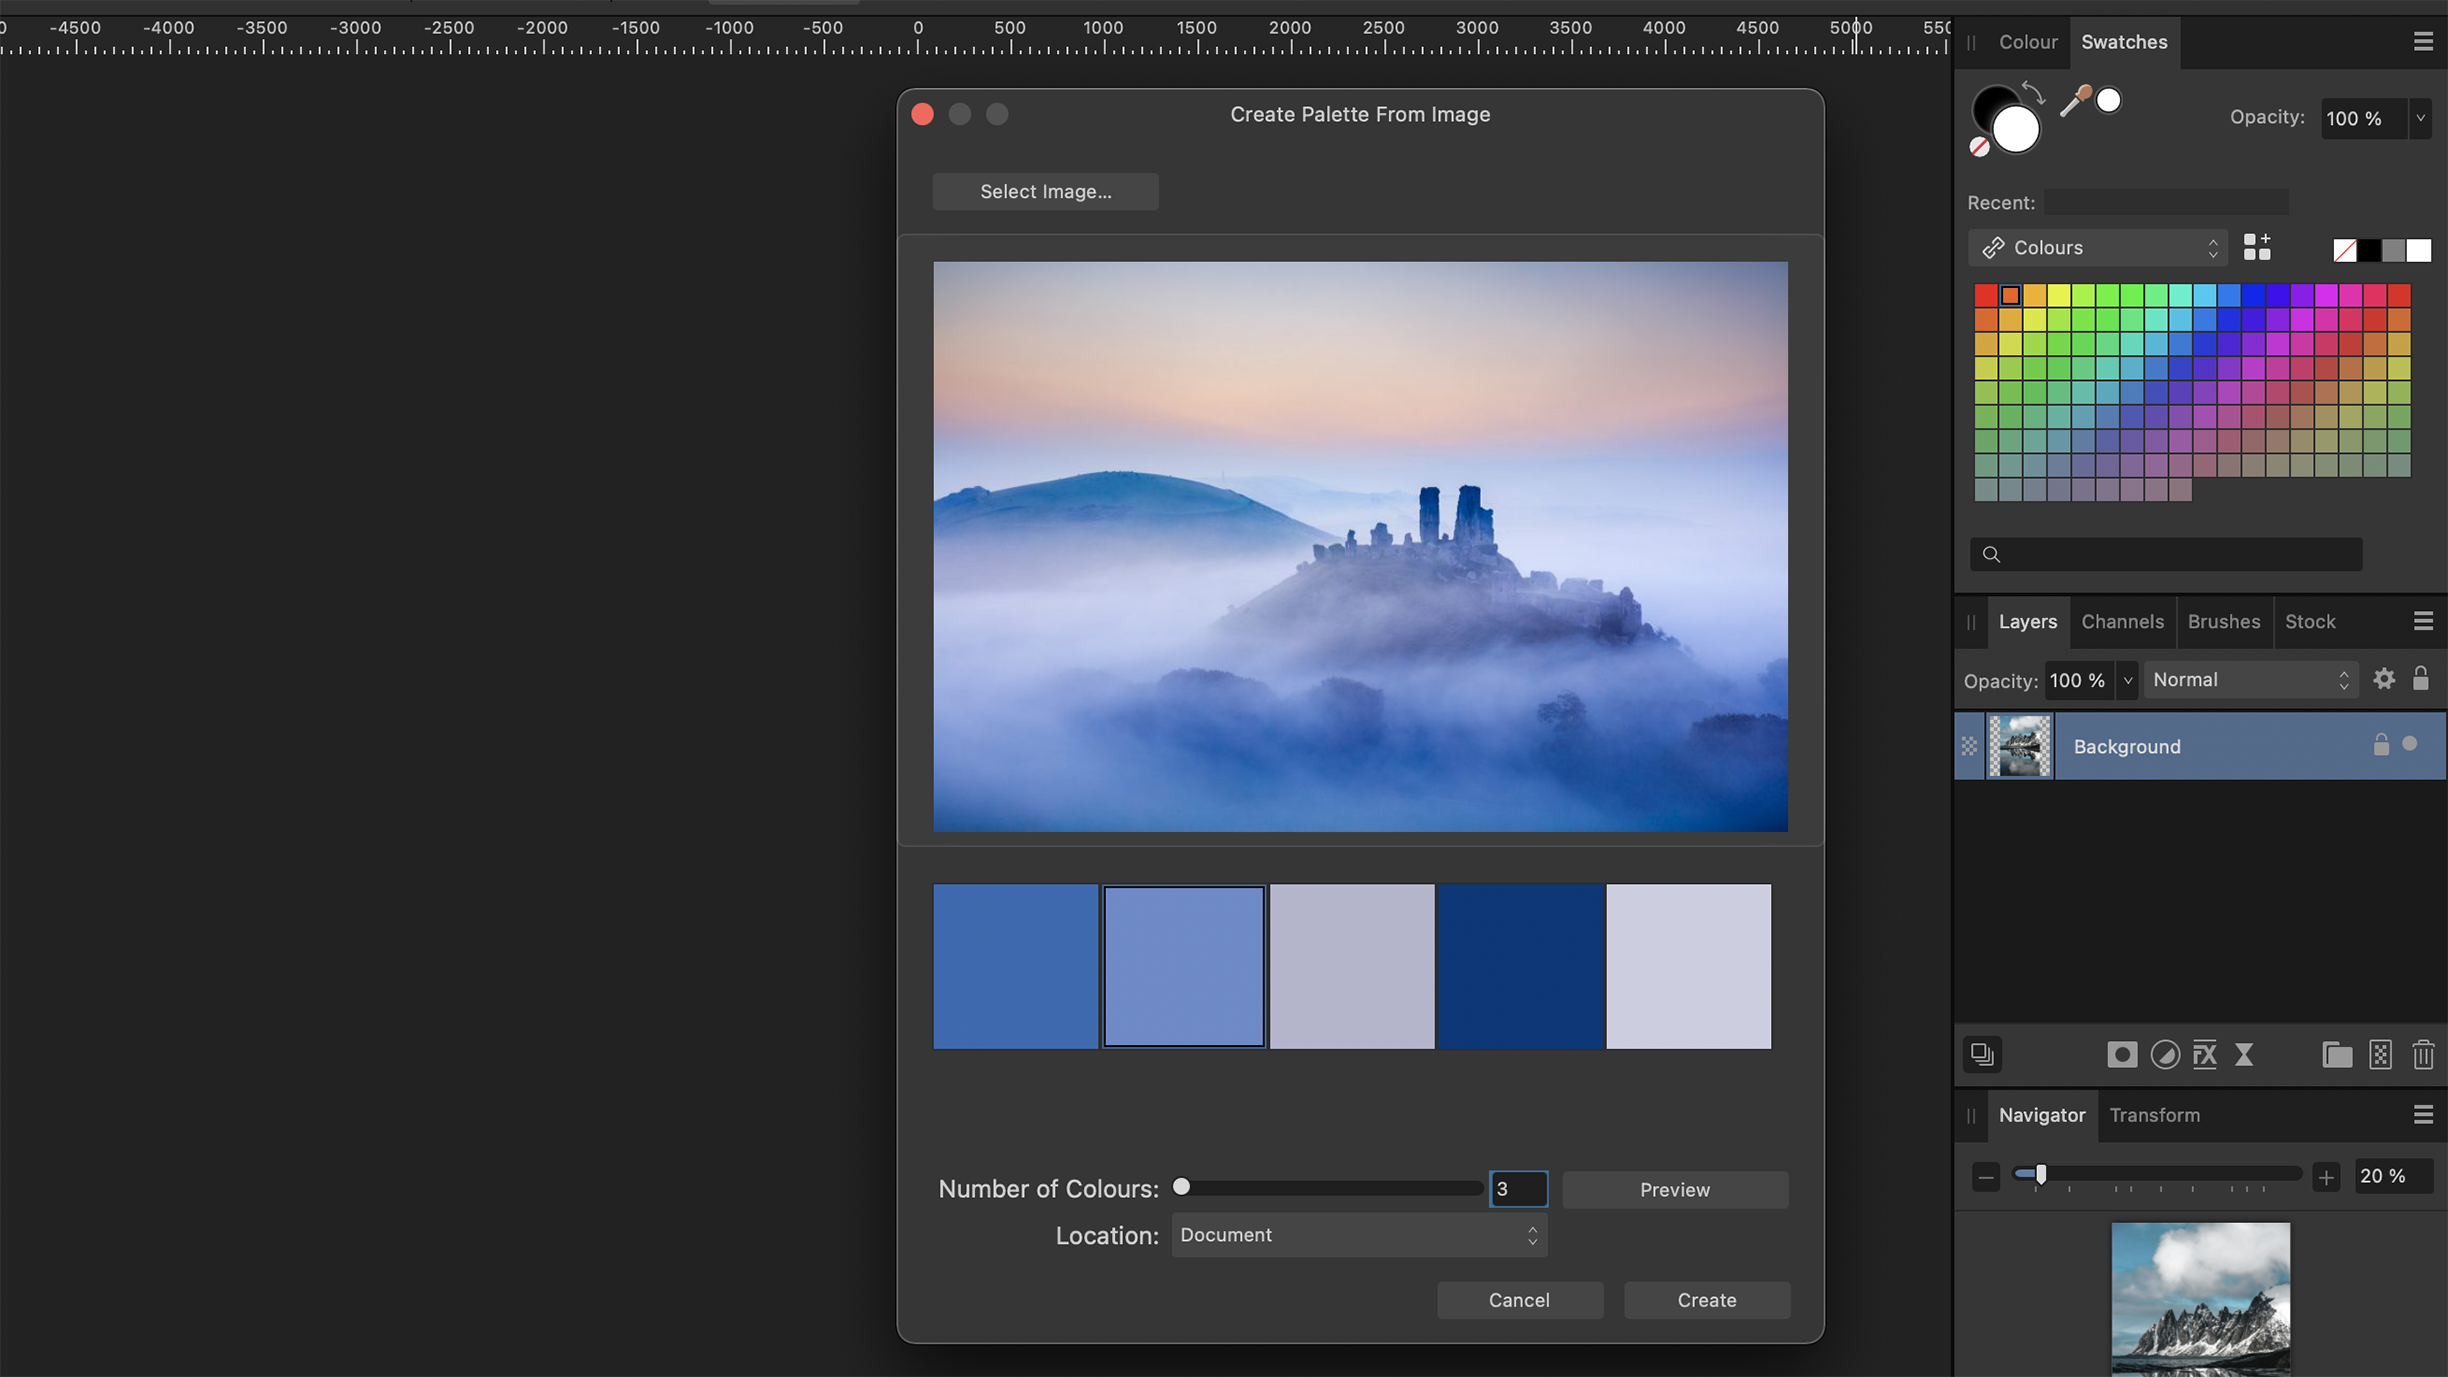
Now Affinity samples five colours from the reference frame. Change the Number of Colors from five to three then press Preview to see the three colors Affinity chooses. Click Create to add this colour palette to the Swatches panel. Go back to the Layer panel and add a Gradient Map Adjustment.
4. Start color grading
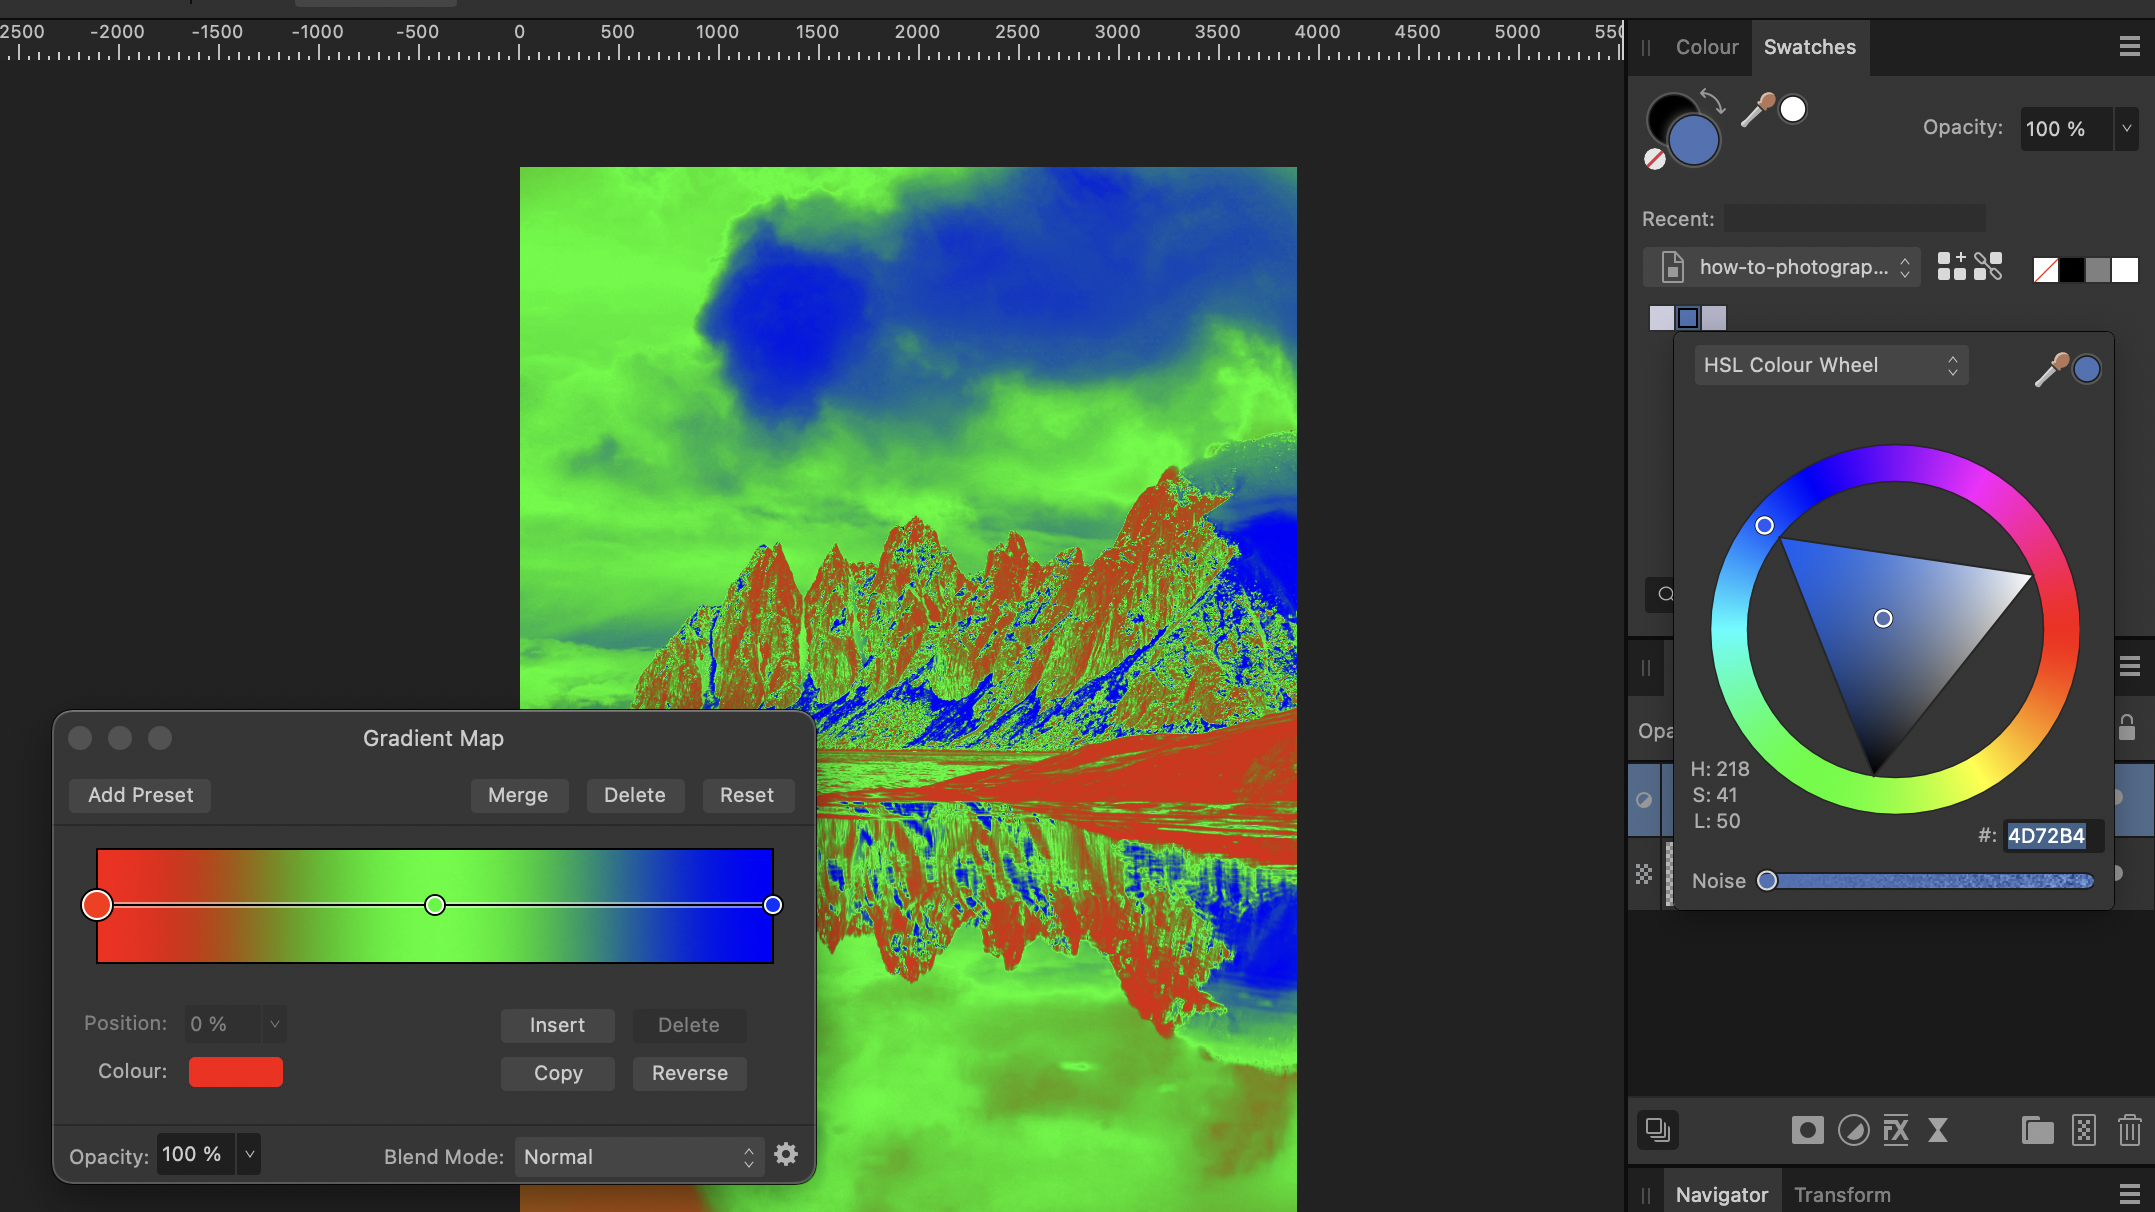
To transform the shadows and darkest color elements, double-click the darkest color in the Swatches panel and copy the colour code at the bottom right. Go back to the Gradient Map and select the left dot to transform the shadows. Click
on Color and paste the copied color code.
5. Repeat and blend
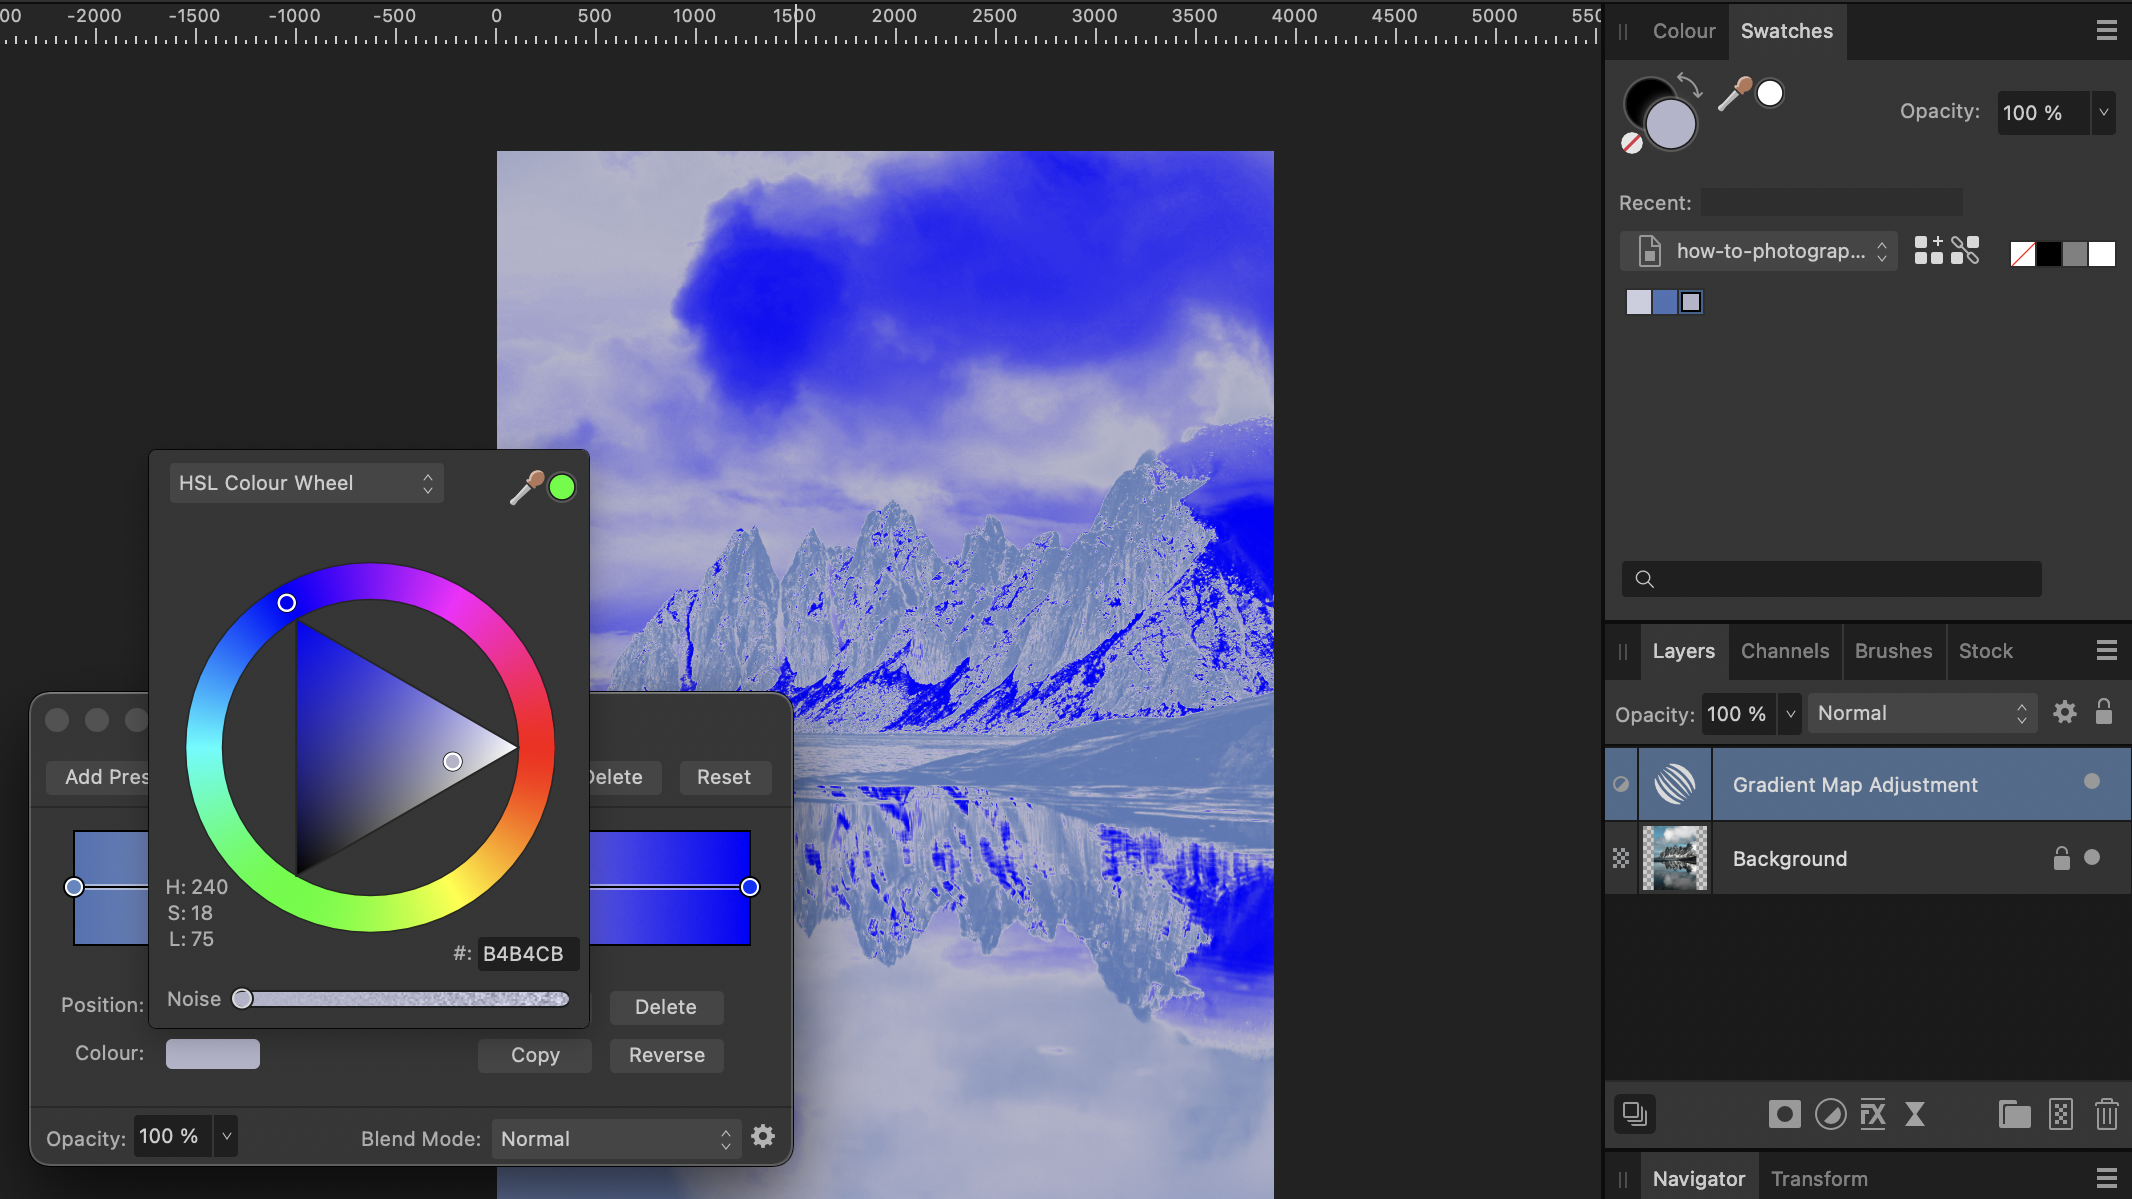
Repeat step 4 for the mid-tones by selecting the mid-tone color palette in the Swatches panel and selecting the middle dot in the Gradient Map. For highlights, select the lightest tone and right dot in Gradient Map. Close the Gradient Map window and change the blend mode to Overlay or Soft Light.
Key tip
Build a collection
After applying the colour grading style, don’t forget to save it as a preset. That way, you can go back and apply the same color scheme to other images without having to redo the process. You can also experiment and see what type of color grading benefits your subjects the most.
See more Affinity Photo tutorials & tips


