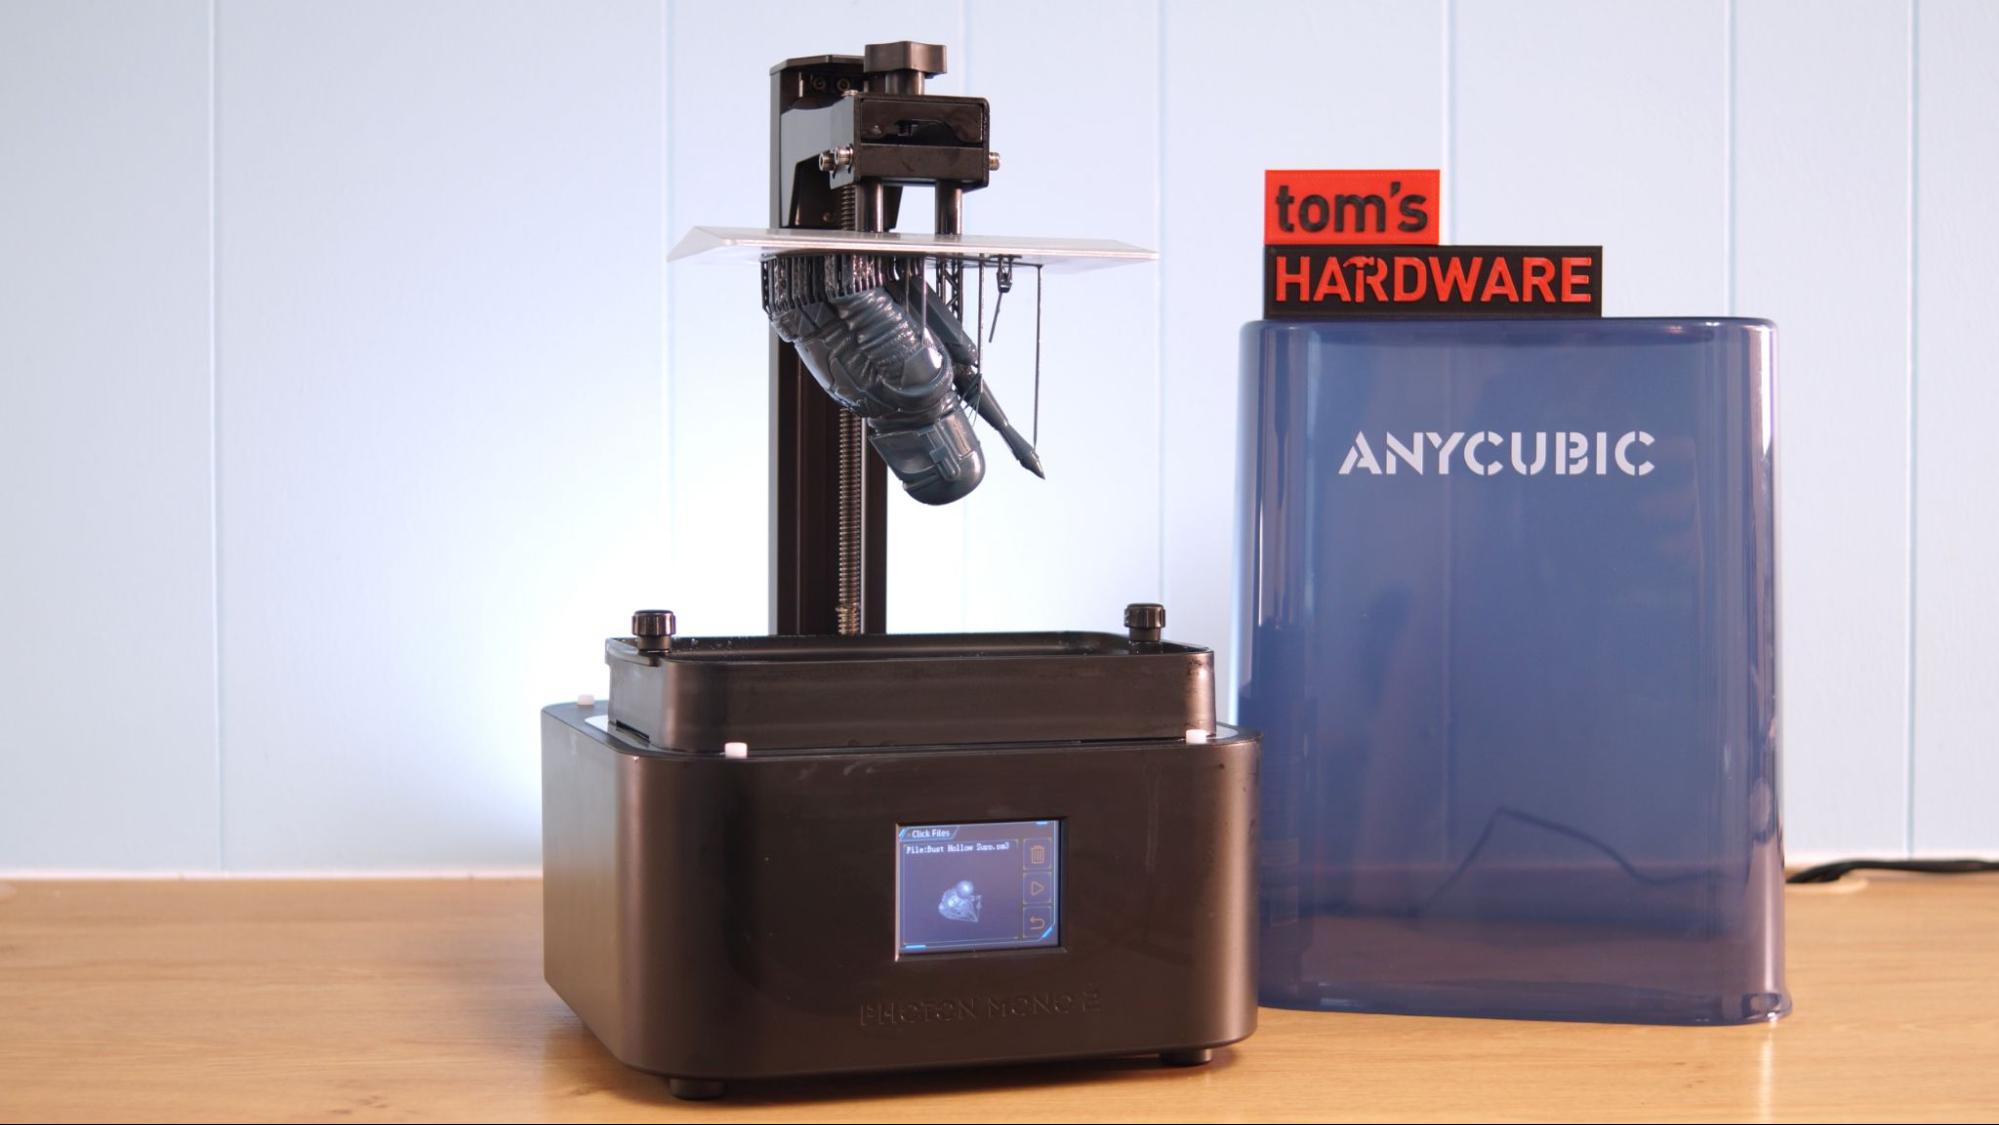
Anycubic’s newest Photon Mono 2 was made specifically with first time resin users in mind. It delivers quality 4K prints with a smaller sized vat and a petite footprint that requires minimal space. Its features are about the same – and occasionally better – than the Photon Mono 4K, which it will be replacing in the Anycubic lineup.
The Photon Mono 2 retails for a rock bottom price of $230. We’ve noticed serious cut backs in the machine’s base unit and cover, both of which are plastic rather than metal or acrylic. Other than making the printer feather-light, cheaper materials don’t seem to be doing any harm. The print quality is quite crisp, the speed is good, and the machine is very easy to use.
Anycubic really delivers the goods on this entry level machine, making it one of the best resin 3D printers on the market.
Specifications: Anycubic Photon Mono 2
Included in the Box: Anycubic Photon Mono 2
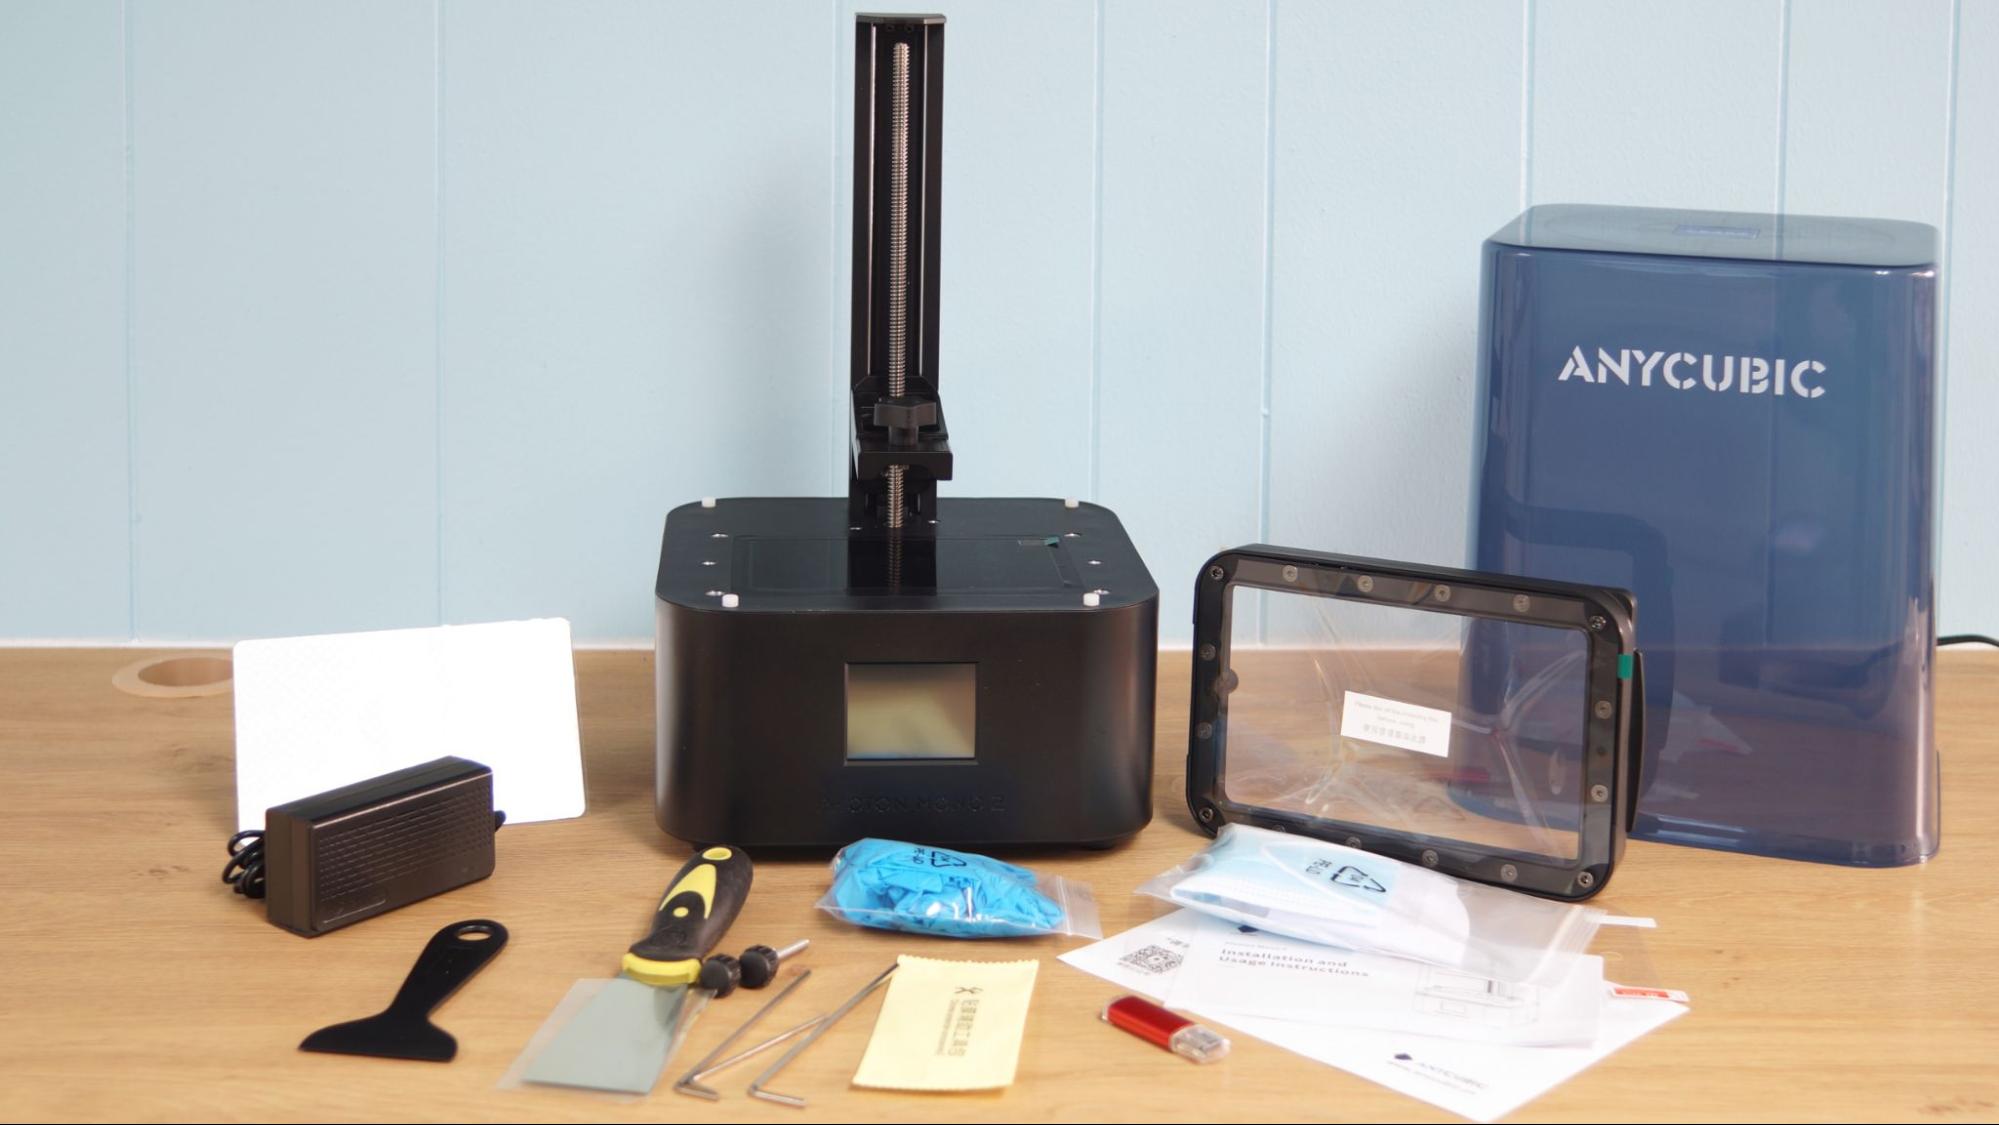
The Anycubic Photon Mono 2 includes everything you need to get started as soon as you unbox the printer. You get a metal scraper for the build plate, a plastic scraper for the FEP film, a large screen protector, paper funnels, disposable gloves, disposable masks, a set of Allen keys, a power cord with adapter and a printed manual.
Also in the box is a USB thumb drive preloaded with Anycubic’s Photon Workshop slicing software, a PDF of the manual and two pre-sliced test prints.
Printing Safety with Anycubic Photon Mono 2
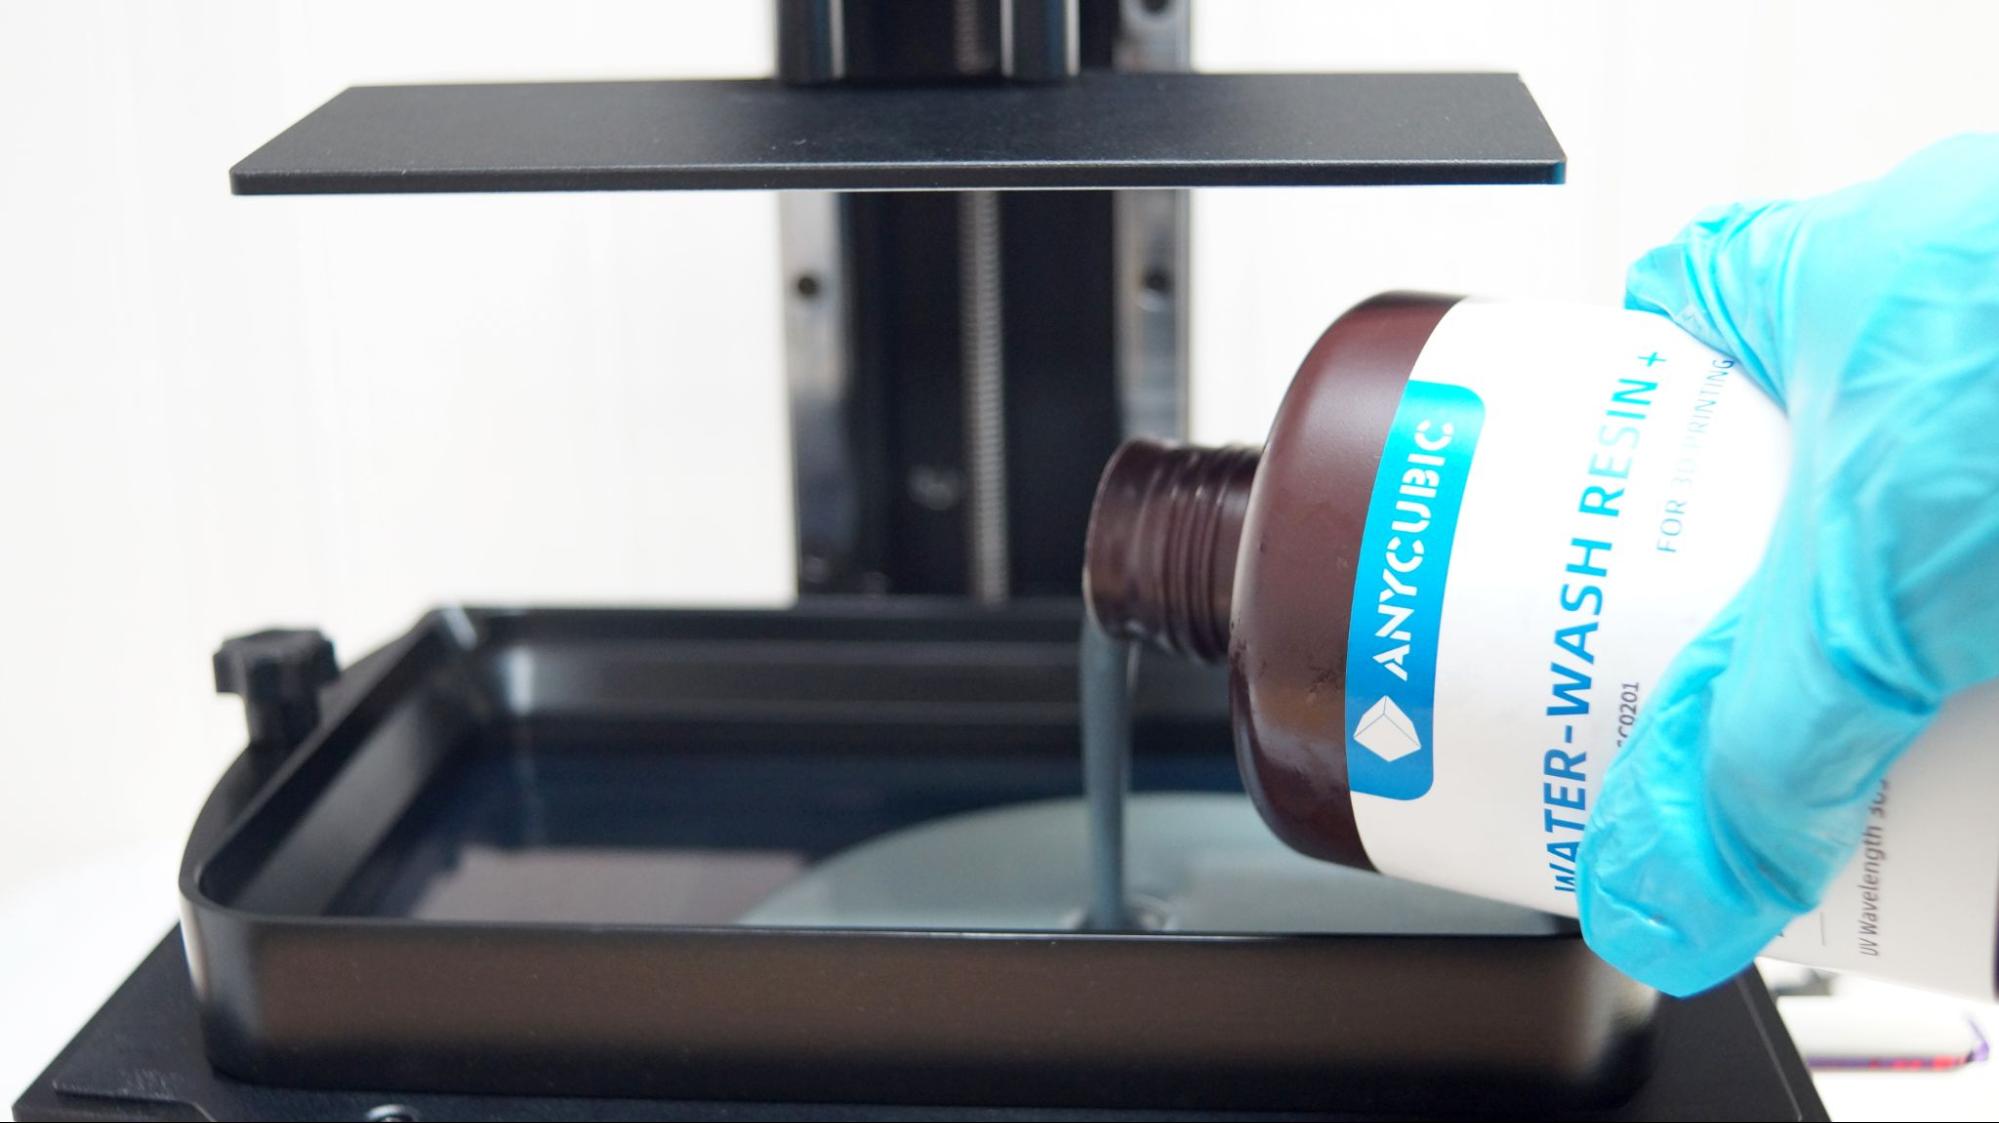
The Anycubic Photon Mono 2 requires the same safety precautions as other resin printers. Uncured resin is dangerous, and the solvents used to clean your prints can be irritating to the skin. Use gloves and safety glasses when pouring resin and handling uncured prints.
Make sure the room you use your resin printer in is well-ventilated to avoid inhaling fumes. Spilled or dripped resin should be immediately cleaned with 99% isopropyl alcohol. After printing, make sure to wipe down your printer and bottles to remove smudges of uncured resin. Always keep your resin tightly sealed and safely stored out of reach of pets and children.
Assembling the Anycubic Photon Mono 2
The printer comes mostly assembled. You only need to remove the LED screen protector used for shipping and apply the fresh one provided. Screw in the vat and build plate and you’re ready for calibration.
Calibrating the Build Plate on the Anycubic Photon Mono 2
Like all 3D printers, the Anycubic Photon Mono 2 requires calibration before its first print. Leveling the build plate is fairly straightforward and only takes a piece of paper and an Allen wrench.
To level the machine, remove the vat and then place the piece of paper provided by Anycubic on the LCD screen. Loosen the four adjustment screws on the sides of the build plate. The build plate should wiggle freely.
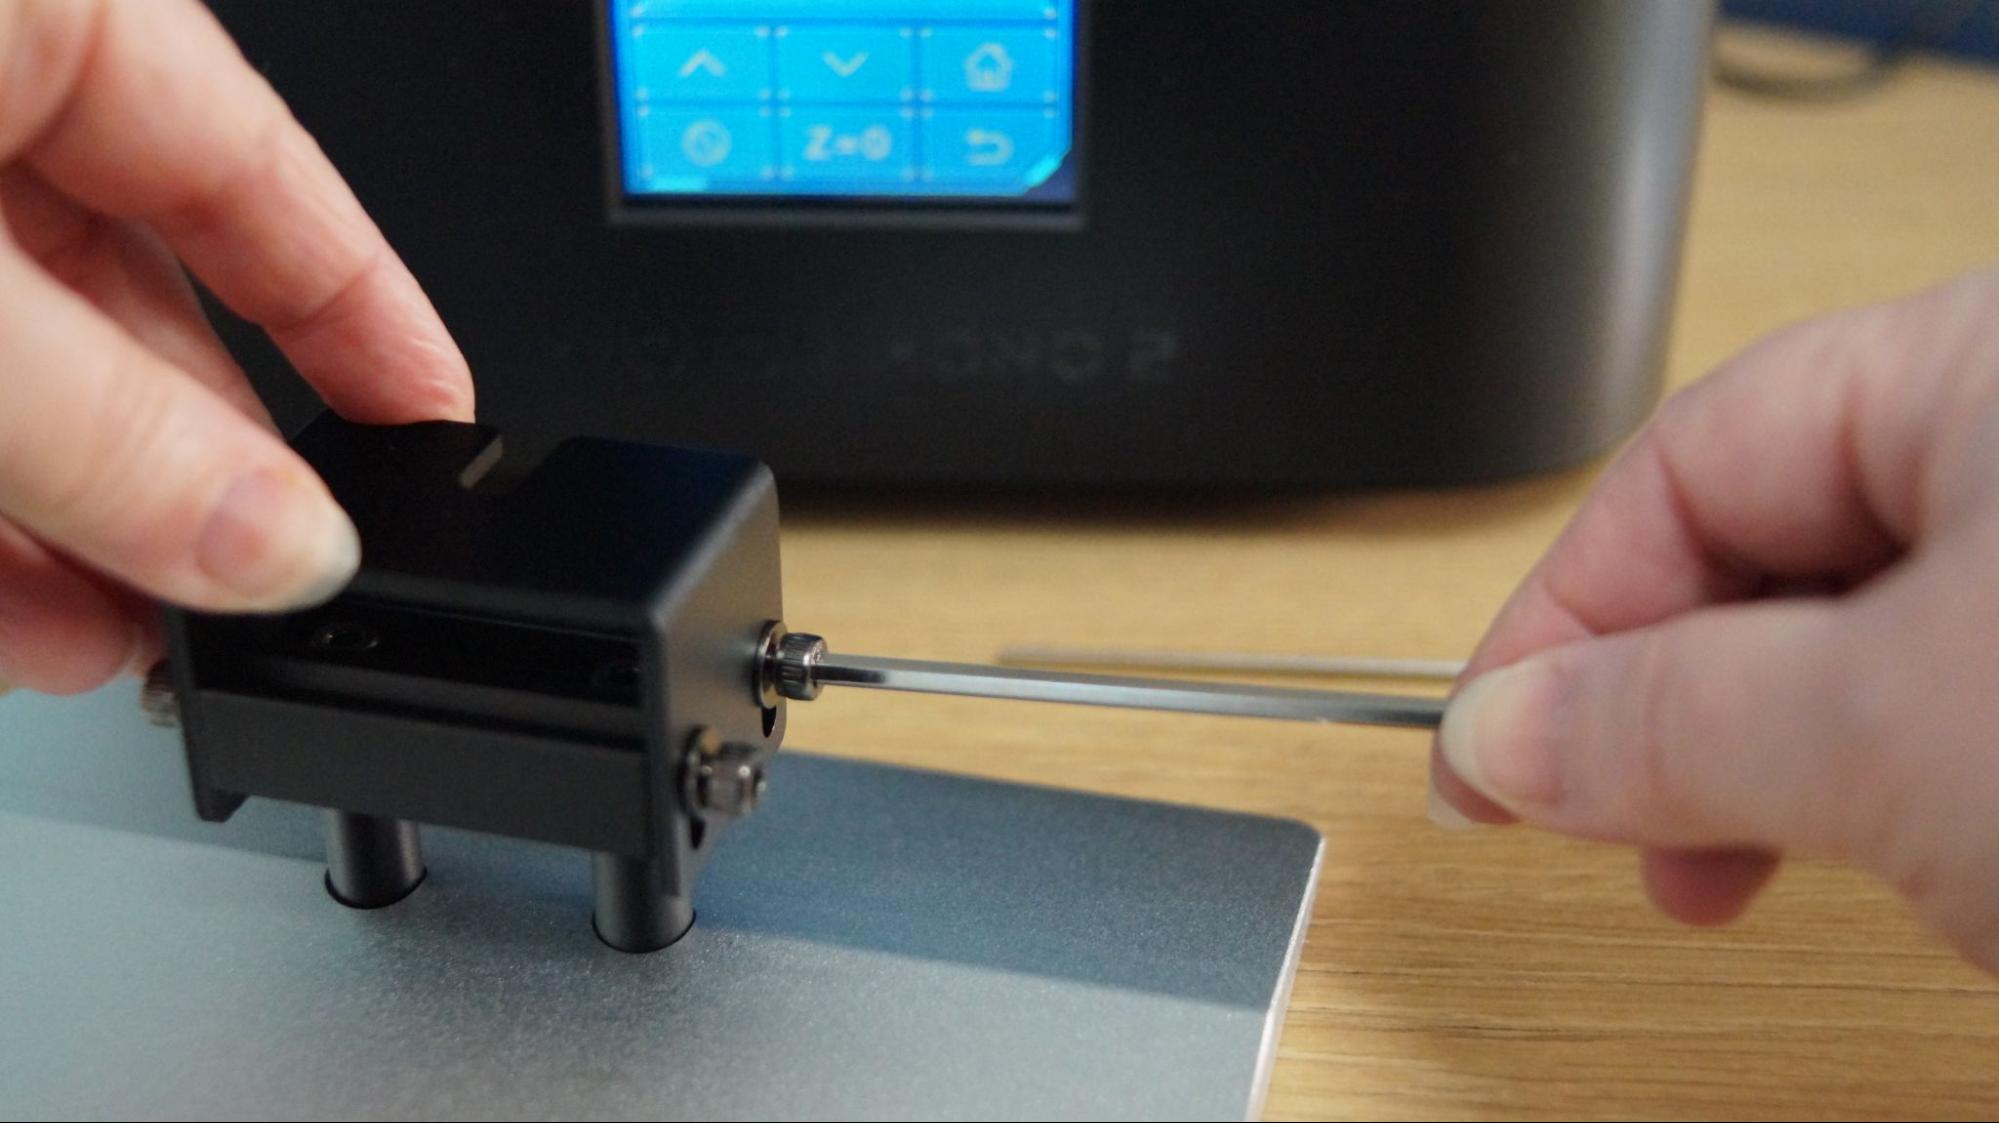
Place the build plate on the Z axis and tighten the top knob. Click the Tools symbol on the touch screen, then Move Z. Click the Home symbol and the Z axis will lower to the glass and stop automatically.
Press the build plate firm and evenly to the glass. Now tighten the screws.
Click Z=0 on the touch screen. This sets the Z height. Press Enter and exit the menu.
Next, test the UV light. Raise the build plate up (Move Z) until you can see the LED lights inside the machine. While still in the Tools menu, press Exposure and select an image and the amount of time it should flash. Press next and you should see the image. If, for any reason, you don’t see the full image, contact service for help.
Design of the Anycubic Photon Mono 2

The Anycubic Photon Mono 2 has a black base that is largely plastic and a blue plastic hood. The machine is very light and could be improved with rubber feet to prevent it from sliding around the counter. The hood feels a bit like Tupperware, but it still does a good job shielding the print area from UV light. There is metal where needed, like around the glass and Z axis.
The Photon Mono 2 packs a lot of detail in its prints. It has the same “LighTurbo” system you’ll find on newer Anycubic machines, which provides smoother details. Its 4K light source on a 6.6 x 3.5 inch build surface equals an X/Y resolution of 34 microns. For comparison, a human hair averages 70 microns, depending on the person. This boils down to super crisp details on your tiniest prints.
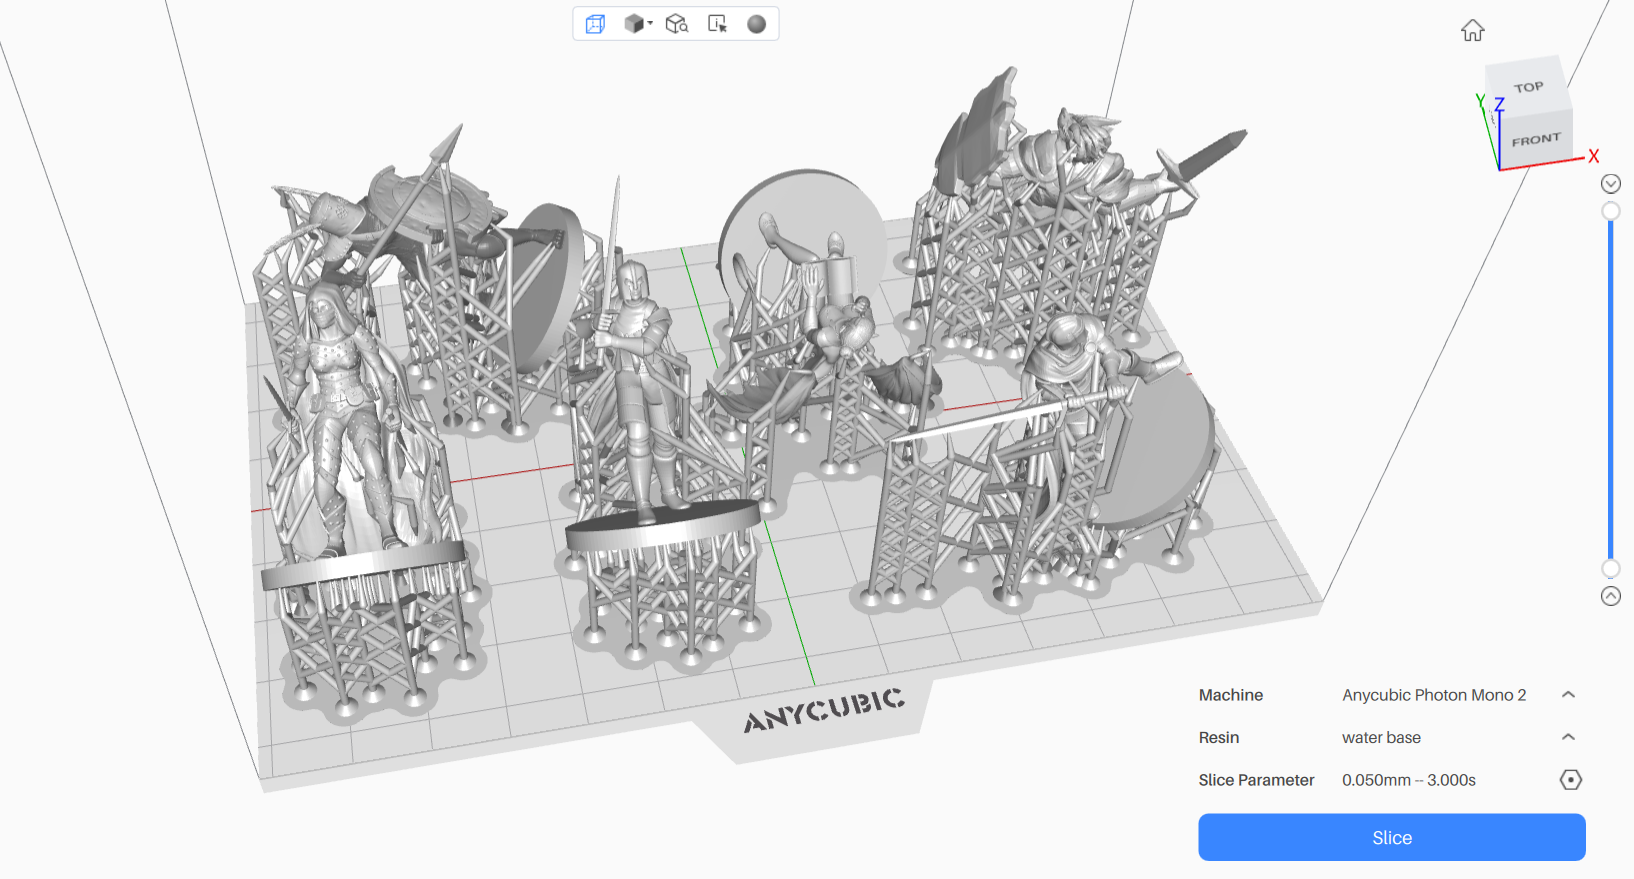
The build volume of 165mm x 89mm x 143mm, 20% larger than the photon Mono 4K it’s replacing. This is on the smaller size of resin printers, but I was still able to fit 6 presupported miniatures on the build plate at once.
The Mono 2 has a laser-etched build plate that helps prints stick. Things still come off easily enough with a little prying from the metal scrapper. The top of the plate has enough slope to allow most of the resin to drain back into the vat.
It comes with an extra large screen protector for the LED glass, which covers the glass and the slight gap around it. This makes keeping the printer clean super easy.
Unlike its FDM printer cousins, the Anycubic Photon Mono 2 reads files from a USB stick rather than a microSD card. The port is located on the side with the power switch, situated where you’re unlikely to drip resin.
Navigating the menus on the color touch screen is easy because there are only three sub menus: Print, System and Tools. The Print menu displays thumbnails of all your models on the USB stick. System is for selecting language and displaying information you might need for service. Tools is where you move the Z axis, test the LEDs and level the bed.
Slicers Compatible with the Anycubic Photon Mono 2
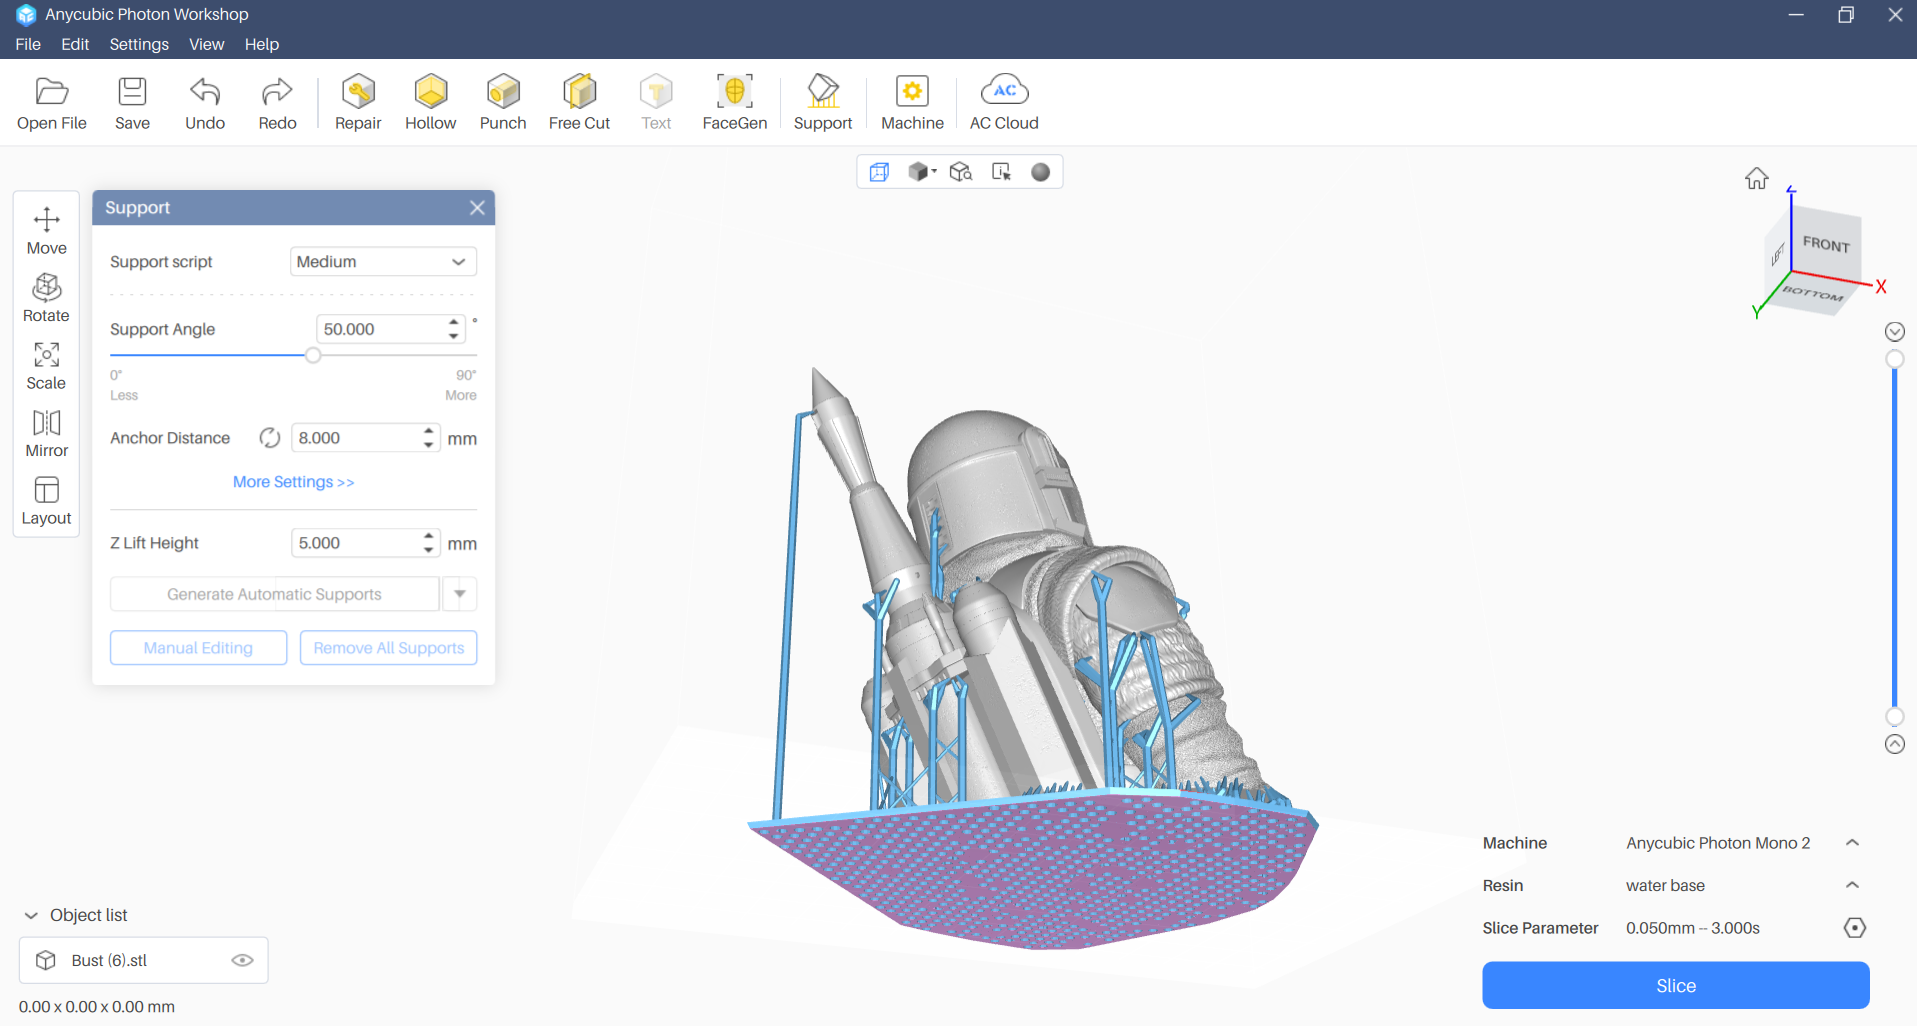
The Anycubic Photon Mono 2 ships with a copy of Photon Workshop V3, its custom slicer. The slicer has improved greatly and I didn’t have any problems using it. It handles supports well, both automatically and manually. It also has tools for hollowing the model and adding a drainage hole so you can conserve resin.
There are no profiles currently available for Lychee Slicer or Chitubox.
Washing and Curing Your Prints
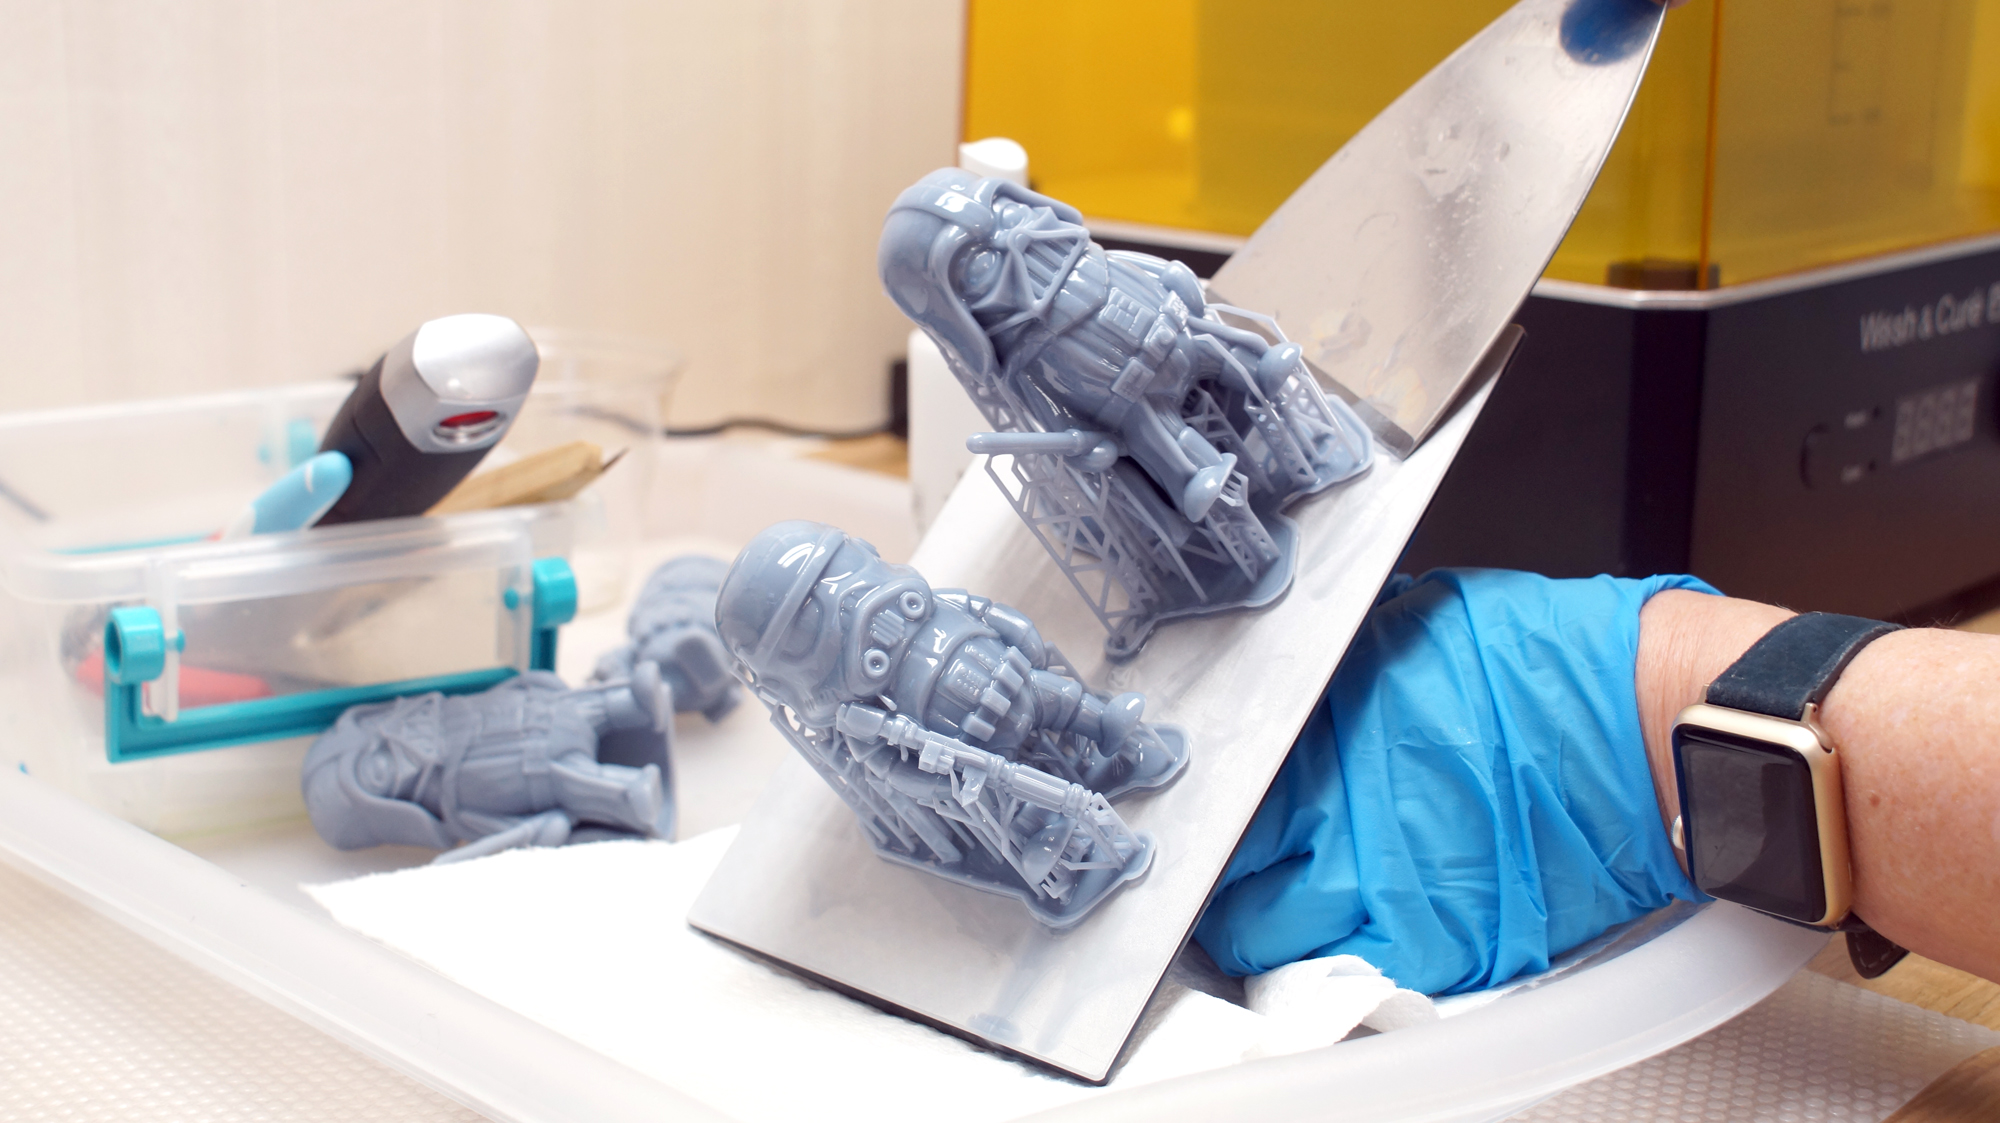
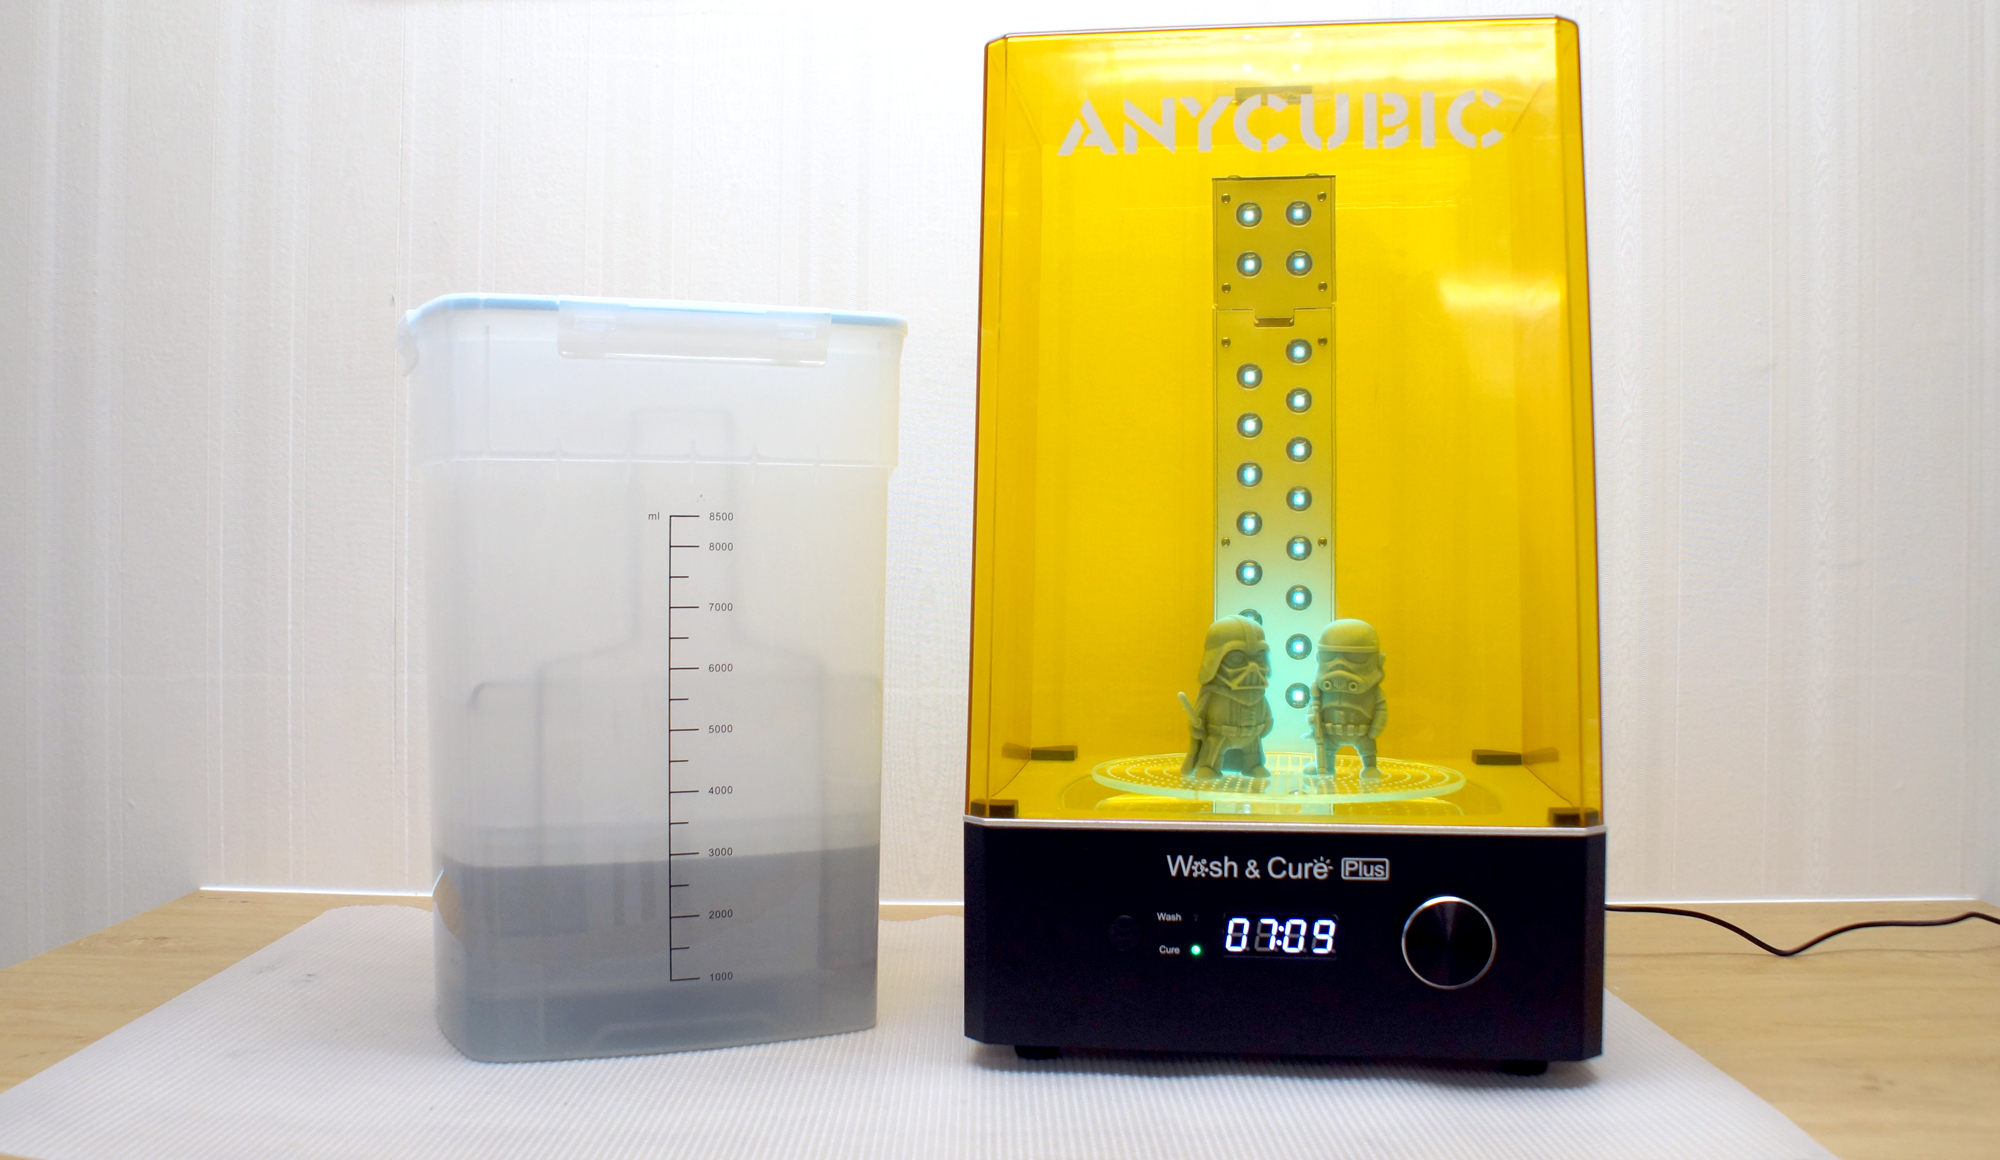
Before you can admire your prints, you’ll need to wash them with Isopropyl alcohol and cure with UV light. I like to give prints a 30-second hand rinse in a container of 95% Isopropyl alcohol, then a 2 minute rinse in the Anycubic Wash and Cure, which is sold separately, and retails for $249 at Anycubic.com.
Completely dry the print with a hair dryer on cool – IPA left on the print will turn white. You can also let the print air dry in a place away from sunlight.
Supports are easier to remove before curing because they are softer. Clip the supports off with side cutters and use tweezers to remove stubborn supports. Remember to always wear gloves while handling uncured prints.
Then place the print in a UV curing station for 15 minutes, or outside in bright sunlight for a few hours.
Your IPA should never be flushed down the drain, especially after being contaminated with uncured resin. Instead, keep using the resin until it’s too dirty, then leave the container open to evaporate. The remaining sludge can be cured with UV light or the sun before being thrown away.
Supports should also be cured before being thrown away.
Sample Prints on the Anycubic Photon Mono 2
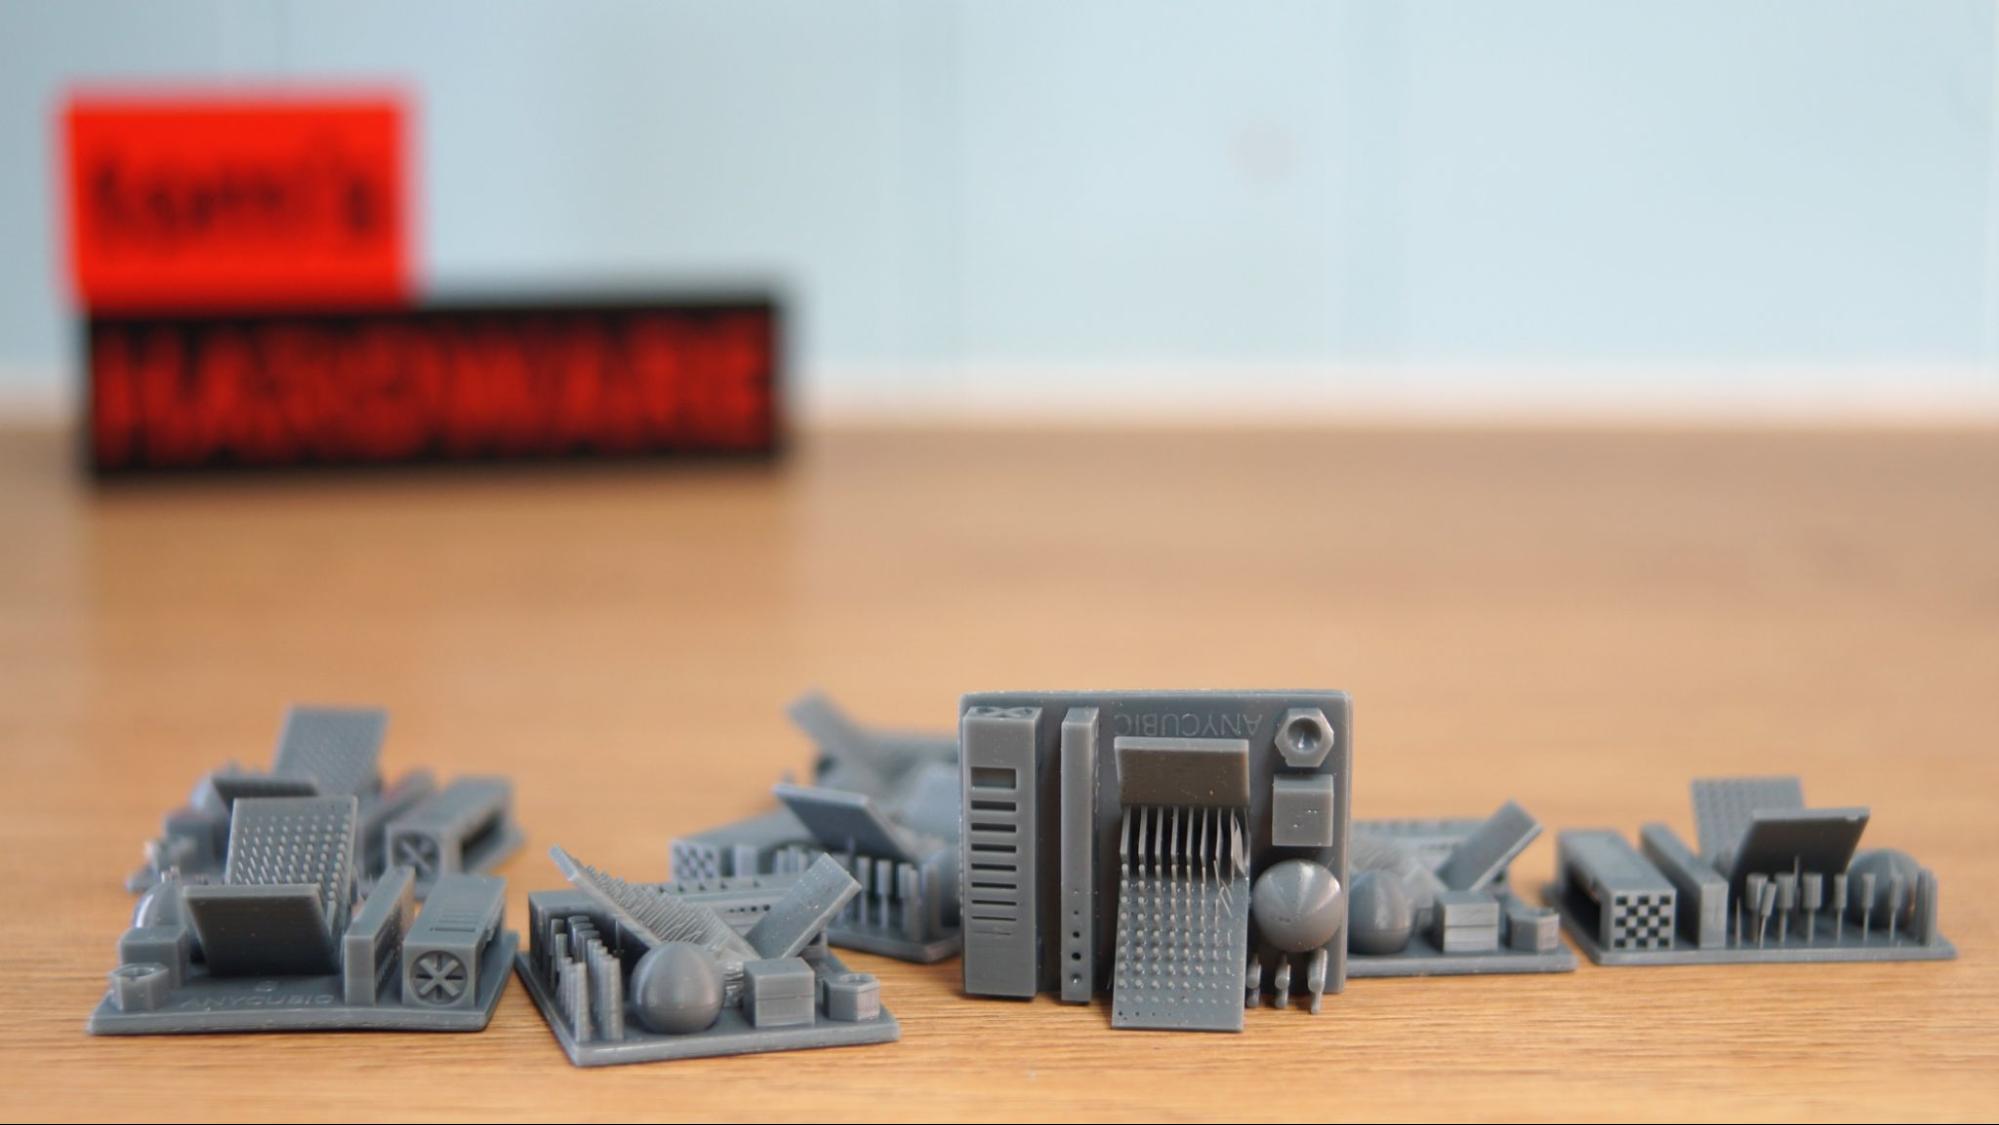
The first print you should always run is a test print, and Anycubic provided a very detailed exposure test. This is a special pre-sliced file called R E R F (Resin Exposure Range Finder) on the USB stick that has 8 nearly identical models. Each model is numbered 1 to 8. The first model will print at the default exposure, and the other models each print at .25 second longer. This allows one plate of test prints to give you a decent range of exposure settings – from 1.5 to 3.25 seconds using a default of 1.5 seconds.
I ran this model of Boba Fett at 70% to fit on the plate, with the bust and base printing separately. This printed using Siraya Tech’s Fast Navy resin and a 3-second exposure time, taking 5 hours and 15 seconds for the bust alone, then another 3 hours and 10 seconds for the base. The model has incredible details, down to the cracks in the helmet and wrinkles in the sleeve fabric. There are no tell-tale layer lines when viewed with the naked eye and you have to look super hard to find any with a camera set to close up.
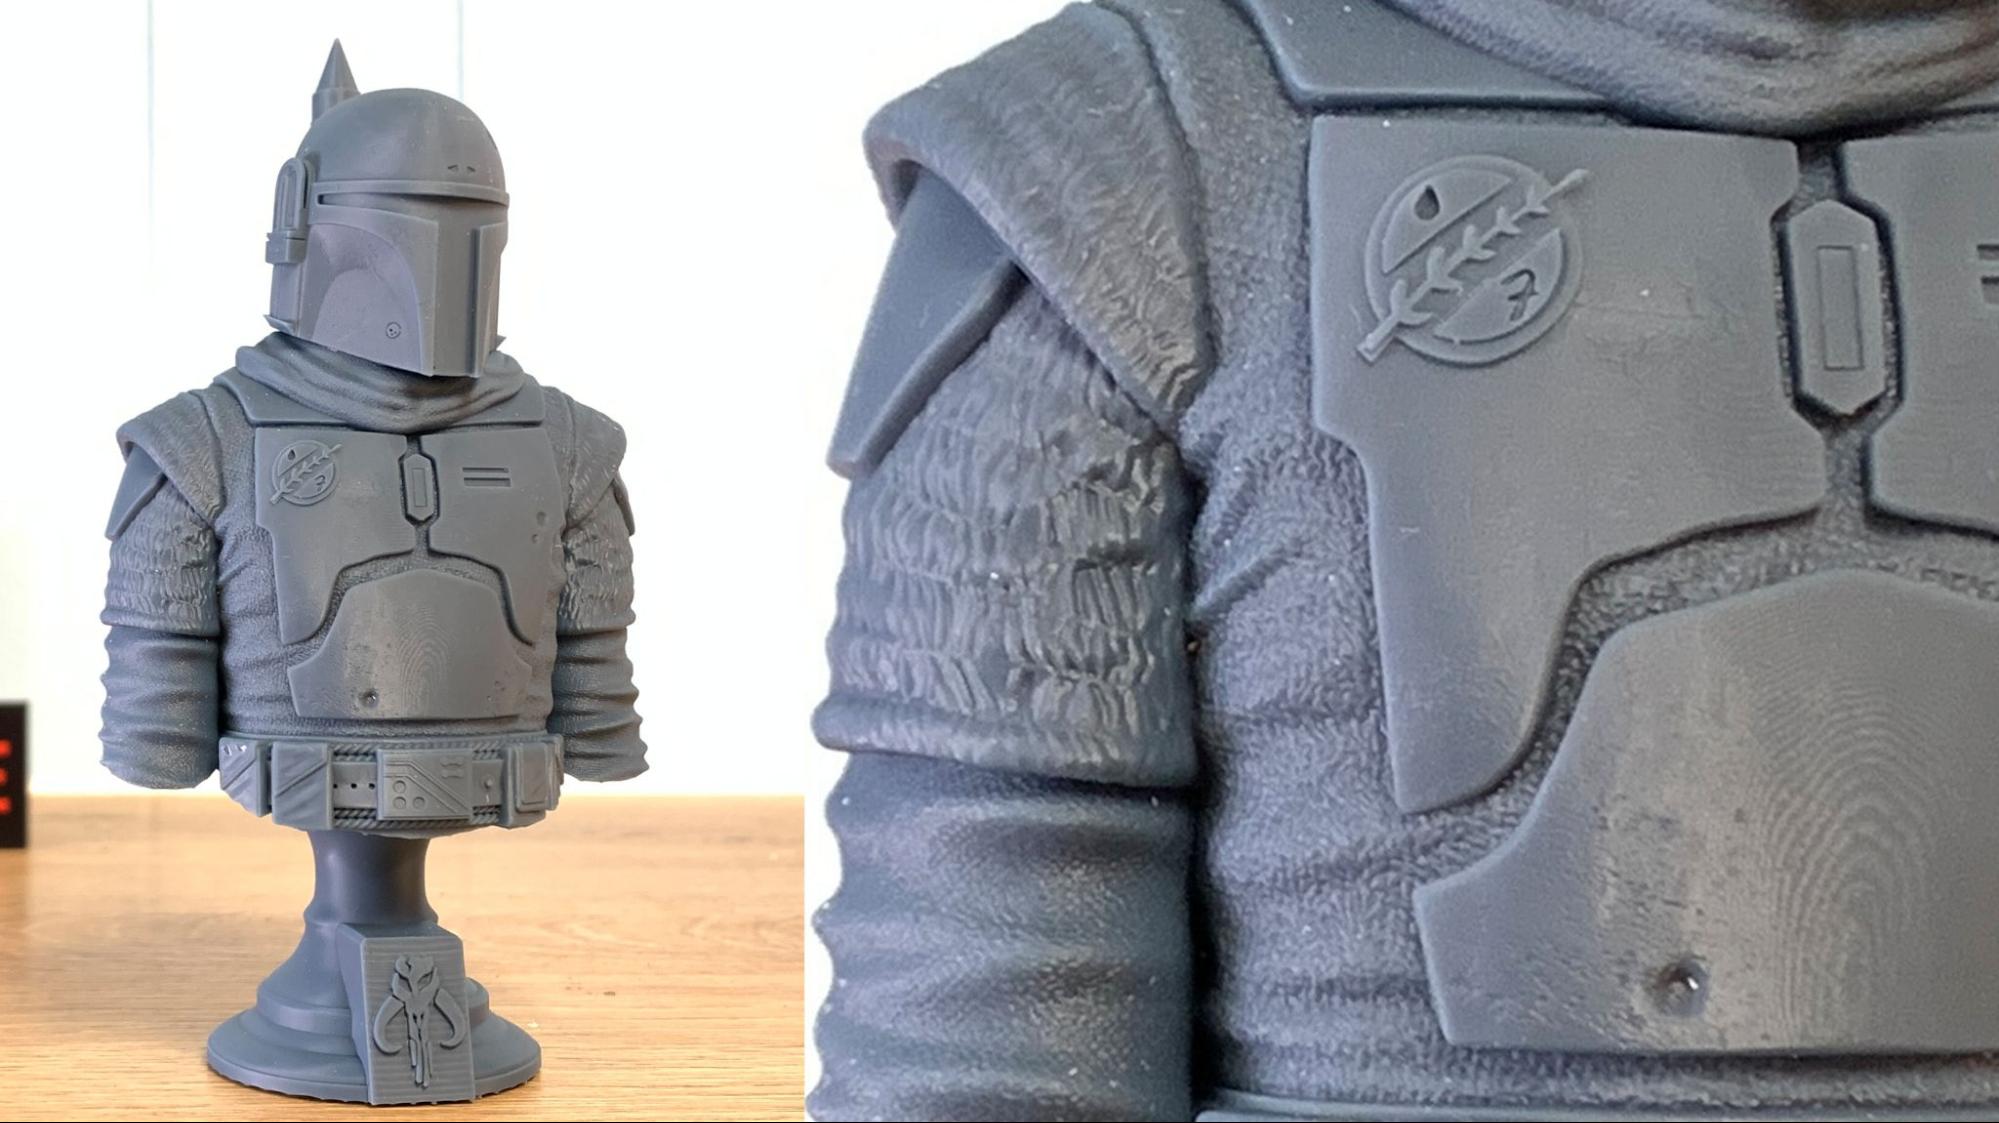
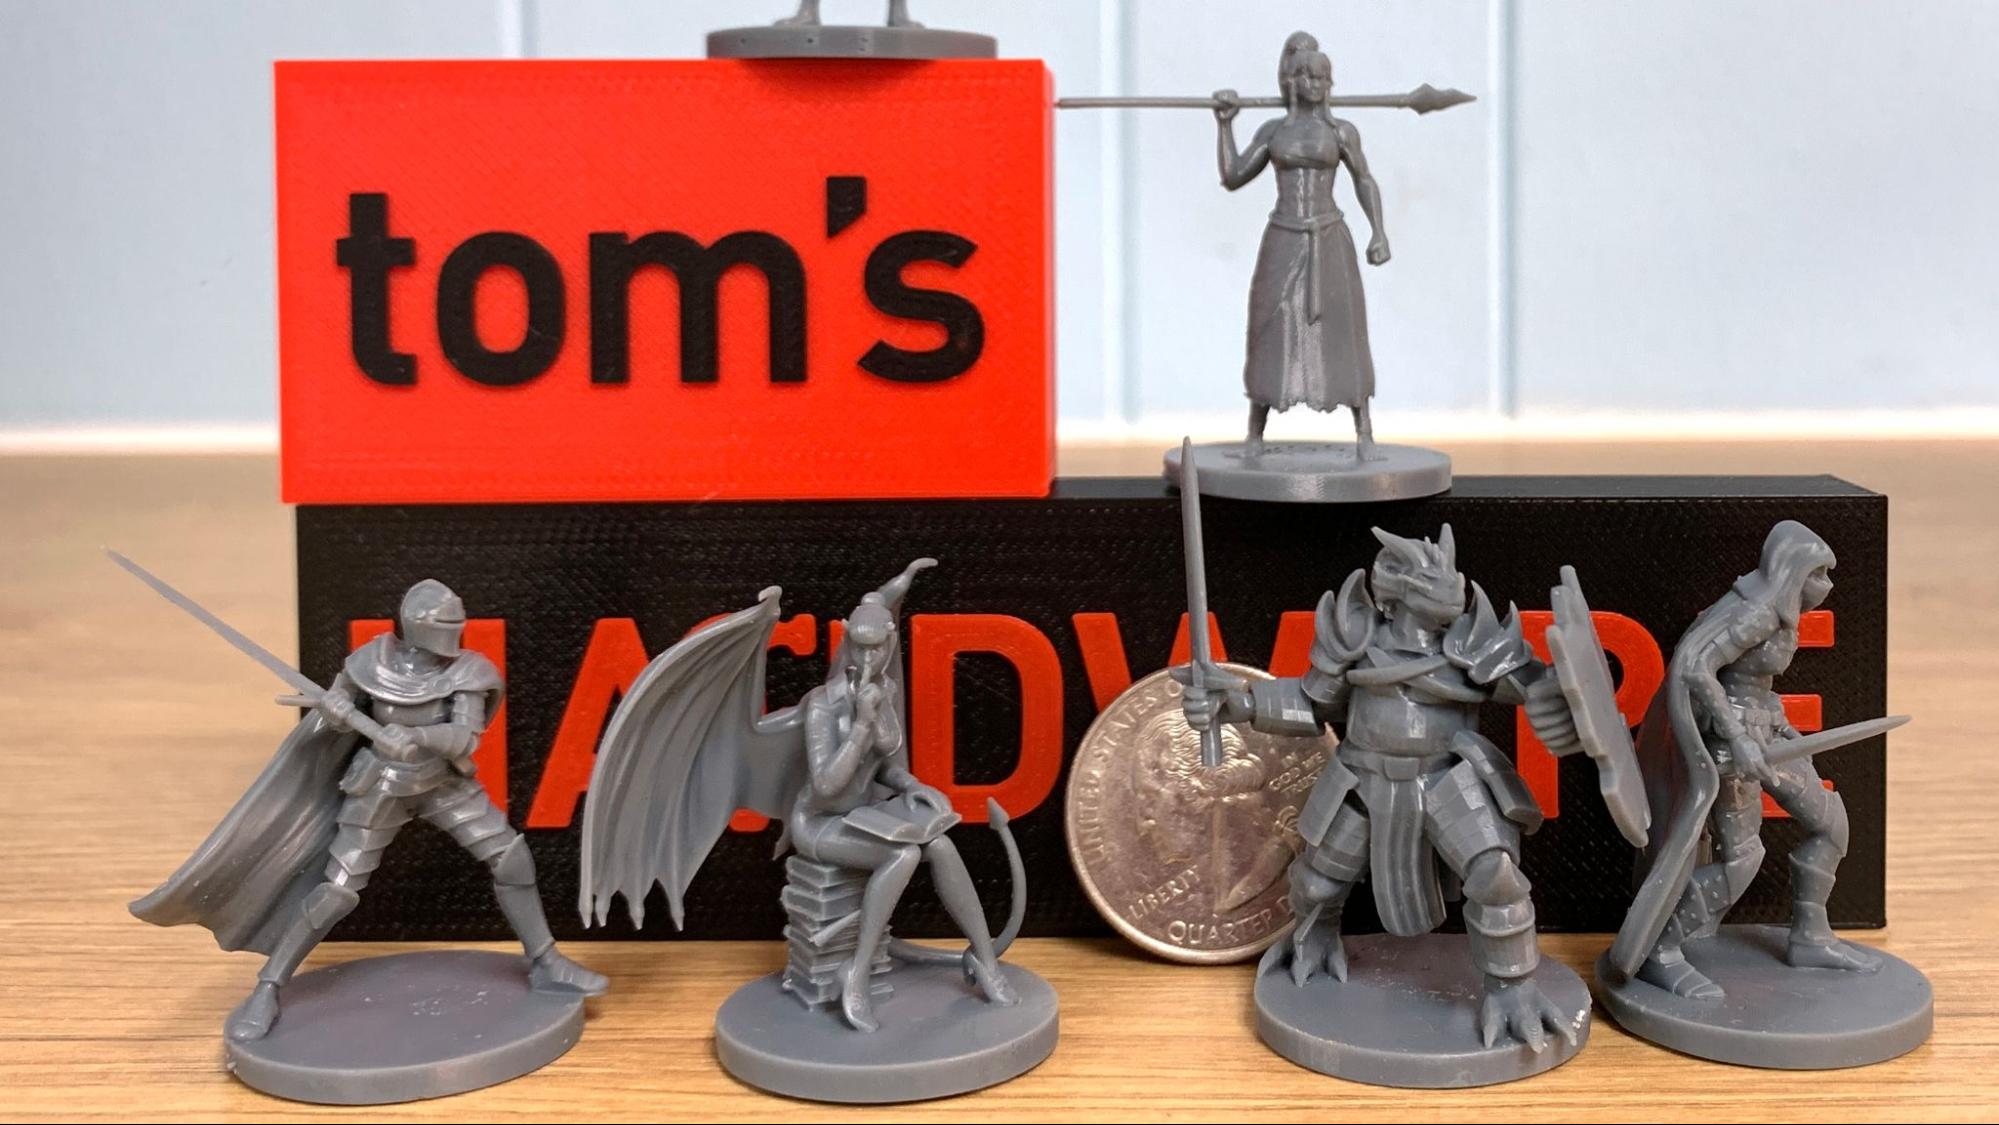
Table-top gamers love resin printers because they can produce miniature figures with tiny details. I printed this collection of adventurers from MZ4250 in Anycubic’s Grey Water Washable Resin. The resin has a low odor and printed without trouble. The models took 2 hours and 4 minutes to print at a 2.5 second-per-layer exposure. They are super detailed, right down to the buckles on their belts.
The resin cured with a satin shine, because I used alcohol already in my wash station to clean them. It’s important to note that water washable resin is still toxic to wildlife and should not be poured down the sink. If you choose to wash with water you’ll get a flat finish – and still have a gallon or so of nasty water you’ll need to dispose of like a household chemical.
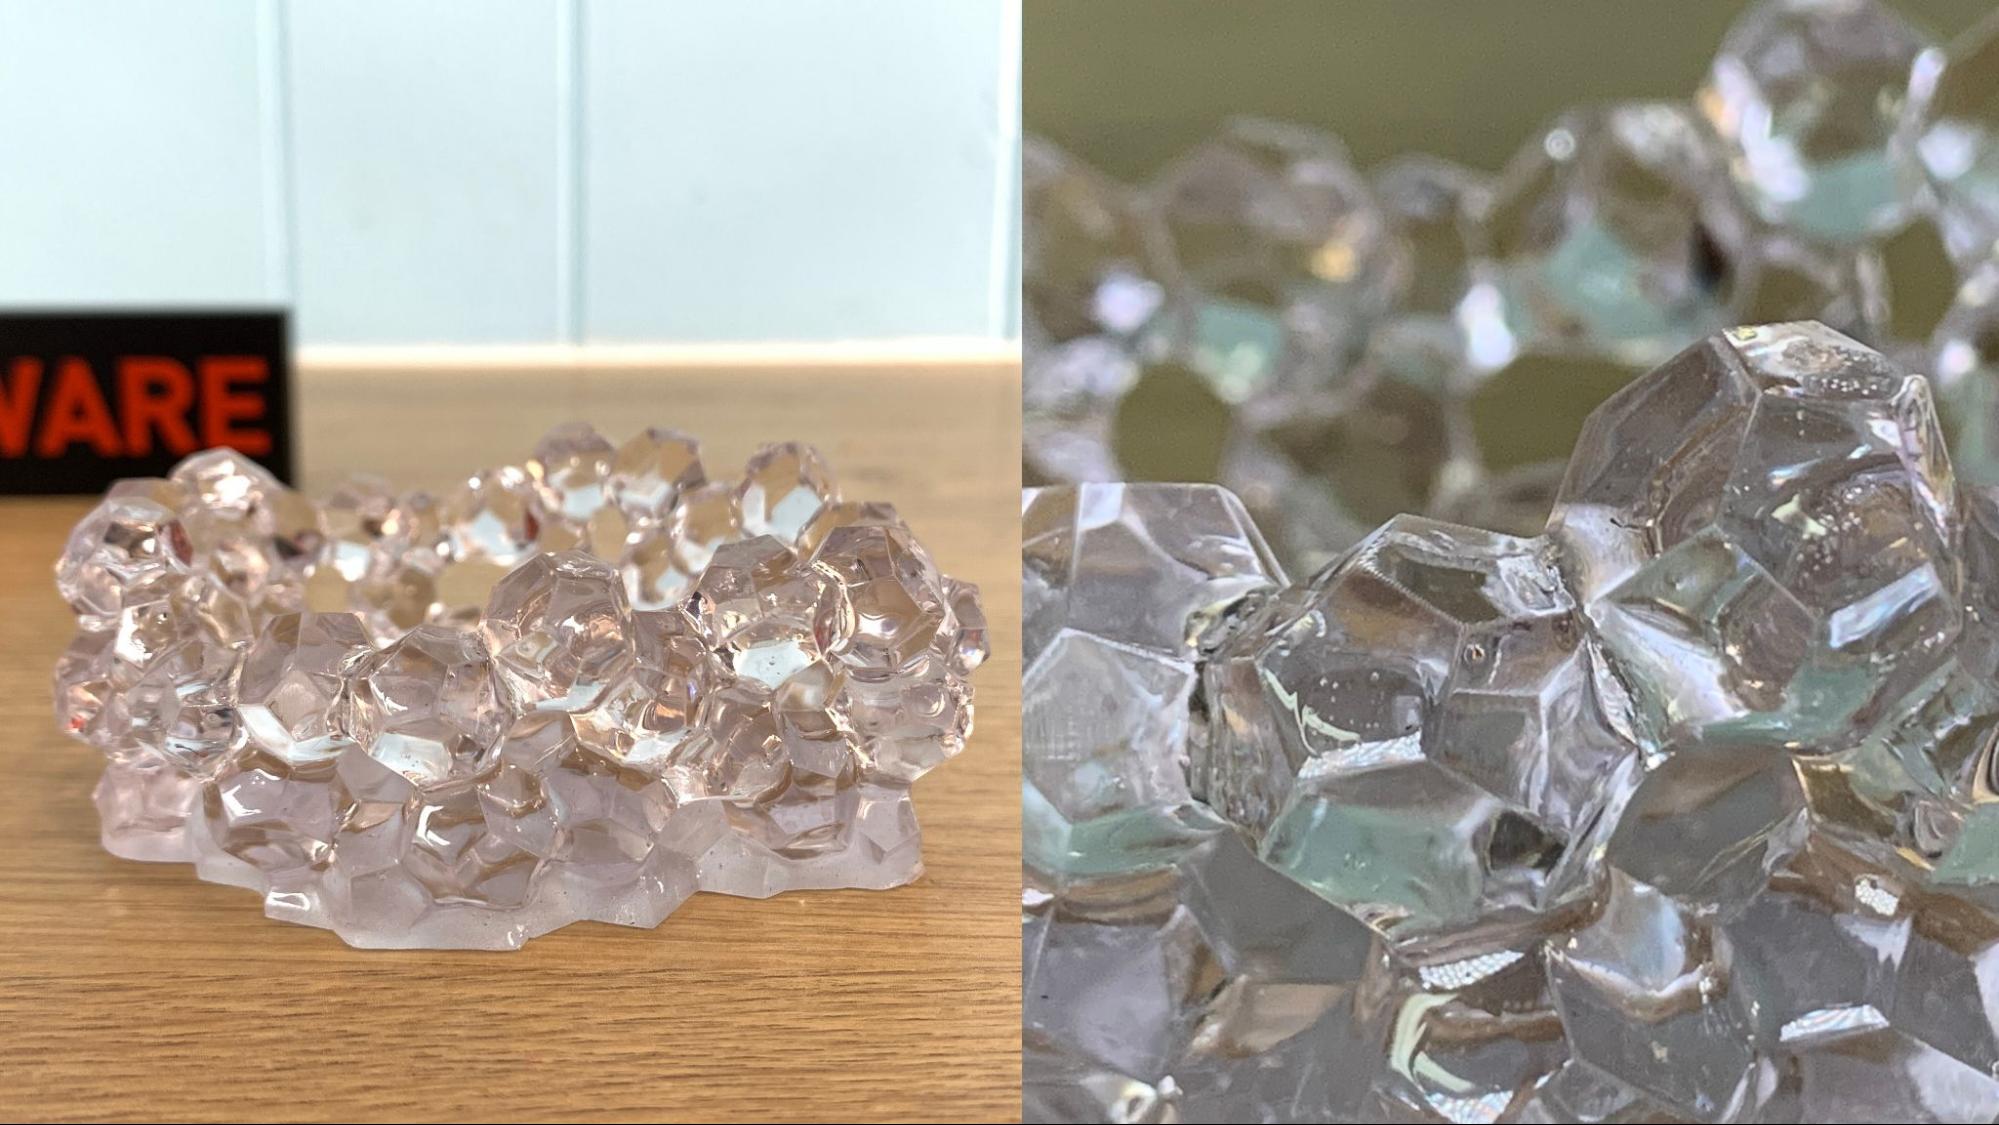
Anycubic sent a sample of its new High Clear Resin to test with the Mono 2 printer. This is a new formula of resin that can create crystal clear prints when you follow a simple curing technic. The model printed as normal, using a slightly longer exposure and less curing time. It printed in 2 hours and 13 seconds with a 4-second layer exposure and no supports. The whole print was cleaned in alcohol, then the sides were given a light coat of fresh resin with a brush to seal the fine layer lines. Then it was cured for 2 minutes. It was cleaned a second time in alcohol and put back in the curing station WET for another 2 minutes. The finished result is as clear as glass where sealed, and frosted where it was just cleaned.
Bottom Line
The Anycubic Photon Mono 2 is a money-saving resin printer with excellent 4K print quality. Its smaller size makes it easy to find space for, and its light weight makes it easy to move in and out of storage. The printer could use feet with more grip to prevent it from sliding around, so I would suggest putting it on a non-skid mat.
Priced at $230, the Anycubic Photon Mono 2 is a truly budget printer that makes it easy for makers to start their journey in resin. The quality is excellent with super crisp details and exposure times are no different from other top-of-the-line printers. The build size is a bit small, but not a problem if your focus is on miniatures and small models.
If you want to spend a bit more money on a machine that has a bigger build plate and a heavier base, try the Anycubic Photon M3 which has a 219 x 123 x 250 mm build volume with a finer, .28 micron resolution and air filters. However, if you want high-quality resin prints at a very reasonable price, the Anycubic Photon Mono 2 is hard to beat.
MORE: Best 3D Printers
MORE: Best Resin 3D Printers


.jpg?w=600)


