Since it was first released in 2005, the AeroPress has established quite the fan club. Coffee enthusiasts rave about it. There's even an annual competition where thousands of baristas from around the world battle it out to create the best-tasting AeroPress coffee. The appeal is obvious, with a winning combination of speedy yet flavorful results and a versatile, portable design - all for under $50.00
When Alan Adler invented the AeroPress, he didn't just bring a new model to the market but also invented a unique coffee-making method. It's been a game-changer. Its introduction has disrupted the coffee industry, with the AeroPress rivaling the depth of flavor of the French press and the speed of a capsule coffee maker. It's no surprise it appeals to innovators and coffee nerds. While it may look daunting, it's also simple enough for coffee newbies to quickly grasp the basics.
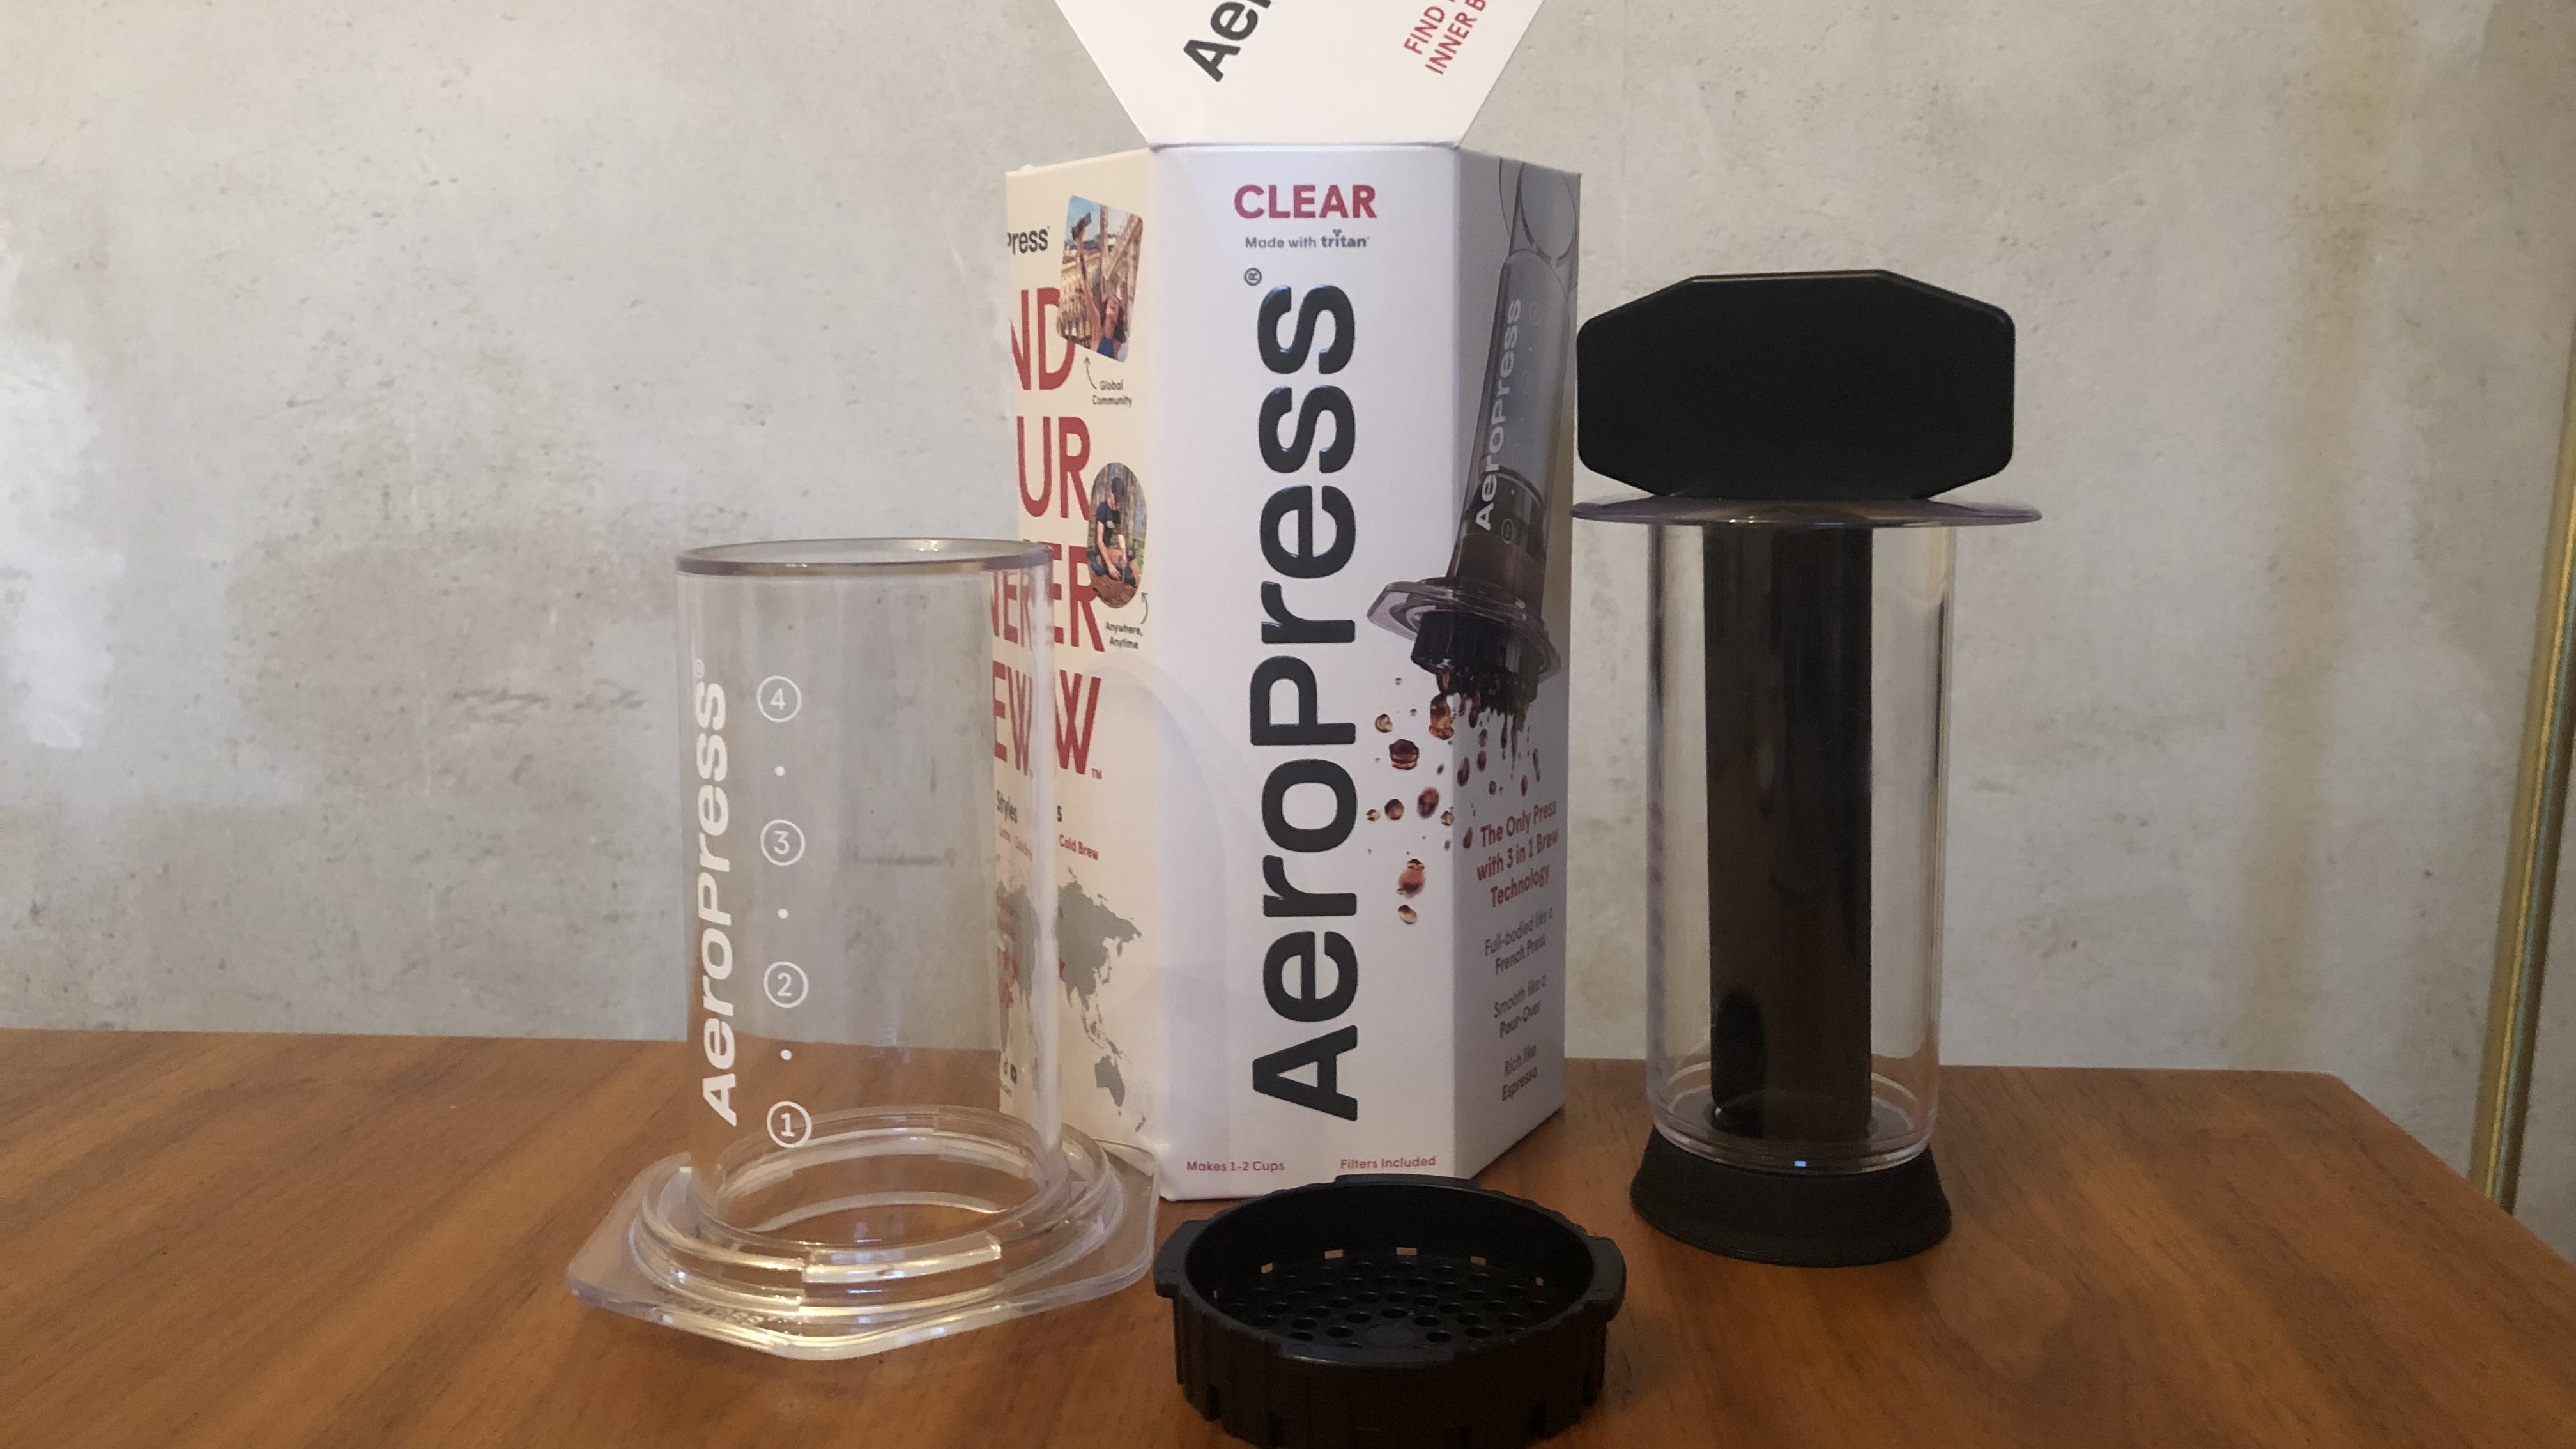
The AeroPress Clear is one of the more recent additions to the family. As its name suggests, the main difference from the original is the clear cylinder, which allows you to observe every stage of the coffee-making process and is made of a more durable material.
So why has the AeroPress attracted such a cult following? And does this latest model deserve the hype? I put the AeroPress Clear through its paces to find out. I tested it multiple times a day for two weeks to see how it performed in terms of ease of use and, most importantly, the quality of the brew. While I was impressed by the great-tasting coffee and rapid results, there were a couple of design features that I feel you should be aware of since they may not suit everyone.
My review considers the design, features, performance, maintenance, and more to help you weigh up whether it's the best coffee maker for you. I'll also consider how this new kid on the block measures up against the AeroPress Original and challenge it to a duel in French Press vs AeroPress to figure out which brewing method is best.
AeroPress Clear: Key specs
AeroPress Clear: First impressions
While unboxing the AeroPress Clear, I was pleased to discover it was mostly packaged in recyclable materials, like cardboard. Plastic packaging was pretty minimal, with just a small bag enclosing the filters to keep moisture out. Overall, it was great that the AeroPress arrived without the guilt of lots of packaging going to landfill.
I was surprised by how compact the AeroPress Clear was. Compared to bulky coffee machines, it takes up very little space in your kitchen and is small enough to tuck away in a drawer. The diminutive size is also a draw if you plan to take your AeroPress out and about.
Unlike convoluted coffee machines, the AeroPress is super simple to get going. There are just three main parts - the cylinder, the plunger, and the filter cap. All I had to do was attach these together and insert a paper filter. It pretty much arrives ready to start brewing - a dreamy cup of coffee is just minutes away.
Top tip: rinse the paper filter in water to avoid a papery taste to your coffee.
AeroPress Clear: Price & availability
The AeroPress Clear retails for $49.99, positioning it as an affordable coffee maker. It's similar in price to a mid-range French press. Its price is a huge part of the appeal - it makes espresso-style coffees more accessible to people who don't want to pay through the nose for a high-end machine.
It's worth noting that the AeroPress Clear is $10 more expensive than the AeroPress Original. It may be worth paying the extra if you love experimenting with different recipes, as the clear cylinder makes it easier to observe the intricacies of the process. The Original should do just fine if you're on a tight budget though, or you may find deals where you can get it for less.
Already have an AeroPress Original? It's probably only worth shelling out to add the Clear to your collection if you're a super fan.
The AeroPress Clear comes with the basics, including a coffee scoop, a stirrer, and paper filters to get started. Additional AeroPress accessories are available to buy separately, though they are relatively pricey. They may be worth the investment if you crave a certain style of coffee - for example, the AeroPress Flow Control Filter Cap helps you craft an espresso.
You can buy the AeroPress Clear directly from the AeroPress website, but it’s also available from major retailers like Amazon, Walmart, and Target.
Score: 4.5/5
AeroPress Clear: Design

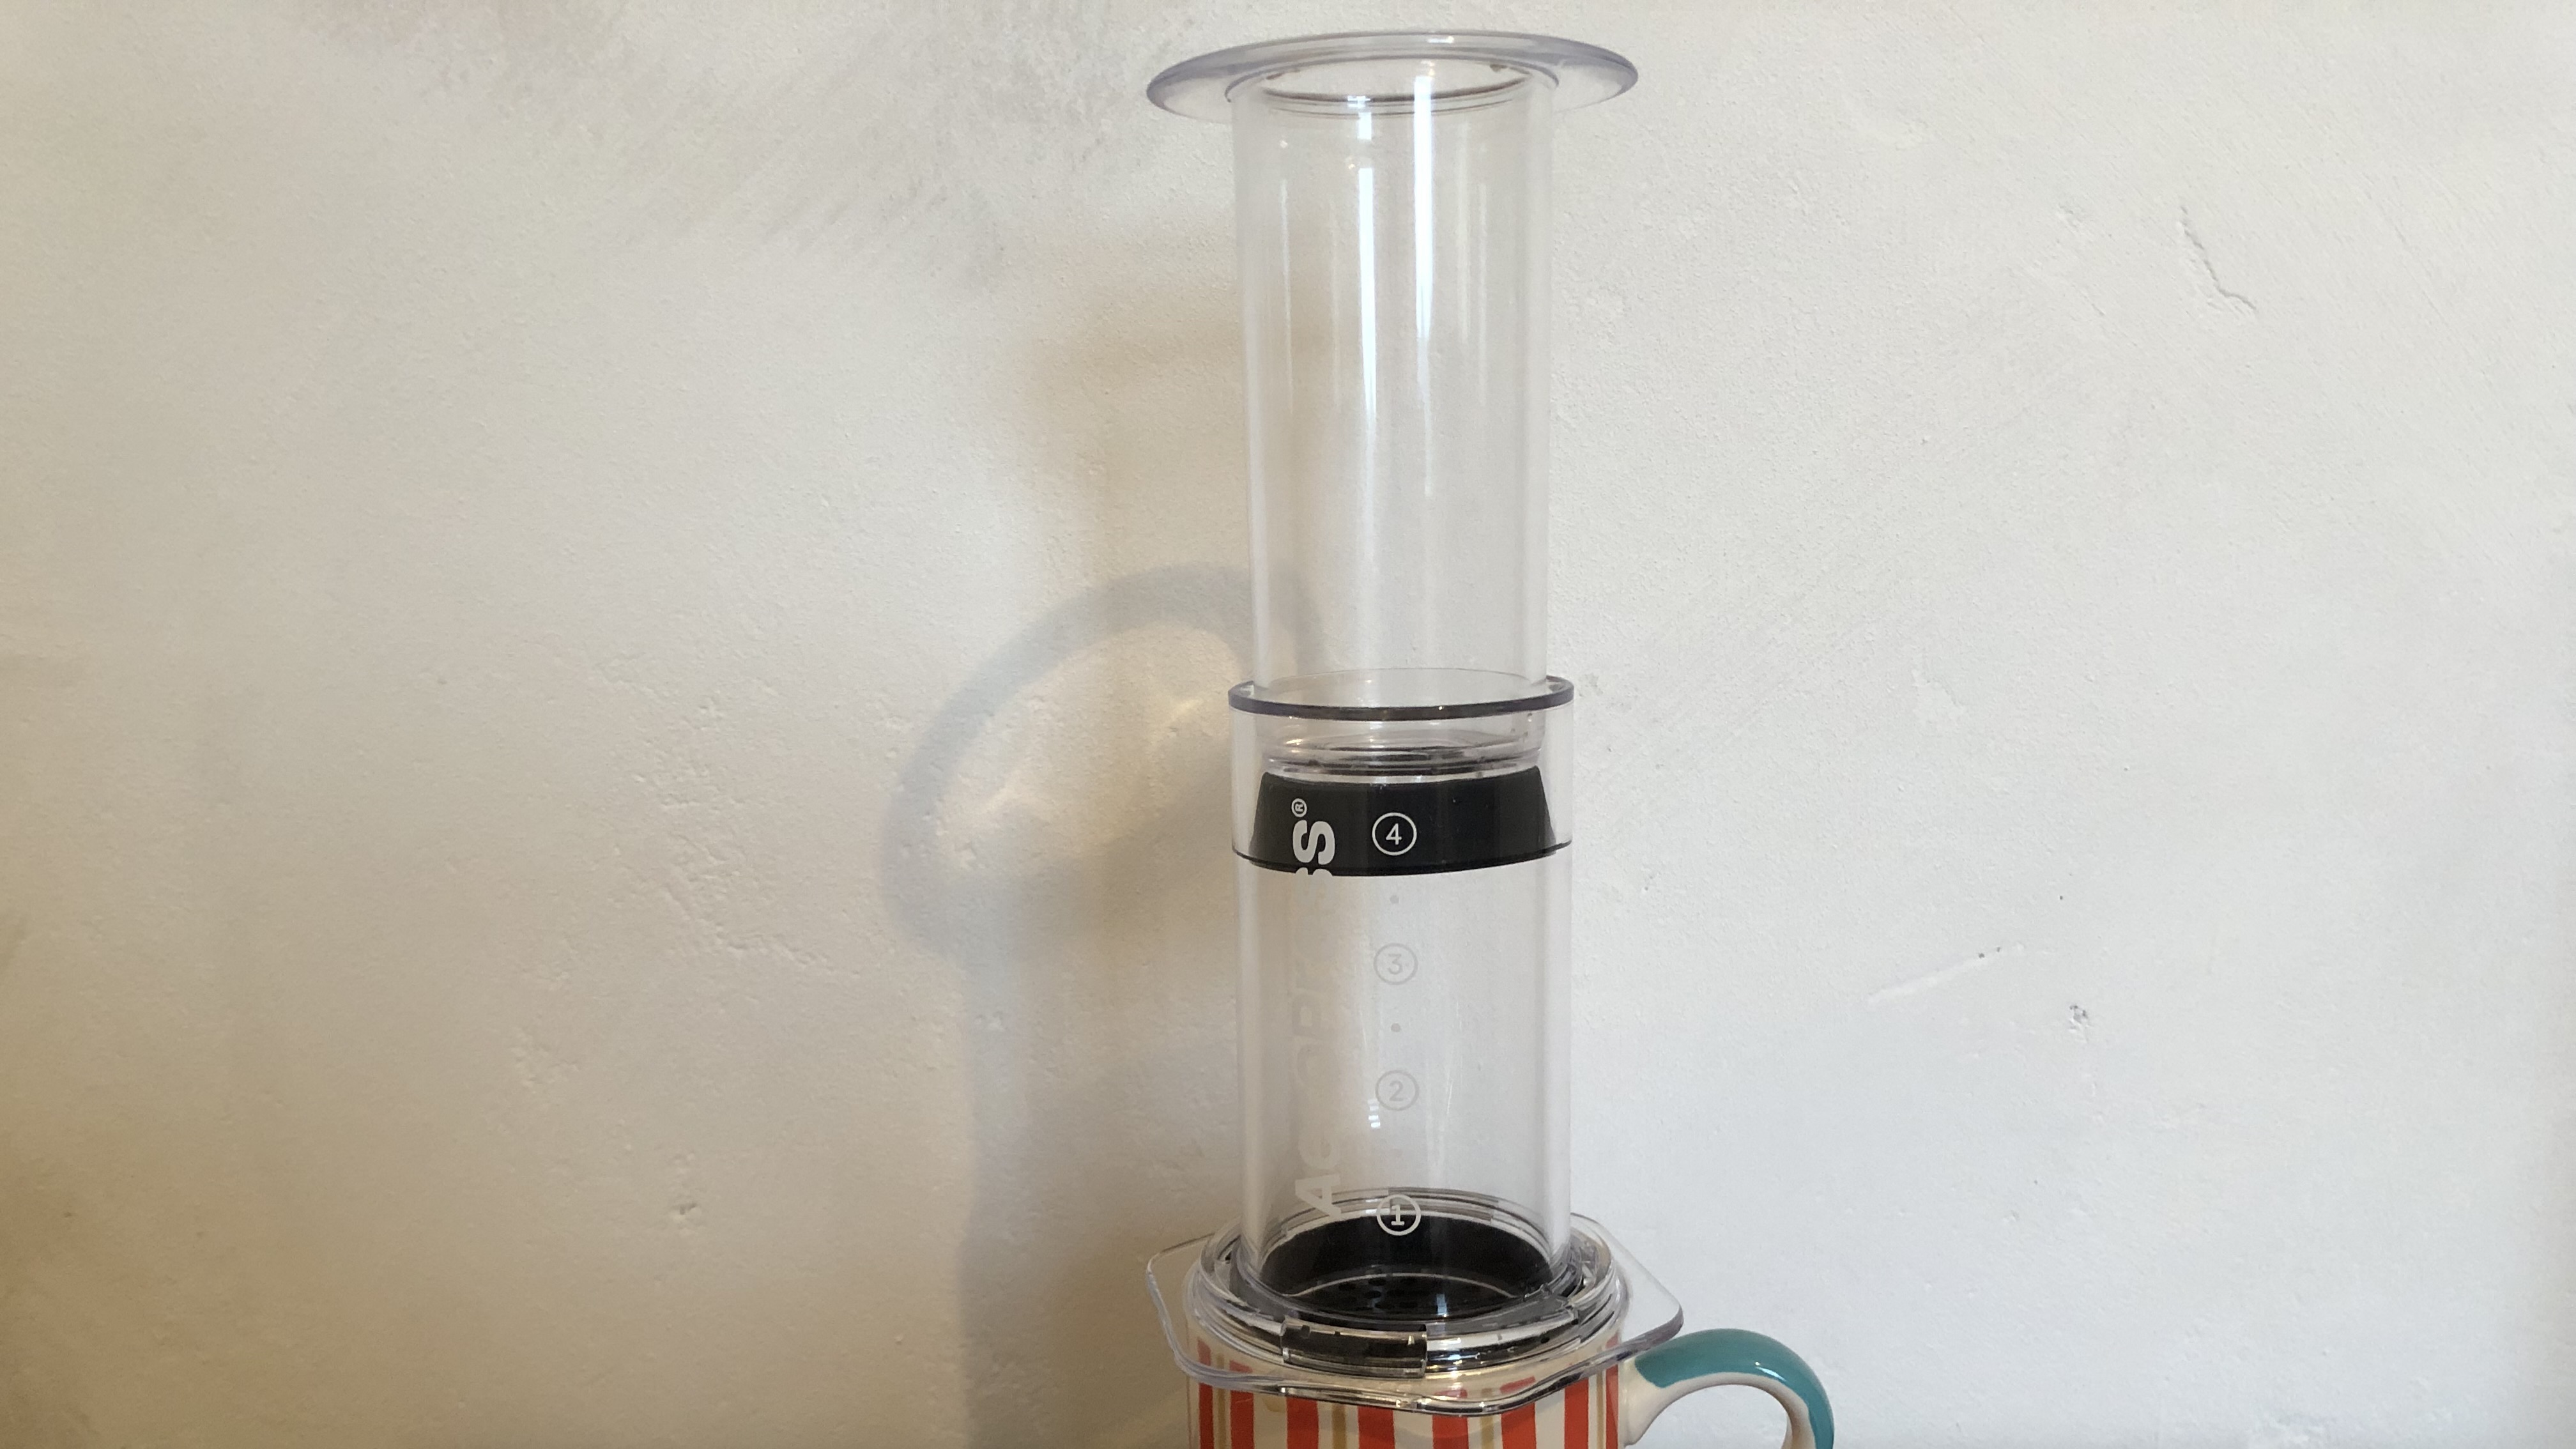
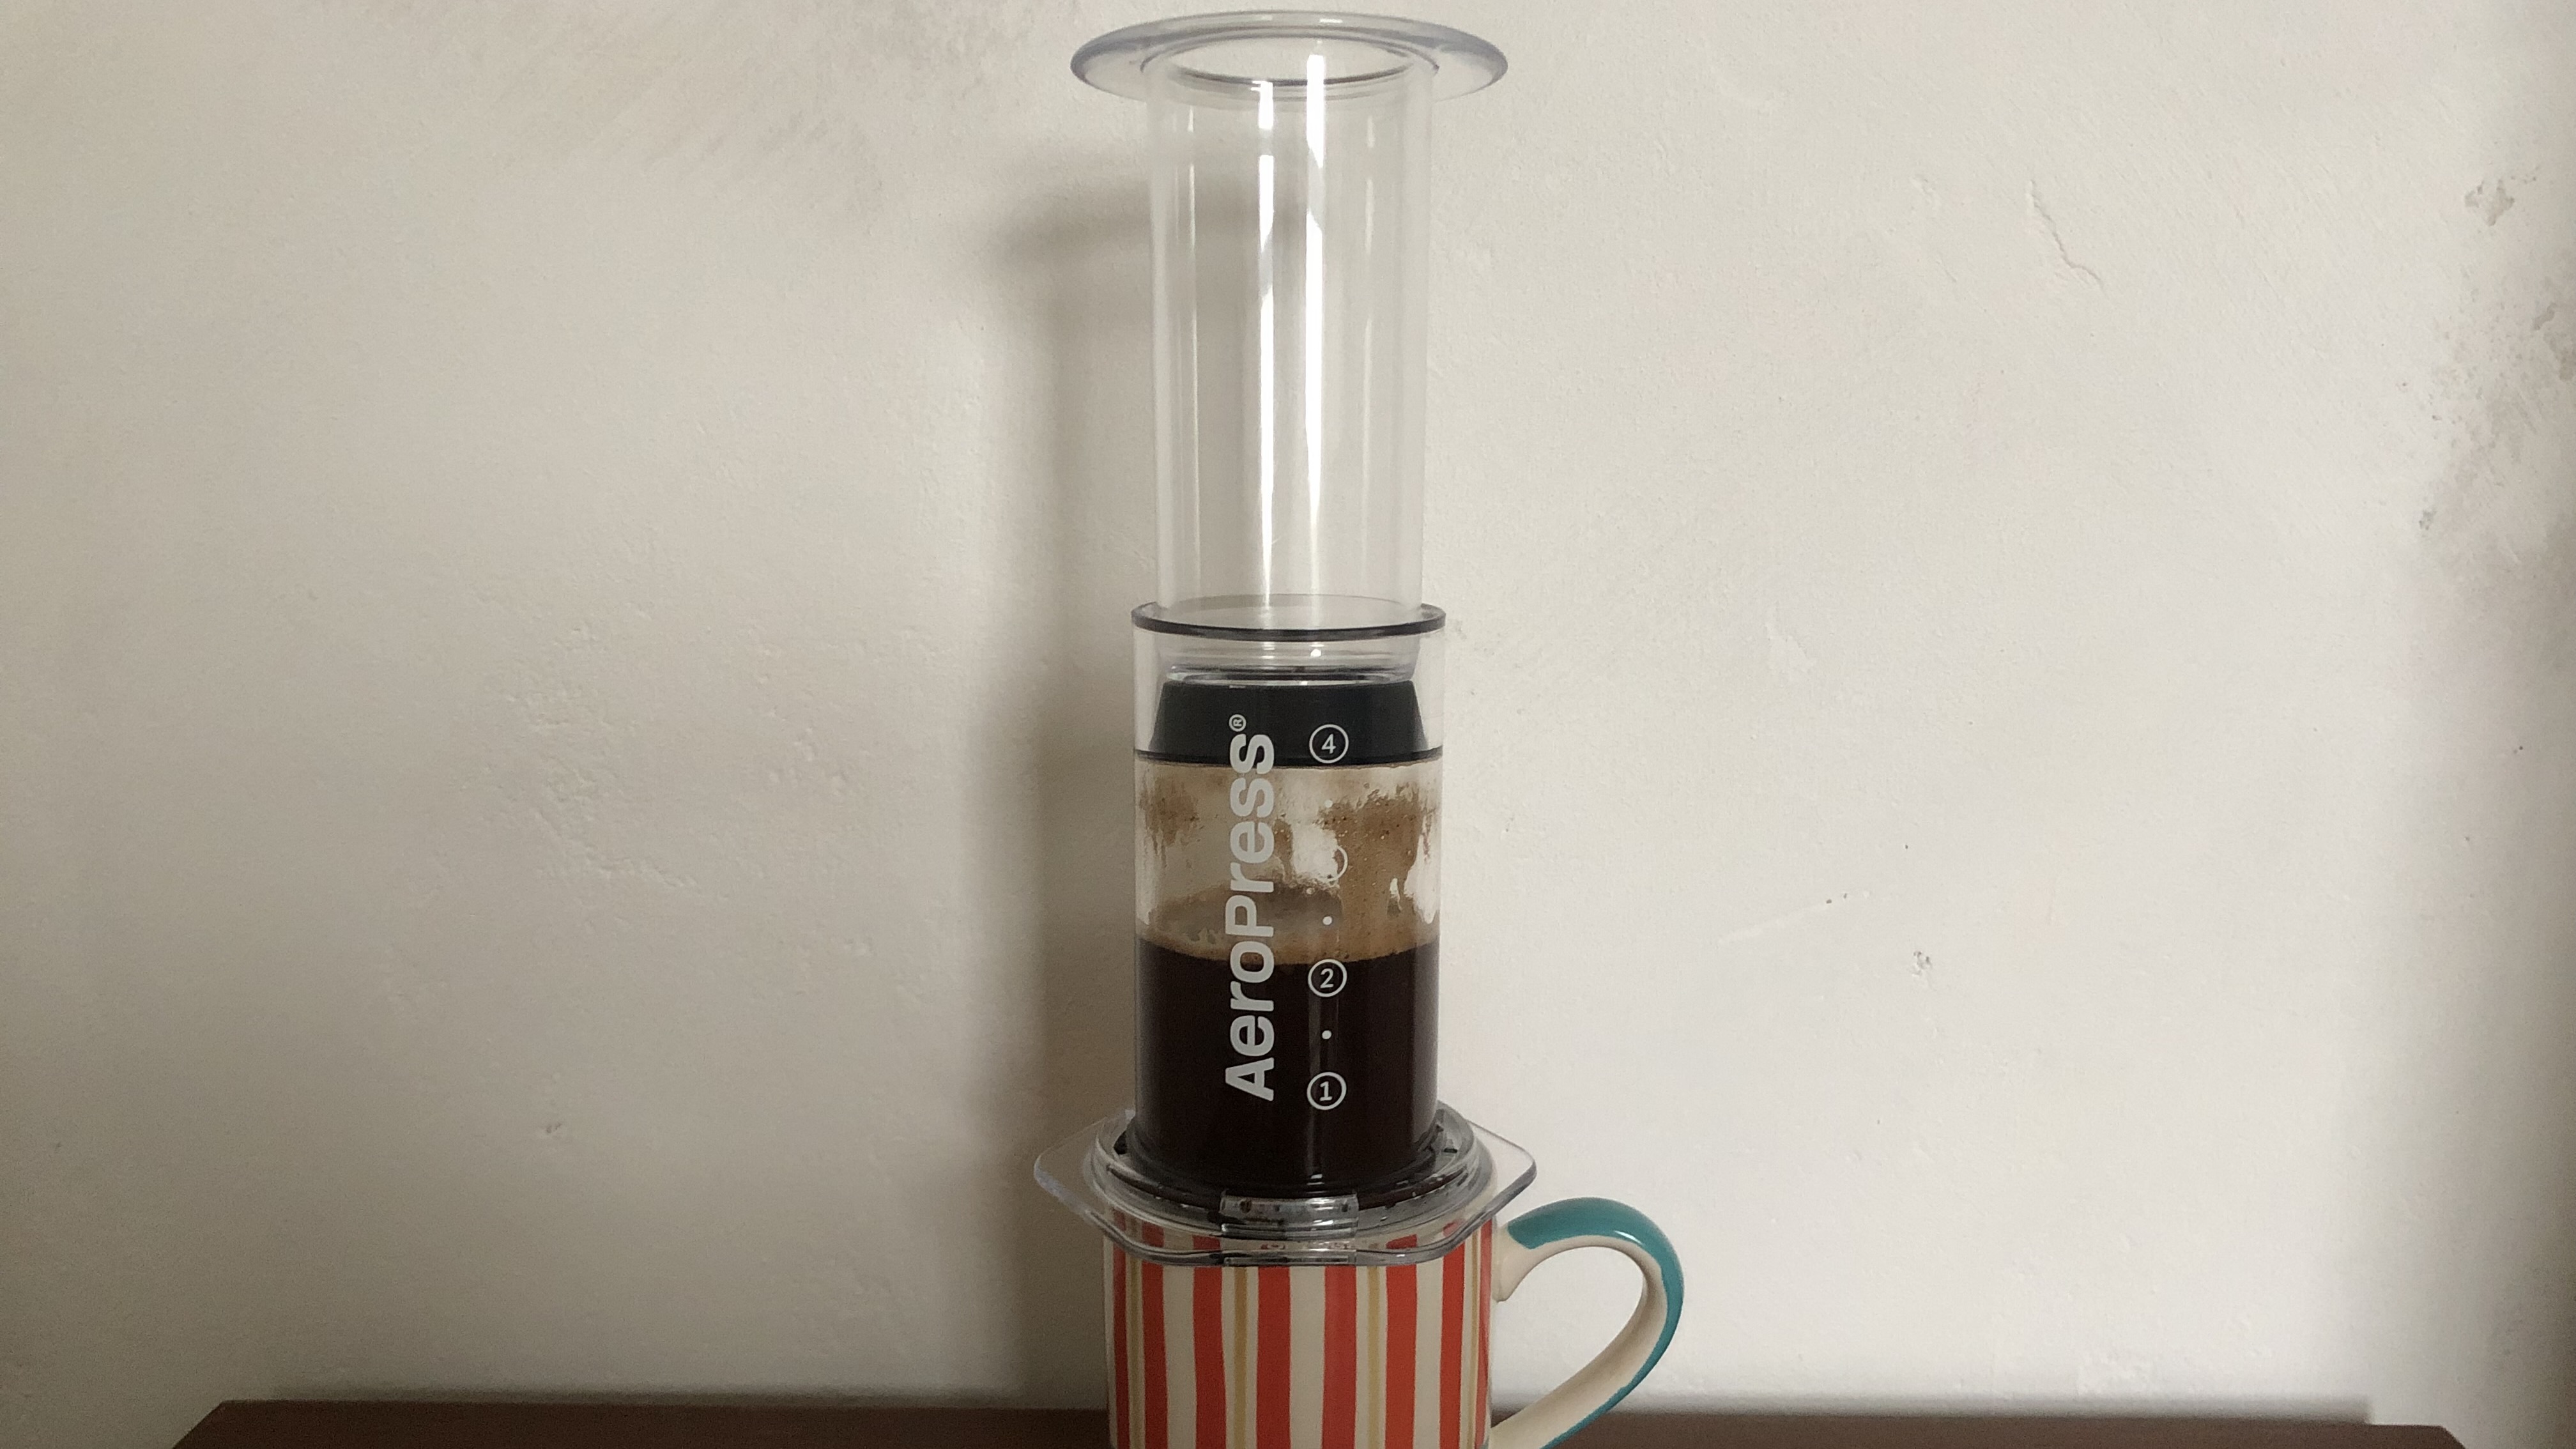
At first glance, the AeroPress can look a little scientific and offputting. But it's much simpler to use than it looks. As its name suggests, the main twist on this model is the transparent cylinder. It sports measurements in white text which stand out really well against your coffee, enabling you to clearly observe each stage of the process. Plus, it makes life easier when you're a little bleary-eyed in the morning. I personally find the AeroPress Clear more visually appealing than the Original with the contrast between the dark coffee and the light text.
As with all of the AeroPress models, the Clear is made of plastic rather than glass, which may not be to everyone's taste. But that does mean it's incredibly lightweight and highly portable. Thanks to its ingenious design, the AeroPress has established itself as a favorite among campers and outdoorsy people. I decided to put it to the test by taking it with me on long hikes. I was pleased that it fared well even on crisp wintery days, providing a welcome pick-me-up. Depending on how far you venture out into the wilderness, it can be a little more fiddly to use. Ideally, you need a flat surface to balance your cup and the AeroPress to avoid any spillages, but that shouldn't be a problem on a campsite.
The AeroPress Clear is so sturdy and easy to carry that it's also a good choice if you want to stash it in your bag and take it to work. It's a whole lot cheaper than treating yourself to a coffee on your way. The only downside is that your colleagues will inevitably ask to try it, and the AeroPress Clear is not well suited to entertaining a crowd.
That brings me to my main gripe. The AeroPress only offers a single serving if you like a taller drink - it makes the equivalent of 3 espresso-sized cups. If you only plan to make coffee for yourself or only drink espresso, that's no big deal. But it was pretty tedious when I had to repeat the same steps to make drinks for my partner and friends at the same time. If you have a larger household or anticipate making drinks for a crowd, the AeroPress XL may be a better buy.
When buying a coffee maker, it's easy to get carried away thinking about the taste, but it's essential to think about how it will fit into your life. An important but often overlooked aspect is cleaning and maintenance. I loved that the AeroPress Clear produced very little mess, and it saved me time. You can pop the used coffee puck straight into the trash - no faffing around scraping the grounds out. The good news is that the AeroPress is dishwasher safe, making it super simple to clean.
From a sustainability perspective, I would have preferred it if you didn't have to use and throw away paper filters, but that's the price you pay for a smooth brew and less clean-up. You can purchase a separate metal filter for your AeroPress from Amazon if that's a concern.
Score: 4/5
AeroPress Clear: Performance
The AeroPress has established a reputation as a manual coffee maker for connoisseurs. It did not disappoint.
Compared to my usual French press, I found the AeroPress delivers a smoother, cleaner brew with greater clarity of tasting notes. Even with the same coffee beans, I could pick out subtleties that I had never noticed before. I identified tasting notes like chocolate and nuts and enjoyed comparing different varieties. The unexpected flipside of the small servings was that I took the time to savor my coffee more. When you only have a limited amount, it encourages you to be more mindful.
Thanks to the paper filter, your coffee is grit-free, making for a clean taste that avoids being too heavy on the mouth. Of course, the best bit is you can enjoy your cup of coffee right down to the bottom without worrying about residue.
So, what's the secret behind the AeroPress taste? The AeroPress describes its process as 3 in 1 brewing. This coffee maker cleverly combines immersion, aeration, and pressure. It's this unique method that gives the coffee its distinctive taste, which is somewhere between the robust flavor of the French press and the smoothness of pour-over.
Over the course of a couple of weeks, I experimented with all kinds of recipes and methods. Even so, I barely scratched the surface. The possibilities are almost endless with this versatile coffee maker. It's totally possible to go down a rabbit hole researching the many weird and wonderful variations online.
Small tweaks to the process can make a dramatic difference to the resulting coffee. One drawback is that consistency can be difficult to achieve. One time I attempted to recreate a particularly flavorful brew for my partner but it proved elusive.
With the AeroPress, it pays to be precise. On a couple of occasions, I cut corners and guessed the amount of coffee, and it affected the taste. I'd recommend sticking to the instructions until you've got the hang of it and then experimenting with different variations. It is a little more involved than using a French press, but it's also much less convoluted than using an espresso machine.
While the variations are almost infinite, there are two main methods for brewing with the AeroPress: the original and the inverted method.

The original method
The original method has a lot going for it. It's possible to serve up great-tasting coffee in little over a minute - perfect if you want to squeeze in a quick but flavorful coffee before you leave the house.
The original method involves you placing the AeroPress on top of your cup. You will need to choose one wisely to match the size of the opening to avoid spillages. This method does require a little pressure, but you'll be rewarded with a satisfying hiss as the coffee enters your cup. I found that if you grind the beans too fine, you encounter more resistance. After trial and error, I discovered that medium-fine was the way to go. The resulting taste is clean and smooth.
The coffee drips through a little before you fully push down the plunger, so you don't have a lot of control over the brewing time. It all happens pretty quickly, so it's best to fully engage in the process rather than get drawn into another task; otherwise, half your coffee might escape before you've had the chance to plunge!

The inverted method
As its name suggests, the inverted method is not for the faint-hearted. Essentially, it's the opposite of the original method.
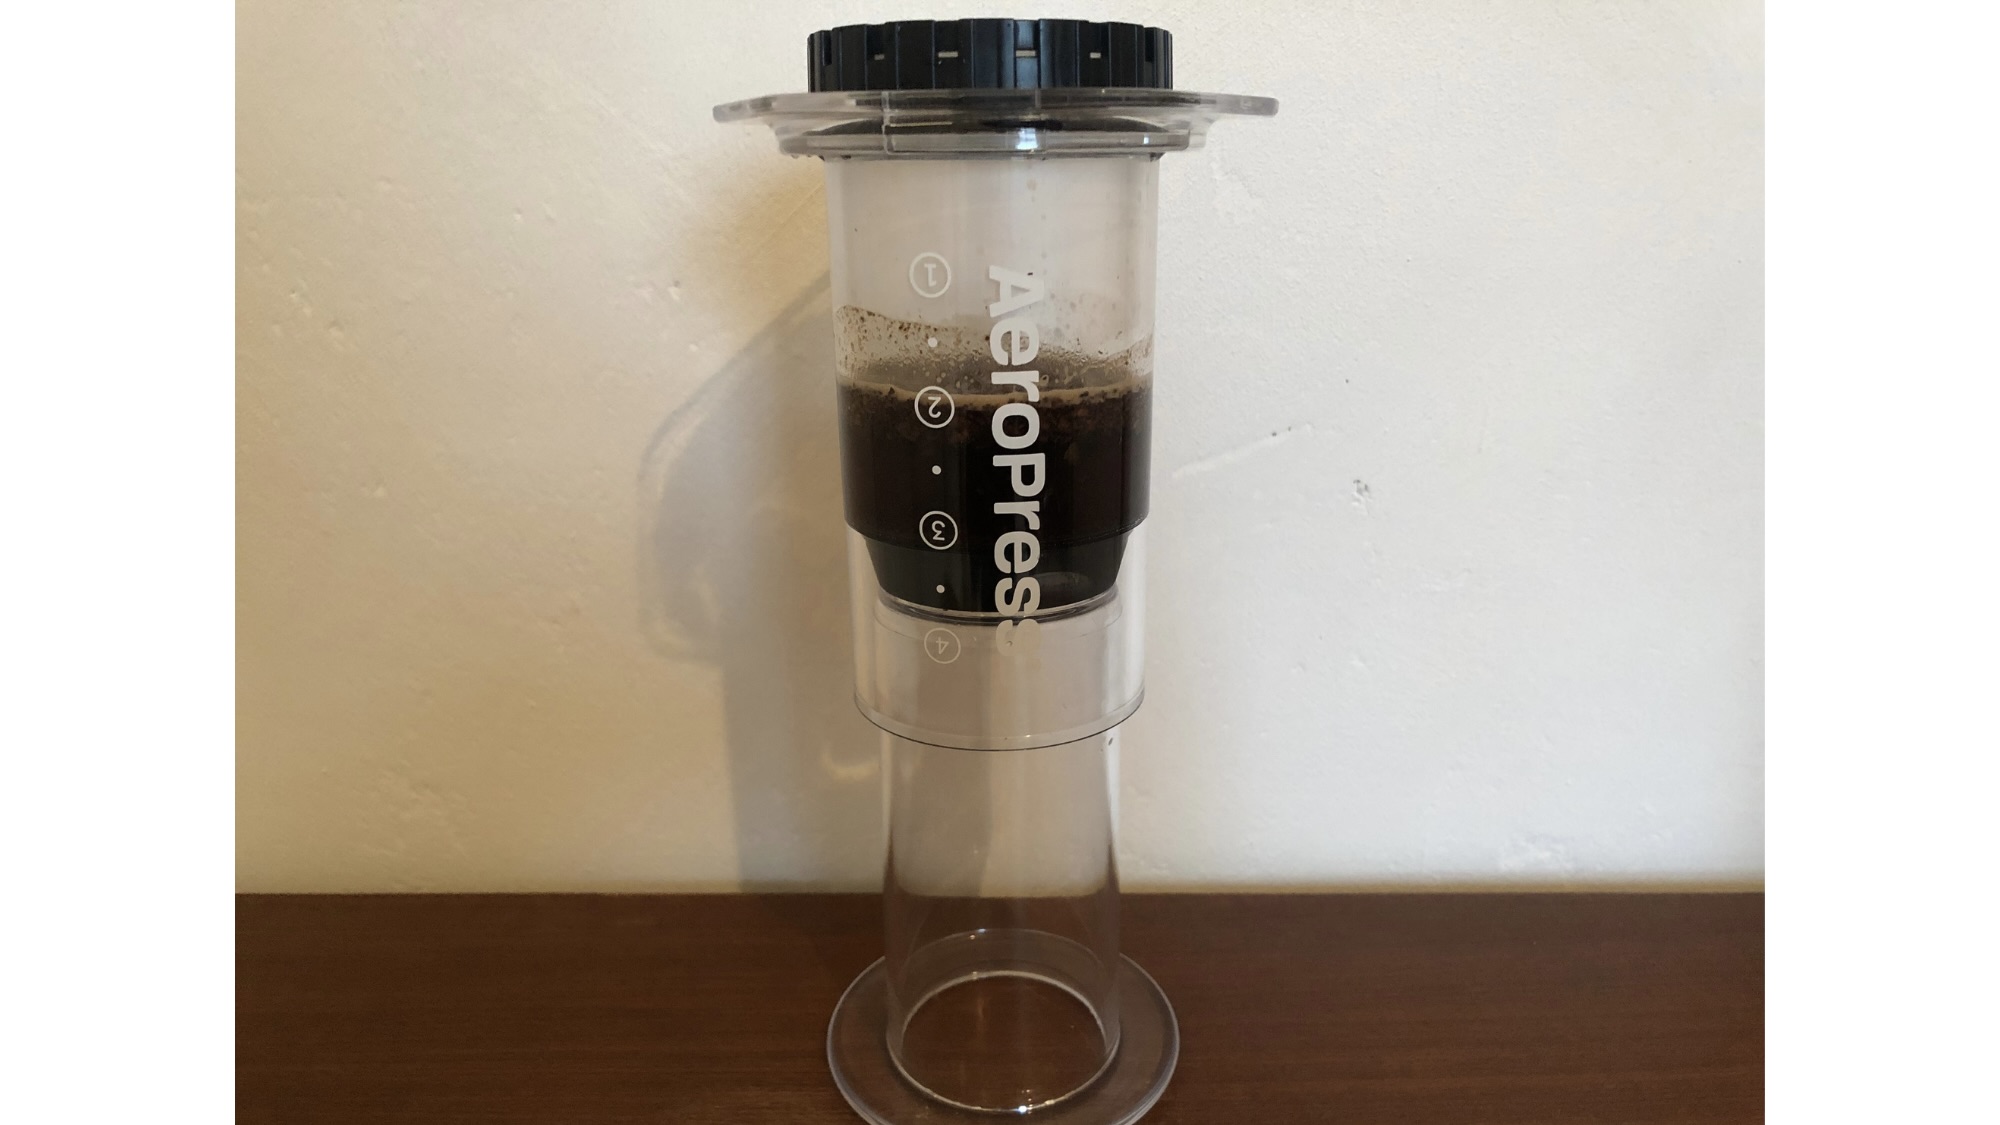
First, place the cylinder on your work surface and add your coffee grounds and a little water to encourage the grounds to bloom. After a few seconds, add the remaining water. Leave about thirty seconds before placing your cup on top and flipping the whole stack over in one deft movement. With any luck, your cup should land upright with your coffee in it. I learned it's best to do it with confidence and commit to it.
The inverted method takes a little practice to get the hang of and is not something I'd be inclined to risk on a rushed morning. Instead, I found myself gravitating to the original method on busy days, while I opted for the inverted style on lazy weekends when I had more time for experimentation.
The main benefit of the inverted method is the added control and prevention of drip-through, allowing you to fine-tune the coffee to your tastes. It's popular with AeroPress aficionados as there are lots of ways to change up the flavor. Compared to the original method, I found the resulting brew was more robust and velvety, more closely resembling an espresso-style coffee.

Specialty coffees - American, latte, espresso, and cold brew
The AeroPress Clear comes with recipes for 4 types of coffee - American, latte, espresso, and cold brew.
The espresso was the stand-out drink. The force of the AeroPress helps you get tantalizingly close to a true espresso flavor. If you crave that full-bodied texture, you may want to take it to the next level with the AeroPress Flow Control Filter Cap. This accessory is available to purchase separately and gives you more control of the brewing process, allowing you to create stronger drinks.
You can't go wrong with an American if you prefer a taller drink. I found, however, that the espresso showed off the strengths of the AeroPress better with its more intense flavors. It did meet the approval of friends, though, when they came round to visit.
I was excited to try out the cold brew. Normally, the process takes 24 - 48 hours, so you either have to be incredibly organized or treat yourself in a cafe. I was seriously impressed that you could recreate it so quickly. The cold brew brings out different flavors and is more mellow, which is great if you find it hard to tolerate bitterness.
The claim of making a latte with an AeroPress is a bit of a stretch. You need to froth or steam the milk yourself for a true latte. I used my own milk frother to create passable lattes. Without the aid of a milk frother, though, the latte is a little more lackluster compared to what you would expect in a coffee shop.
I also experimented with more adventurous recipes like a Japanese-style flash-brew and a Cuban coffee. I was impressed by the versatility of the AeroPress Clear and can totally see how people become obsessed with discovering new variations.
Score: 4.5/5
Should you buy the AeroPress Clear coffee maker?
Buy it if…
Don’t buy it if…
How does the AeroPress Clear compare?
The AeroPress is both a brand and a unique style of brewing, so there's nothing exactly like it. If I were to compare it to a French press, it delivers a cleaner, smoother cup of coffee, though it can't quite match that full-bodied flavor. If you prefer a more robust cup of coffee, you can purchase a metal filter for your AeroPress that lets through more of the rich, flavorful oils than a paper one.
If you're in the market for a manual coffee maker, the Moka pot is another option. This alternative serves up a rich espresso-like coffee, though you will need to exercise patience as it can take about 6 minutes to brew. By comparison, the whole AeroPress process takes about 2 minutes from start to finish.
Curious about how the AeroPress Clear stacks up against the other offerings from the brand? Both the Original and the Clear are identical in size, so the accessories work for both. As the name suggests, the main difference is the clear cylinder rather than the original grey. That helps you clearly observe every stage of the process, from the coffee grounds blooming to the freshly brewed coffee filtering through into your mug. It will appeal to coffee geeks who enjoy toying with the process and making small changes to fine-tune their coffee. Plus, the Clear is made of a more durable material, so it may withstand traveling better than the Original.
If travel is your main reason for buying, the AeroPress Go is specifically designed with camping in mind - perfect if you're looking for a coffee maker to accompany you on adventures. It all folds up neatly in one cup, meaning you don't have to rummage through your bag to find all the parts.
The AeroPress Clear is relatively pricey, given it doesn't include many additional features compared to the Original. If you're on a budget, the AeroPress Original will save you $10.
The AeroPress XL is the most expensive offering but may be a better investment if you plan to make coffee for more than one. It sports a larger capacity - 20 oz compared to 10 oz with the Clear and the Original. That's the equivalent of 6 espresso-sized drinks.
How I tested the AeroPress Clear Coffee Maker
- Tested for two weeks, making multiple drinks per day
- Tested a variety of drinks, including espresso, latte, american, cold brew, and more
I tested the AeroPress Clear over two highly caffeinated weeks, using it as the only coffee maker in my kitchen. My partner and I used AeroPress to make hot and iced drinks, and I tried out the original and inverted method as well as different types of coffee, like latte, americano, espresso, and cold brew. Plus, I experimented with more adventurous recipes, including Japanese flash-brewed coffee and Cuban coffee. I also tried out the AeroPress flow control cap, which is available to purchase separately either directly from the AeroPress site or resellers such as Amazon.
Read more about how we test.


