Bass plays a vital role in a trip-hop track. Much like trip-hop beats (which we've covered here), using bassline loops is a perfectly valid approach, and memorable trip-hop tracks such as Portishead’s Glory Box make great use of quite lengthy sampled basslines.
Nevertheless, let's assume you want to create your own parts from scratch. To that end, although often subby in nature, a simple programmed sub bass synth sound more often than not simply won’t cut it.
In the spirit of sampling, a played feel, even if it’s repetitive and looped, is a style that better captures the essence of this genre. Here we’re going to look at a couple of different approaches, and both use DAW bass instruments.
How to make a trip-hop bass part
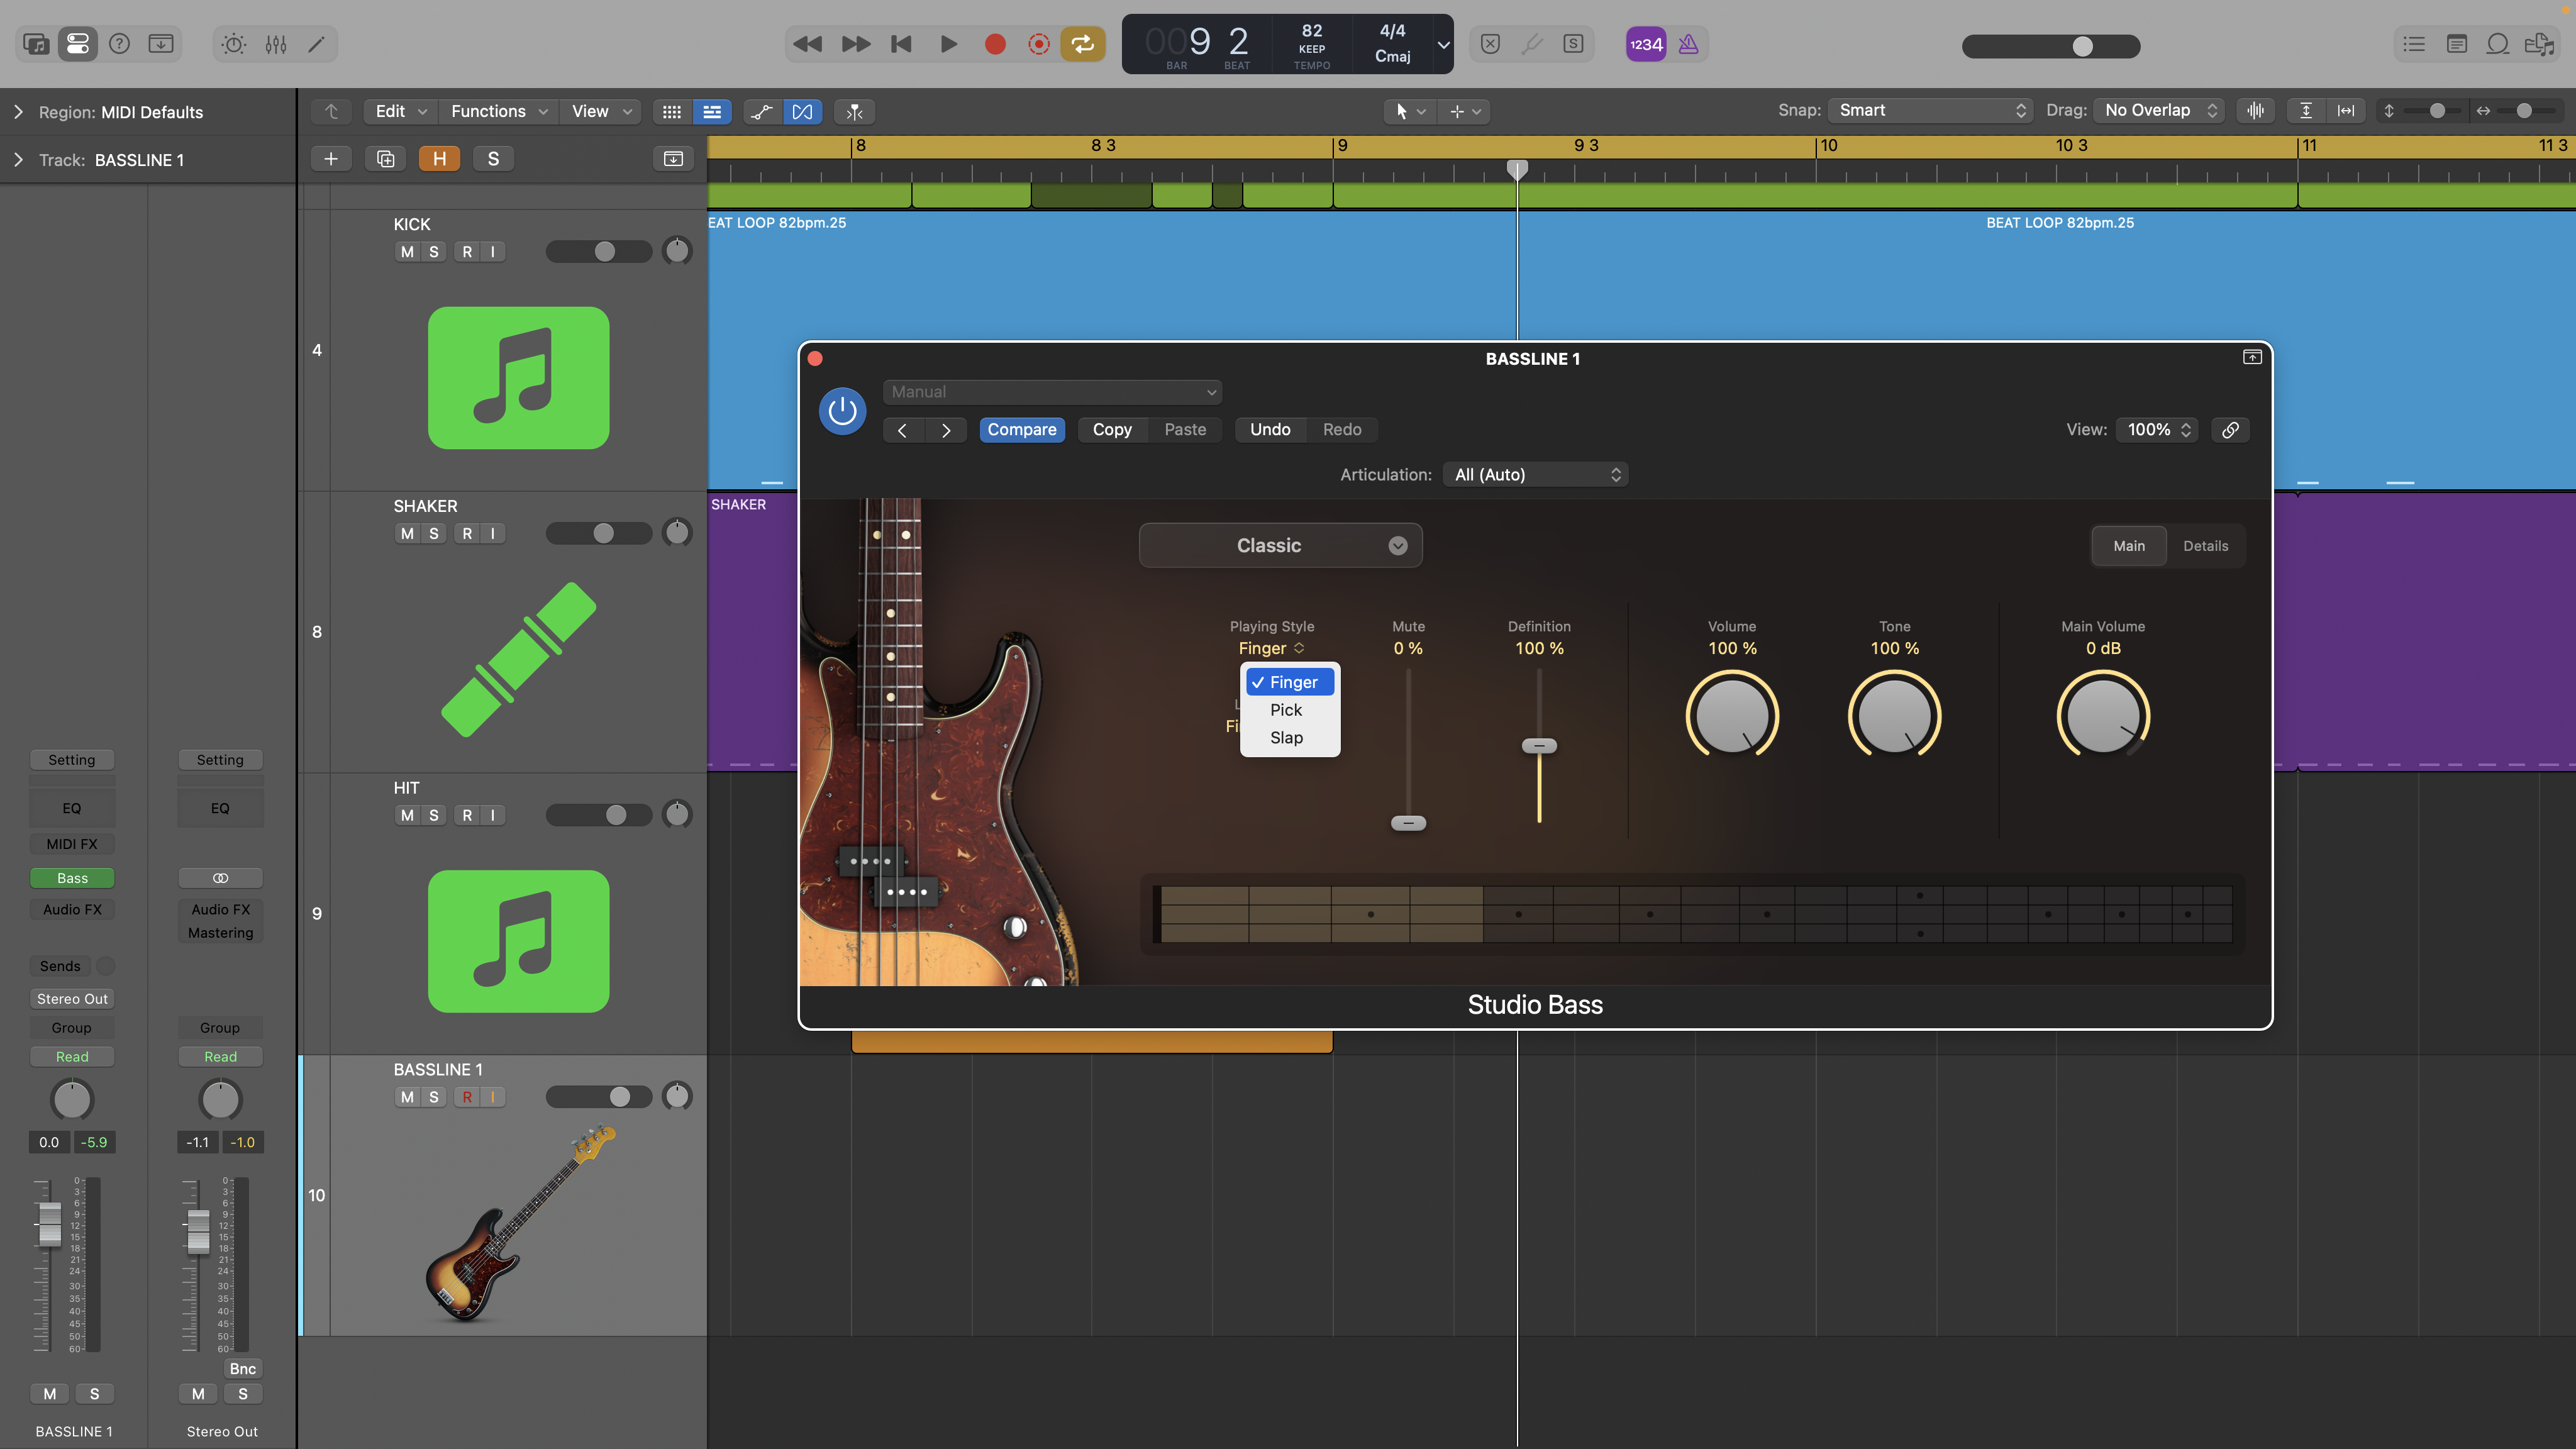
1. Electric bass played fingerstyle rather than with a pick produces a solid sustained sound that’s reasonably smooth. This blends well as either a more melodic or more dub-style bass, and if you choose the patch wisely will also match the sonics of other elements in your track.
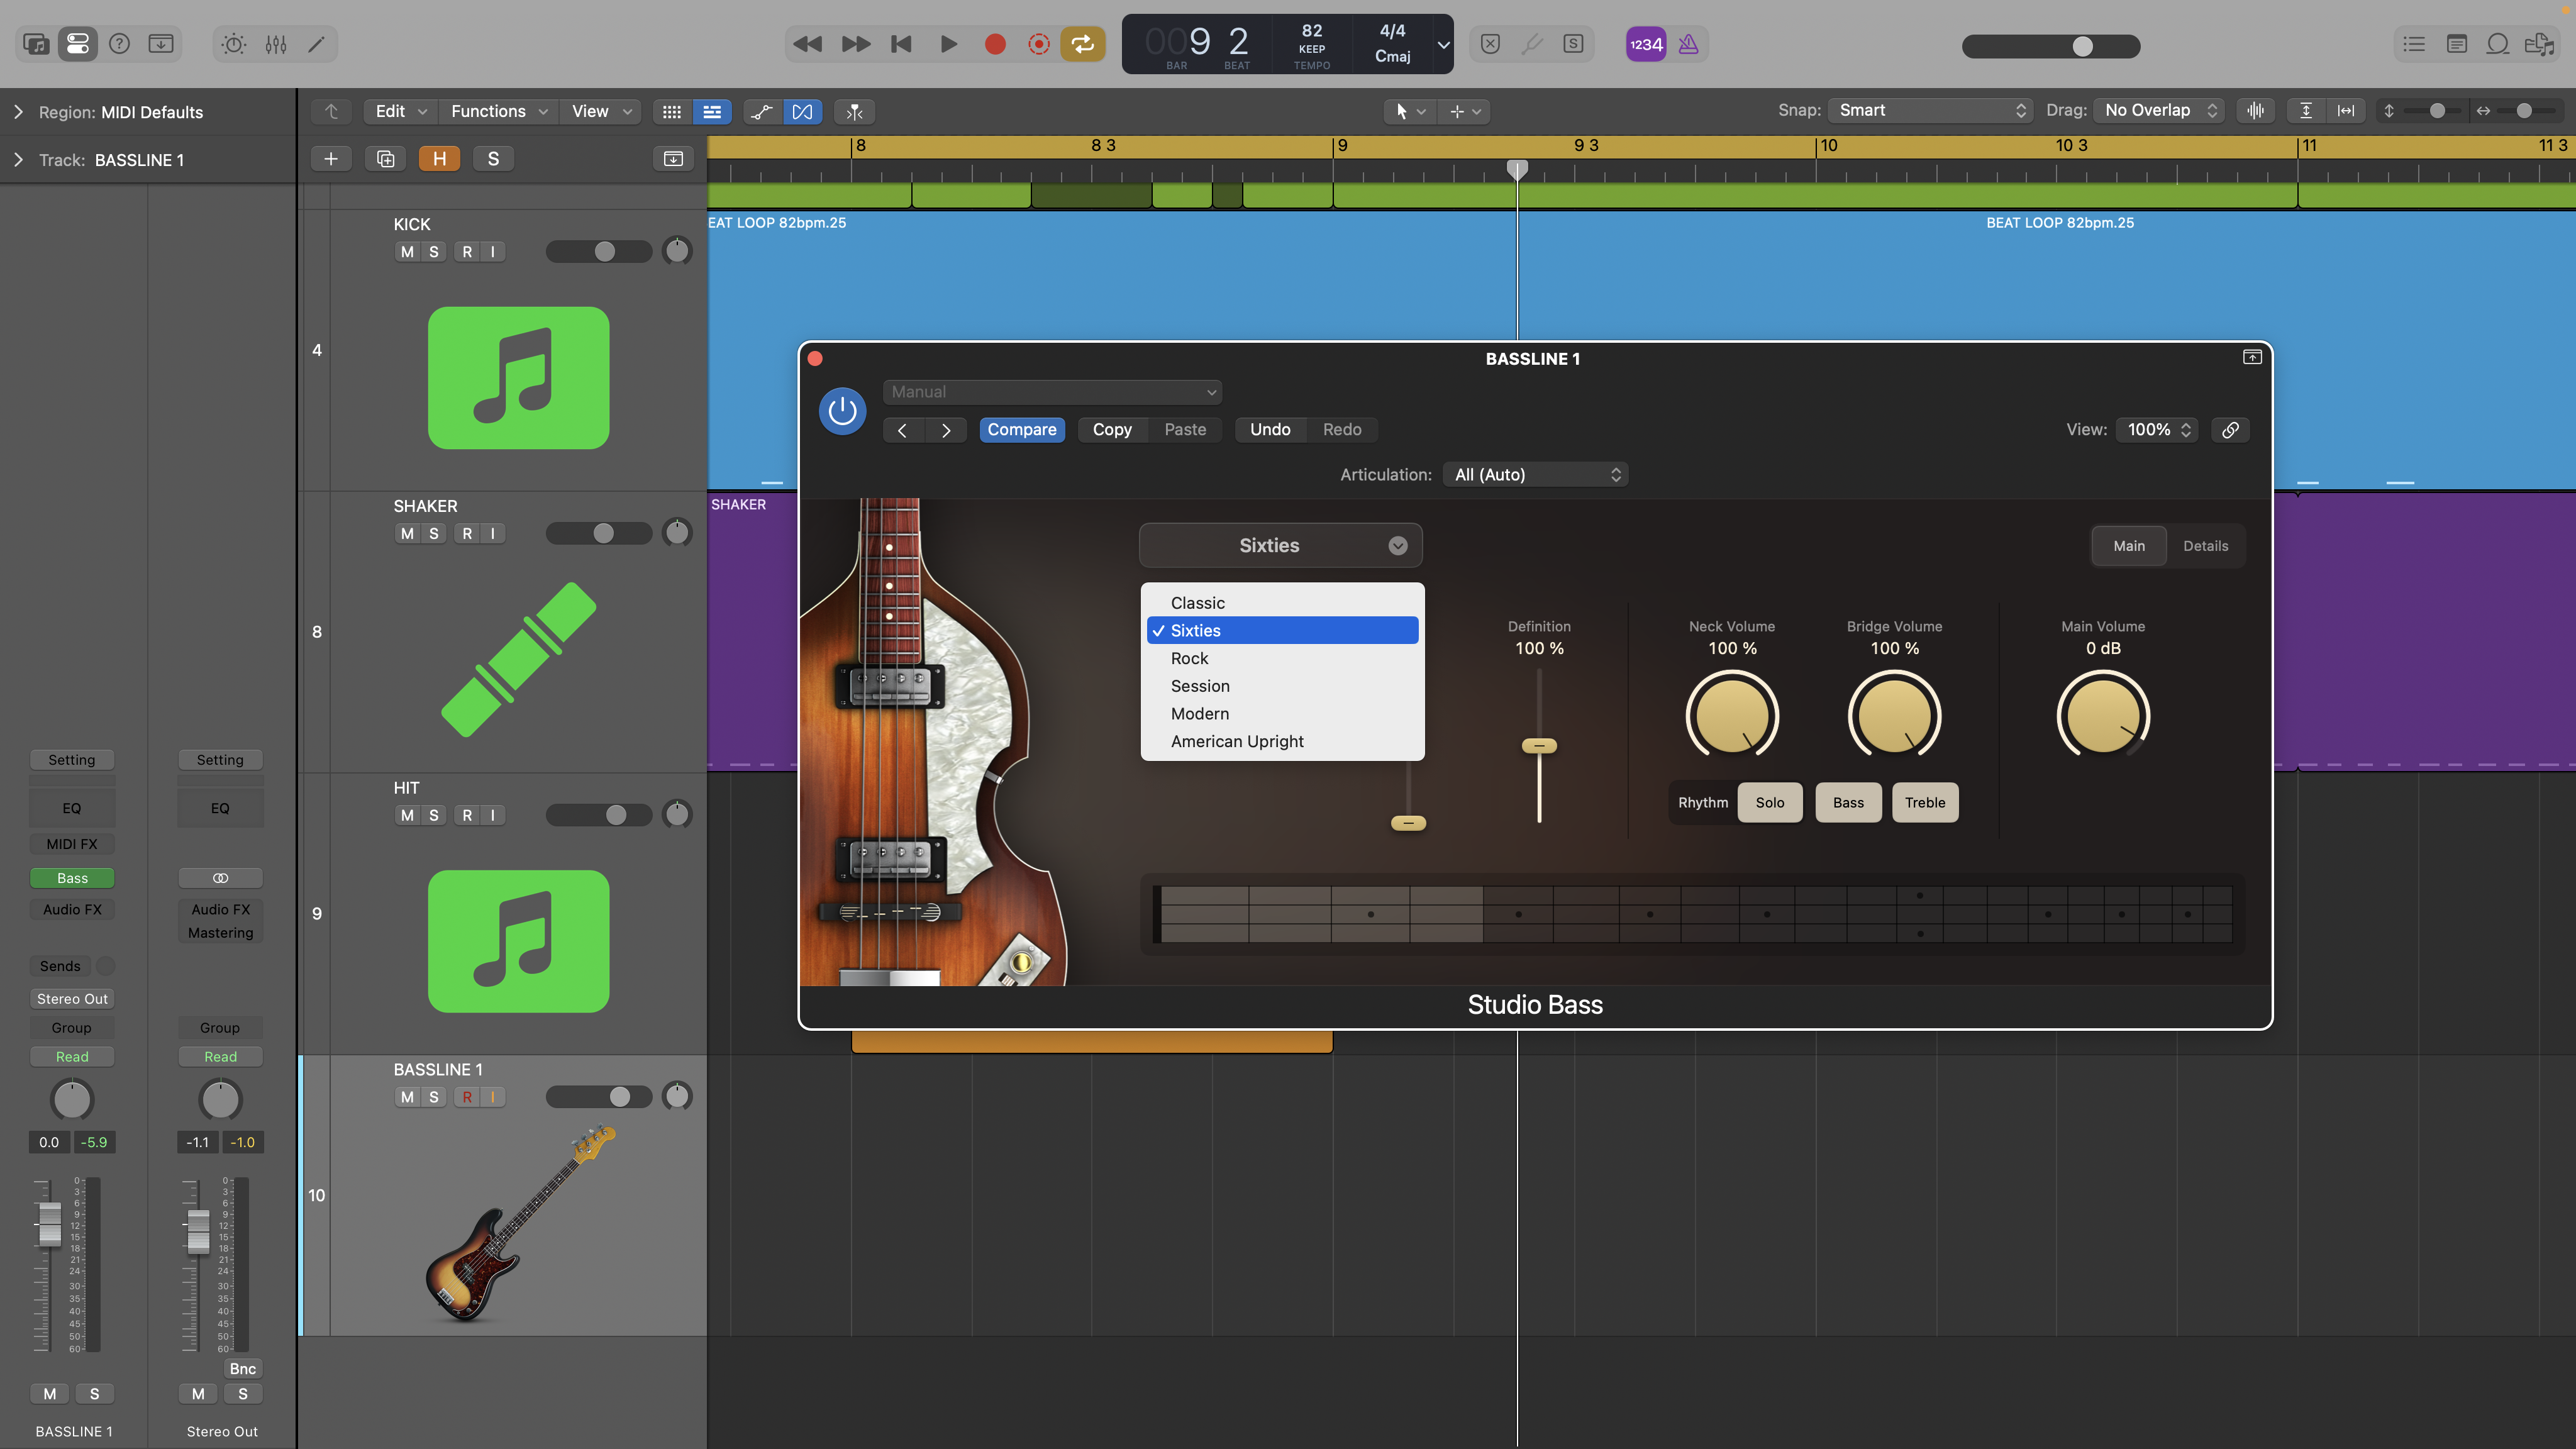
2. Here, we’ve loaded up a suitable sample-based instrument and you can see we have various different basses and also playing styles to choose from. As mentioned we’ve opted for the finger playing style. Meanwhile the 60s style bass provides darker sonics and a solid sustained sound.
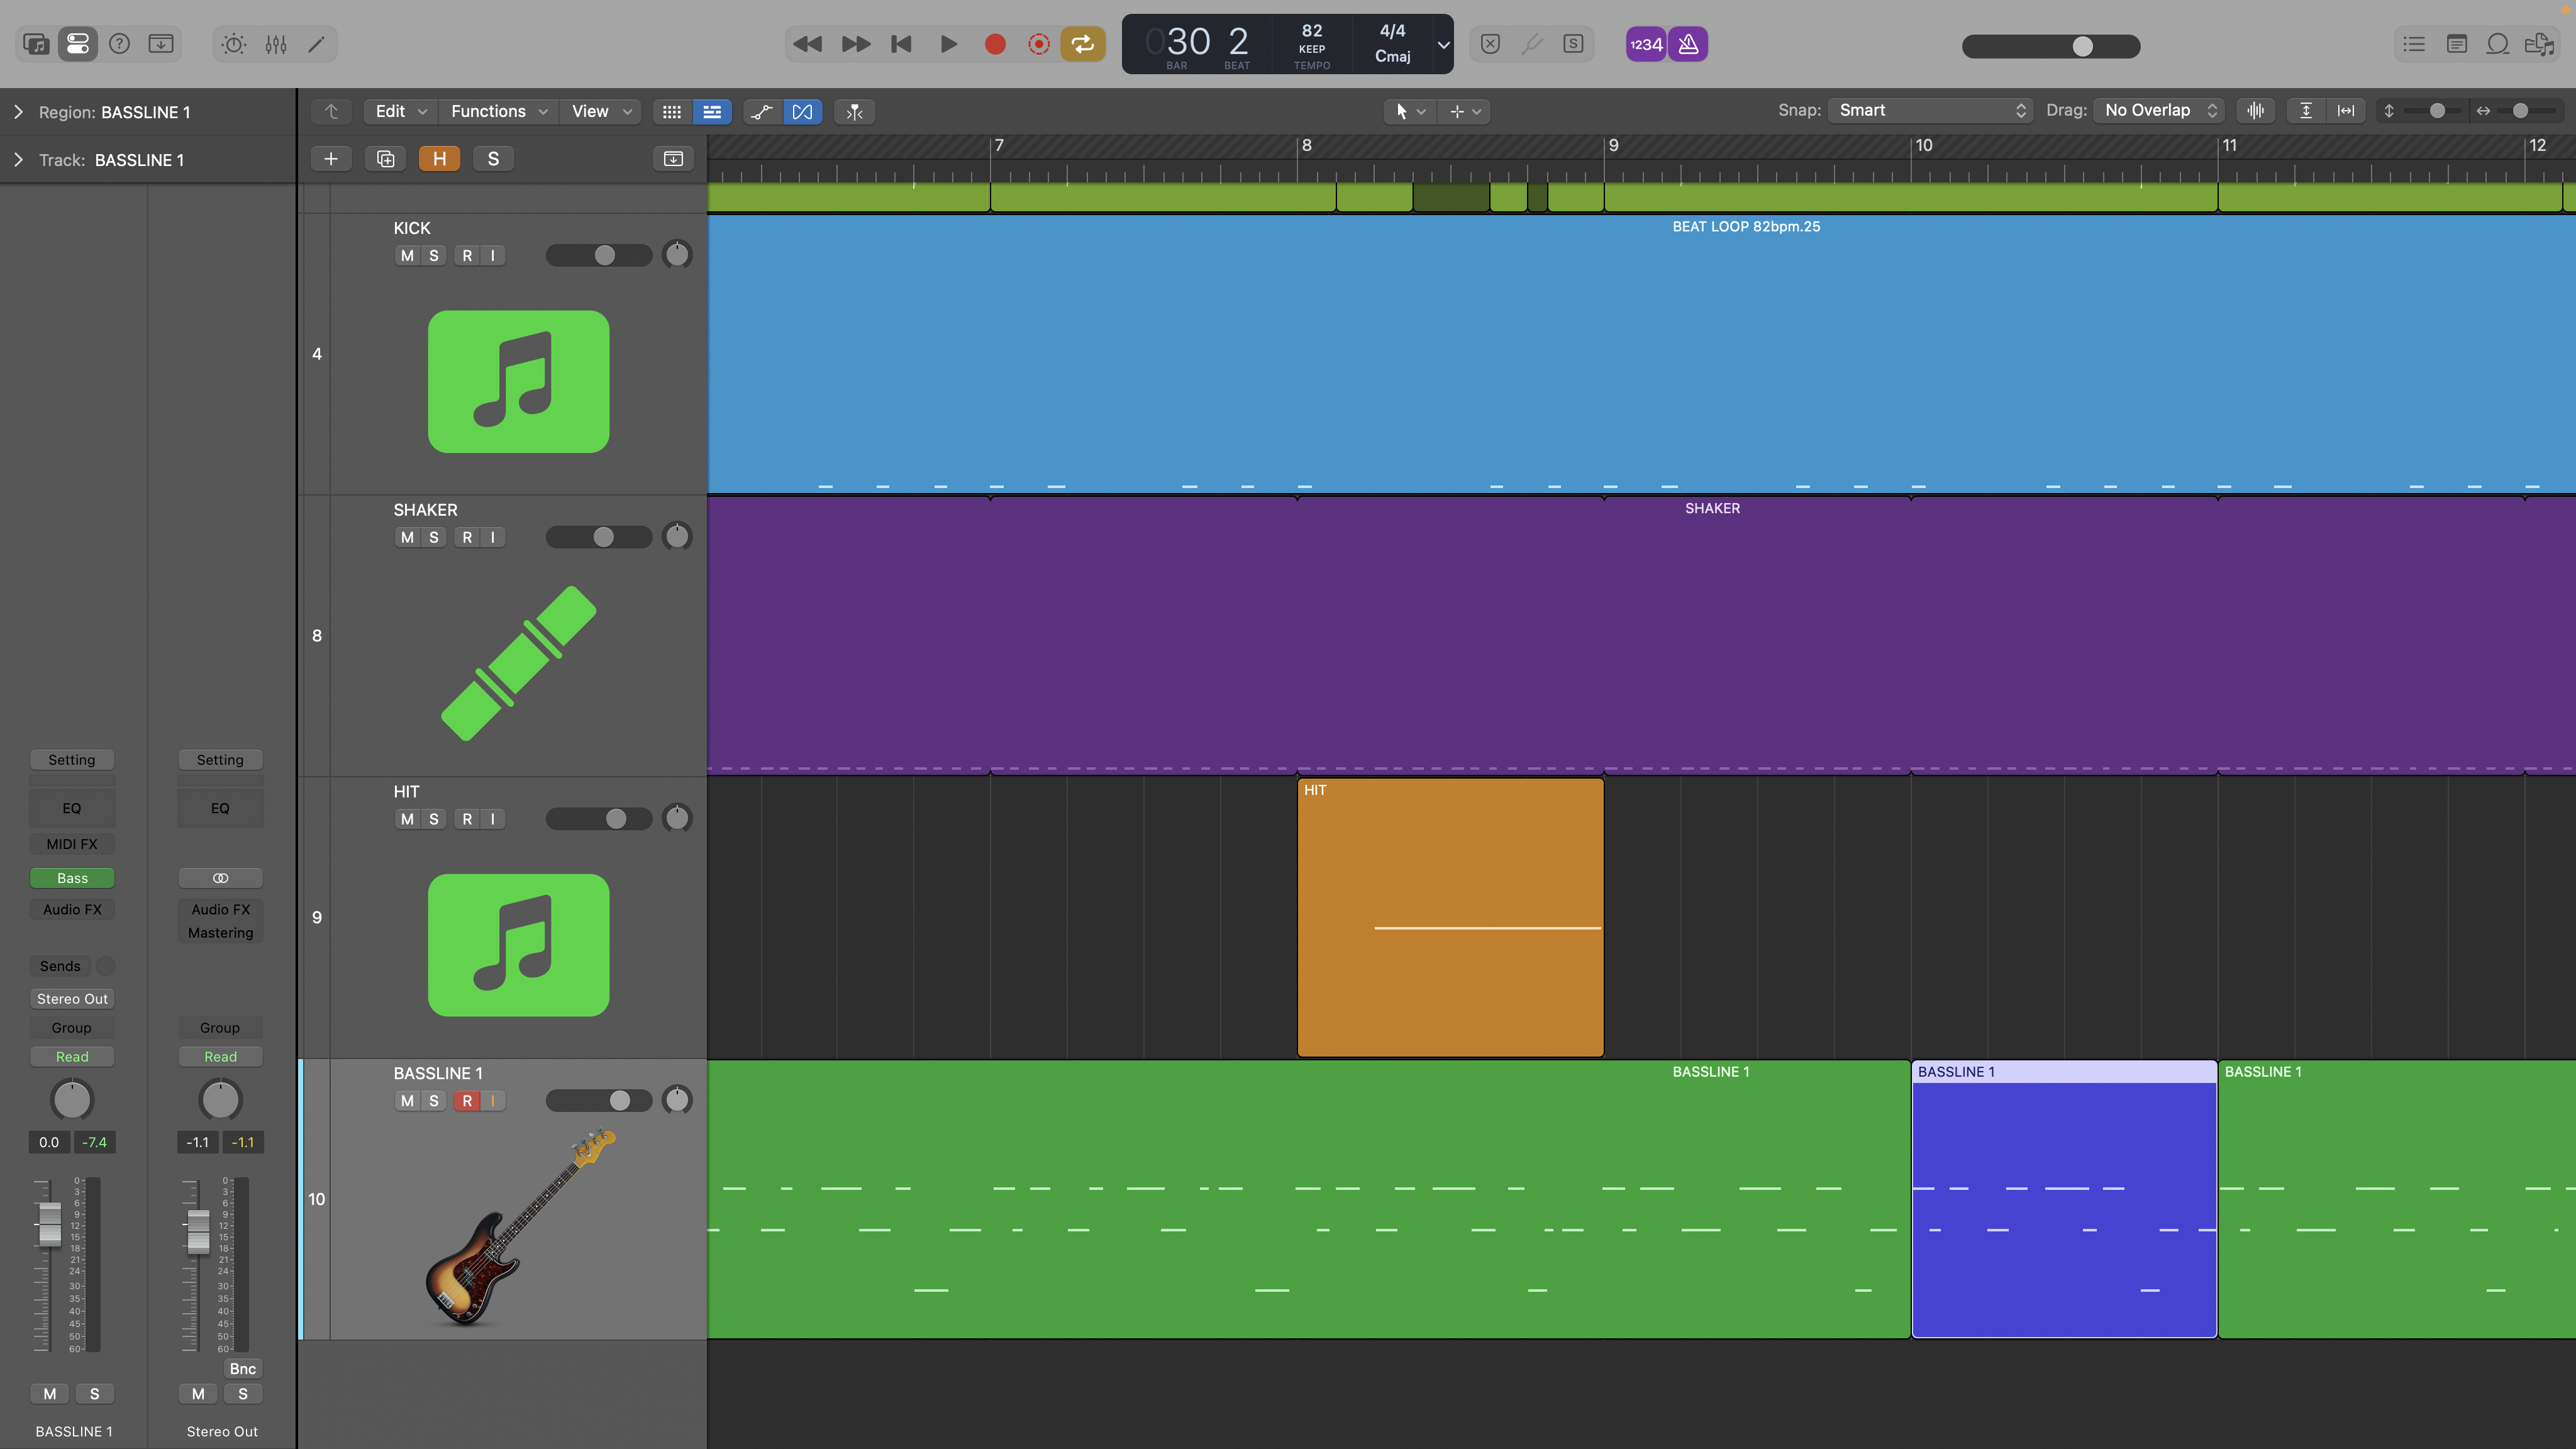
3. For our first bass part let’s go for a hypnotic idea that loops every bar. To achieve a played feel we’ve played along to our beat loop across a number of bars until we get a bar that’s roughly what we want, and we’ve then cut this bar out so we can loop it.
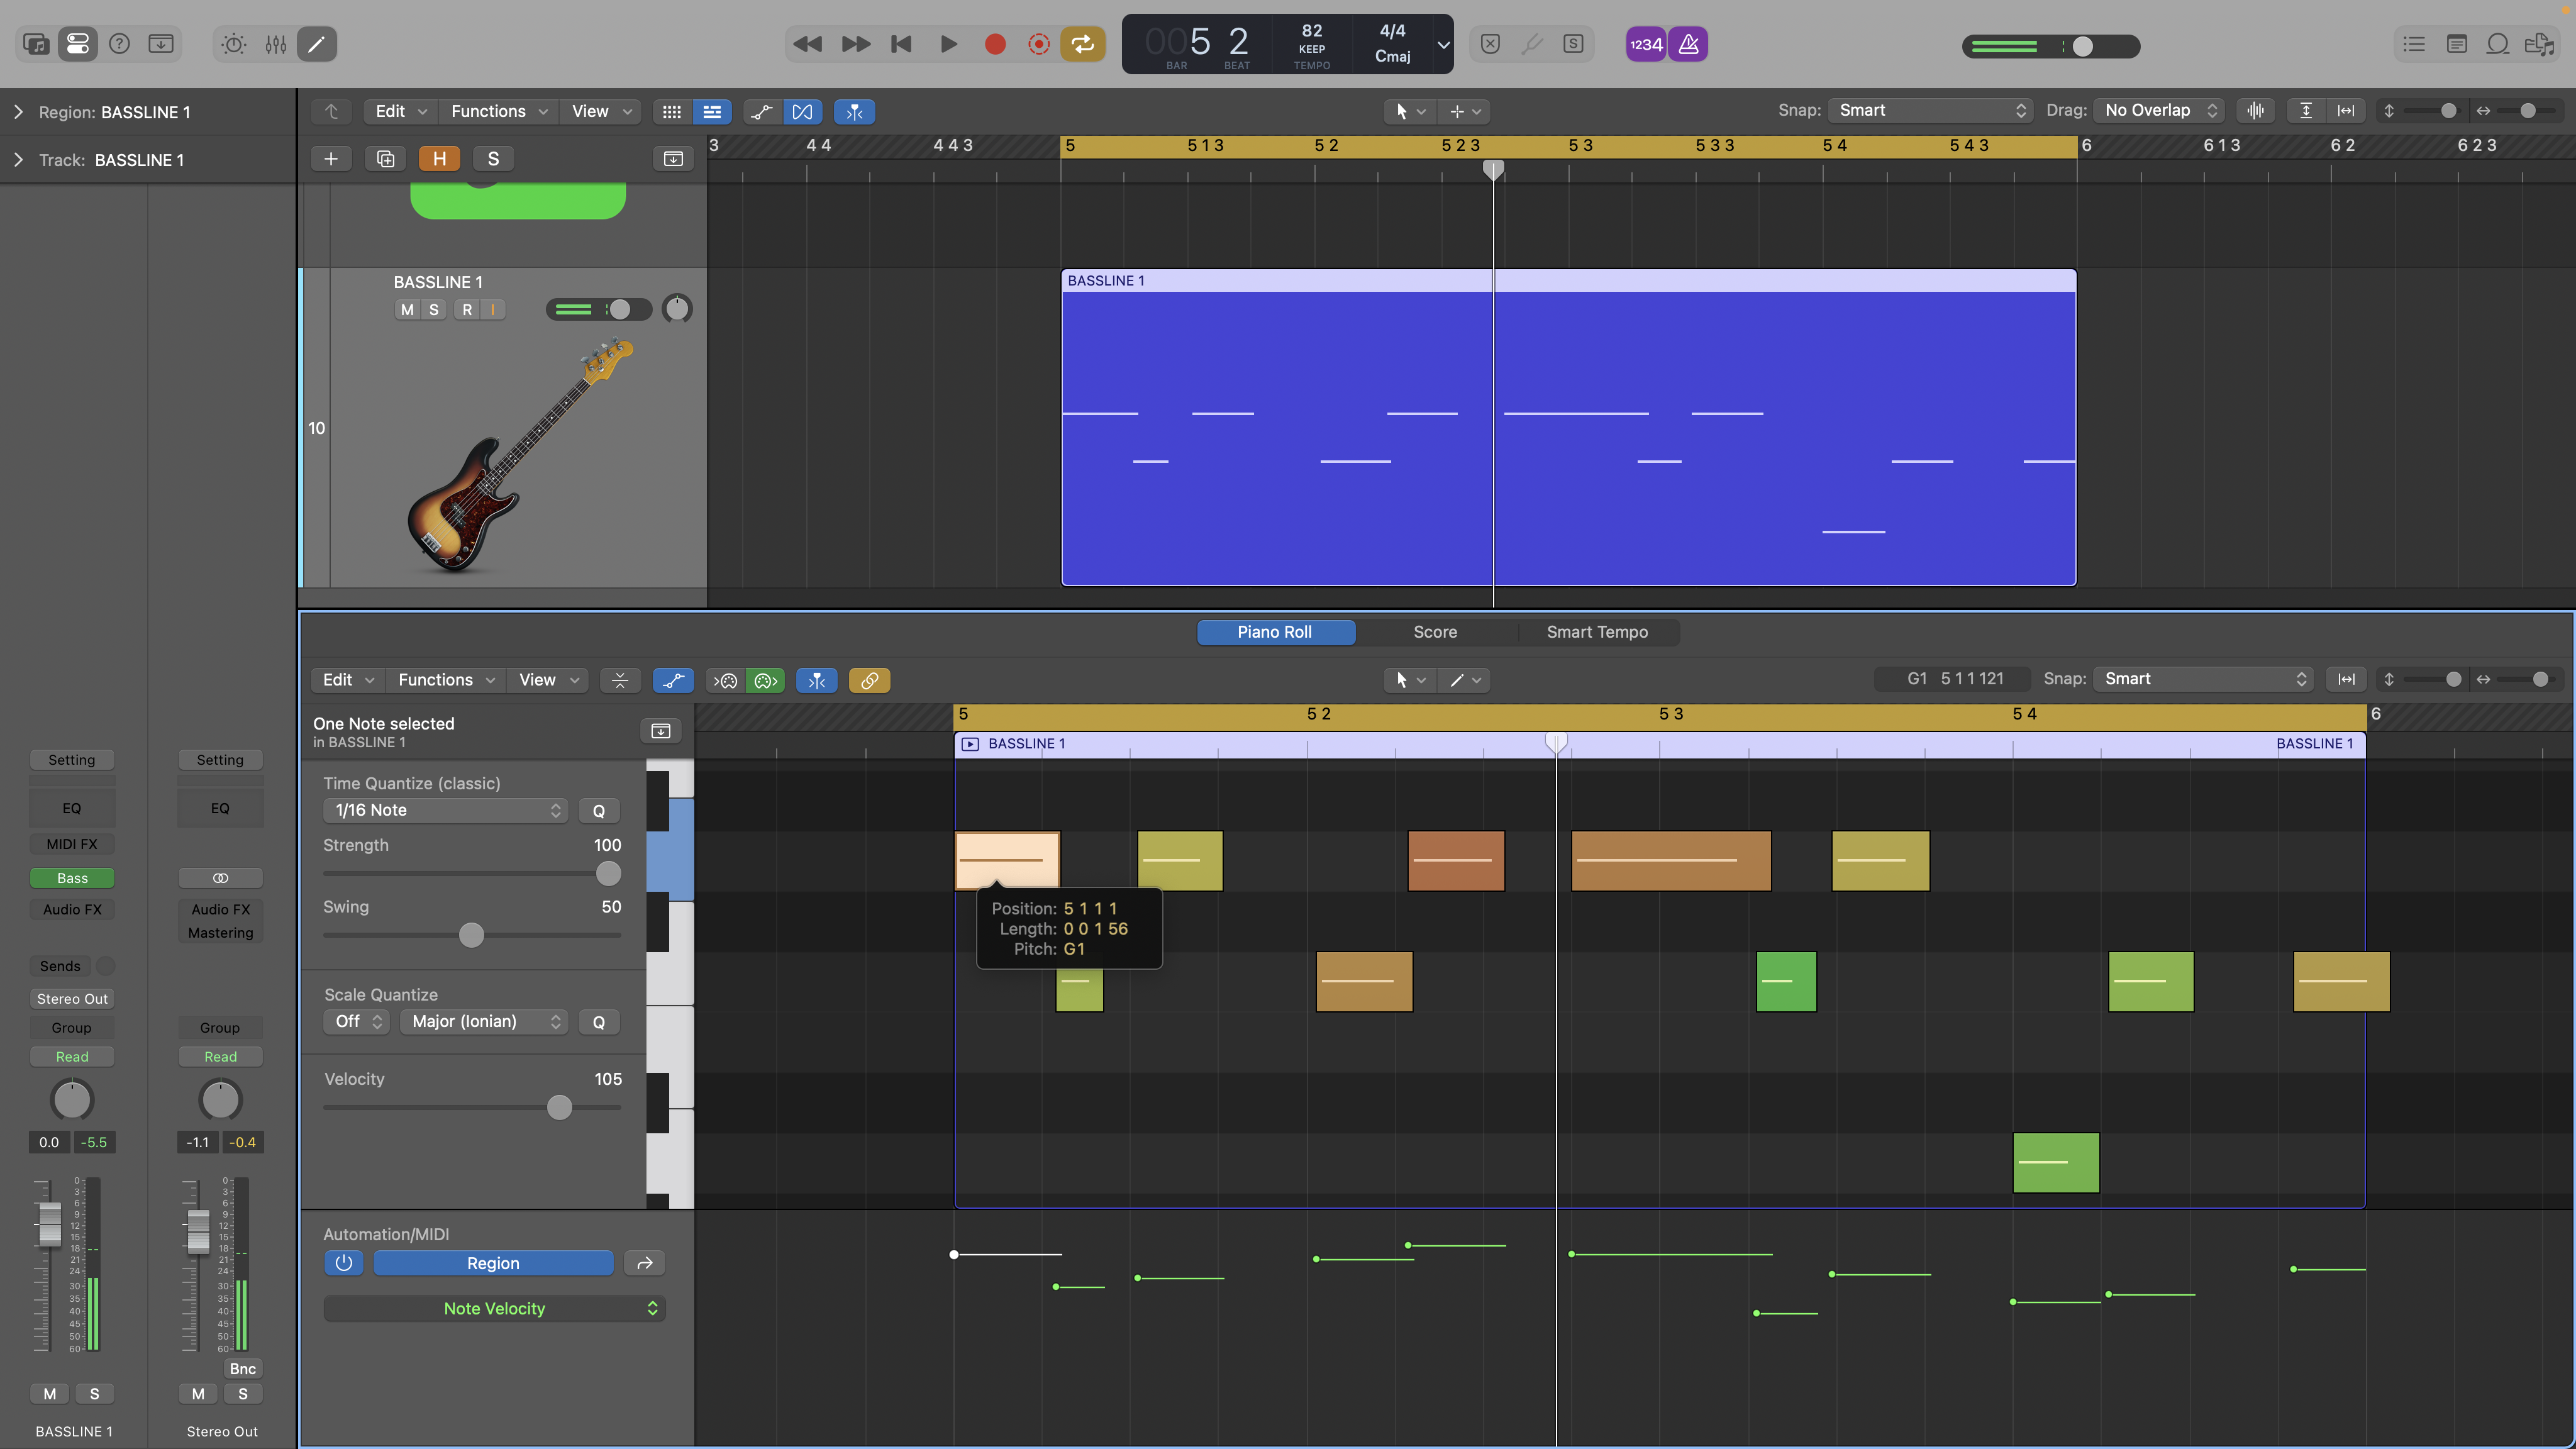
4. Now let’s finesse the part. The quick option would be to quantize all the notes and maybe apply a groove template to match our beats. But to retain a more organic outcome - and given it’s only one bar - we’ll start by quantizing the downbeat and then shift the other notes and adjust velocities manually.
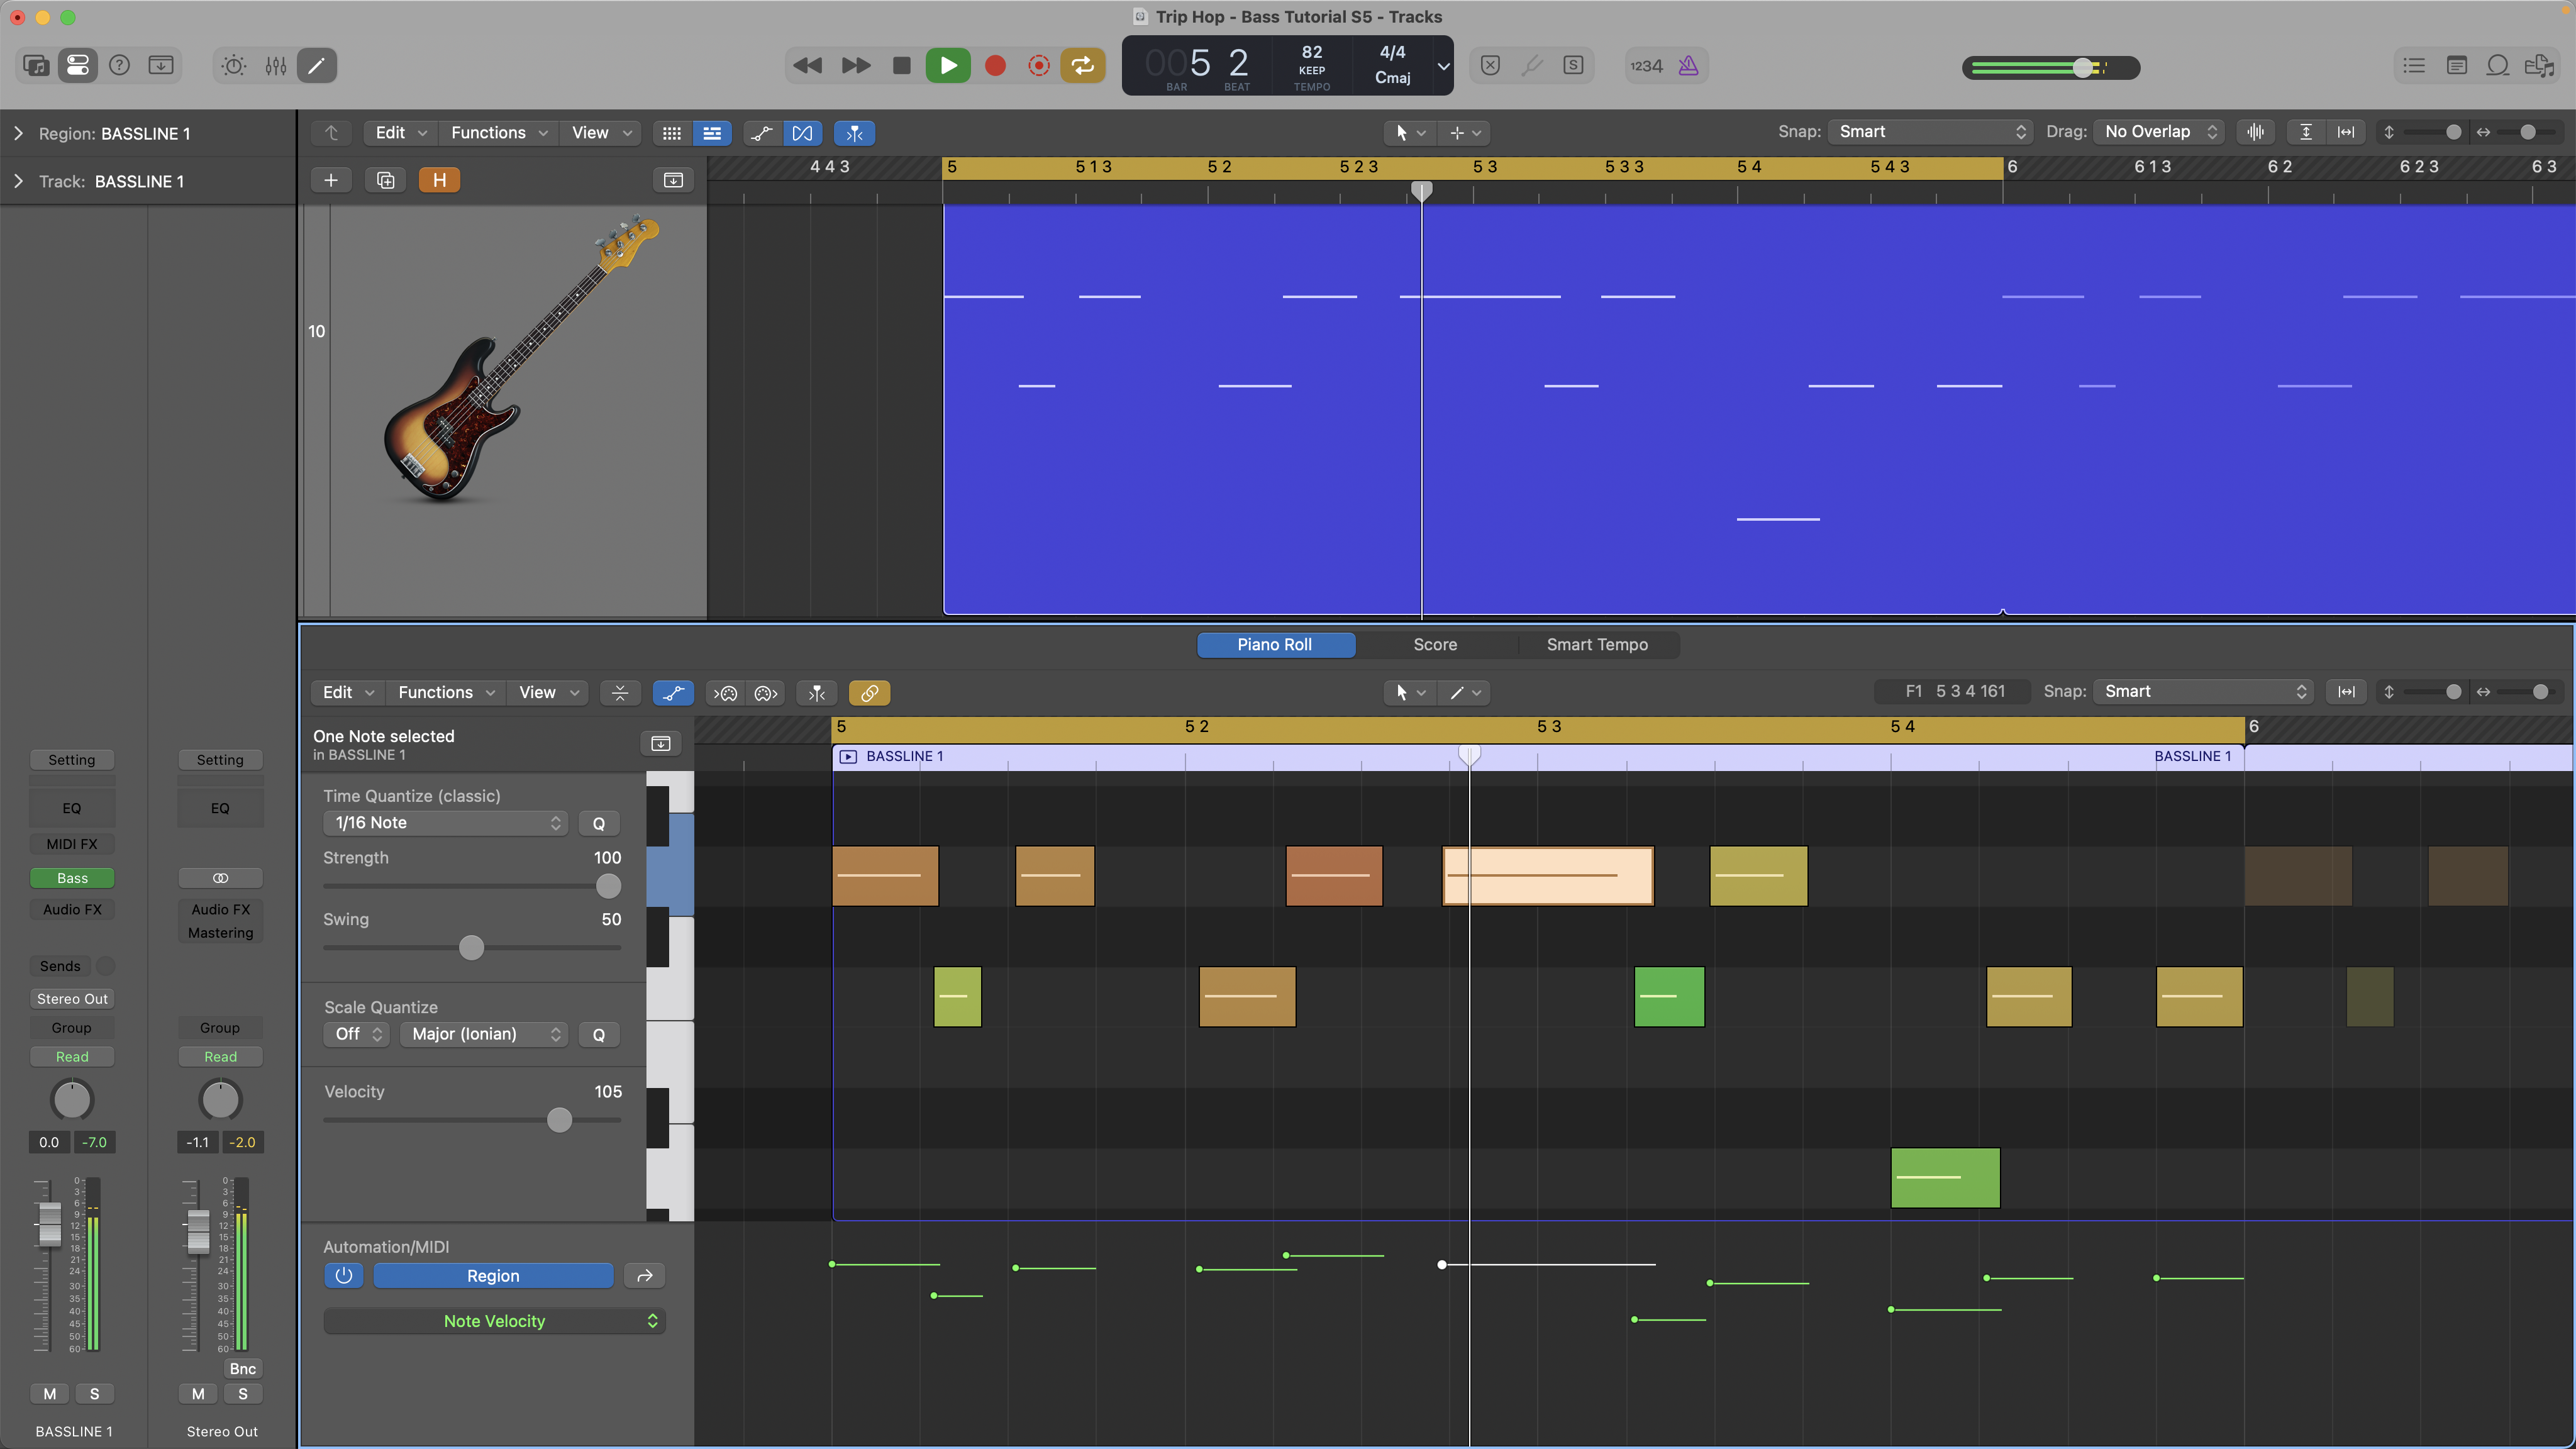
5. Working our way through the bar we’ve focused initially on the note lengths, with plenty of overlaps and a few gaps so that the feel is pretty continuous but still has rhythm. Then, a couple of velocity adjustments to make it reasonably even but not machine like. Finally we’ve exaggerated the push into the second half of the bar.
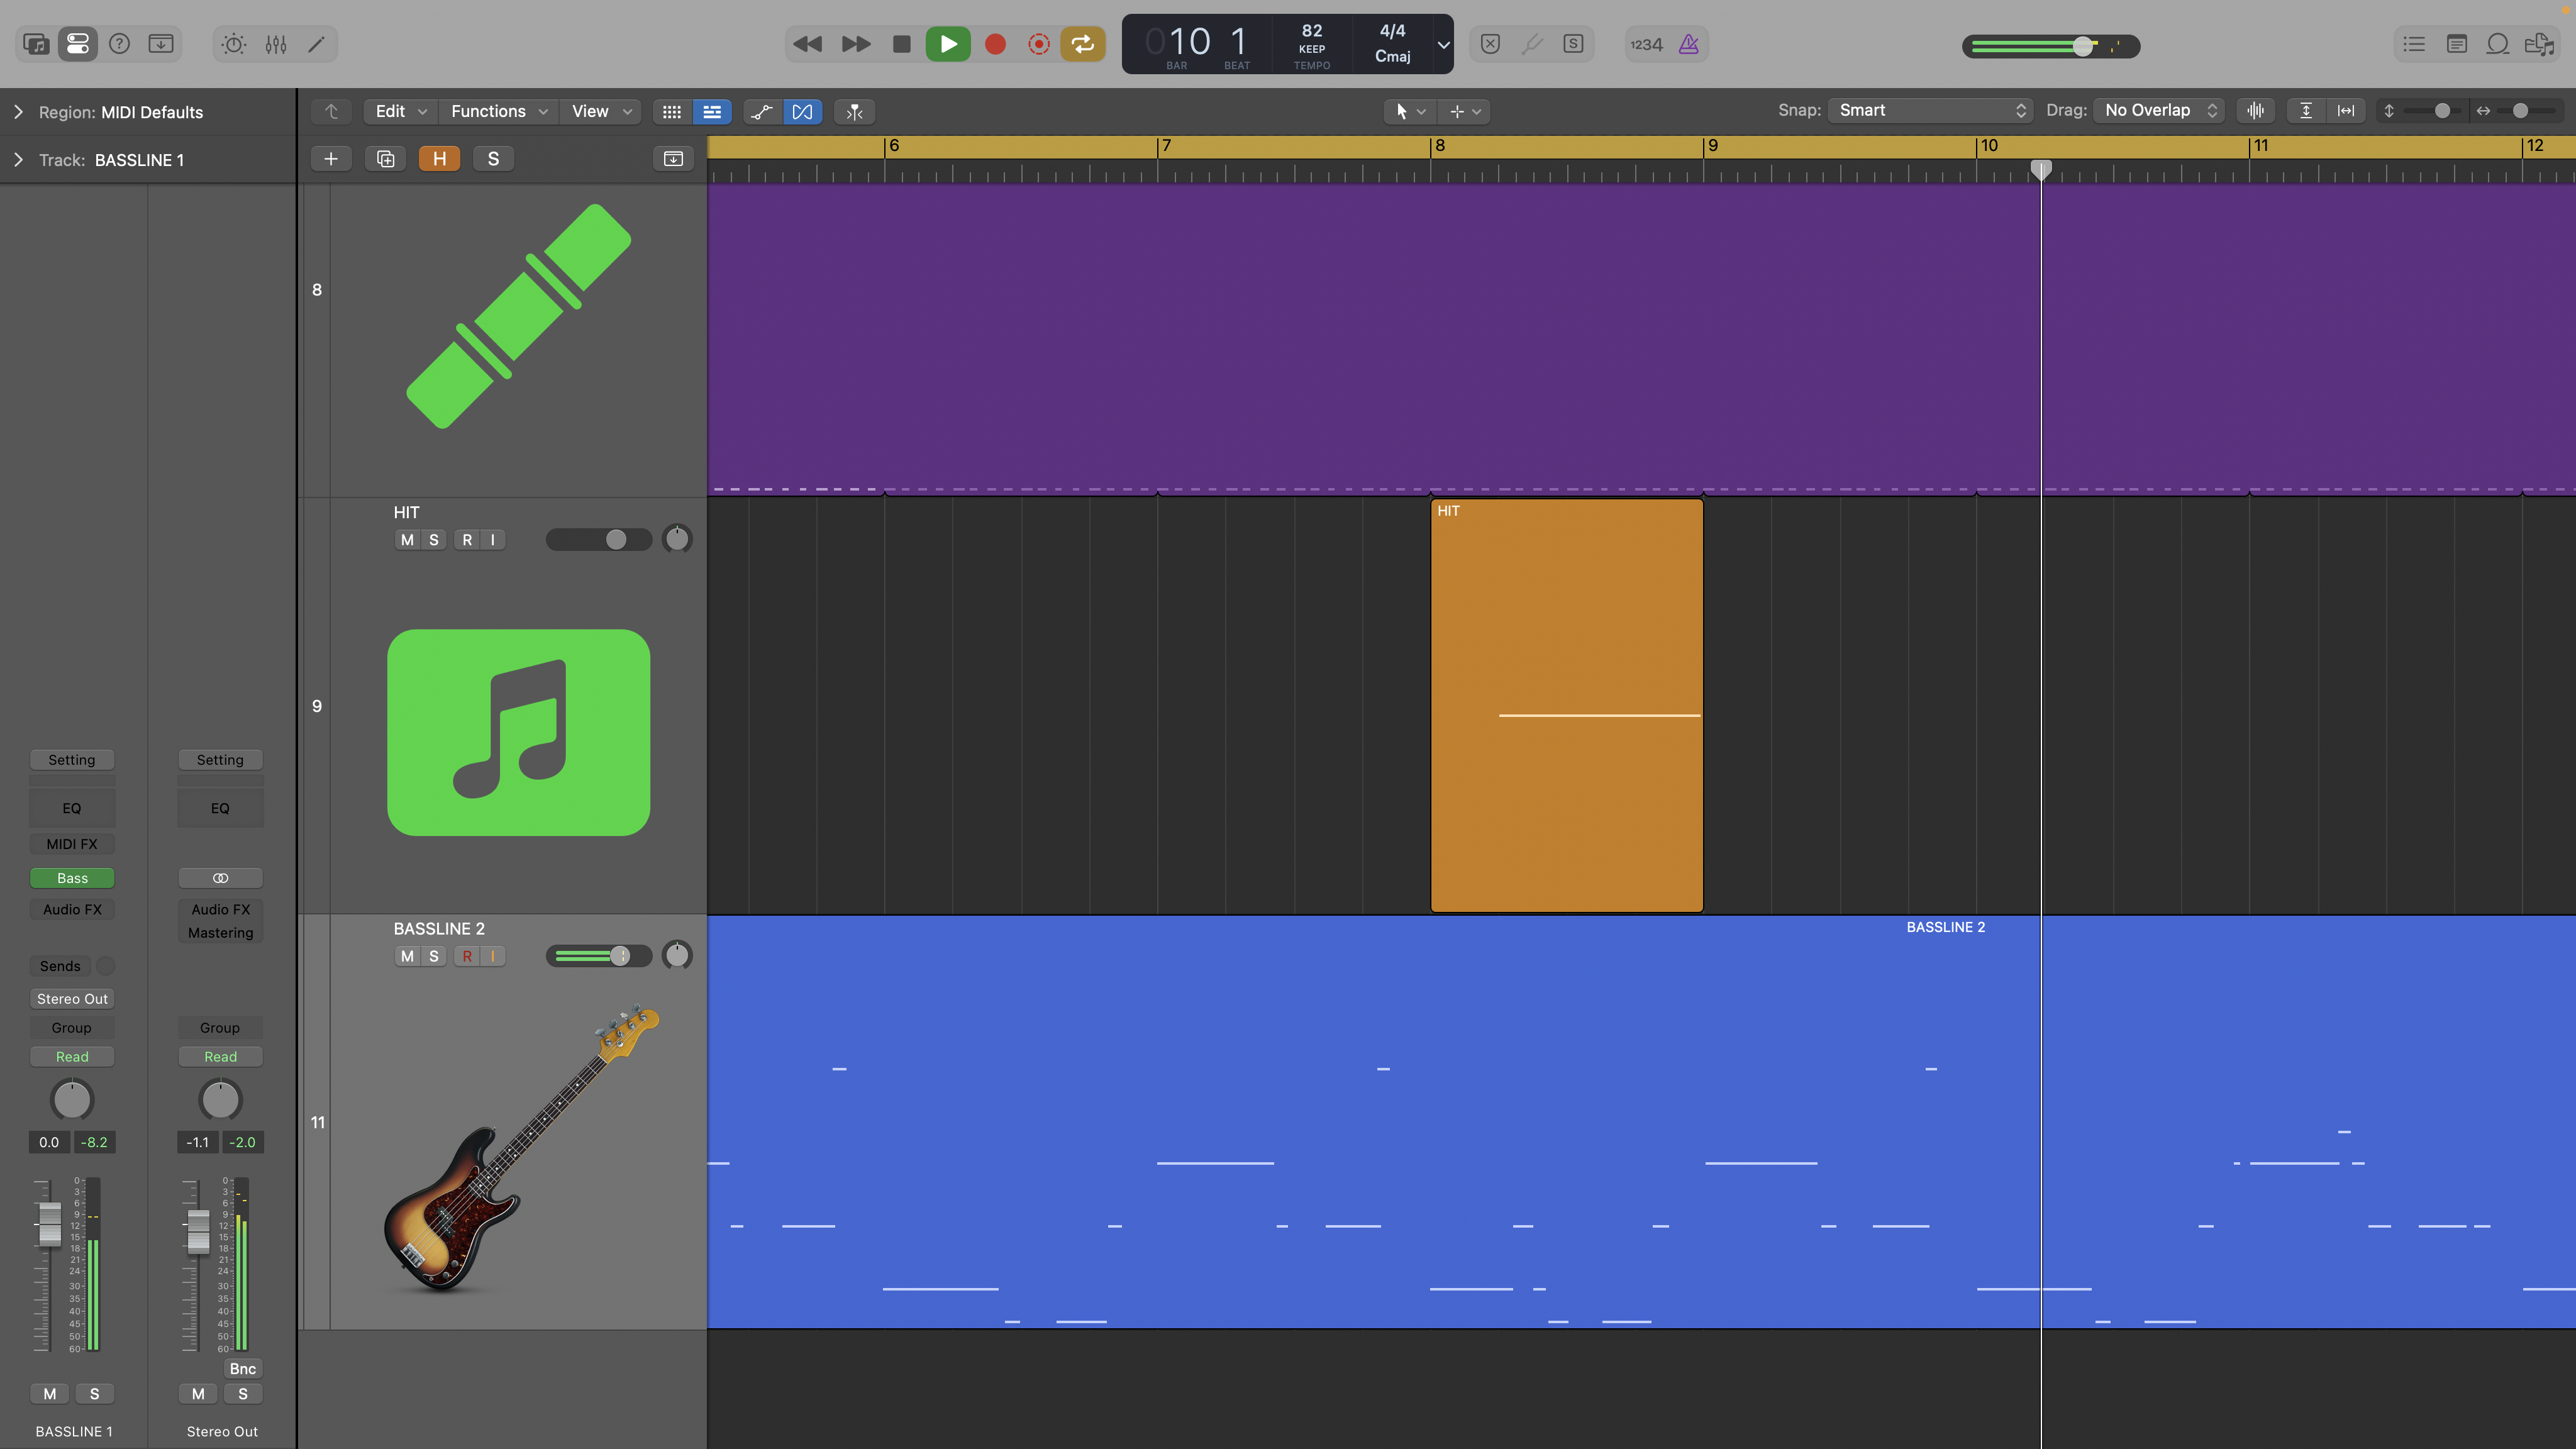
6. For our second bassline we’ll stick with the same sound but go for a more melodic idea. Once again we’ve played a few ideas over an 8-bar loop and from this we’ll select some bars to work on. This time the part is a 2 bar descending pattern, and the aim is to make it sound as if it’s been played and sampled
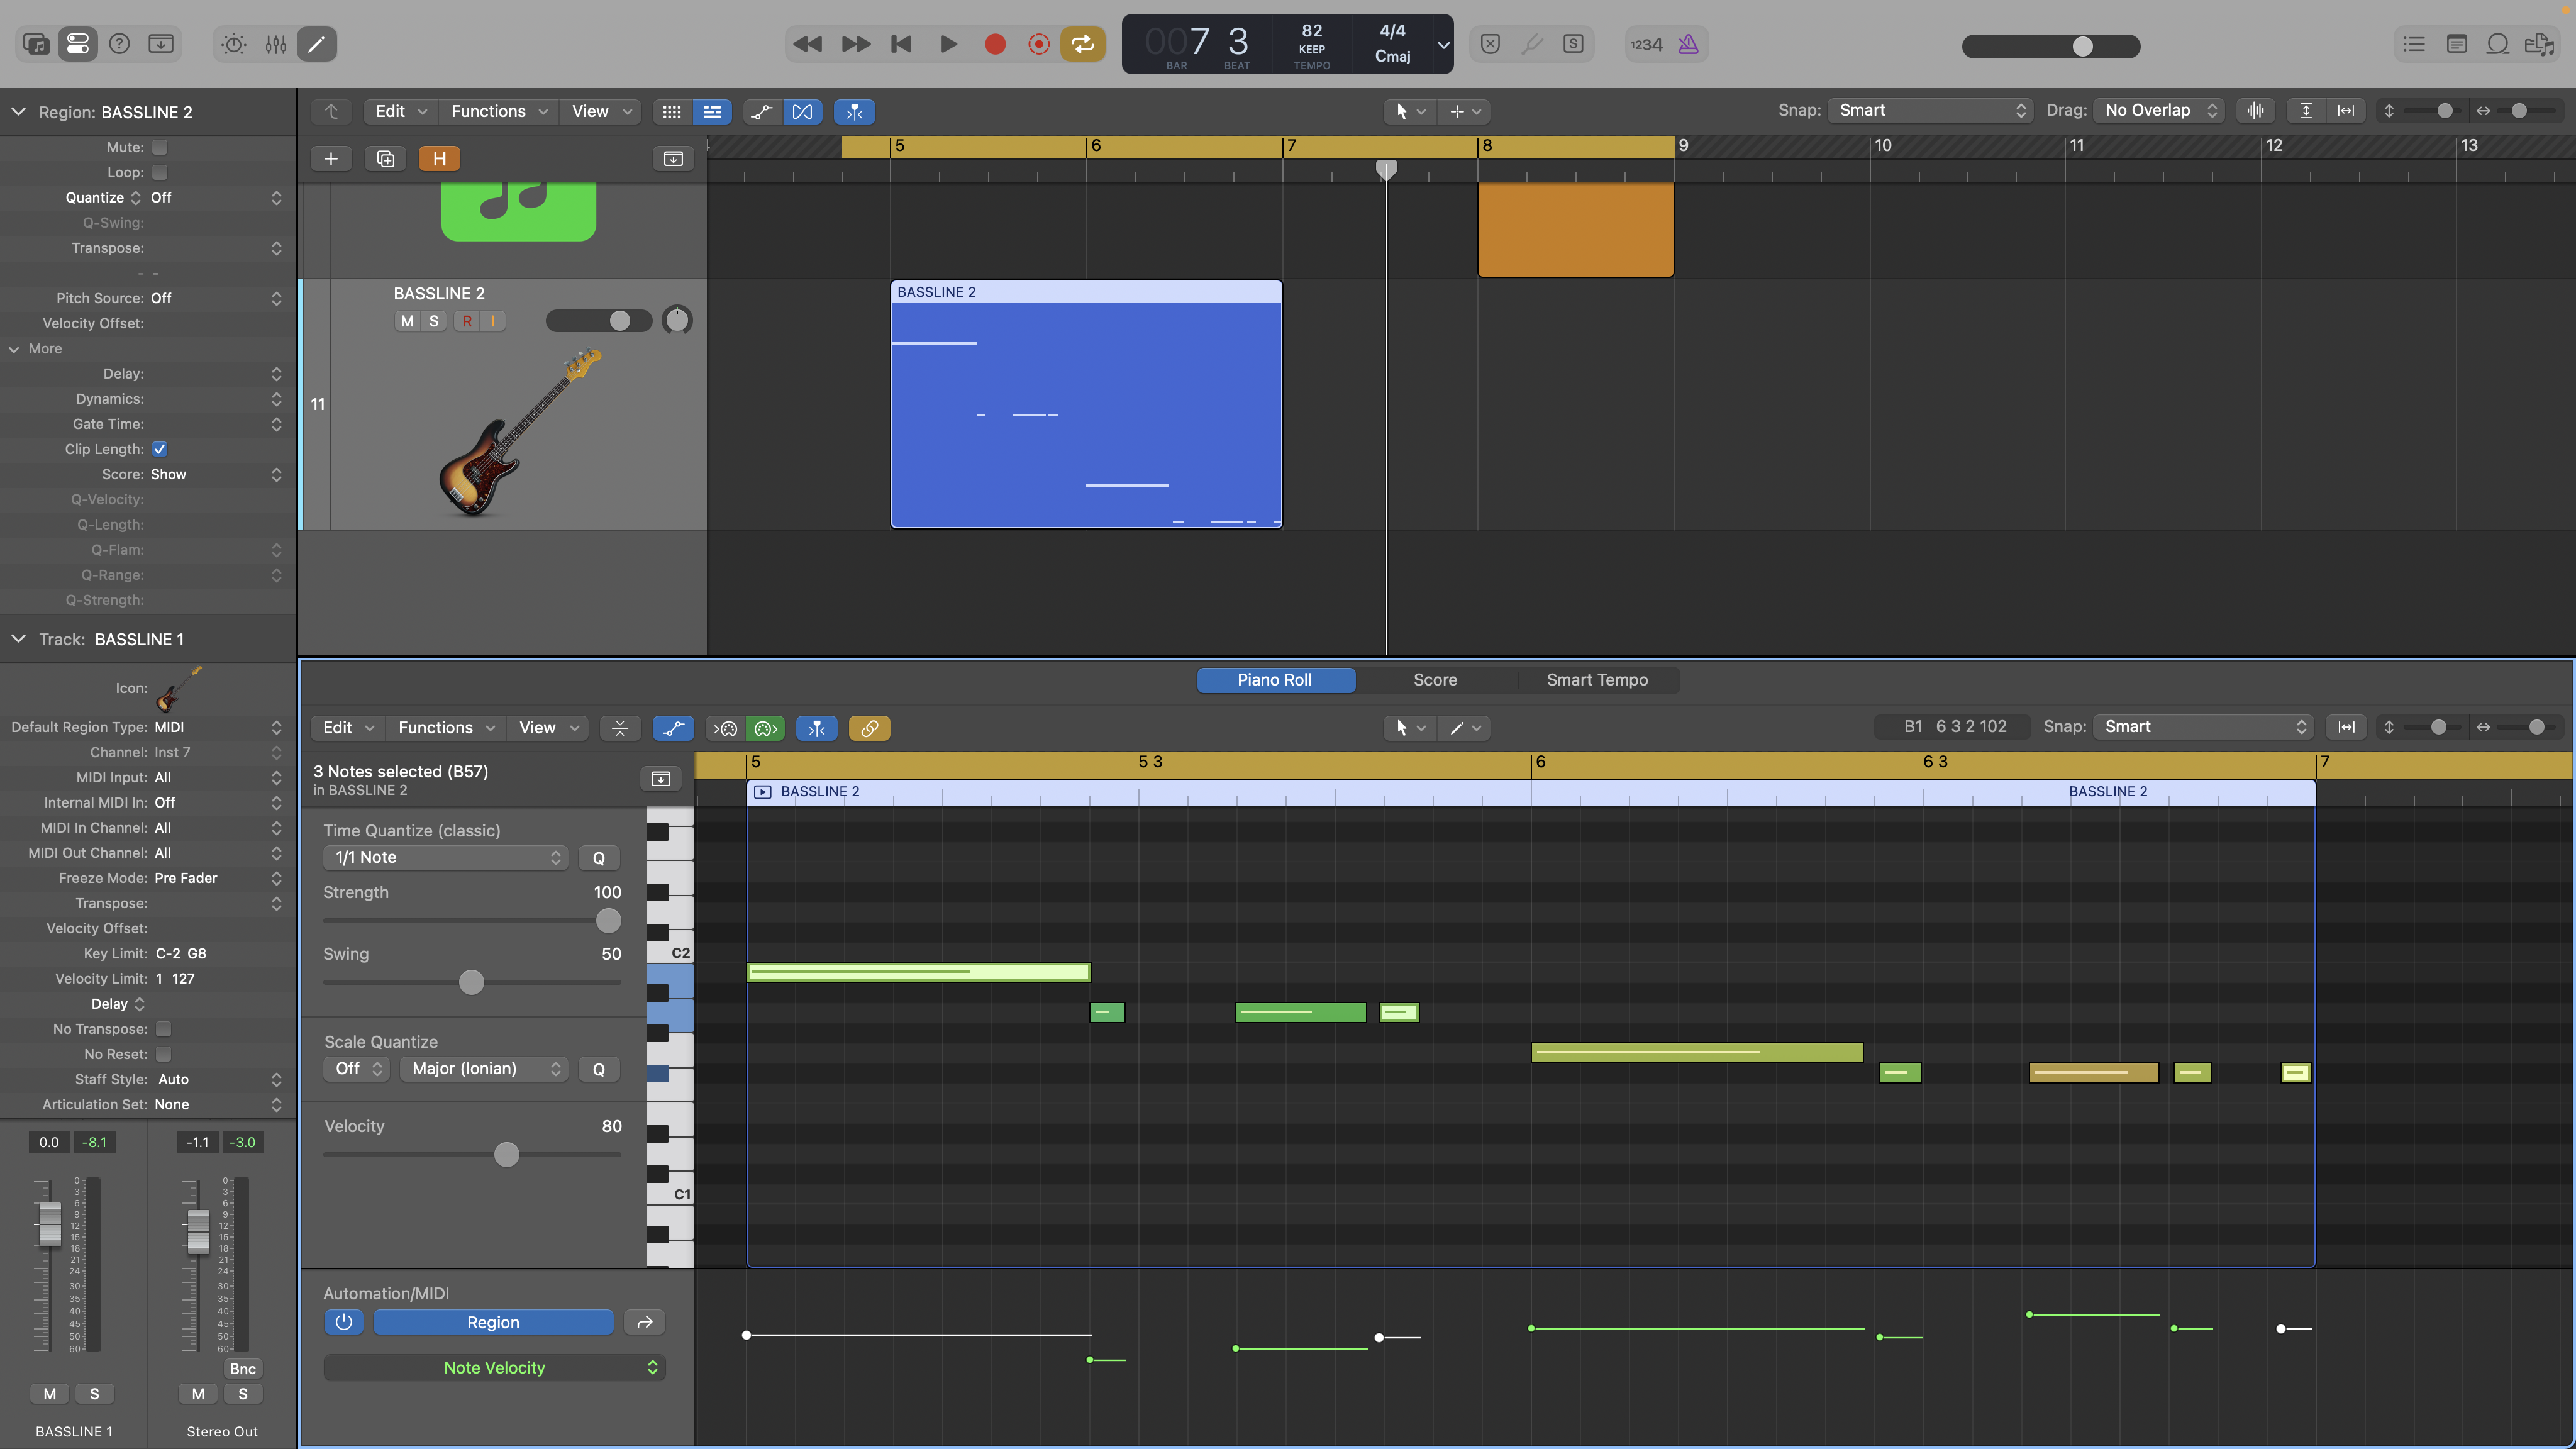
7. The pattern is across 2 bars but for variation we’ll create a 4 bar loop, and each 2 bar section will be slightly different. Let’s start by looking at the initial 2 bar MIDI part. We’ve quantized just the first downbeat, then added a few more short passing notes to add feel (highlighted).
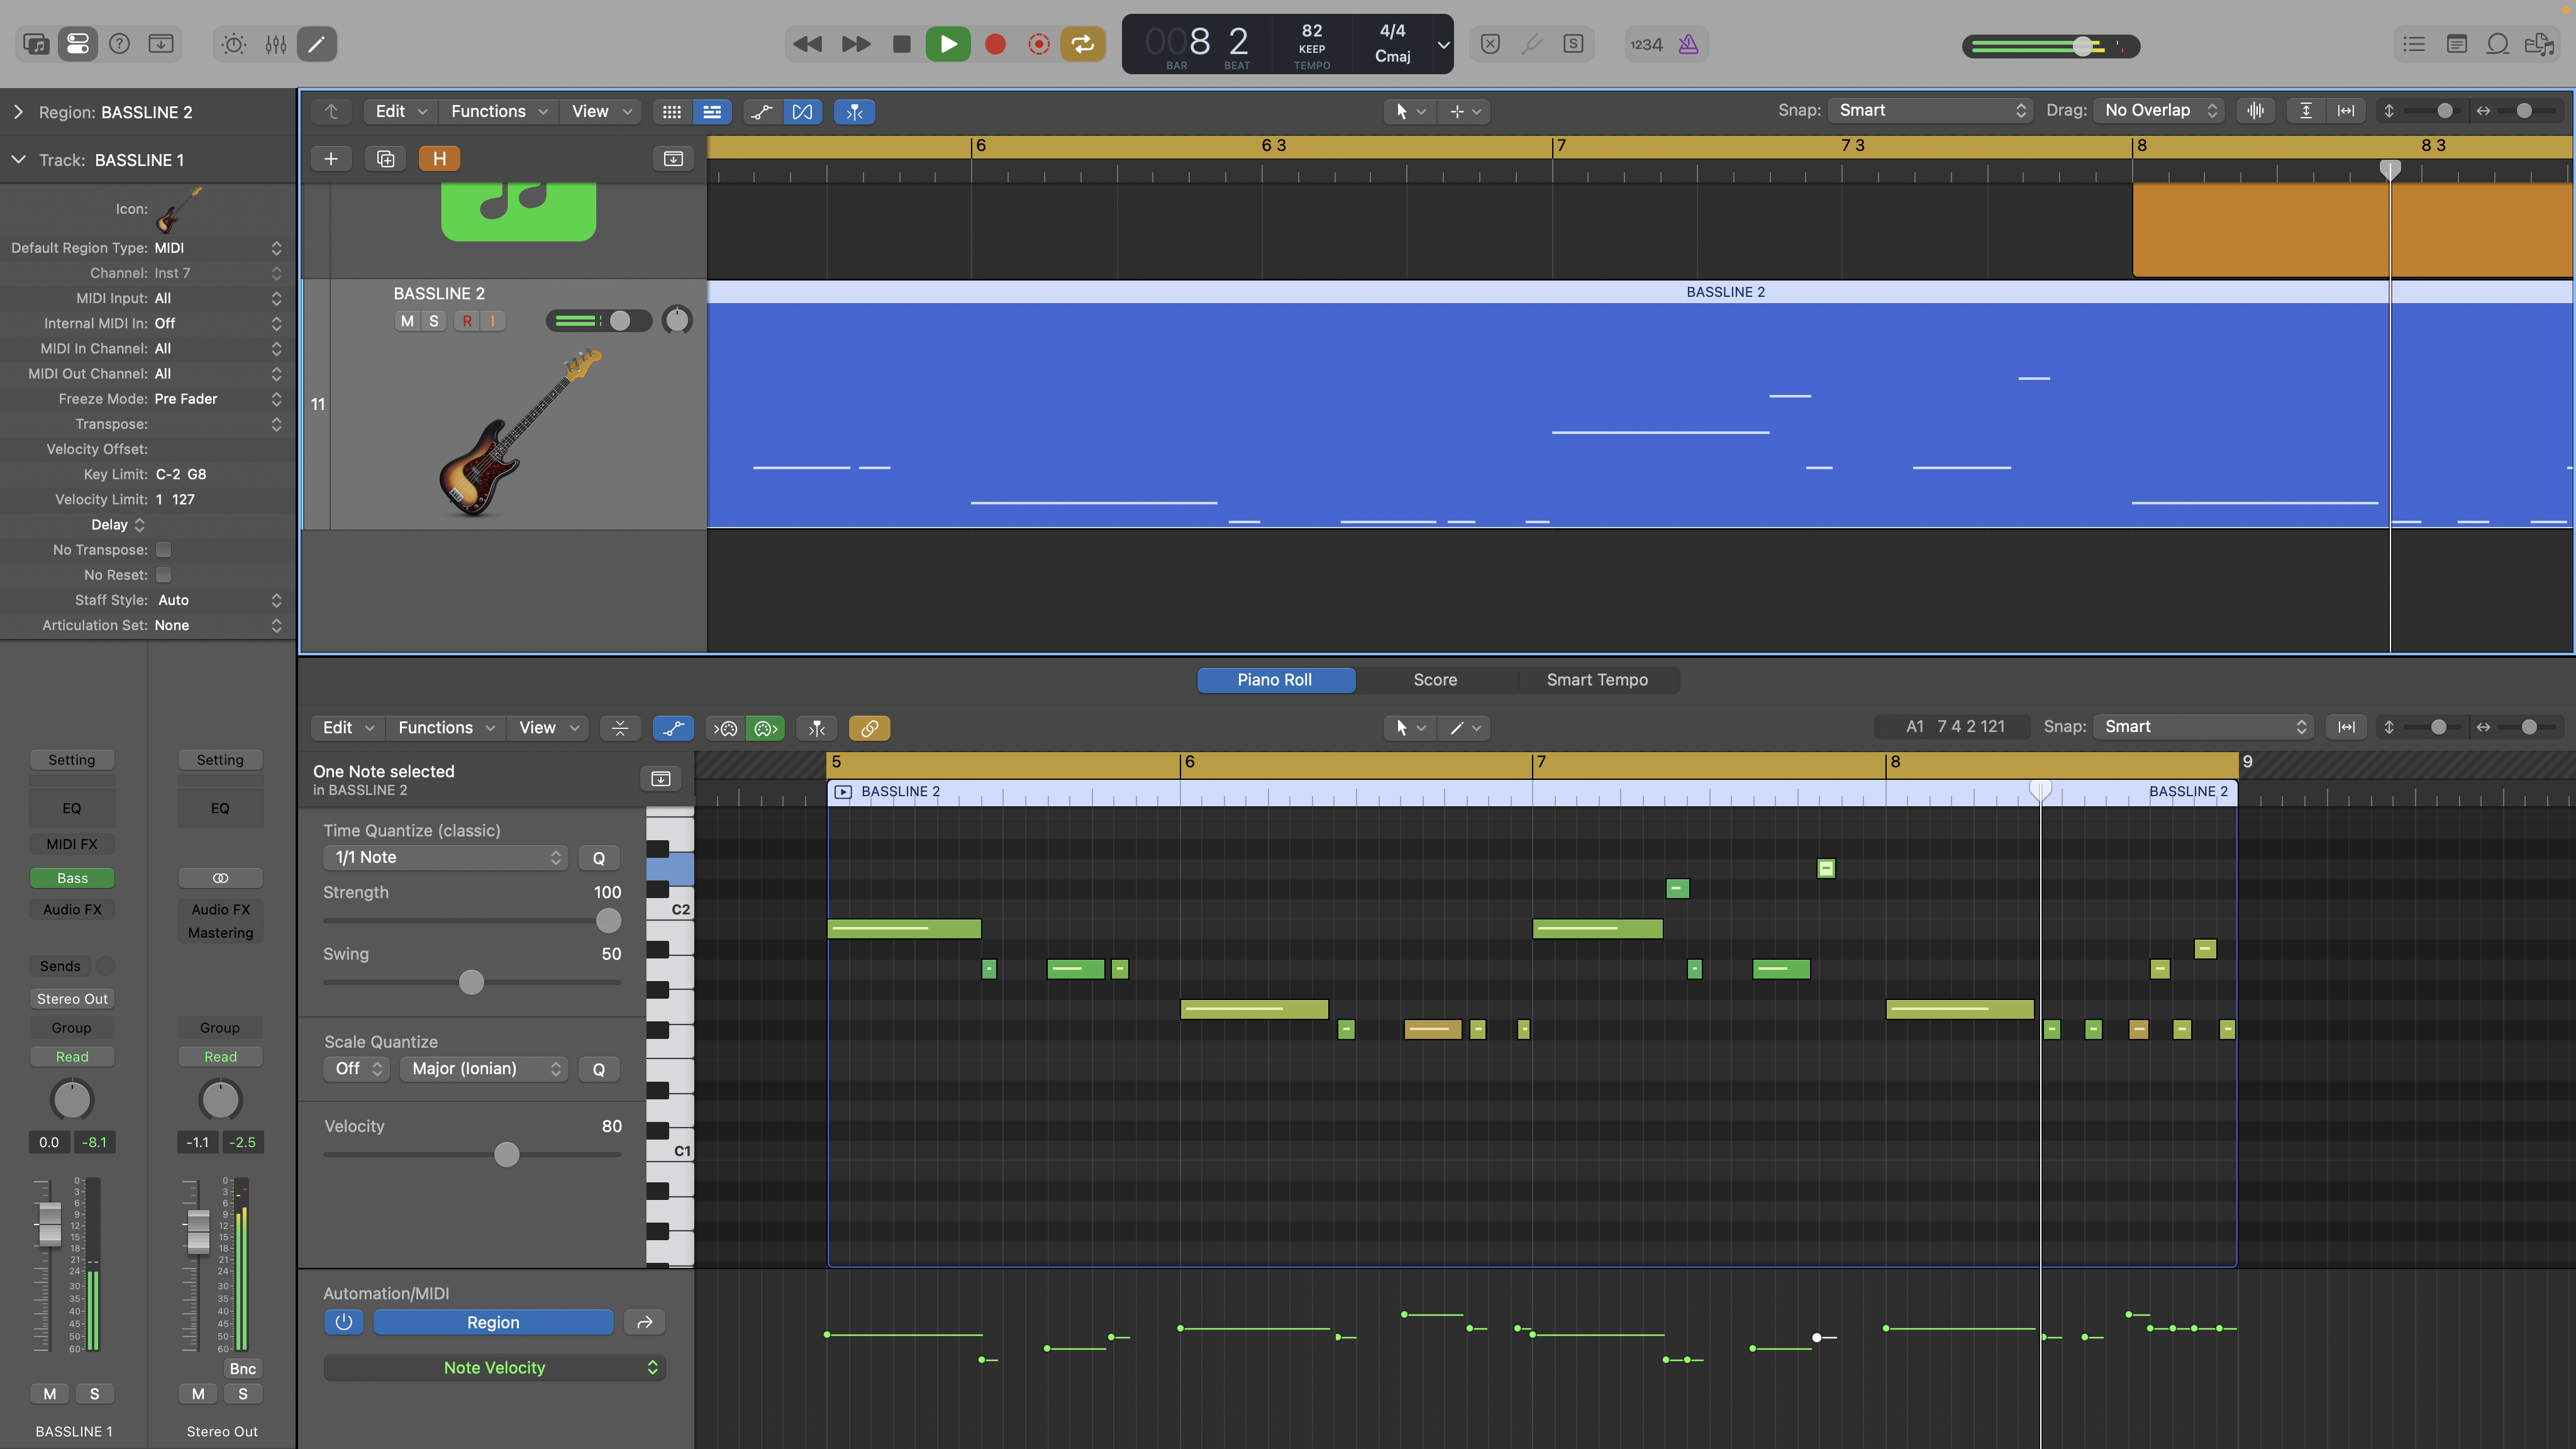
8. Copying this 2 bar section to the second half of the 4 bar loop, let’s now expand it some more. This includes adding some more passing notes and a turnaround section across the last beat. The turnaround plays on 16ths creating a lead back into the first bar of the 4 bar cycle.

9. One final technique to make the part sound more realistic is articulations. For electric bass these provide more specific played sounds such as slides, mutes and so on. How you select them varies across instruments, and could be via key switching or in bespoke ways, like our Logic Pro Studio Bass.

10. Here, we’ve used a few articulations. Specifically, a couple of shorter notes are muted ‘dead’ notes, which contributes to the rhythmic aspect of the part. There’s also a short slide up halfway through bar 3 and a slide down at the end of bar 4. All told these changes produce a more fluid part ready for further mix processing.


