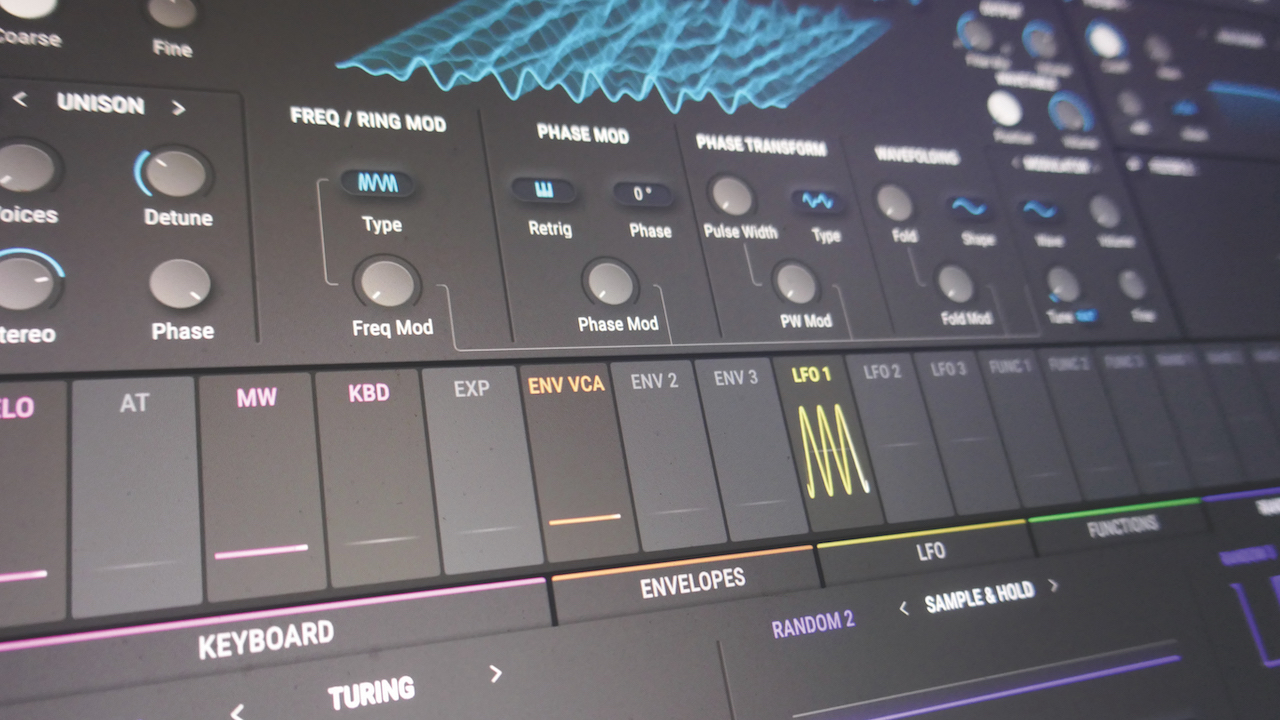
One of the things that may have held back your sound design aspirations is just how complex soft synths can look.
Sometimes this is done deliberately – developers want their creations to look feature-packed, so pack in more dials and sliders on that UI than are strictly necessary. And sometimes this is done because devs are basing the software on some classic hardware; they want to replicate that hardware down to the nearest button.
However, when it comes down to it, most synths have pretty much identical – OK, very similar – sections and controls, and once you understand those sections, you’ll be amazed at just how easy it is to create new, complex sounds, just by tweaking a very few options.
So if you want to get designing sounds with any synth, you’ll need to understand the basics of how the audio signal in a typical synth works, so let’s take a quick (and we mean quick!) look.
The easy guide to how synths actually work…
It’s all about the signal flow with most synths, and that usually means starting at the left with one or more oscillators that generate the sound, a filter that removes part of it (the most popular synthesis type is ‘subtractive’ named because of this type of removal), and then an amplifier so you can hear it.
These three sections – the oscillator, filter and amplifier – can be found in every softsynth. And most will then add envelopes to control how quickly the filter and amplifier come into play, and a low frequency oscillator that can be applied to add an up-and-down movement to most parameters. And that’s it: synthesis in a nutshell. So, you could say that sound design with synths simply hinges on how you manipulate those parameters.
Get tweaking
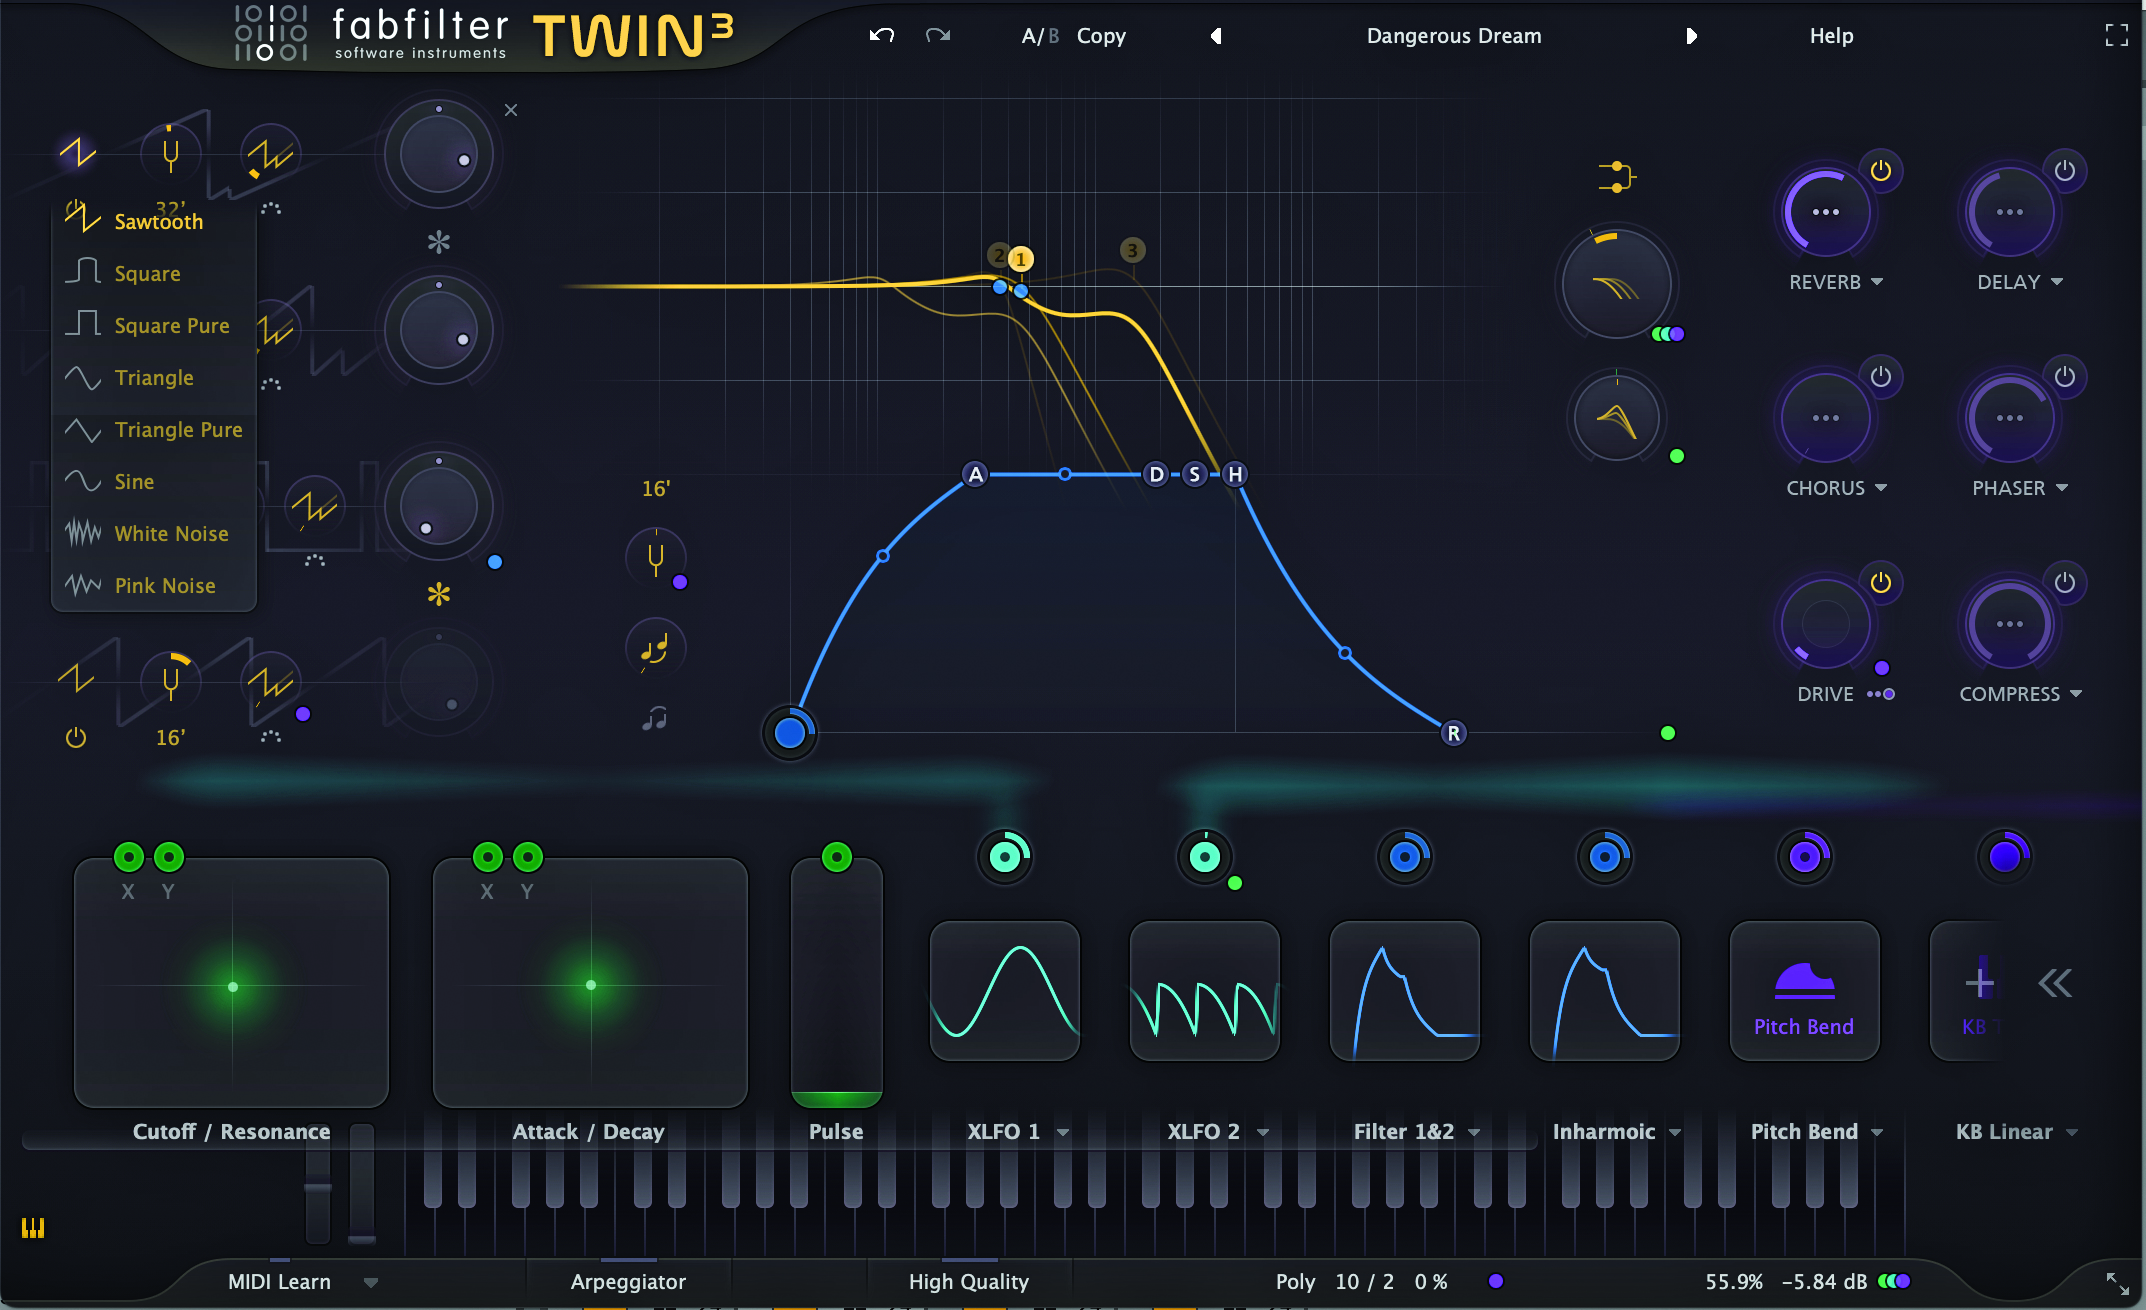
Now, armed with the basic sonic structure for any synth you own, you should be able to identify those sections. The oscillators act as the sound generators (often placed top left), with everything else flowing left to right. The controls for each section are where you can make your sweeping changes - we’ll give you a quick rundown of what each control does, so you’ll know which can have the most dramatic impact on your sound.
The oscillators will have tuning dials – often fine and coarse – which essentially control the note being played. There will also be options to change the waveform that the oscillator is producing. All synths will have a sawtooth (quite a buzzy sound), often used on the initial patch when you first load the synth up. Other options include a pure sine wave, and square, although many more types can often be found.
For the filter, this is where you start subtracting different frequencies from the sound. You get the filter type: usually low pass, high pass and band pass. These make the filter do exactly that: remove high frequencies – set by the frequency control – low frequencies, or a range of other frequencies. The resonance control is like an emphasis option, promoting frequencies around the point in which the filter frequency operates. Both frequency and resonance are commonly used by sound designers as they can quickly introduce drama.
The amplifier section will usually have a level out (volume) and be linked to an envelope which will control the volume of the note being played over time. So you get the Attack (how long it takes to come in); Decay (how long it takes to get from maximum level to the sustained level); Sustain (how long it lasts); and Release (how long it takes to fade from the sustain level).
Finally, LFOs (low-frequency oscillators) are important as they can manipulate most parameters by way of modulation (which we’ll come to later) and are essentially another oscillator that introduces a positive/negative cycling variance to most parameters on your synth to, say, introduce vibrato to an oscillator.
That’s another quick overview of what is essentially the subtractive synthesis found on most softsynths, especially those that emulate classic analogue models (VA or Virtual Analogue), and the main controls your sound design experiments should cover. But there are one or two other common synth types that you’ll probably come across.
Other synthesis options
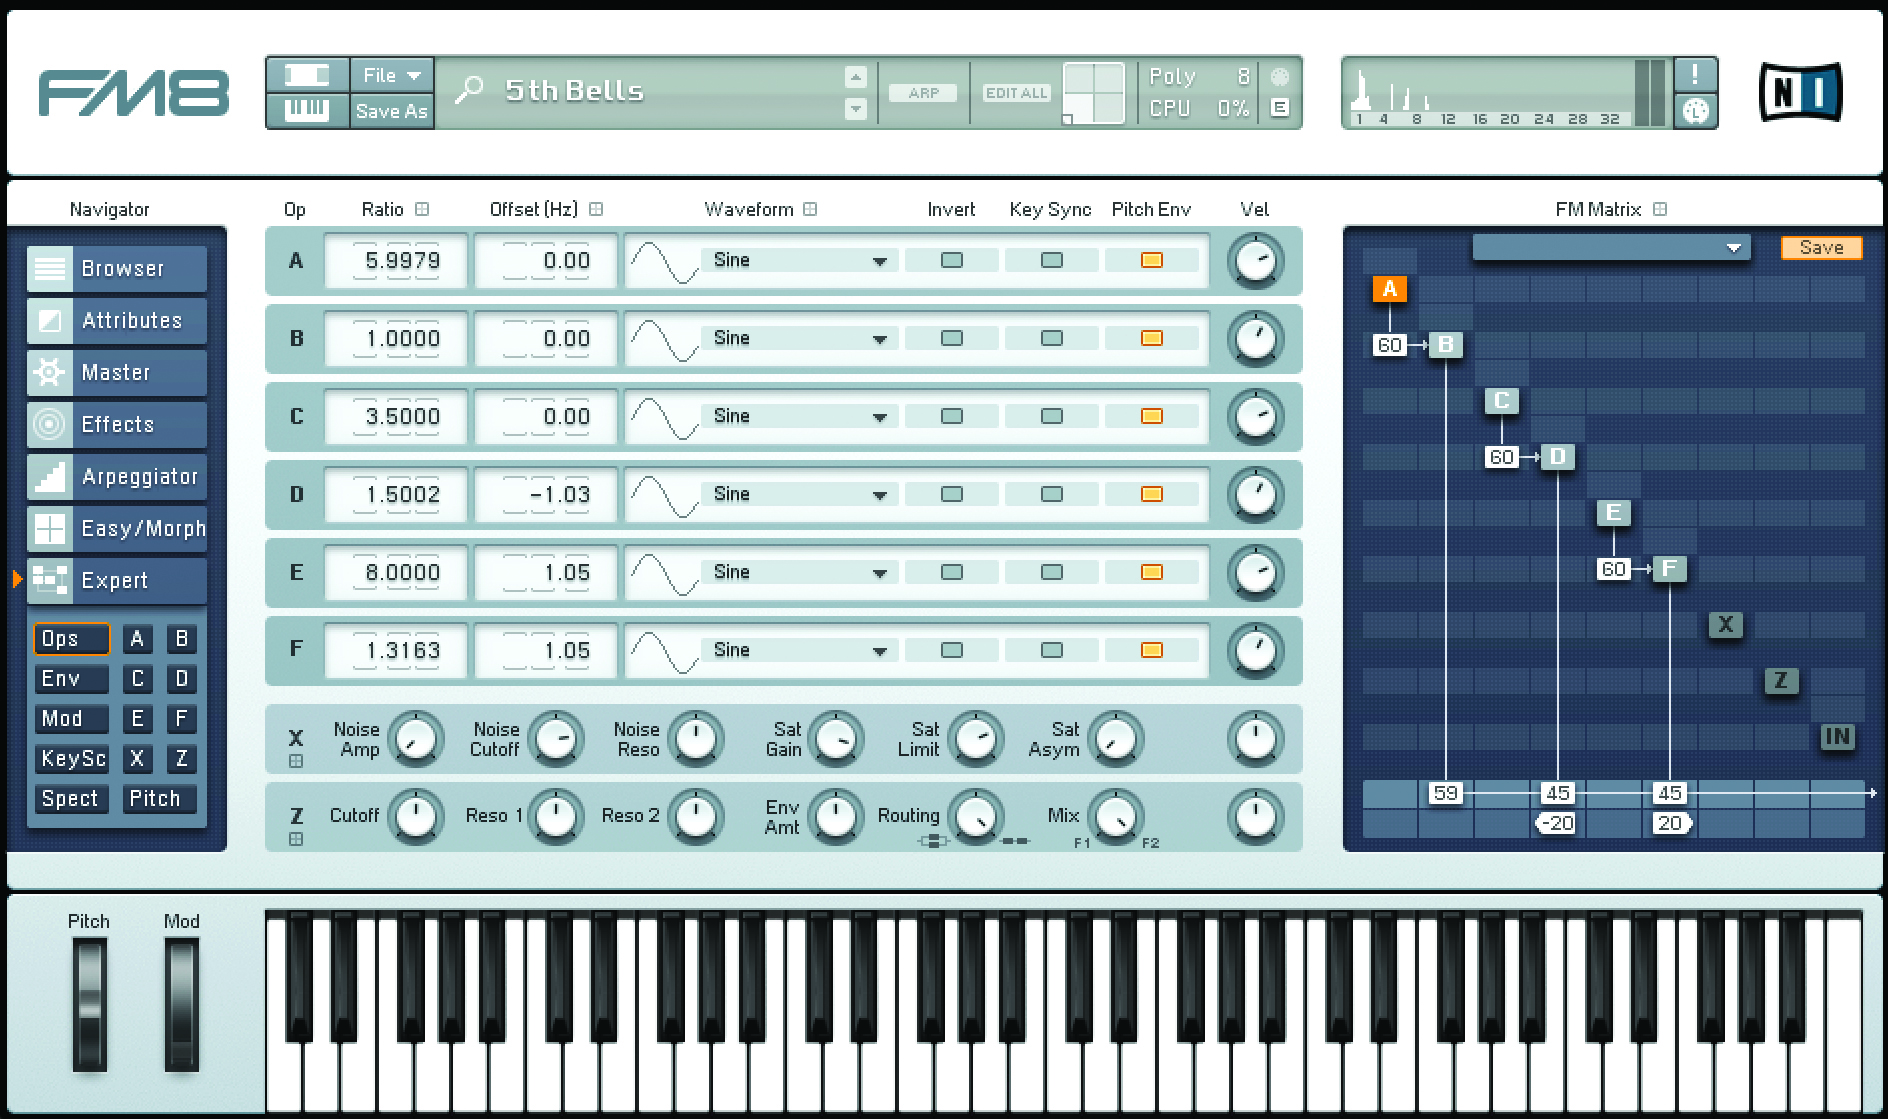
FM (frequency modulation) synths are less common than VA – probably because they are more complex. However, they’re still great options for sound designers as they can focus more on real-world instruments like bells and pianos, rather than electronic (which analogue synths tend to be good at). FM synthesis has a carrier signal which determines the pitch and a modulator acting upon it resulting in more complex timbres. Different combinations of these can result in very varied sounds.
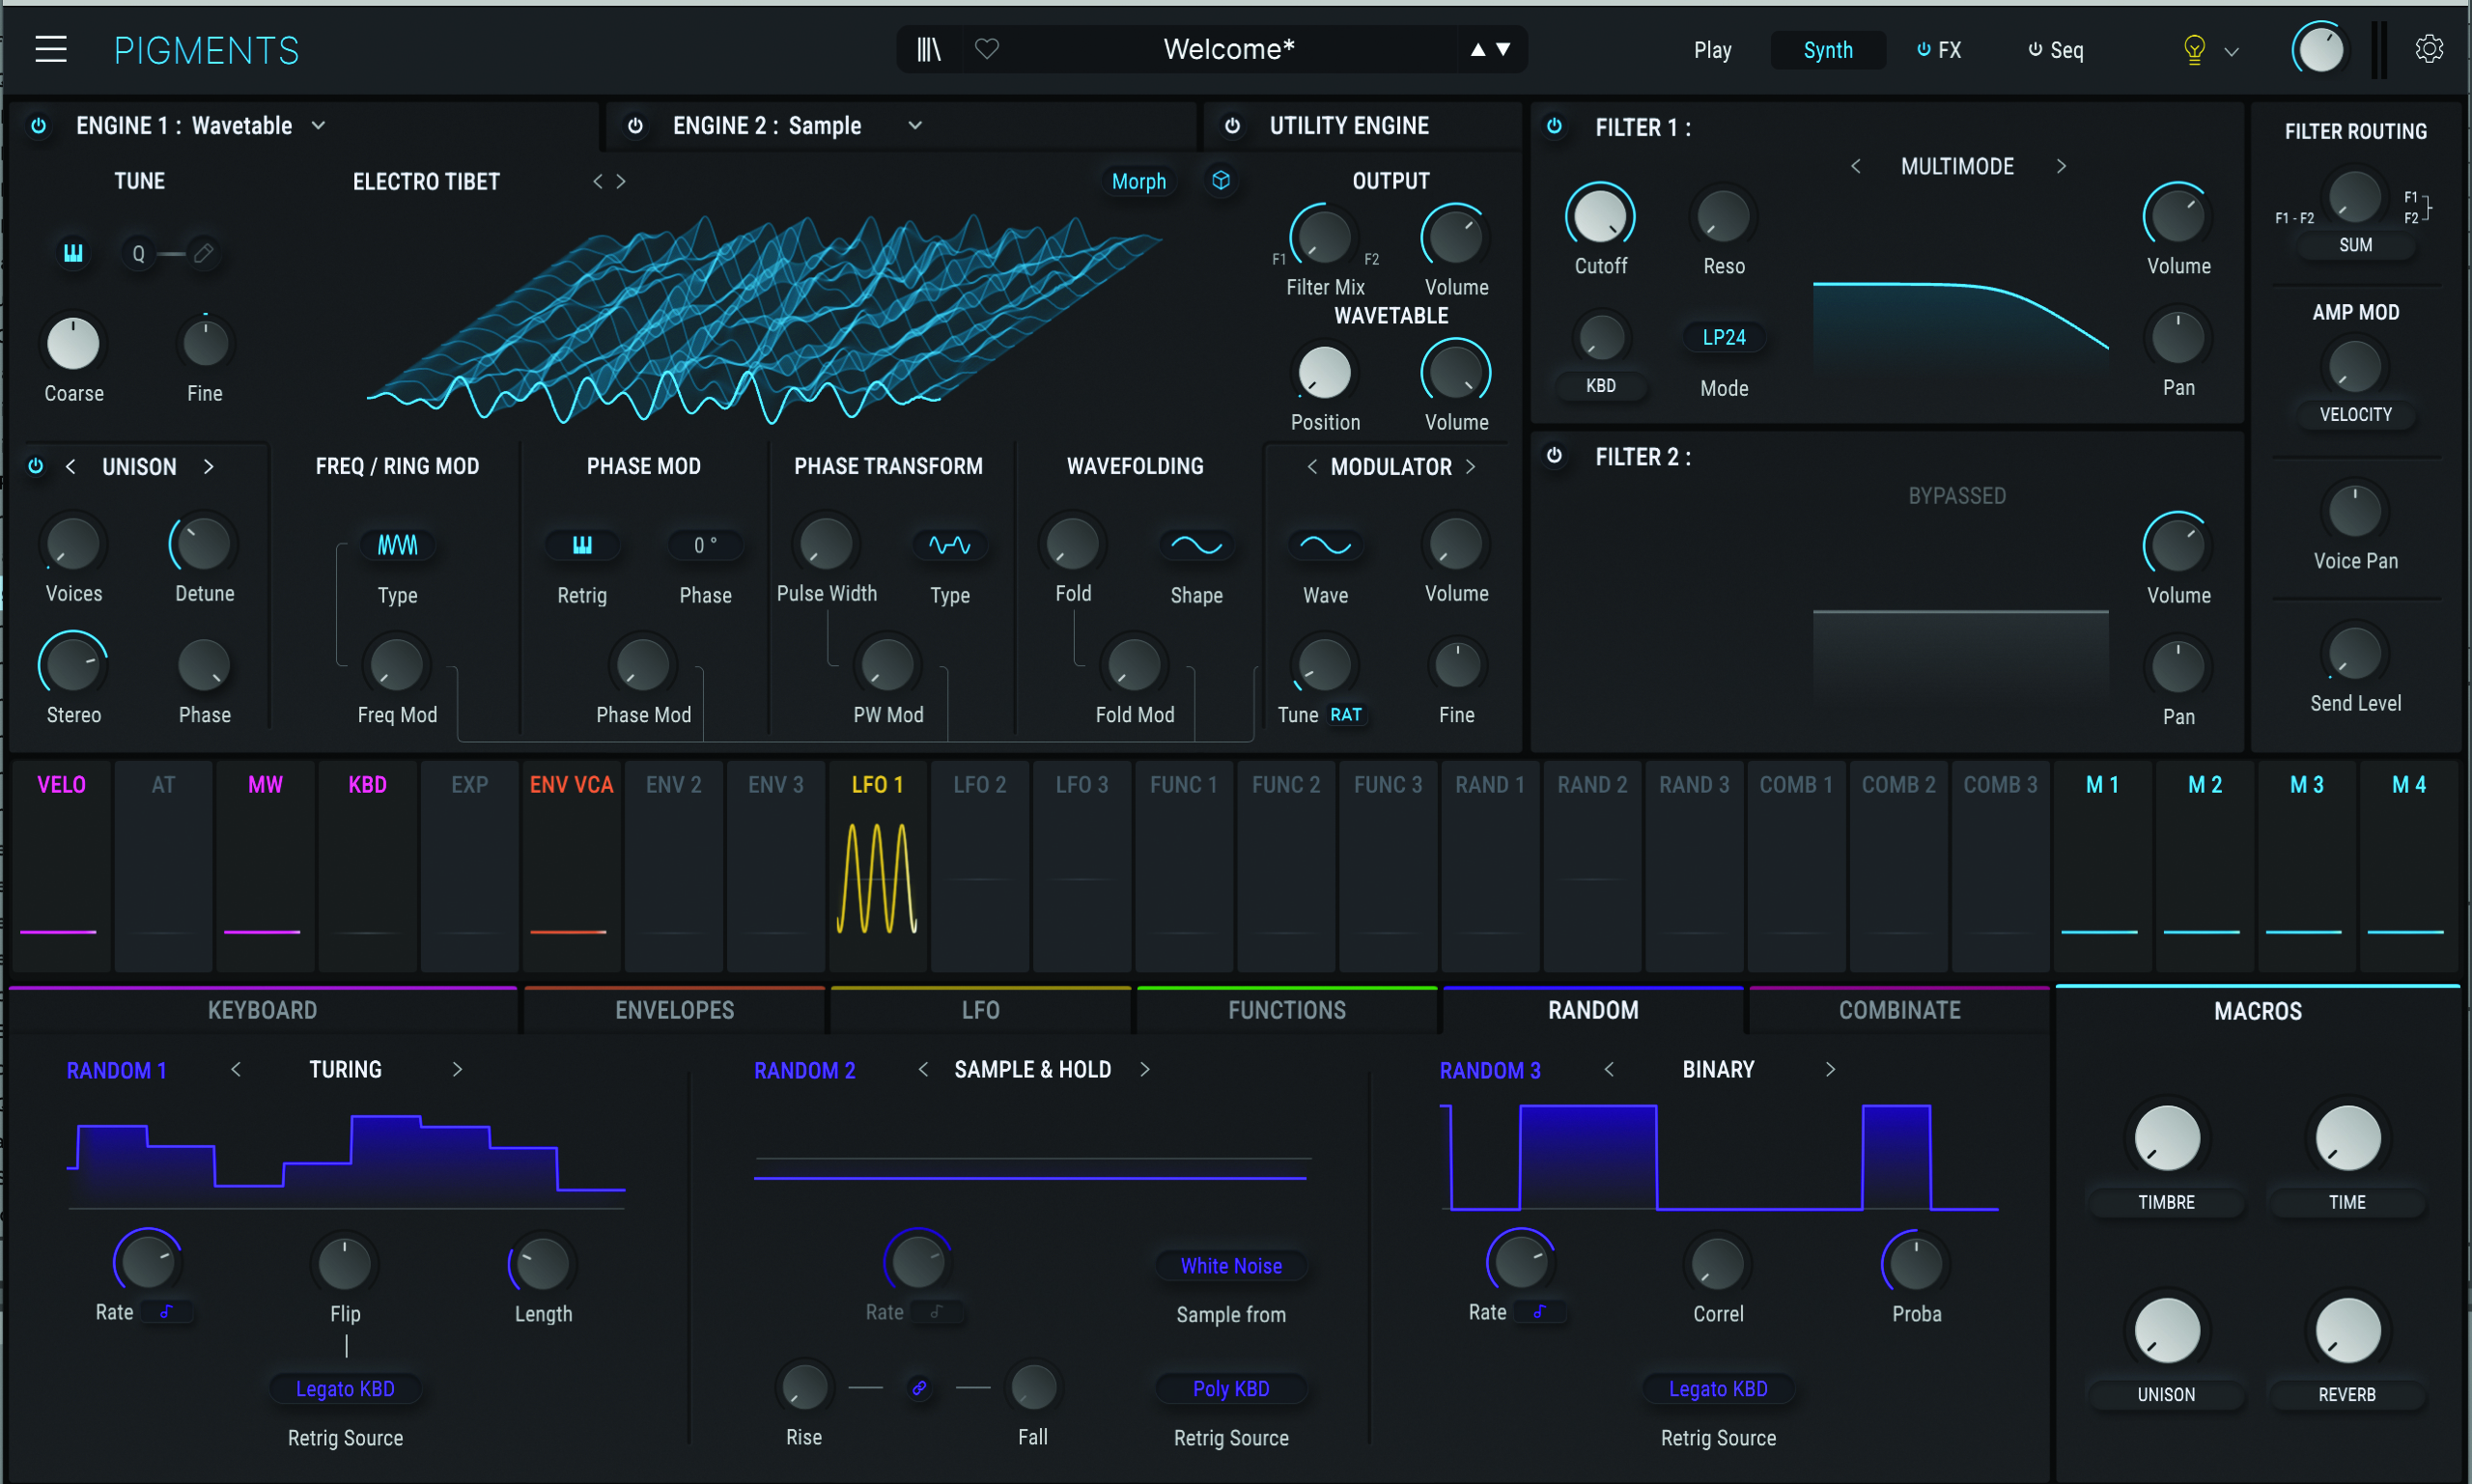
Wavetable synths offer more varied sounds than either FM or subtractive. This is because they not only have more complex waveforms in their oscillators (on top of the square, saw and sine ones used in VA), but they also allow you to morph between several of them which are stored in a ‘wavetable’.
Other synthesis types that are becoming more popular include physical modelling – which models real (and sometimes off-) world acoustic instrument properties – and granular, where your source is smashed into grains, which is great for more extreme sound design.
9 easy sound-tweaking tips for any synth
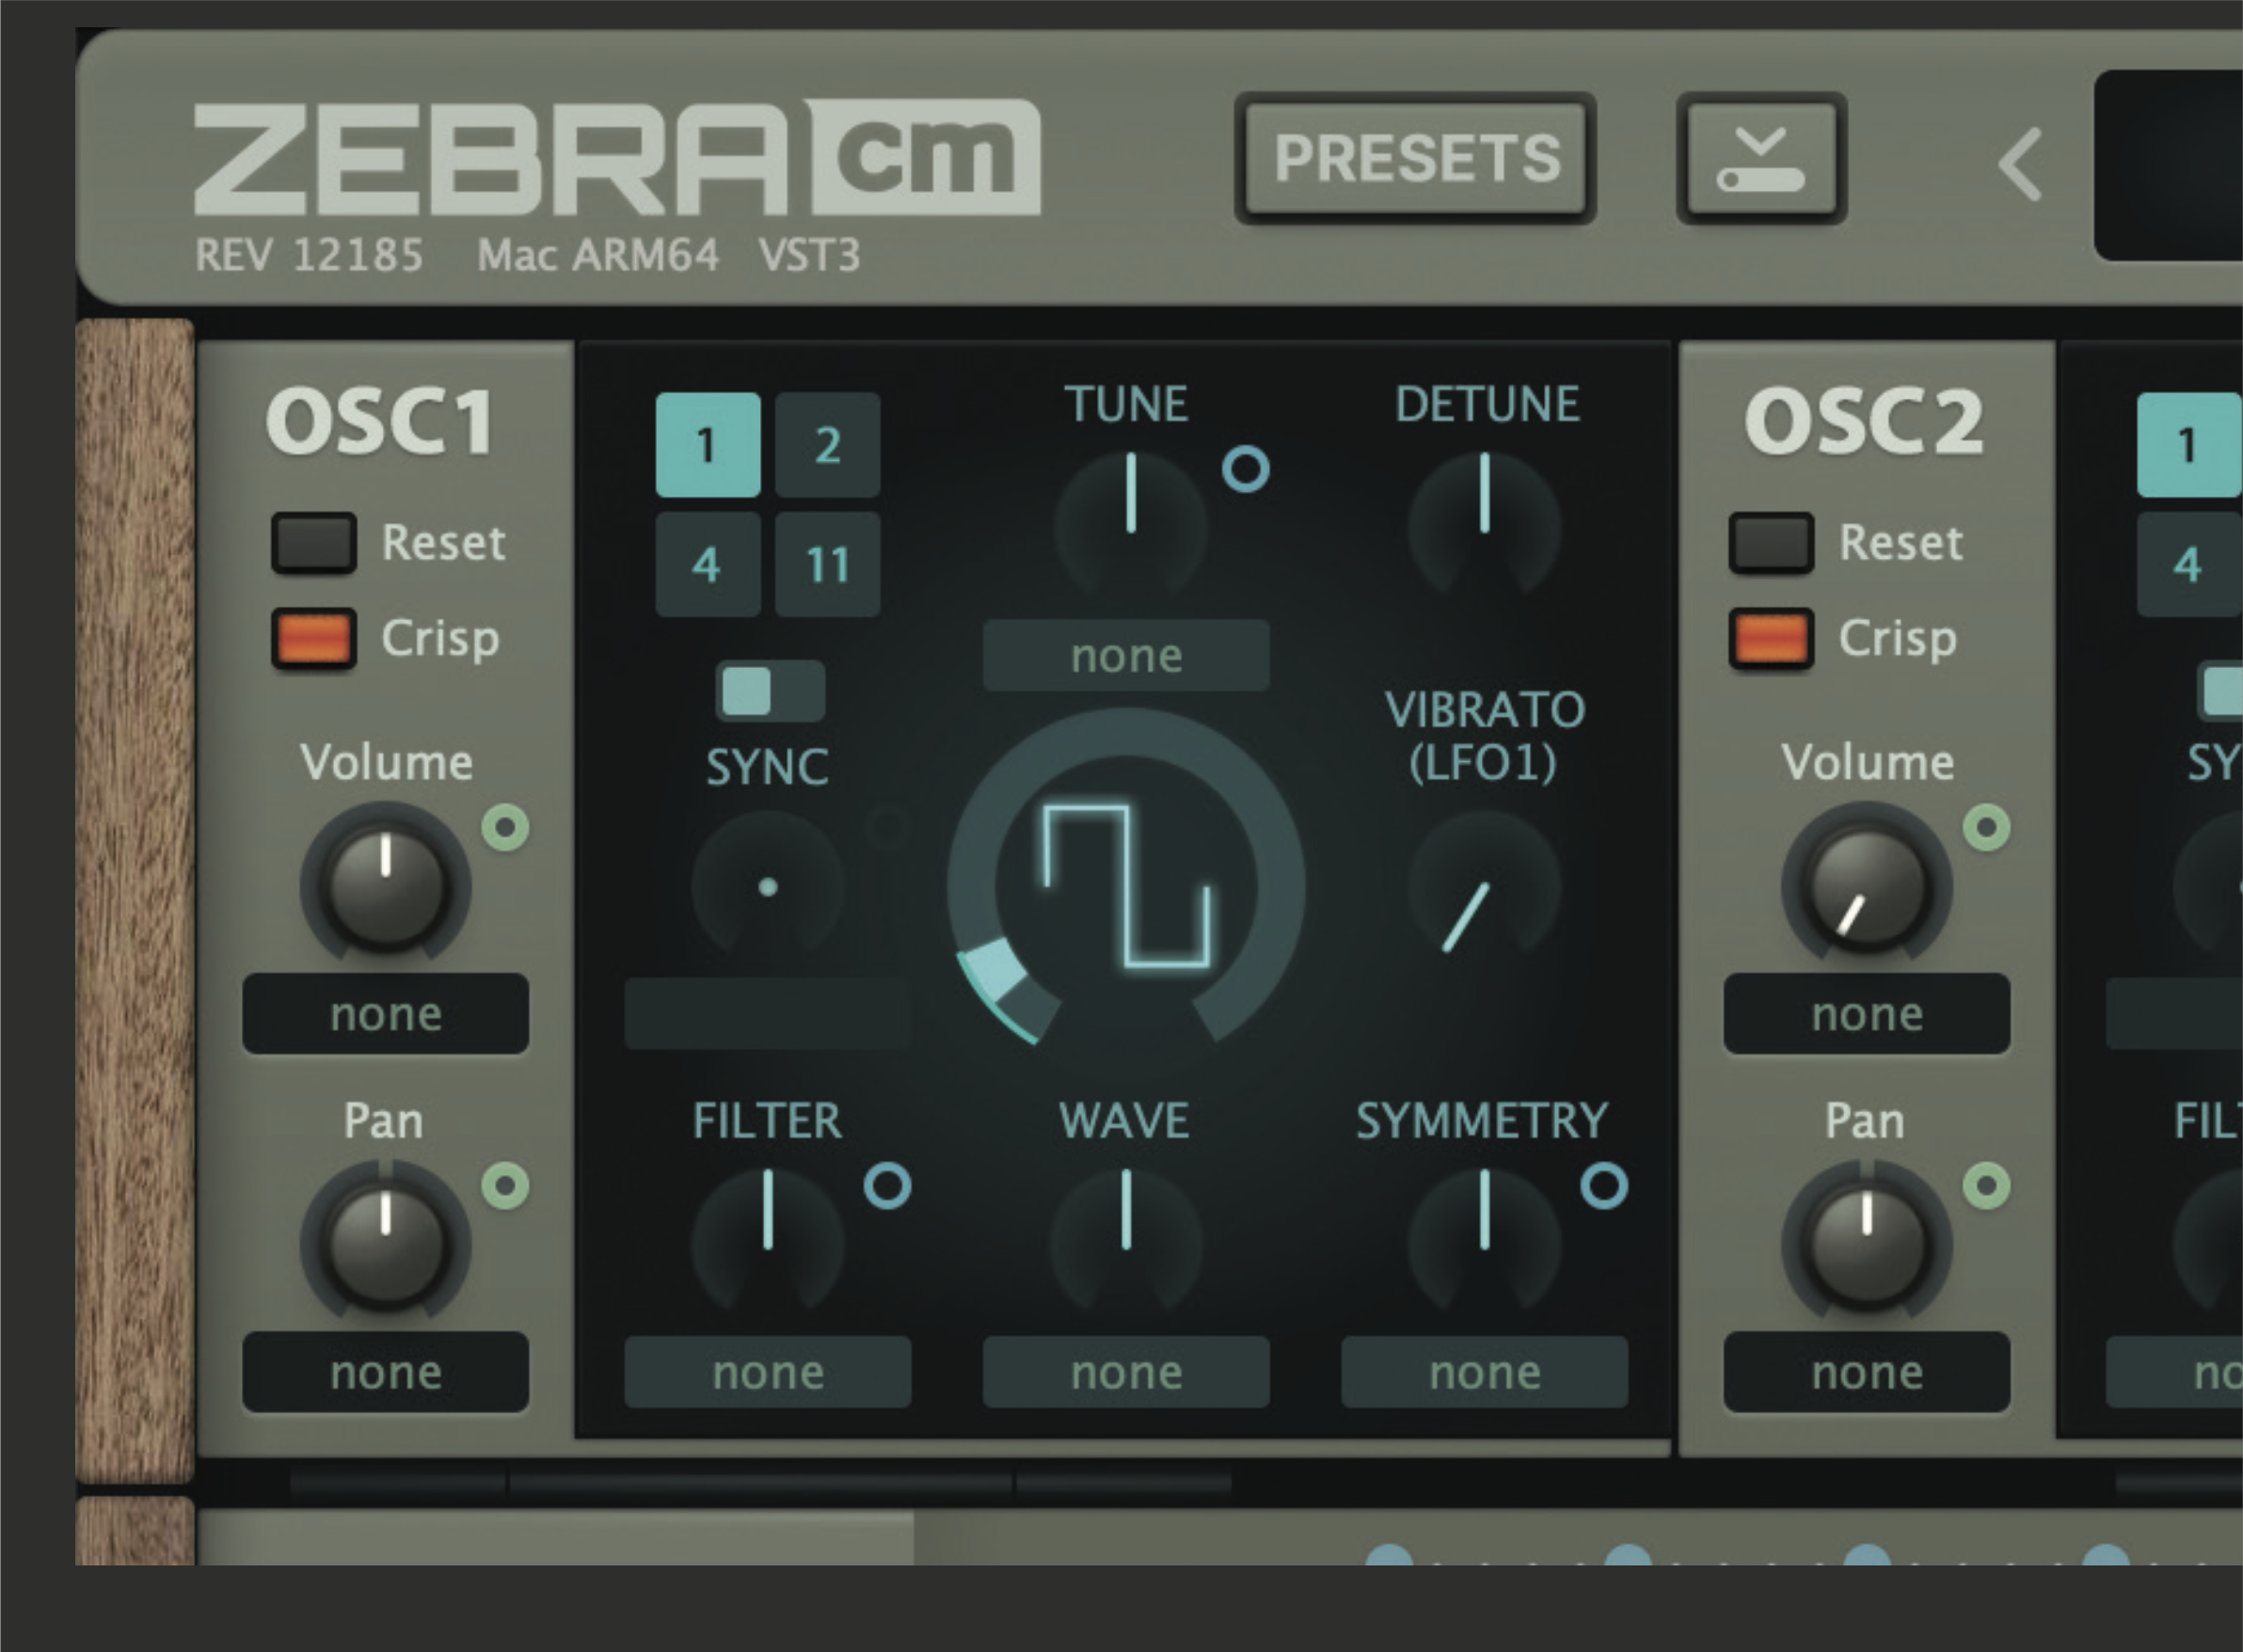
By following these tips you should find your way around any synth. We’ll start with the basics of your sound: the oscillators. Load your initial preset (usually called Init) or any other sound. Starting on the top left (usually) we’ll select different oscillators, the core of our sound. Try going from the sawtooth that usually loads in to a square for a rounded, less harsh tone.
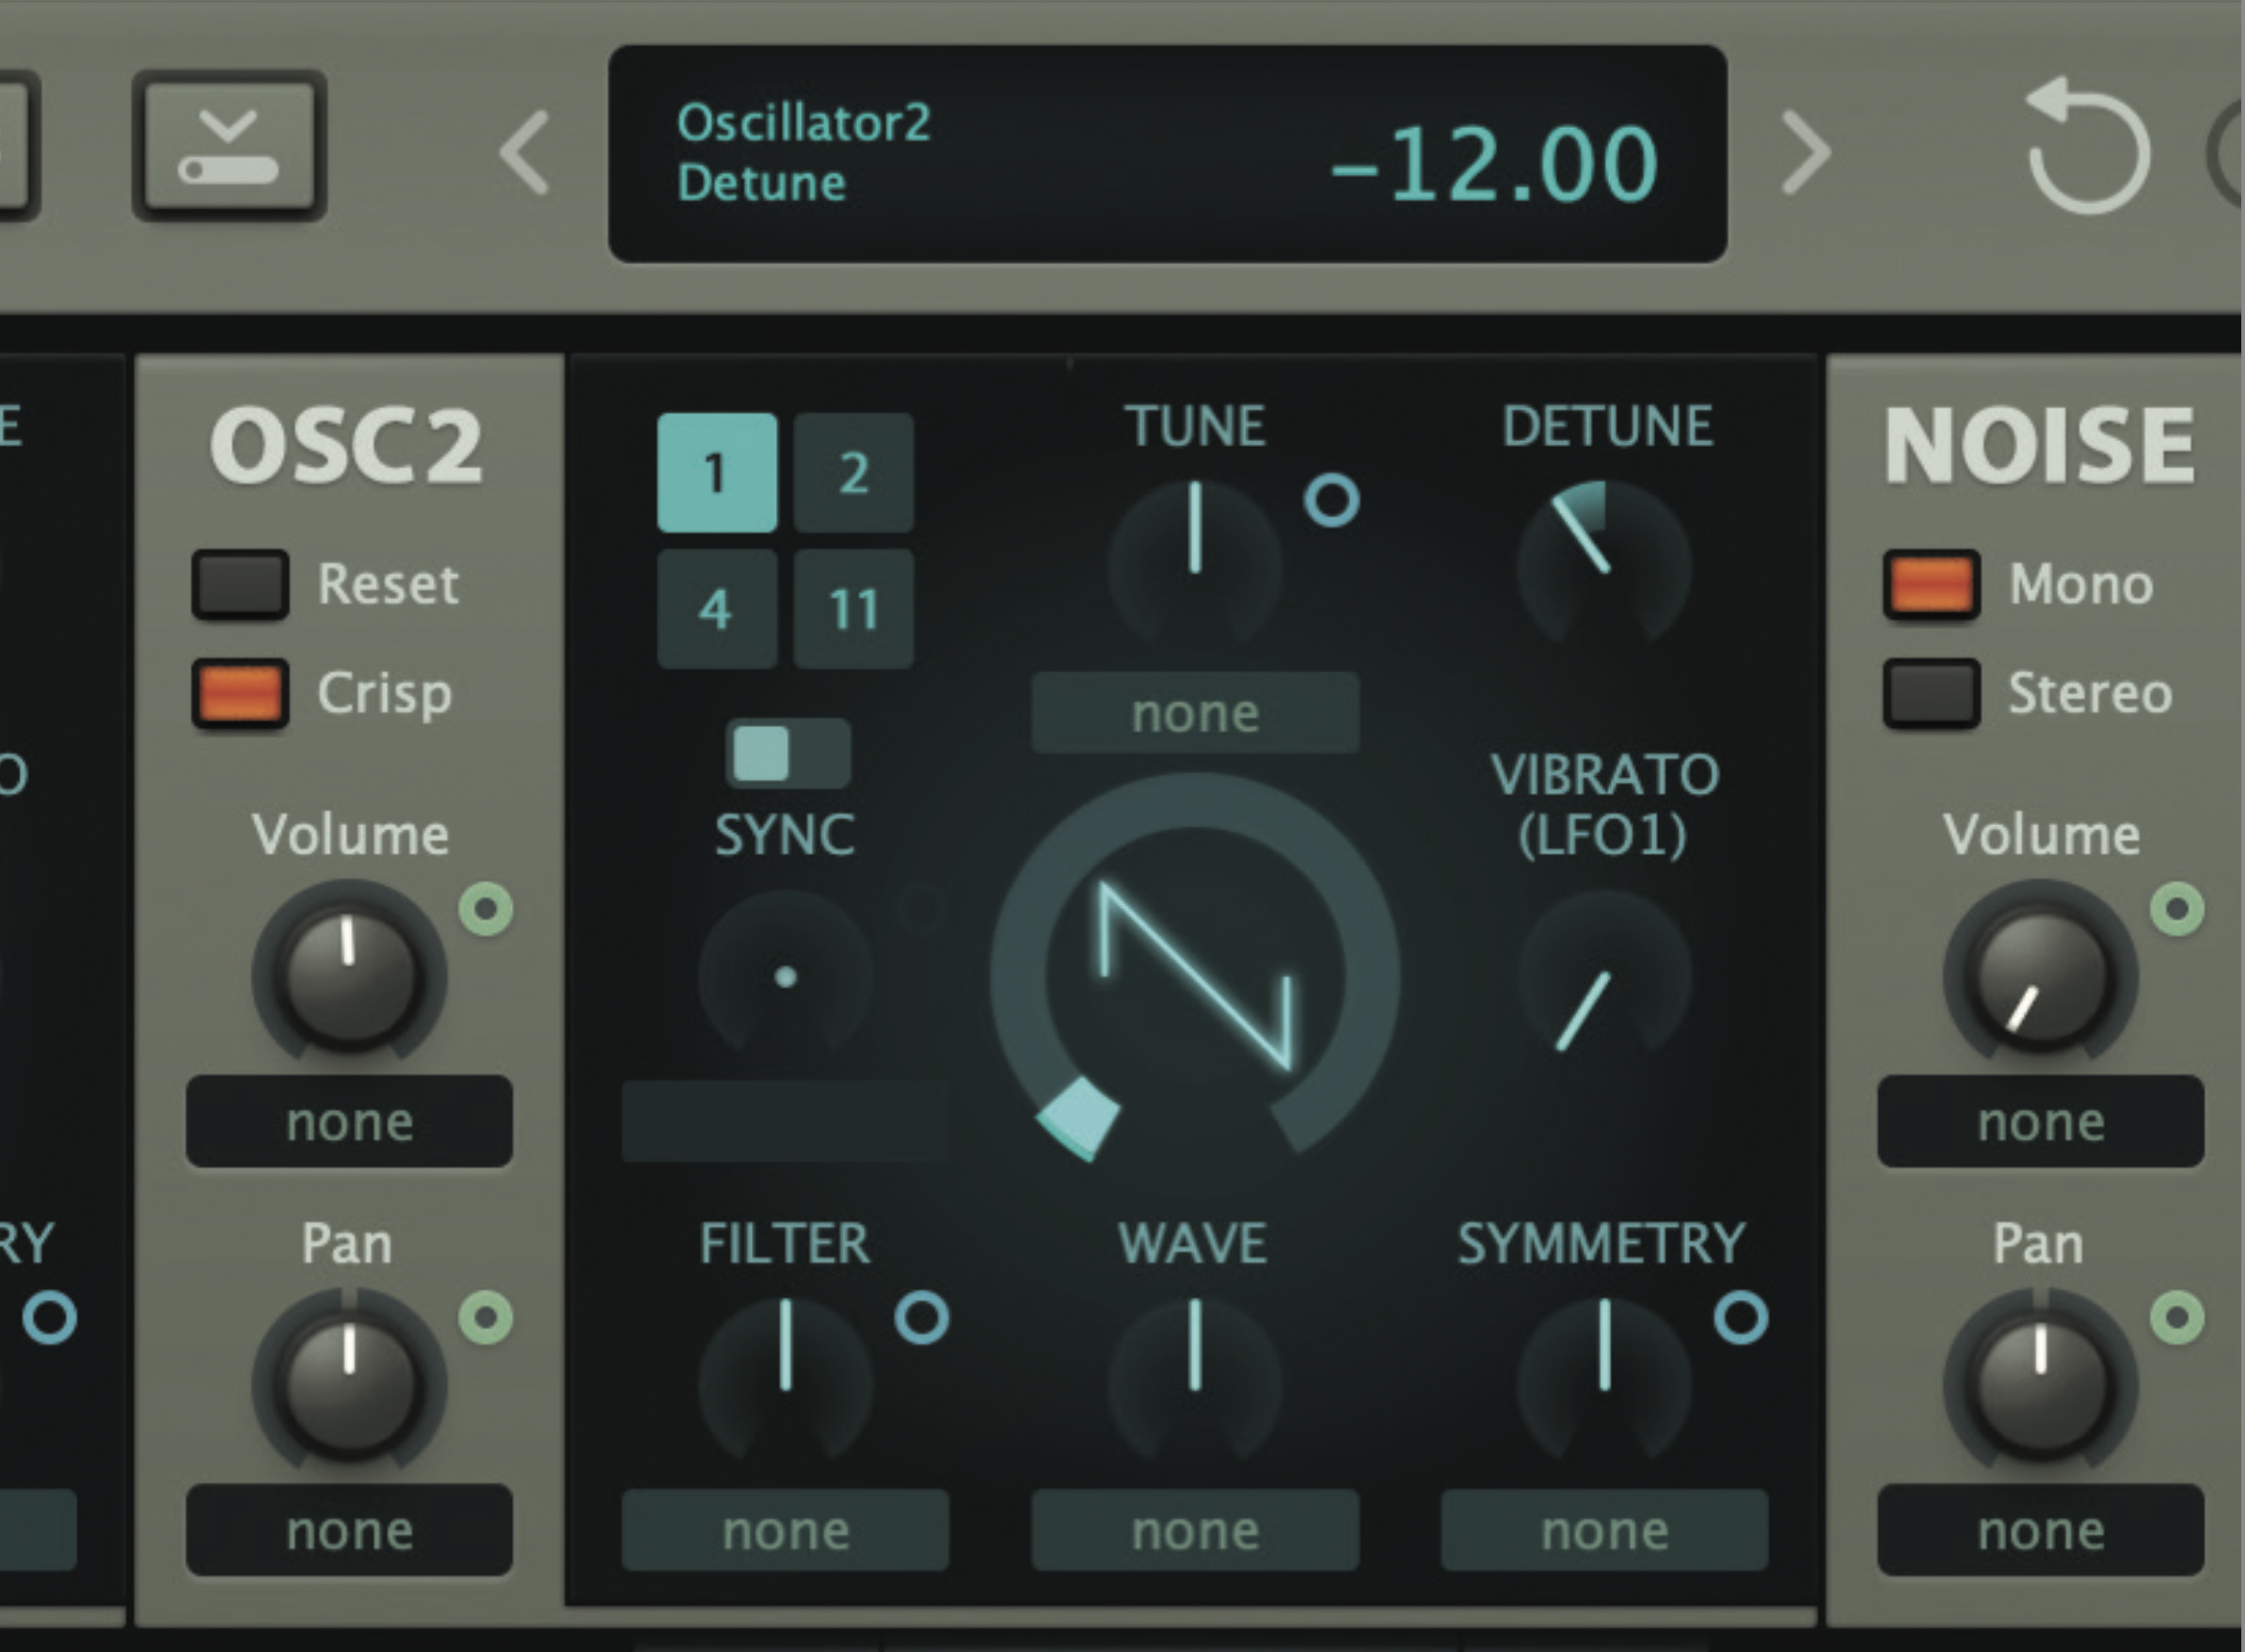
Looking to create fatter sounds in an instant? One of the easiest and most effective ways to liven any synth sound up is to bring in some detuning between your core oscillators, so here we’ve simply added Oscillator 2 in our trusty Zebra CM (which you can get via our Plugin Suite) and detuned it by 12 semitones so that it’s an octave below Oscillator 1.
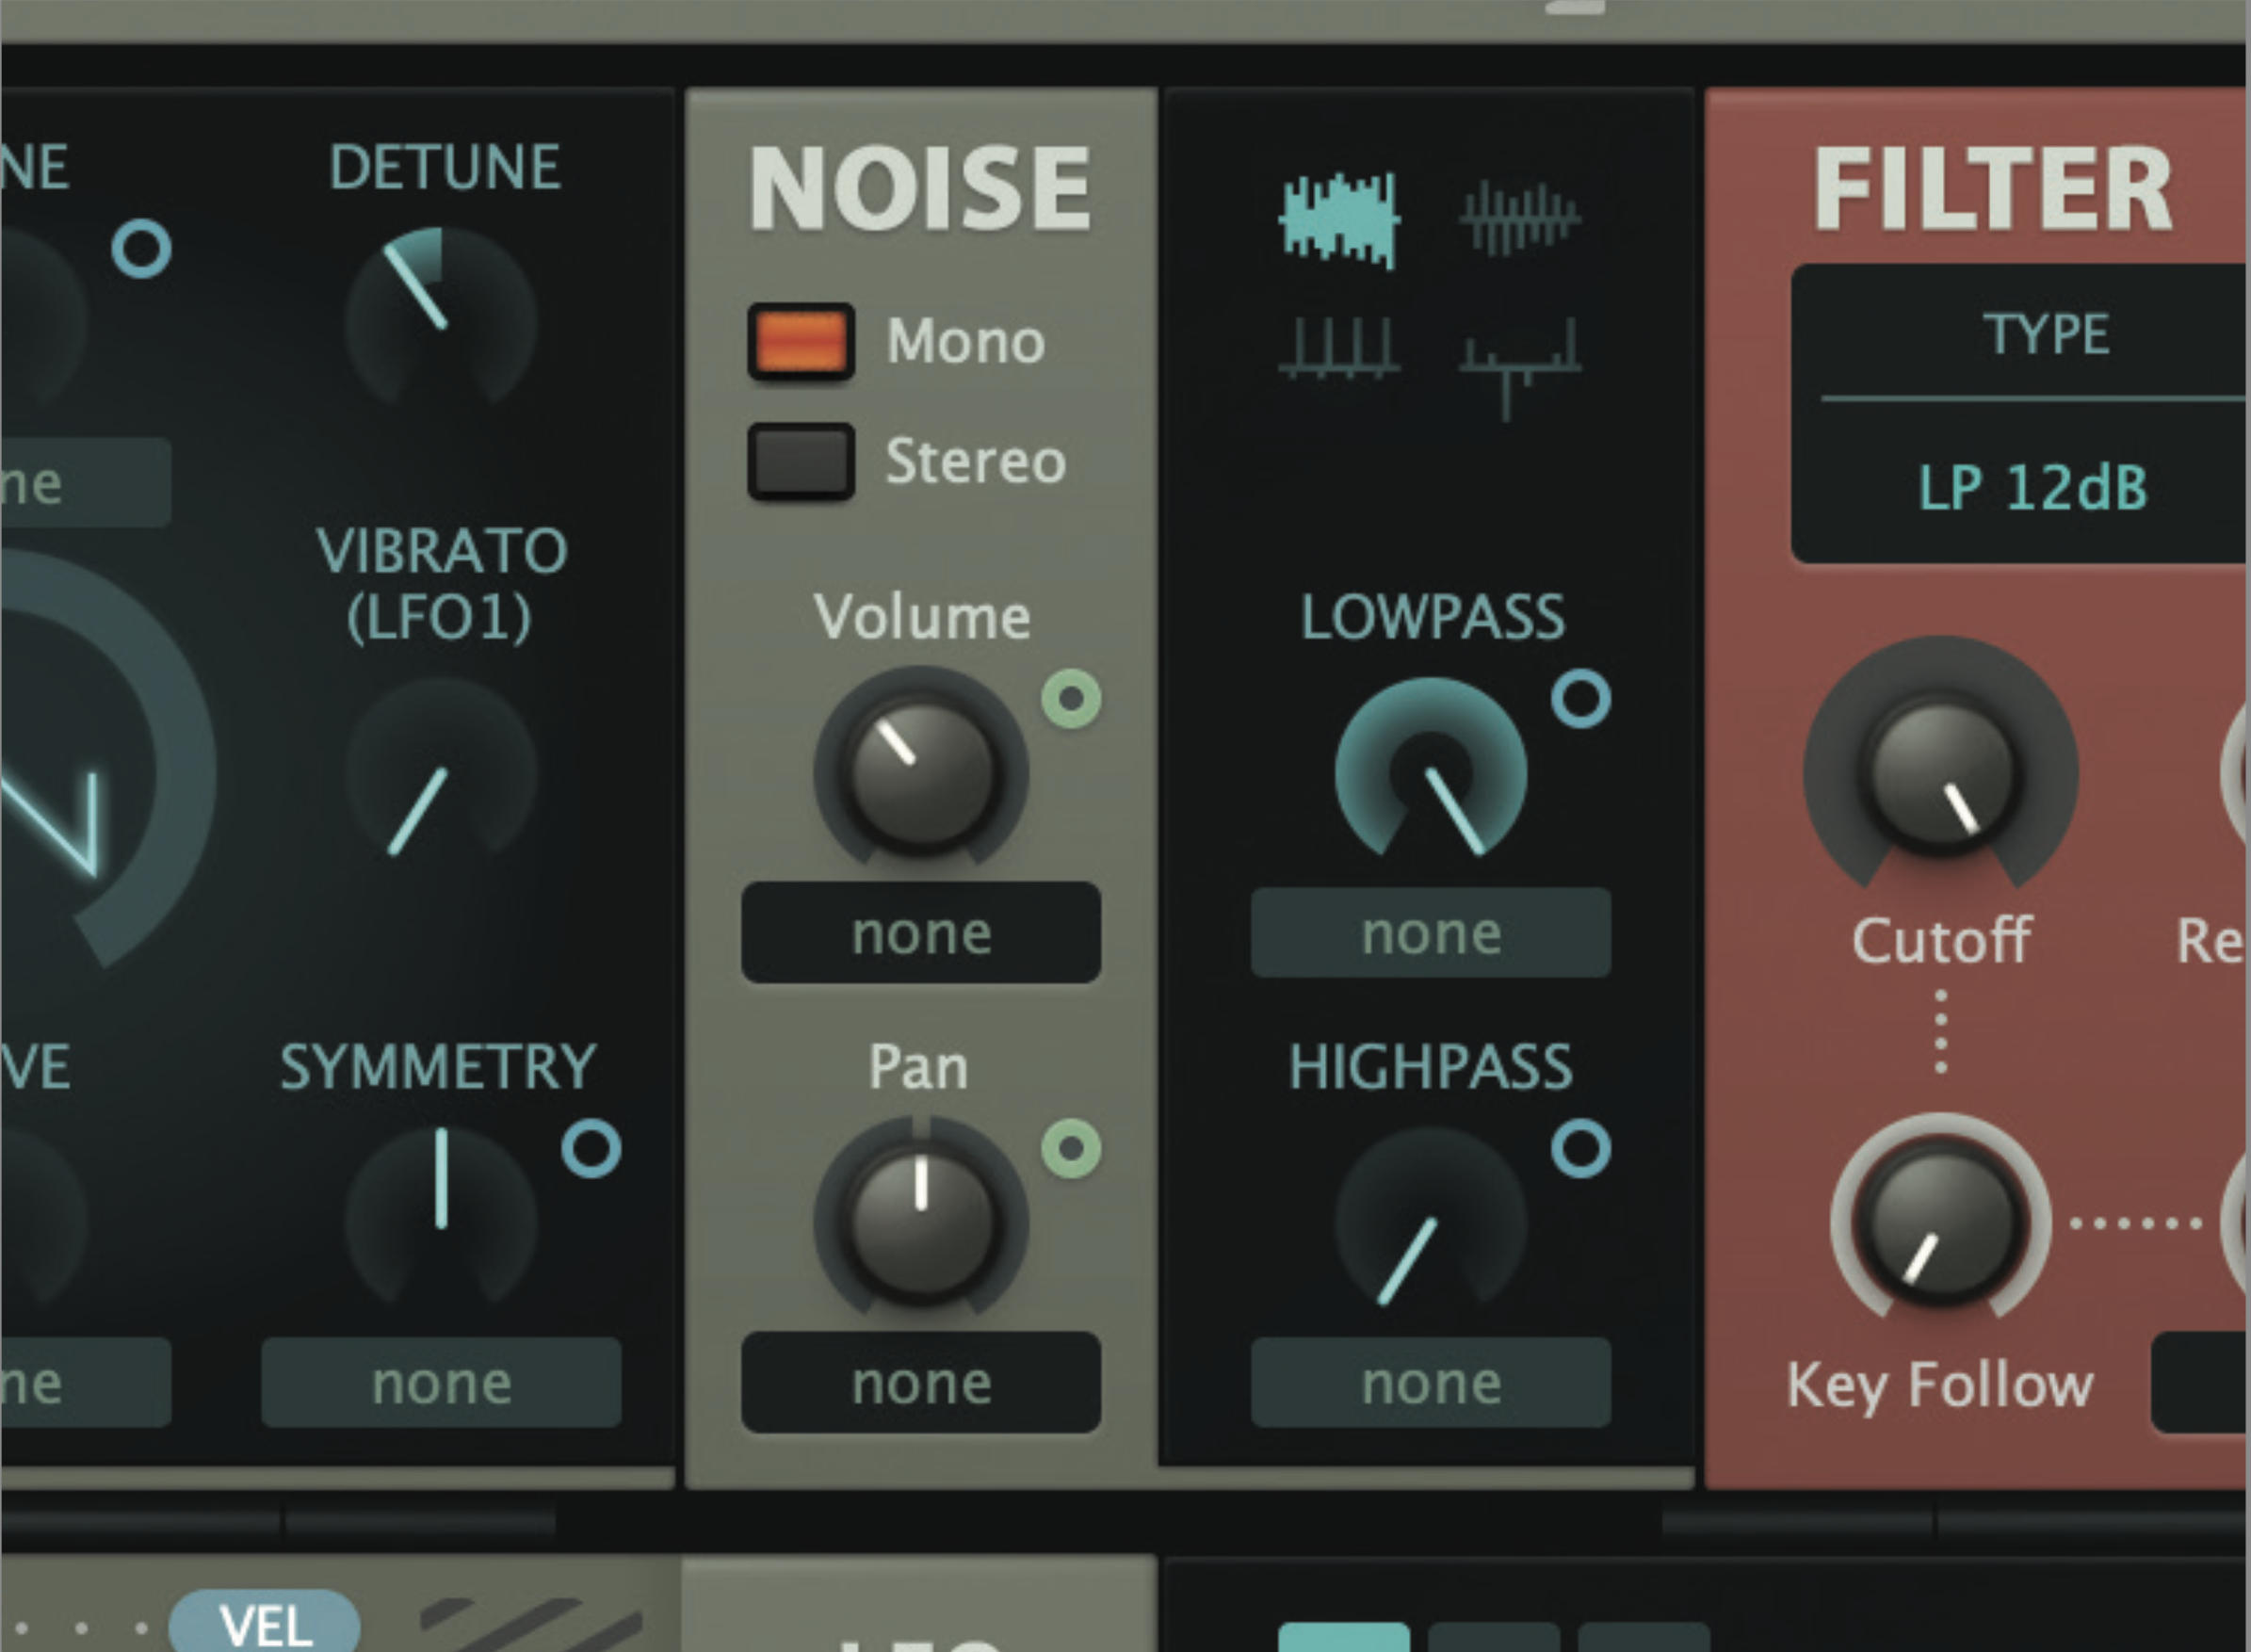
Time to make some noise. Many synths will come with a noise oscillator which adds white or pink noise into your sound. Obviously tread carefully with this, but bringing in noise can produce quite glitchy and ’80s video game sound results if used well.
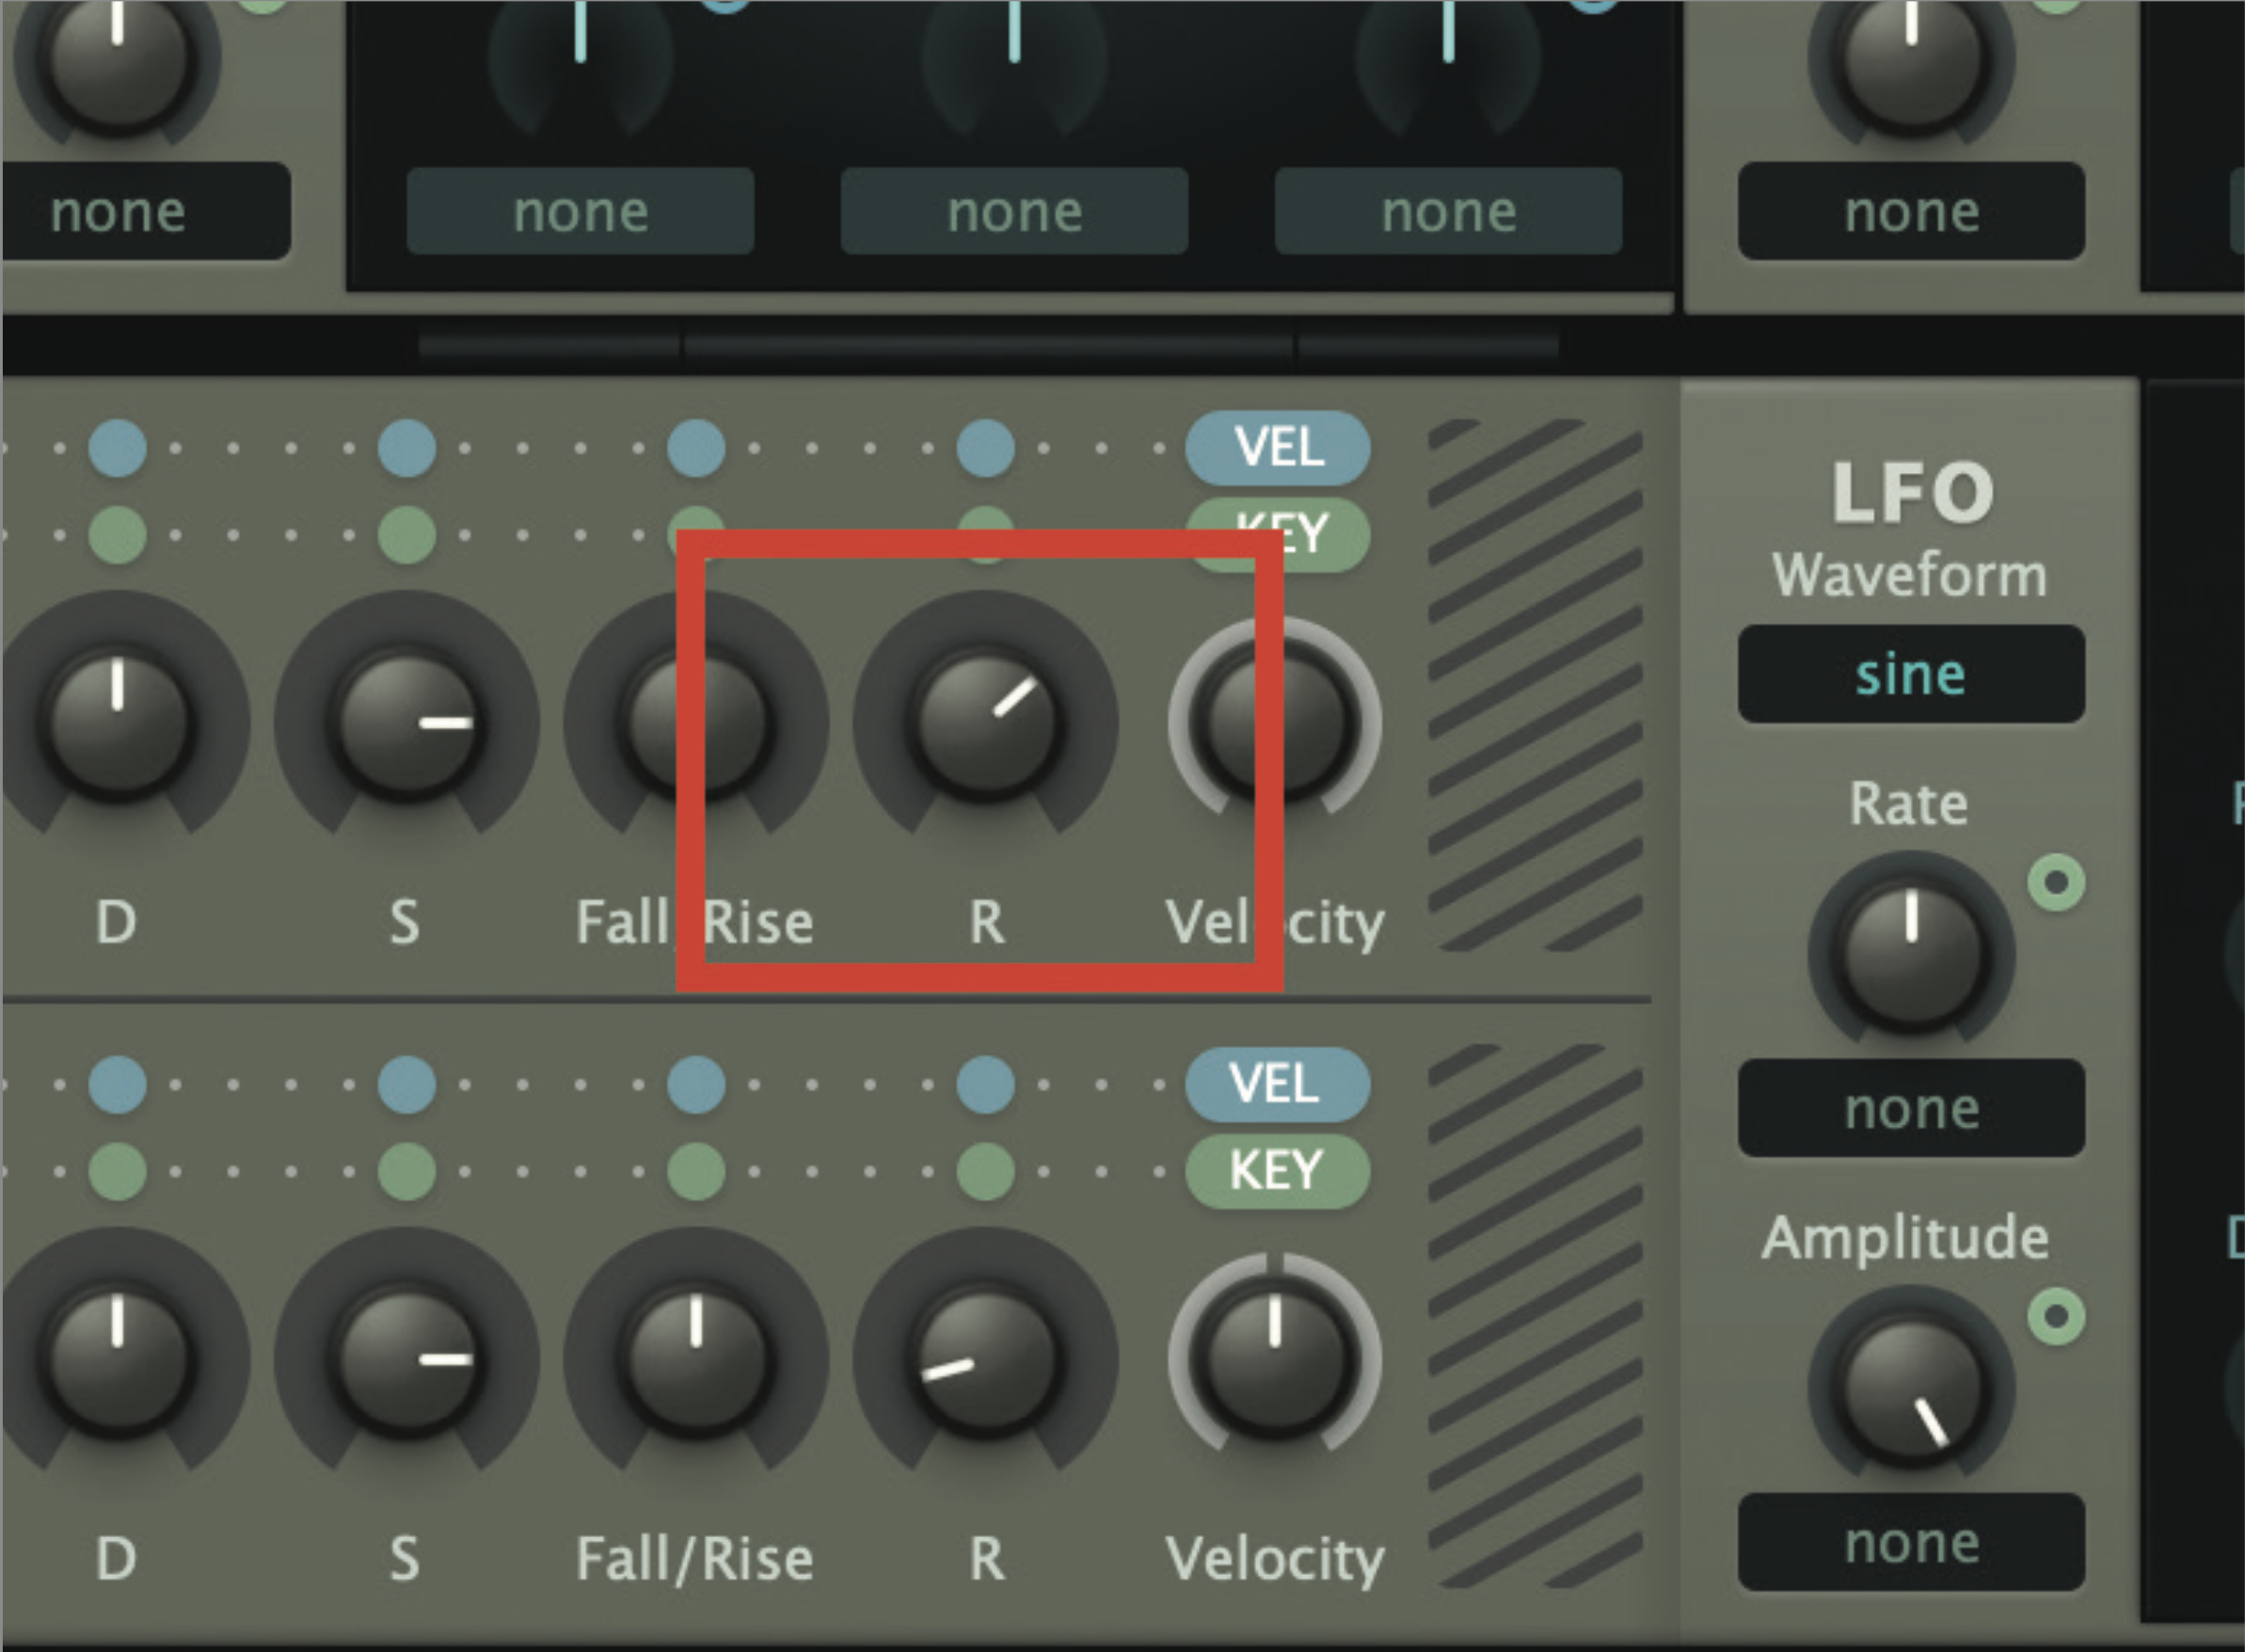
The envelope Release dial is your friend for sound design. Here we’ve simply increased it to make our noisy sound last longer. It can turn any stab into a dramatic lead sound.
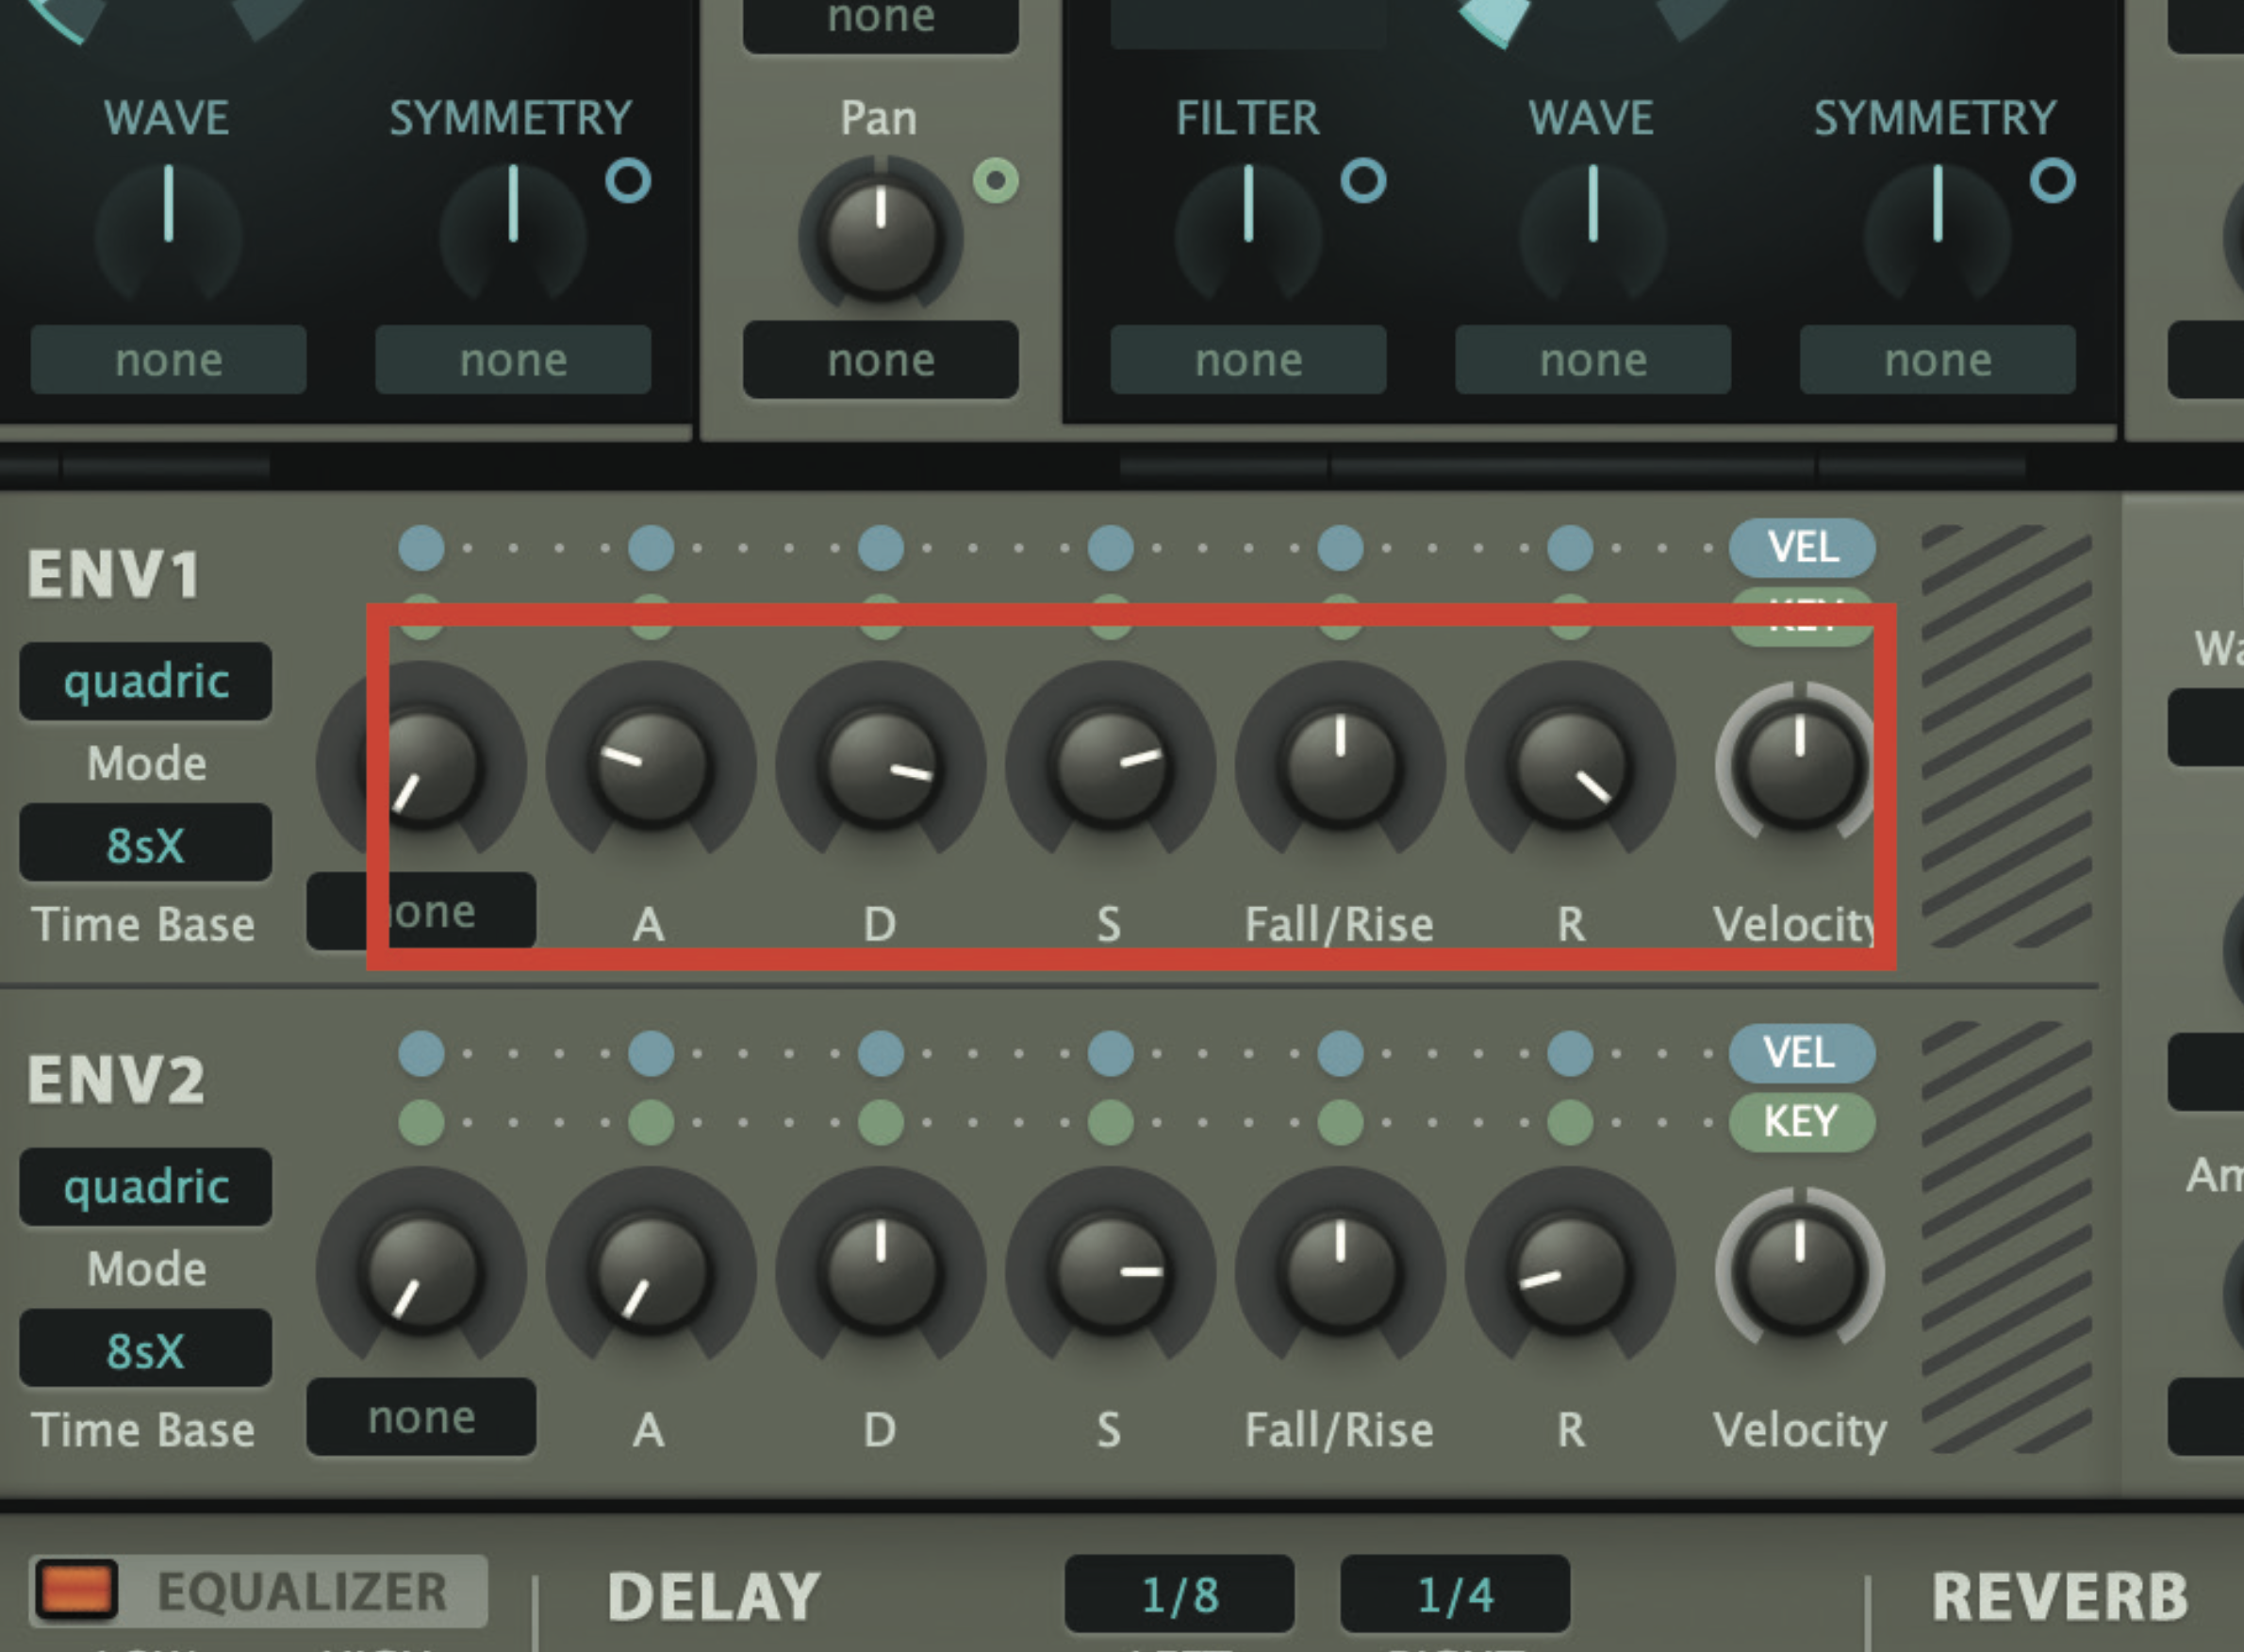
Turn a bass into a pad… and vice versa. The envelope section is also where you can easily turn any shorter bass-style sound into a pad. Here we’ve increased the Attack and Release to make the sound fade in and out. Turn a pad into a snappier bass sound by doing the opposite.
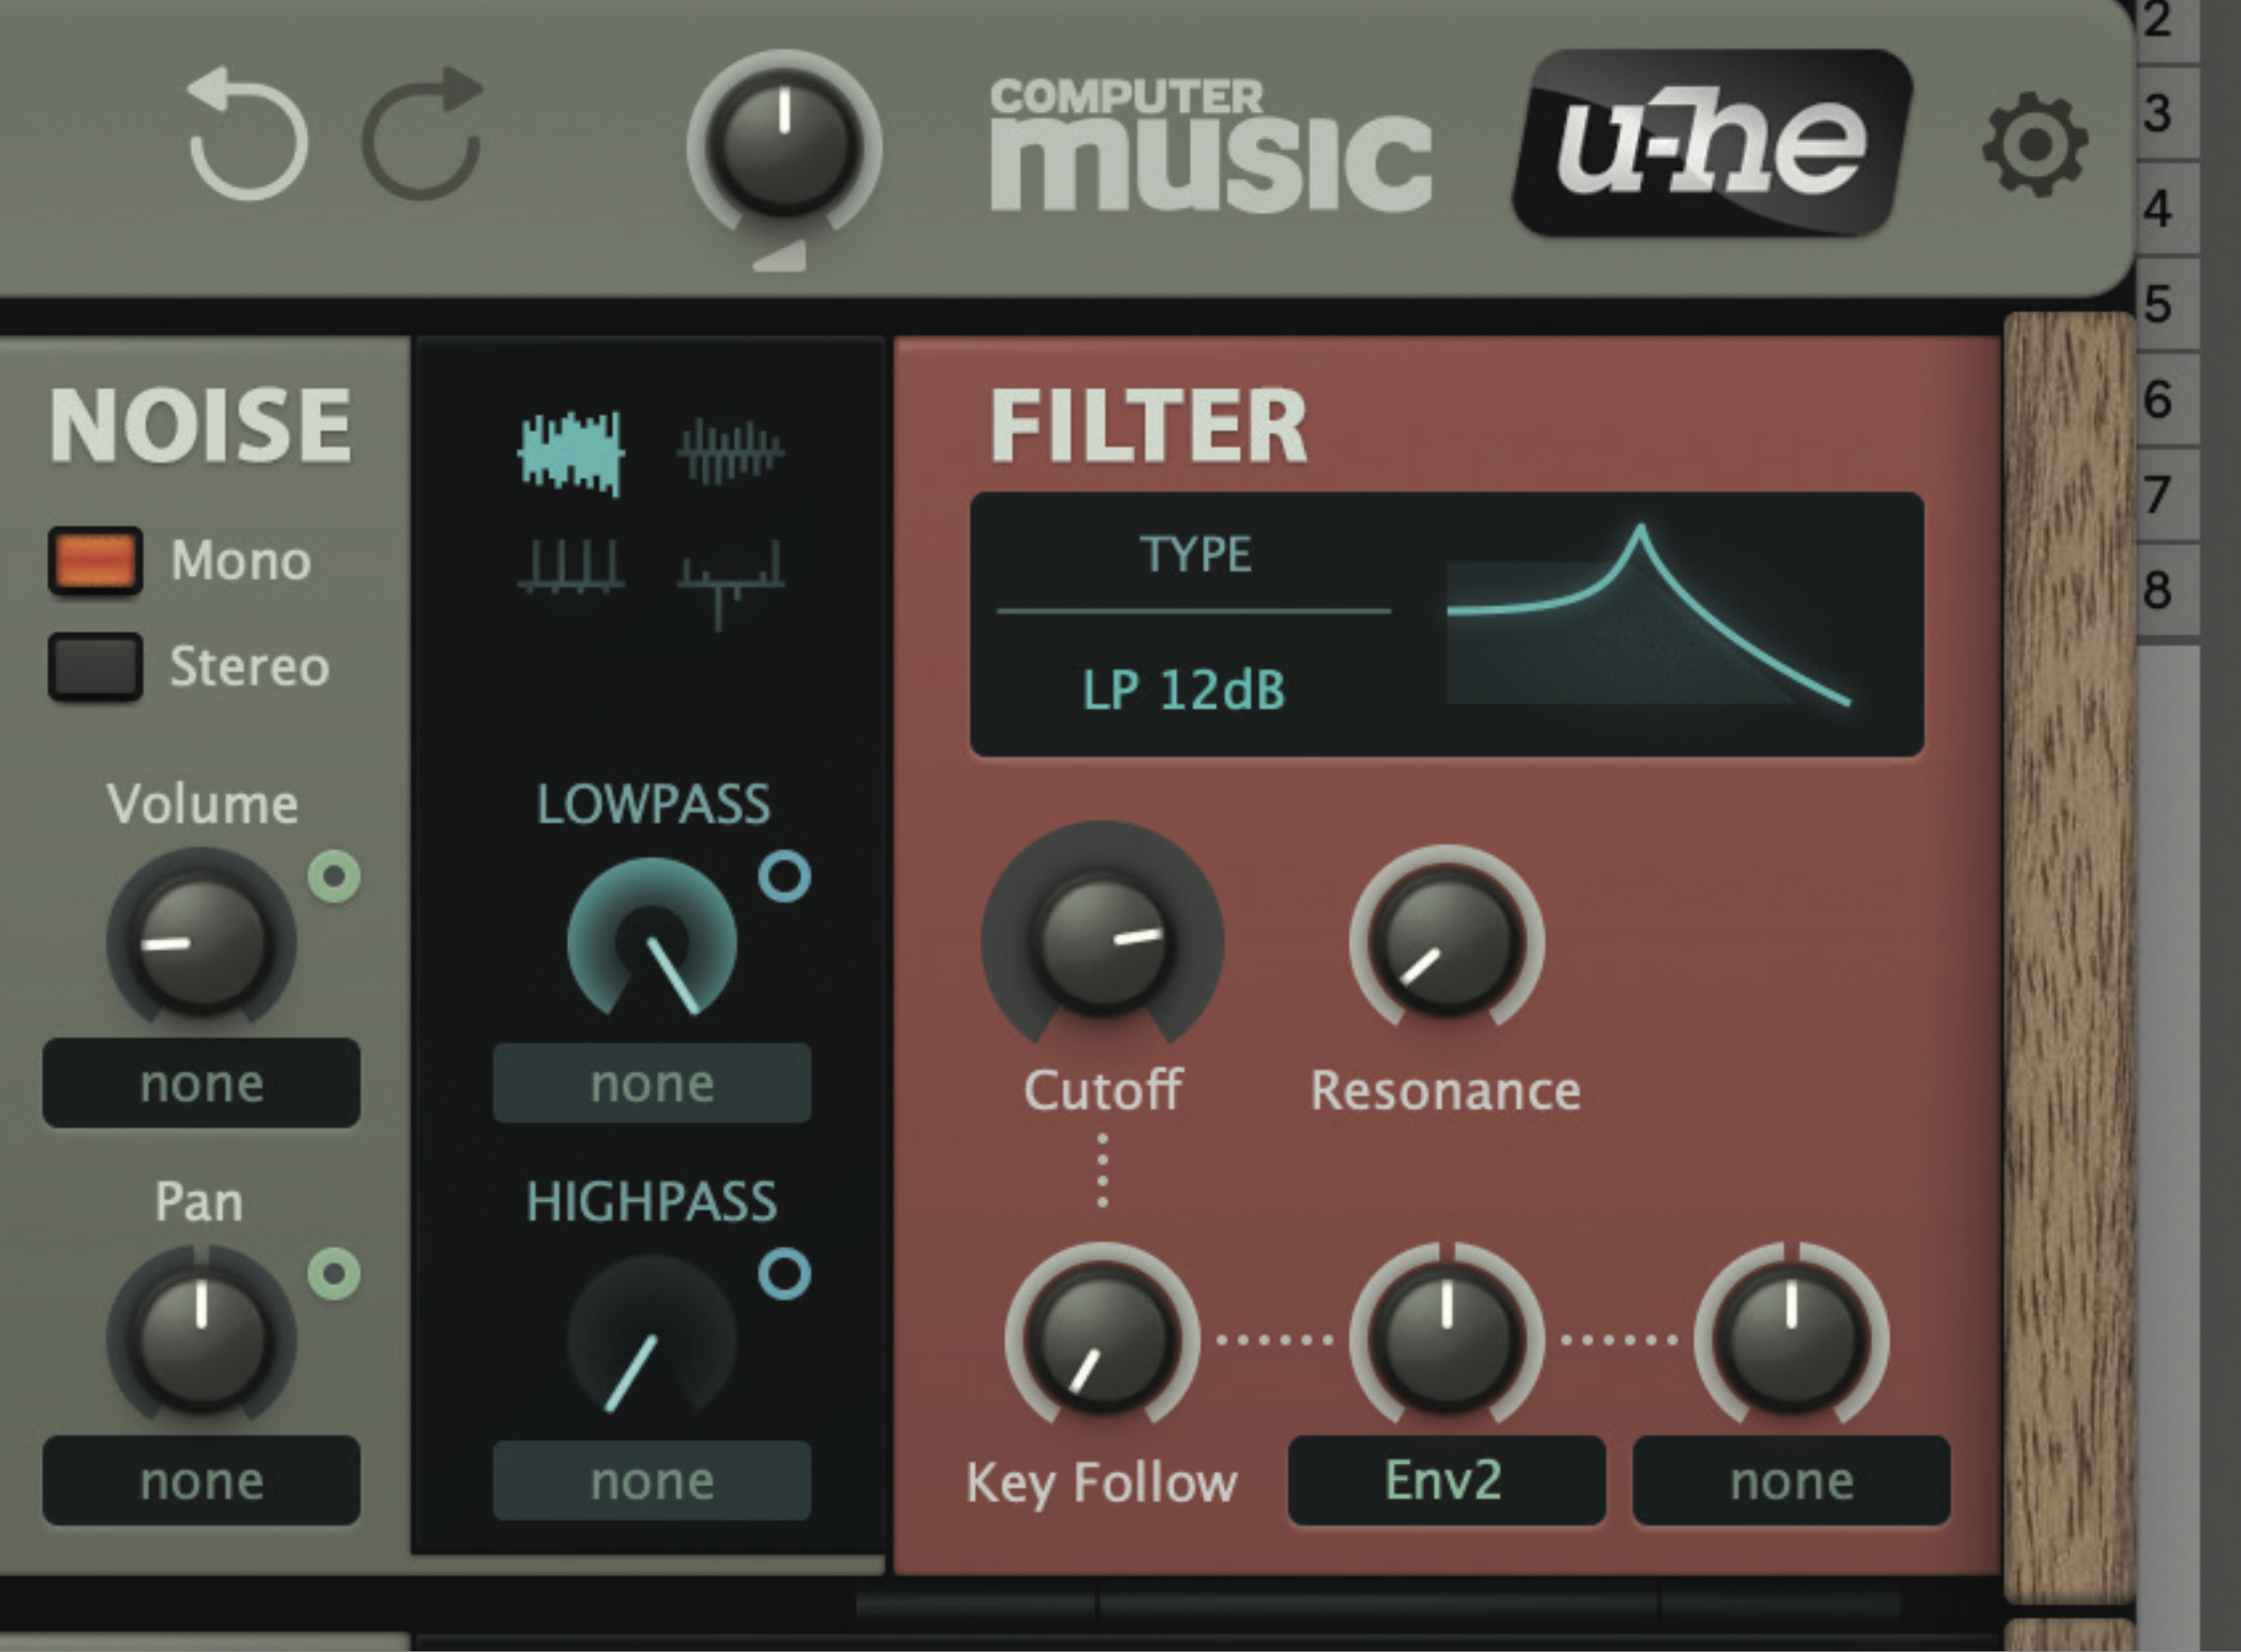
Filtering is hands-down the most important (and easy) sound design area on your synth’s front panel (bar modulation, which we’ll come to), with tweaks to the Frequency dial giving you big ‘meow’ changes while the Resonance option adds a ‘squeal’-style effect.
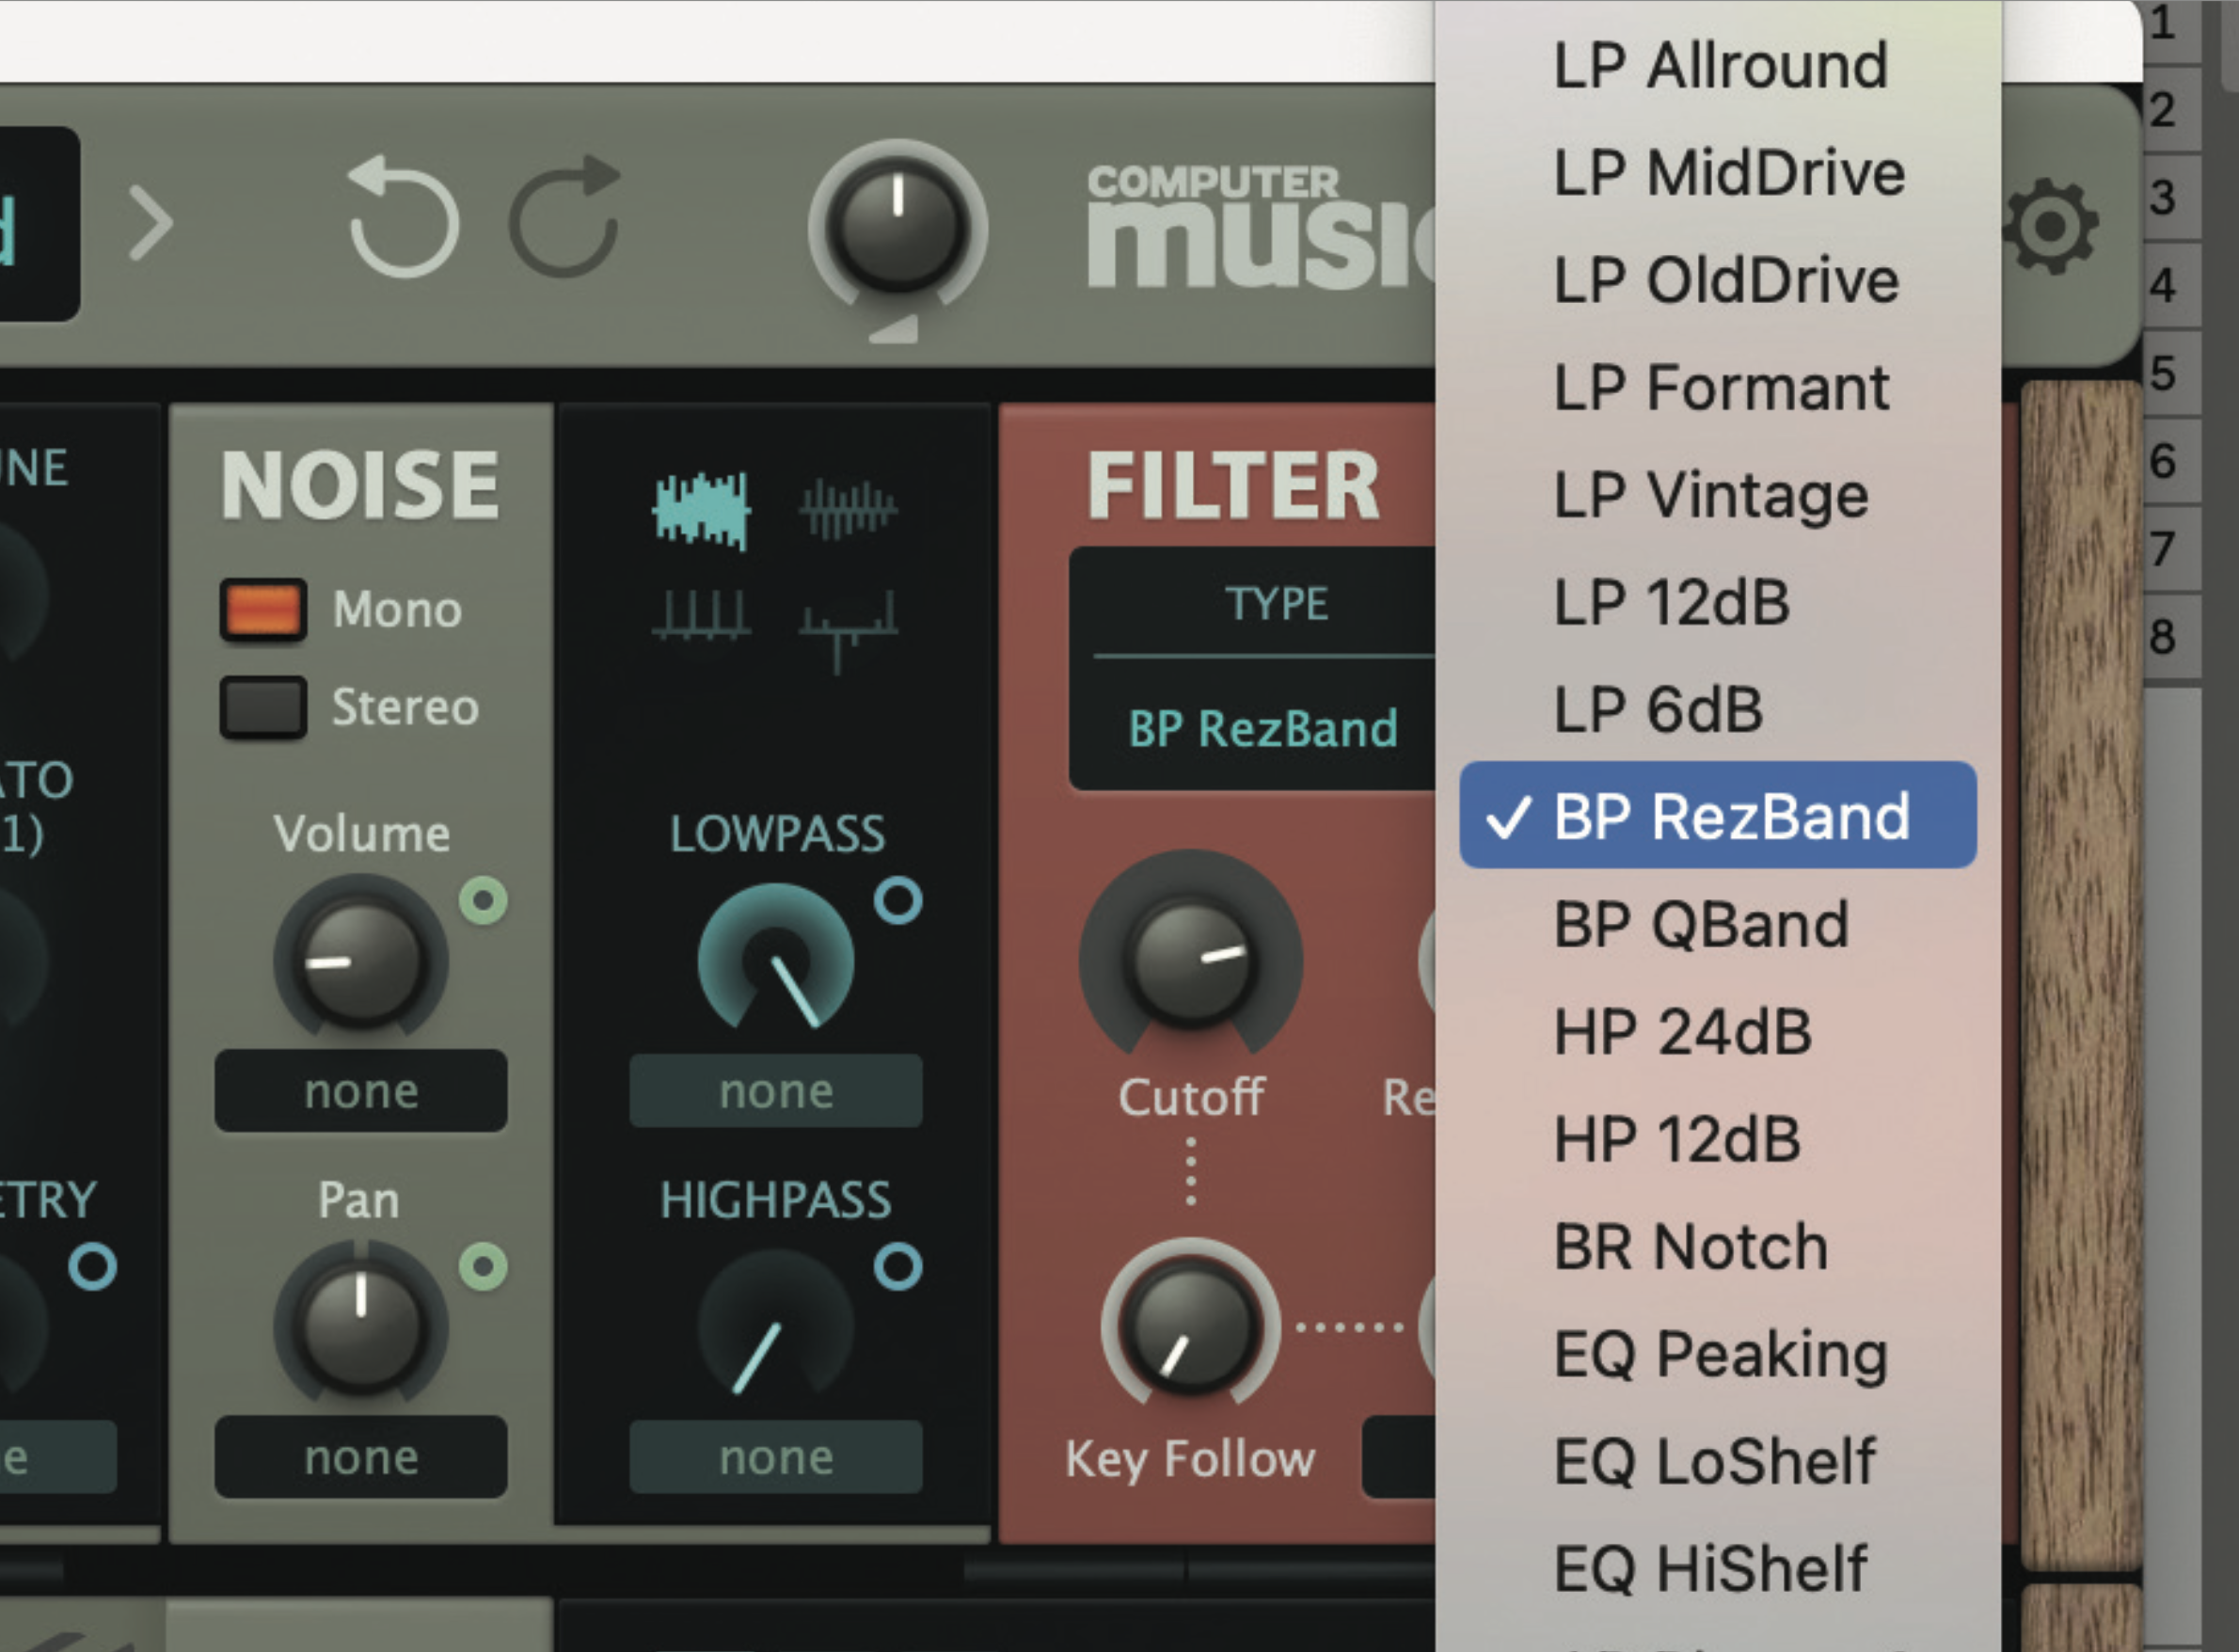
Filter changes can be dramatic. In fact switching filter type can be as dramatic as the oscillator type in Tip 1 above. Most synths will have high, low and band-pass filter options. Changing from low to band-pass, as here, can give a ‘telephone’ quality. Not always good, but it can make a sound stand out in a mix.

Delays can really add something special to a sound. Many synths come with effects, and of course these can be your sound design friend. But we recommend switching in the delays first, as they can really liven up any sound. GForce knows this and makes the delay effects prominent in its Oddity (above).
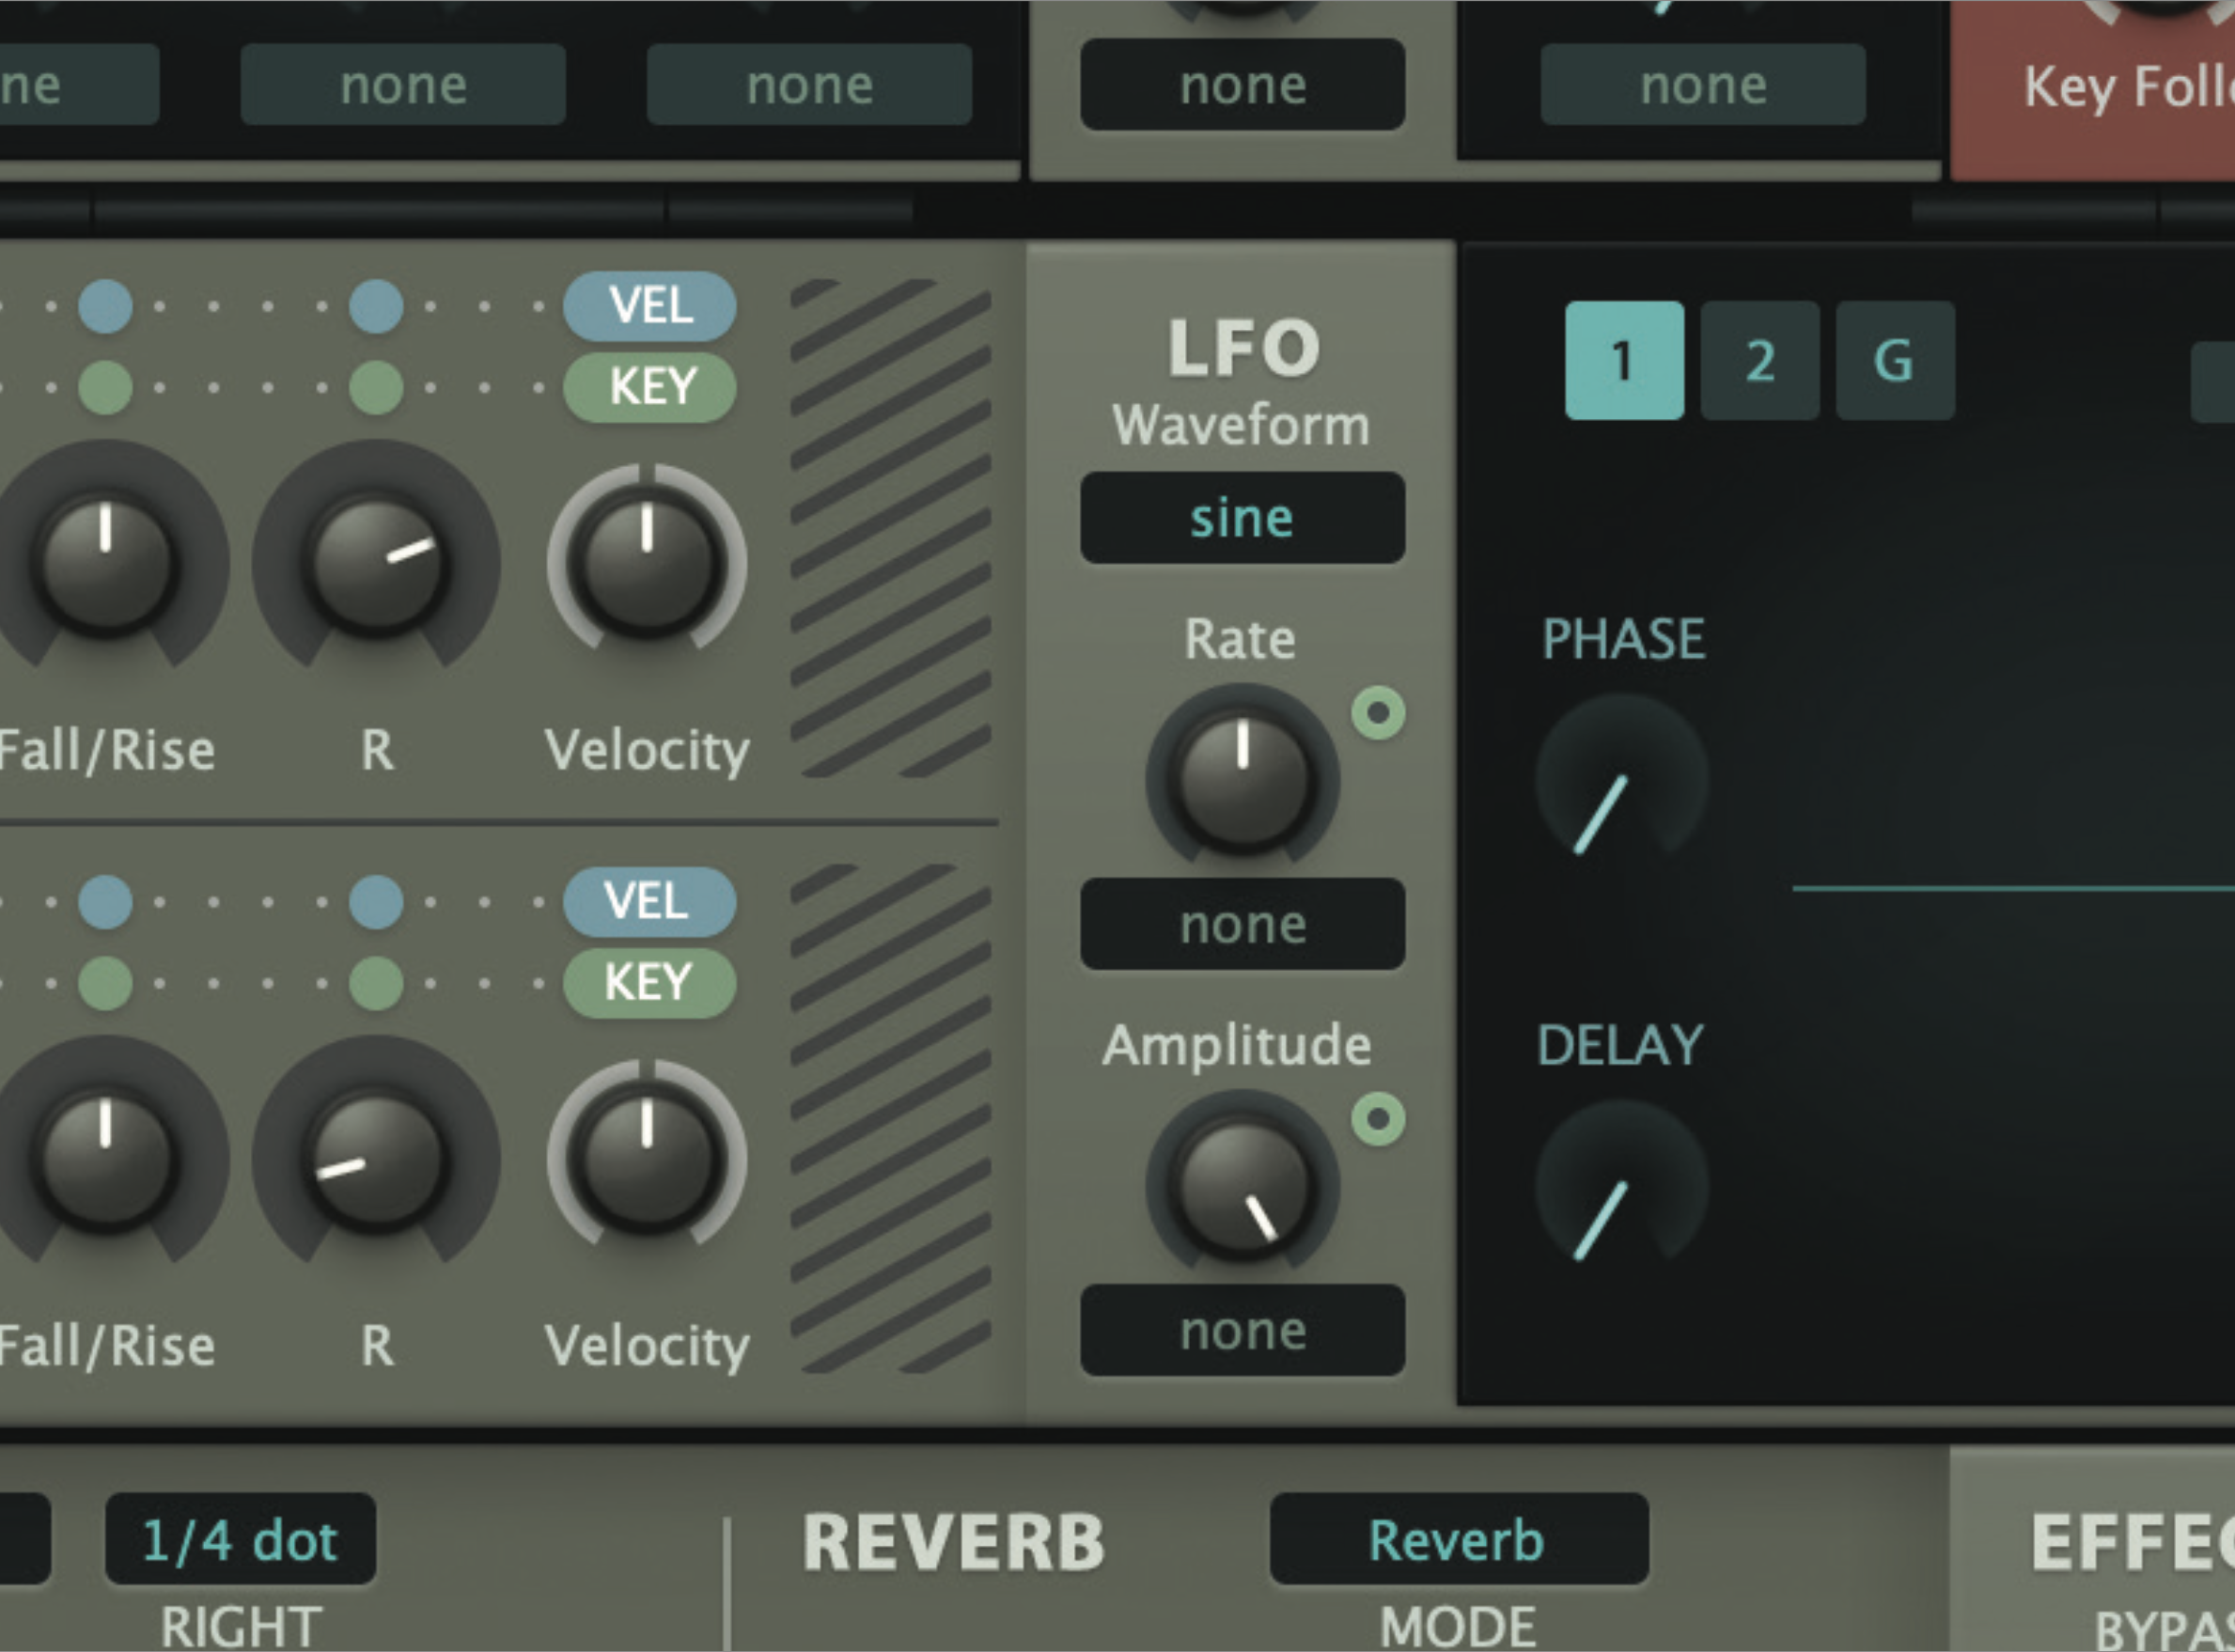
Modulation is your best sound design tool. We have a whole section dedicated to this, but get to know your LFOs and other modulation sources, and you can liven up (usually) any parameter by adding movement. Now you know which synth controls can be easily tweaked for maximum results.


