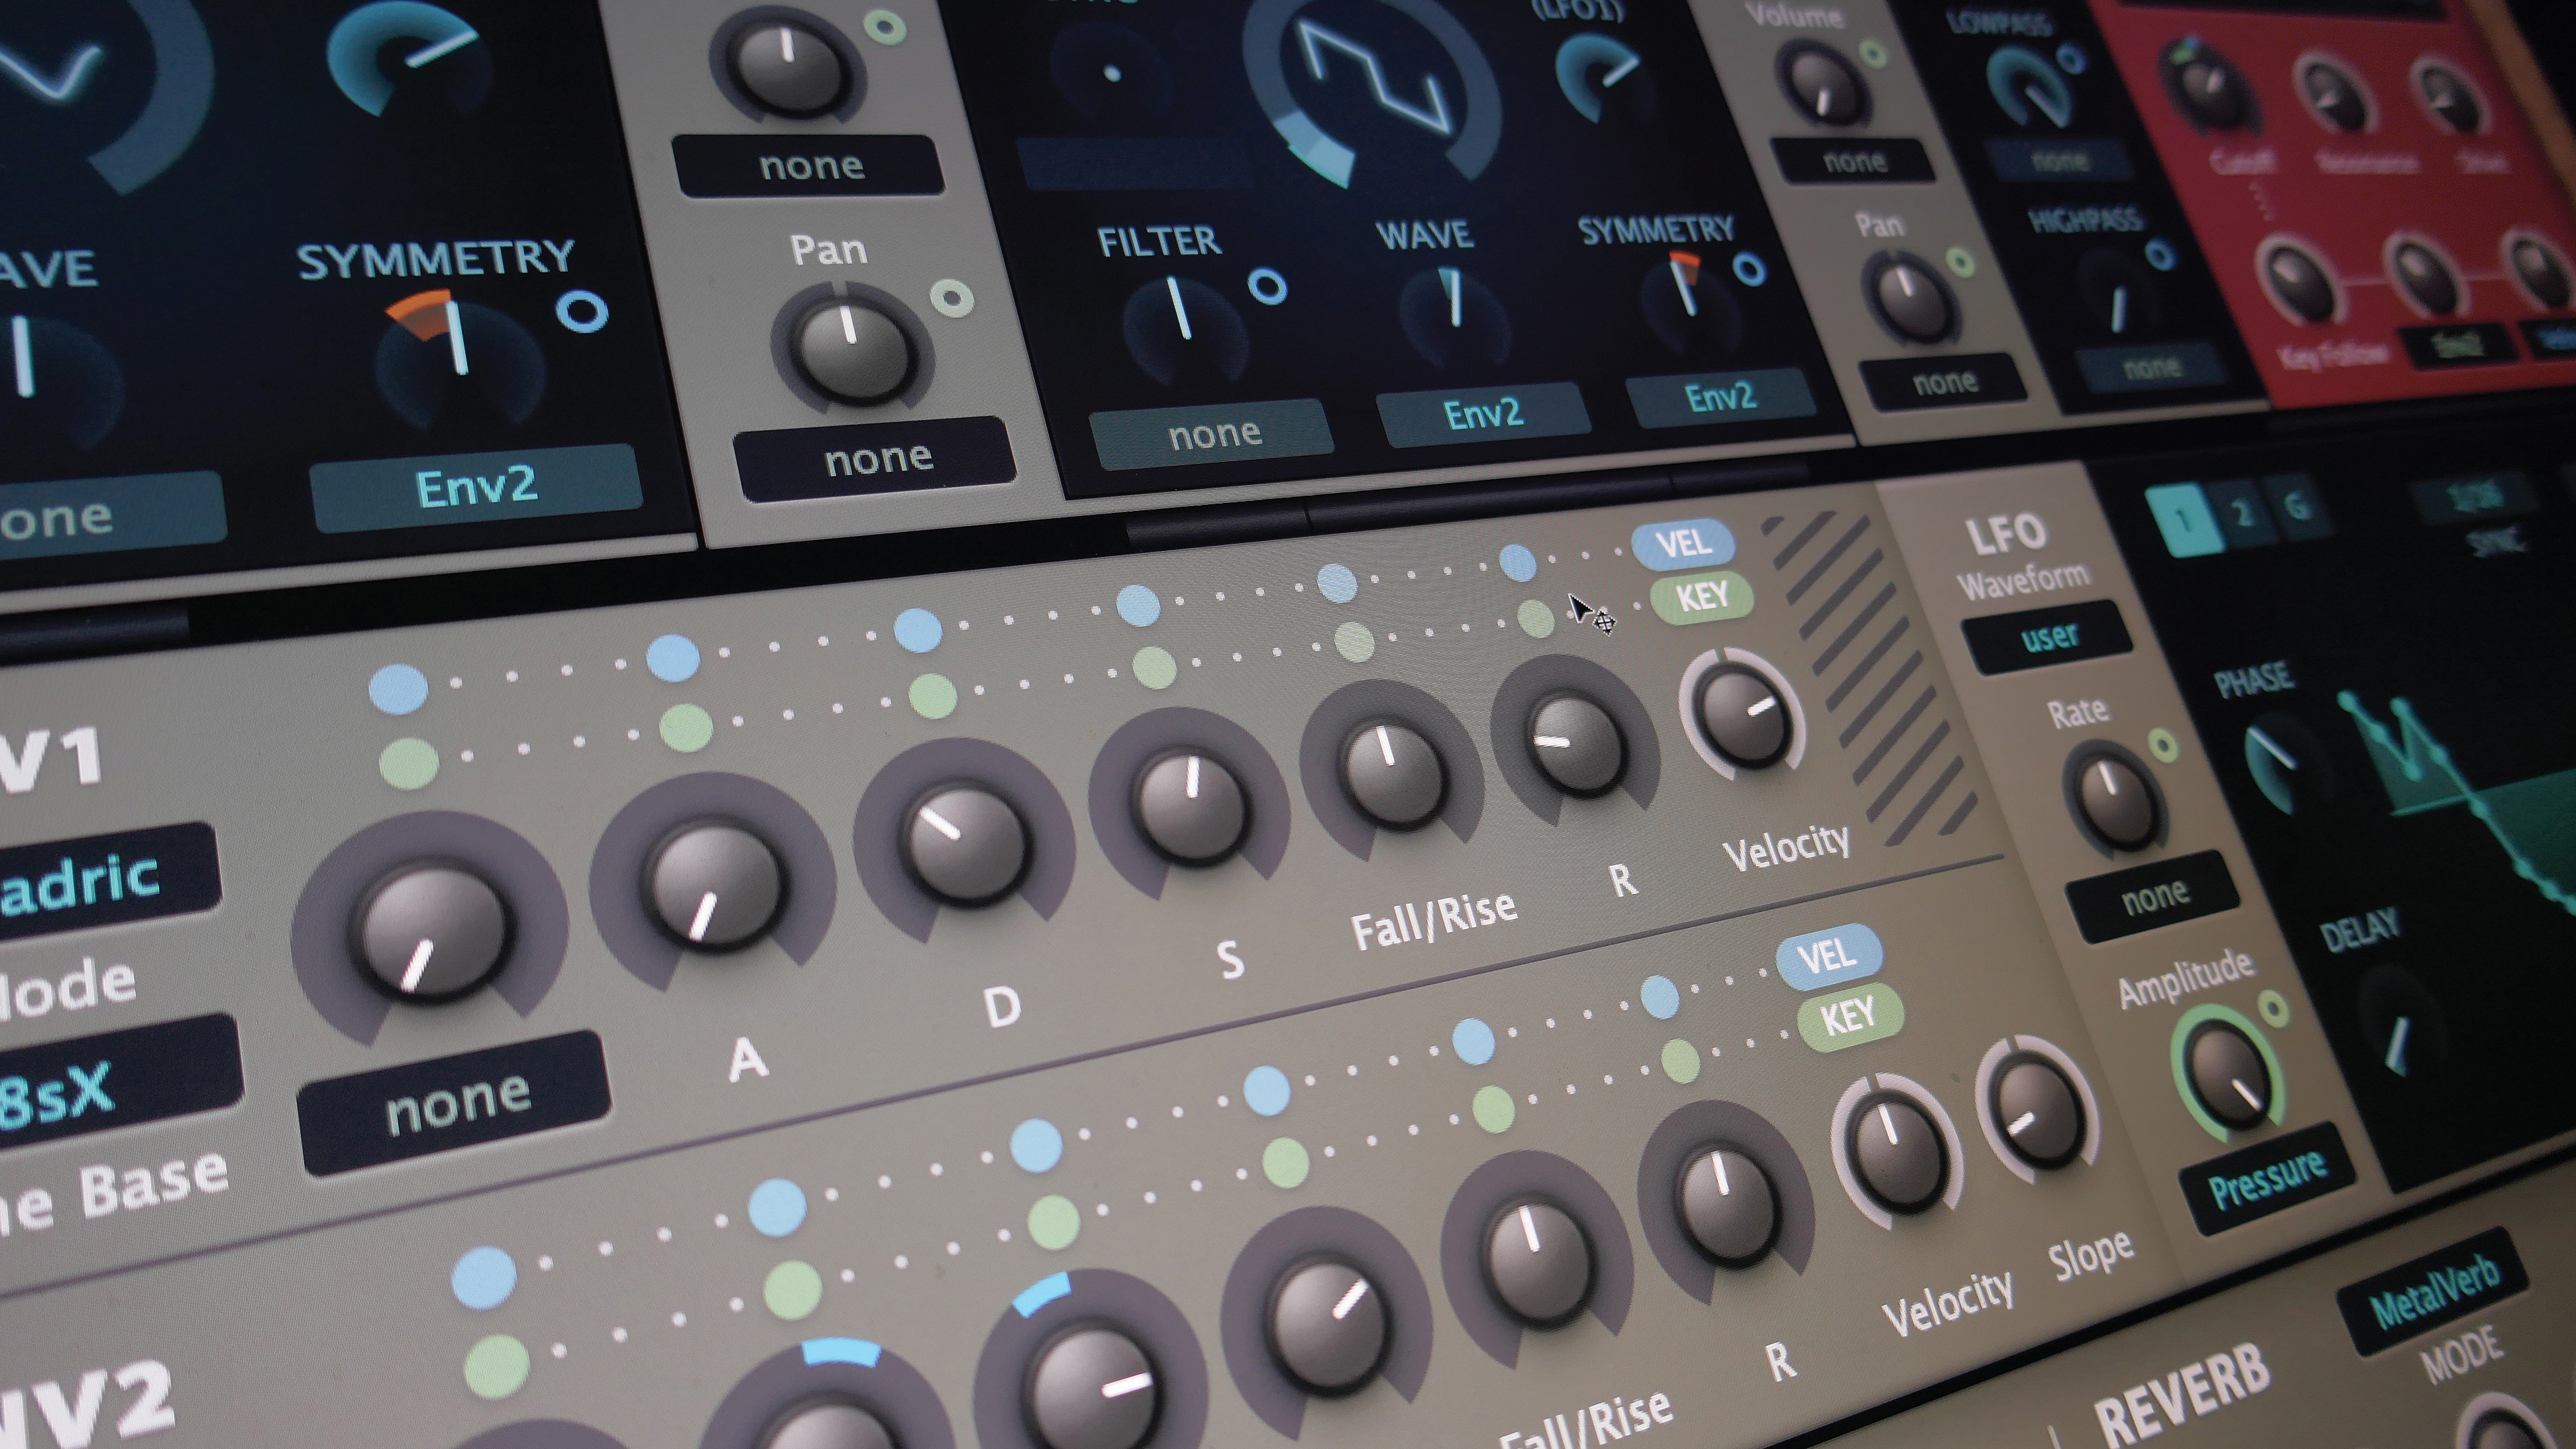
Today, we're going to show you how to design an atmospheric synth pad using any polyphonic synth plugin.
In this tutorial, we're going to use ZebraCM, a synth that comes bundled with the Computer Music Plugin Suite, a set of free plugins you can get free with every issue of Computer Music Magazine. If you don't have ZebraCM, you should be able to follow along with any synth plugin you have to hand.
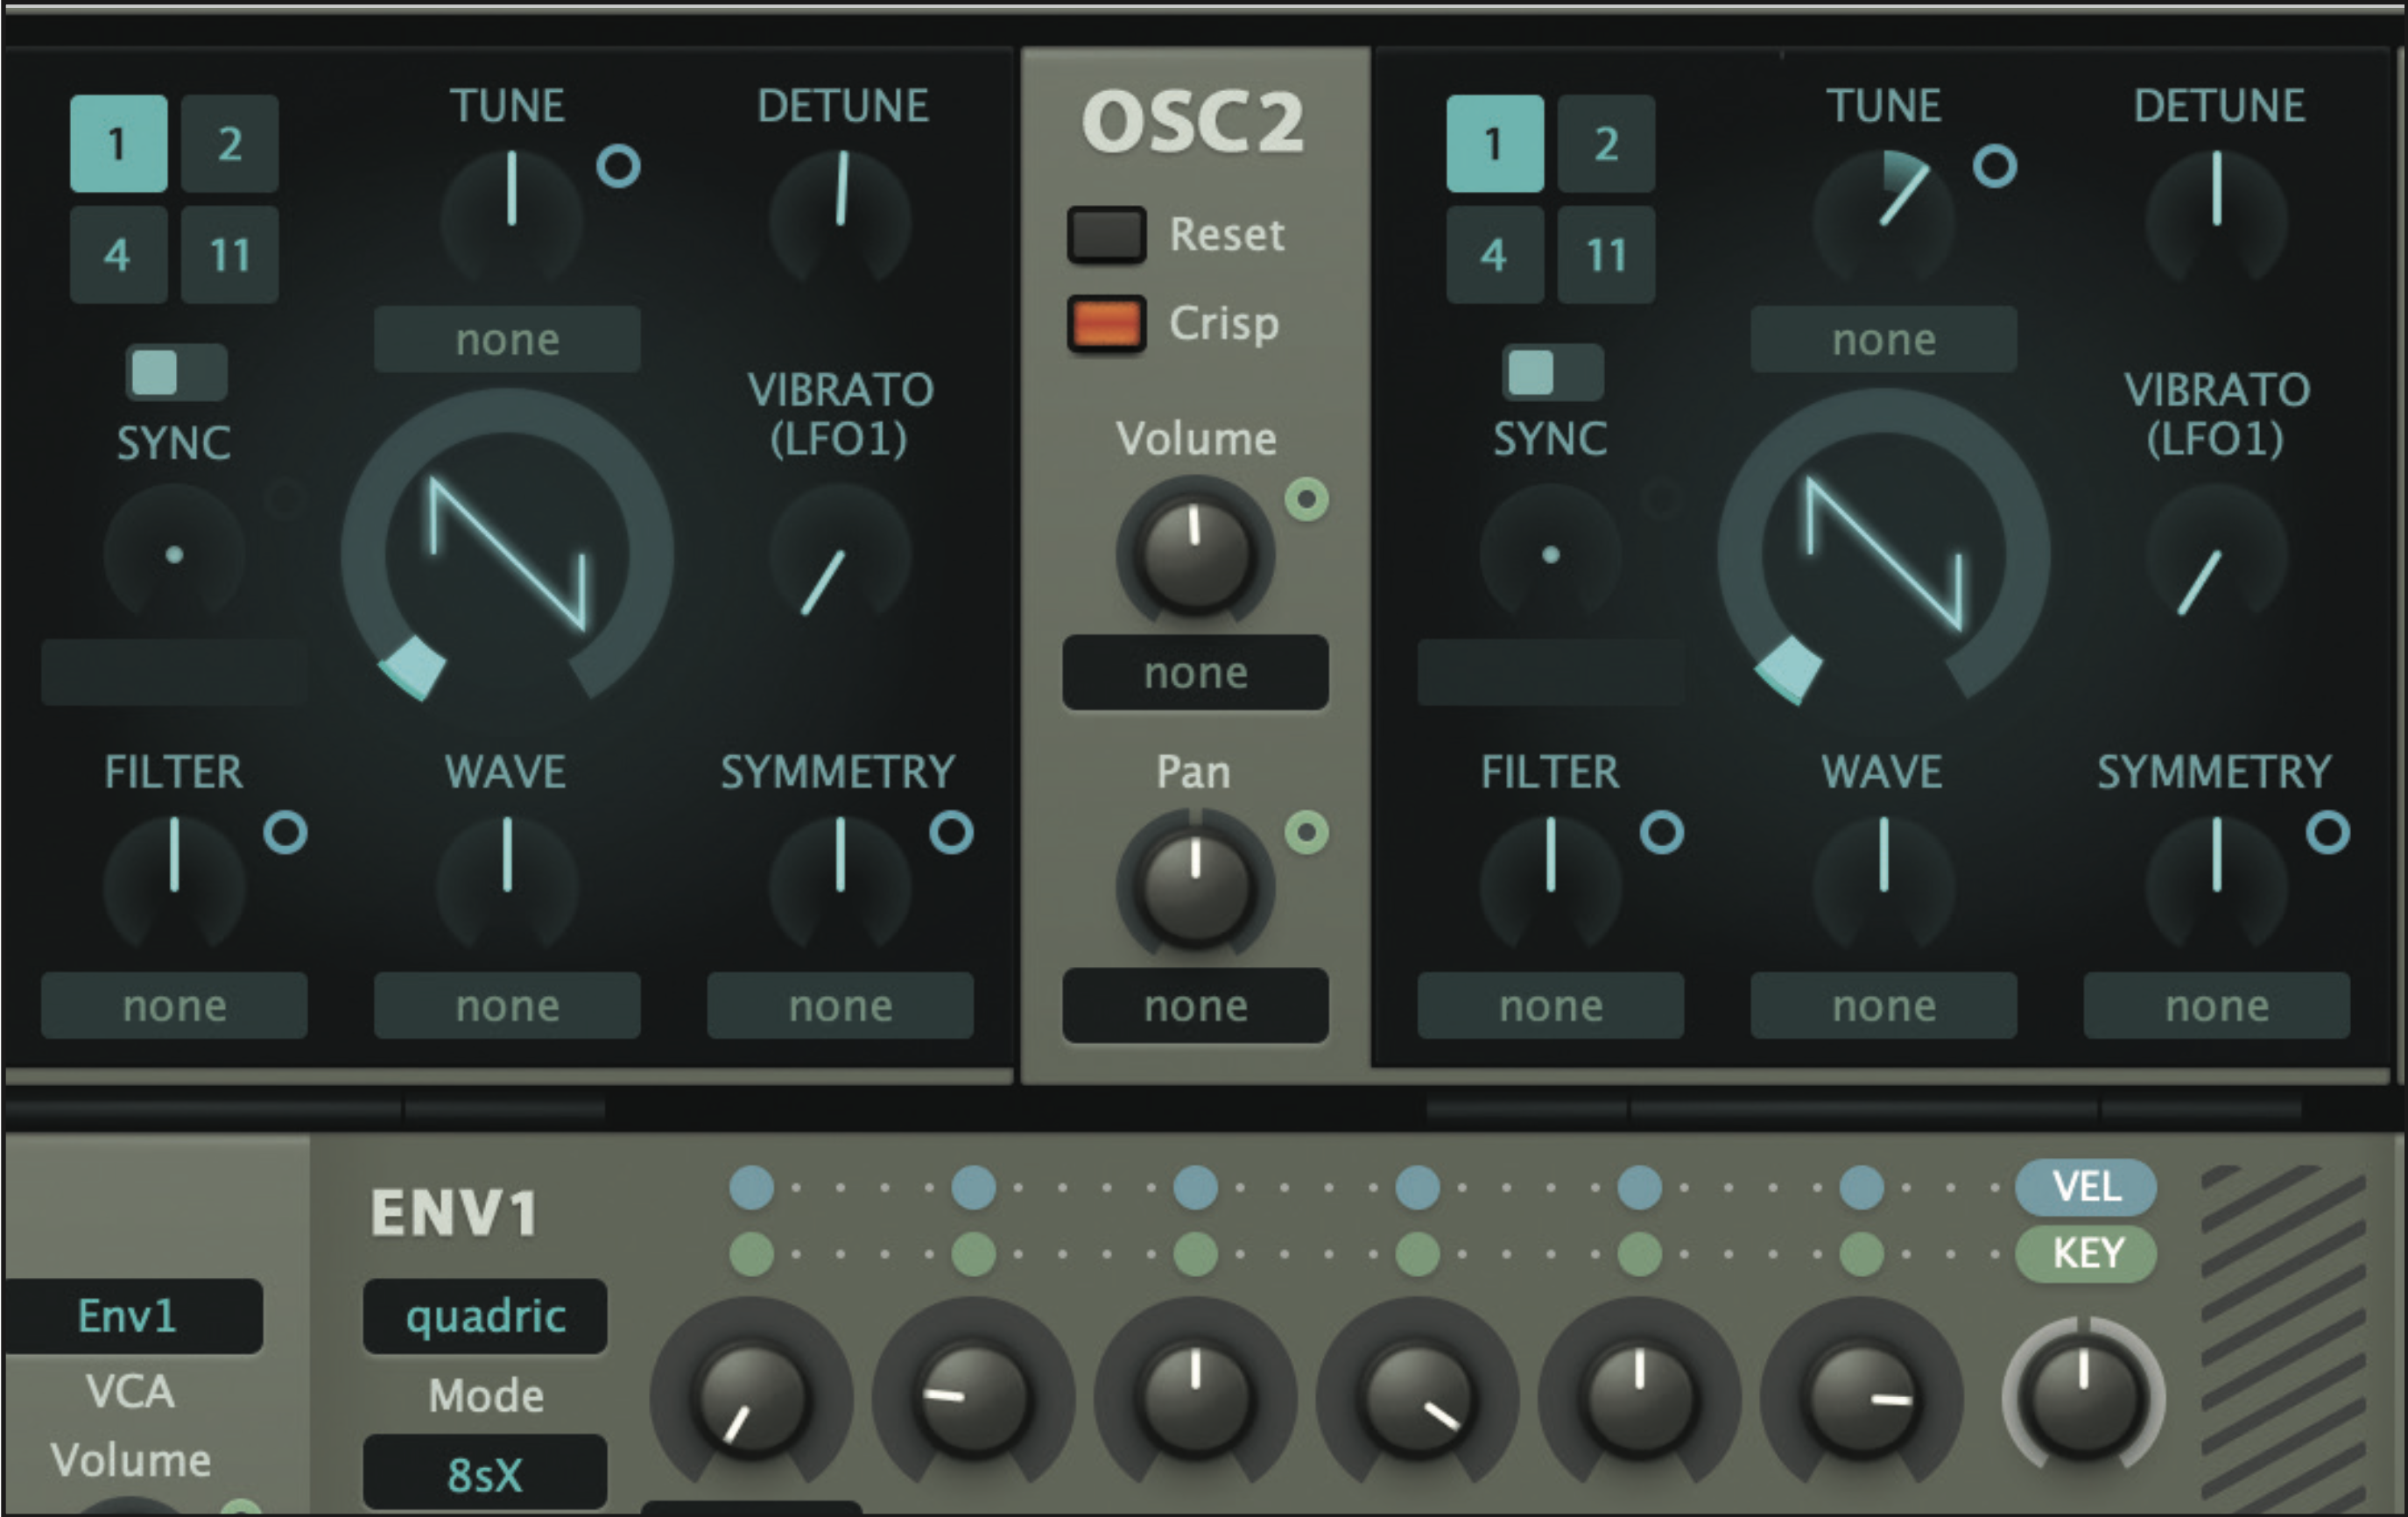
Click on the preset bar and select Init, keep both oscillators as sawtooths but shift OSC2 up by an octave by moving the Tune Dial up 12 semitones. To add some thickness, increase the Detune dial to 1.03 for a subtle addition.
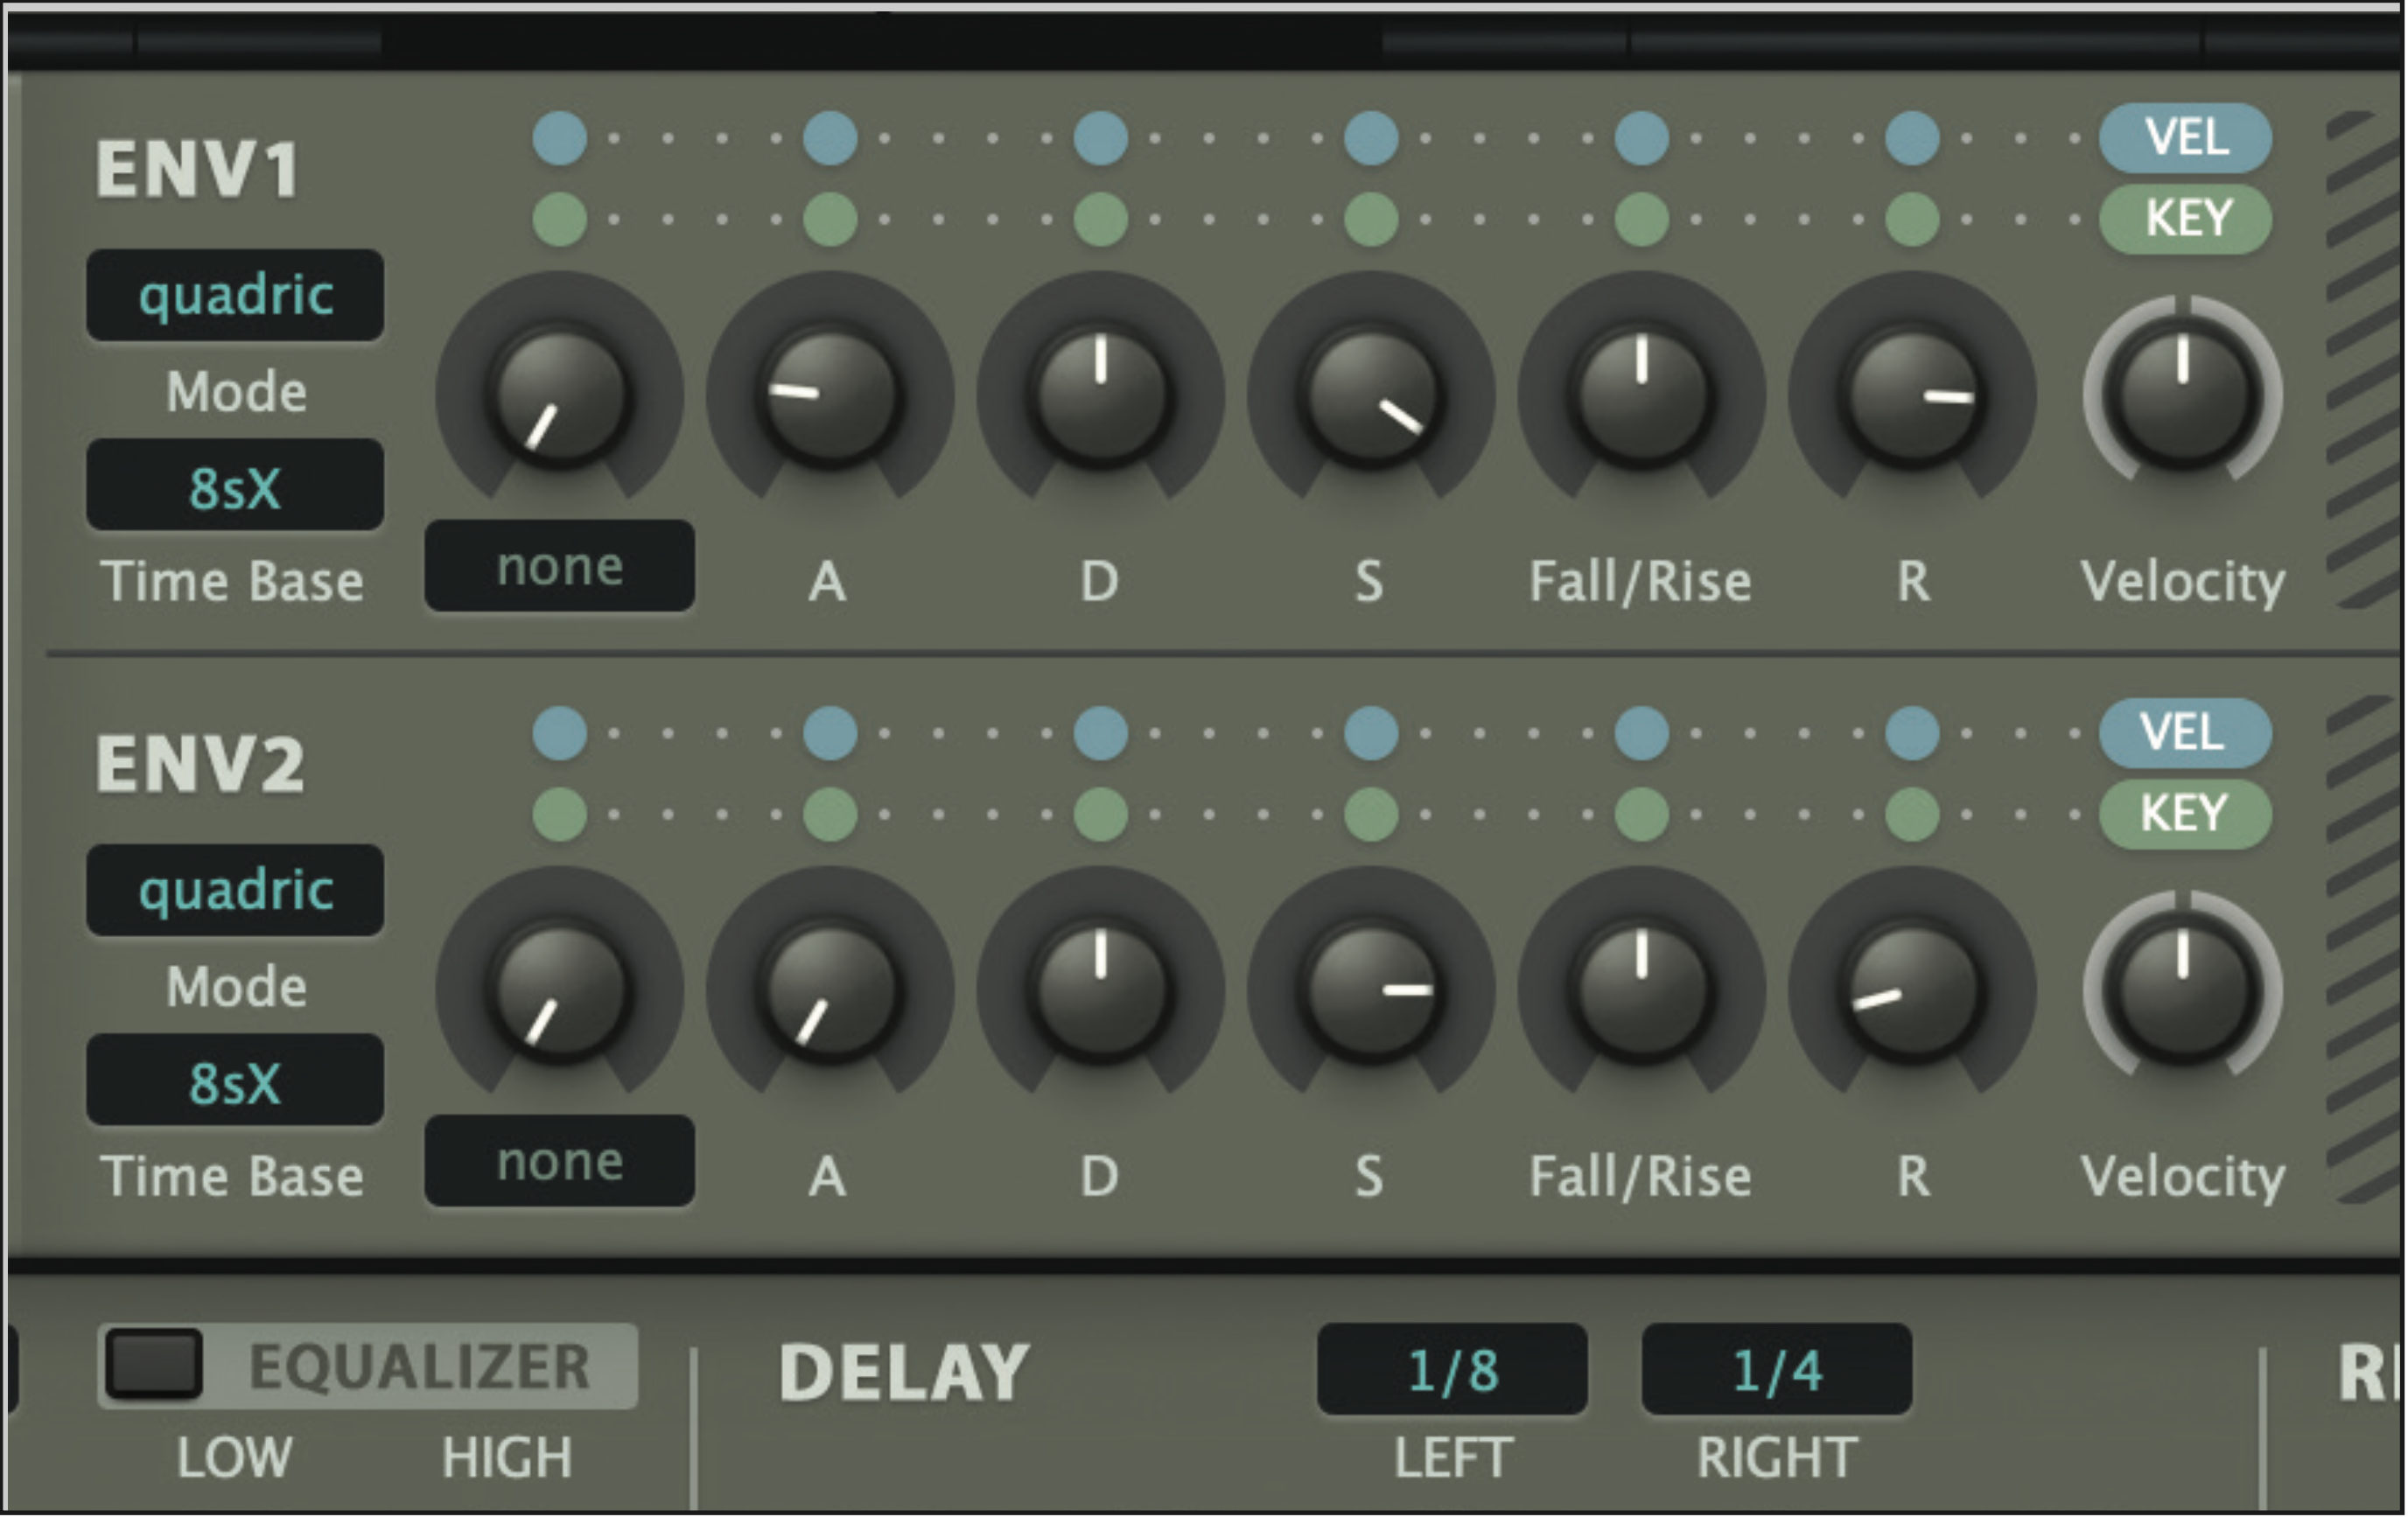
In the amp envelope (Env1), we want the sound to come in fairly quickly, but to hang around for a while before fading slowly. So set the values to around those shown: Attack 22; Decay 50; Sustain 92; Release 81. Obviously experiment here because this defines the shape of your pad sound over time.
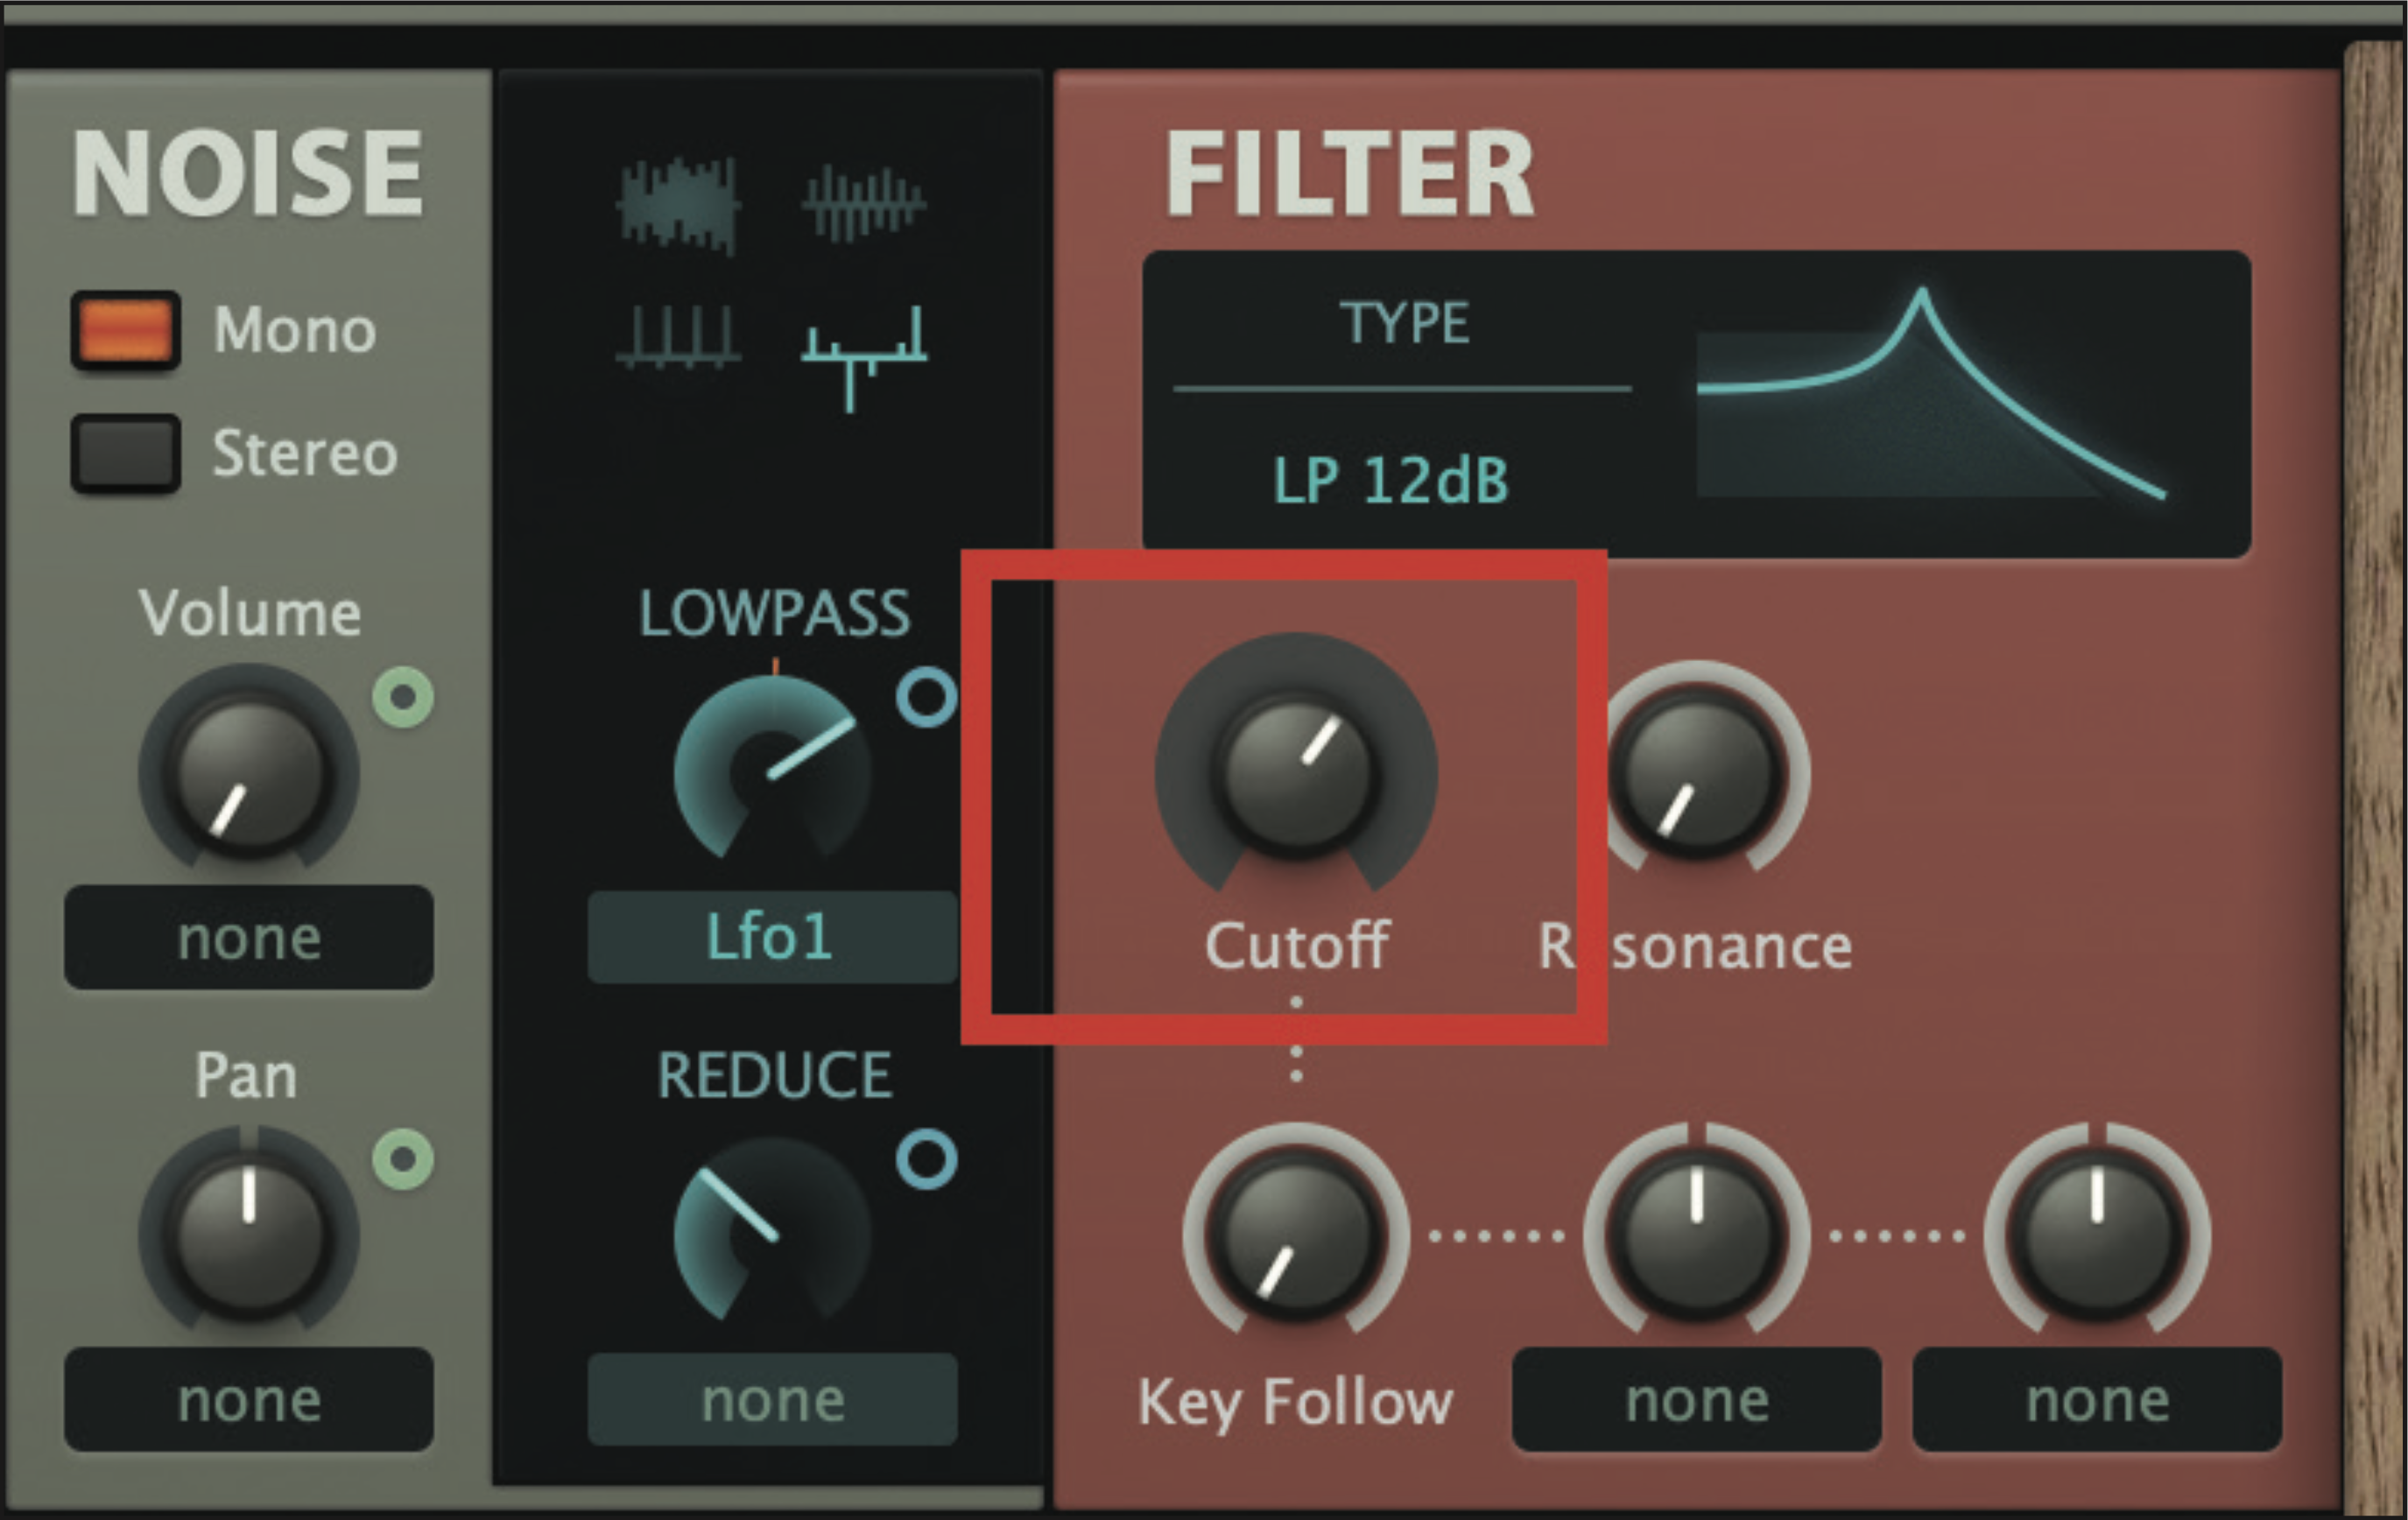
In the filter section, set the filter as LP 12dB and the cutoff to around 90; this is up to you and will represent the higher register of the pad sound you will hear (and can, of course, be adjusted later).
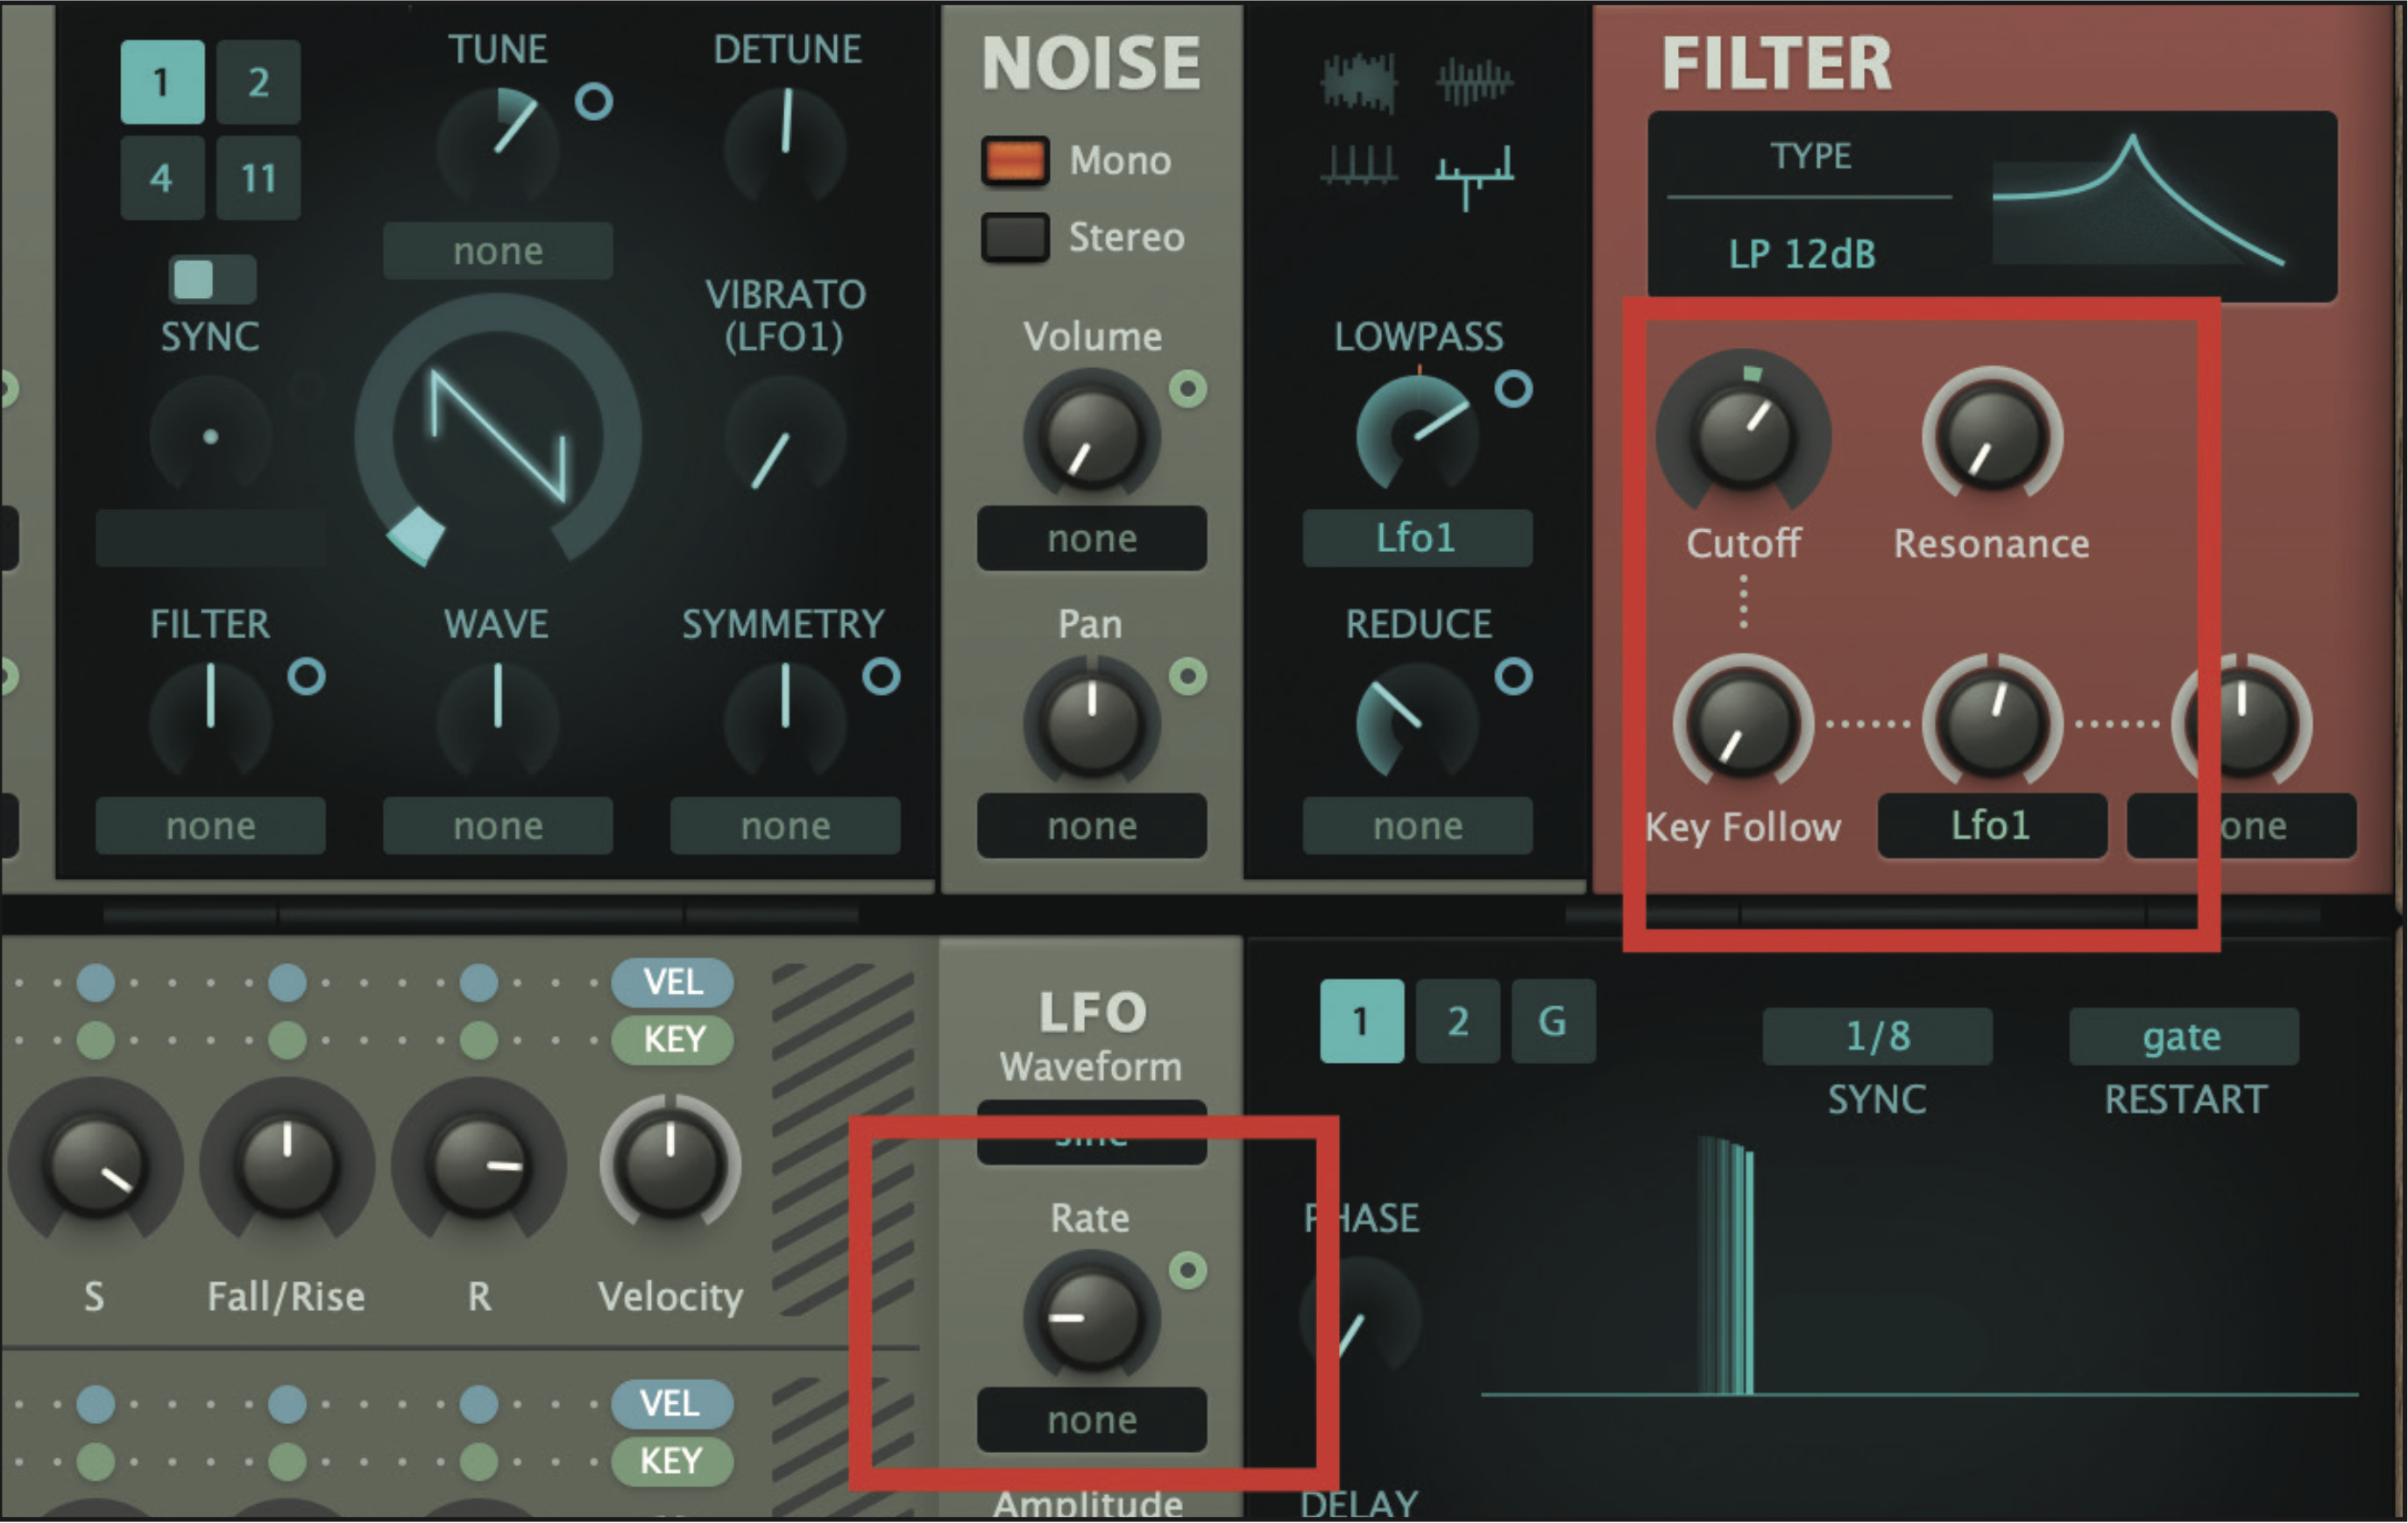
We want our LFO to modulate the filter frequency in step 3 for a gentle swelling effect, so set the Rate at a slow 40 using a sine wave LFO. In one of the filter frequency slots, select LFO1 as the modulation source and you should hear the filter frequency gradually rise and fall. Sweet!
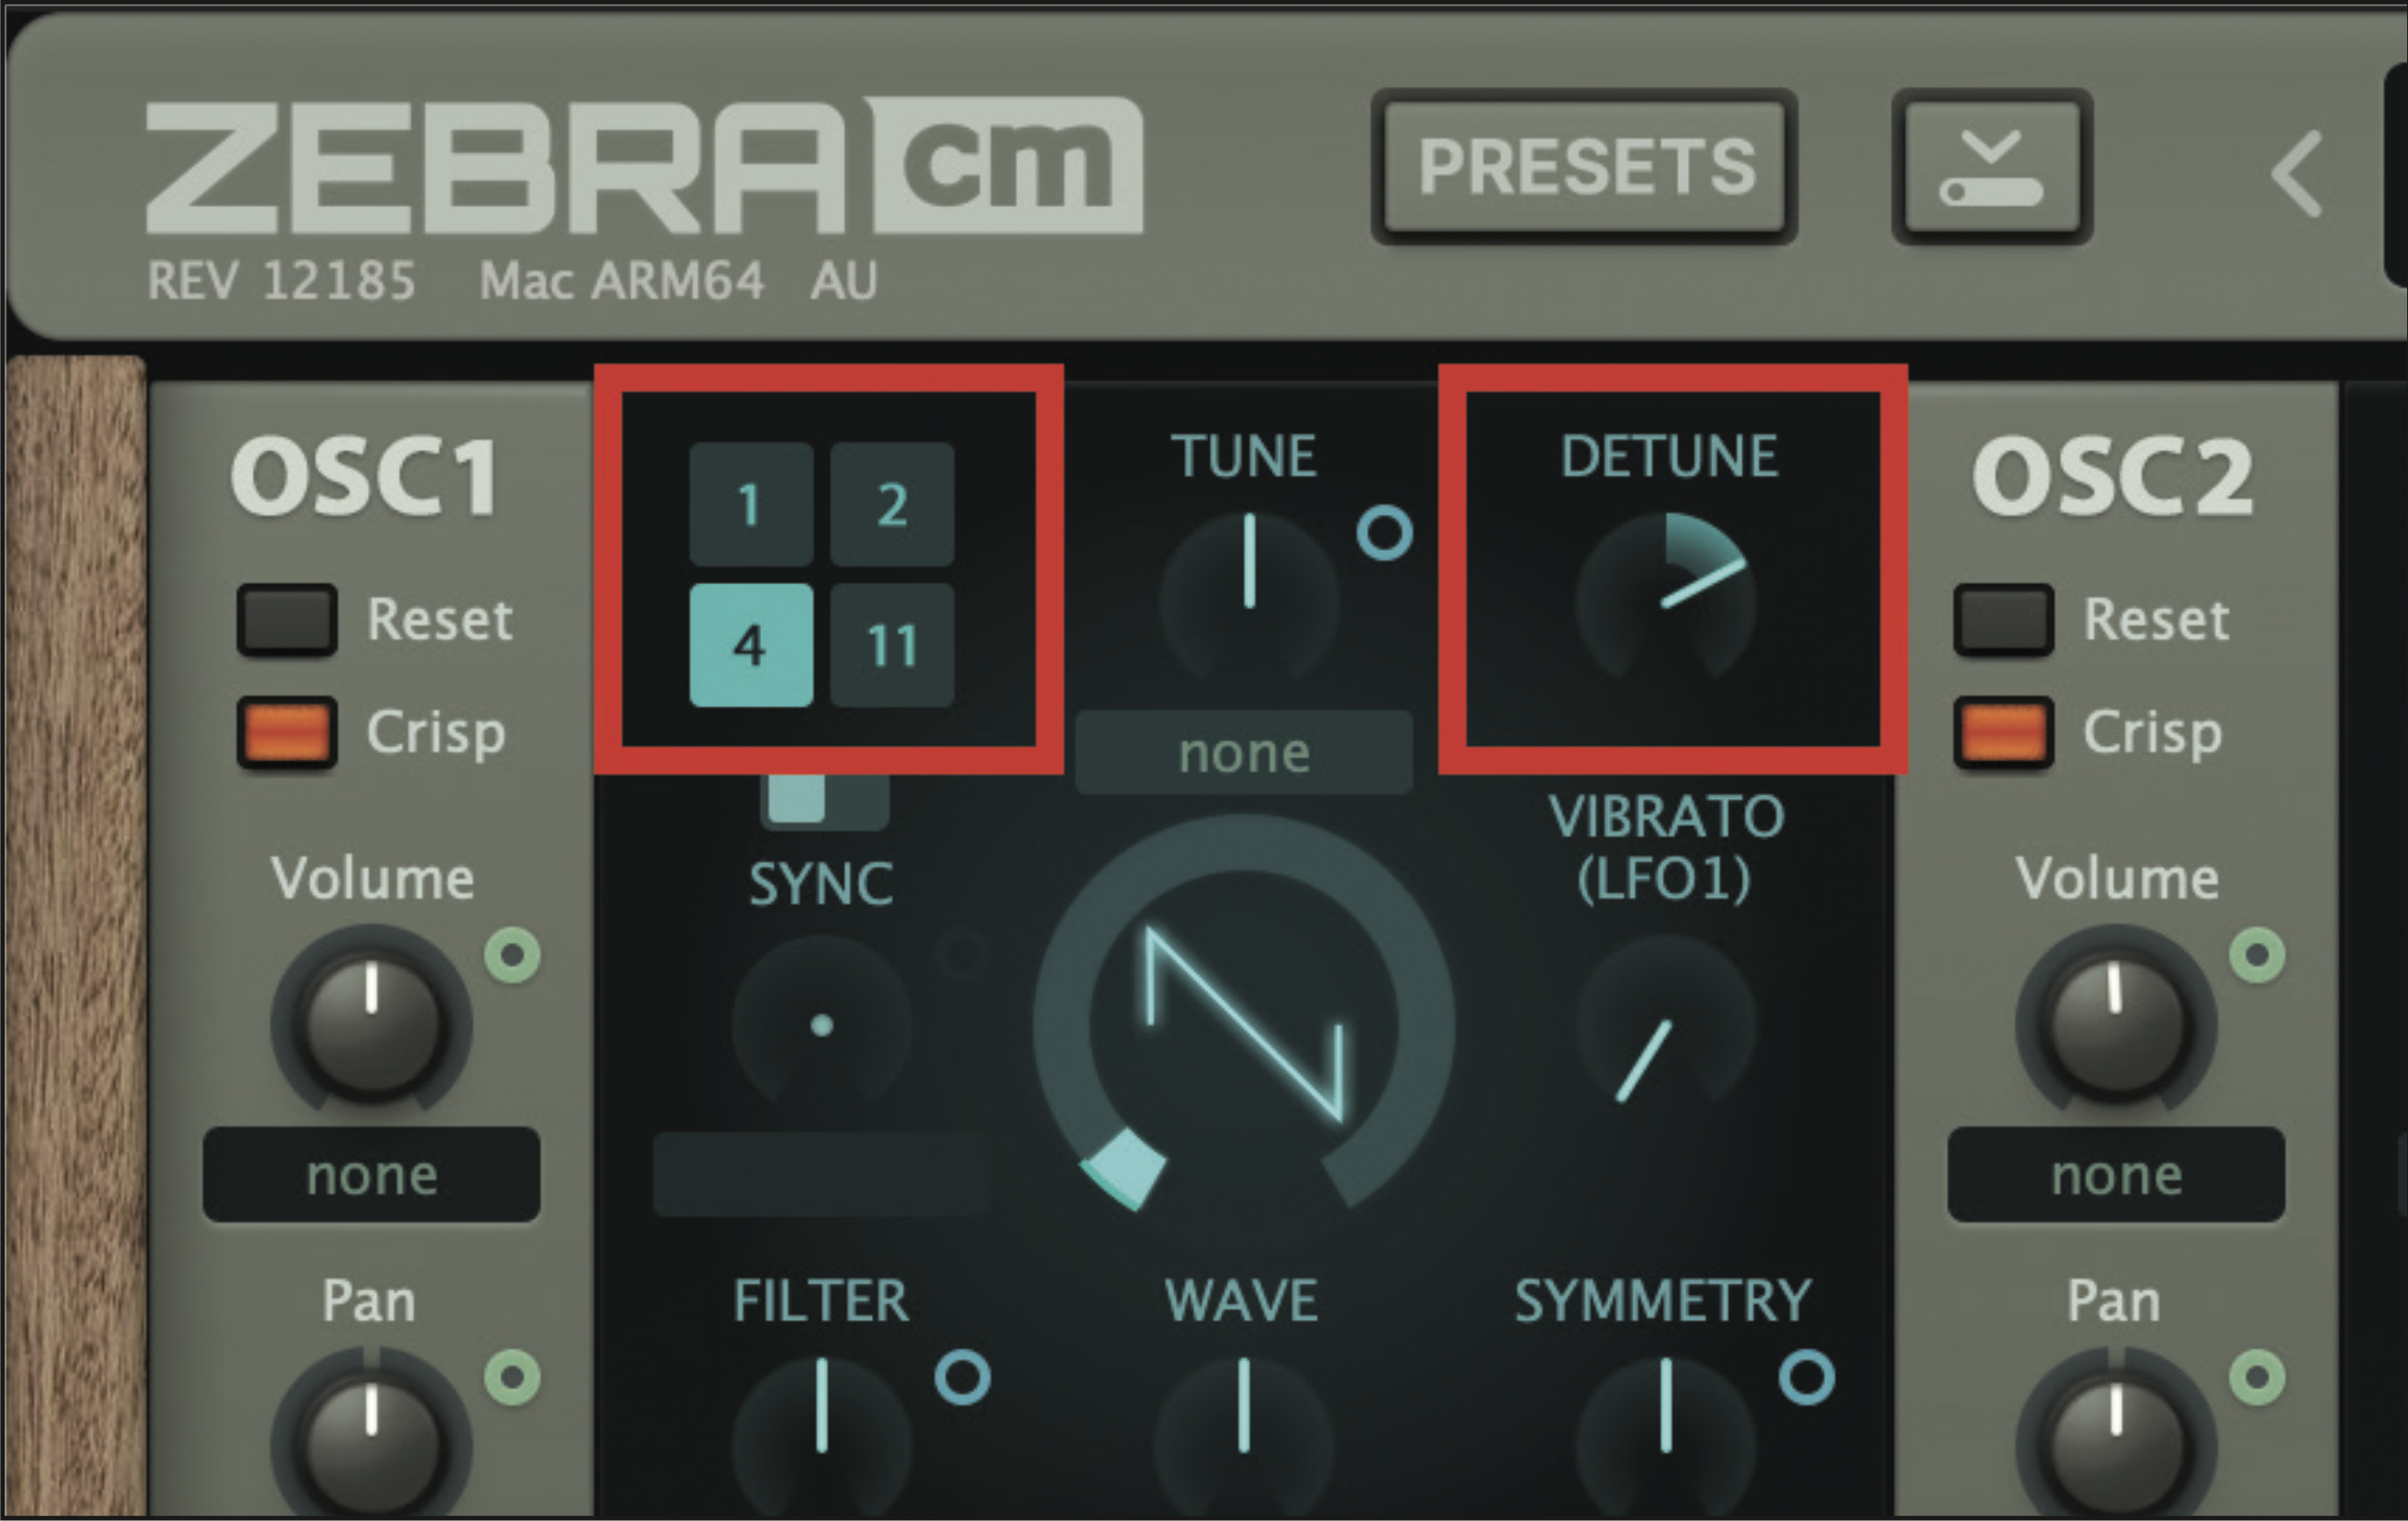
Use Unison to really open the sound up. As we saw in the second tutorial. We found that a value of 4 and Detune value of 15 on ours gave pleasing results, but now is the time to tweak and settle on something you like.
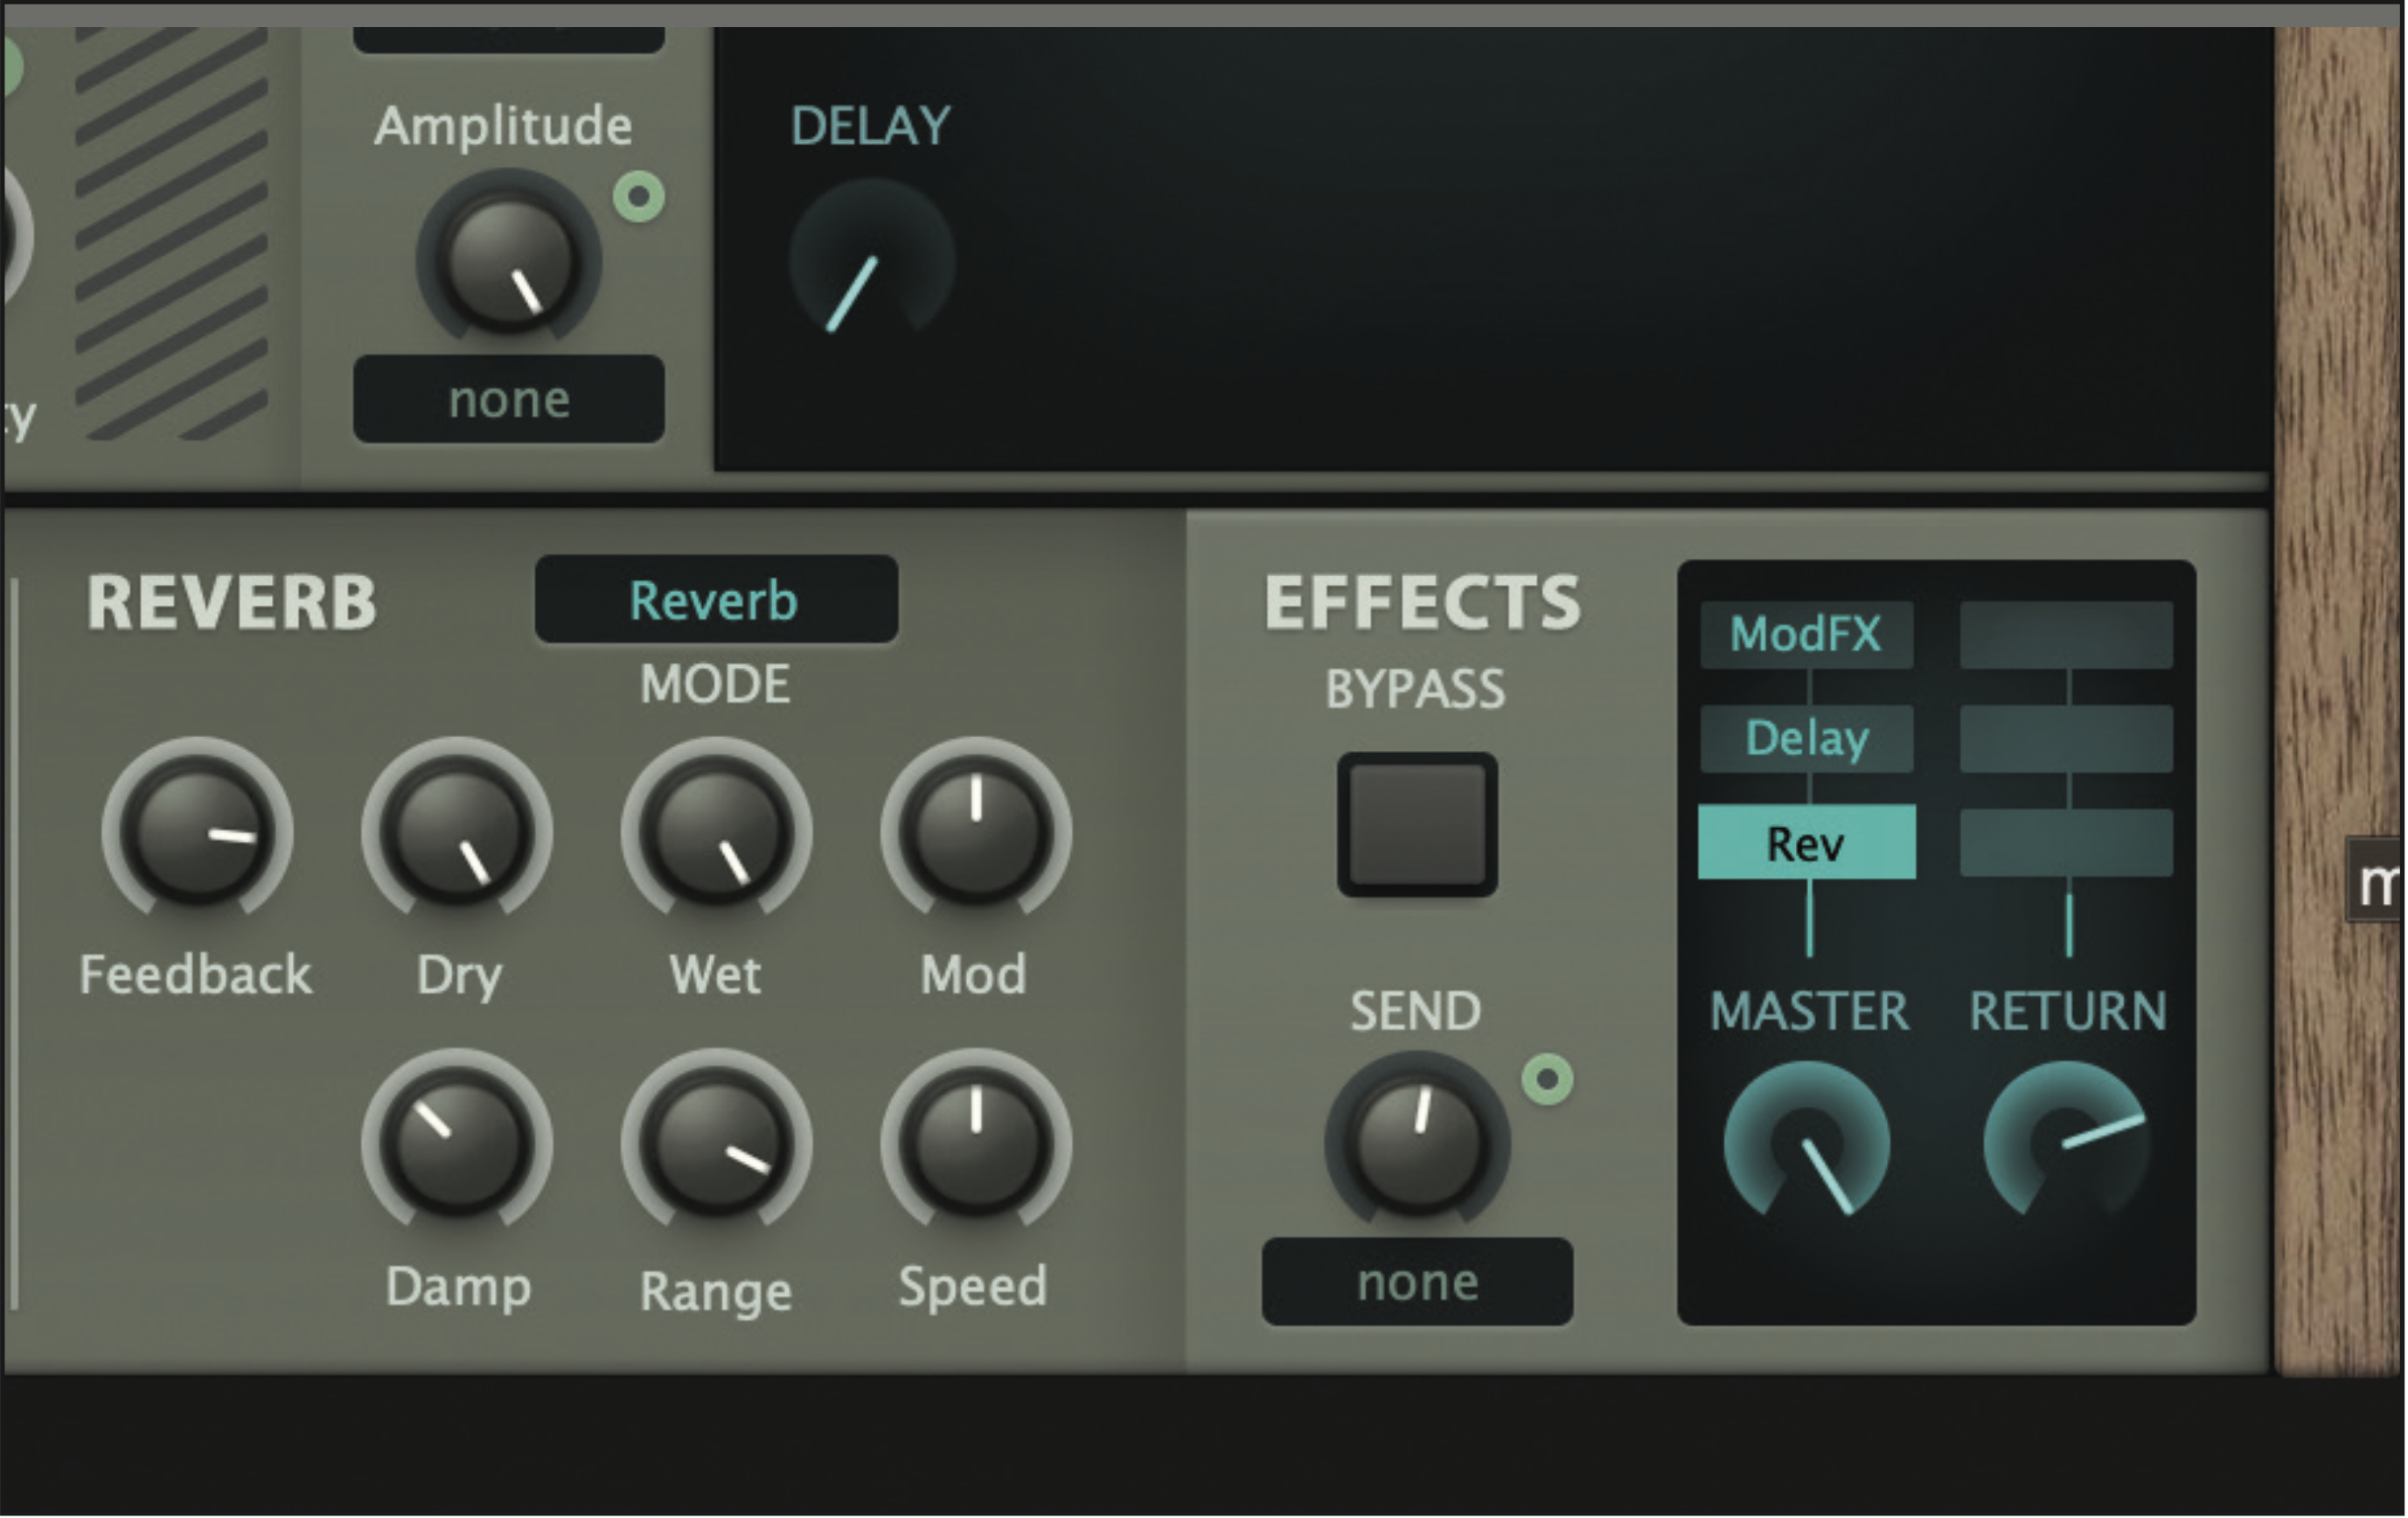
Finally, add effects. Reverb is your weapon of choice for more ambient results, and we love our ambience, so have set the Damp to 35, Dry, Wet and Range to late ’80s. You can use this pad as a template going forward, so revisit all the steps and tweak away!


