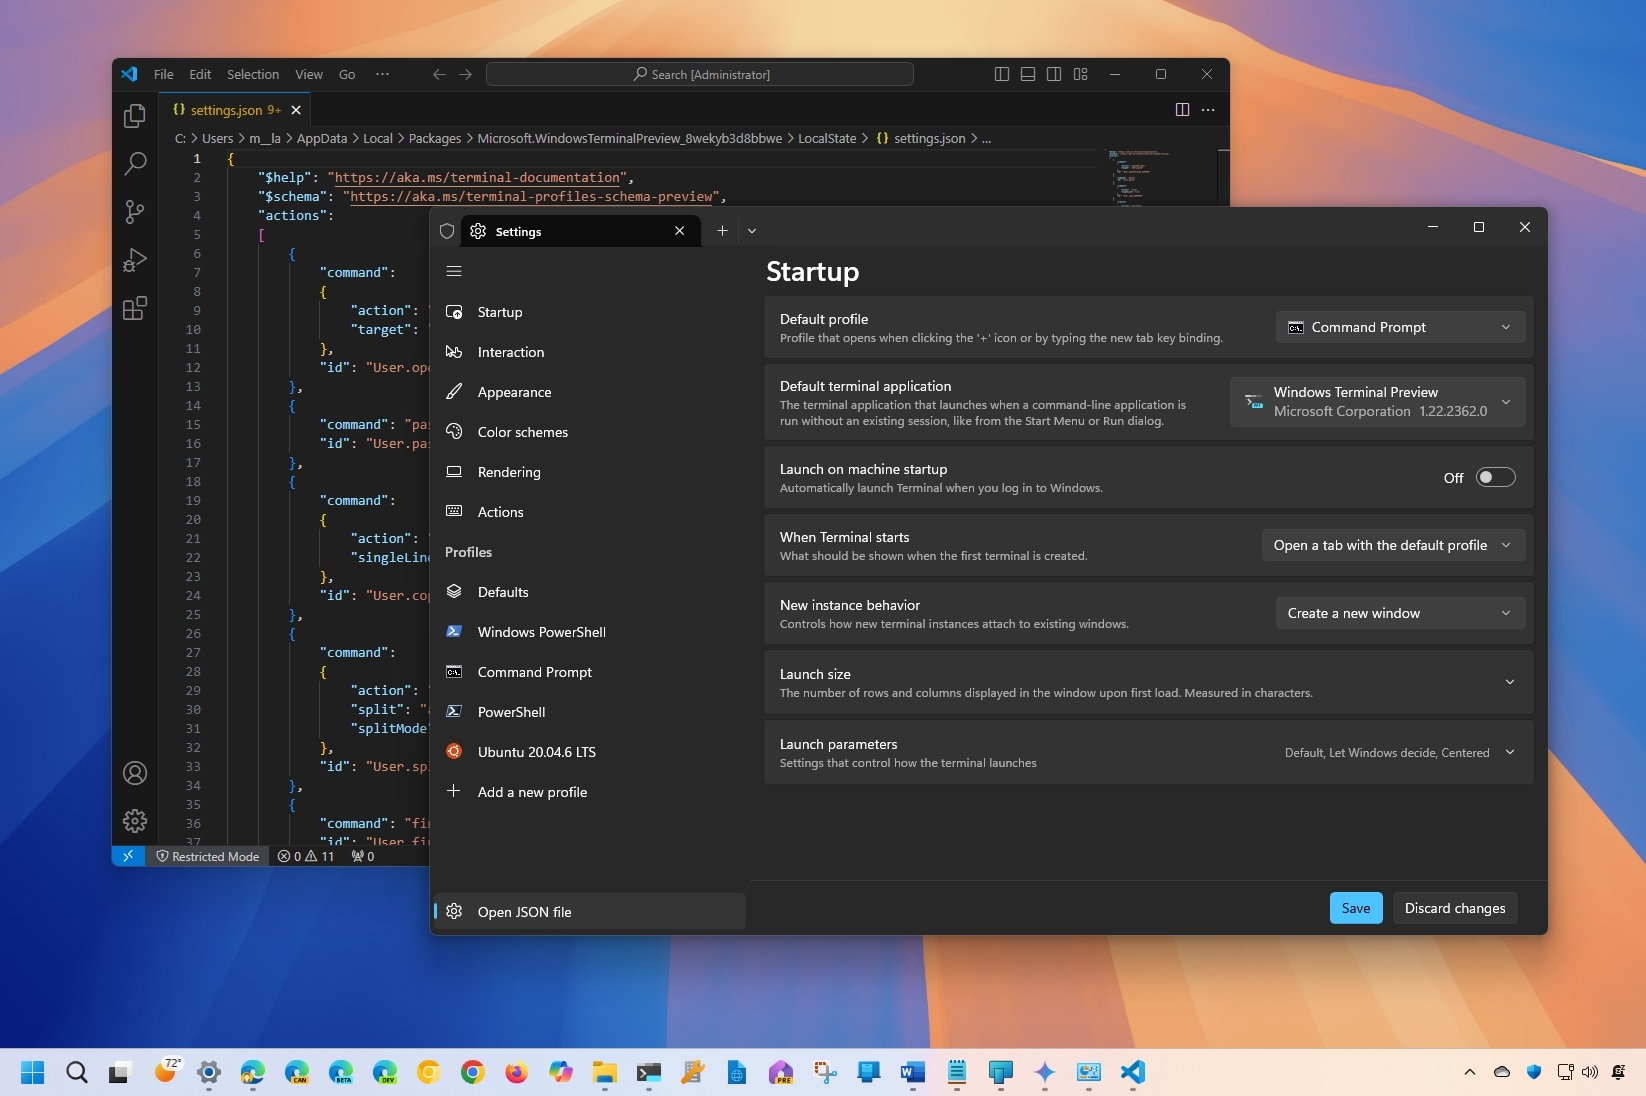
On Windows 11 (and 10), the Windows Terminal is the new default experience to run virtually any command-line shell, including Command Prompt, PowerShell, WSL instances, and more.
Out of the box, the app includes the most common settings, but through the settings page, you can control many aspects of the app and each of the profiles. However, in this guide, I will share my top five favorite configurations that I believe everyone should change, including changing the startup behaviors, setting a custom startup directory, restoring the default blue color theme for PowerShell, and backing up the configuration settings.
In this how-to guide, I will outline several configurations you should consider applying to your Windows Terminal.
Top 5 configurations to implement on the Terminal app
Although the Windows Terminal comes with a wide range of features and settings, these are the top five configurations you have to implement on your setup.
1. Launch always as admin
If you usually change system settings or run different tools that require elevated privileges, you should consider configuring the Windows Terminal to always launch as an administrator.
To set the Terminal to always run as admin, use these steps:
- Open Windows Terminal.
- Open the main menu and choose the Settings option.
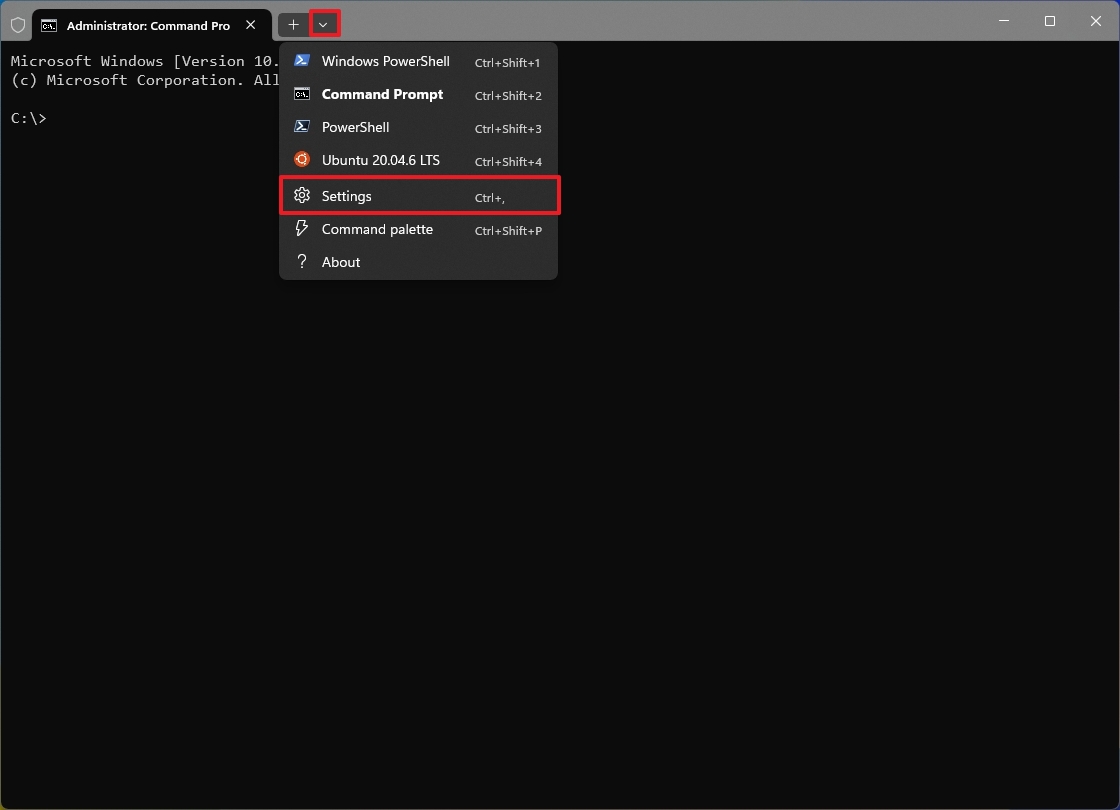
- Quick tip: You can always use the "Ctrl + , (comma)" keyboard shortcut to open the settings experience directly.
- Click on Defaults under the "Profiles" section.
- Turn on the "Run this profile as Administrator" toggle switch.
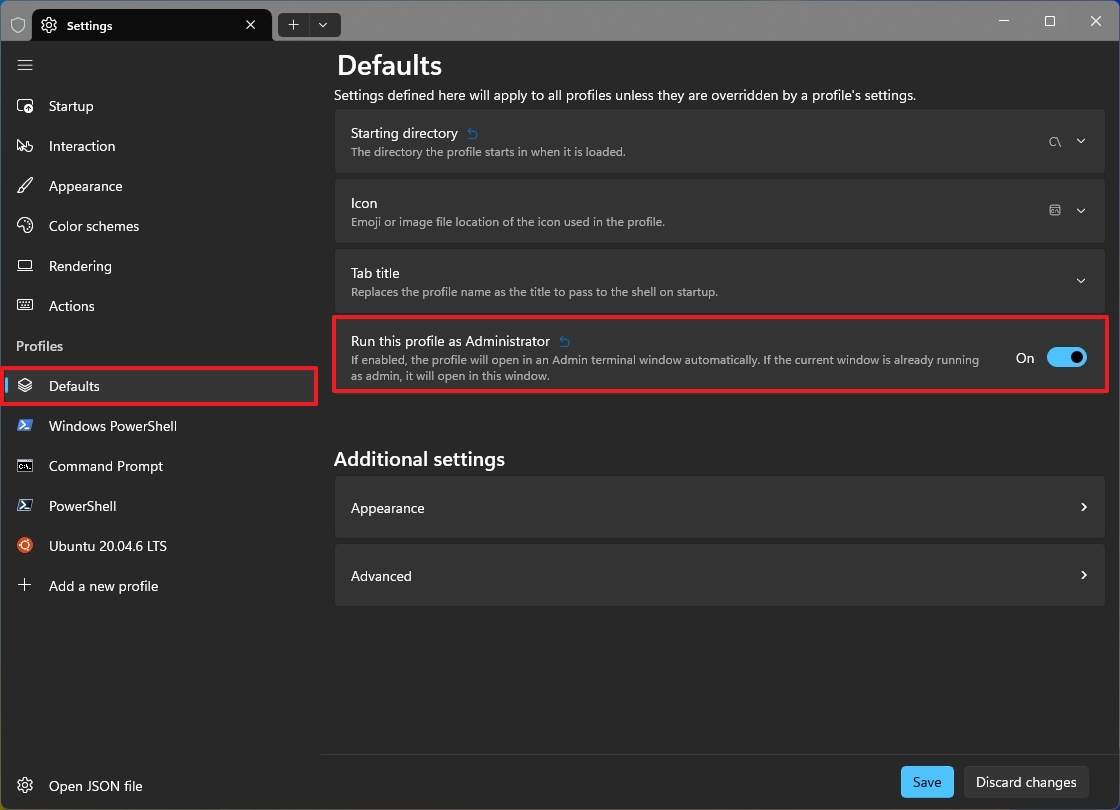
- Click the Save button.
Once you complete the steps, the command-line app will always start with administrative rights.
2. Set Command Prompt as default profile
Windows 11, by default, sets PowerShell as the primary command-line experience when launching the Terminal, but you can always change it to Command Prompt.
To set Command Prompt as the default command-line experience with the Windows Terminal, use these steps:
- Open Windows Terminal.
- Open the main menu and choose the Settings option.

- Click on Startup from the left pane.
- Select the Command Prompt option from the "Default profile" setting.
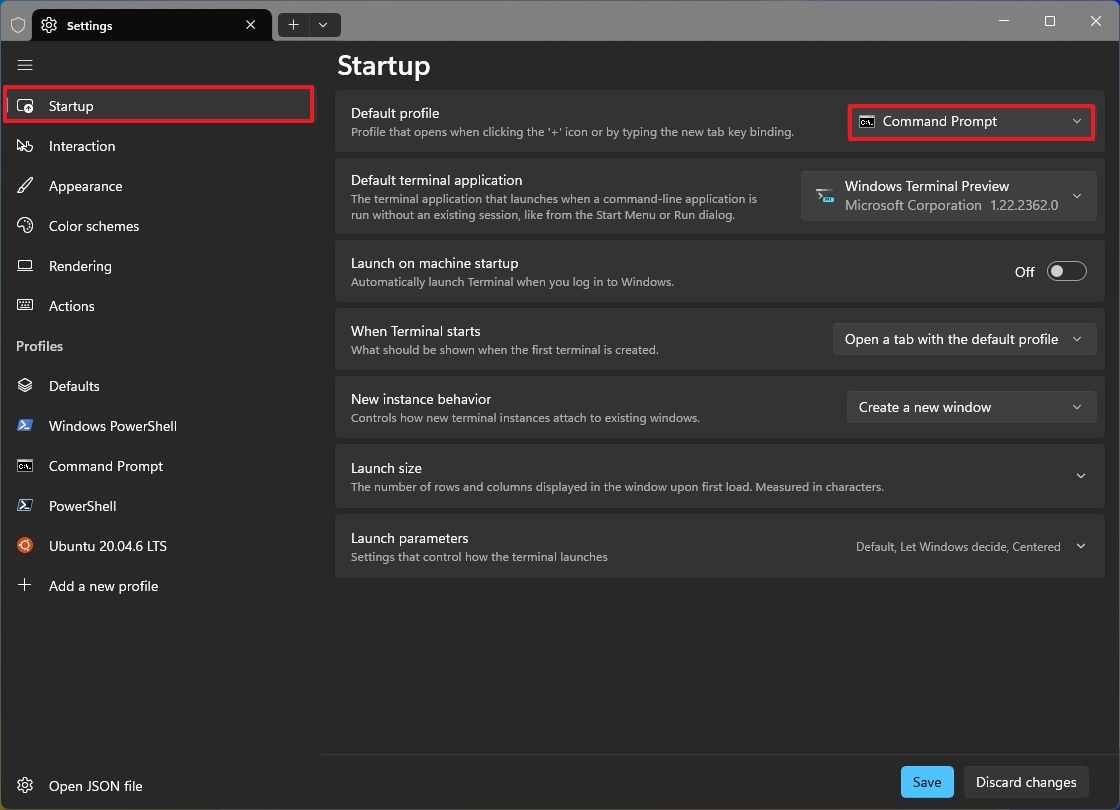
- (Optional) Choose the version of the Windows Terminal to use with this experience.
- Quick note: This is recommended if you use the preview version of the Terminal and want to set it as your default.
- Click the Save button.
After you complete the steps, the Terminal app will launch in Command Prompt by default.
3. Change PowerShell color theme
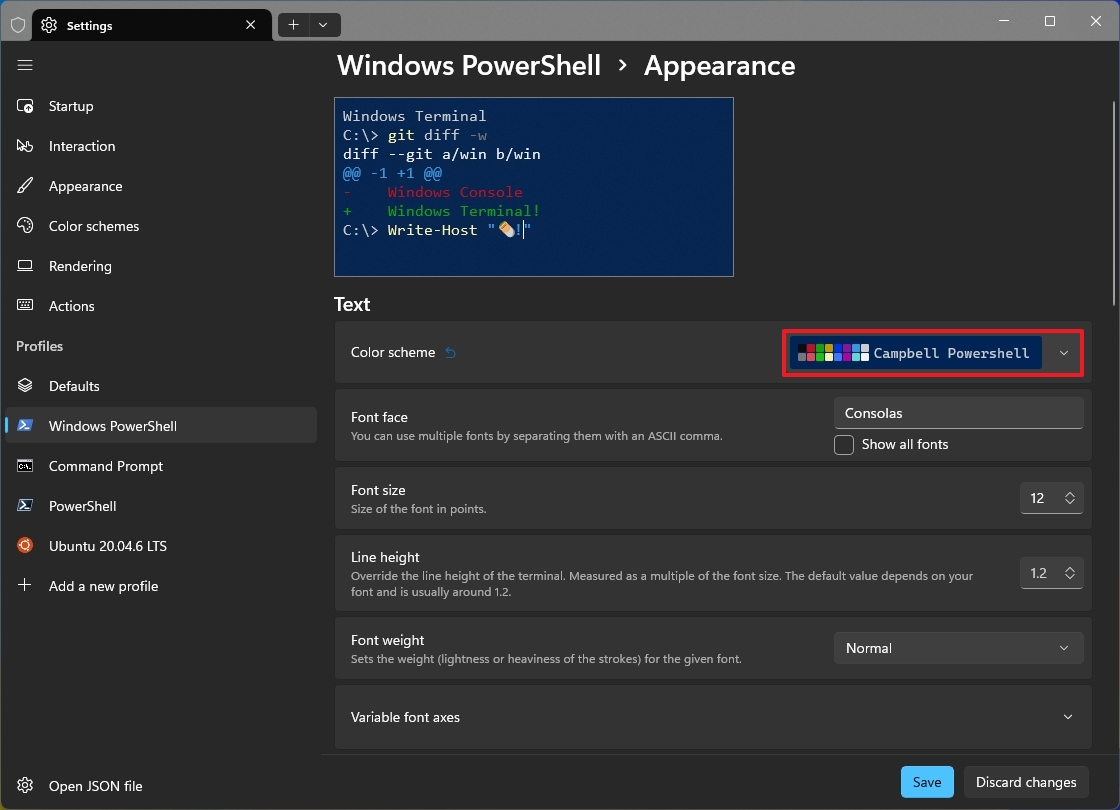
The Windows Terminal uses the same dark theme for every command shell profile, including PowerShell, while the legacy experience used to include a blue background. If you want to keep the same legacy color scheme, you can edit the PowerShell theme to use the Campbell PowerShell color scheme.
To restore the blue color scheme on PowerShell for the Terminal, use these steps:
- Open Windows Terminal.
- Open the main menu and choose the Settings option.

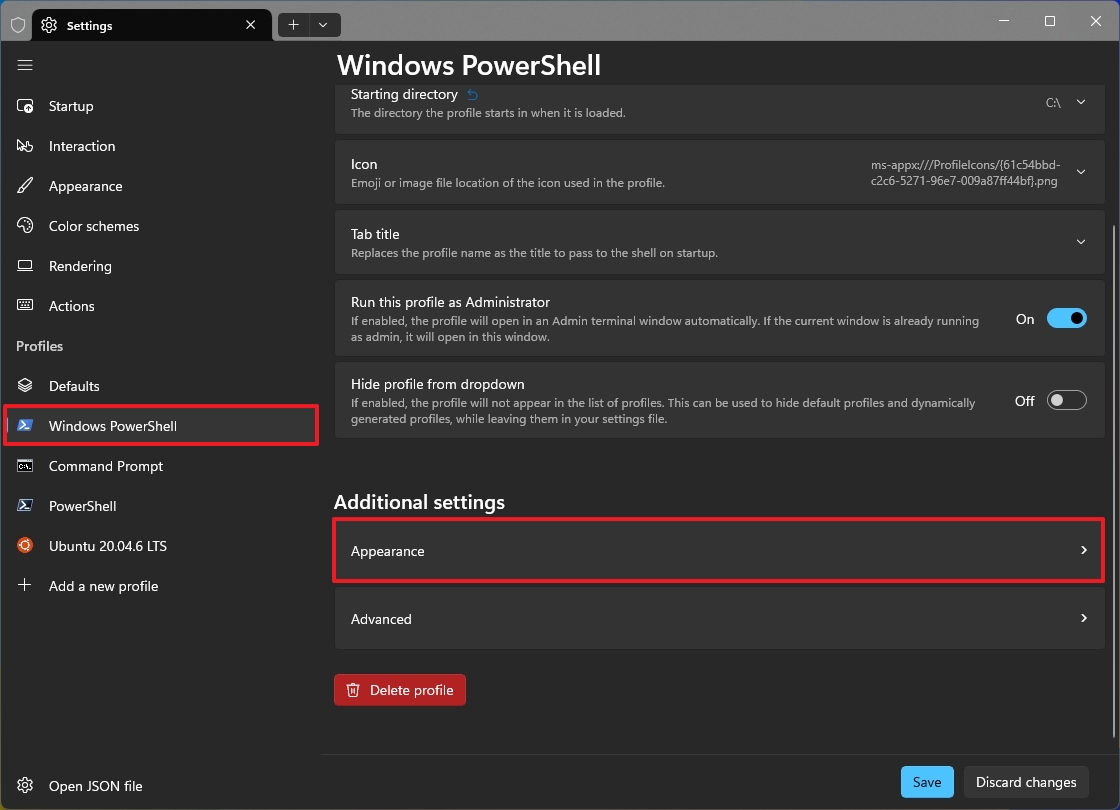
- Click on Windows PowerShell under the "Profiles" section.
- Click the Appearance setting under the "Additional settings" section.
- Select the Campbell PowerShell option from the "Color scheme" setting.
- Click the Save button.
Once you complete the steps, the next time you open PowerShell, the command-line shell will start with the legacy blue color scheme that makes it easier to distinguish from the Command Prompt shell.
4. Change starting directory
The Windows Terminal always opens on your profile directory, located in the "Users" directory, but you can set any path for all your profiles.
To change the starting directory for the Terminal app, use these steps:
- Open Windows Terminal.
- Open the main menu and choose the Settings option.

- Click on Defaults under the "Profiles" section.
- Quick tip: If you only want to change the startup directory for an specific profile, then select the profile, and change the same "Starting directory" setting.
- Click the Starting directory setting.
- Confirm the path by which you want the app to start by default.
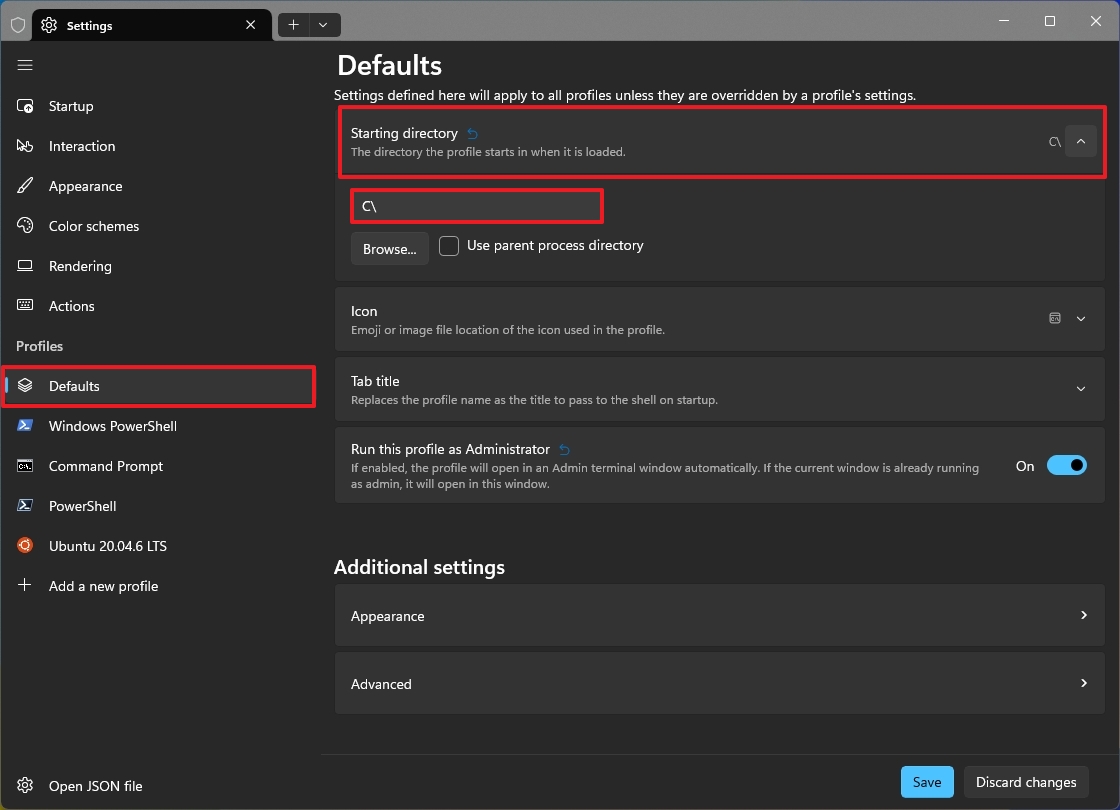
- Quick note: I usually set the "C:" drive, but you can choose any location. For example, if you use a command-line app frequently, you can set the startup directory in that path to save a few commands.
- Click the Save button.
After completing the steps, any command-line shells will start on the desired directory.
5. Create settings backup
Although the option to create a backup of the Terminal settings, you can easily export the XML file containing all the configurations you spent a lot of time setting up.
To back up the Terminal settings, use these steps:
- Open Windows Terminal.
- Open the main menu and choose the Settings option.

- Click on "Open JSON file" option at the bottom left to open the settings in your default text editor.
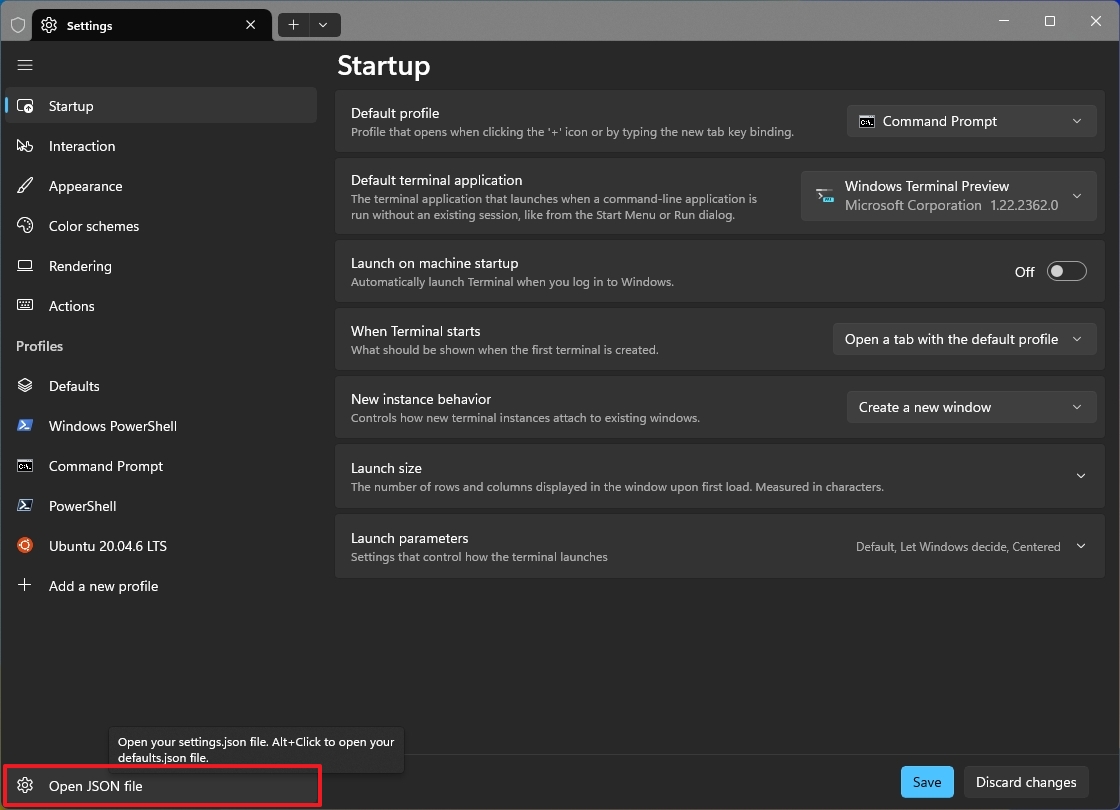
- Click the File menu and choose the Save As option.
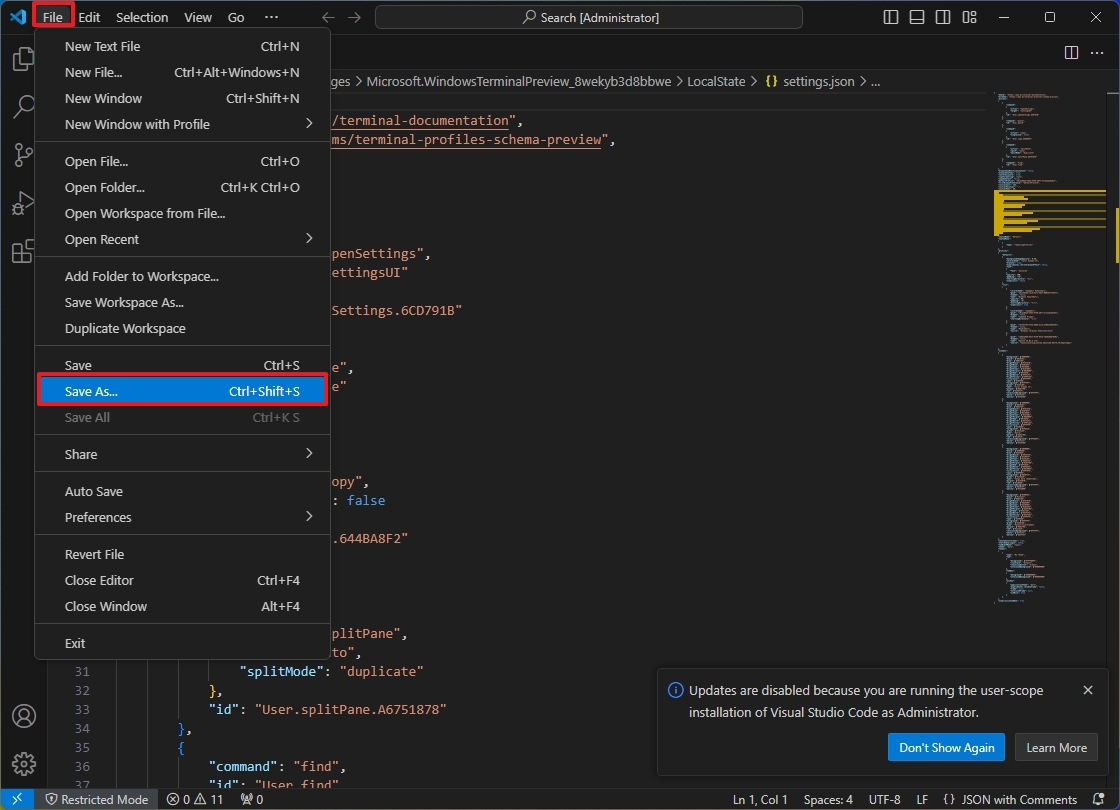
- Choose the location to save the file.
- Quick tip: You can save the settings file in OneDrive since it'll make it easier to restore the settings on your main computer and other devices.
- Confirm the name of the file.
- Click the Save button.
Once you complete the steps, whenever you ever need to recover your settings, you can simply copy and replace the contents of the Settings.json file with the configuration from the backup.
The process of restoring the settings is straightforward. You only have to open the backup file with any text editor, select and copy contents to the clipboard, then open Windows Terminal > Settings, click on "Open JSON file," select all, delete the contents, and then paste the contents from the clipboard and save the file.
More resources
For more helpful articles, coverage, and answers to common questions about Windows 10 and Windows 11, visit the following resources:


