The holiday season is officially here, and we at Android Central pride ourselves on creating content that’s as helpful to you as Santa’s elves. Now, we know the season can leave everyone feeling a little stressed, but there are some tricks you can use to make the holidays the best!
We’re going to provide five “how-to’s” to help you be more efficient, so you can spend less time trying to remember what you forgot and focus more on family, fun, and those tasty dishes!
Take great group photos. Every time!
Twas the day of Thanksgiving and all through the party,
Jamal snapped pics while his fam partied hardy.
One thing Jamal noticed after a while,
No perfect pic was taken while trying to get folks to smile.
No need to yell, “Everyone smile for goodness sake!”
Now you can take a burst of photos and pick the best face.
Here’s how to use Google Photo’s new feature: Best Take
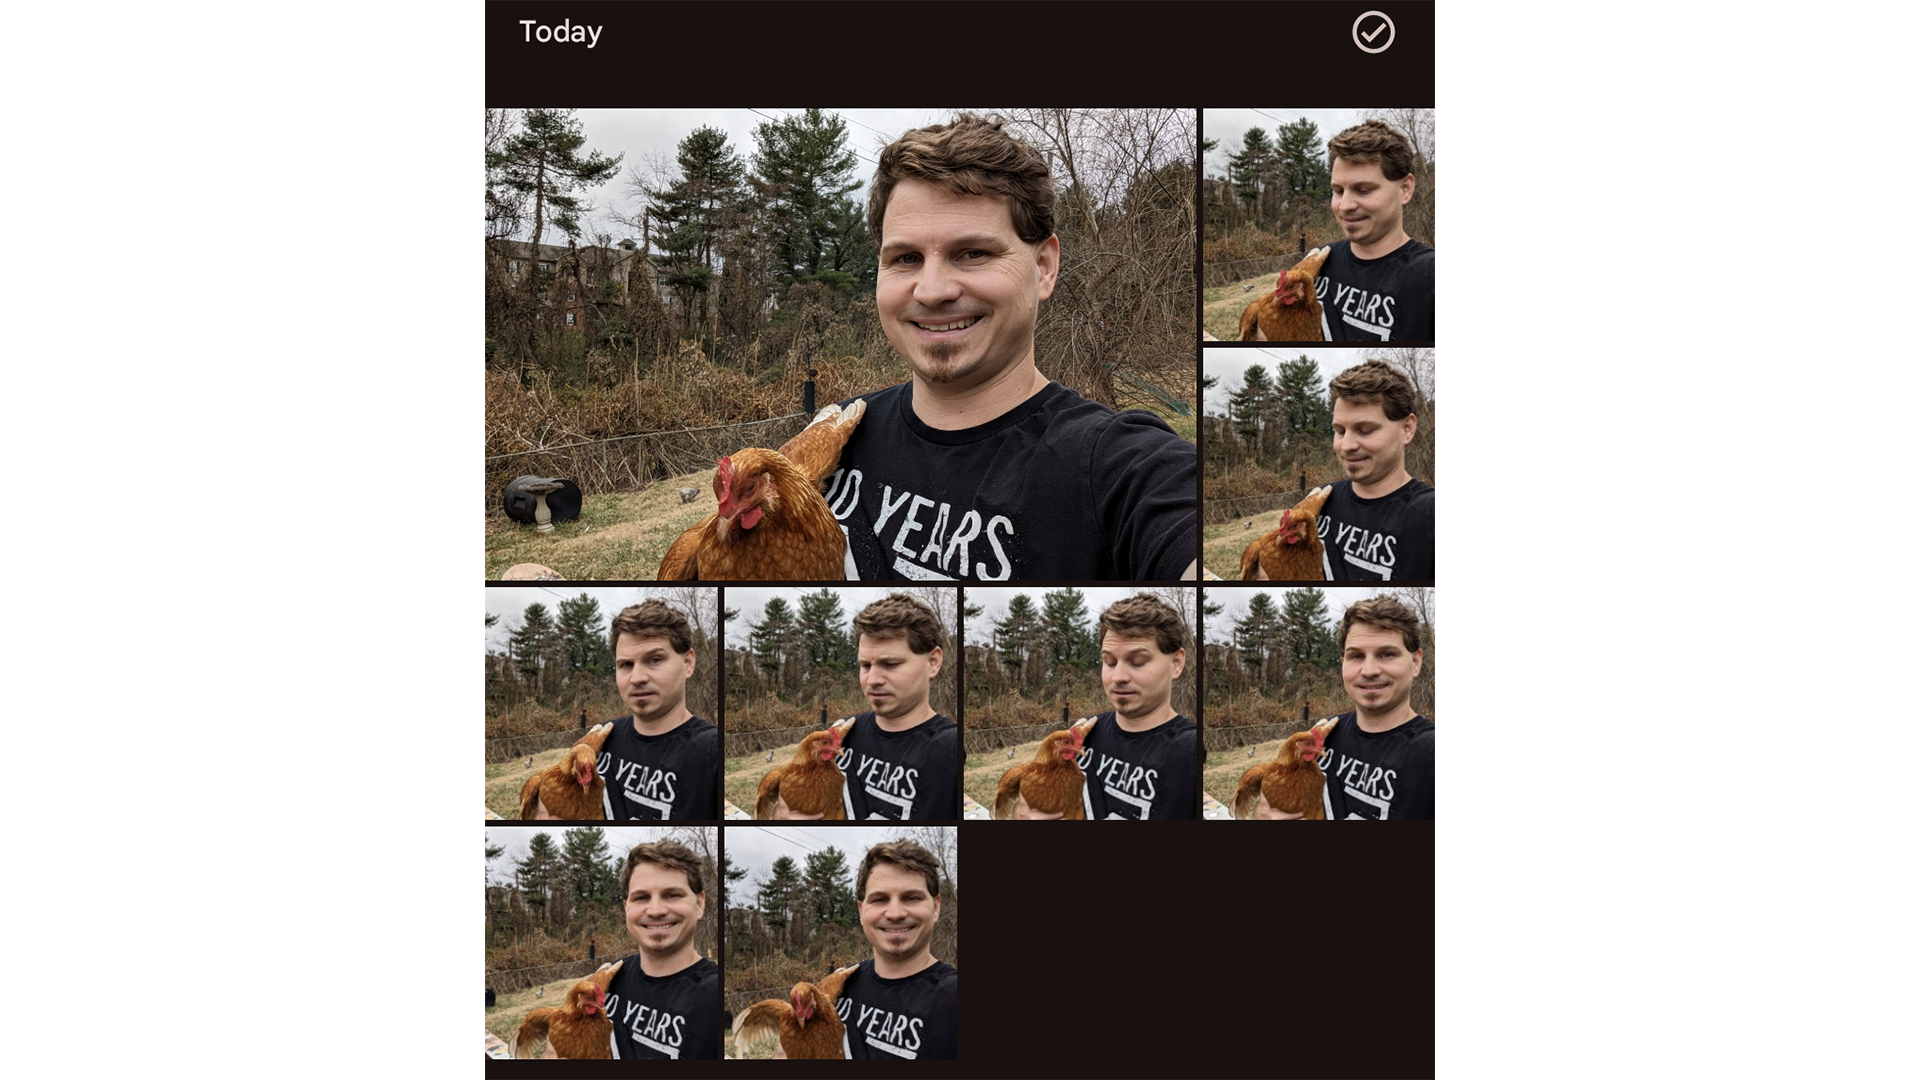
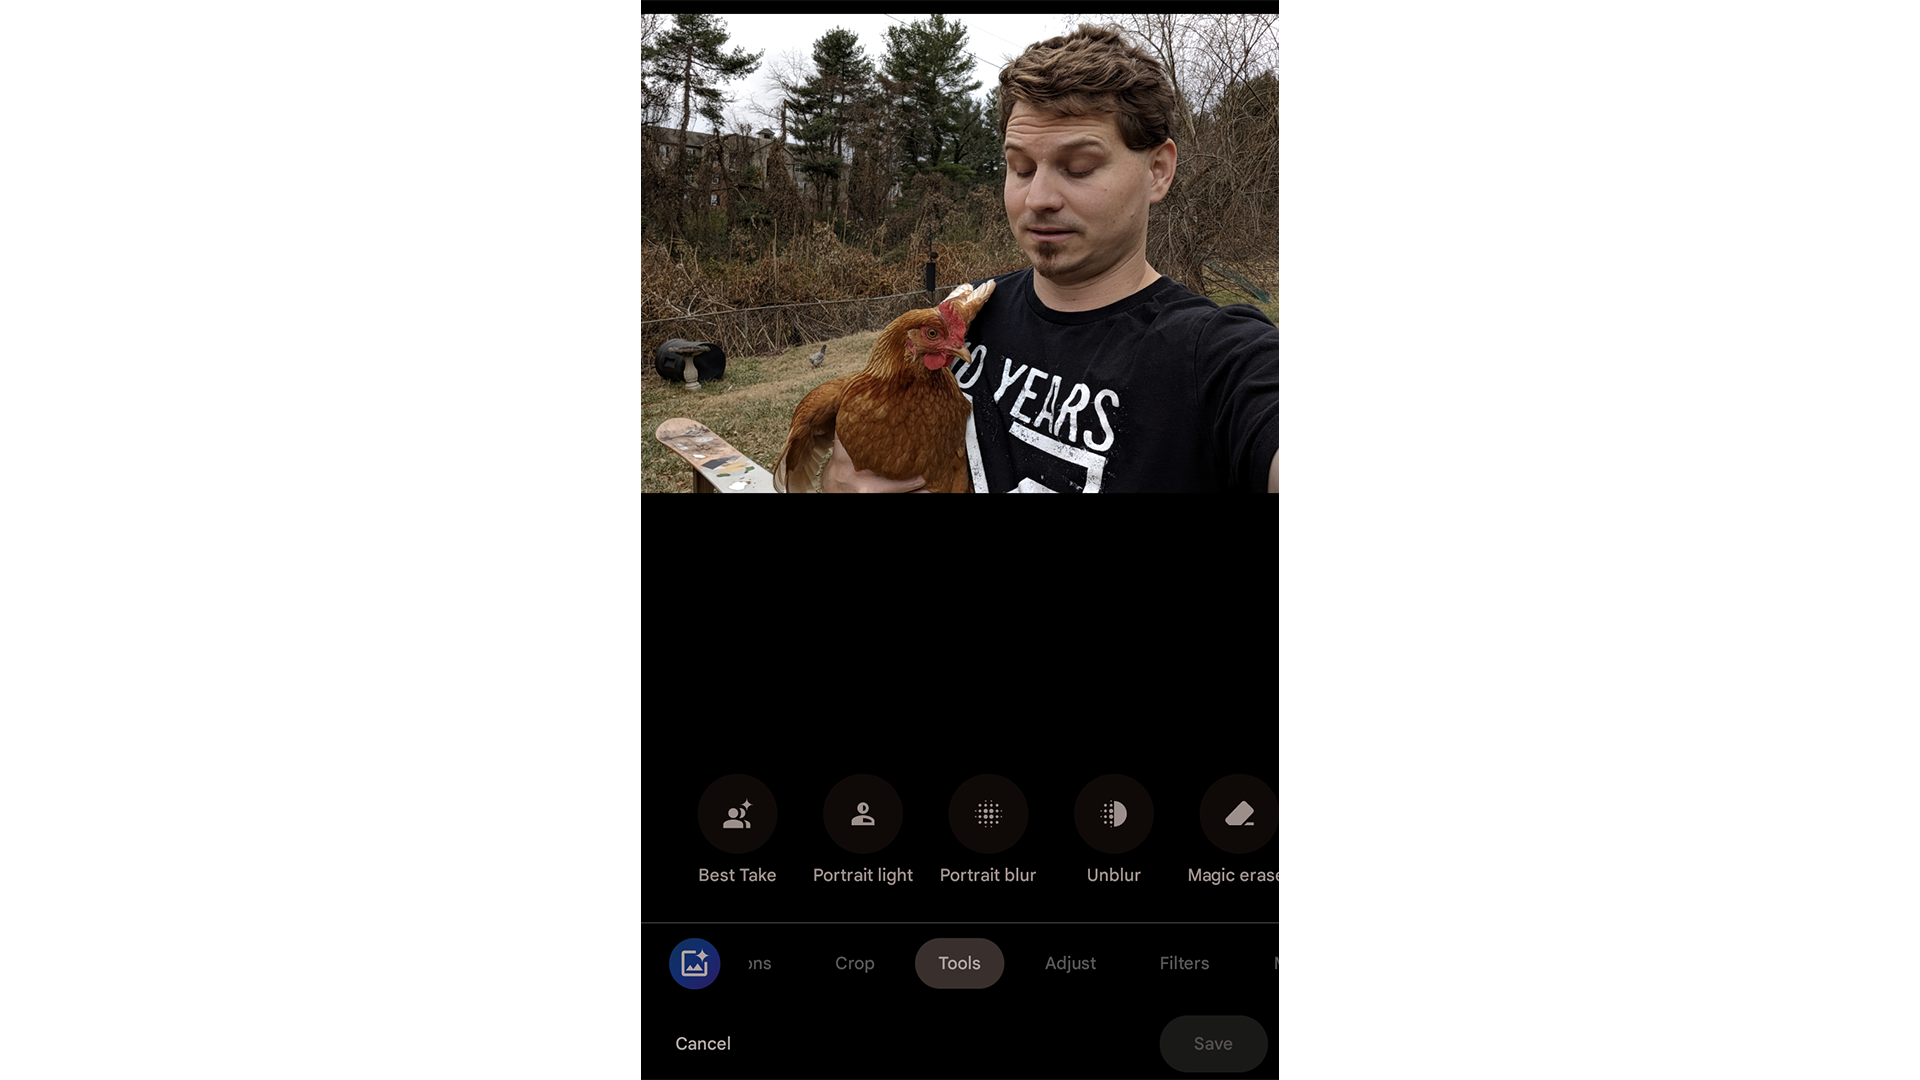
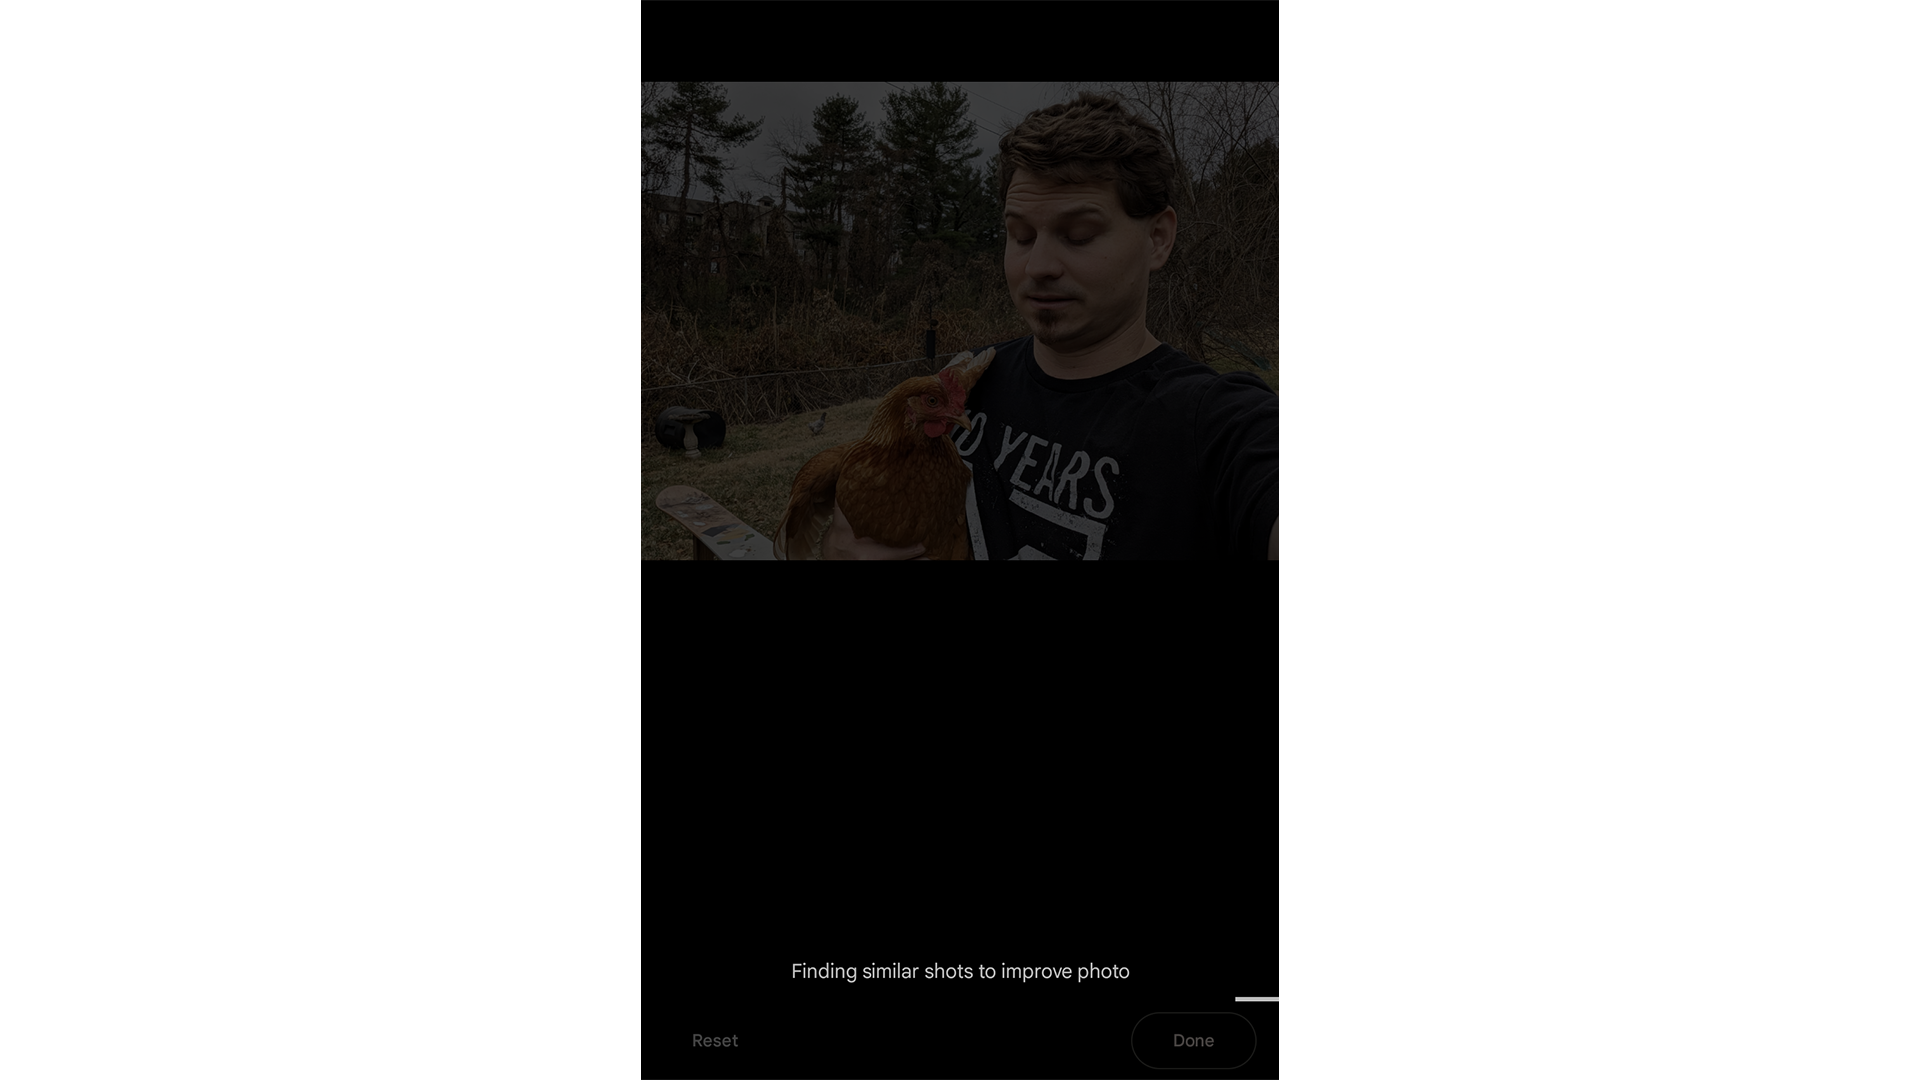
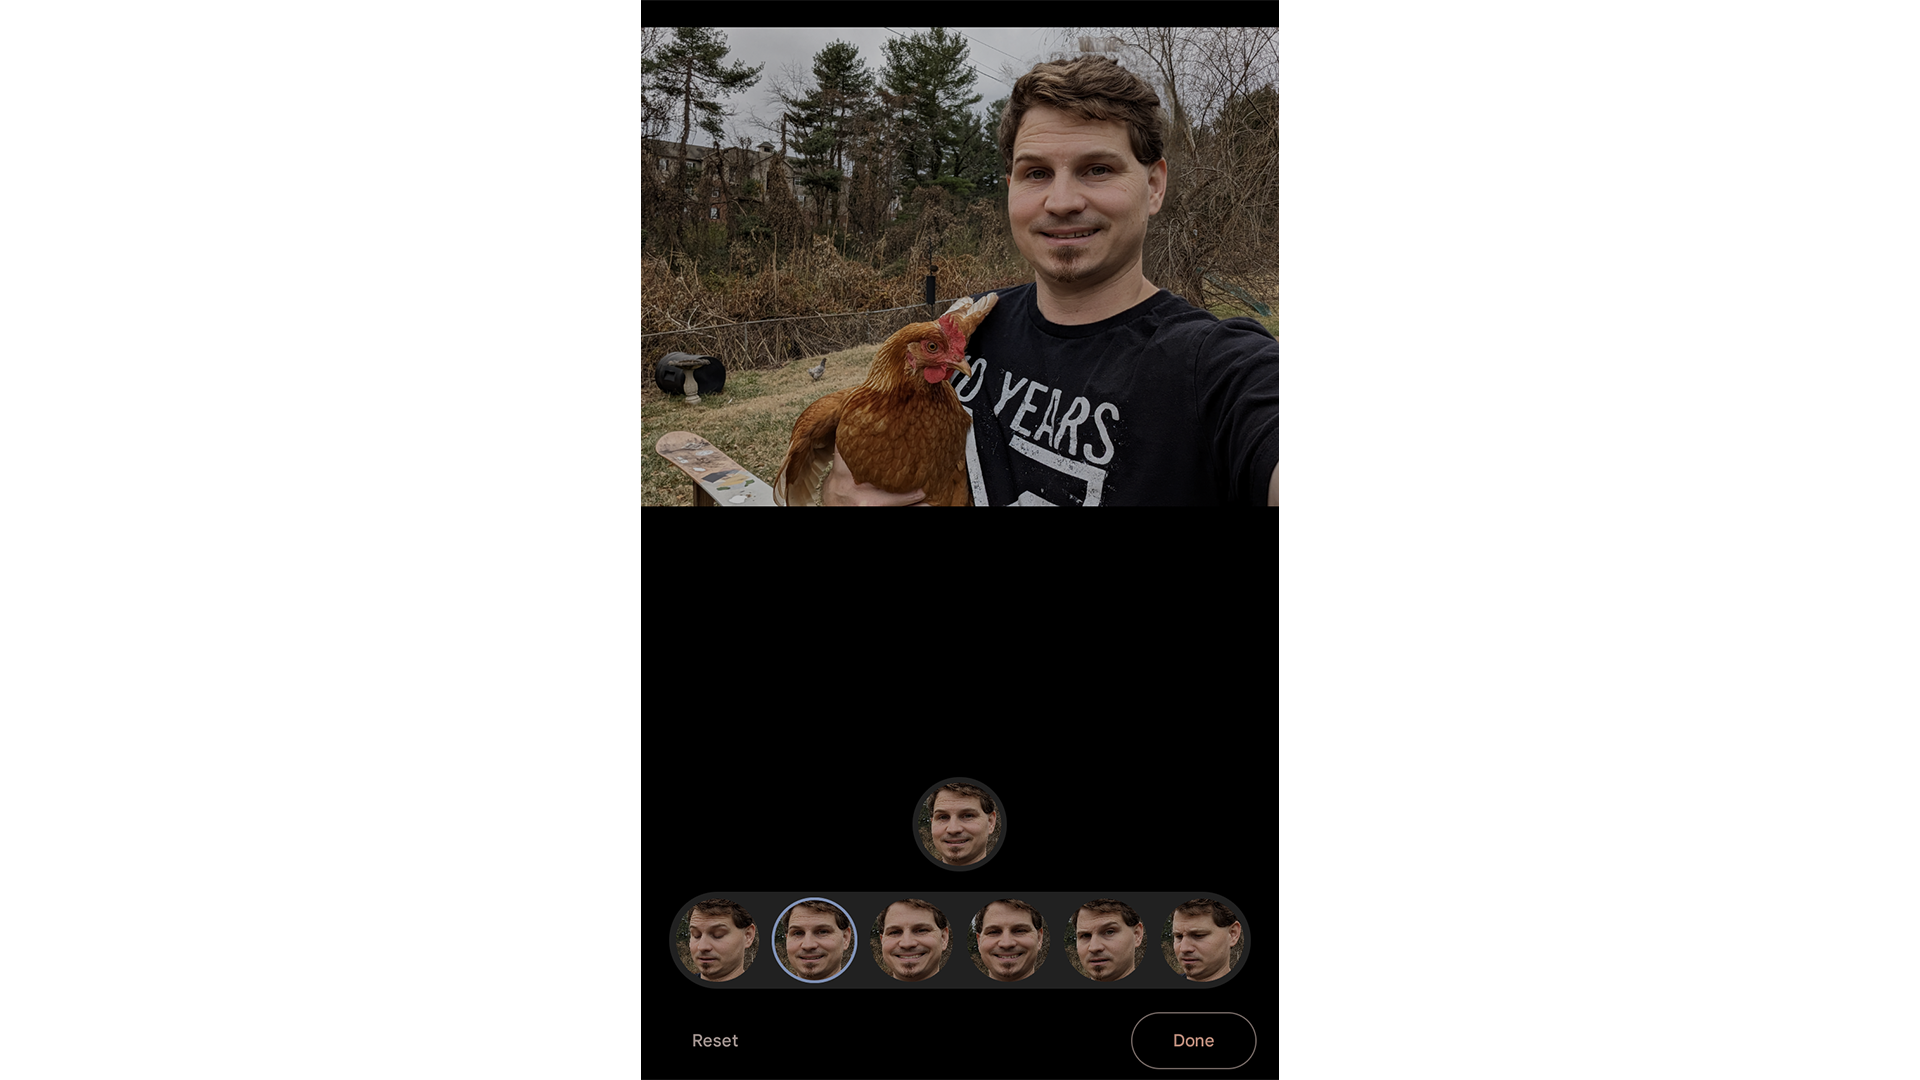
Take a burst of photos. Three or more similar images will do, but more images, and options. Open Google Photos and select the Tools option. There, you will see Best Take above it. The tool will automatically suggest faces you can choose from. Try them out and pick the best one. Once you’re good with the changes, tap Done, which will take you back to the main screen. From there, you can save a copy. Your original is always preserved.
Of course, this feature only applies to Pixel 8 and Pixel 8 Pro users for now.
Restore magic moments with Audio Magic Eraser
At the Thanksgiving feast, Uncle James gave the best toast,
You recorded it, but it sucks because the dog barked while he spoke.
Any other time in history, that would’ve been tragic!
Today, just use Audio Magic Eraser! It works just like magic!
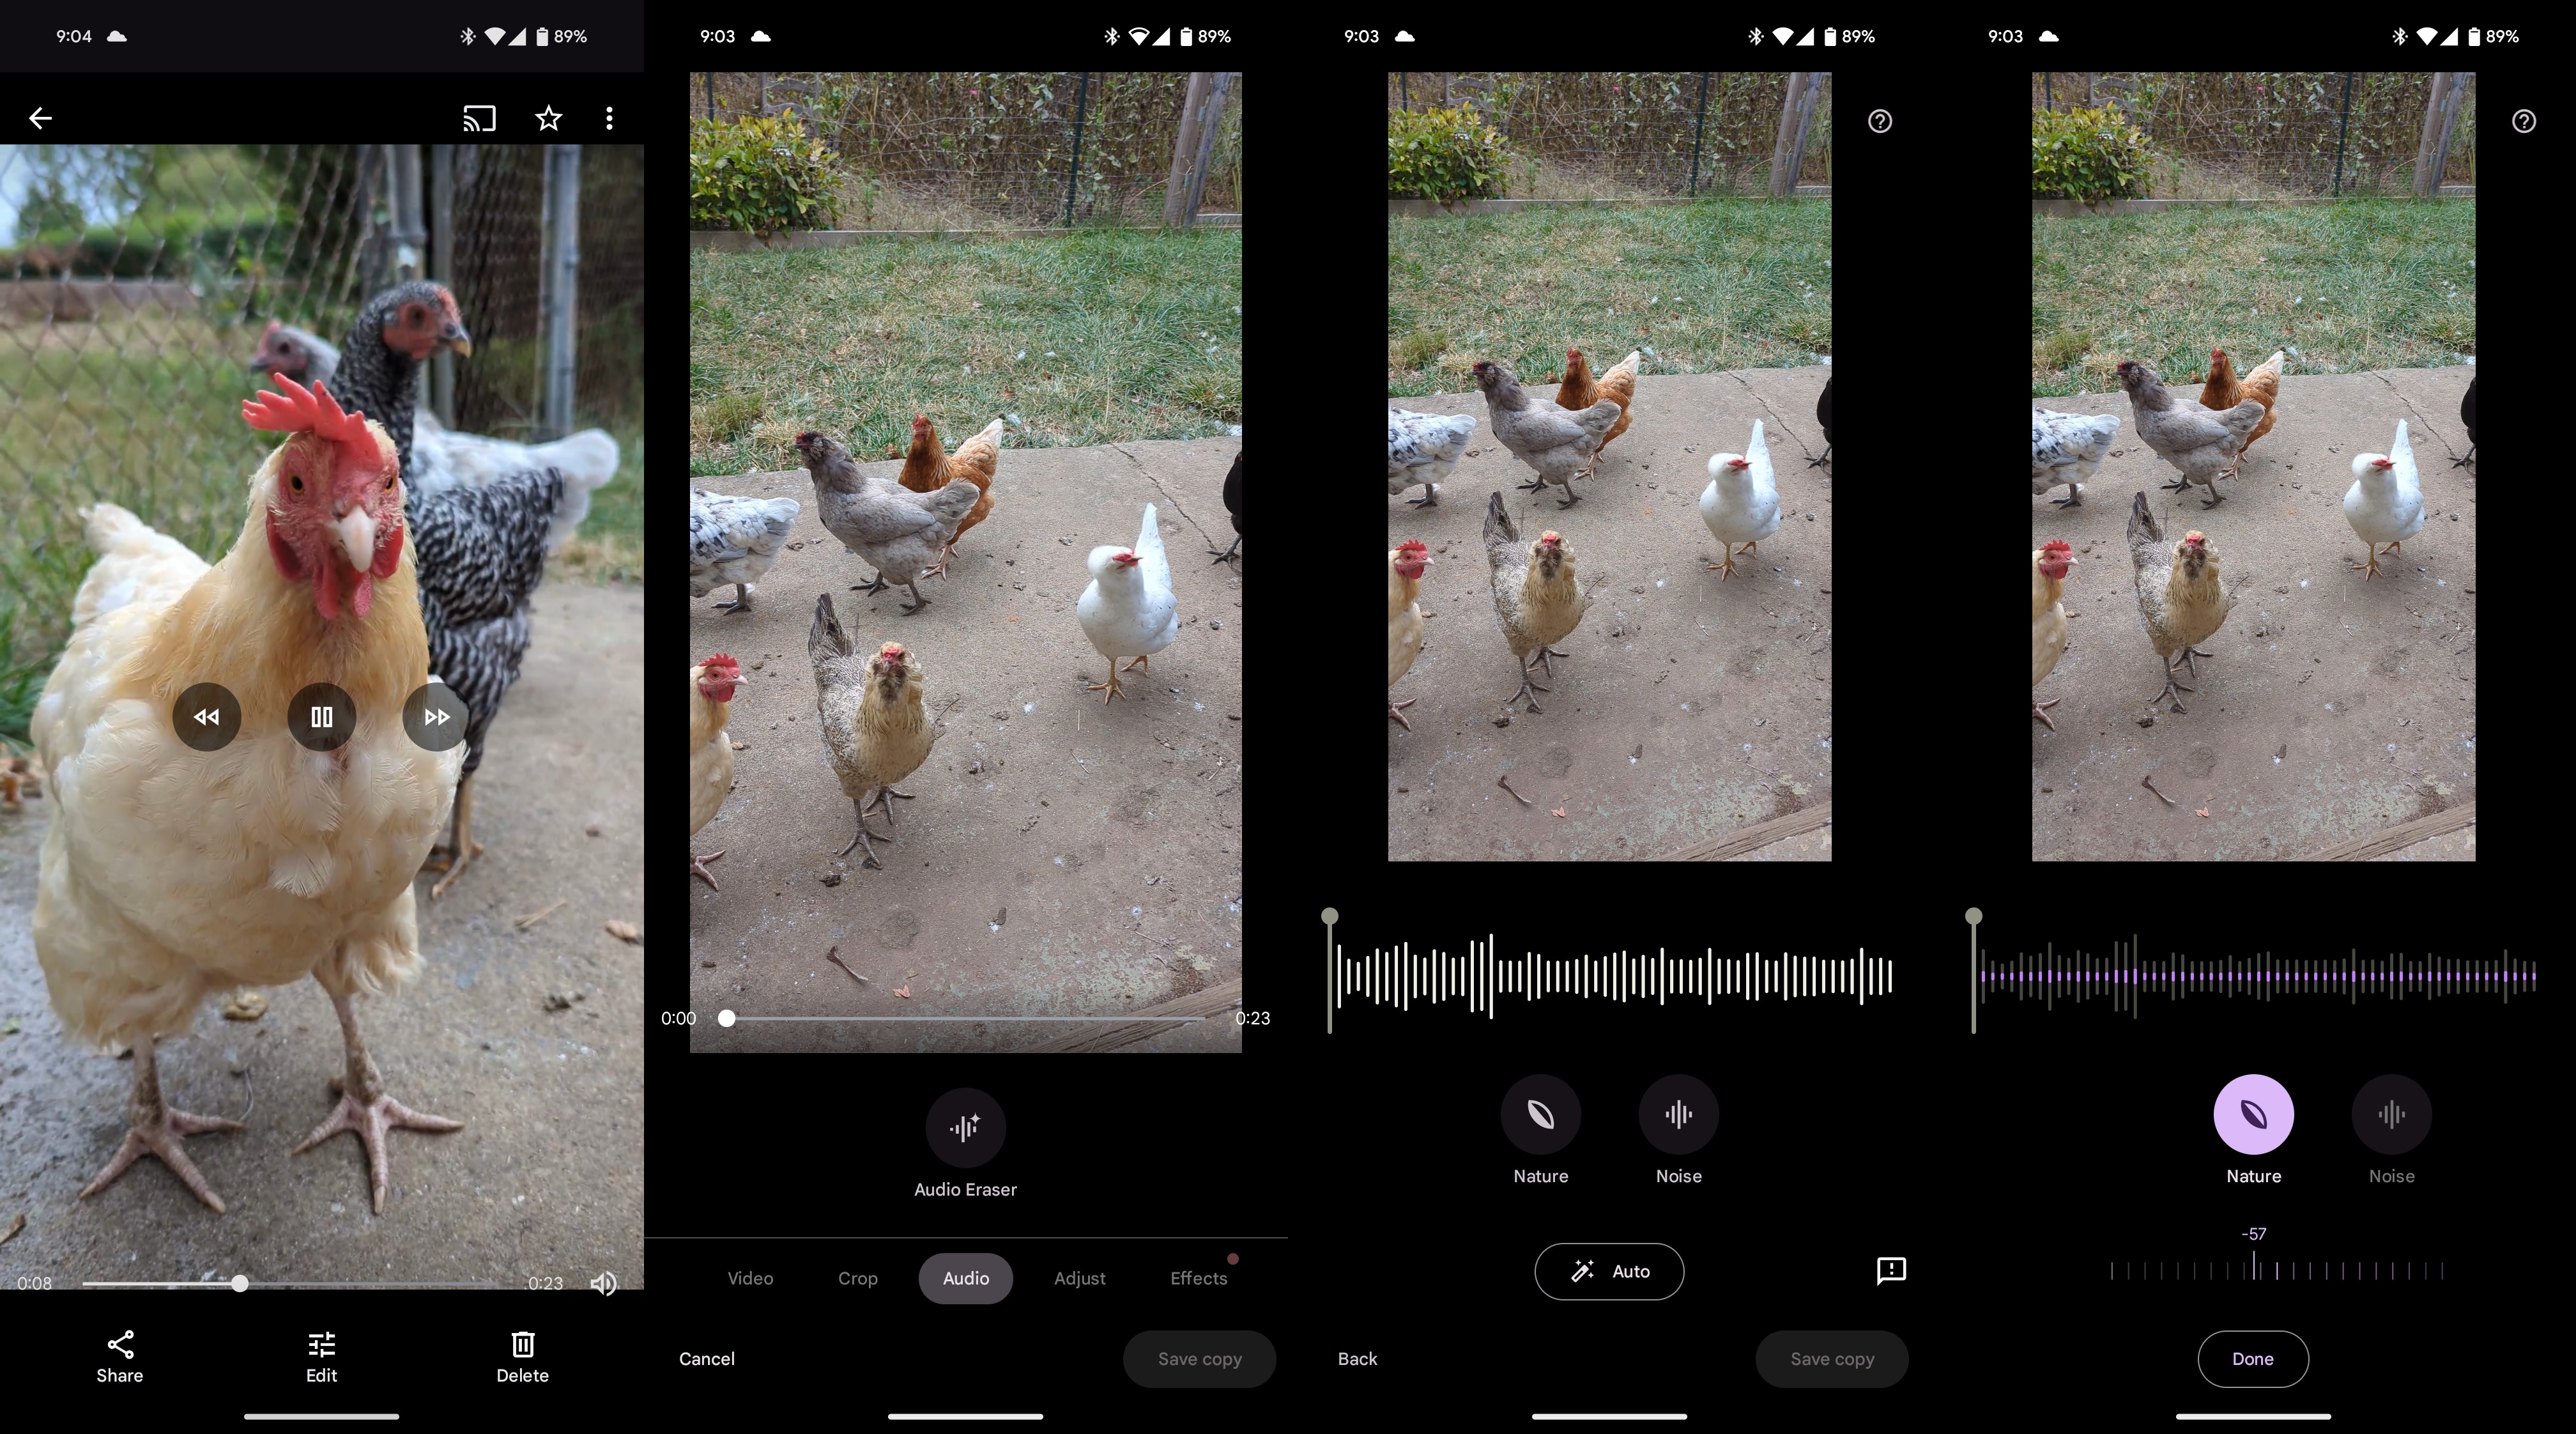
Open Google Photos on your Pixel 8 or Pixel 8 Pro. Choose a video, then tap Edit. Select the Audio option from the bottom then Audio Magic Eraser. After all the sounds are identified, they will appear as separate soundtracks with clear labels on the bottom, such as Nature or Noise. Tap a soundtrack to edit it. Move the slider to enhance or diminish the selected soundtrack. Hit Done once you're satisfied. Select Save a copy to save your edited video file separately.
Save time typing by ripping text from flyers and invites!
Do you have party invites? Flyers with embedded text?
You really want to go but don’t feel like typing all of that into GPS!
Well here’s a little tip for your calendars and your ride:
Screenshot the image and rip the text that’s inside.
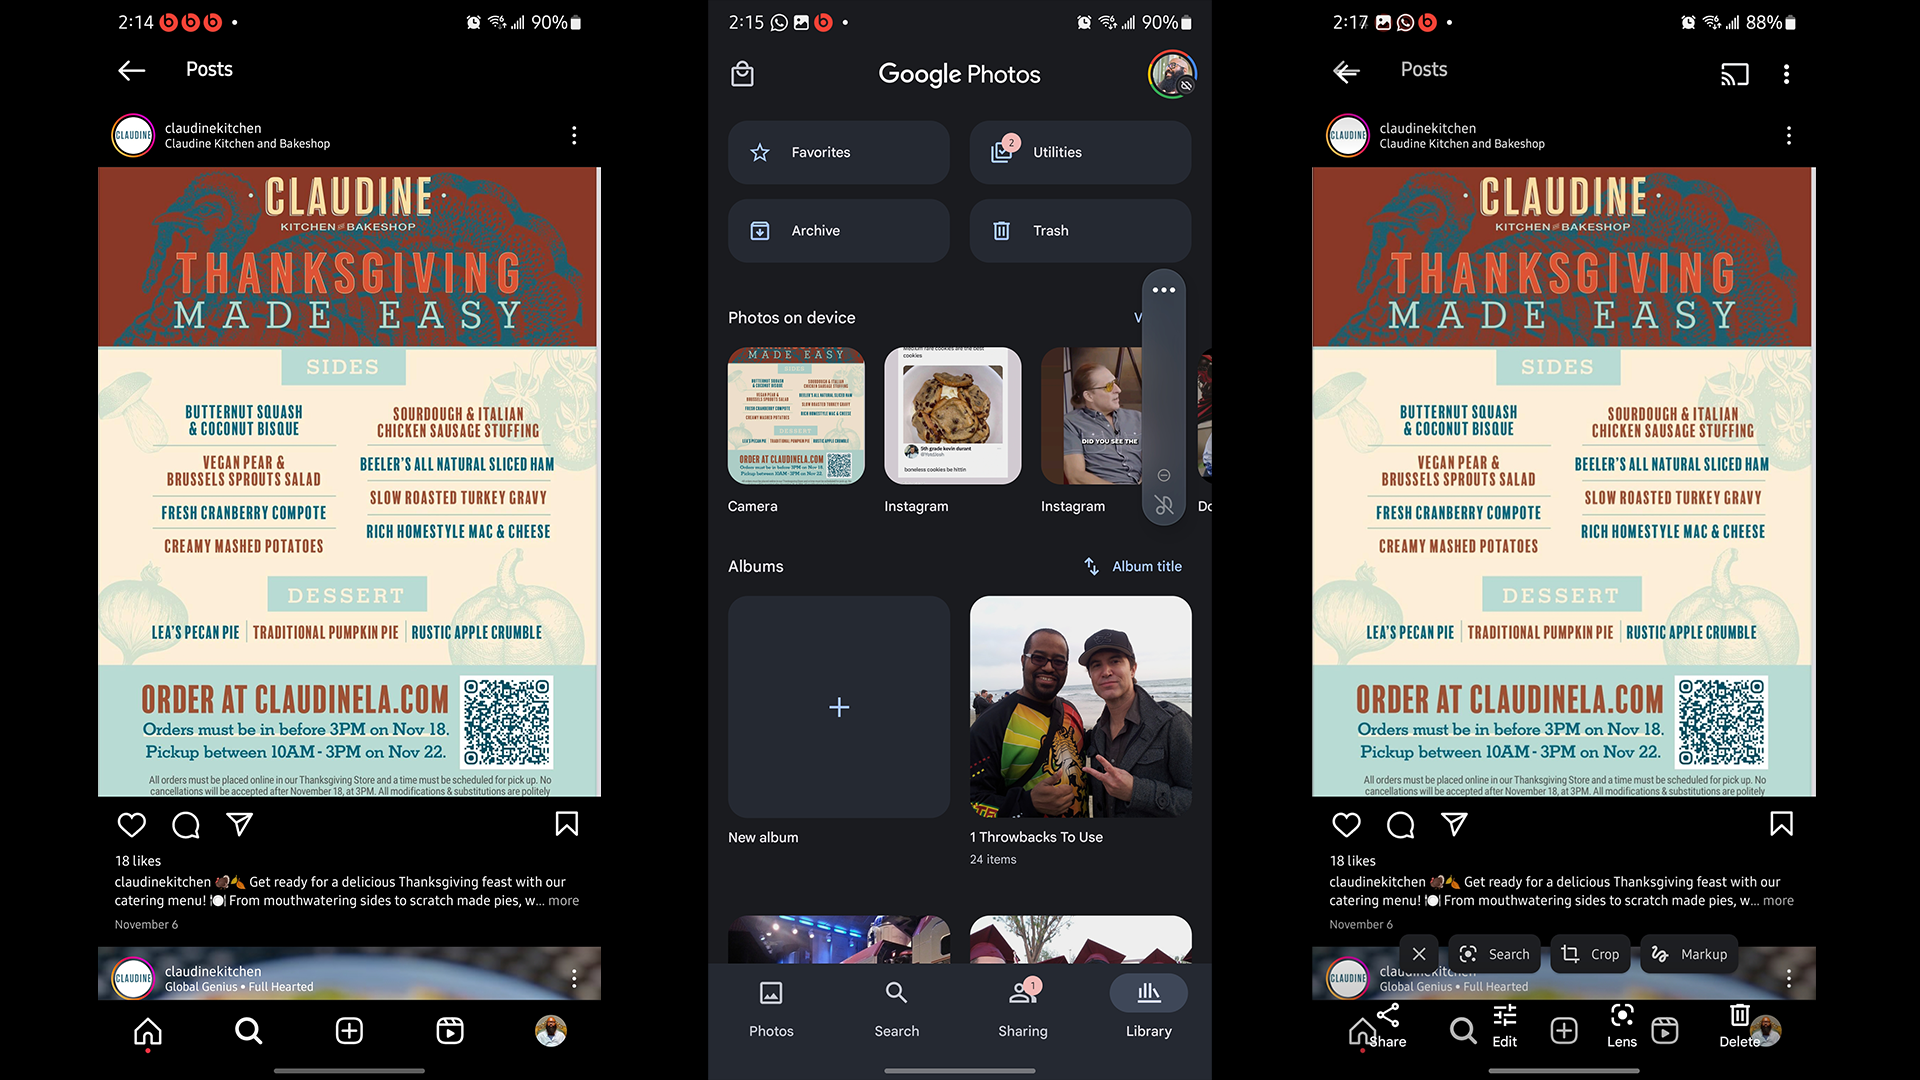
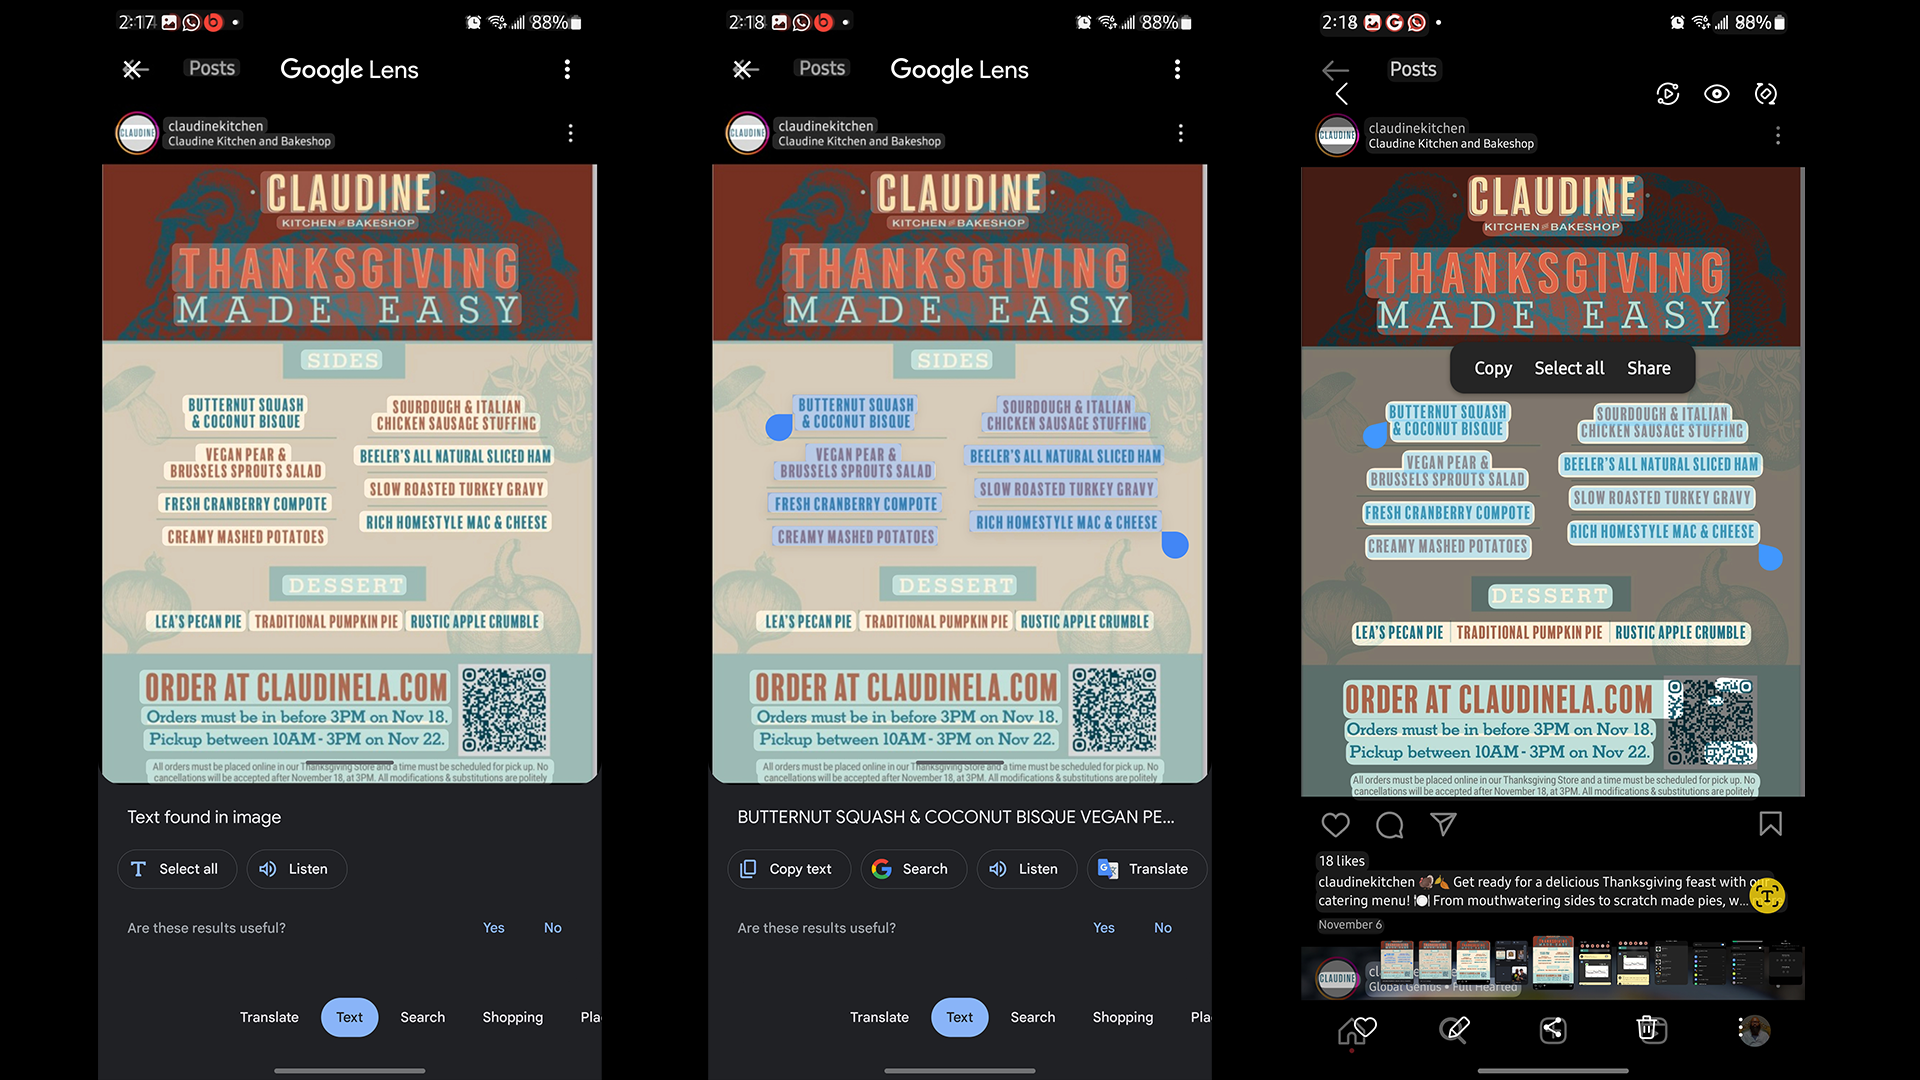
Take your screenshot, then open Google Photos. Tap on Library at the bottom, then Screenshots or Camera, depending on your device, then choose your screenshot. When you do, several options populate the bottom of the screen. One of the first ones is Copy text. Once you do that, the AI scans the image, and you’ll see all the text appear highlighted. You can now hold and drag across the text you want to copy, like an address, and paste it into Google Maps.
On some devices, like Samsung Galaxy phones, you can also go into the Gallery app, then tap on the “T” in the lower right corner of your screen, and the text becomes editable.
Bonus: one of the options is to Copy to computer. You can tap that, and a list of computers whose Chrome browsers you’re signed into will show up. Tap one. Now go to that computer, open Chrome, click Edit from the top menu or the Settings dots on the side of the window, and choose Paste. You’ll now see your text pasted into whatever document you have opened in Chrome or the search field in Google Maps or Google Search.
Share the party photos with the entire family
Wanna share pics from your lit family gathering?
Mom’s beautifully baked bird, or your drunk uncle blathering!
You could reach out after the party, hoping somebody responds,
Asking them to email their photos. Yeah, good luck once they’re gone!
Actually, it’s really quite simple to set up one central location,
Using Google Shared Albums you’ll save yourself some frustration.
For large family gatherings, this feature seems “heaven sent,”
Just remember to set up that shared album ahead of the event!
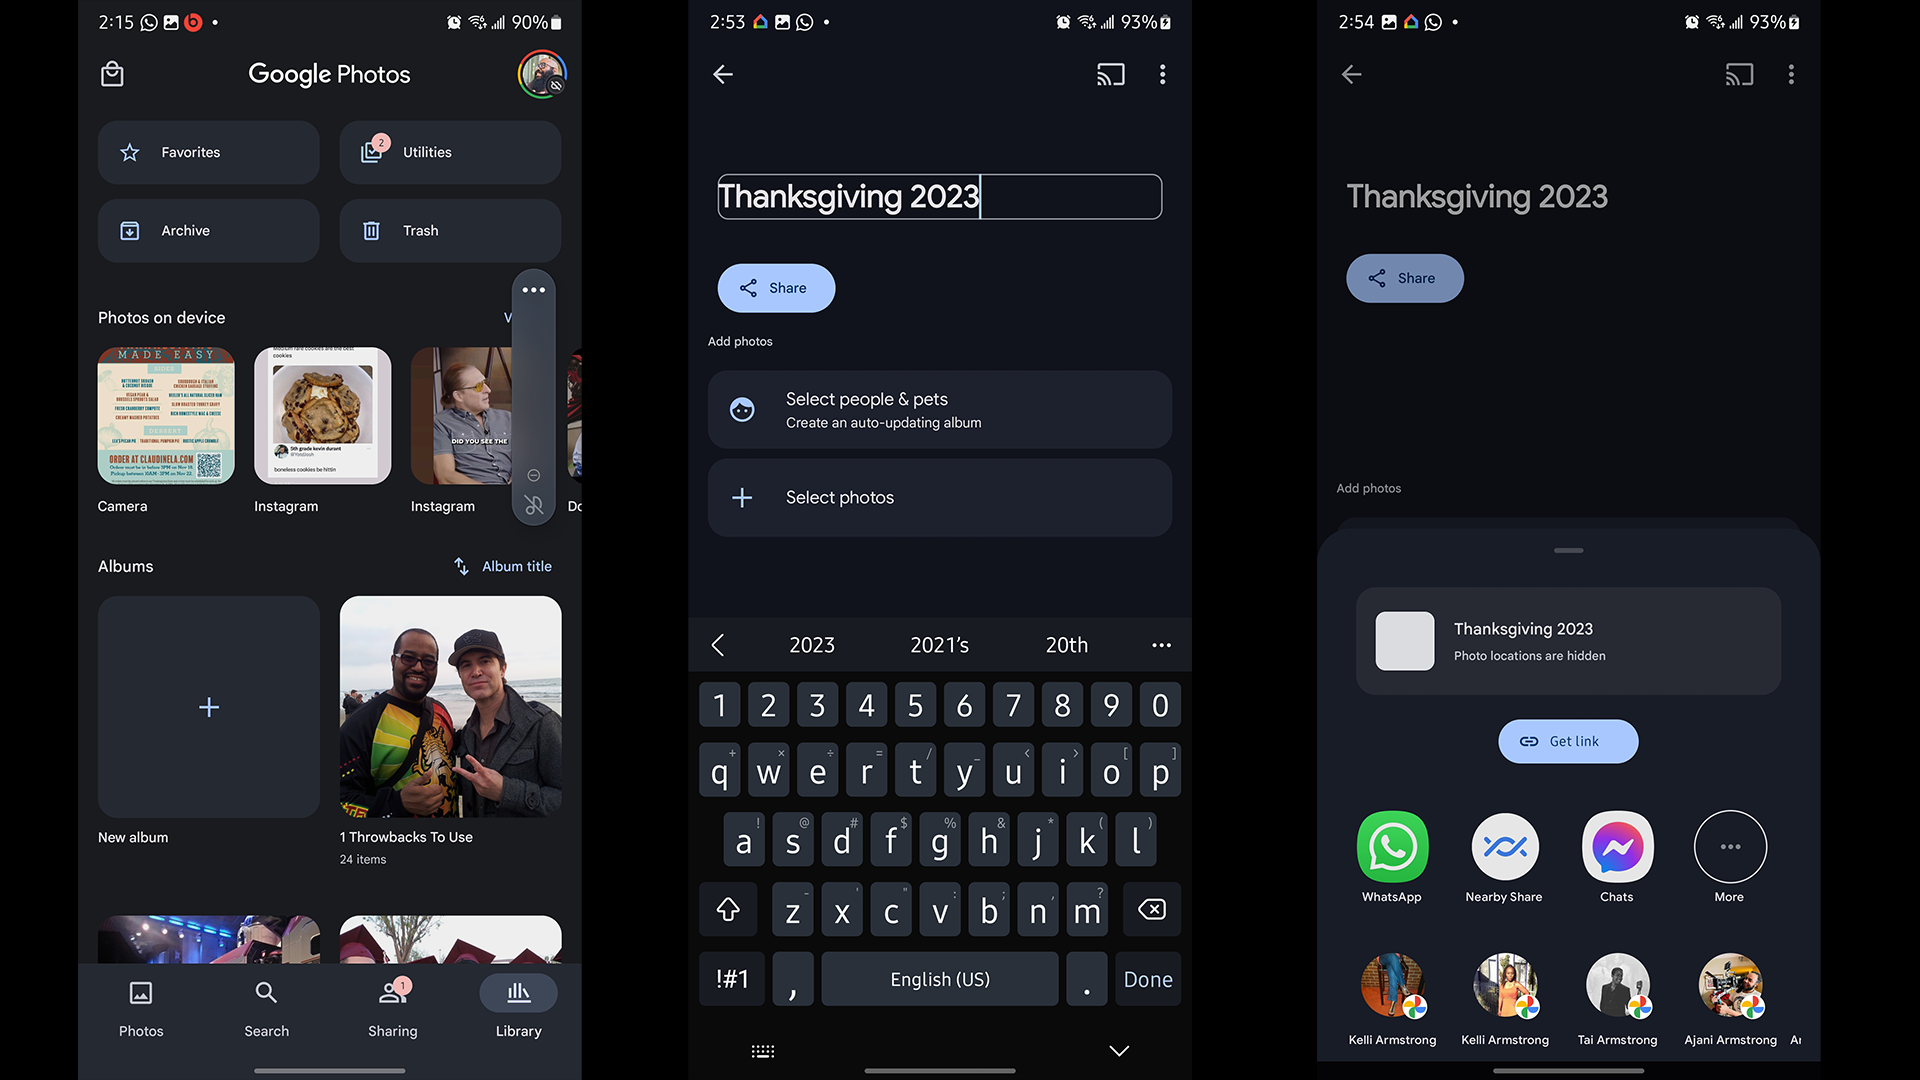
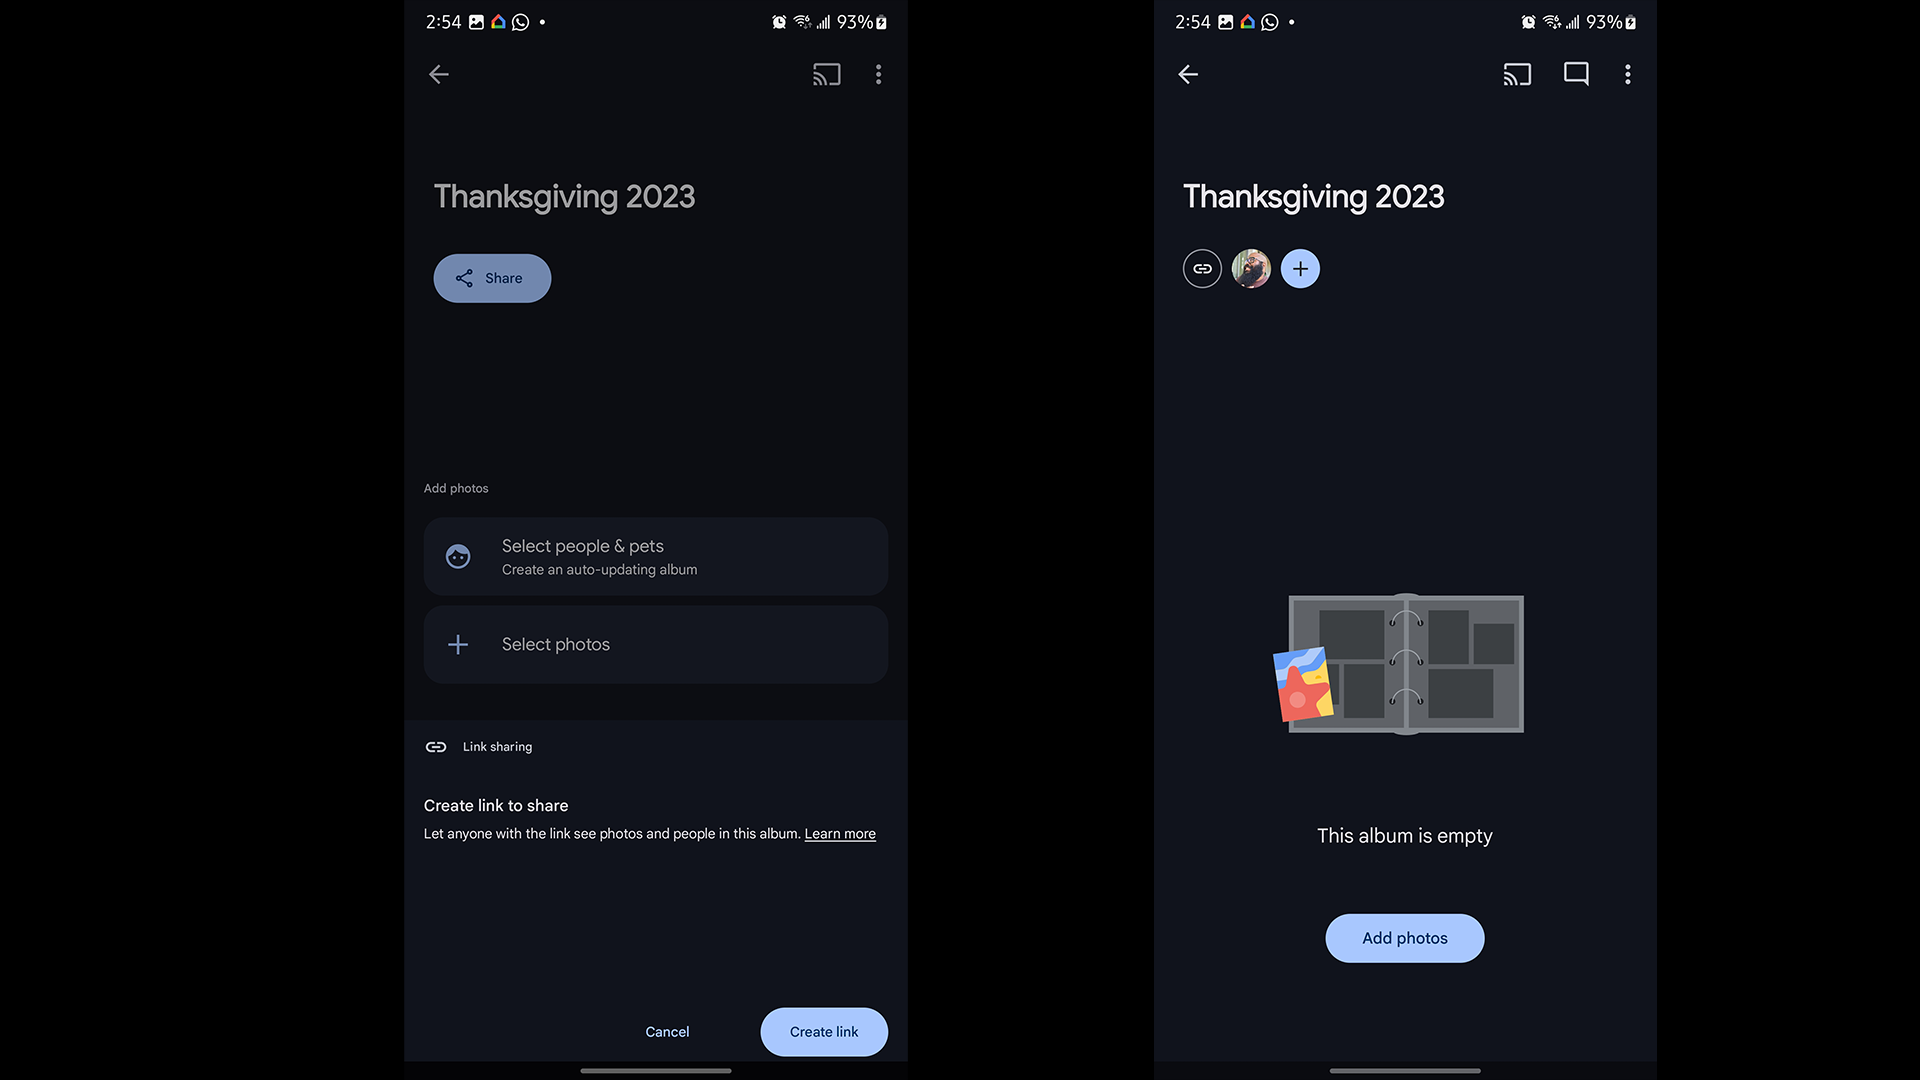
On your mobile device, open the Google Photos app. Sign in to your Google Account. At the bottom, tap Library. Then tap on the blank New Album square. Name it, then tap Share. Tap on Create link (it’s now copied to your clipboard), and the next thing you’ll see is the album created and your Google thumbnail image at the top with a “+” next to it.
You can now click on that and select who to share your album with. You can share directly with anyone with a Google Account if they’re in your contacts or by searching using their email address or phone number.
For everyone else, you can share the link you copied to your clipboard. When you share a link to your album, anyone with the link can view the photos and add to the album unless you change the privacy settings. You can modify those settings by tapping on the link icon in the upper left of the screen when you’re in the Shared Album and then modifying whichever options you wish to change.
Stay on top of it all! Use your own personal assistant
The holidays are too busy, so many lists to maintain,
Meals and gifts and toys, it’s mayhem in your brain!
You’d seek help, but only celebrities and CEOs can afford an assist.
Not so, call on Google Assistant for help managing those lists.
“But Tshaka,” you say, “I don’t really know what all it can do?”
Here’re some suggestions to lessen your stressin’. I gotchu, boo!
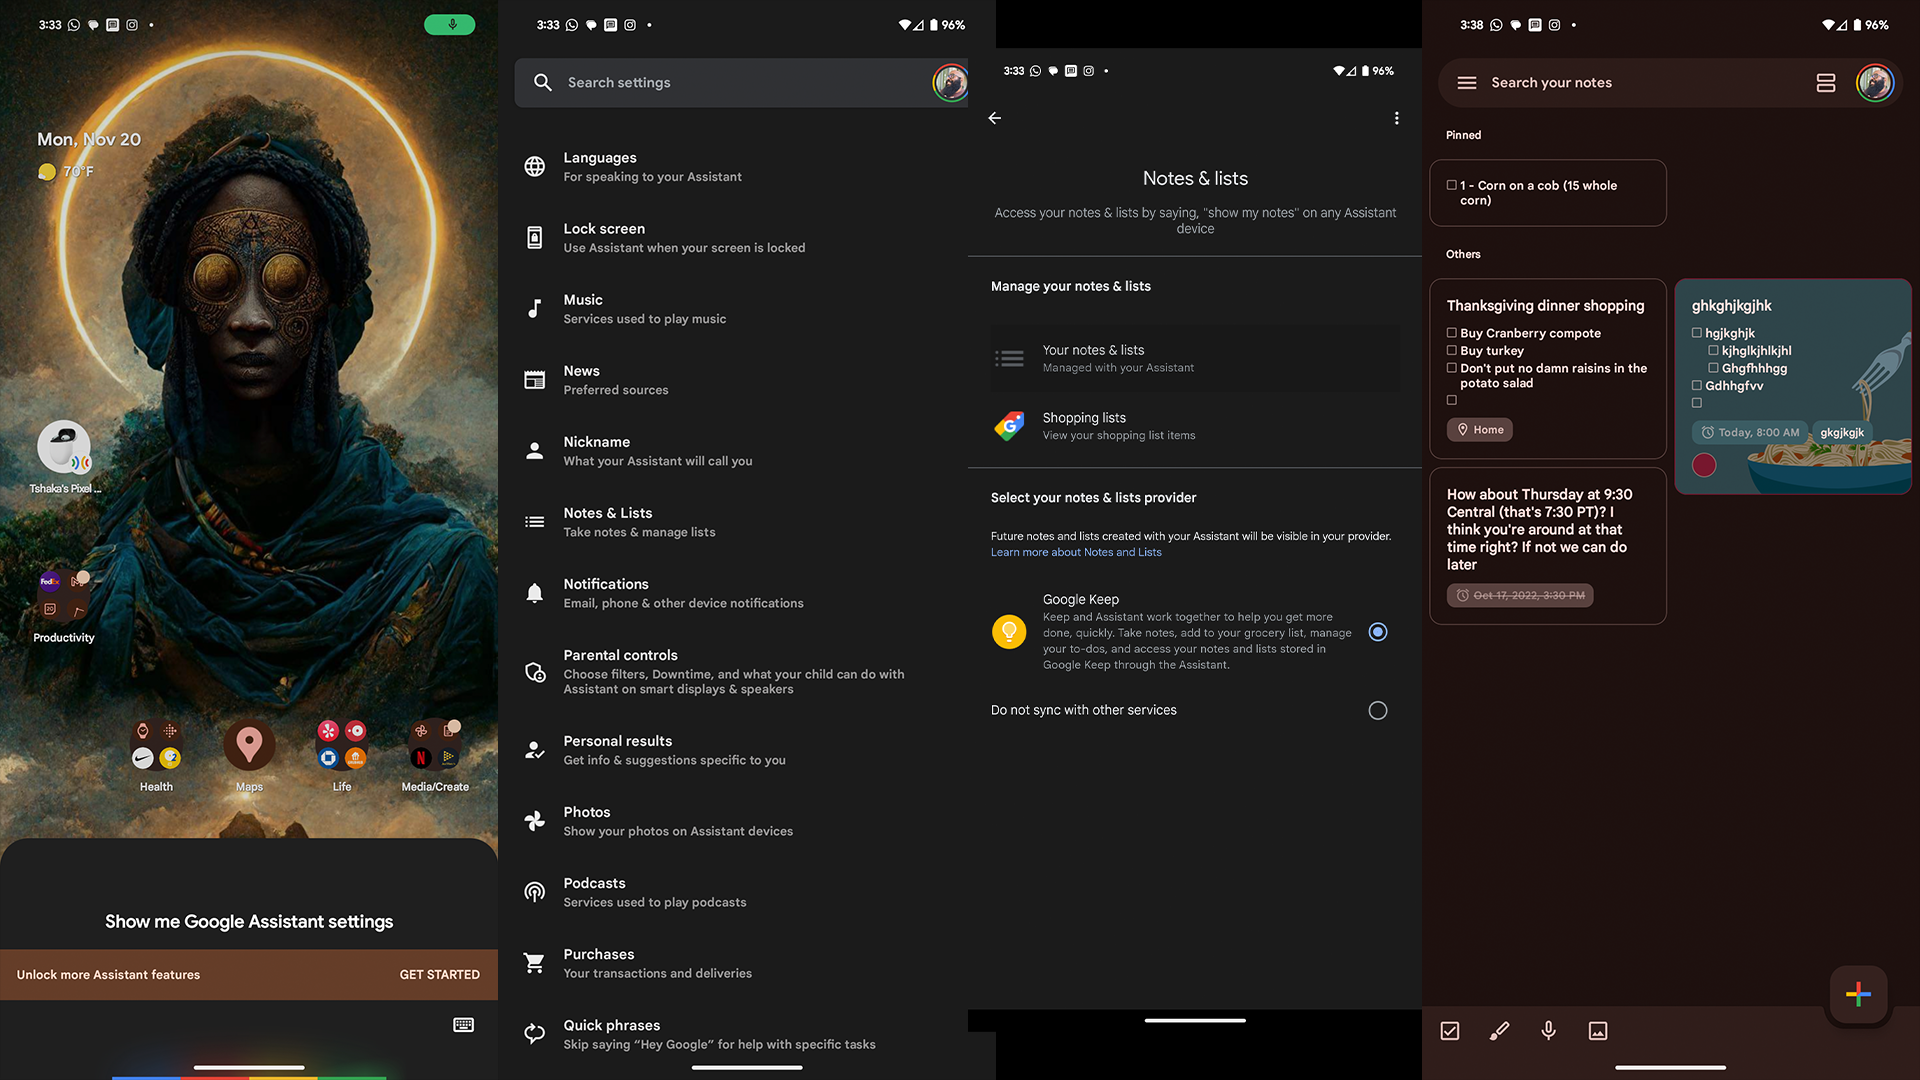
First things first, open Google Keep on your phone if you’ve never used it before. This is where all of your lists and notes you use with Google Assistant will go.
Now that you’re familiar with that, tell Google Assistant to “open Google Assistant settings.” Keep scrolling down the page until you come to the option that says Notes & Lists, and tap on that. Tap on Google Keep so that the radio button next to it is on. Now, Google Assistant will send notes to — and create and manage lists in — Google Keep.
Now, when something is on your mind that you know you’ll forget if you don’t write it down right now, all you need to do is say, “Hey, Google! Take a note.” Assistant will walk you through the process of dictating that note. To find that note, you’ll just go to Google Keep, or you can always ask Google Assistant to show you your notes.
You can also use Google Assistant commands or list options to edit your lists. For example, say a command like “Hey, Google, add ‘Remind my guests not to put raisins in the potato salad’ to my Thanksgiving dinner list.”
Wrapping things up
All of these tips will help make your organizing and managing strong, but the great thing is you can use these tips all year long. Play with Google Keep a bit more; it’s basic-ish but actually does quite a bit. You can add dates, times, and even geolocation to your notes and your lists. And Google Assistant is even more powerful than the functions we’ve shown you for the holidays. Learn to use it from your phone, your watch, or your tablets and smart displays.
Do you have any hacks that you’d care to share? Help the rest of us out and drop them in the comments down there.


