
Get all your news in one place.
100's of premium titles.
One app.
Start reading
Tom’s Guide
Tom’s Guide
Technology
Annie Collyer

4 things I wish I'd known about cleaning an electric grill before buying — one is a hidden fire hazard

Cleaning electric grill.

Get Grillin' Week 2026

Welcome to Get Grillin' Week 2026 here at Tom's Guide. We're celebrating everything about the perfect backyard cookout. We want to help you choose the best grill (and the gear to go with it) as well as learn new tips and tricks when it comes to maintenance and best practices. Because now summer is here, it's time to get outside and get grillin'.

I am, quite frankly, obsessed with my electric grill. I used to think that grilling wasn't worth the clean-up or the preparation, when I could just throw the same food into my air fryer and get other chores done while I wait for it to beep.

This was until I tested an electric grill, which has truly changed the game when it comes to hosting in the summer. But, like any grill, it needs a deep clean after a few uses.

While cleaning any grill is intricate and in some cases, messy, an electric grill is a totally different ball game. While it's definitely a little less messy than a charcoal grill, there are a few things to consider if you've just invested in one. Or, perhaps you're considering investing but want to know what the maintenance is like?

I've deep-cleaned mine, and here are some things I wish I knew before deciding to keep my electric grill over my charcoal model.

Full disclosure: despite its maintenance schedule, I still swear by my electric grill. So, let's get started. Before, though, it's important to note that just as you would with your house, it's smart to start cleaning your electric grill (or any grill) from top to bottom. Here's how to clean an electric grill the right way.

1. Remove the heating element before doing ANY cleaning

Unlike charcoal and gas grills, an electric model has a heating element. This heating element attaches to the side of your grill, and the other end needs to be plugged into a socket. This is what gives it power.

Before you do ANY cleaning, or even remove anything from your grill, you need to detach this heating element and store it somewhere safe and dry. You don't want to risk any electricity shocks while cleaning, or the risk of accidentally turning a dial and switching it on.

2. The lid might look like it's peeling paint, but it's probably not

(Image credit: Future/Annie Collyer)

Start this job by opening your grill and cleaning its lid. This is where grease from your food and smoke vapours sit, so it will be grubby. You might notice some flakes coming off the lid that you might think are paint, but you're probably wrong. These flakes are non-toxic because they're probably carbon deposits that have formed while cooking.

(Image credit: Future/Annie Collyer)

You'll want to collect these, using a plastic scraper like this one, to scrape them away. Some paper towels might come in handy here. Don't use a vacuum of any sort as they'll be greasy, so this will clog your vacuum straight away.

3. Your grates are probably dishwasher-safe

(Image credit: Future/Annie Collyer)

Most grill grates are dishwasher safe, since they're made from cast iron with an enamel coating. Before you put yours into your dishwasher, though, you will want to give them a good scrub to get rid of any debris, ideally using a stainless steel grill brush. Mine came in a set from Weber.

Mine were seriously grubby, so I gave them a pre-soak in my sink before slinging them in my dishwasher. I don't mind some deposits being left on them,as this seasons them a little, so long as the bulk of it has been washed away.

4. You might need to get your screwdriver set out

(Image credit: Future/Annie Collyer)

This is arguably the most important part of cleaning an electric grill. And the trickiest, too.

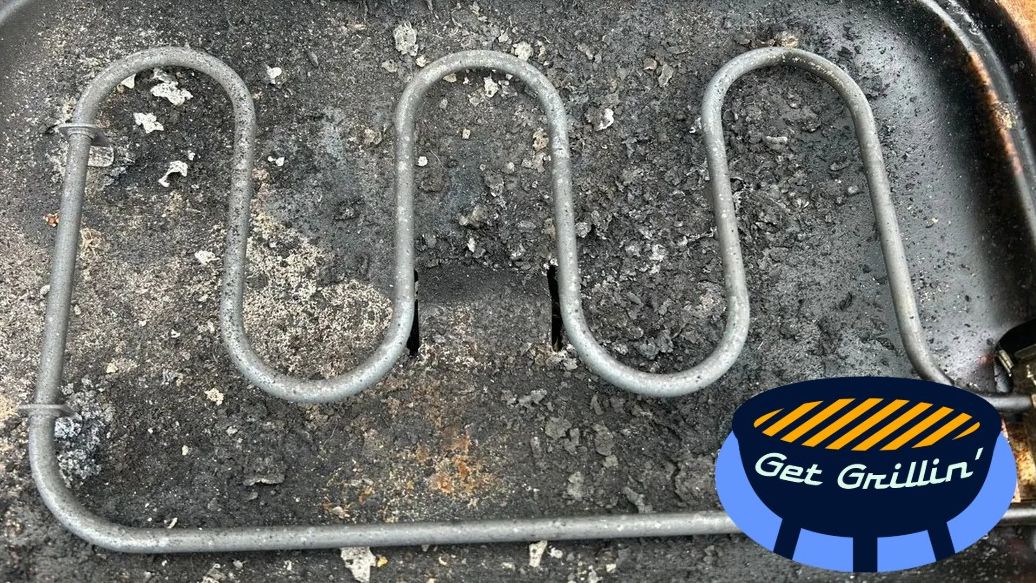
The heating element in an electric grill cannot be cleaned or submerged in water. So, to reach underneath it and around it, to clean the rest of the cooking bowl, you'll need to remove it. In some cases, this is easily removable; be sure to refer to your manual for help.

(Image credit: Future/Annie Collyer)

In my case, you'll need a screwdriver and a steady hand. Find the screws that attach the heating element to the main grill and remove them. Carefully, remove the heating element and set it aside. You might want to use gloves while doing this as it can be dirty.

Under the heating element, there will be grease and leftover food particles. If not cleaned away frequently, these can cause a fire. It seems mine was well overdue!

Again, go in with a plastic scraper or use a paper towel to collect any deposits off the side and bottom of this bowl. Then, you can go ahead and clean this bowl with soapy water (check your specific manual first). This is where I found my crevice cleaning brush to come in handy.

Reattach the heating element to the grill, using the screws and screwdriver. Don't worry, as the heating element will clean itself eventually, as food will burn off the element as it heats.

(Image credit: Future/Annie Collyer)

In my case, I'd definitely left this bowl for way too long without giving it a clean. I'm hoping that after another few cooks I'll be able to budge these leftover stains.

For more top tips, check out these 11 grilling tips and tricks everyone needs to know.

What not to do while cleaning your electric grill

Do not use liquid cleaning products on the grill while the heating element is installed. Exposing this element to cleaning chemicals could damage it.

Don't use a metal brush on anything other than its grates to minimize the risk of scratching your grill.

More from Tom's Guide

Sign up to read this article
Read news from 100's of titles, curated specifically for you.
Already a member? Sign in here
Related Stories
Top stories on inkl right now
One subscription that gives you access to news from hundreds of sites
Already a member? Sign in here
Our Picks
Fourteen days free
Download the app
One app. One membership.
100+ trusted global sources.