Improving your putting performance doesn't happen by mistake, and can only be achieved through hard work, dedication and access to the best putting tips.
For those that struggle to find the time, this doesn't mean you need to spend hours on the practice green every day as many amateur golfers now choose to practice at home, thanks to the best putting mats and putting aids on the market.
Whether you want to improve your understanding of how to read greens, or simply work on putting drills to help you lower your scores on the golf course, this extensive list can certainly help.
Thanks to our network of Golf Monthly Top 50 Coaches, we are able to share some of the best ever putting tips to help you pursue putting perfection...
SHORT-MEDIUM RANGE DRILLS
PUSH BALL DRILL
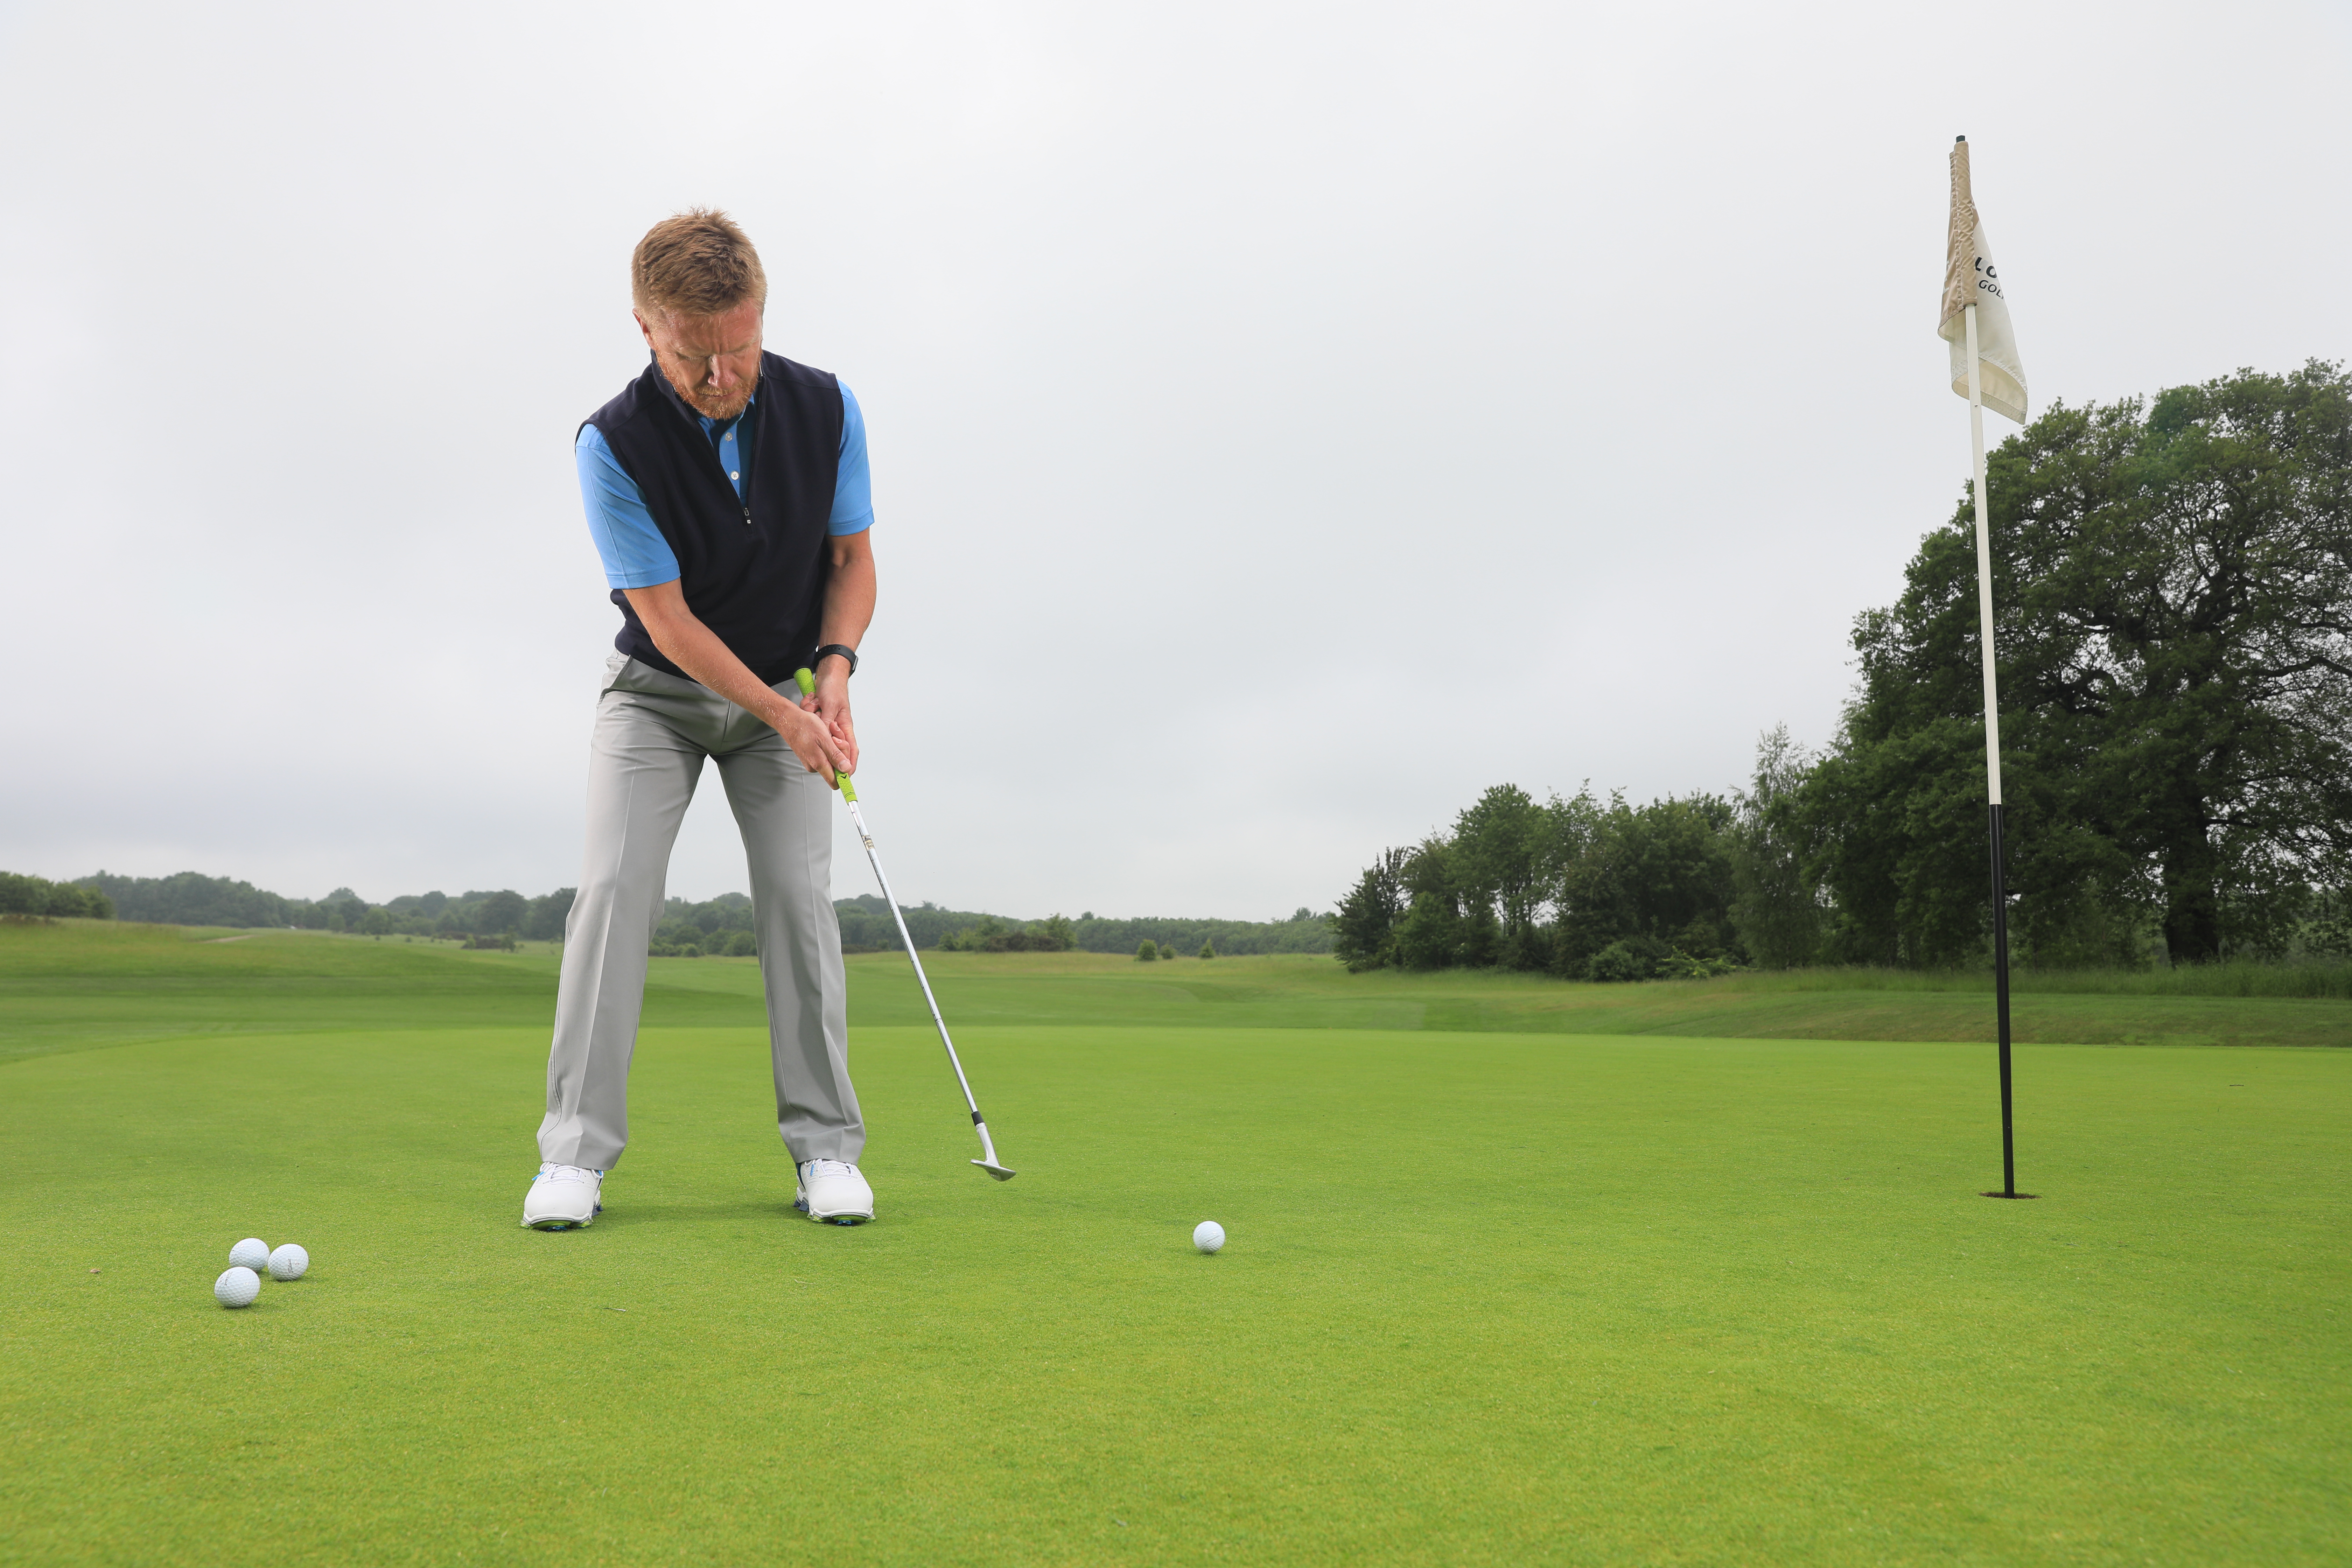
This is a simple drill if holing out from short distance is of concern. The concept is to continue to move the putter face towards the hole achieving a square impact. This action reduces unwanted sidespin often causing the ball to lip out.
Place the ball two feet from the hole with no backswing, and simply use the shoulders to 'push' the ball to the hole. It's a good idea is to use dual colored golf balls to check for uneven roll, which immediately indicates any spin imparted.

RULER DRILL
This simple drill is designed to provide feedback on the position of the putter face at impact, a crucial component in achieving a high short putt conversion rate.
Find a flat putt and place the ball on the six-inch mark on the ruler (starting at the beginning of the ruler). The aim is to roll the ball so it stays on the ruler and drops into the hole.
If the ball falls off to the right, the putter face would have been open at impact; if the ball falls off to the left, it would have been closed.
Increase the challenge and degree of difficulty by simply moving the ball back three inches on the ruler after each successfully holed putt.
3 TEES DRILL
I remember playing many times in the Australian Open at Yarra Yarra, where the speed and severity of the greens called for some brave decisions.
What speed are you going to hit the ball into the hole? This, of course, will determine the line you take. When playing, my preference was to hit a firmer putt taking out the break.
This drill will help you to combine pace and line, developing your feel for what strength is required for the particular stroke. Find a three-foot putt with a slight break.
The three tees represent how hard you’re going to hit the putt: the back one firm to take out the break; one medium pace with a little break; and one where you just roll it in taking all the break.
ARC DRILL
Place an alignment stick on some really long tees (or similar) so the stick is three or four inches in the air. You can use this on putts of up to three or four feet.
Make your stroke, keeping both ball and putter underneath the stick. This will promote a shallower path to your stroke. If you knock the stick off, something has gone wrong either on the takeaway or follow-through.
You’re looking for a saucer-shaped arc rather than a cup-shaped one and this drill encourages that.

BELLY WEDGE DRILL
For this putting drill use your most lofted wedge and work on keeping your levels throughout the stroke to make sure you’re not coming down too steeply or up too aggressively through impact.
It’s about hitting the equator of the ball with the leading edge. To do this, you must retain your posture through impact and the connection between your arms and body.
If your arms are wandering about all it's likely that the leading edge won’t strike the equator. Obviously, you must take great care here, perhaps starting out off the green until you’ve got the hang of it.
MID LENGTH DRILLS
HIGH JUMP DRILL
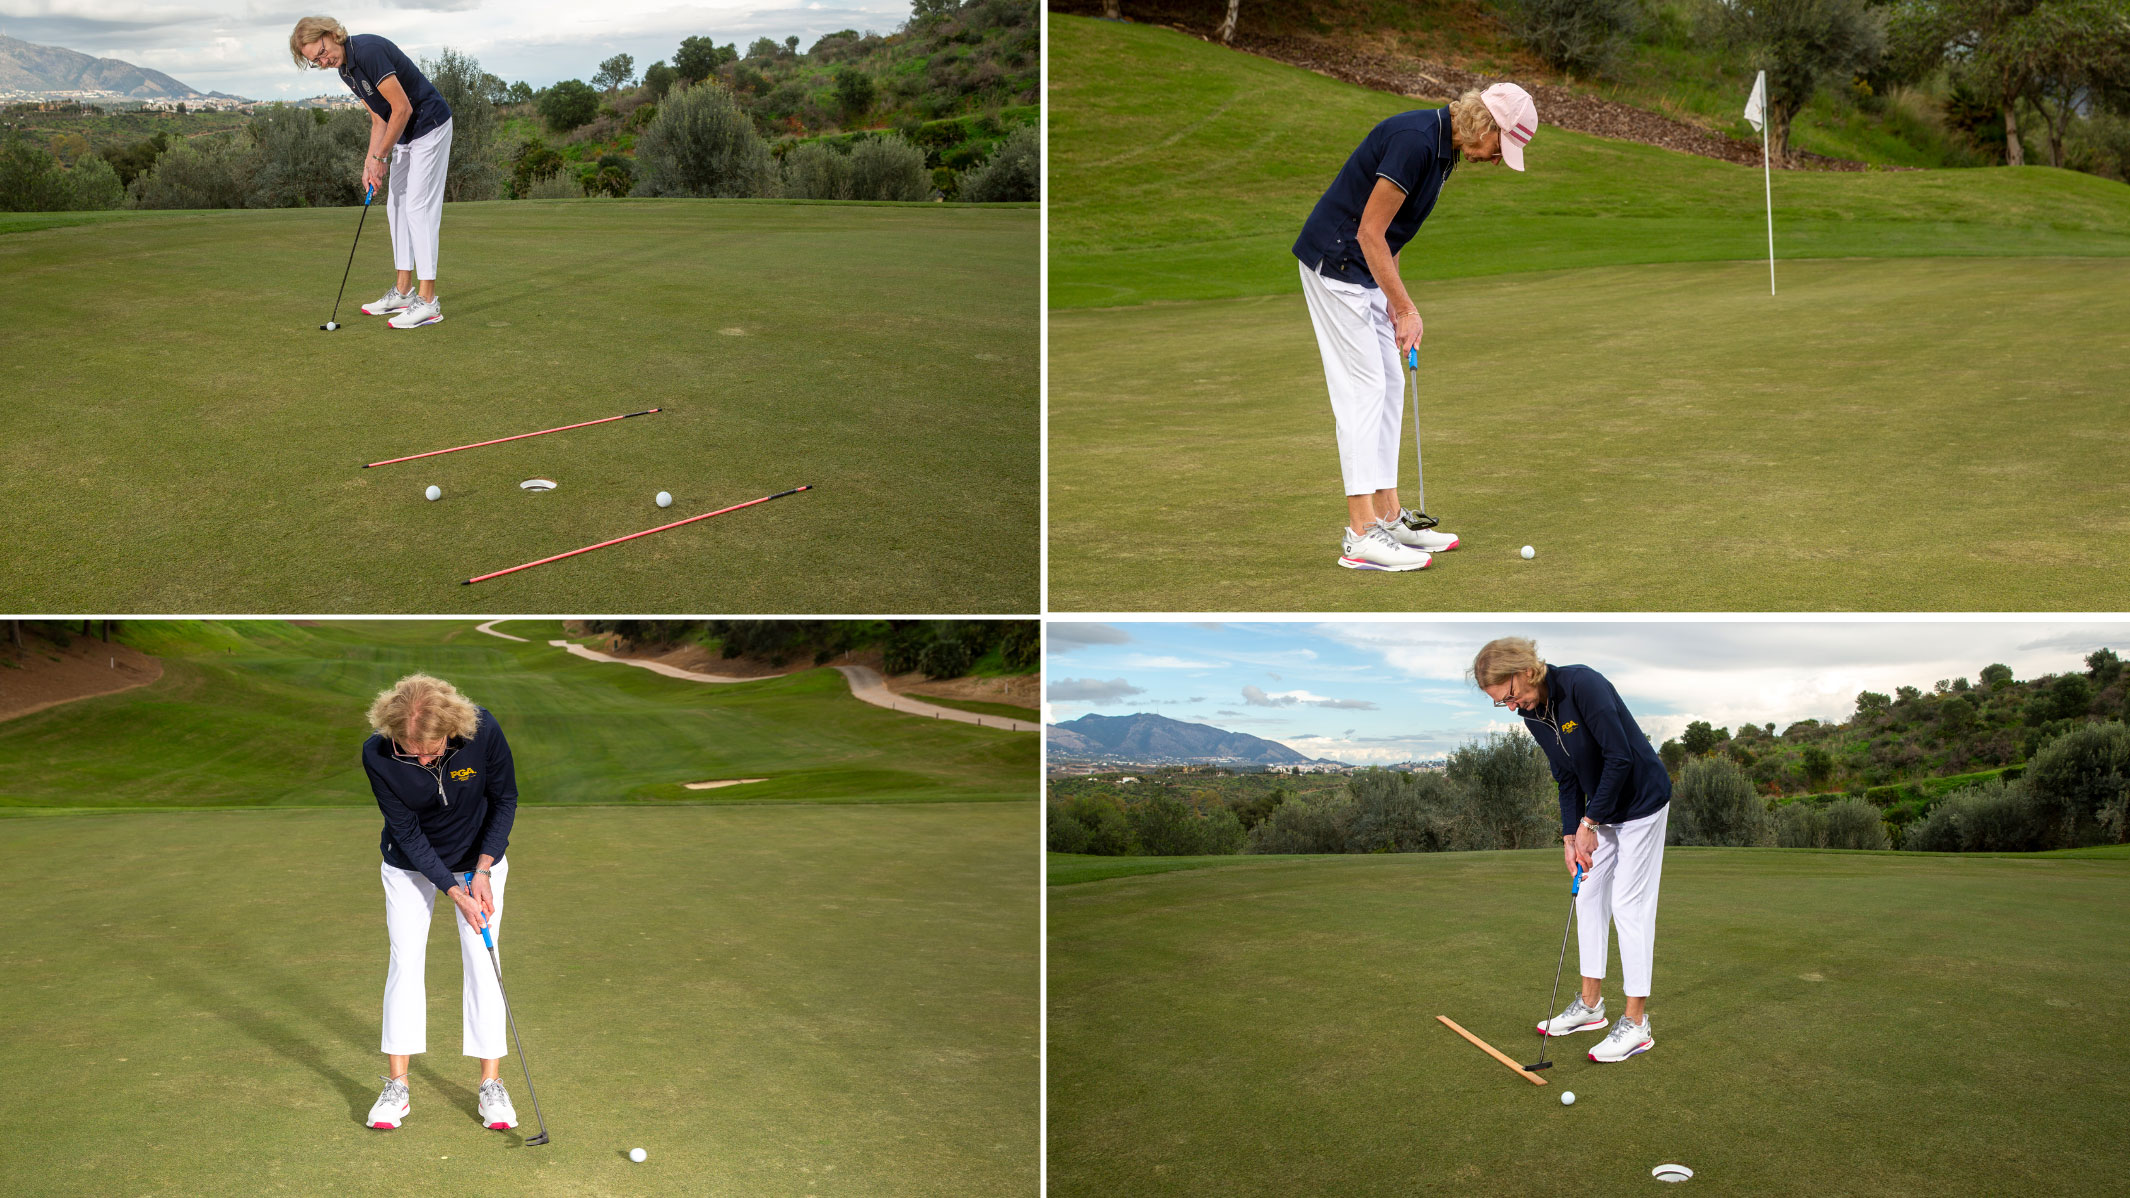
The aim of this drill is simple: to get the ball finishing between the two alignment sticks. It can be a good drill to use in the winter when, typically, the greens are running a bit slower.
The majority of club level golfers tend to come up short on mid to longer range putts, so this 'jumping' over the alignment sticks drill encourages the golfer to strike the ball a fraction harder.
Make a few putts with the sticks then remove them aiming for the ball to finish approximately a foot behind the hole if not converted (the desired distance stated in the PGA Teaching Manual).

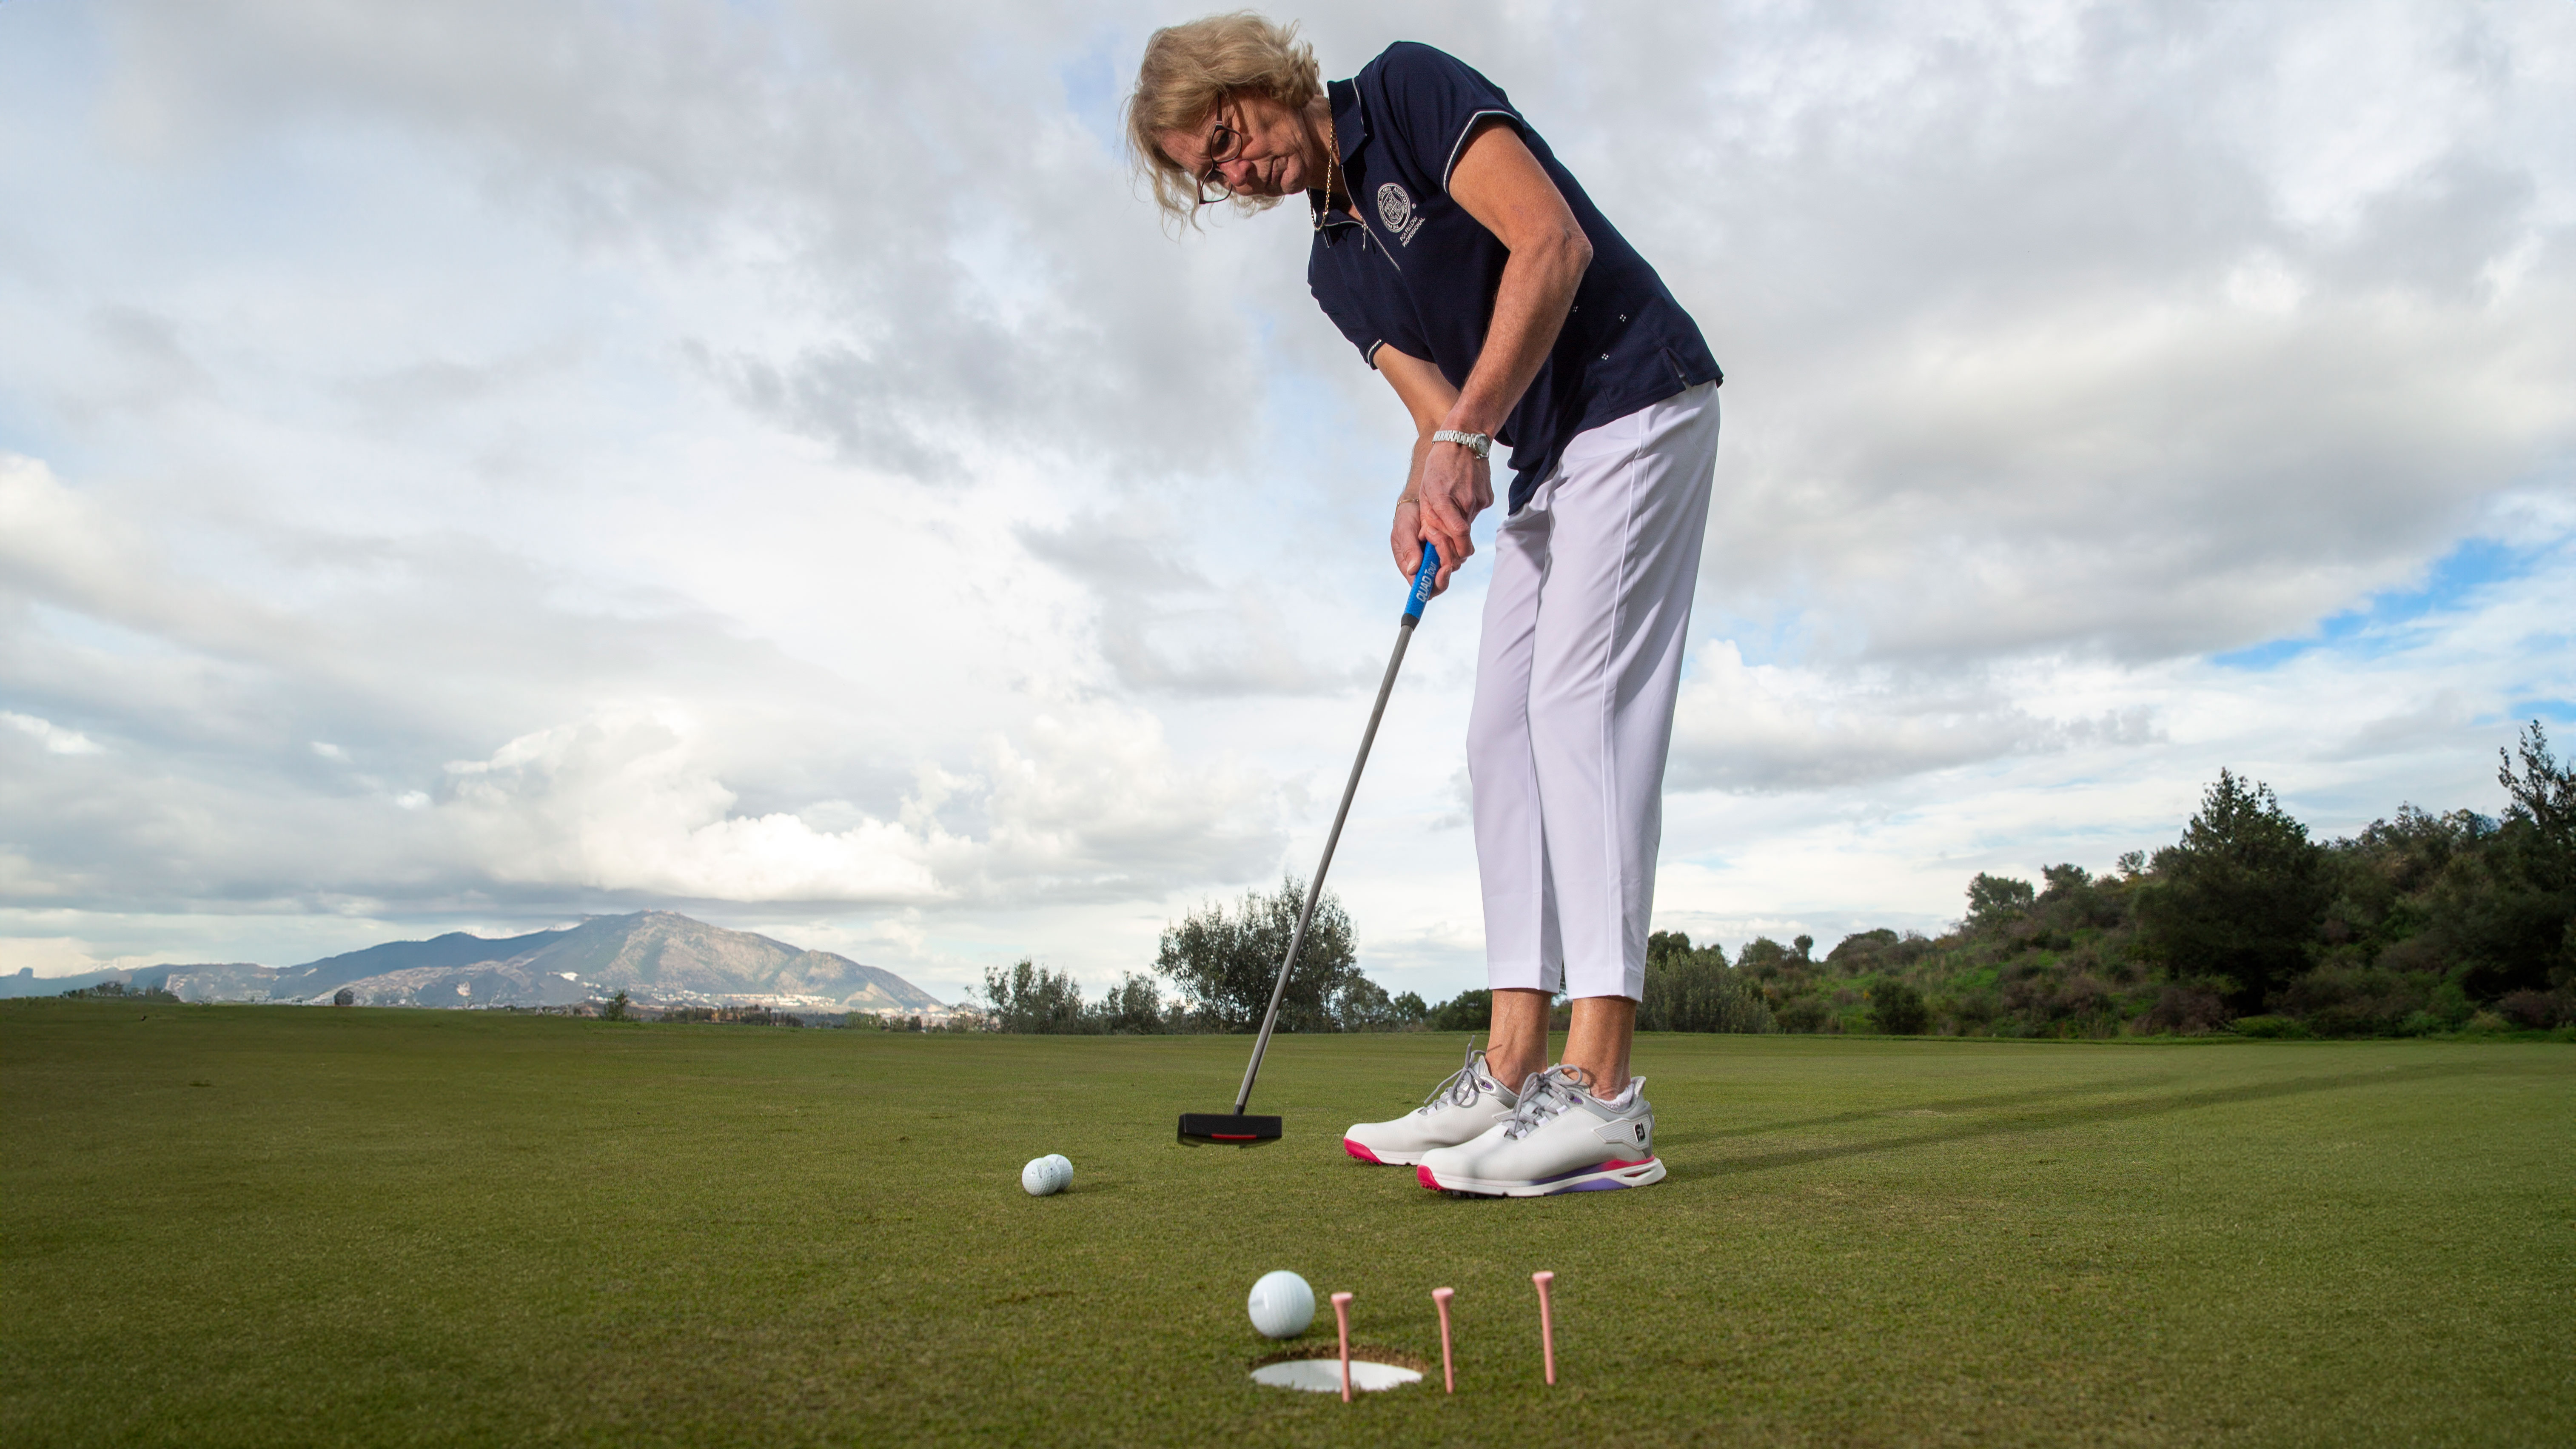
3-2-1 DRILL
Tee pegs are a simple, inexpensive and effective way to improve putting. This drill tests aim and focus. The idea is to ensure practice is harder than the game itself.
Start from three feet with three tee pegs close together. Aim to hit any of the pegs with the first putt. If successful, remove one of the tee pegs, and putt again.
If the ball strikes either of the two pegs, remove one, so you are left with a very testing target of one tee peg, which is the ultimate challenge.
Then, you can move further and further back into more of a mid range distance. This drill can be modified depending upon skill level, plus you can add in breaking putts for an even stiffer challenge.

Focal point drill
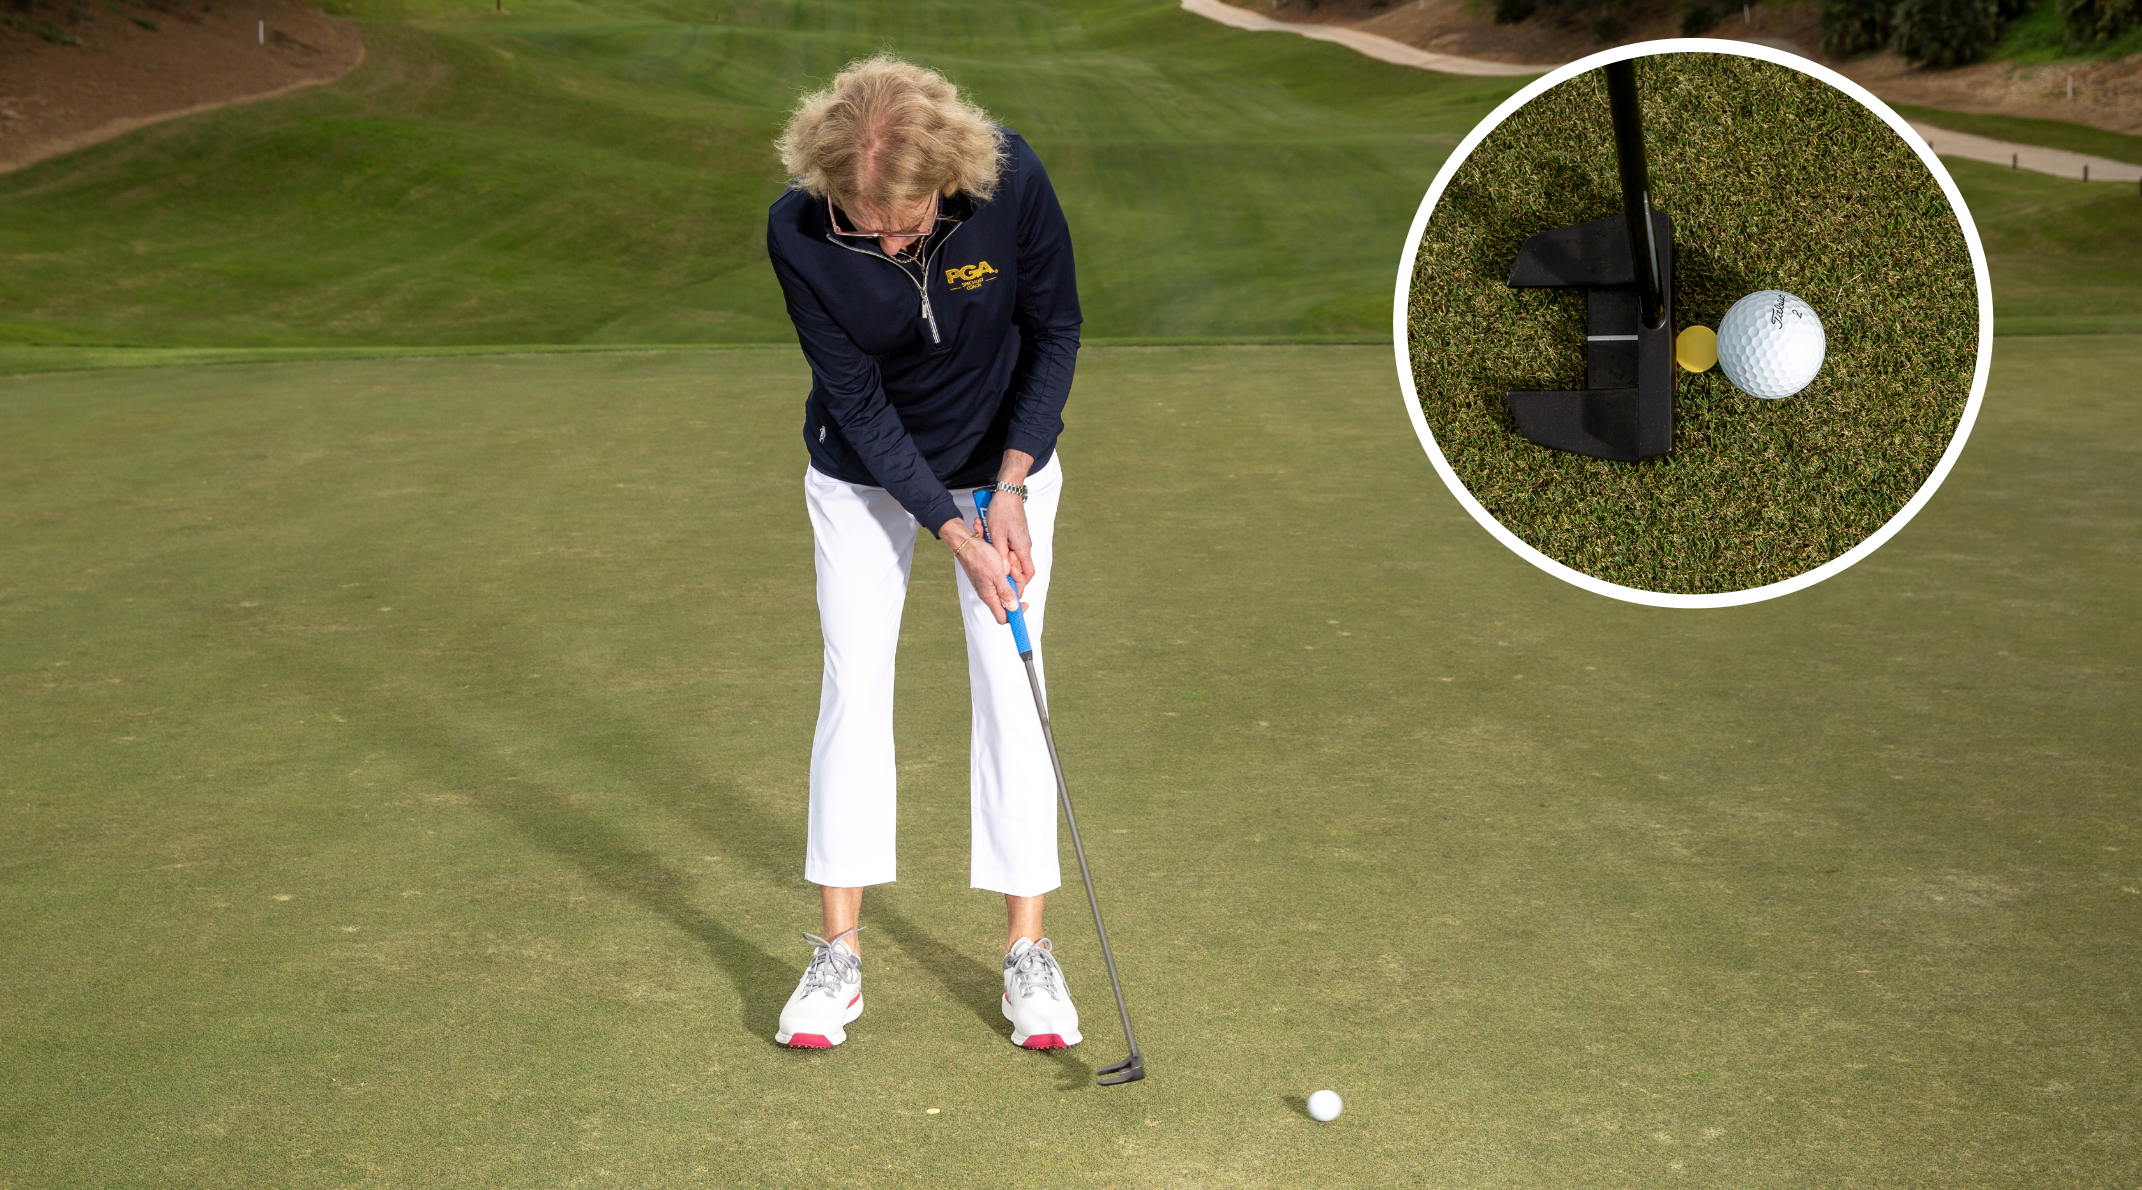
Many golfers believe their focus during the putt must solely be on the ball. However, the ball moves - so what ends up happening? The whole body moves, at the most critical part of the stroke - impact.
As a result, the clubface points left (closed). Your focal point ideally should not be on the ball - it should really be a spot between the ball and the putter face.
Find a spot between the blade and the ball, which could be, for example, a darker piece of grass. Keep your attention on that as you make your stroke.
In the example below, I’m going to count to three, keeping my eyes fixed on the yellow marker, which is a nice visual to use in practice before you become accustomed to your 'new' focal point.
Catherine wheel drill
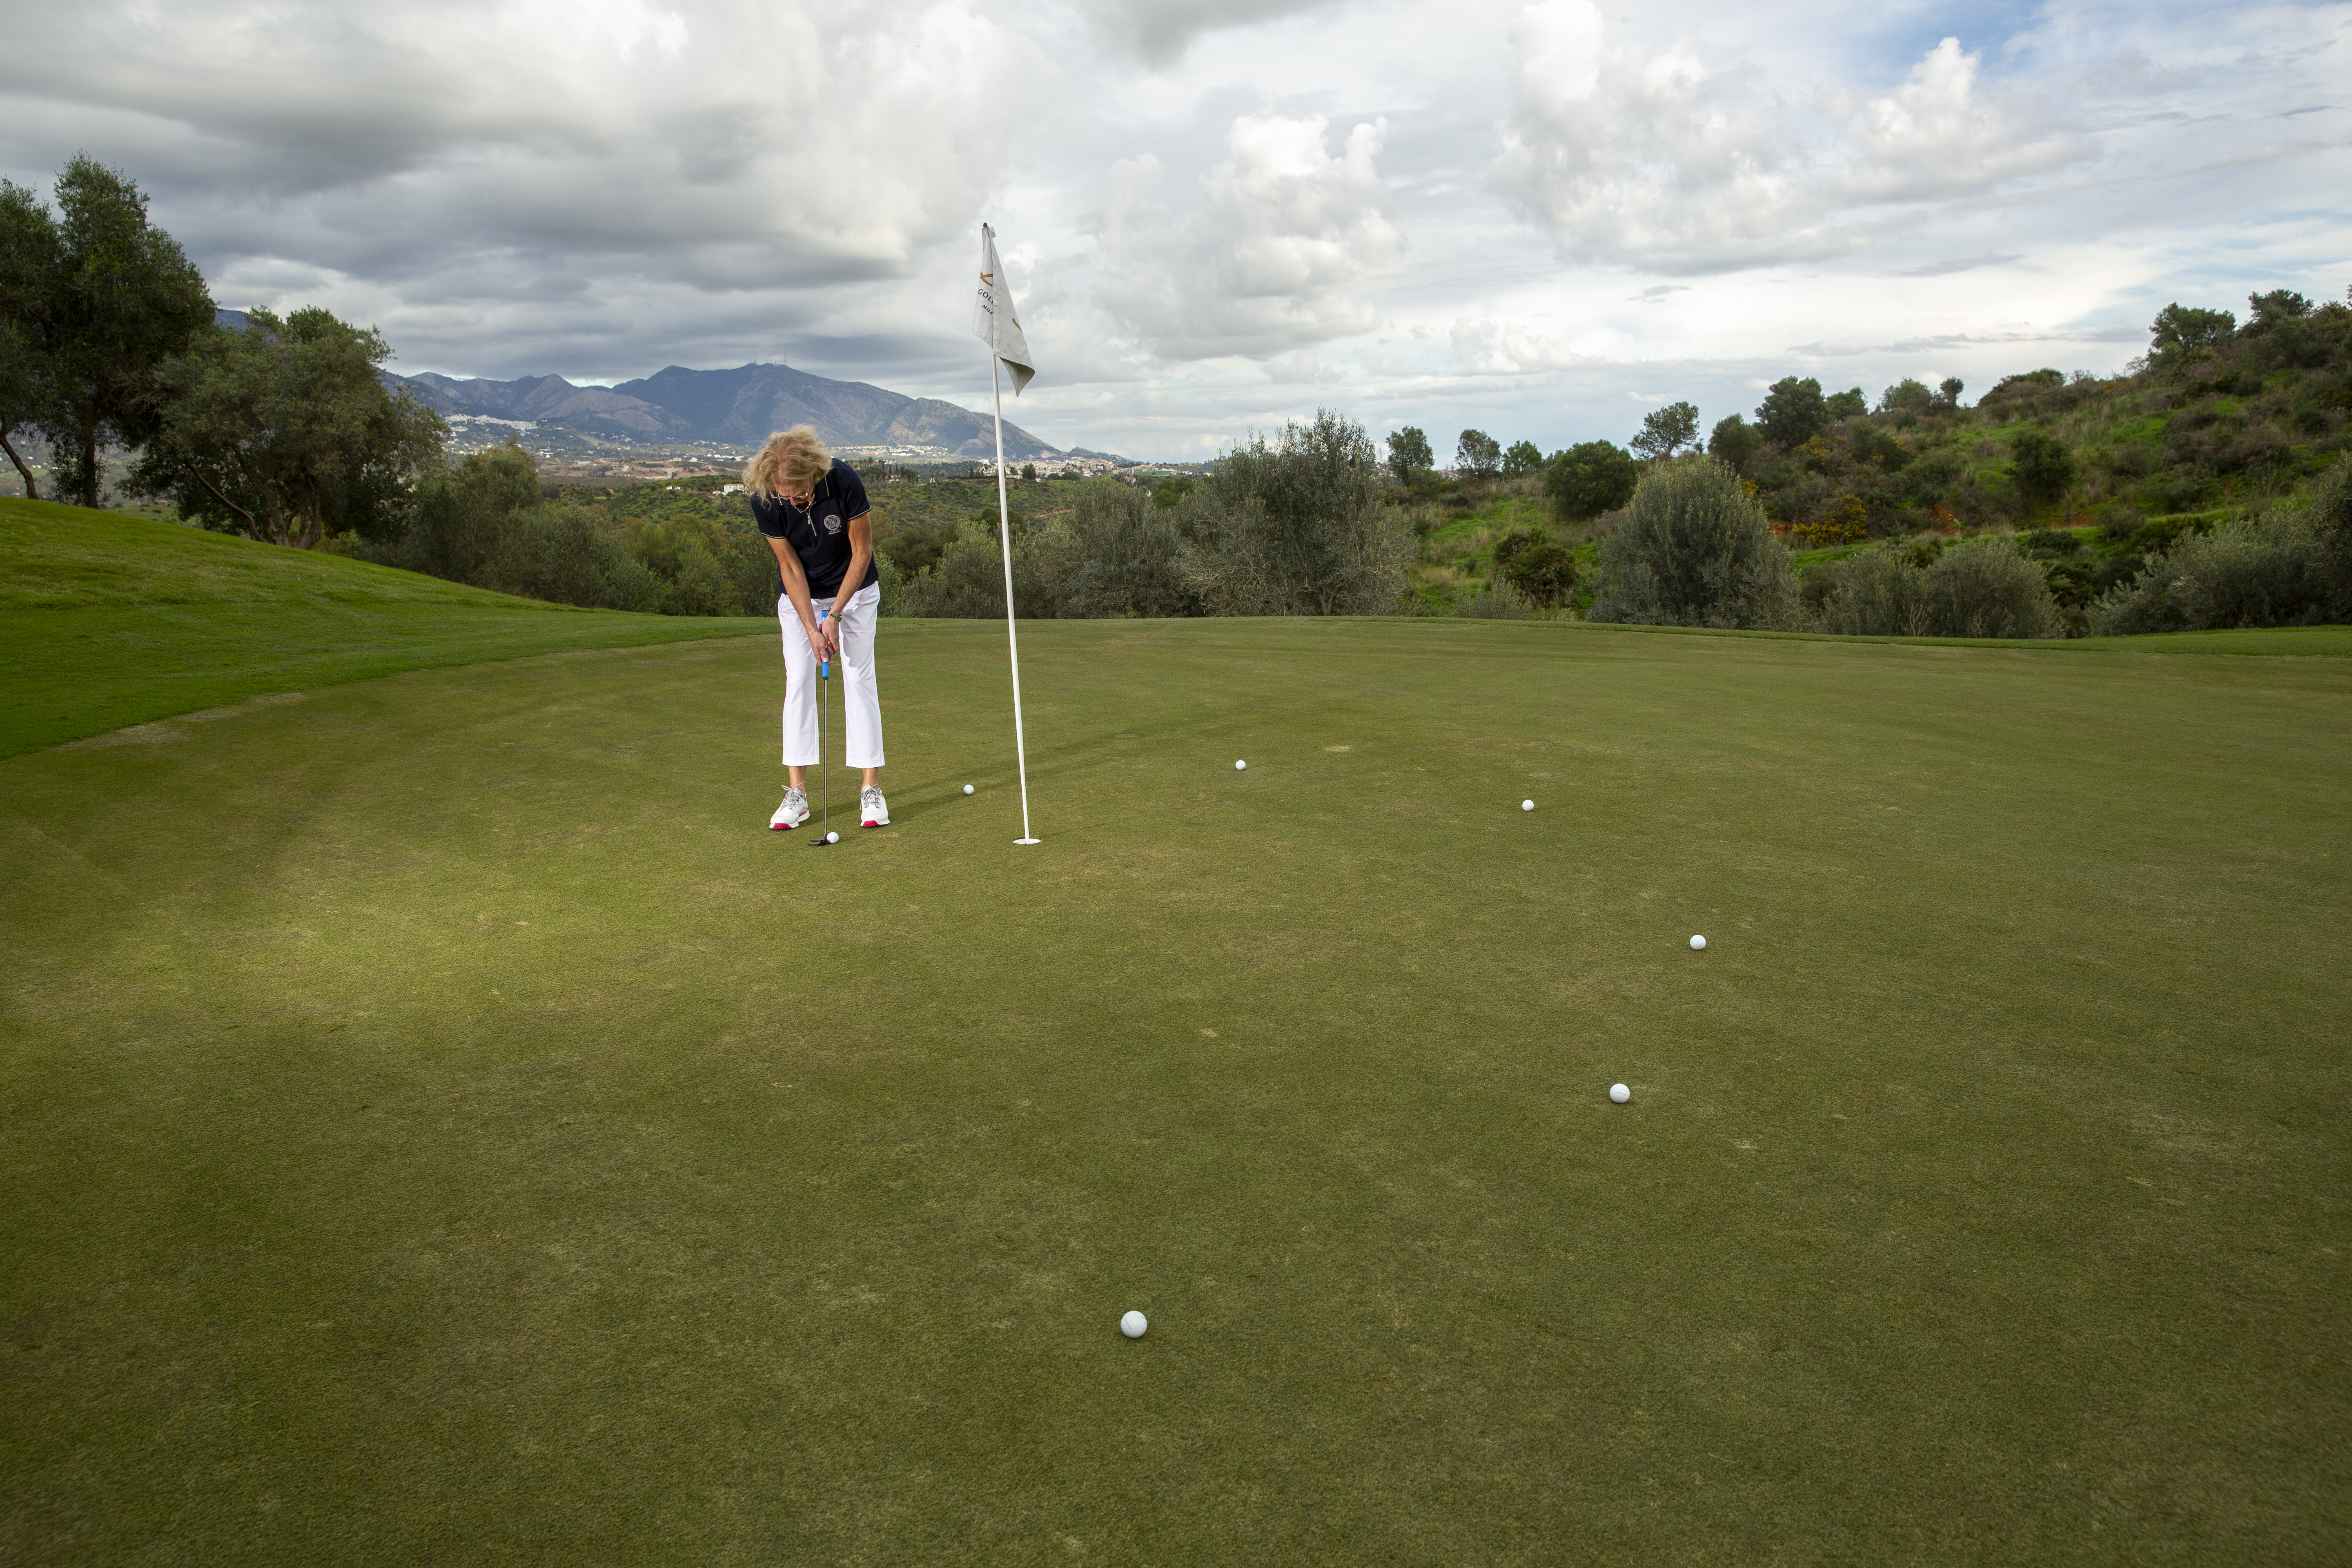
Set up a series of putts around the hole, from 4ft to 10ft. You might find that this drill works as good mental preparation for the round.
The aim is to follow your routine as you would normally on the golf course - so mark the ball, read the putt, and take your practice strokes as if you were playing a competition.
It’s difficult to replicate the exact pressure you might feel on the course, but following a practice process will certainly assist. Adding your own points system can help, too.
I like to start off with the 4-footer as a par putt, then the 5-footer for a birdie, and so on (par, birdie, par, birdie). Miss the first one, you’re one over, and it gets you thinking, ‘Can I get back to level?’
It's super for the mindset and personal challenge. This drill was utilised extensively at the start of my England U18 East Regional Coaching sessions.
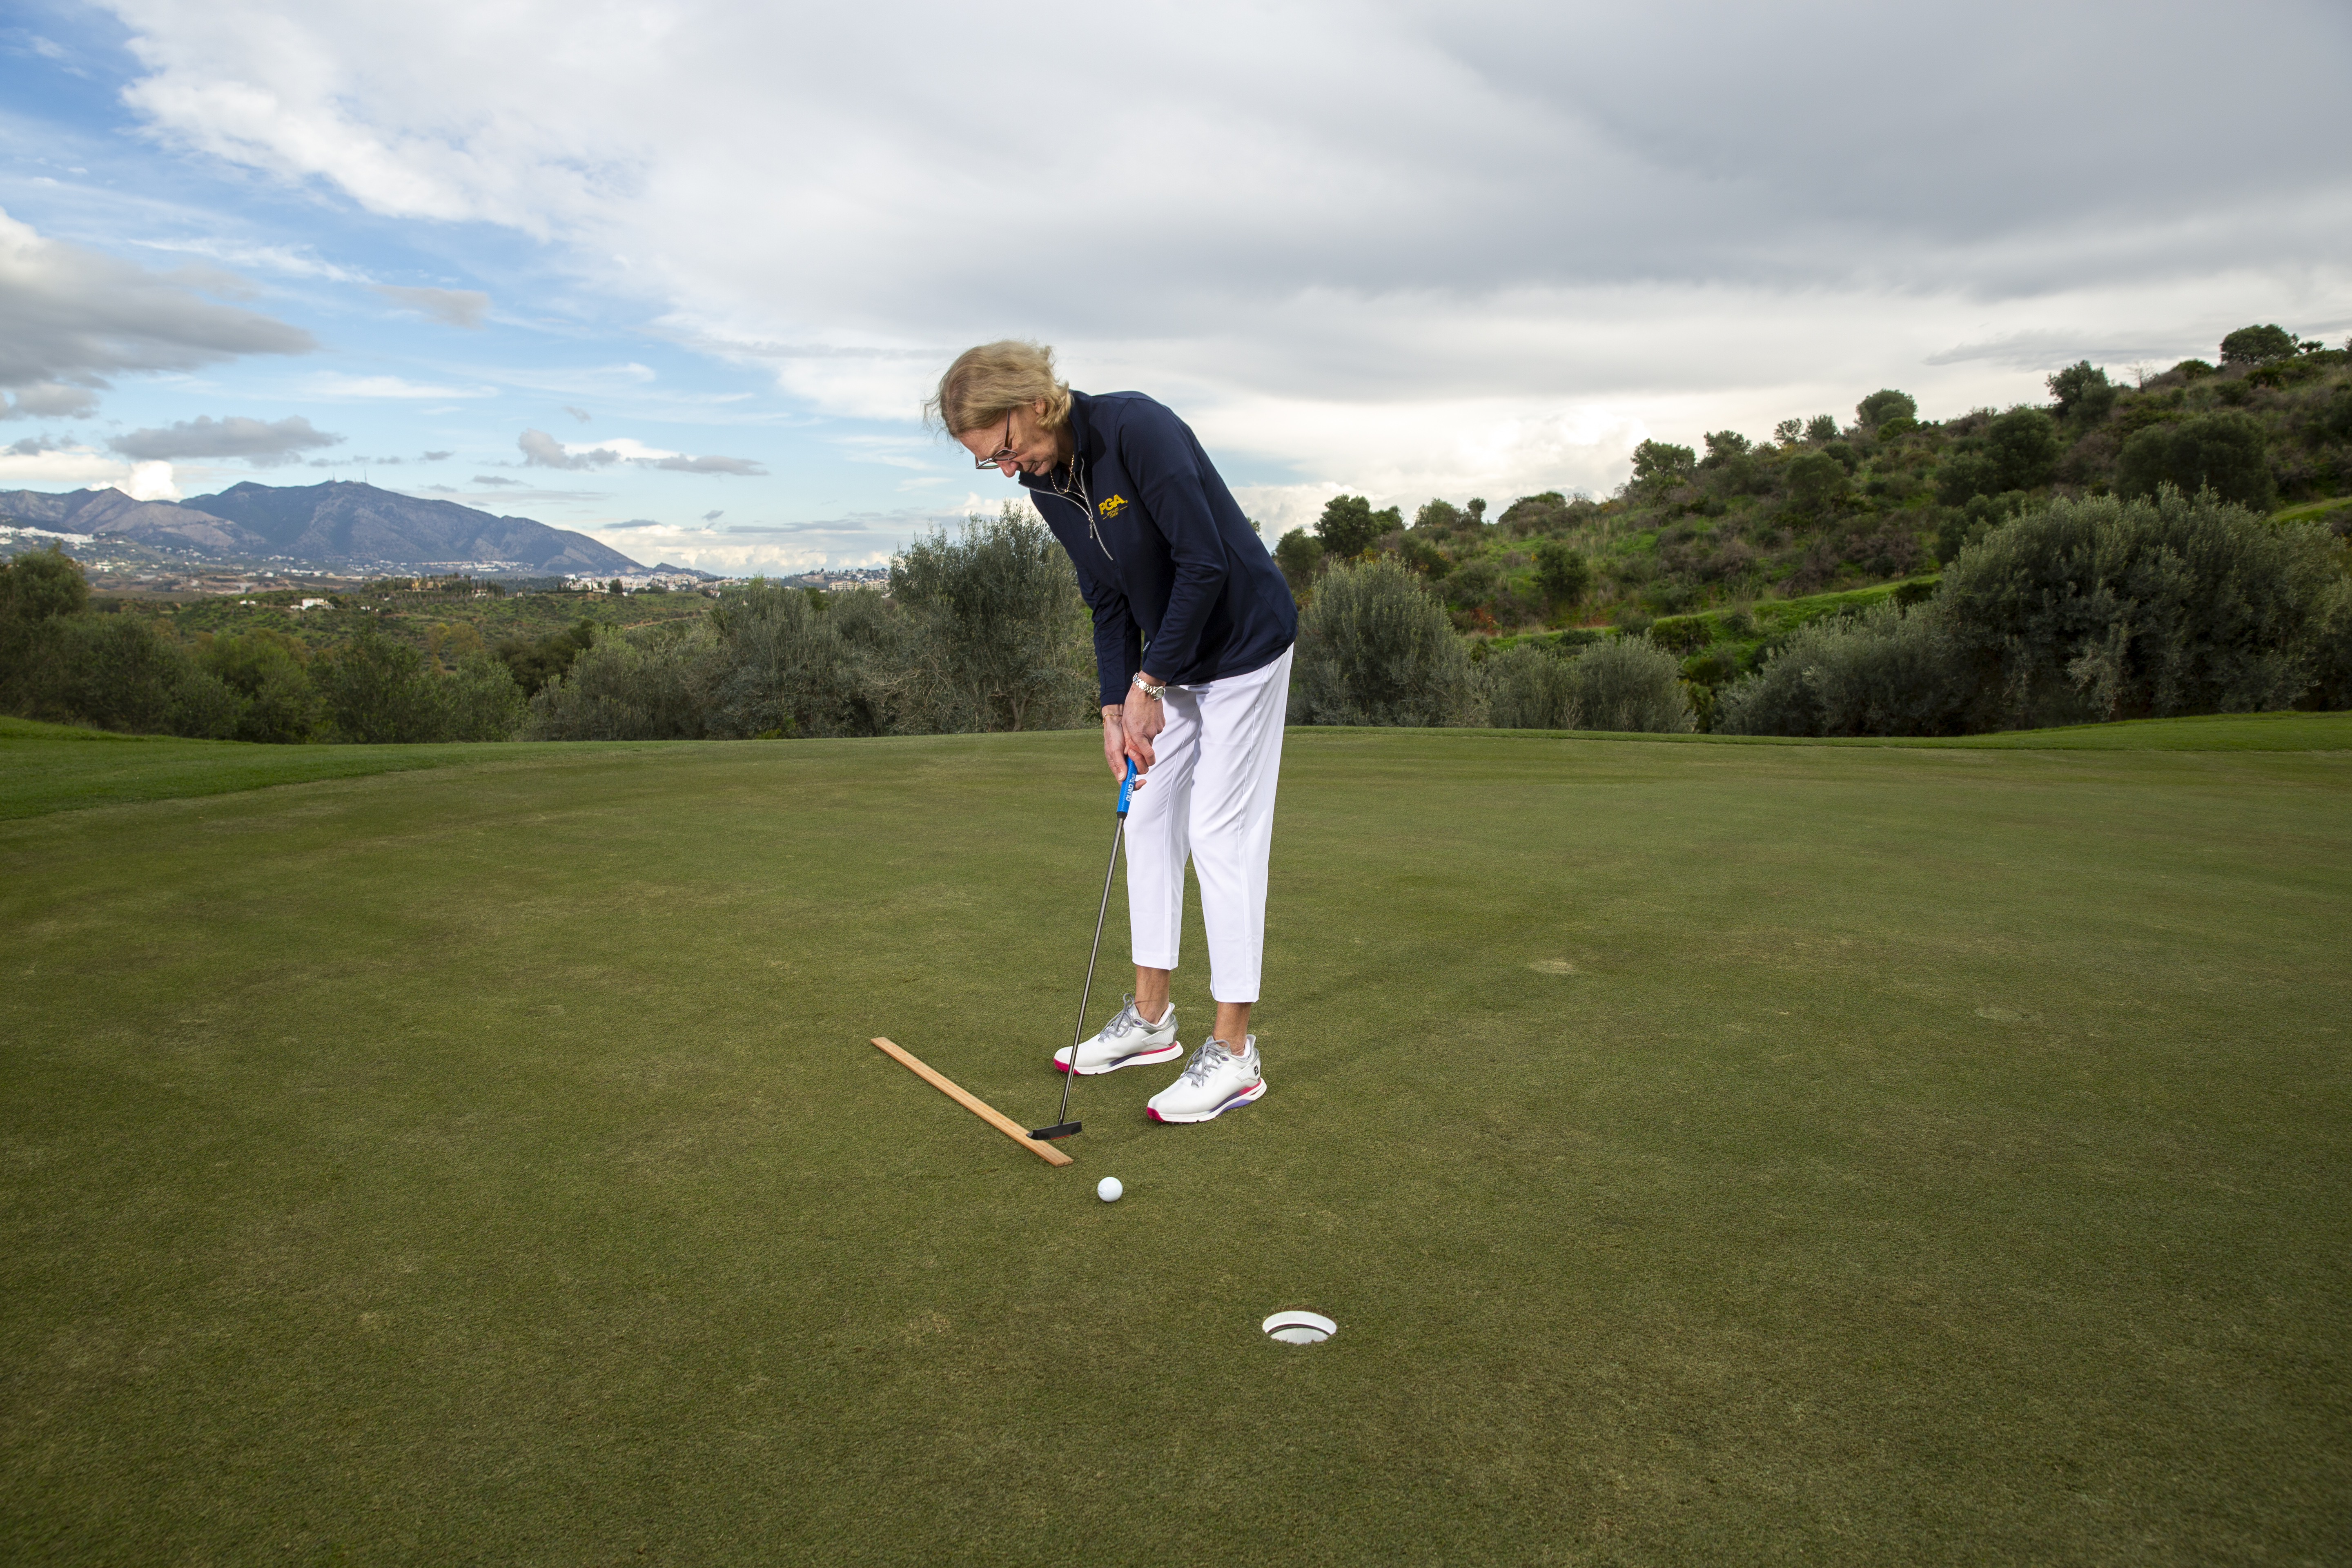
HIGH POINT DRILL
Most golfers don’t allow enough break in their putts and . Find a putt from about ten to 12 feet with some break in it, then spend time working out the high point of the break.
Now lay an alignment stick or club down at that high point. The goal is to get your ball to almost shave the inside of the stick before breaking back towards hole. This will give you a clearer visual picture of the break in a putt.
LONG RANGE DRILLS
POINT OF ENTRY DRILL
Remember that on breaking putts, the ball will not be entering the front of the hole, but via one side or the other. You must work on your entry point, using something to help visualise that in practice.
The little tool here does the job perfectly, but equally it could be a couple of tees forming an entry gate around the hole.
The entry point might be at 4 o’clock relative to where you’re standing, or even 3 o’clock on big-breaking putts. But if you look only at the front of the hole, you’ll always miss breaking putts on the low side.

Speed station drill
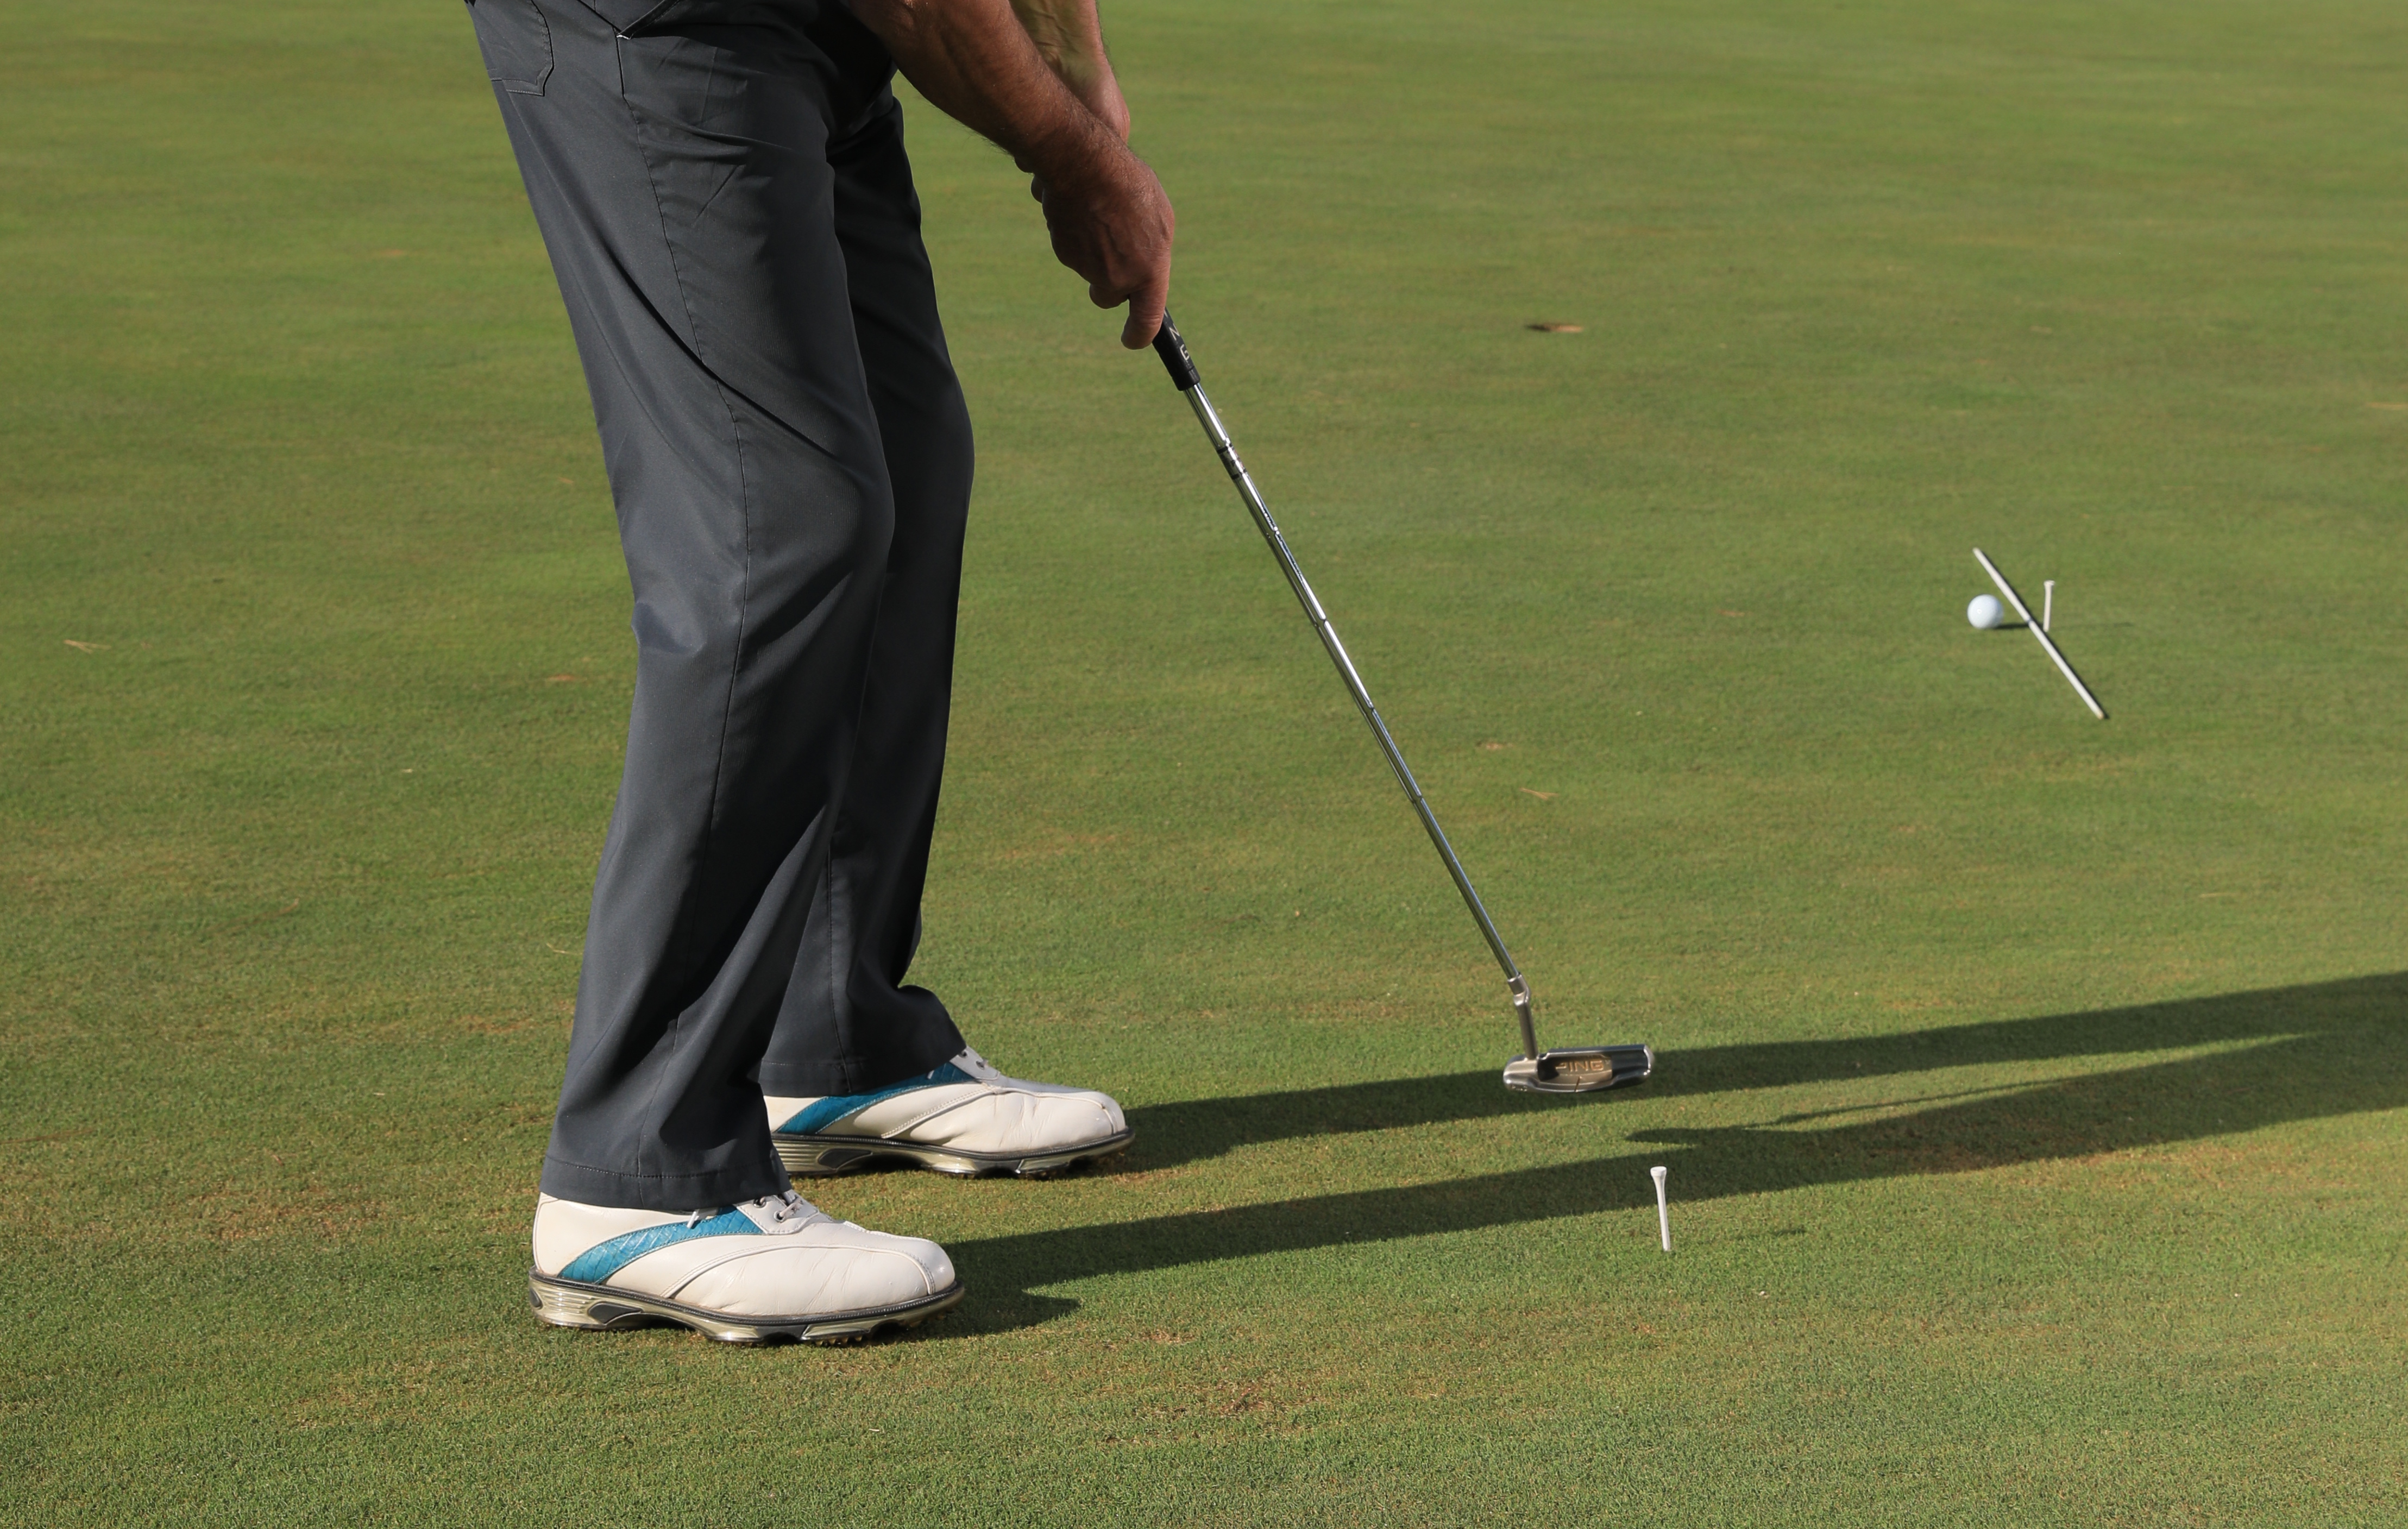
Set up a speed station on the putting green with two tee pegs 15 inches apart. Dave Pelz says the perfect speed for any putt is 15 inches past the hole, so if you finish between the two markers, that’s good speed - dead-weight nearer the first tee, perfect speed nearer the second.
If you’re six inches short of the first marker or beyond the second one, that’s not too bad - it’s the misses beyond that you’re trying to avoid when the next putt can start to become more testing.
Fringe drill
In this drill, the focus is being removed from holing the putt. Just go from fringe to fringe (no hole involved), ideally around 30-40 feet, which is the type of distance many recreational golfers three-putt quite regularly.
Observe the roll on the putt, and be aware of your backswing length and tempo, reducing the temptation to accelerate just prior to impact.
When taking a practice stroke, I like to do so looking at the target. This helps me to focus upon distance rather than the technicalities of the putt.
ONE HANDED DRILL
Everyone will feel as if they have a more dominant hand when putting, so this is a good drill to practice a variety of short, medium and long putts with one hand.
I like to feel the right hand releasing a little adding the feel element and ‘power’ source on the longer putts requiring additional distance.
I’m a great believer in having a feeling of freedom for the longer putts. Golfers who struggle from long range tend to get really rigid with no free flowing action from this range.
Just let the clubhead swing back and through colliding with the ball. With the shorter putts, I prefer to feel the left hand and arm as an extension to prevent any unnecessary movement from holing out.