To this day, there are no cameras, professional or otherwise, that can capture panoramas the way an iPhone can. With a regular camera you can shoot a series of overlapping frames and stitch them together in software. It works great, but it’s time consuming. With an iPhone, you simple switch to Panorama mode and pan across the scene while the phone captures and stitches multiple frames in real time to produce a perfect panorama on the spot.
But things can go wrong – in fact, three things in particular. It’s not the iPhone’s fault, it’s yours! But once you understand the dos and don’ts of panorama shooting, these are easily fixed.
1: Your panorama is too wide
This is where the panorama you get is super-wide but very thin, and there’s a simple explanation – you got too greedy! The iPhone is so good at capturing panoramic scenes that it’s tempting to keep on panning to capture more and more and more.

But iPhone panoramas are a fixed height, so if you keep on panning, the image isn’t going to get taller, but wider and wider – until you get to the point where you’ve got a thin little pencil of an image that’s no good to anyone.
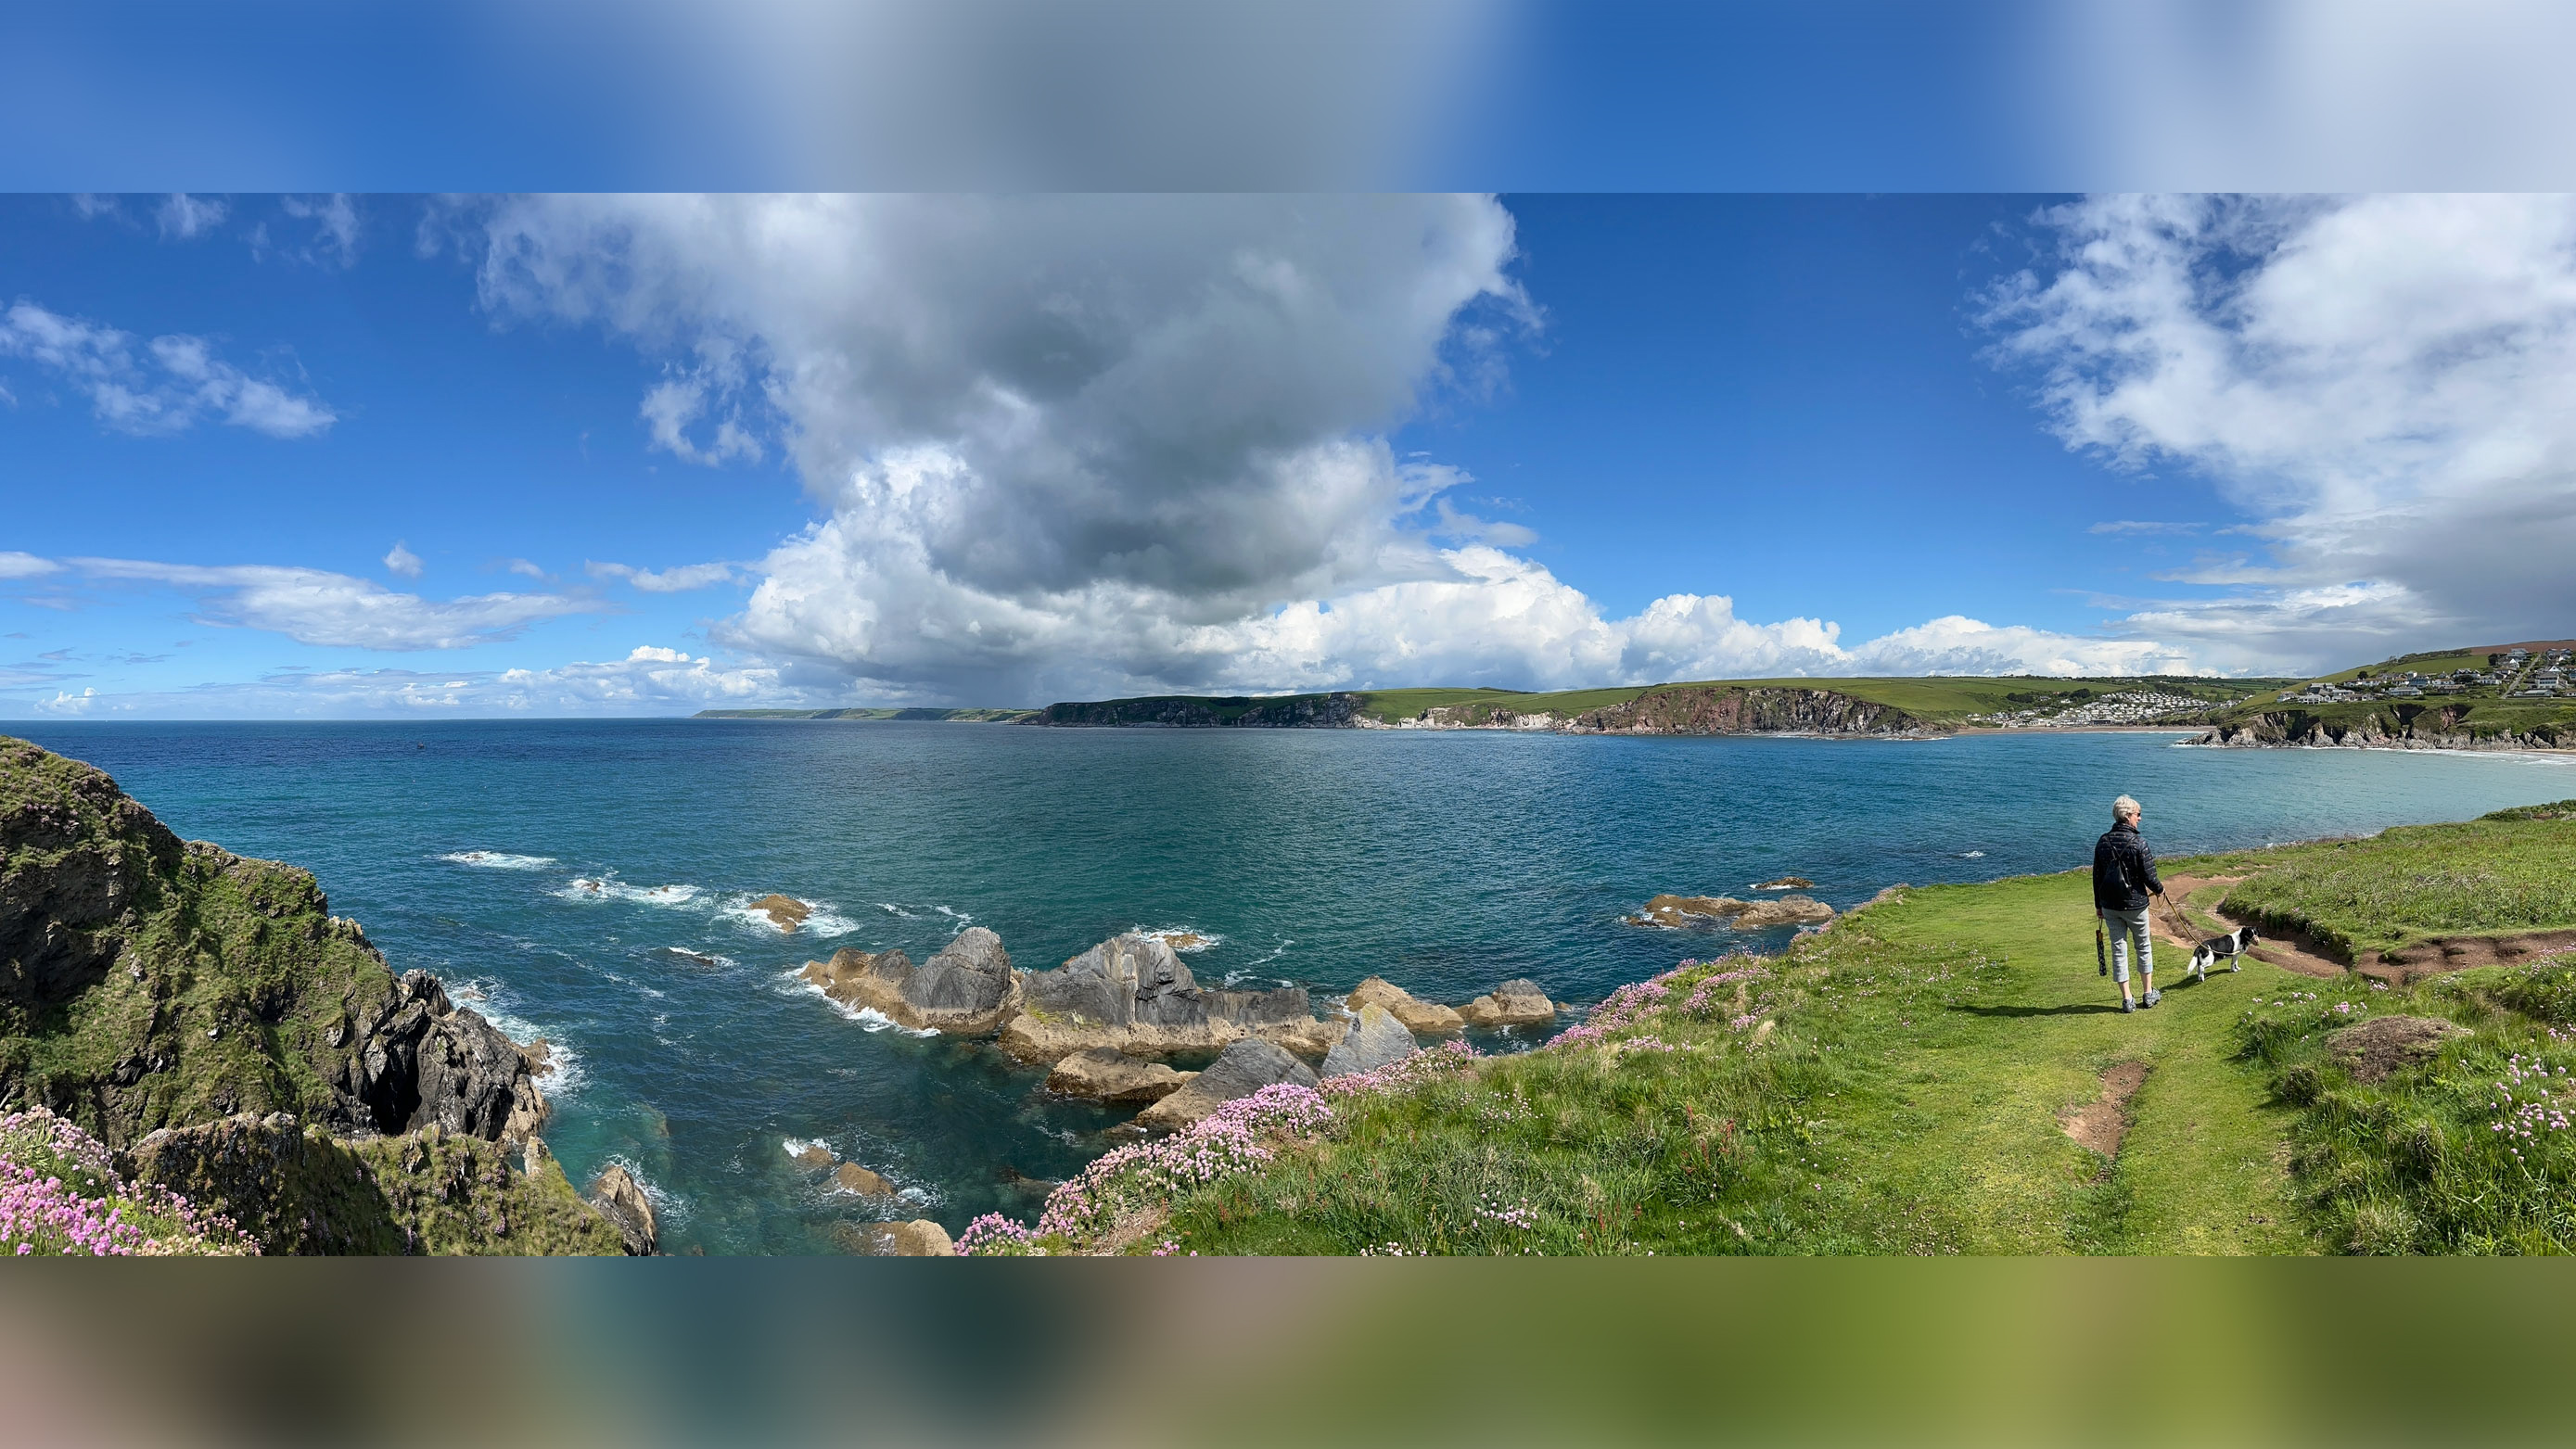
The way round this is to keep your panoramas short. Aim for finished images only 2-3 times wider than they are high. This also helps with the next panorama problem…
2: Your horizon’s not straight
Shooting panoramas handheld is so easy, most of us wouldn’t bother with a tripod, right? After all, we’ve got the little on-screen arrow to help us keep it level. But the further you pan, the more you will tend to drift, so that eventually your panoramic image will take on a tilt. Your iPhone will do its best, and you can always straighten the image later, but you’ll lose a lot of the image area when you do it.
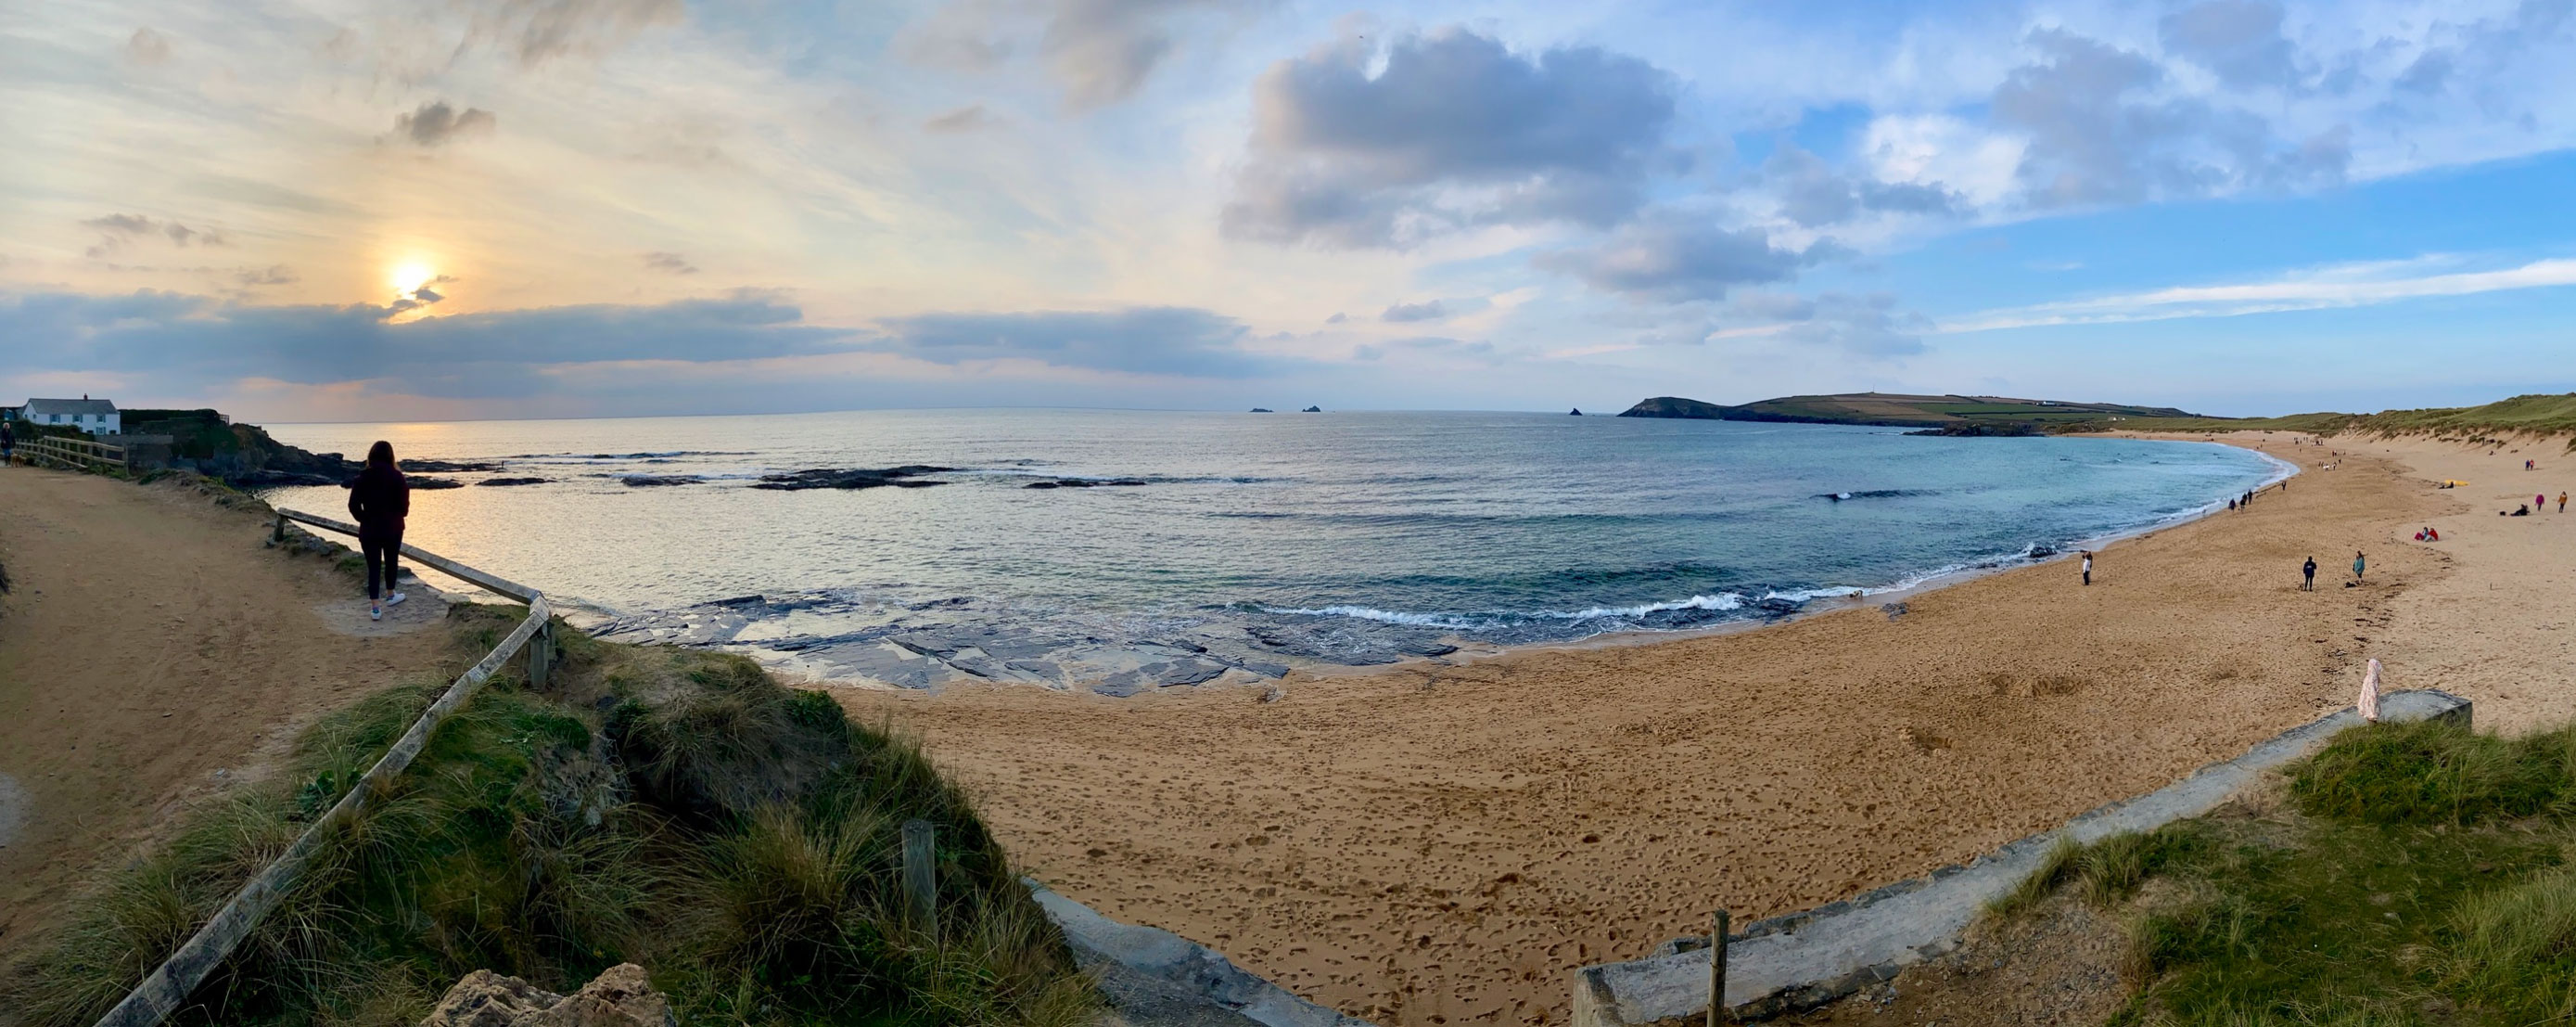
The solution is to keep your panoramas reasonably short and to pay careful attention to the horizon. You need to watch the arrow, but you also need to watch the yellow line running horizontally through the center as you pan – keep this on the horizon and don’t let it tilt. If you can do this, then you reduce the risk of the third panoramic predicament… barrel distortion (bowing)
3: You’ve got bendy lines/barrel distortion
To a degree this is unavoidable and all part of the panorama ‘look’, but there are two causes for this that you might be able to do something about. One is not keeping the iPhone level and tilting it up or down while you’re panning. It’s tempting to do if you’re photographing a city skyline, say, but it will cause distortion. If at all possible, keep the iPhone level, with the yellow line on the horizon.
The second cause is having objects close to you in the foreground, like a wall or a fence. In real life, we know these are straight, but to the camera they are much further away at the edges than at the center, so you will get a weird bulging effect in the middle of the shot.

If you step a little further away you will notice this less, or not at all. That’s because the difference in distance from left-center-right of the frame is much less.
Sometimes you can’t avoid some distortion in panoramas and it’s not the end of the world when it happens. But if it really bugs you it’s good to know how to avoid it – keep your iPhone level not tilted, and don’t get too close to any foreground objects.
The iPhone is so good at panoramic images it’s a shame not to use this feature as much as possible, and these simple tips should help you get the most out of it.
Check out the best add-on lenses for iPhones and smartphones