If an item is old or a little rundown and shabby, it doesn’t mean that it’s time for it to retire to a landfill. All it needs is a little bit of elbow grease and dedication and it can look like new again. Not only is restoring our possessions a great way to be more sustainable, but the completion of such a challenging project can also be very rewarding.
Not to mention, the before and after pics look more than satisfying! Bored Panda has gathered a whole list of people who didn’t back up from the challenge and brought back old items to their original beauty. Scroll down to find them, and be sure to upvote the ones that made you want to do the same.
#1 Eastlake Pocket Door Plate Restoration
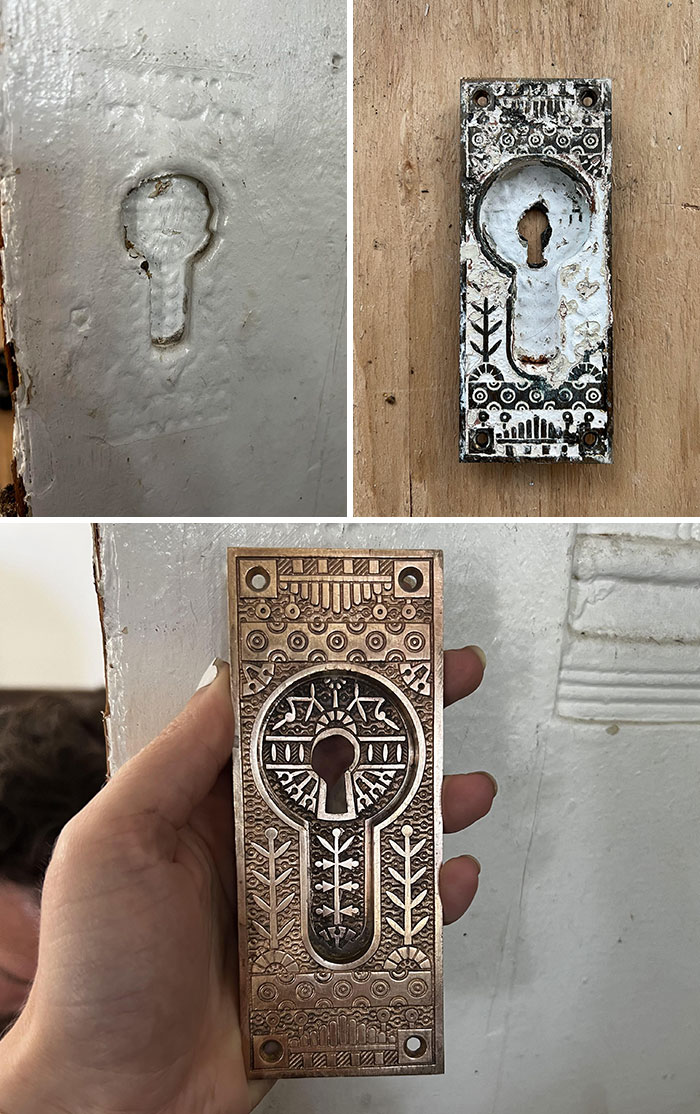
Image credits: 1890victorian
#2 Viking Axe Before And After Restoration
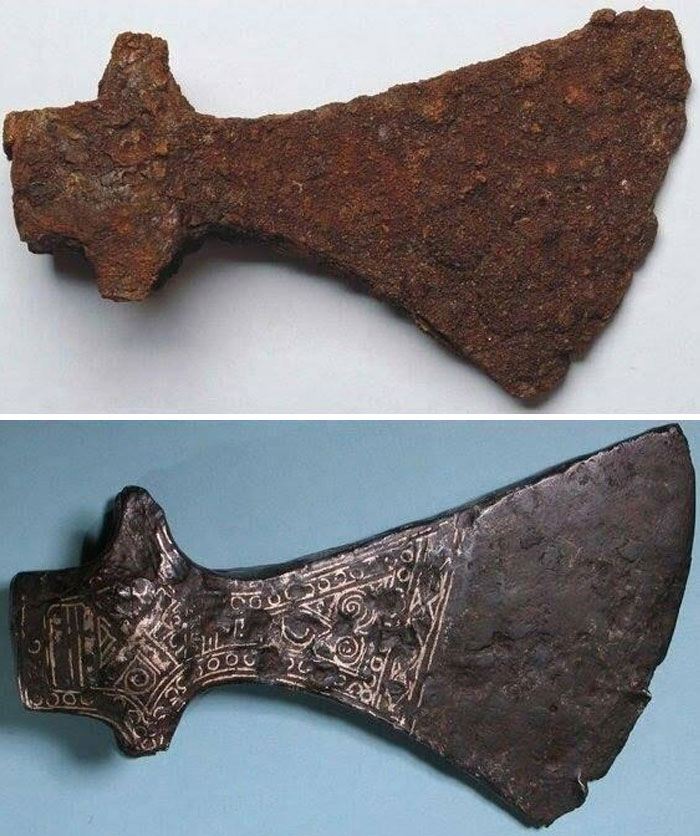
Image credits: conditackler
#3 Refurbished The Front Doors Of Our 1864 Home, Learned A Ton, Love The Outcome. Finished With Wood Kote Ultra 450 Poly
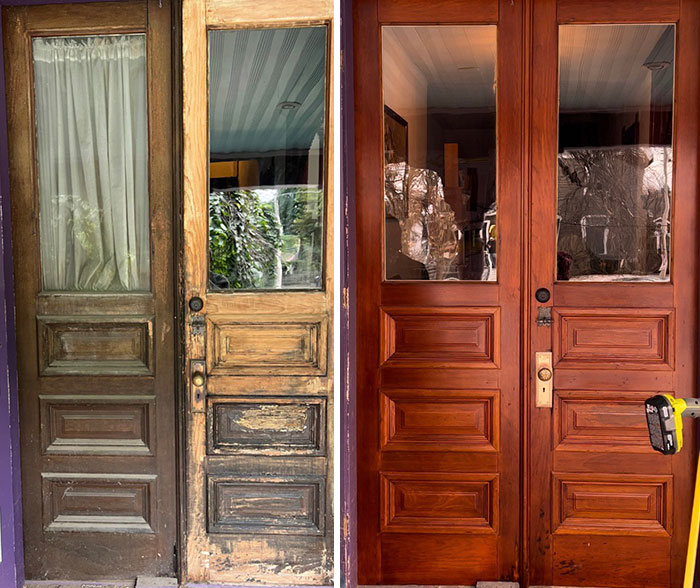
Image credits: lpen-z
Tackling a restoration project is great for those who don’t want to part with something that is dear to their heart. Or those who refuse to participate in throwaway society. And those who wish to save money by buying items secondhand that need just a bit of a refresh. And even those who like transforming old things to sell them and make some money on the side.
Whatever motivates a person to give an item a second life, there are many ways to do that. One of my personal favorite restoration projects I see people doing is making old and antique wooden furniture look almost new.
#4 Picked This One Up For The Price Of The U-Haul To Haul It. I Haven't Found Any Info On It, But Refinished It Anyway
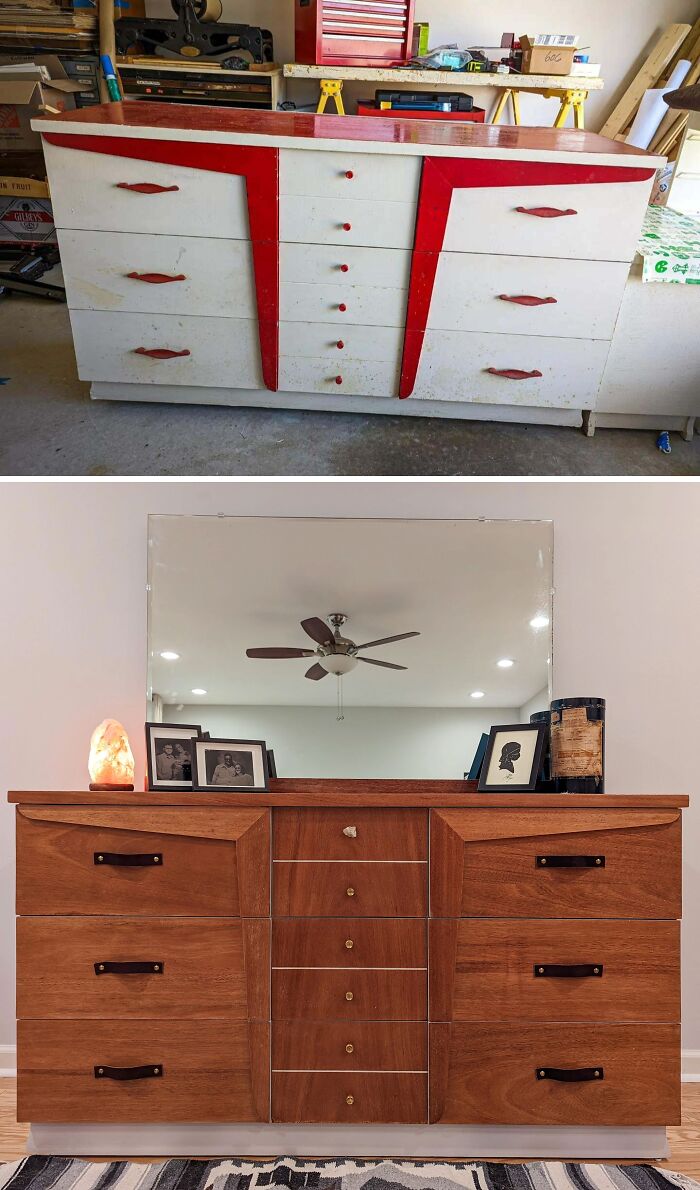
Image credits: mlkandtoast
#5 My Craft. I Restored These Century Old Doors Of A Mausoleum
The doors are about 130 years old, made from oak and are heritage protected. I am a carpenter and my job was to restore them, rebuild missing parts and treat the surface. I hope I did them justice.
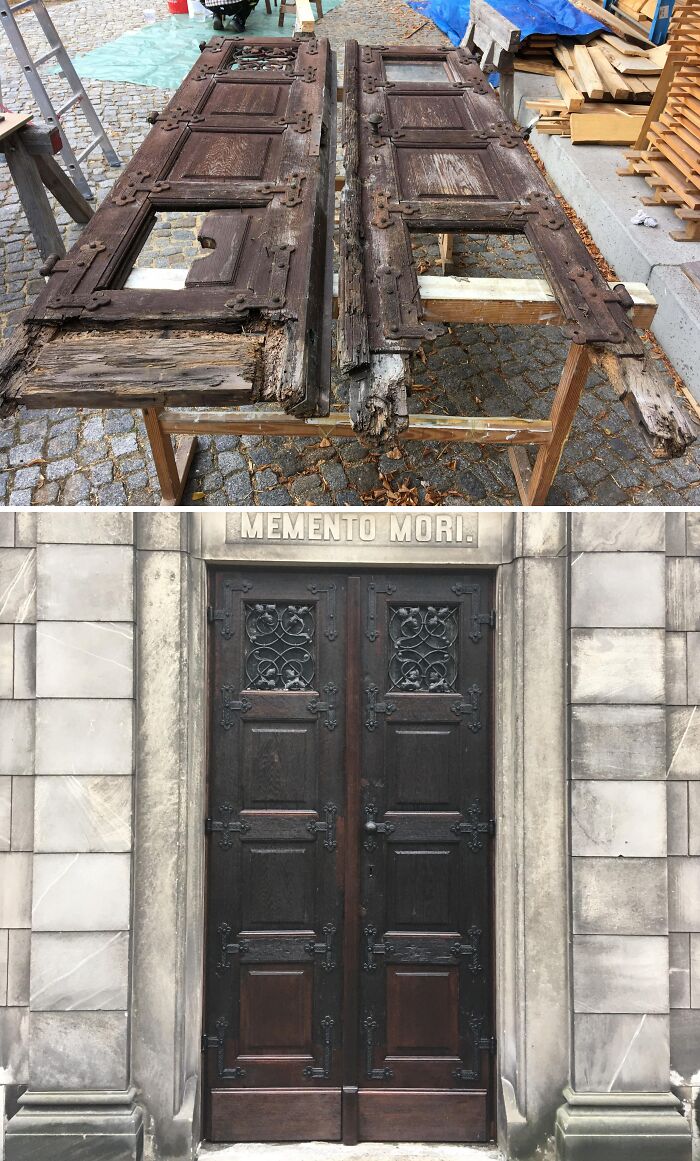
Image credits: MoonMoonMoonMoonSun
#6 As Part Of My Recent Bedroom Renovation I Decided To Restore This Almost 100 Year Old Wardrobe Instead Of Ripping It Out And Replacing It With Something New With Much Less Character. Sometimes Old Things Can Still Be Nice With A Bit Of Work
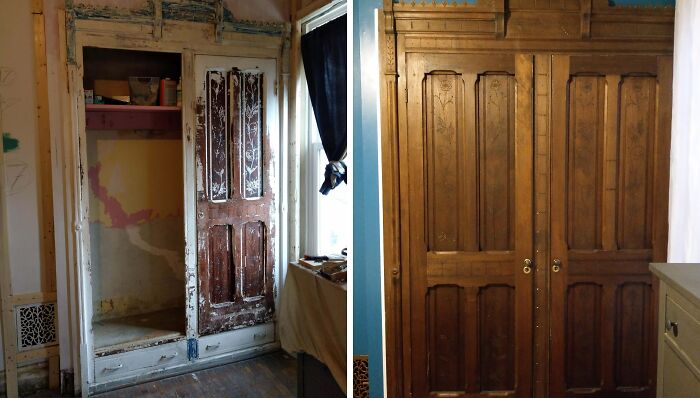
Image credits: mcn35
However, I'm not talking about those instances where natural wood pieces end up getting a layer of paint whenever they become a bit worn down. Sure, doing a trendy and chic paint job on an antique cabinet might make it look like new, but it pains my heart to see all the original beauty and charm being hidden by a coat of white, green, blue, or black. Besides, the paint eventually chips, making it look even worse in the long run.
Such a way of refreshing an object is also not technically considered a restoration, as it’s not bringing the item to it’s original state but rather making it a new piece altogether with a few novel updates.
#7 Restored My Night Stand I Didn’t Even Know Those Colors Were Possible
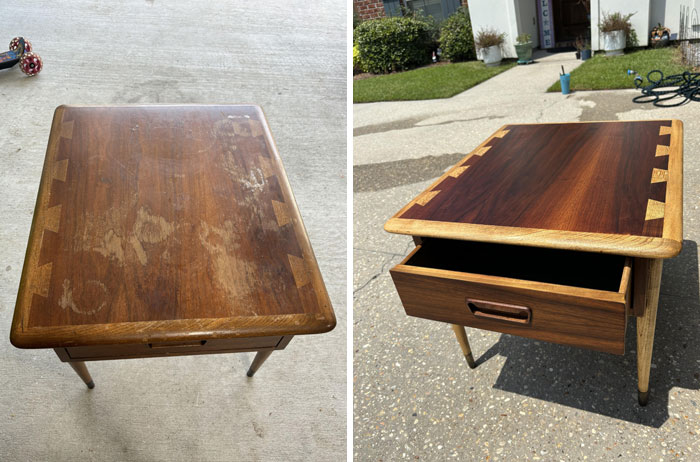
Image credits: Melodic_Local_4385
#8 Liked The Shape Of This Vase And Knew It Was Spray Painted, No Guess As To What Was Underneath But Decided To Give It A Go. Pleasantly Surprised
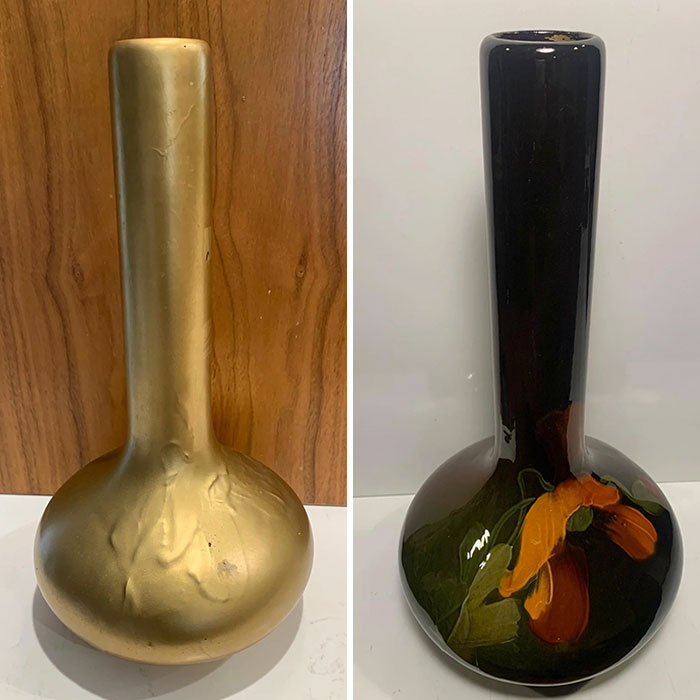
Image credits: theothercrystal
#9 (USA) Antique Boiler Door I Converted To A Fireplace
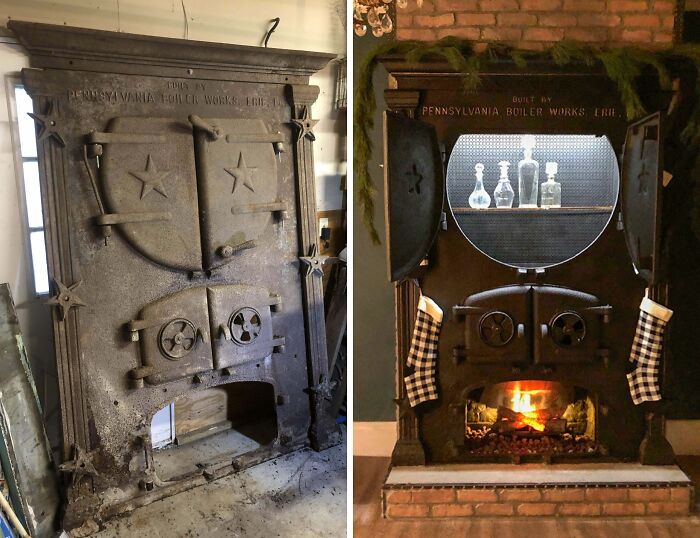
Image credits: reddit.com
Those restorations where wooden furniture is brought to its original state I enjoy the most. When antique or vintage pieces get a good cleaning, a fresh coat of stain or wax and are repaired as needed, it makes my heart sing. Bonus points if they get freed from layers of paint that were clouding their original beauty.
If you’re interested in learning how to rejuvenate your furniture pieces or are simply fascinated by others doing it, we will be diving into the nitty-gritty of it, as explained by experts over on Bosch.
#10 Herself Again
Was mentioned I should post this here too
Found on marketplace for $30 and scrambled to get it before anyone else recognized it. Late 1970’s rare lamp, not a speck of paint left on her and shines like a mirror!
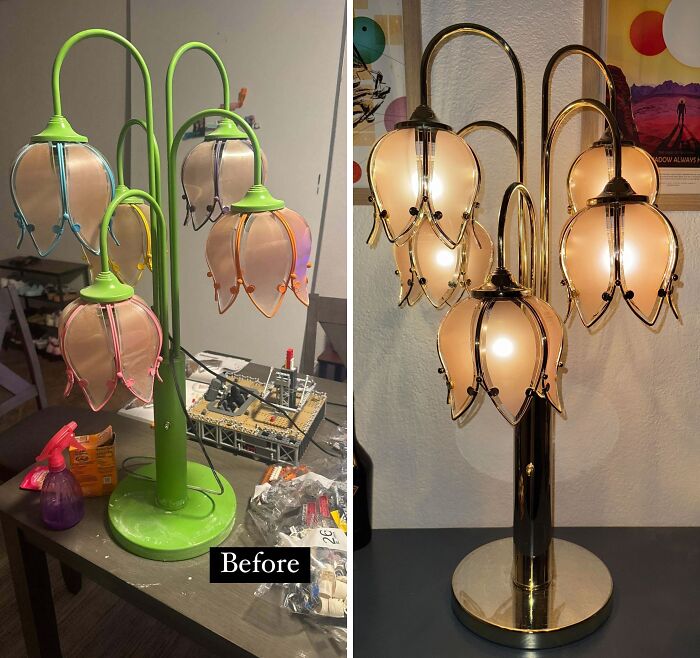
Image credits: stickchomper
#11 Restored This Old Door To Its Former Glory
I started this project not knowing exactly what to expect to find underneath all the old crusty white paint. I’ve also never worked with quarter sawn wood before and wasn’t sure if the medullary rays were a mistake from not sanding the door correctly. The Reddit community kindly let me know that this was a very valuable find and not a mistake. Super excited to be done with this project and have such a great looking door restored to its former glory. Thanks for all your help and kind responses.
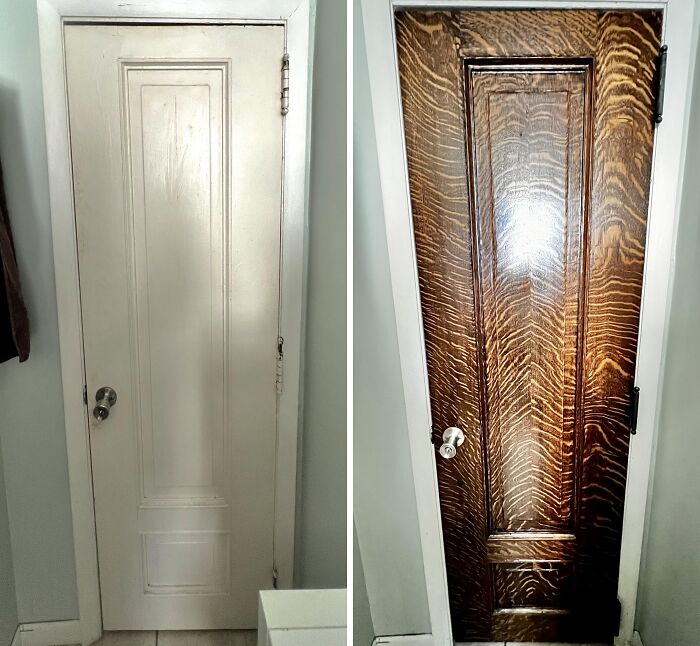
Image credits: ryannearhood
#12 Don’t Know If This Belongs On This Sub. The Previous Owners Of Our 1918 Home Put A Cheap Ugly Finish On The Floors. Second Photo Is The Refinished Result
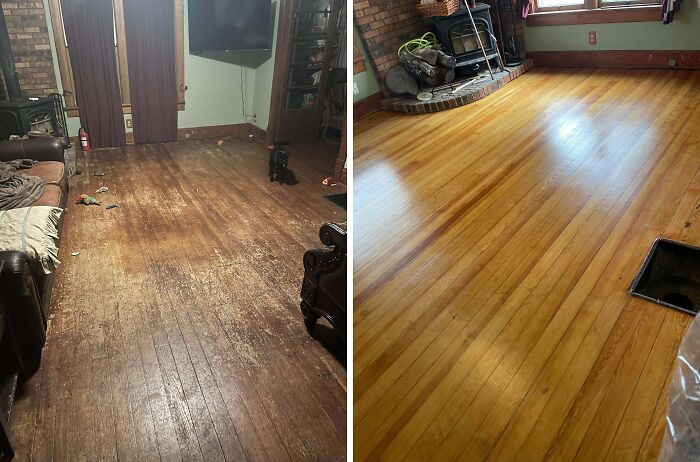
Image credits: charliepuppers
When starting to revive an antique chest you found in grandpa’s attic or a vintage chair you can’t seem to part with, it’s important to first clean it so you can evaluate the work it needs. Often, mild washing up liquid and some water is enough to do the job. If some tough stains remain, they can be removed with cleaning chemicals and spirits, like white spirit. But beforehand, it might be a good idea to test any chemicals on a small or hidden area of the piece, as they can damage its surface.
#13 My Wife Has Had This Desk Since She Was A Kid. I Made It My Self-Isolation Project
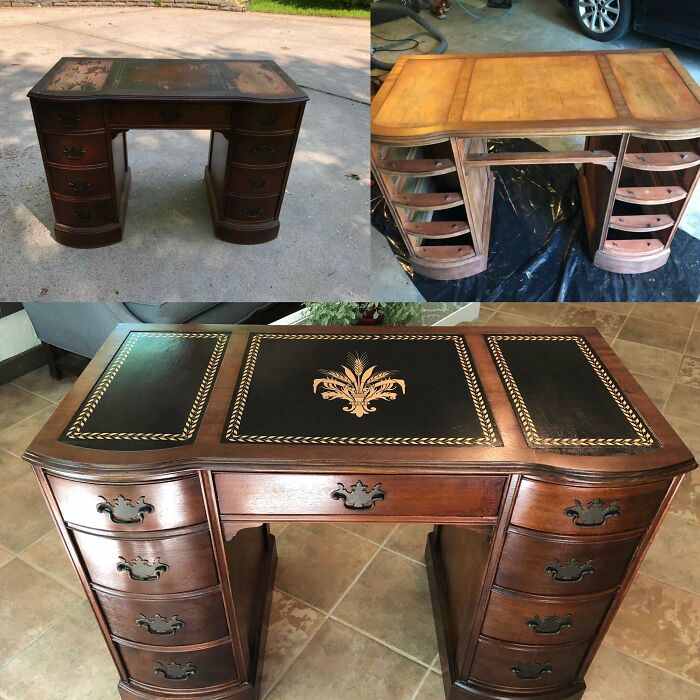
Image credits: Georgiegoodboy
#14 My Parent's House Has This 100 Year Old Hubbel Light Switch, But It Didn't Work Consistently For As Long As I Can Remember. I Took It Apart, Polished The Outside, And Bent The Internal Contacts Back Into Shape And Now It Works Great! The Physical Mechanism Is Incredibly Sturdy And Satisfying To Use
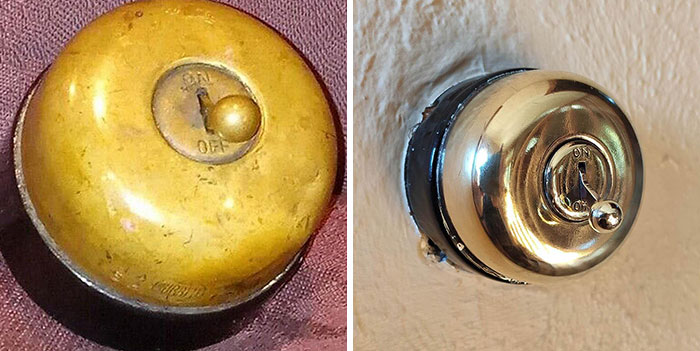
Image credits: markv12
#15 Found An Old Tube TV By The Trash. Now My Cats Have A New Spot!
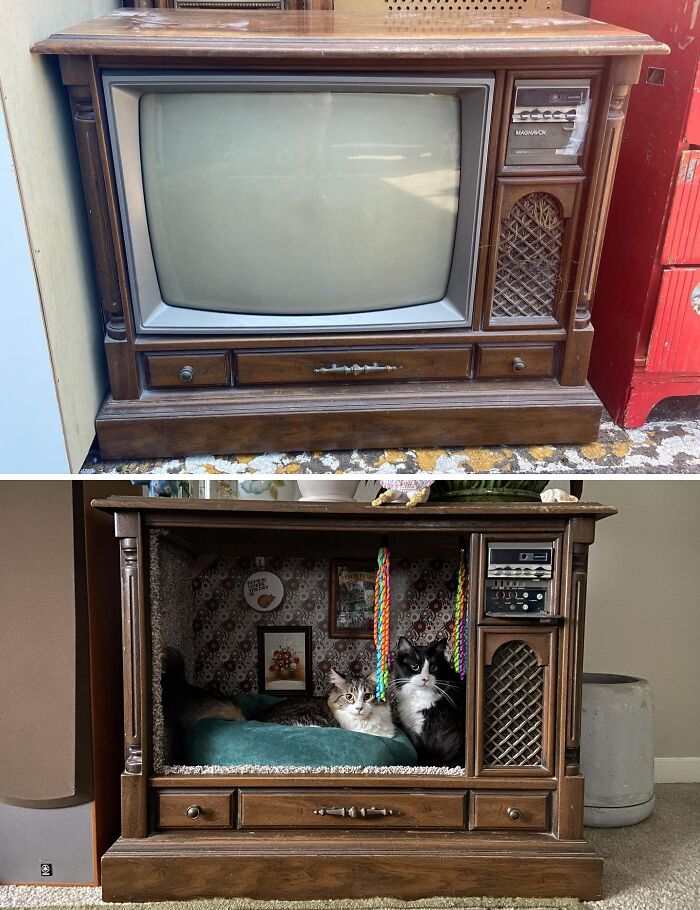
Image credits: vianetzy
After it’s clean, it’s time to evaluate its condition. Take a closer look to see if there are any scratches, cracks, dents, or discoloration. Are there any parts missing or wobbling? Maybe the drawers and doors don’t open easily. In case the furniture’s functionality is damaged, it will have to be restored.
#16 I Didn’t Even Want It, But I Had To Get That Paint Off When I Saw It At Goodwill
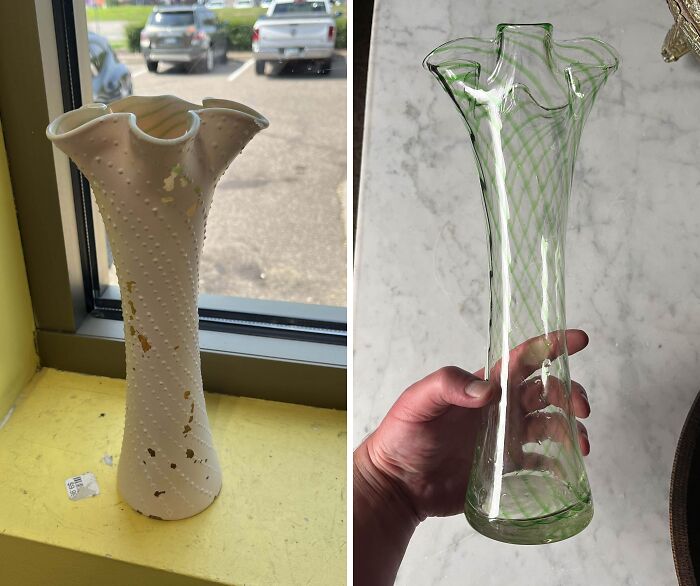
Image credits: tenglempls
#17 Thought I’d Share This 4$ Goodwill Lamp
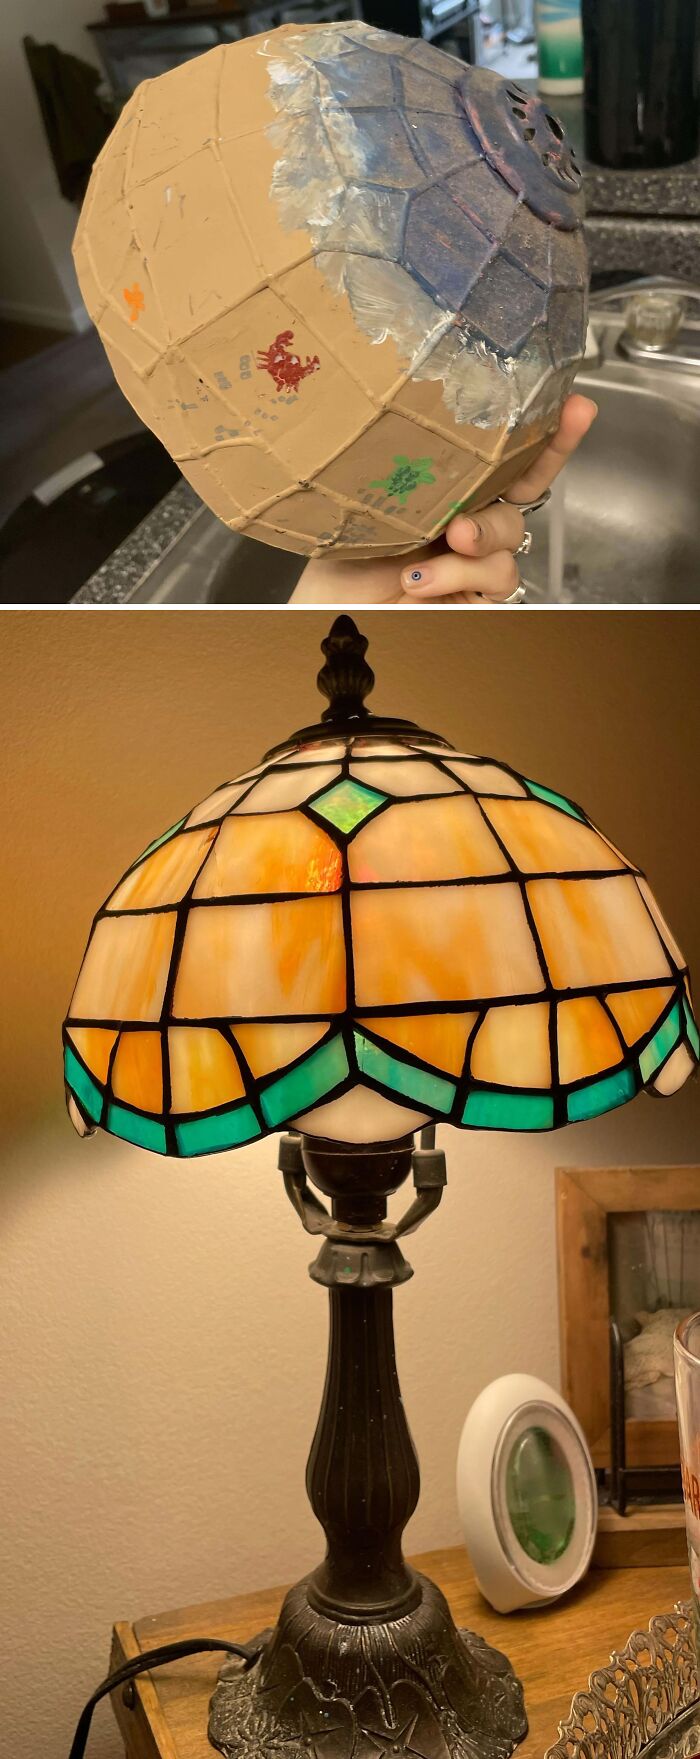
Image credits: Independent_Papaya40
#18 I Don't Know If I Can Top This One! ? Fully Restored Brasilia II Petite Buffet
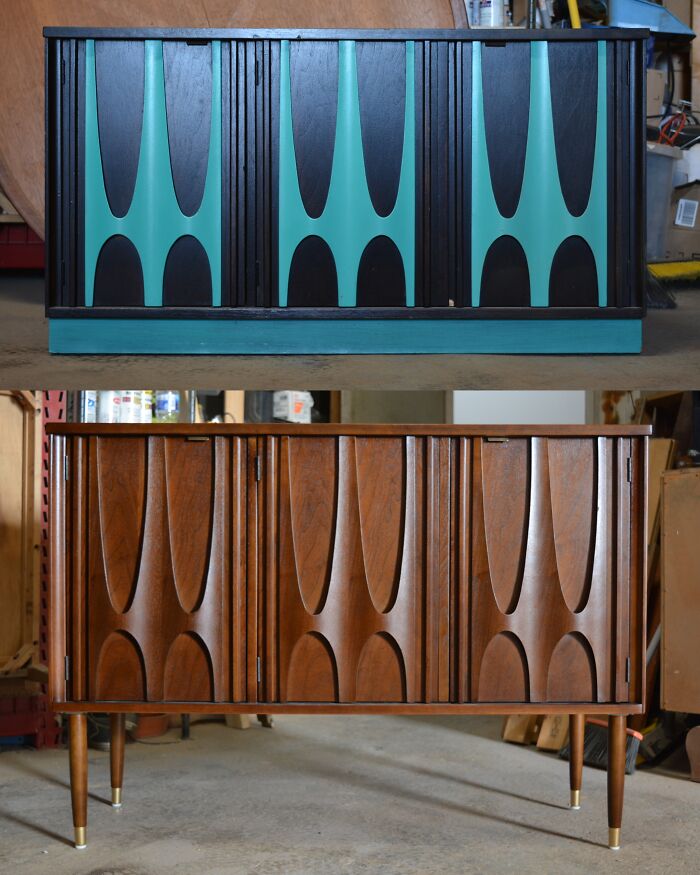
Image credits: midcenturymistress
Loosened connections or unstable parts can be glued with wood glue, while broken hinges should be replaced. Broken areas can be filled with wood filler, which is great to repair any dents and scratches. Water stains on wooden surfaces can be removed with furniture polish or light sanding.
#19 I've Renovated Old Screwdriver
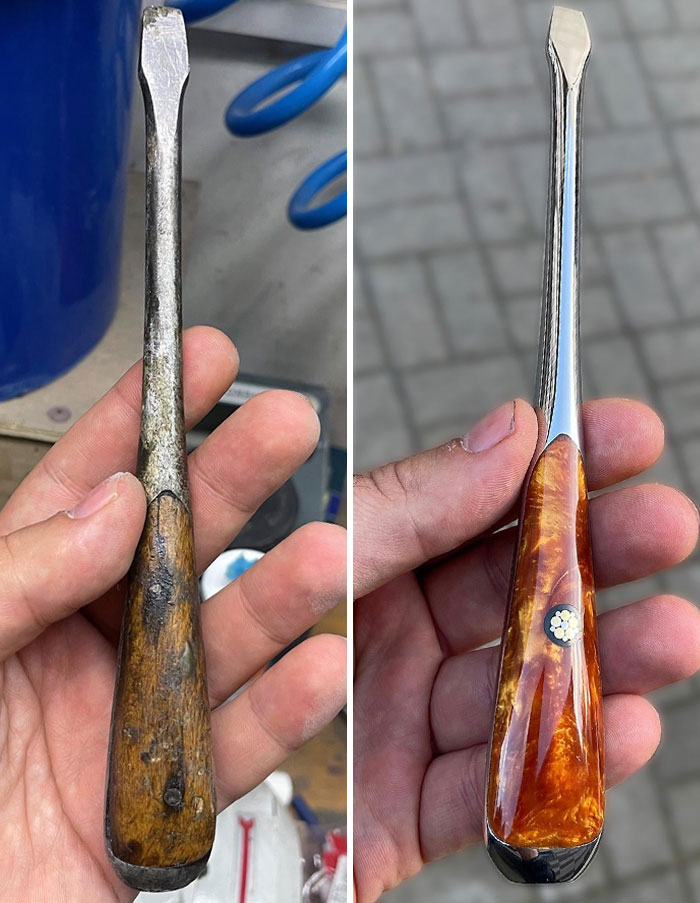
Image credits: Troynoi
#20 I Restored This Rusty & Broken 1940 Chevy Headlight And Transformed It Into A Floor Lamp
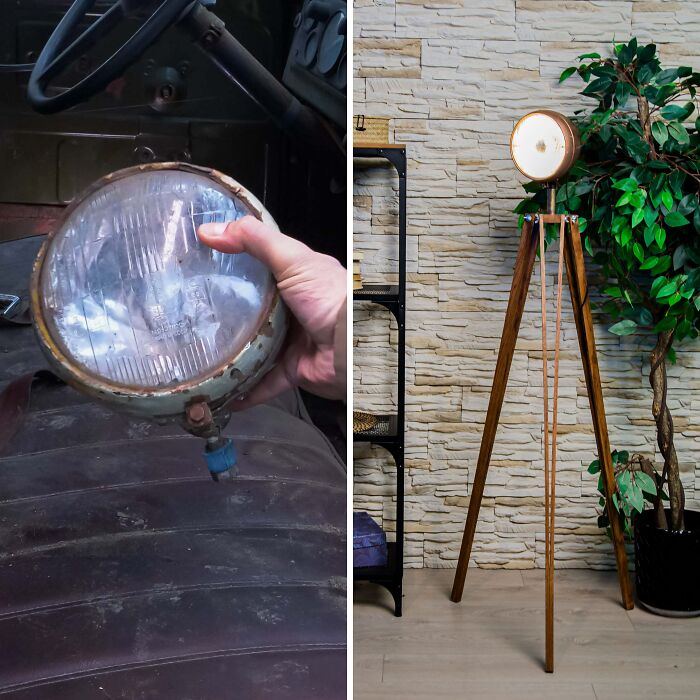
Image credits: TotallyHandy
#21 Painted Antique Mantle Restoration Transformation
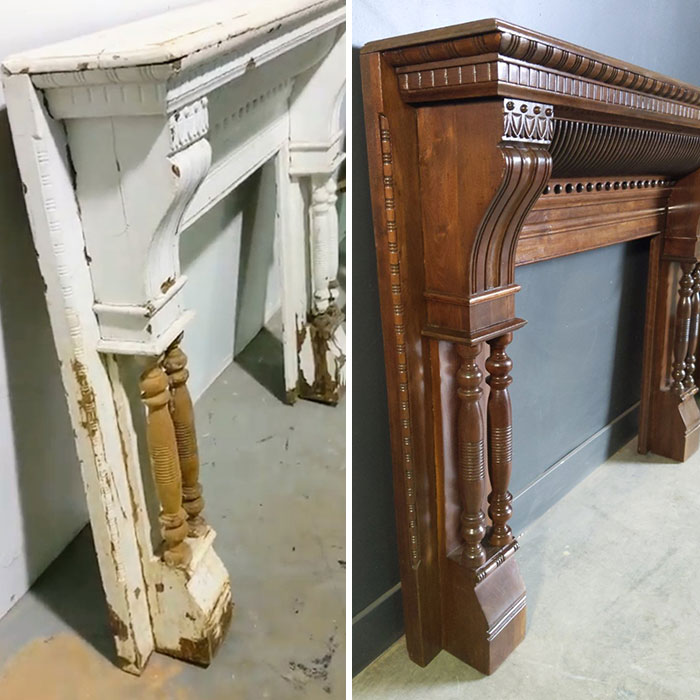
Image credits: senor_roboto
It's also important to mention that older pieces of furniture often have a thin layer of good-quality wood on their surface called veneer. Over time, it gets loose, breaks or cracks. This issue can be solved by adding wood glue and sealing it by putting something weighty on it. If anny bubbles arise, try putting a cloth on top of it and heating the veneer with an iron. When that doesn’t help, inject some wood glue using a disposable syringe and weight it down to dry. In more extreme cases, it might be necessary to replace the veneer with a new one by cutting it and gluing it down.
#22 I Made Another Restoration. Before/After
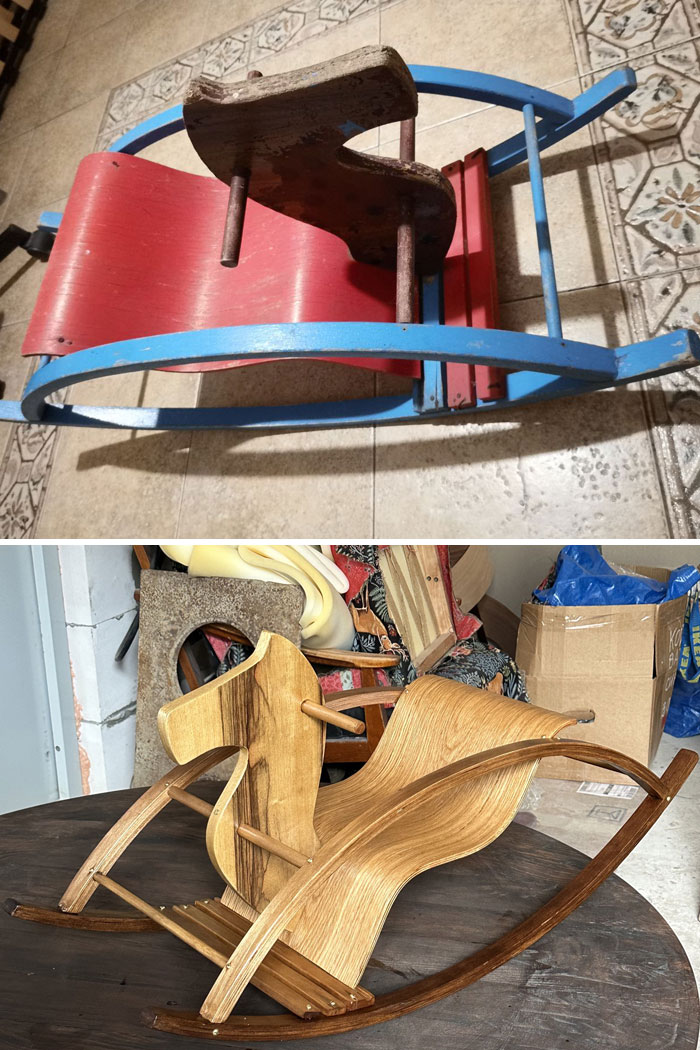
Image credits: lilydavay
#23 Restored My Grandparents Gas Parlor Stove. Not Back To Original Condition, The Firebox.and Burners Were In Really Bad Shape So I Installed Electric Flame Flicker Bulbs
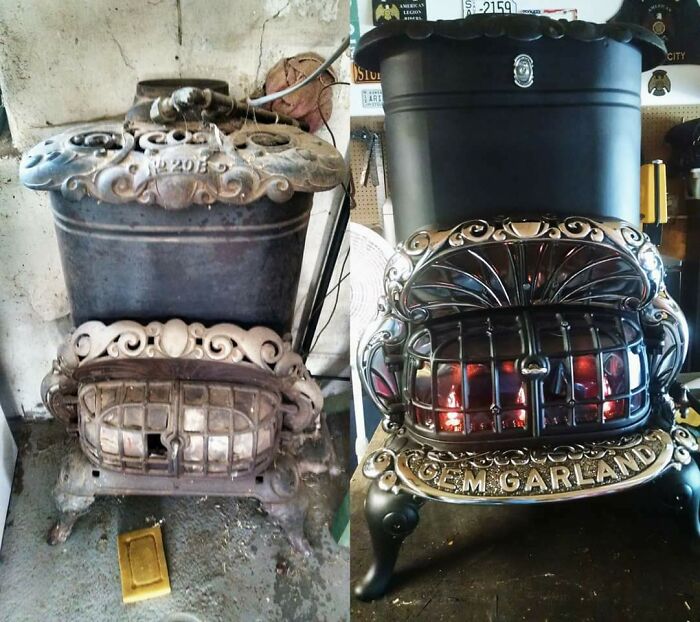
Image credits: navy_snipe
#24 My Father's Eight Year Restoration Of A '61 Chris Craft Capri
This is it's first time in the water, all finished. My father had never built a boat nor approached anything wood related to this degree. He used to do wreck diving as a hobby, but took this on as going into the cold murky depths off of Long Island is no longer appealing to a 63 year old man. He apprenticed with a boat restoration shop once a week and worked on his own boat in his spare time.
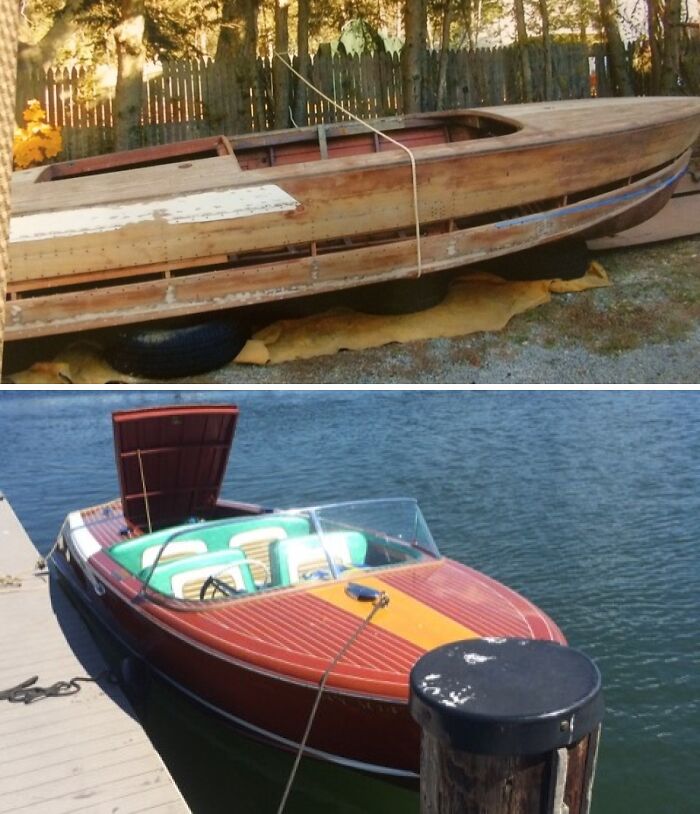
Image credits: ShockinglyMilgram
Before applying a new finish to the piece, the surface has to be sanded. When that’s done, remove any sawdust and be mindful of the thin veneer, as it can be damaged quickly. Then, a finish of your choice can be applied. Natural-looking options include stains, shellac, waxes and polishes. “Shellac, a natural raw material obtained from the excretions of lac insects, is often used in antique furniture restoration,” explains Bosch.
#25 Hi! New Here. I Recently Found This Corner Table In The Trash And Stripped Three Coats Of Ugly Paint Off Of It And Stained It
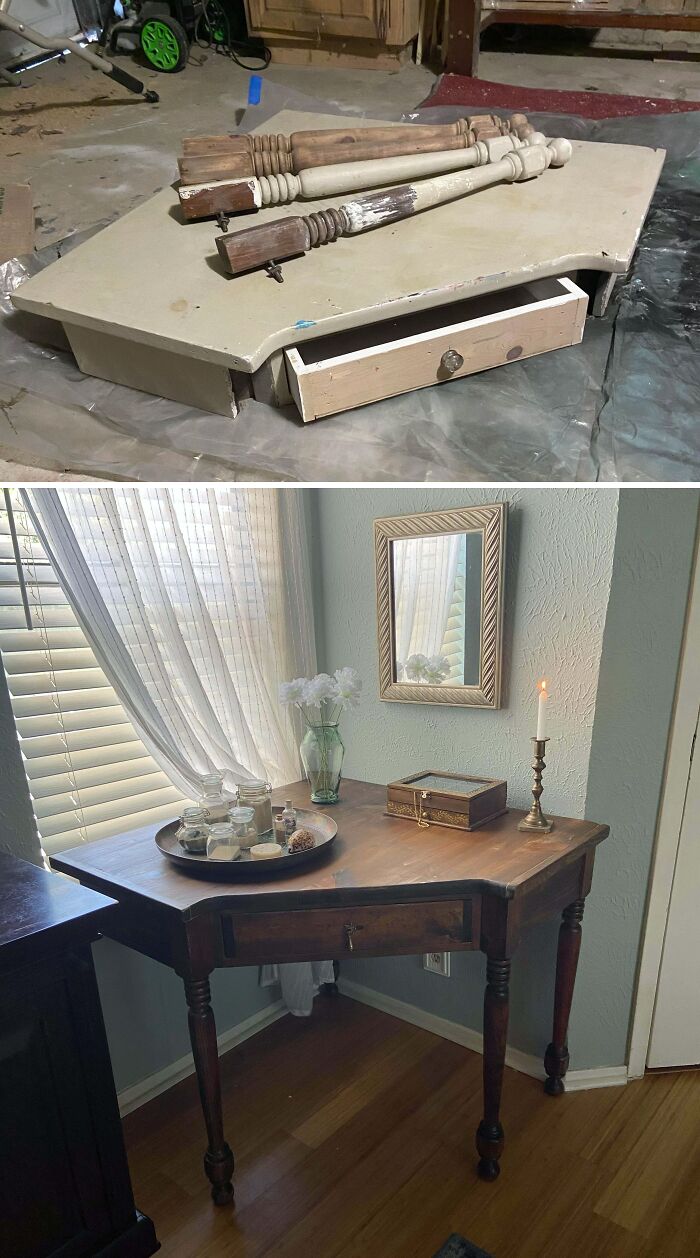
Image credits: mads1renwoman
#26 Bye Bye, Yellow "Antiqued" Paint!
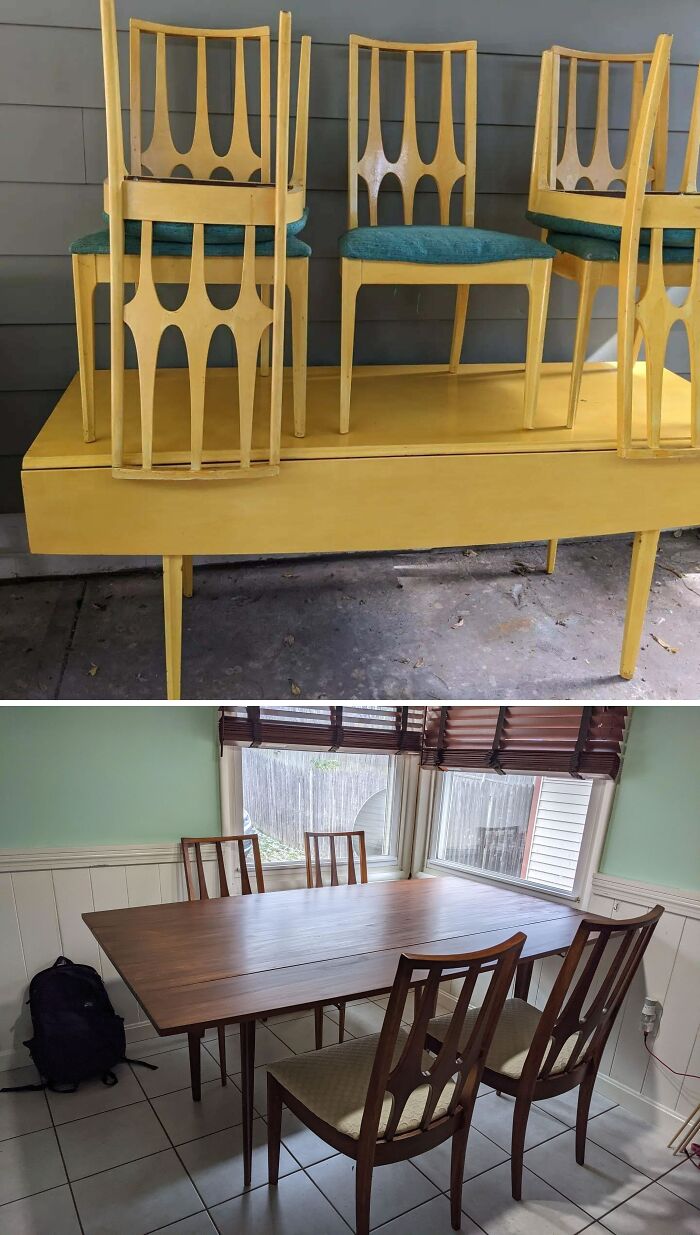
Image credits: GoalHuman
#27 Saved This Beauty From The Trash Can
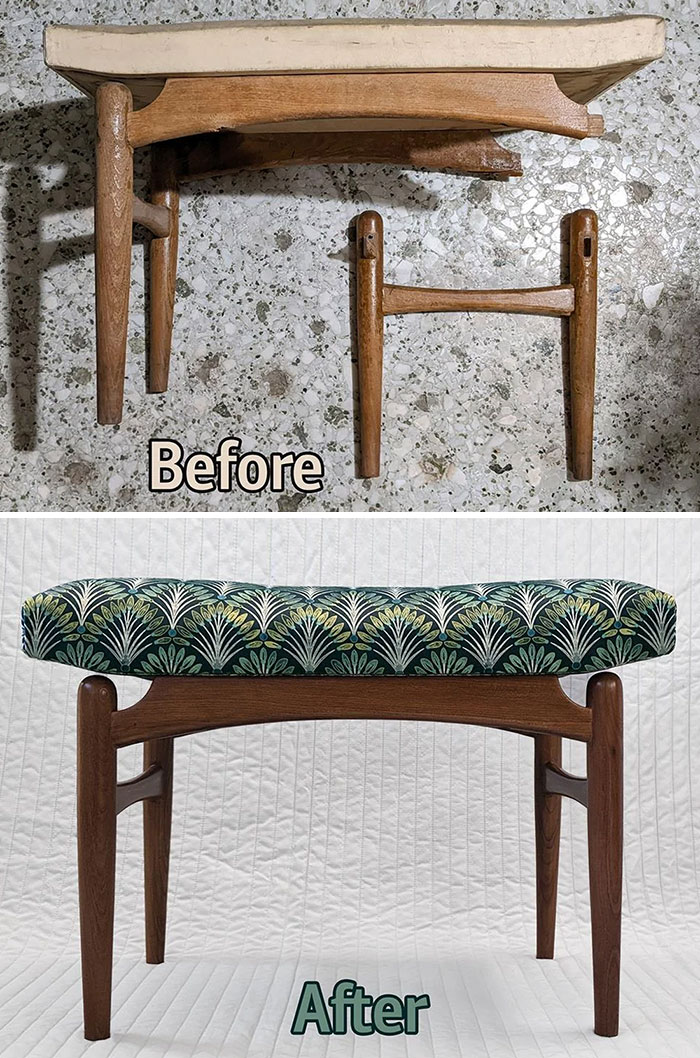
Image credits: Amenra138
If prior to everything the furniture piece was covered in paint, it can be removed with stripping chemicals or stripping and heating tools. It takes a lot more time and work, but the result is sure rewarding and satisfying! For more articles on restoration, make sure to check out these amazing restored cars and pictures.
#28 $25 Solid Teak Table
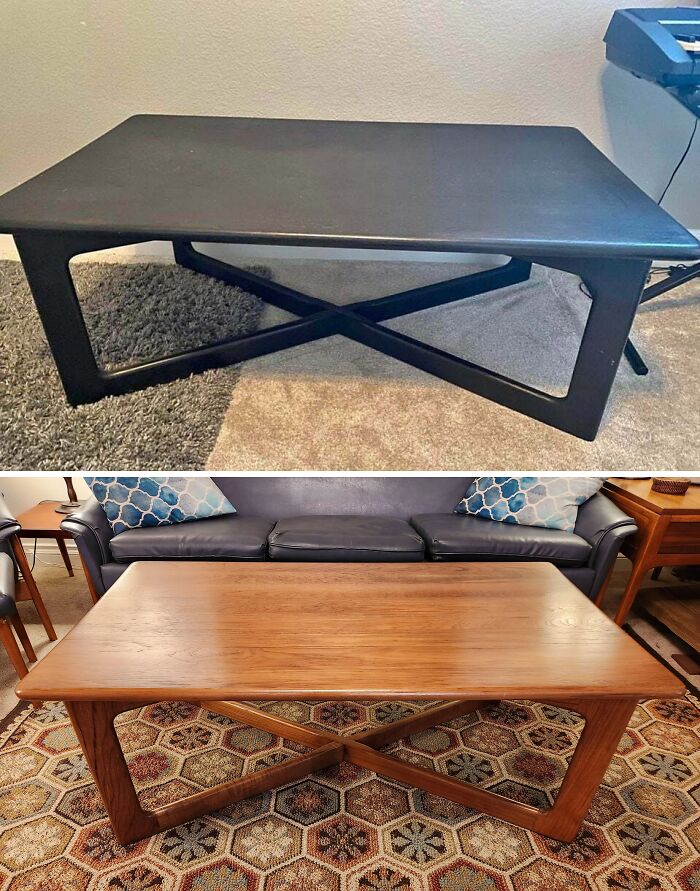
Image credits: Wrathskellar666
#29 DIY Barbie House Made From Old Dresser
I made a DIY Barbie house with my "little" in the Big Brothers Big Sisters program. My goal was to repurpose items or make things myself as much as possible.
I already had basically all the woodworking tools I used for this project, but this was my first big project with them. It was definitely trial and error to figure things out, so there were lots of mistakes made along the way.
Almost all of the furnishings and decor was made from thrifted odds and ends or bits of plywood and dowels. A few things were purchased at Dollar Tree or on clearance at various craft stores. My amazing mom sewed the table cloth, bedding, curtains, shower curtain, and towels. Most of the flooring is stick-on wall paper/decals from Dollar Tree. Kitchen flooring is shelf liner I already had (I think from Target). The "rugs" are placemats that I thrifted or bought at Dollar Tree.
If anyone has questions about where other items came from or how things were made, I'm happy to provide lots more detail.
(Side note: see my post history for kitchen cabinets that were later added... Sorry I don't have any photos of them in the house.)
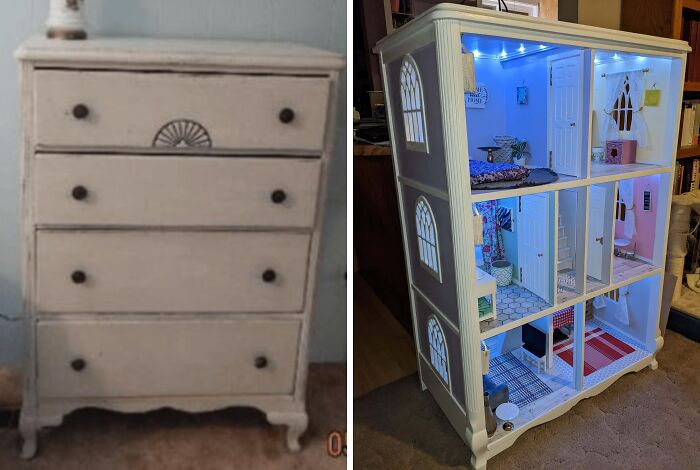
Image credits: Grass_of_Parnassus
#30 Goodwill Rescue Of The Week. Saw Some Cobalt On The Bottom Of This Bud Vase. Got The Twine And Hot Glue Off Only To Find That It Had Three Layers Of Paint On It (Black, Gold, And Red). Some Soaking In Boiling Water And Some Very Satisfying Paint Peels Gave Me This
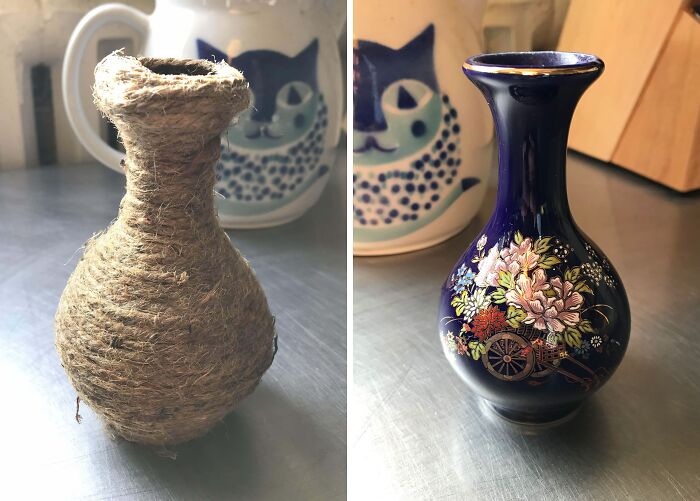
Image credits: tenglempls
#31 Restored This Beauty Back To Its Glory. It’s Now A Staple In Our House
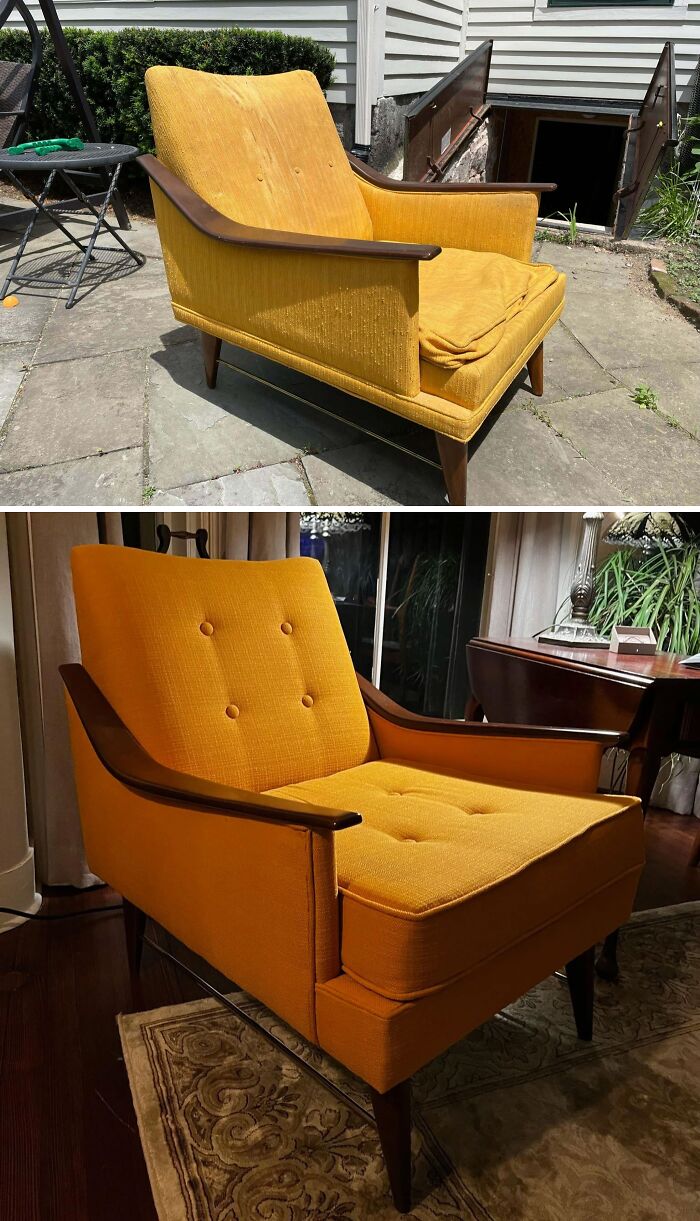
Image credits: Skyewanderers
#32 My First Furniture Refinish
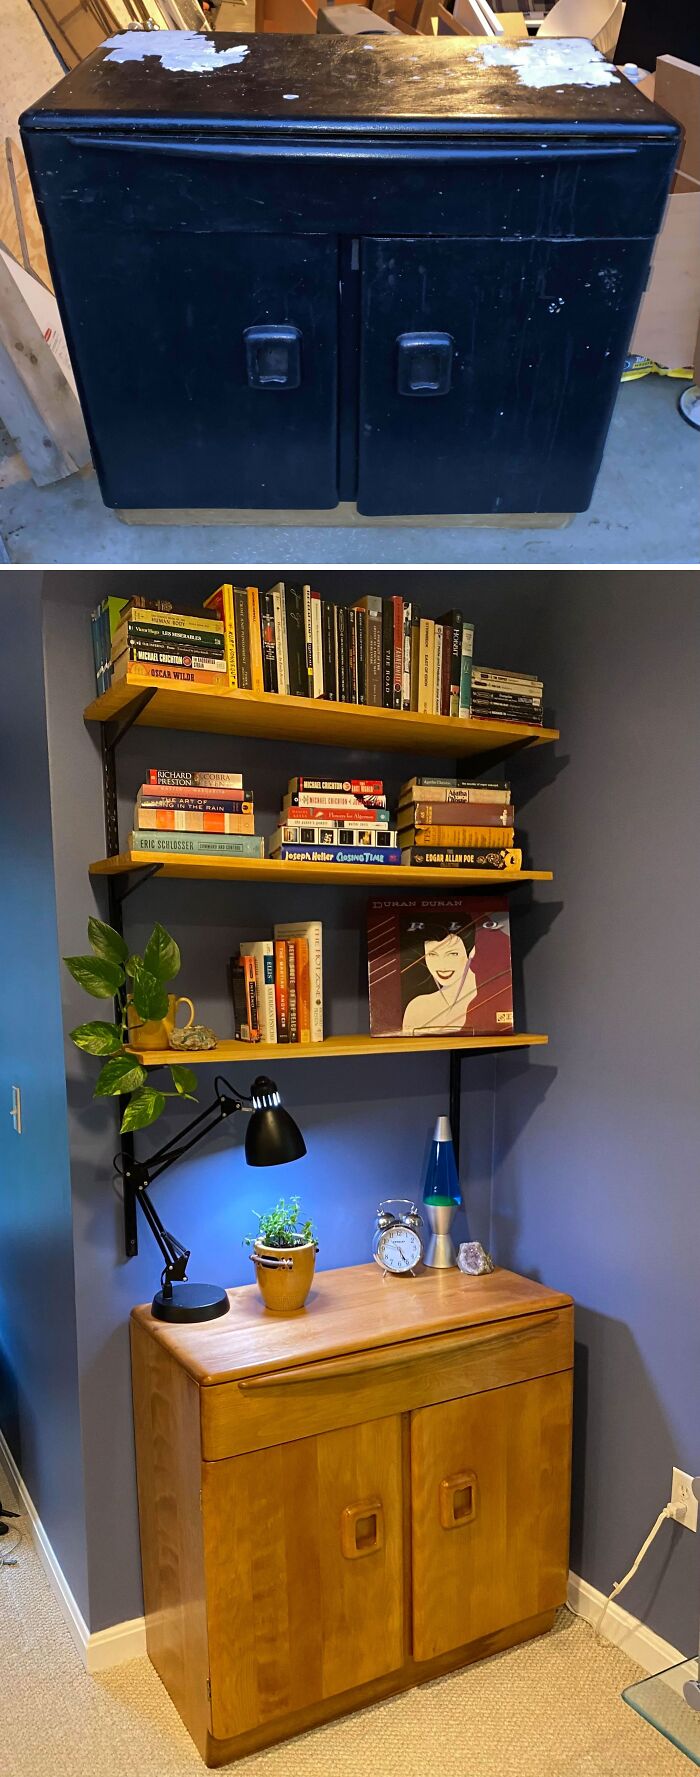
Image credits: gourmet_croutons
#33 American Of Martinsville Dresser That I Tried My Best To Restore
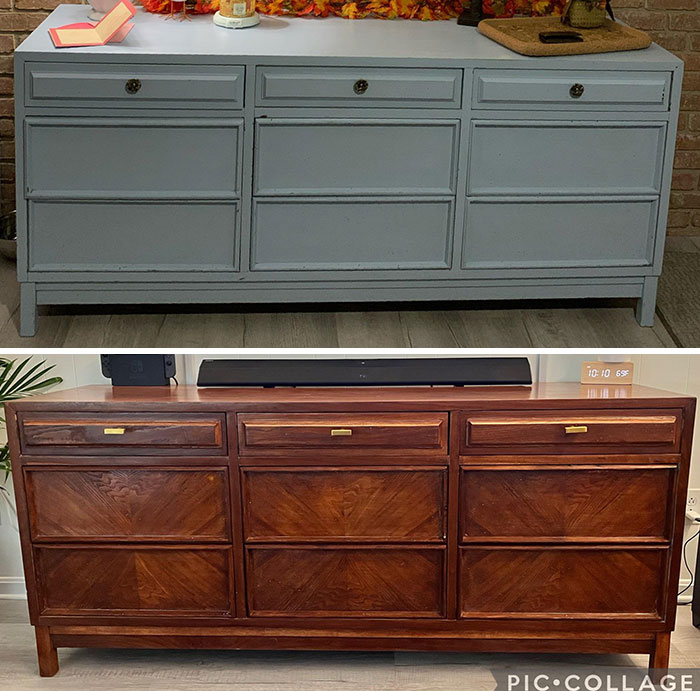
Image credits: LaneyWynne
#34 Inspired To Share This After Seeing Yesterday’s Popular Post
Found on Facebook marketplace for $15 and refurbished as a nightstand.
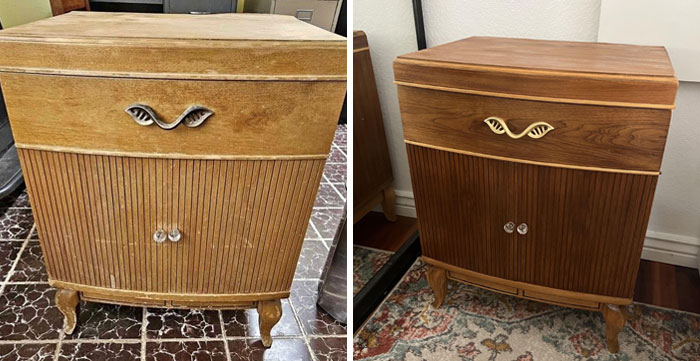
Image credits: trevorl56
#35 Restored This Table Found In Our Recently Purchased 1922 House!
Found in what we have dubbed the "horror room" in the basement of our century home, this table needed some serious tlc. I could have tossed it, but I needed a table for beside the window, and this was literally the perfect height to not block the window and add some extra storage/utility.
Top was scuffed, dented scratched and covered in construction dust. The bottom of the drawer was warped and falling apart. The slide-out panel was swollen stuck and had to be sanded down in place to be removed. The finish was chipping and there was a tar-like residue leftover from some kind of screwed on padding on the feet, not to mention the rusty screws still left in the base of the feet. And naturally, there was rusty hardware that needed to be replaced and split pieces of wood that needed to be glued back together.
In the end I used dollar store contact paper for the drawer and leftover stain and other materials, probably spent $30 max and got some quality bonding time with my new garage and enjoyed some lovely warm spring weather while working on it. Considering how beautiful the grain of the wood is and the hints of chatoyance, I am so in love with this table and happy to give it a new life. Many books will be read and mugs of tea set here.

Image credits: lithigos
#36 Wooden Chair, Before And After
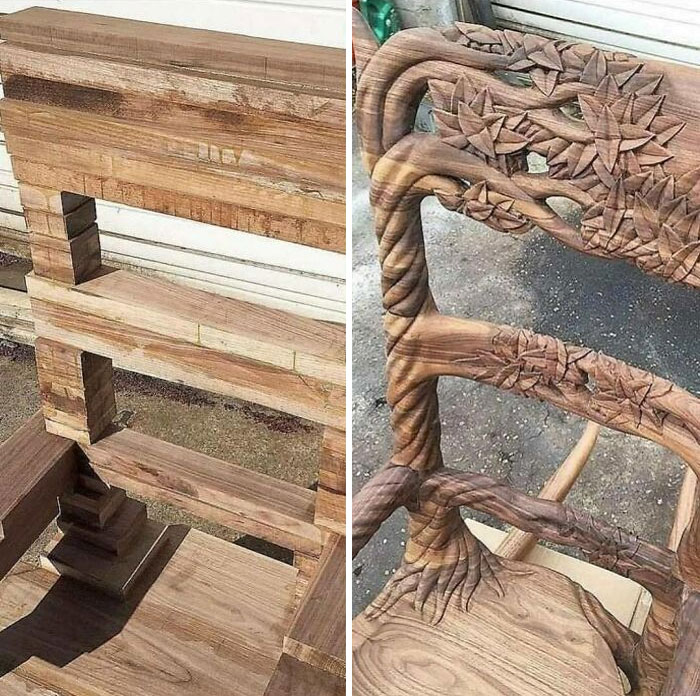
Image credits: _NITRISS_
#37 Repurposed 100-Year-Old Flywheel
In 1963, my grandfather acquired some of these giant flywheels that were in an old factory that used the current from a stream to turn their spindle machines. They sat in his garage for decades until his passing. In 2021 they made their way to me and the other day I turned one of them into a table. Had to router out about 1/8” of the beveled inside edge to make the glass fit. Pretty happy with the way it cleaned up.
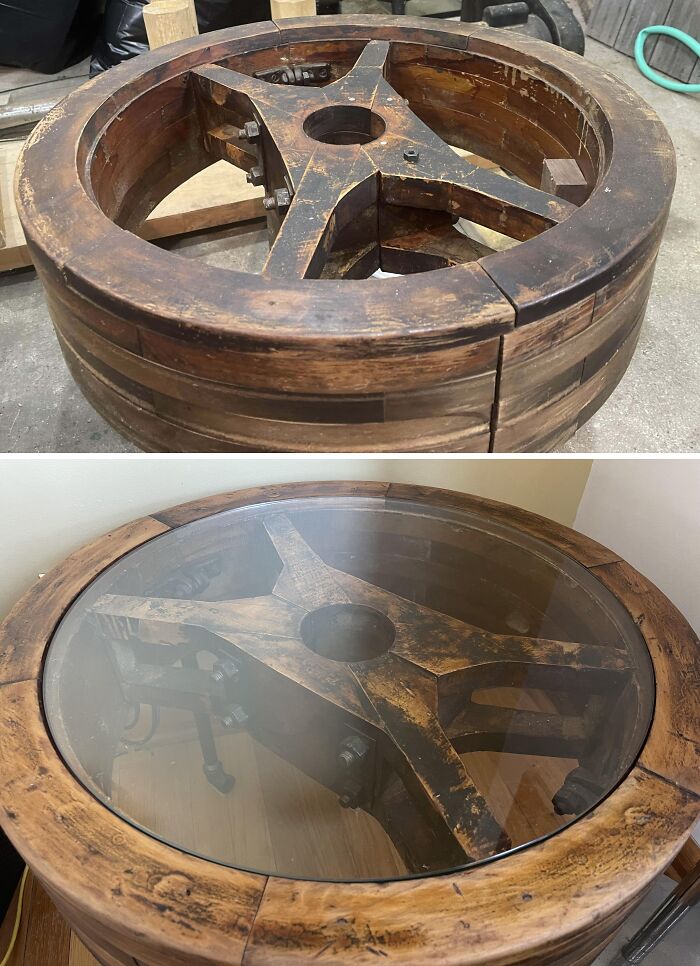
Image credits: DabbledInPacificm
#38 An Old Vintage Radio I Repurposed Into An iPod Speaker
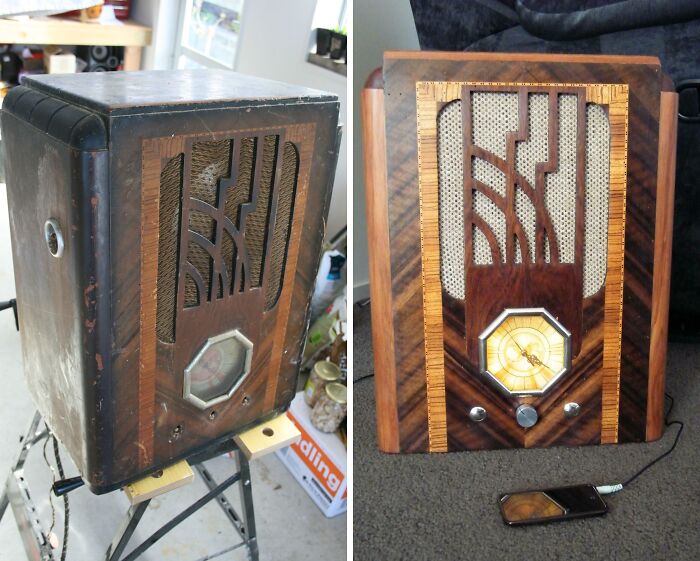
Image credits: Guppy1985
#39 The 19th Century Chair Was Delivered In A Deplorable State
Restoration work was carried out: one side part of the seat, decorative parts of the legs and embossing were restored. The surface was covered with walnut stain, as well as three layers of oil and one layer of wax. The customer's upholstery was complemented with decorative nails along the edging. How do you like this restoration?
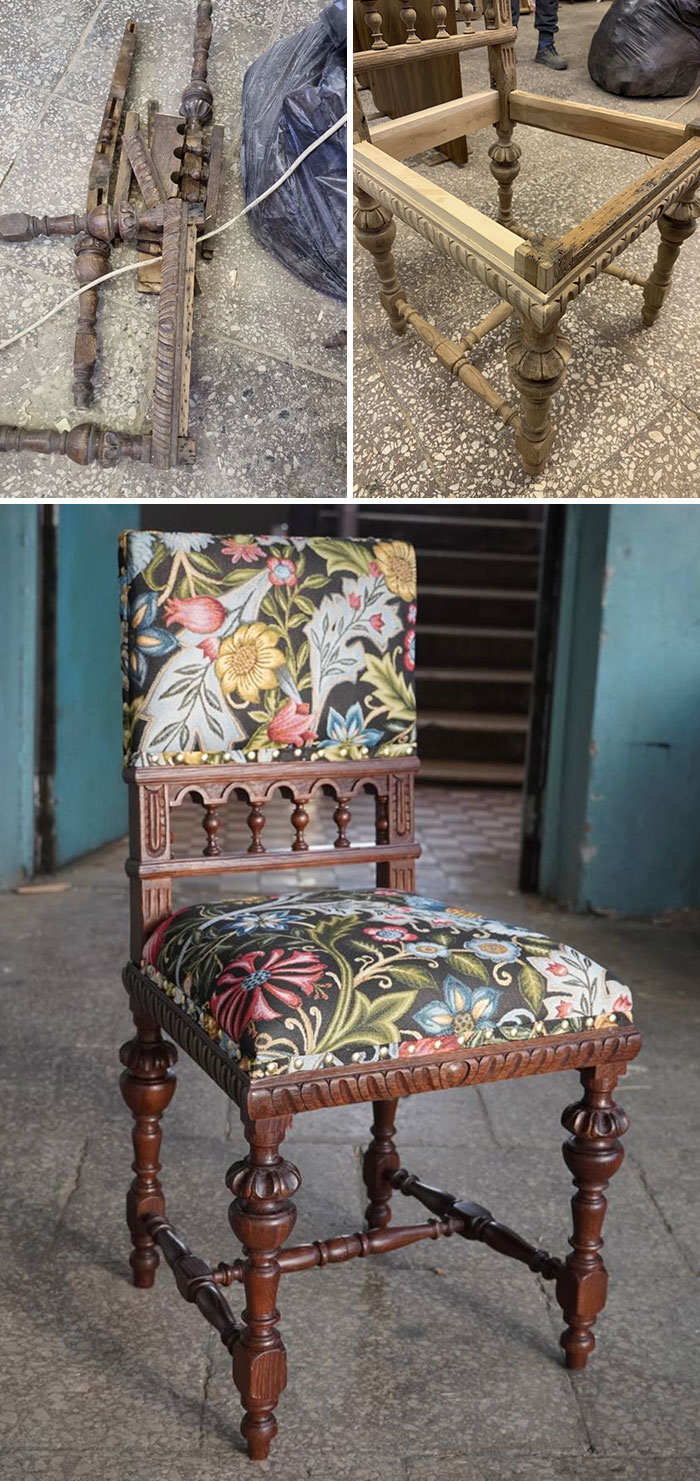
Image credits: Khamza.Atabaev
#40 I Put Two Months Of My Time On Weekends And After Work To Remove The Awful Paint From This Gorgeous Danish Teak Desk With Floating Legs!
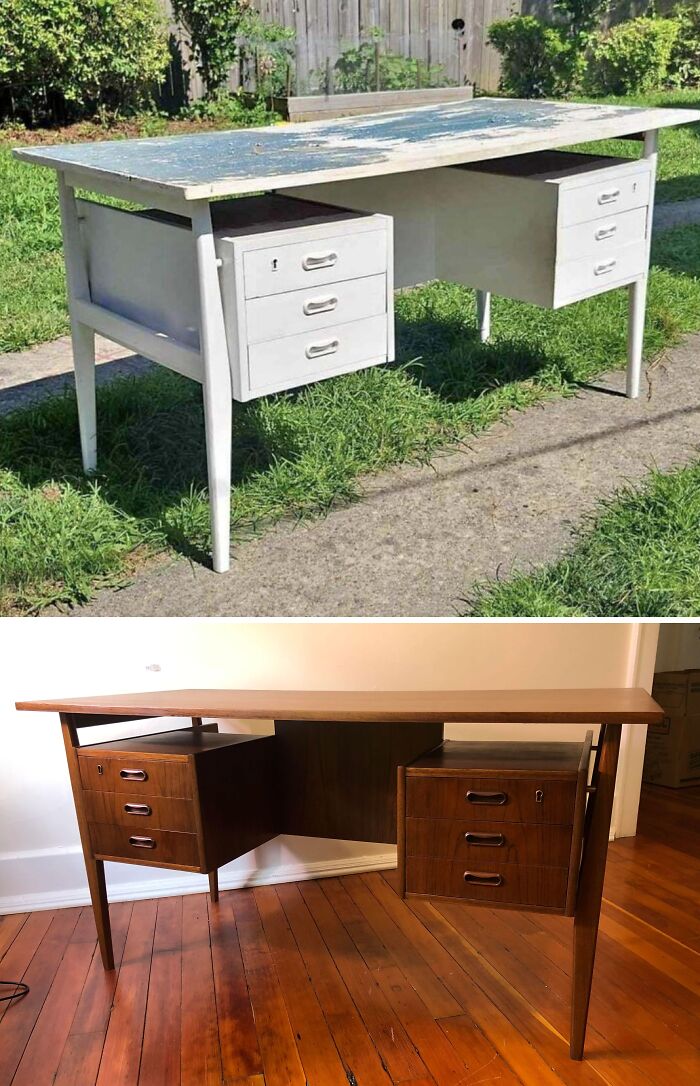
Image credits: PoachedPears
#41 Hobart Mixer Restoration: Before, During, And After
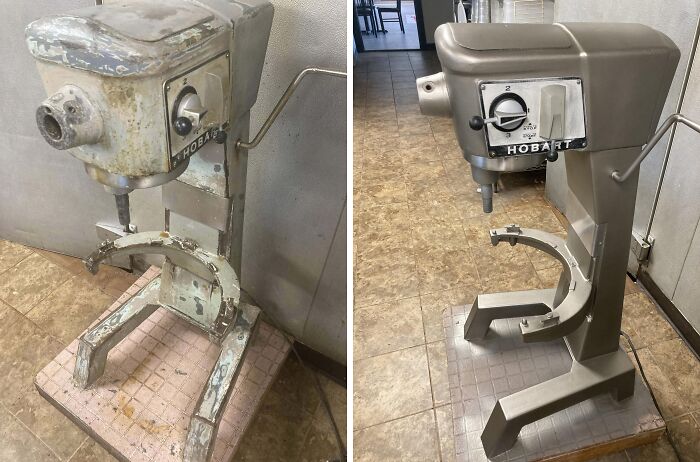
Image credits: vgravedoni
#42 So I Found A Rusty Old Axe, And Decided To See If I Could Restore It. This Was The Process. Turned Out Better Than I Thought!
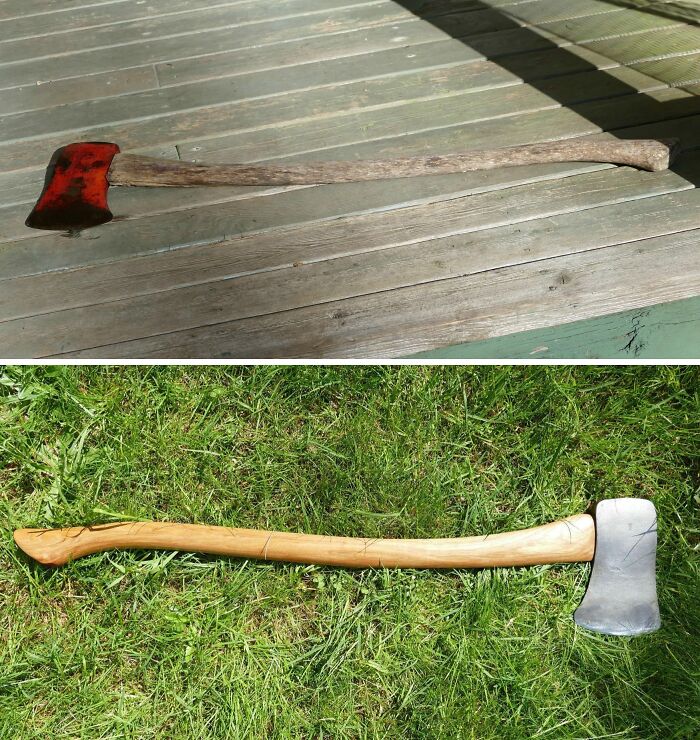
Image credits: RoboftheNorth
#43 1943 Waterfall Vanity Restore
I still have some more to go but I am just so happy I could cry. I bought this poor vanity a month and a half ago when it was just caked in chalk paint. It hid many secrets: gorgeous inlays, some child’s “artwork” of scratching the word “help” in the wood, and the manufacturer stamp! I have spent the last month and a half spending every free moment I have had into stripping off the most gooey, gross paint and sanding it until FINALLY tonight I am to this point. And I am so happy! Tomorrow I get to start staining but I am so proud of how far I have come. I have never done anything like this before and this was a pretty ambitious first project but it is paying off!
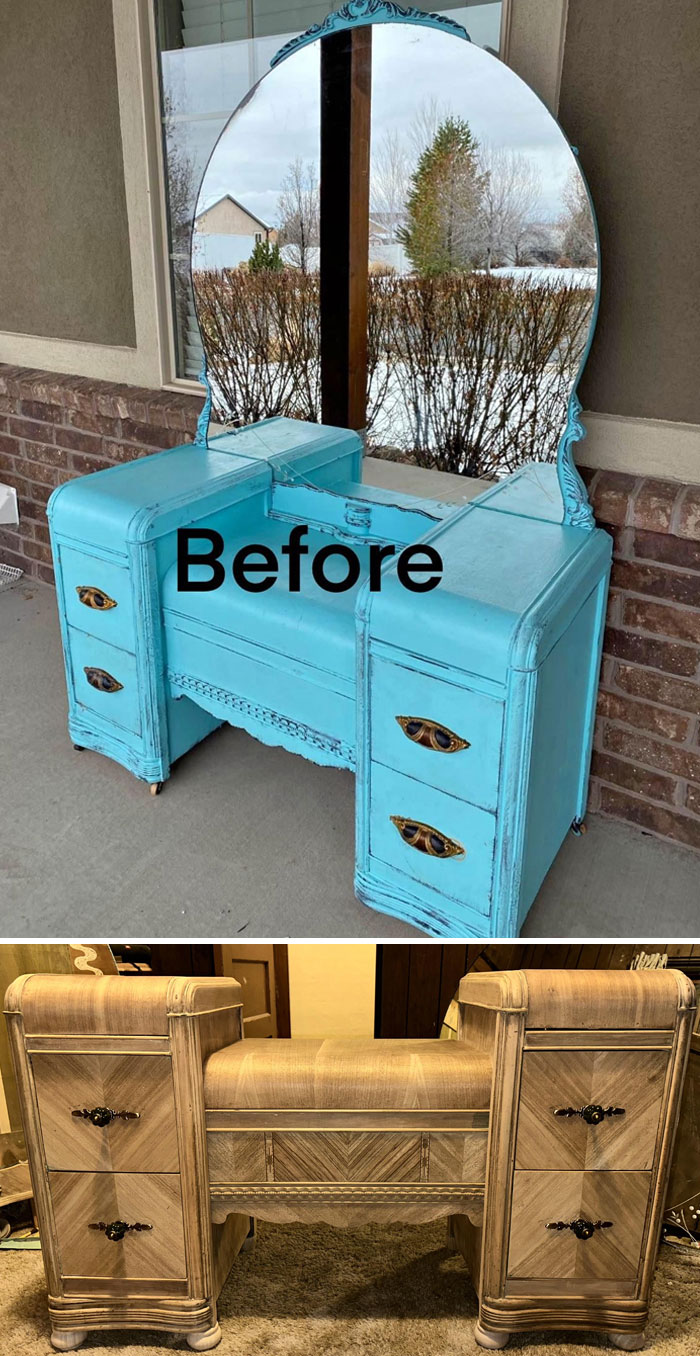
Image credits: Embarrassed_Worth543
#44 Great Aunts Meat Cleaver. Asked For A New Handle And I Went A Bit Overboard
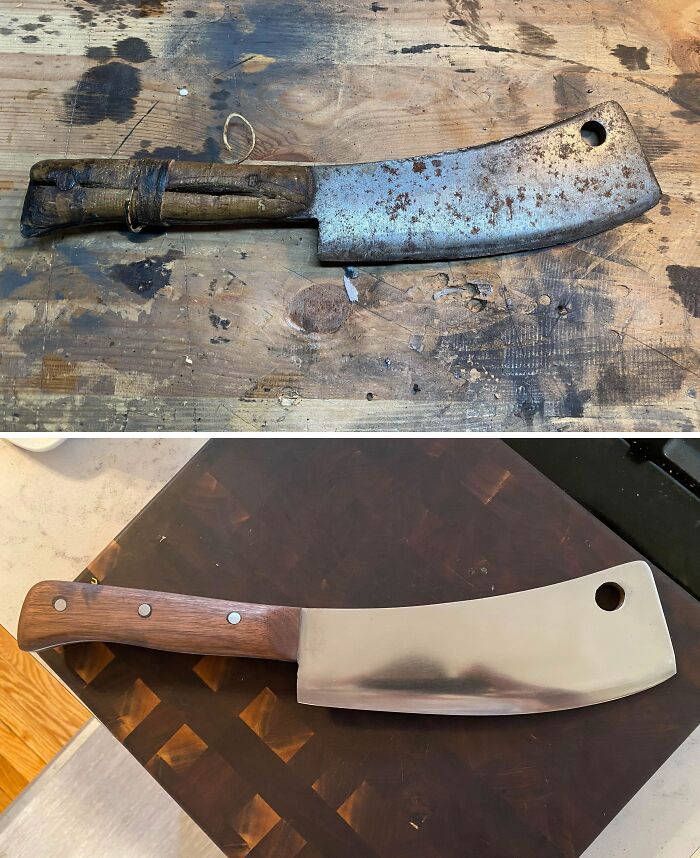
Image credits: Kalsor
#45 First Major Restoration
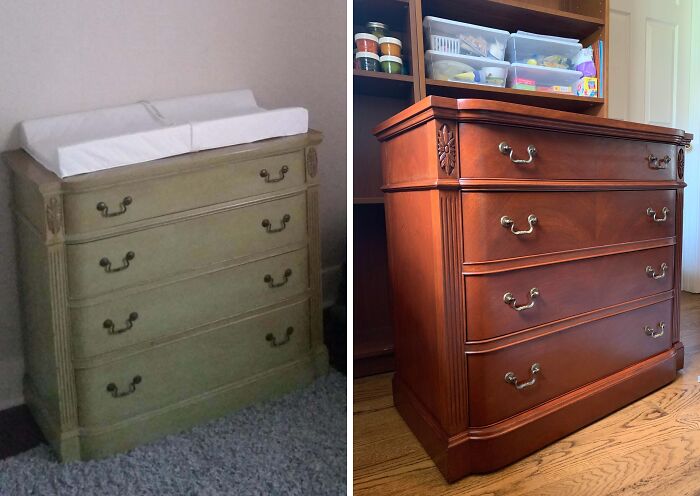
Image credits: Ac_page
#46 $75 Craigslist Find. Ended Up Getting It For Free After He Saw We Were Expecting. First Time Refinishing Something!! Pleased With How It Came Out
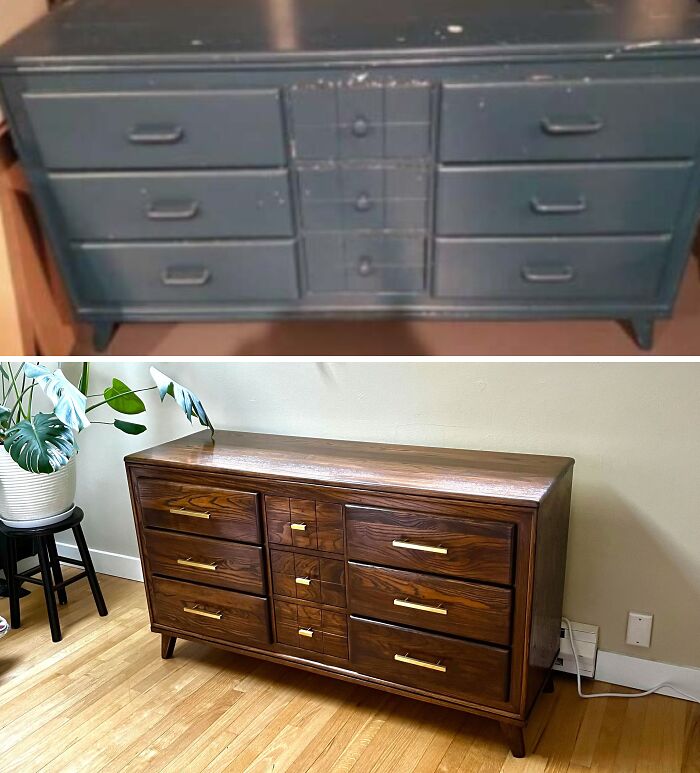
Image credits: L0-Ki
#47 40 Hours On This 1960s Bandsaw And If Looks Like New
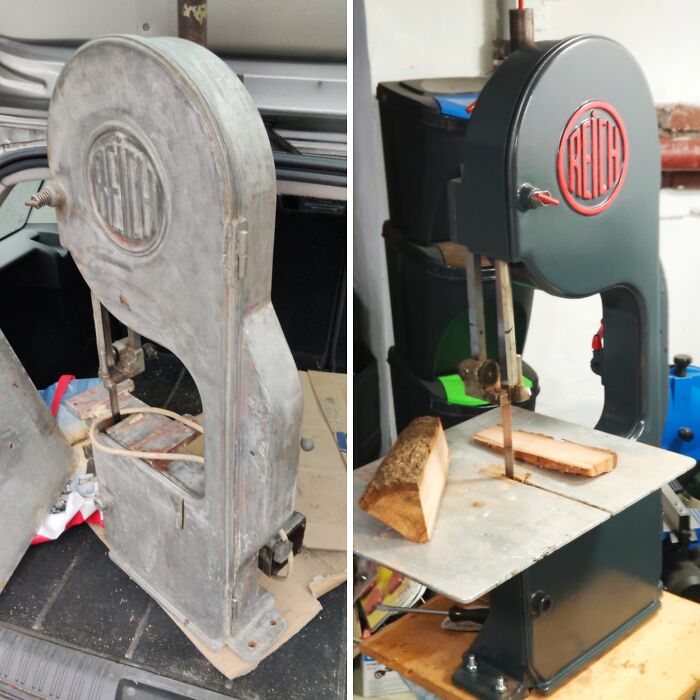
Image credits: reddit.com
#48 Cherrywood Dropleaf End Table Restoration
Found this antique end table at a storage auction; it’s essentially a miniature dropleaf dining table. Absolutely stunning cherry wood underneath!
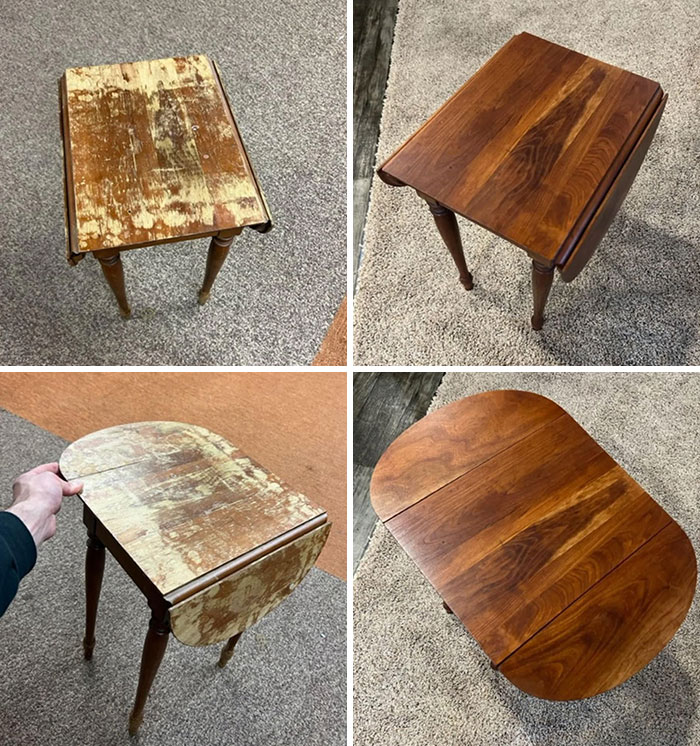
Image credits: Chainsaw-Charlie
#49 1st Tool Box For My Sons 1st Birthday
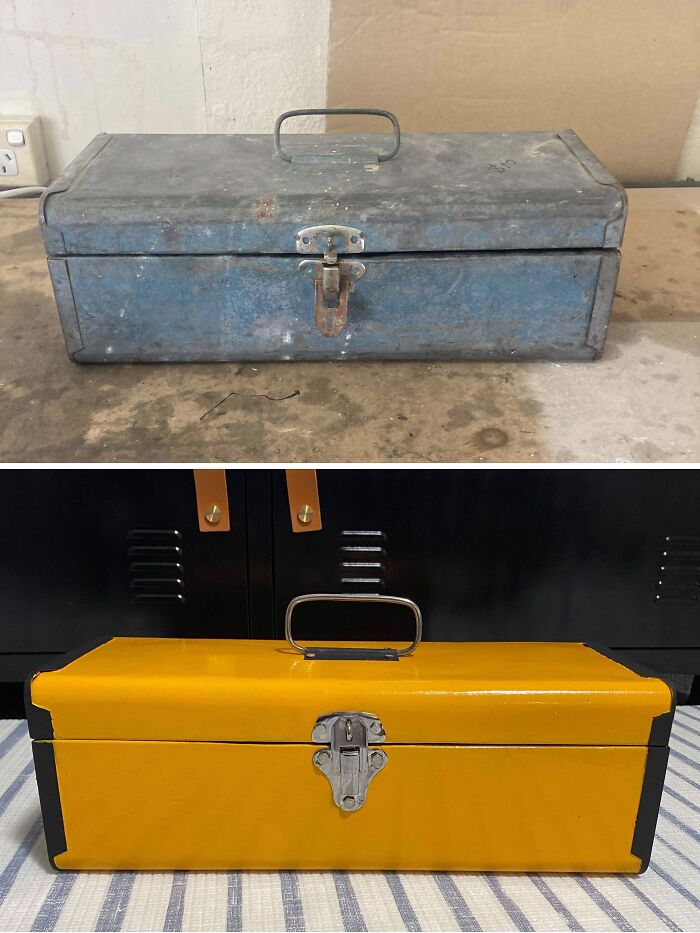
Image credits: vtr1994
#50 No Idea Who Would Buy This, Paint It, And Throw It To The Curb, But I Love My New Lamp
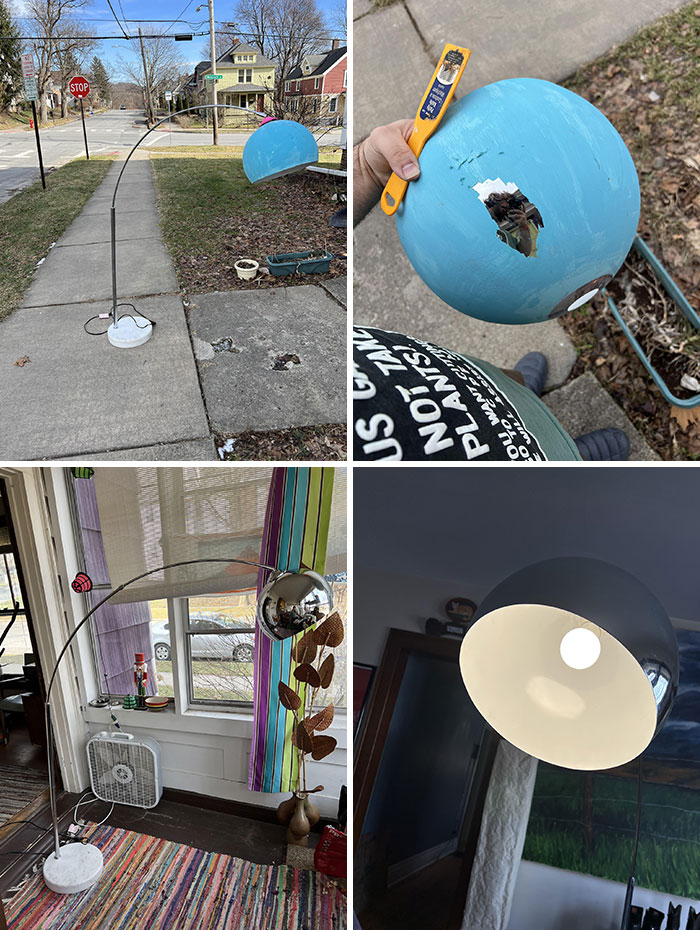
Image credits: 99_ahc


