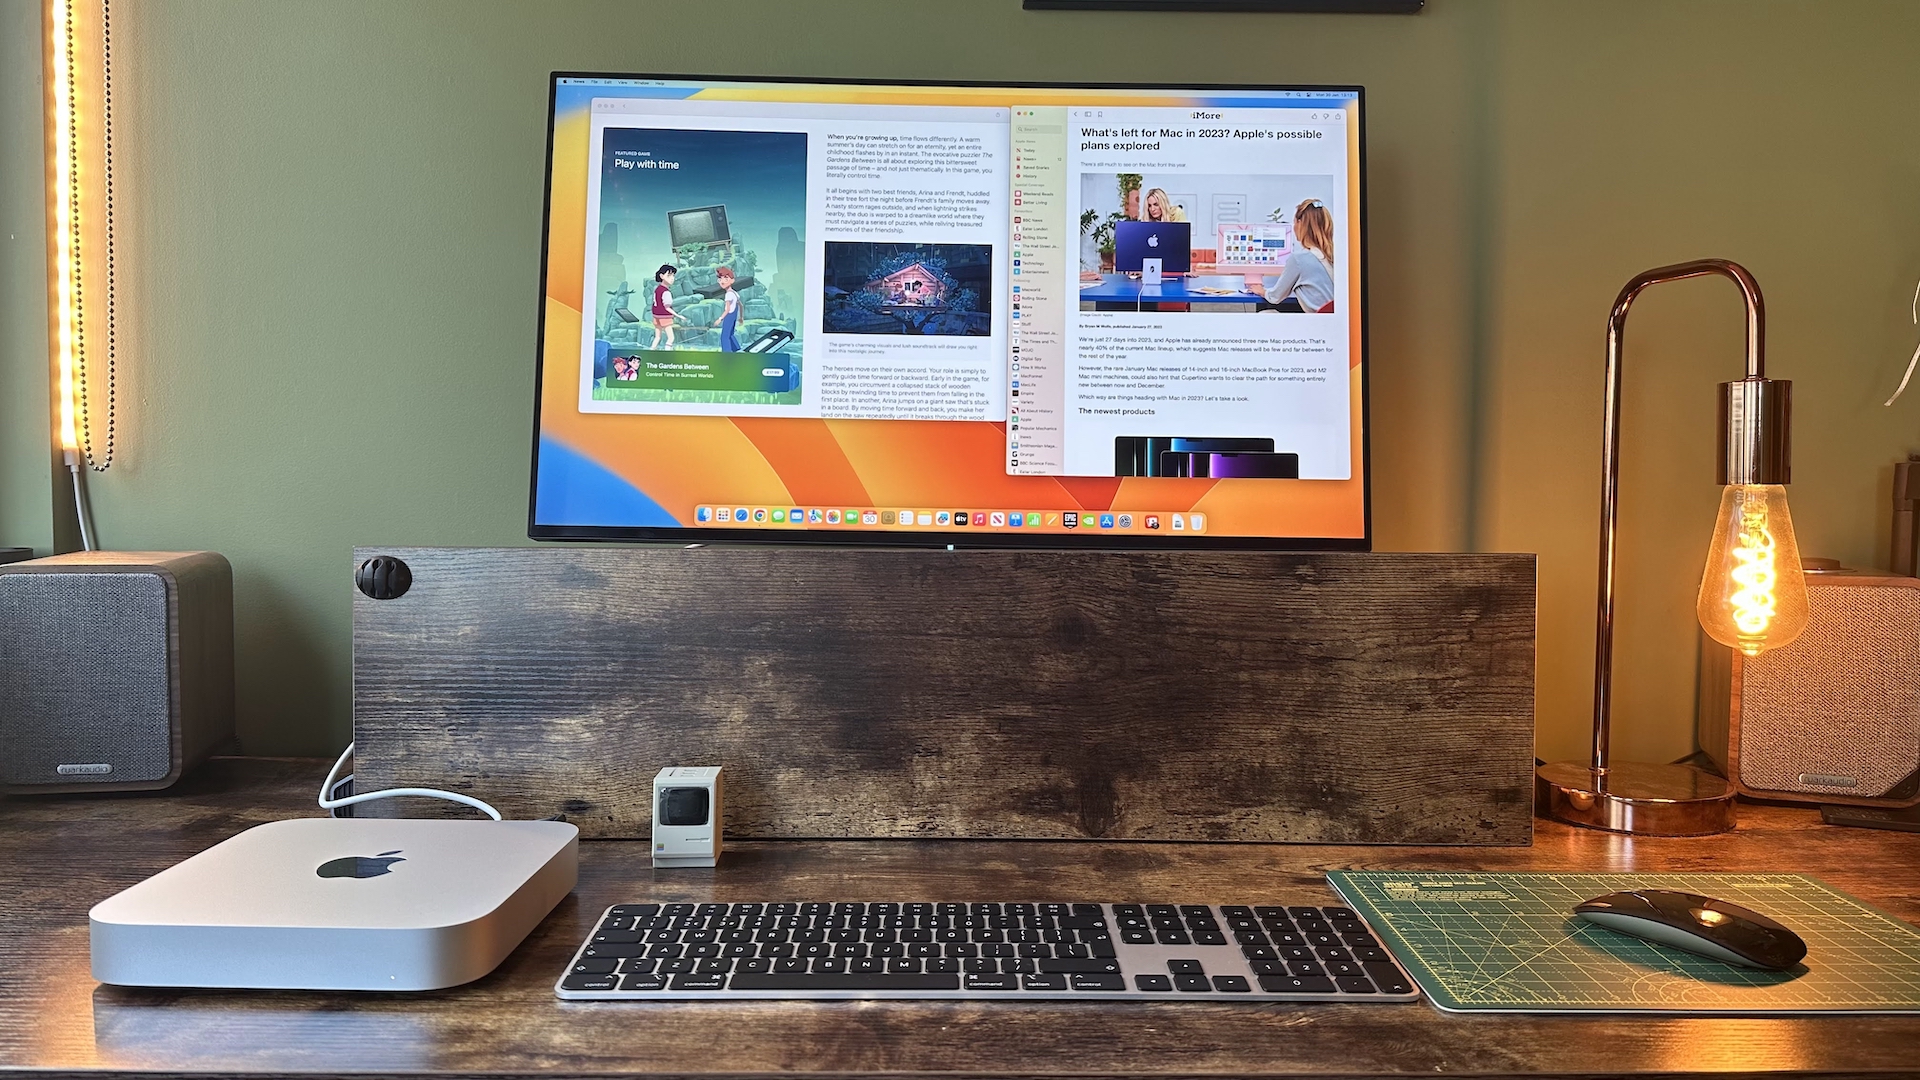
If you’re anything like us, then you use your Mac every day, for up to 8 hours at a time, and even though this faithful warrior shows up for us without fail we rarely give it a second thought. That’s the brilliance of Apple products - they just work (until they don’t), but that doesn’t mean they don’t need a little attention to stay in tip-top shape.
The holiday season is the perfect time to show your Mac a bit of love. It doesn’t need much attention from you, but an hour tending to its needs now will reap rewards in the long run. Follow these 10 tips, and you’ll ensure that your Mac takes 2024 in its stride.
Disclaimer: We’re not going to assume you have the latest macOS 14 Sonoma on your system for this article, but you need at least the version before (macOS 13 Ventura) to follow all the steps exactly as described here. Of course, you can do most of the same things we recommend in previous versions of macOS, but some of the menus will be labeled differently. If you’re still running macOS 12 Monterey, or earlier, then perhaps it’s about time to get into the modern world and update your operating system (see step 4). If your Mac can’t be upgraded to a more modern version of macOS, then give yourself a pat on the back for getting enormous value for money out of an old Mac that’s running for longer than it has any right to, and perhaps make sure your backups are up to date, just in case the worst should happen.
1. Check your free storage situation
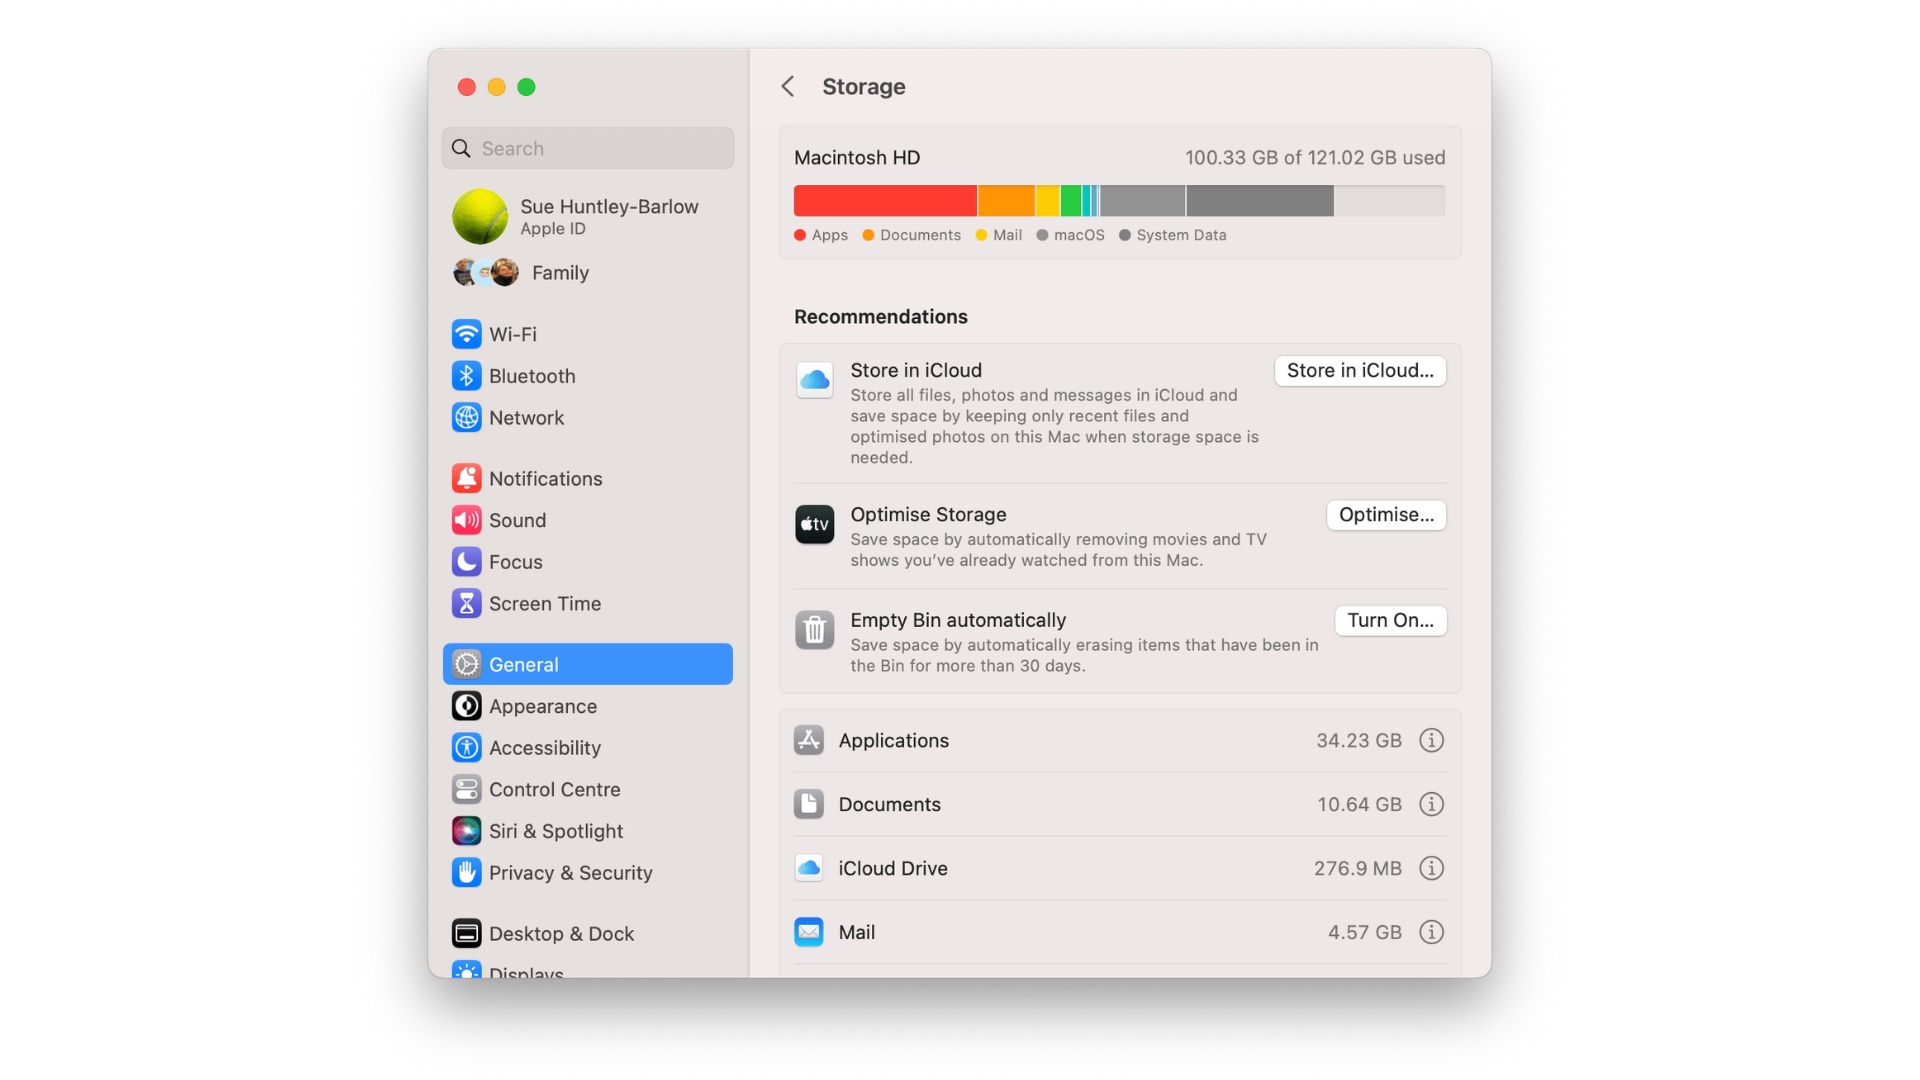
The first thing you need to do is find out how much free space you have available on your Mac. Once your Mac gets near capacity, performance will tank, so you need to ensure there’s enough free space available for everything to run smoothly. You can’t even update macOS without enough free space to download the update, which is usually a few chunky GB in size. So, let’s find out what state your hard drive is in.
Head to System Settings (the easiest way to get there is to click the Apple menu button in the top left corner of the menu bar at the top of the screen). Click System Settings… > General > Storage. There’s a bar graph at the top of the window that shows you what is taking up space on your drive and how much free space you have left. As a general rule of thumb, you want to make sure you’ve got at least a fifth of your hard drive free.
2. Optimize your storage
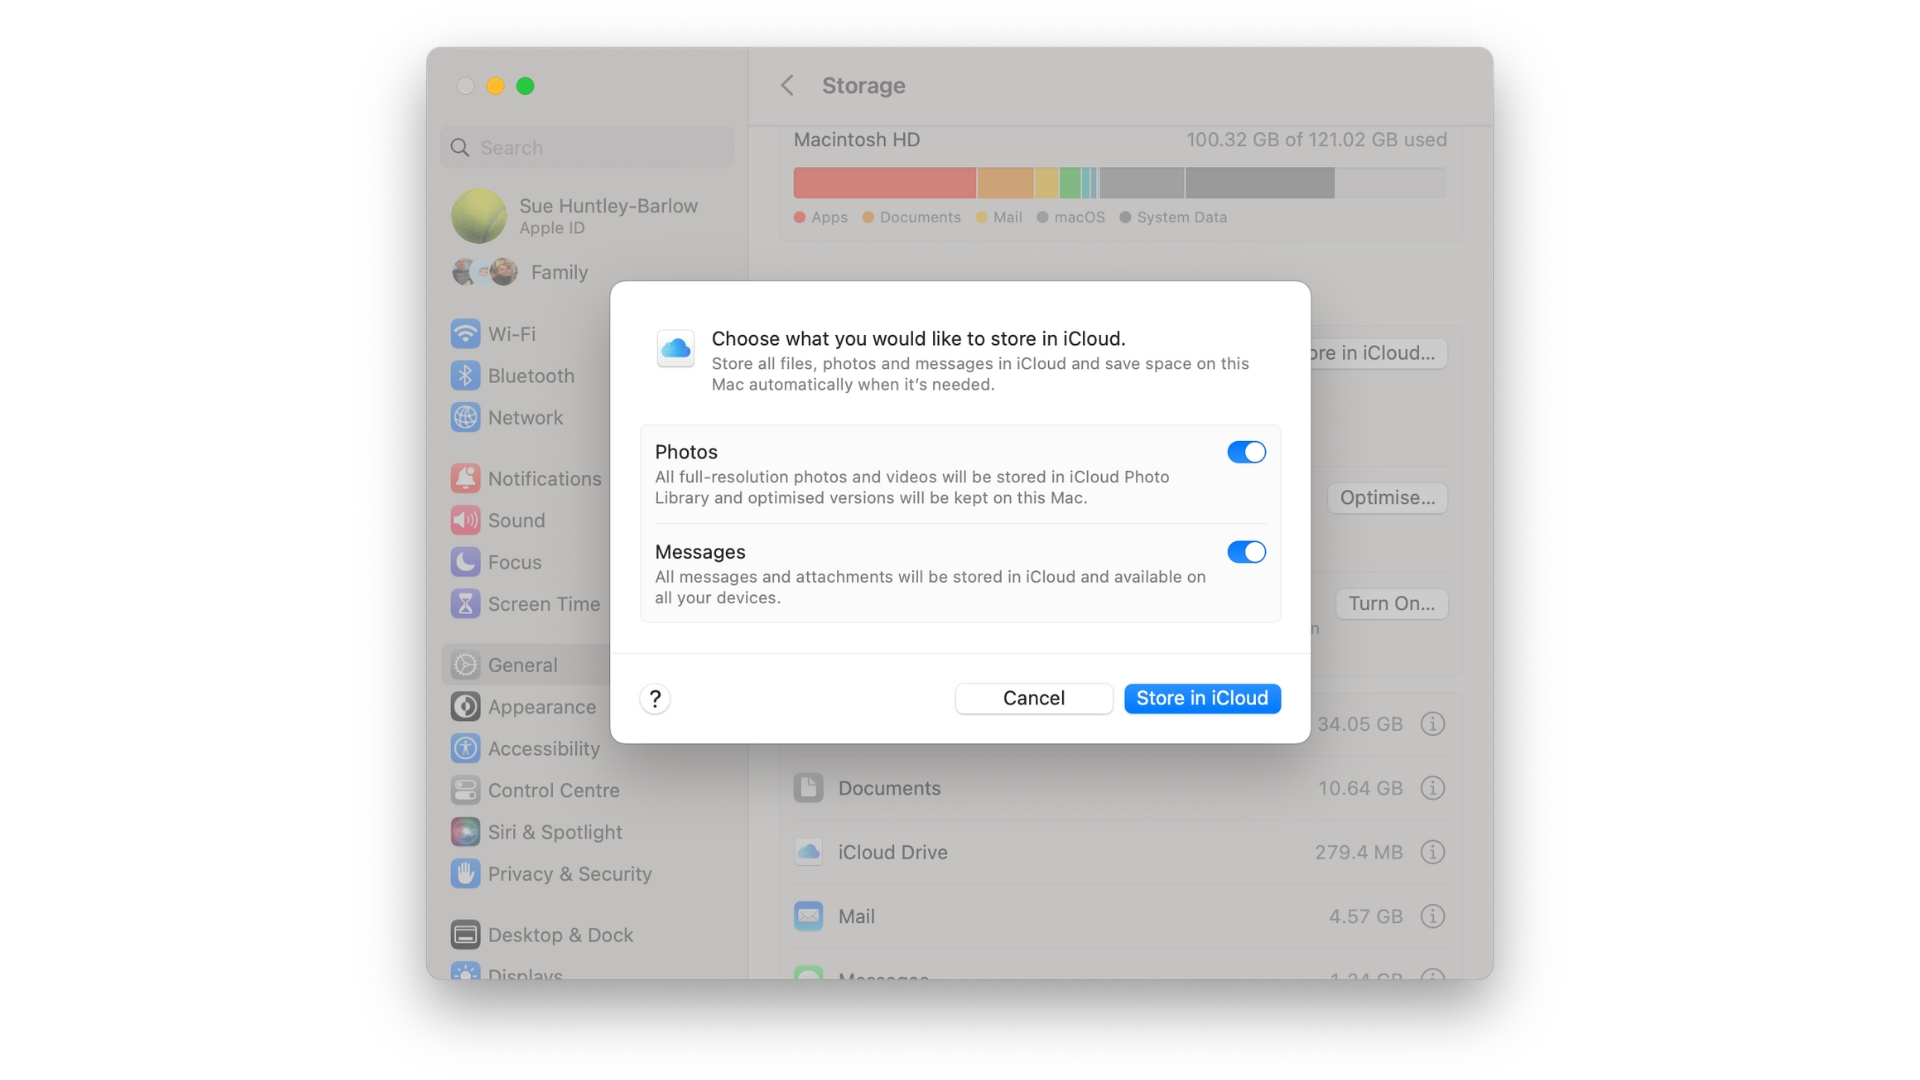
If your free space is a little tight, you need to free some up. You can get easy wins in the storage wars by clicking on the Optimize button next to ‘Optimise Storage,’ which will remove movies and TV shows from your Mac that you’ve already watched in the Apple TV app. There’s also an option to turn on automatically emptying the recycle Bin there, and for storing files in iCloud - this is a good idea because it means your space-hogging full-resolution photos and videos get uploaded to your iCloud account, while low-res previews stay on your Mac. However, the viability of this approach depends on how much storage space you are renting from Apple as part of your iCloud subscription. If you are using the free 5GB subscription, then it’s not a viable option for you, but if you’ve got a subscription of 200GB or 2TB and over, then it’s a great choice.
3. Delete your old podcasts and large files
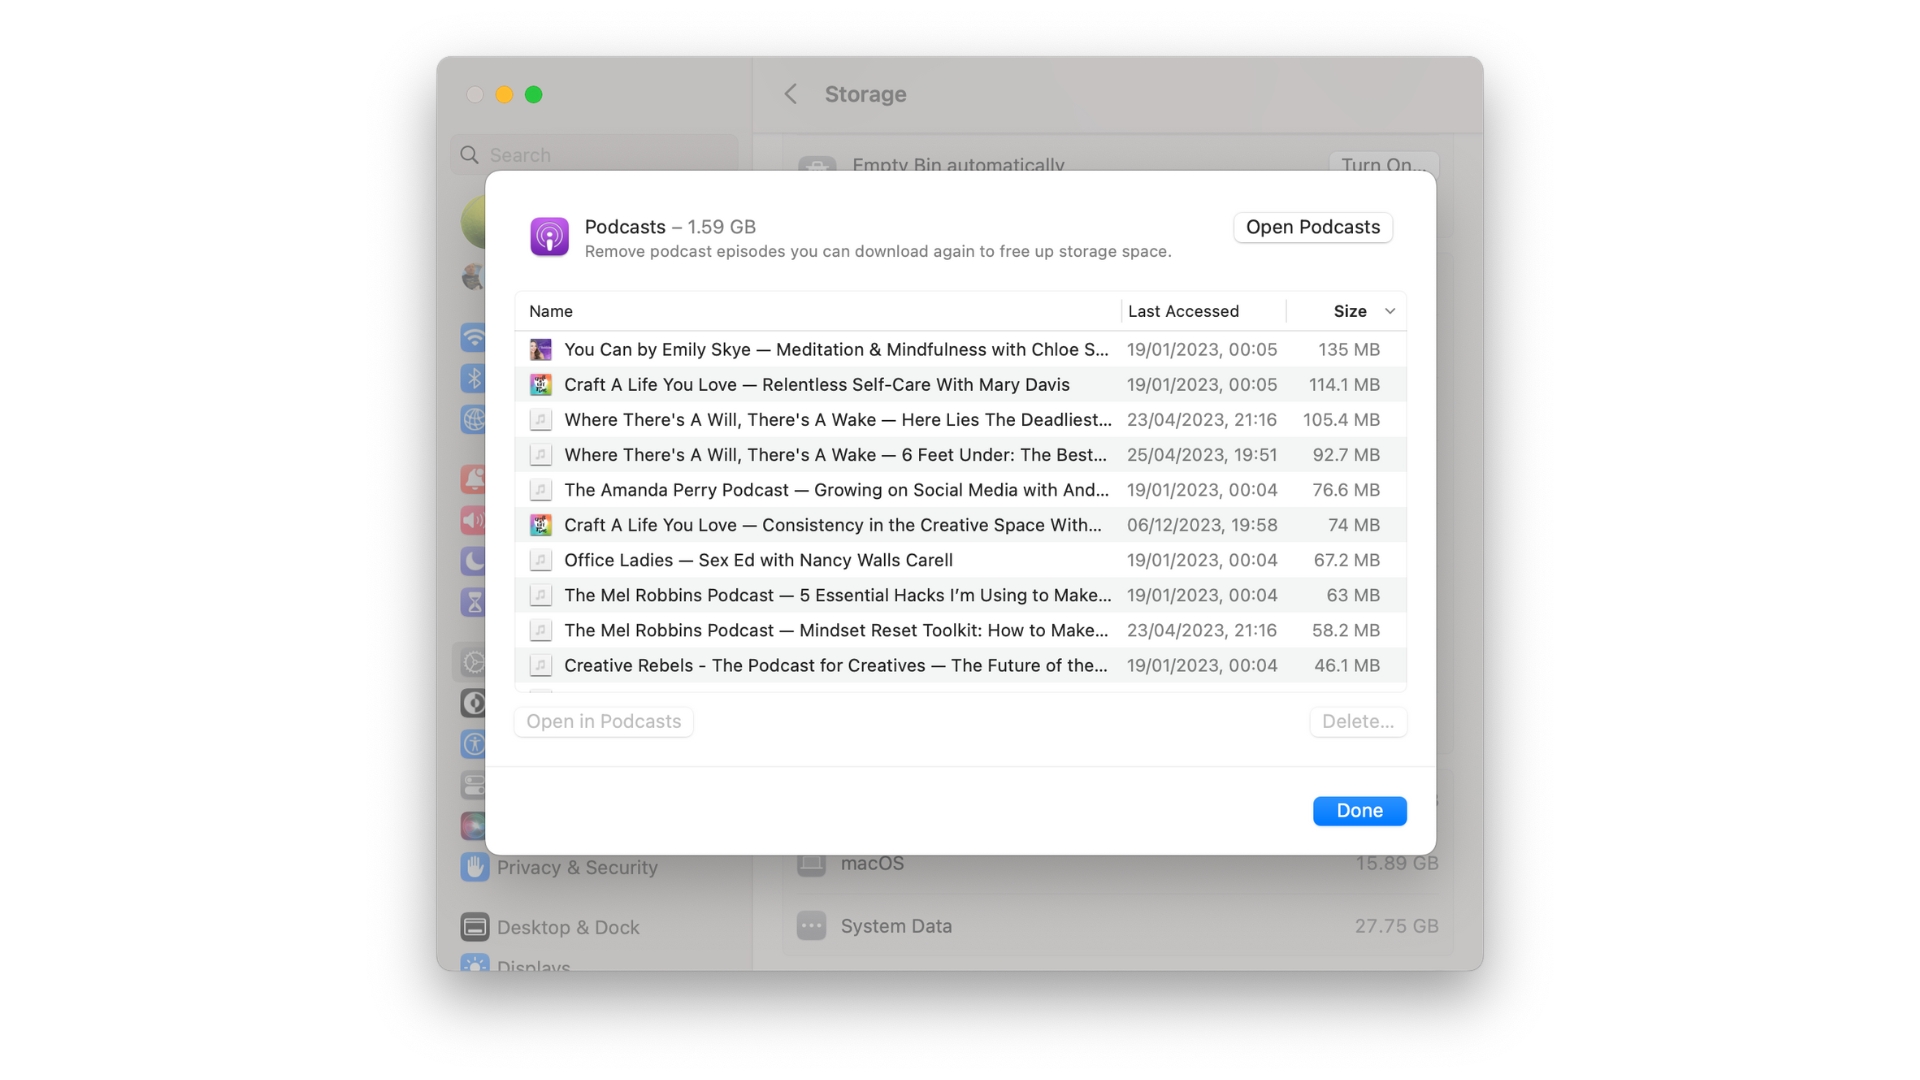
Old podcasts cluttering up your Mac are another easy win for getting storage space back. Scroll down the list of apps under the Recommendations section of the Storage settings until you see Podcasts. Click the “i” icon next to it, and you’ll see a list of all the podcasts stored on your Mac. Select all of them by clicking on the first one in the list and then hitting [command] + [A] on your keyboard. They’ll all turn blue, indicating that they are selected. Now click the Delete button to reclaim all that space.
The other thing that’s worth doing is clicking on the “i” next to Documents. This lists all the files on your Mac in sections like Downloads and Large Files in size order, which is really handy. You might see something like a massive .zip file that you don’t need anymore that’s just taking up space and is ripe for deletion. Obviously, you can also click on the “i” next to Applications and remove any apps you no longer need or use.
4. Update to the latest macOS
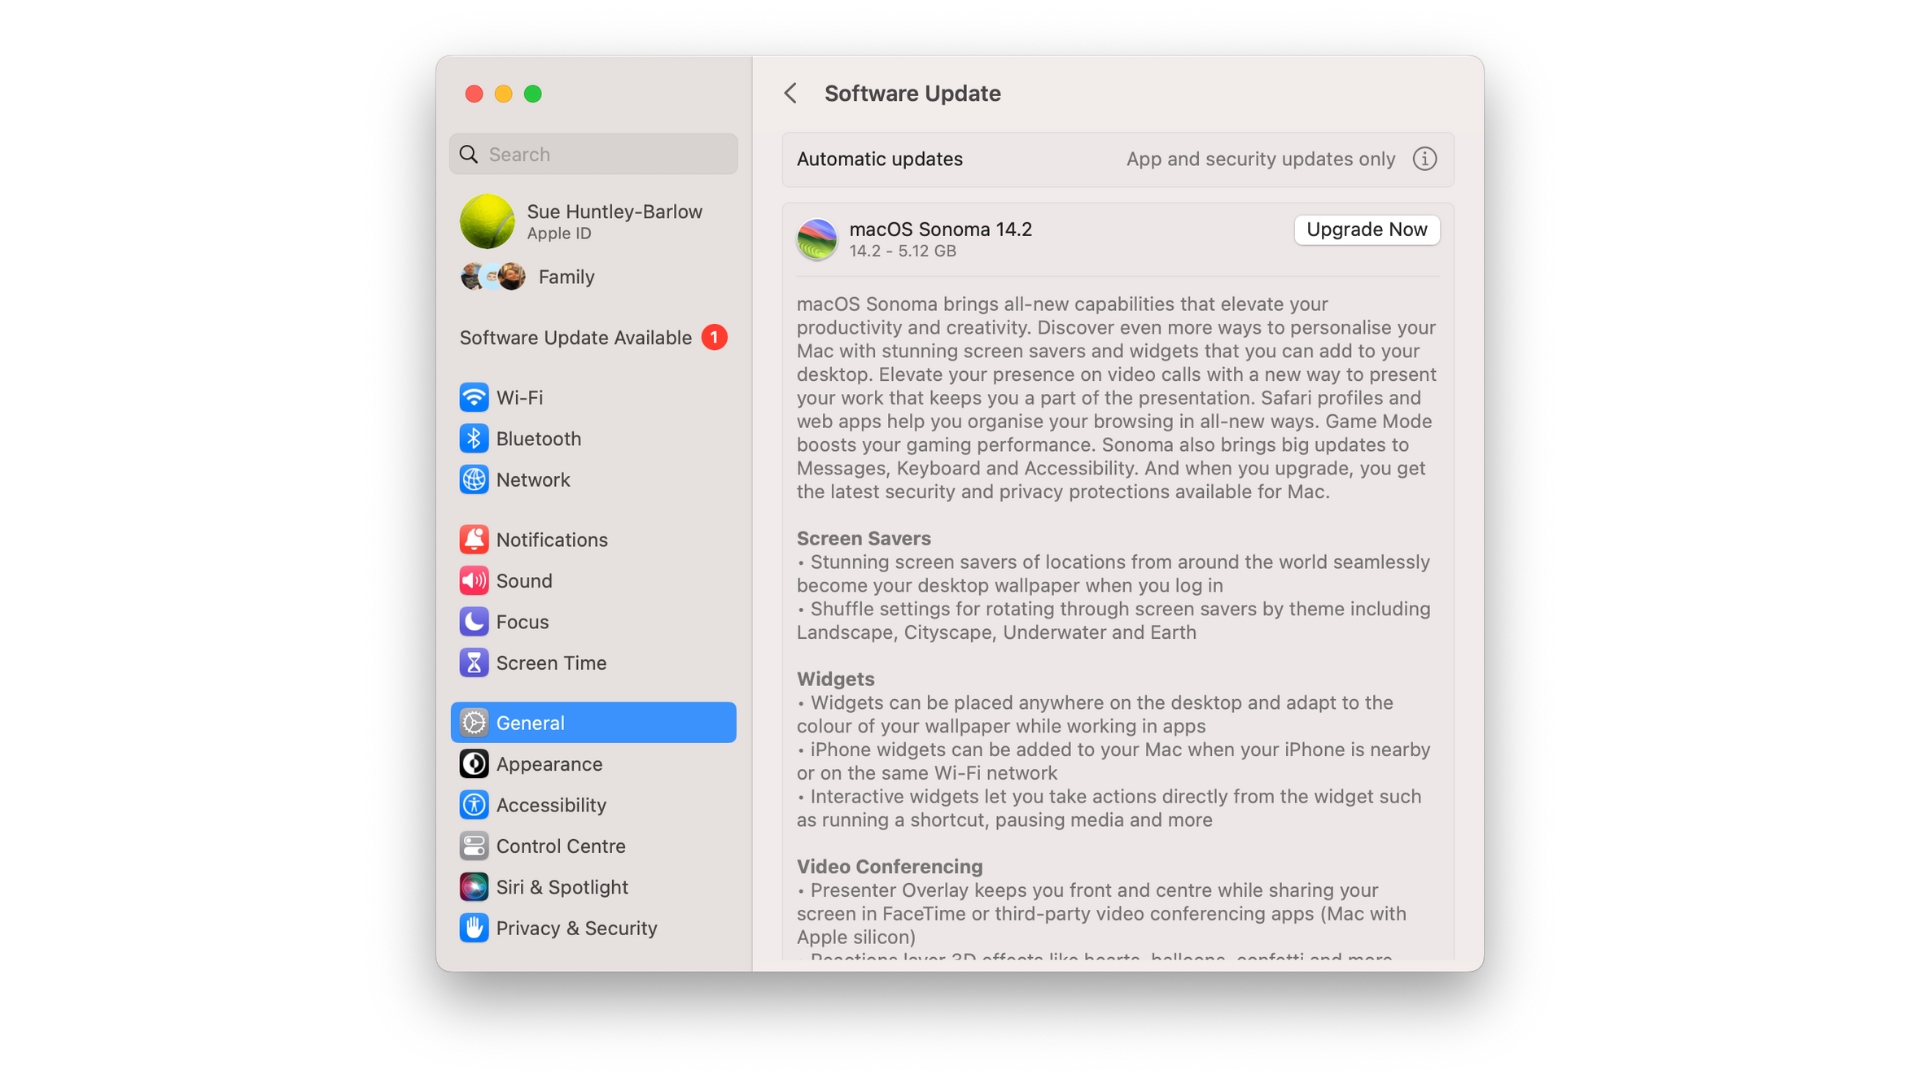
Now that you’ve freed up some hard drive space using a few simple maneuvers, we can start thinking about updating your operating system to the latest macOS version. If you’ve already done this, then skip to the next step, but if not, then this is the sort of thing that you should probably have done a while ago, but maybe you've not found the time to do it. Well, now you have some time, so let’s get it done.
macOS Sonoma is the latest Mac Software - version 14.2 - at the time of writing, so if you’re running anything less than that it’s time to update. Click on Software Update in Settings, and your Mac will take a quick look to see if there’s an update available for you and, if so, give you the option of downloading and installing it.
It’s always a good idea to ensure your Mac is backed up before you continue, just in case, so make sure your backup (I use Time Machine on an external hard drive) is up to date. Next, click ‘Upgrade Now’ to start the download process. Once downloaded, the update will begin, which usually requires at least one restart. There’s always a scary moment when your screen goes completely black, and your heart stops for a few beats before the familiar Apple logo appears, but that’s completely normal. After the restart, you’ll be running the latest version of macOS Sonoma. Spend a few minutes exploring the new features if you have time.
5. Purge your Login Items
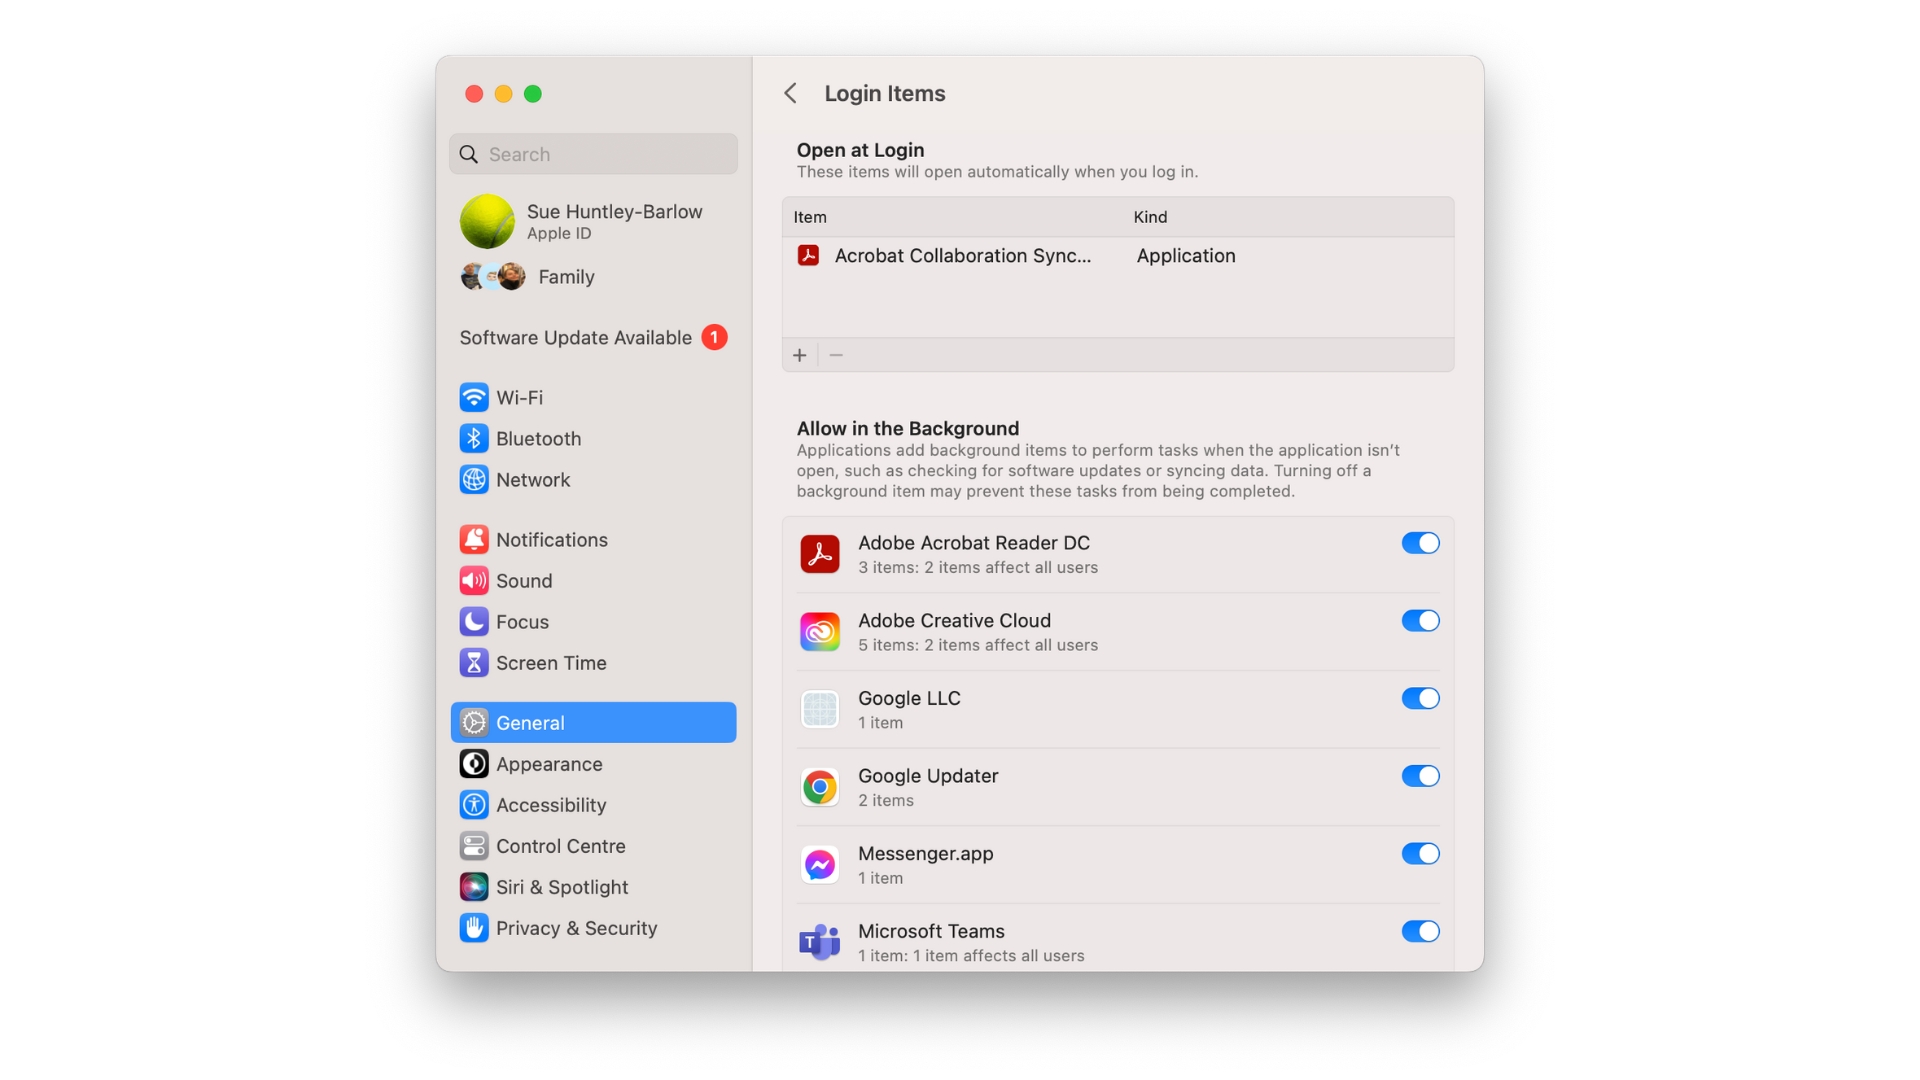
Now your Mac is up to date, it’s time to take a look at what you’ve got running on it. You’ve probably noticed that some programs start up automatically when you restart your Mac when, quite often, you don’t really need or want them to. Let’s do something about that because having them running in the background is slowing things down.
In System Settings, click on General, then Login Items. Here you can see any application that will open automatically when you start your Mac. If there’s anything you don’t want running, then select it and click the ‘-’ button to remove it. Further down in the window, you can see the apps that you’ve allowed to run in the background. These applications can perform tasks, like checking for updates, when the app isn’t open. The more you have running, the more your Mac’s performance will be impacted, so turn off the ones you don’t care about.
6. Check programs with Activity Monitor
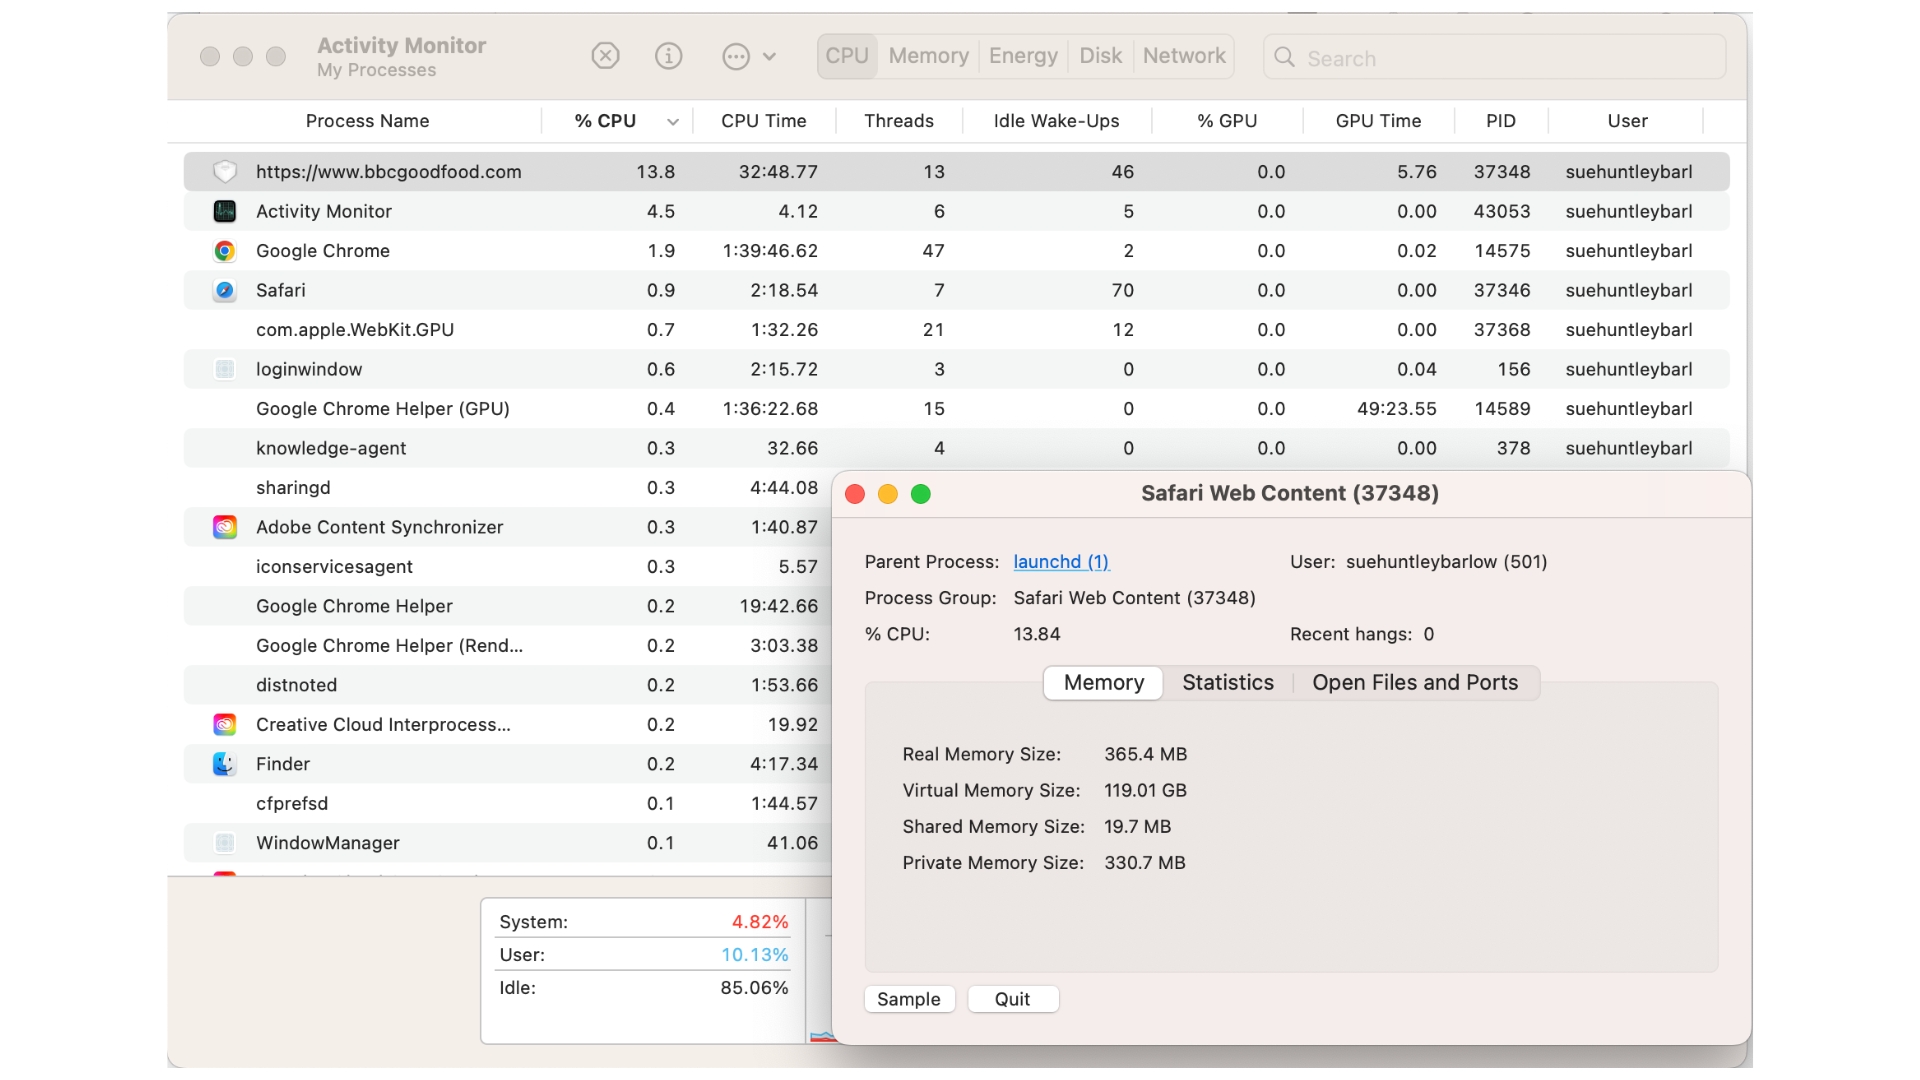
Now, we’re going to dig a little deeper under the skin of your Mac and find out why it might not be performing at its best. Open up the Finder and go to your Applications folder. Scroll down to the bottom until you find the Utilities folder, and in there, you’ll find Activity Monitor at the top - open it. Activity Monitor is a useful tool for determining what is taking up most of your CPU’s resources. It shows each running app on your Mac and the CPU (Central Processing Unit) and GPU (Graphics Processing Unit) percentage it uses.
As you can see from the screenshot above, we noticed that a process called www.bbcgoodfood.com was using up 13.8% of our CPU time! Double-clicking on it revealed that it was running inside Safari. We tracked down the tab, and it was simply an article about how much water you should drink in a day, so there was no excuse for it to be so resource-hungry, and we closed the tab. Another way to use Activity Monitor is to click on the Energy tab and sort the apps by ‘12h power’ - this is a great way to see what apps really hammer your battery usage. If an app you don’t really use is near the top of the list, then close it.
7. Clear desktop clutter
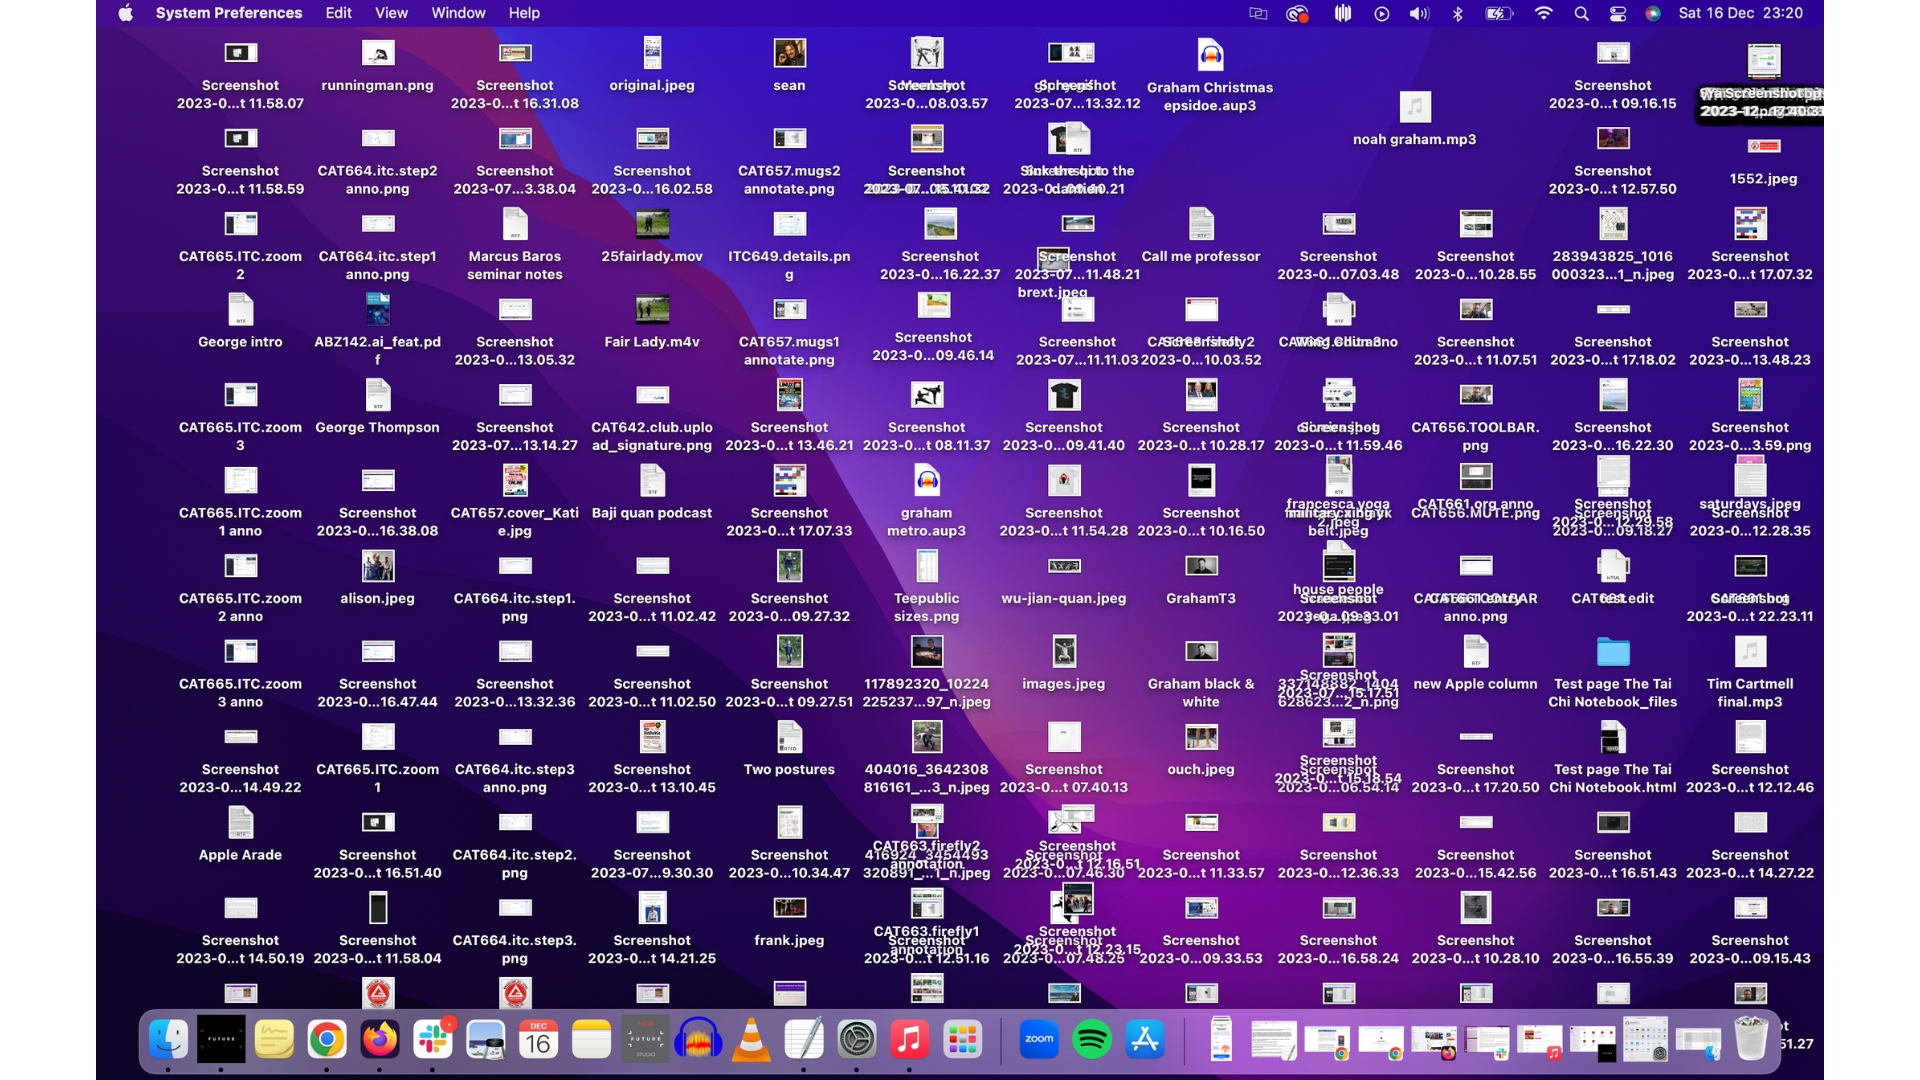
Over time we tend to end up with a messy desktop. We drag files there and forget about them, or take screenshots and they just sit there making the place look untidy. Pretty soon the whole desktop can look unmanageable. So, if your Mac Desktop looks as messy as the one above, then don’t worry, because by selecting one simple option, you can turn it into a desktop that looks like this:
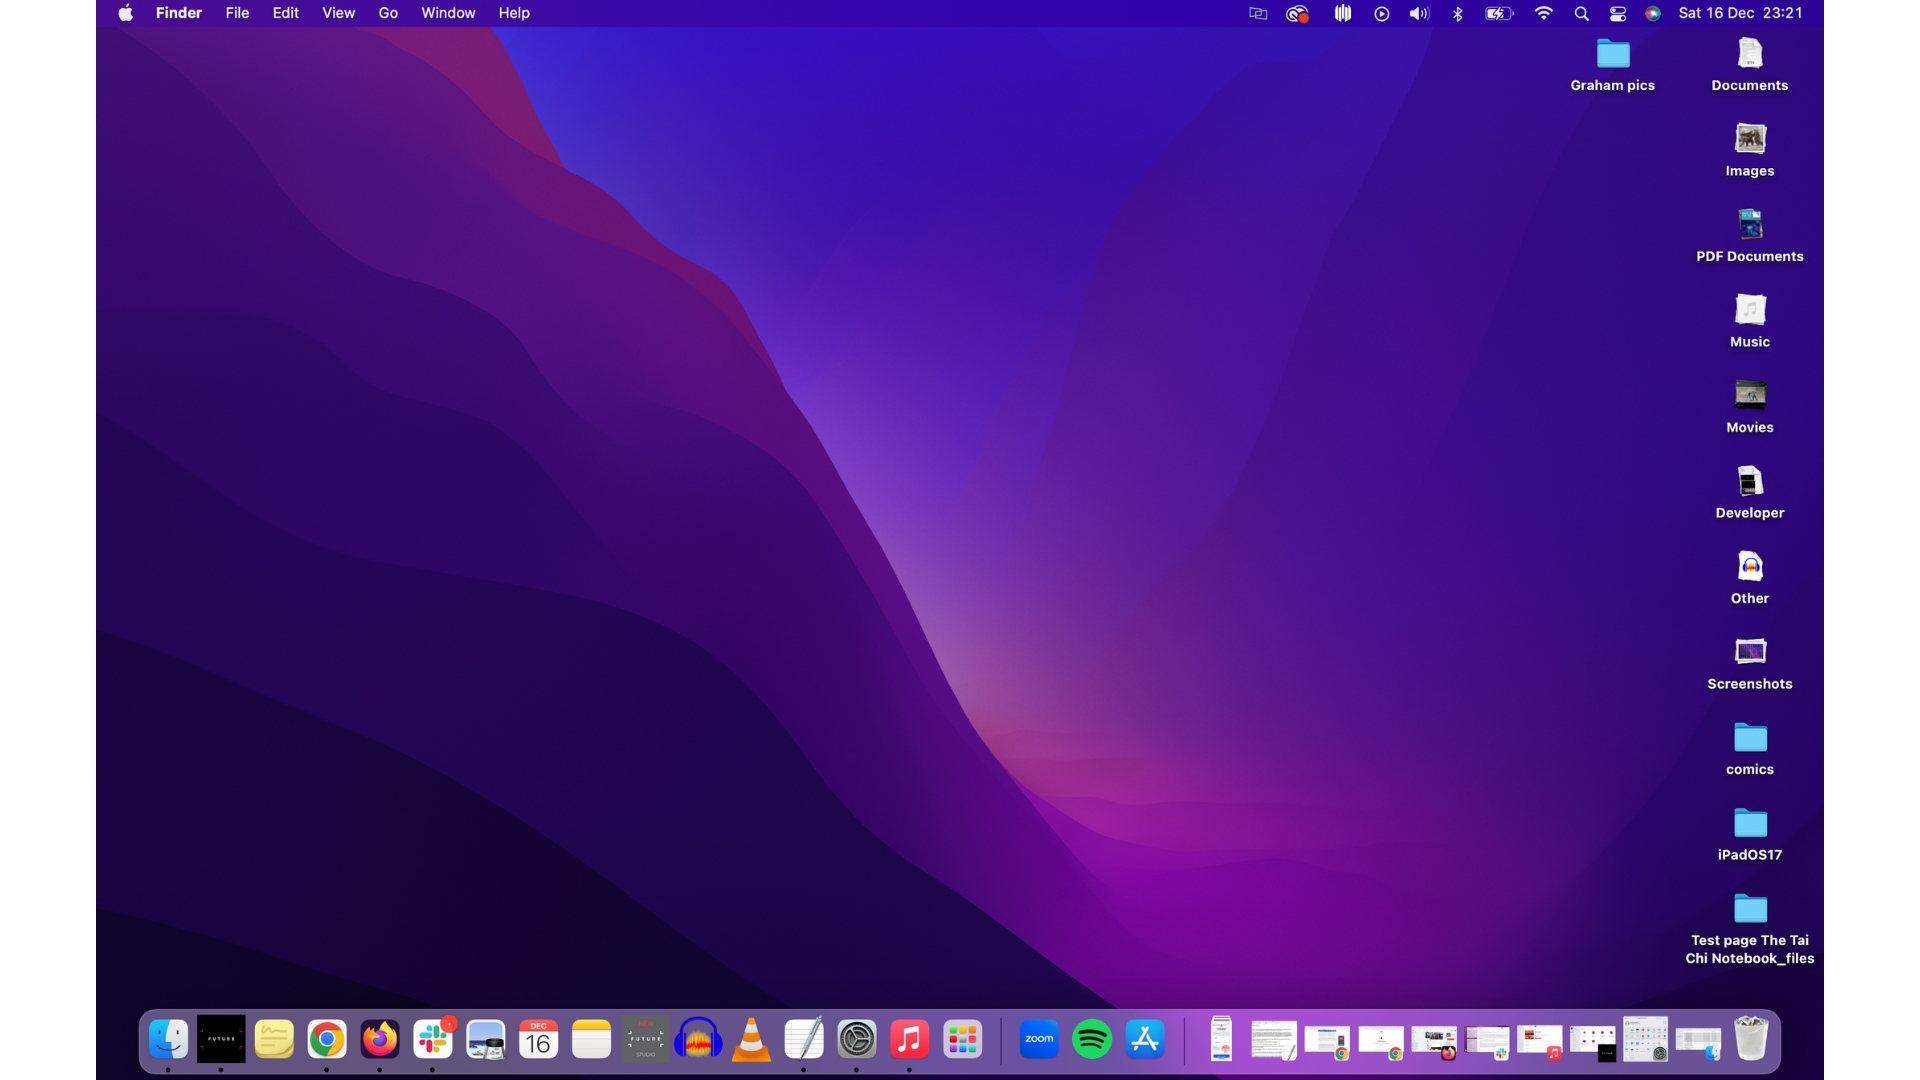
Boom! (As Steve Jobs would say). In one click you have a clear desktop. All you need to do is right-click on the desktop and select Use Stacks from the menu that appears. All the cluttered icons are then neatly filed into Stacks on the desktop for you, which are a bit like stacks of cards that open when clicked on. Nothing is removed and all your files are still accessible using the Finder as normal, but now your desktop looks a lot neater and is more organized.
8. Reduce or turn off graphics/visual effects
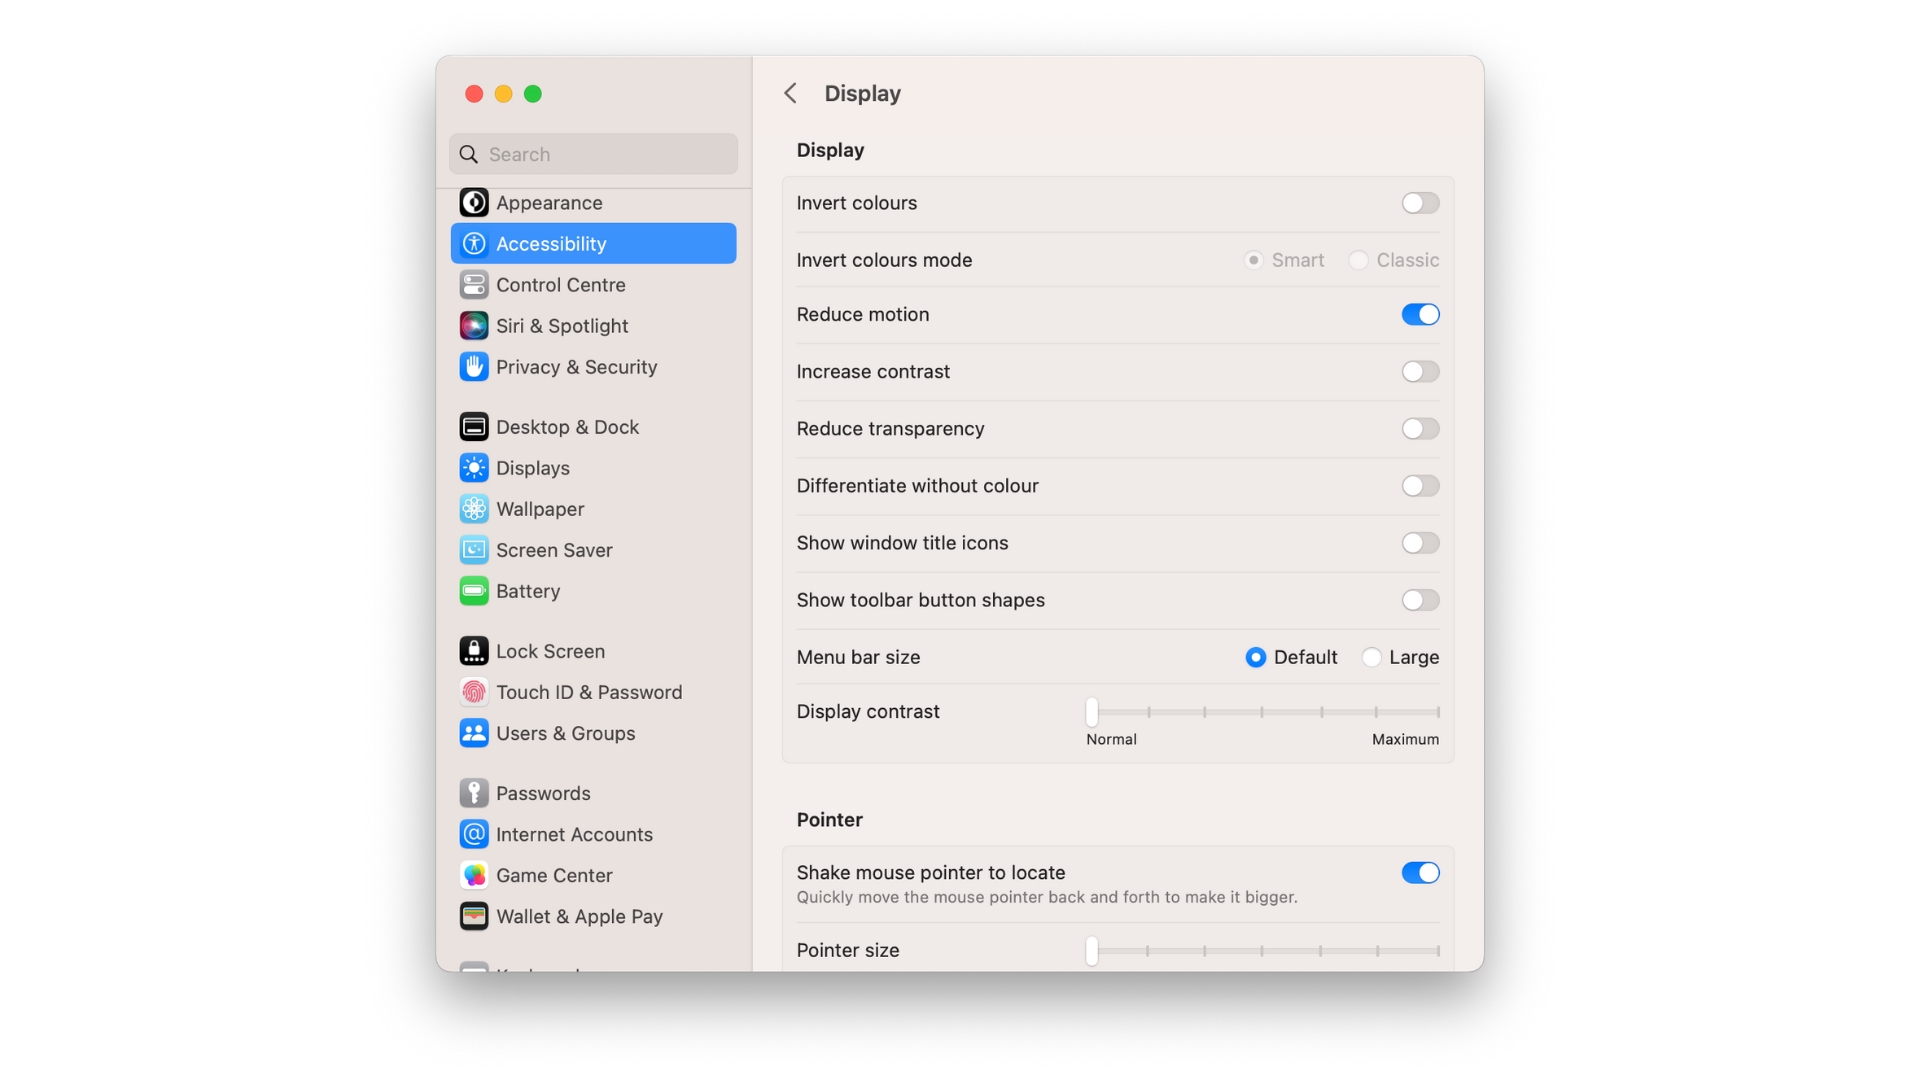
Another thing that can impact your performance, especially on old Macs, is macOS’s visual effects. These are the cool effects that macOS uses when you drag things around and drop them into folders. Sure, they’re nice, but they use up your processing power. To turn them off, head over to the System Settings and click on Accessibility > Display. In the list, you’ll see an option to ‘Reduce motion.’ Turn this on.
9. Clear browser cache
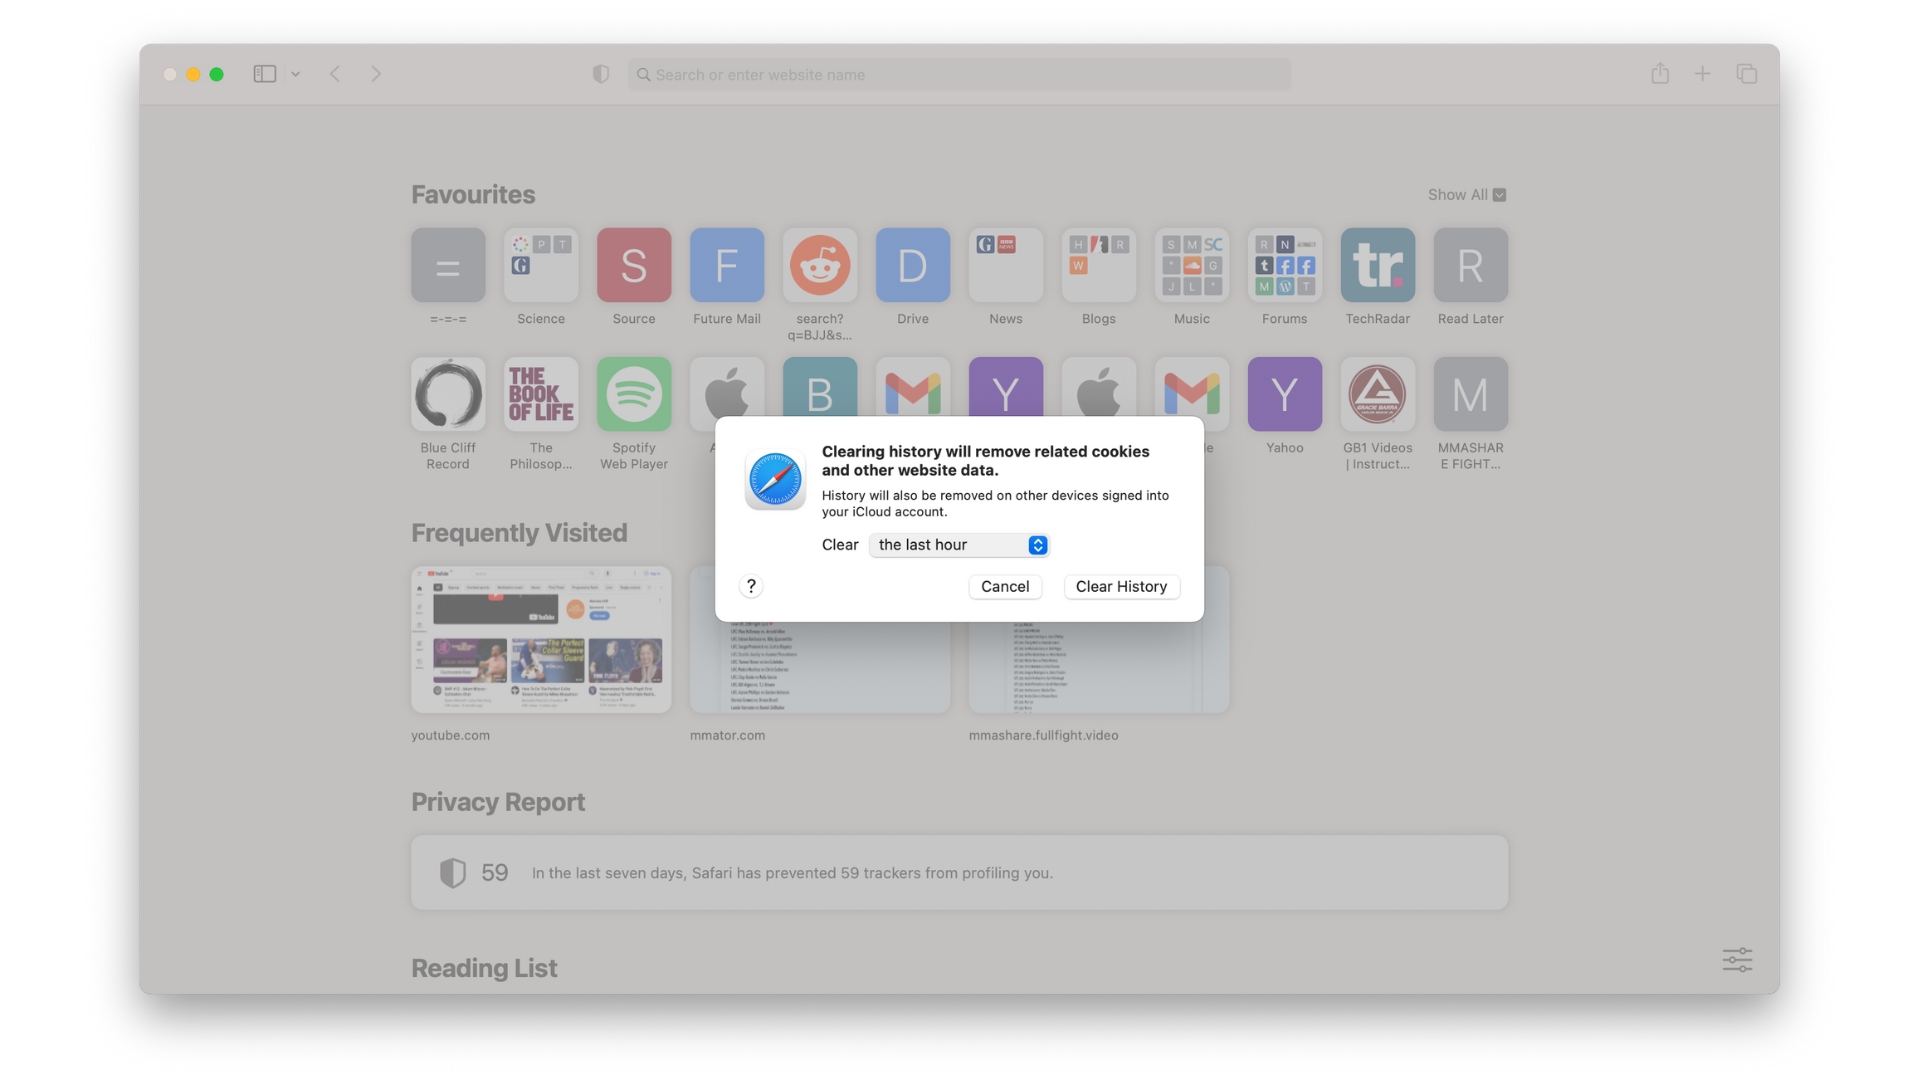
Clearing your browser cache is one of those things that gets suggested to you whenever something isn’t quite working correctly in your web browser on your Mac, but it’s not always obvious how to do it. You should also be aware that you may have to log into all your websites that remember your username and password automatically again if you do it, so we’d save this as a last resort.
In Safari, go to the Safari menu, then Clear History. From the drop-down menu, choose a time period. In Chrome, go to the Chrome menu and choose ‘Clear browsing data…’ Make sure everything is selected, and again, choose a time period from the drop-down list and click ‘Clear data.’
10. Reset the PRAM
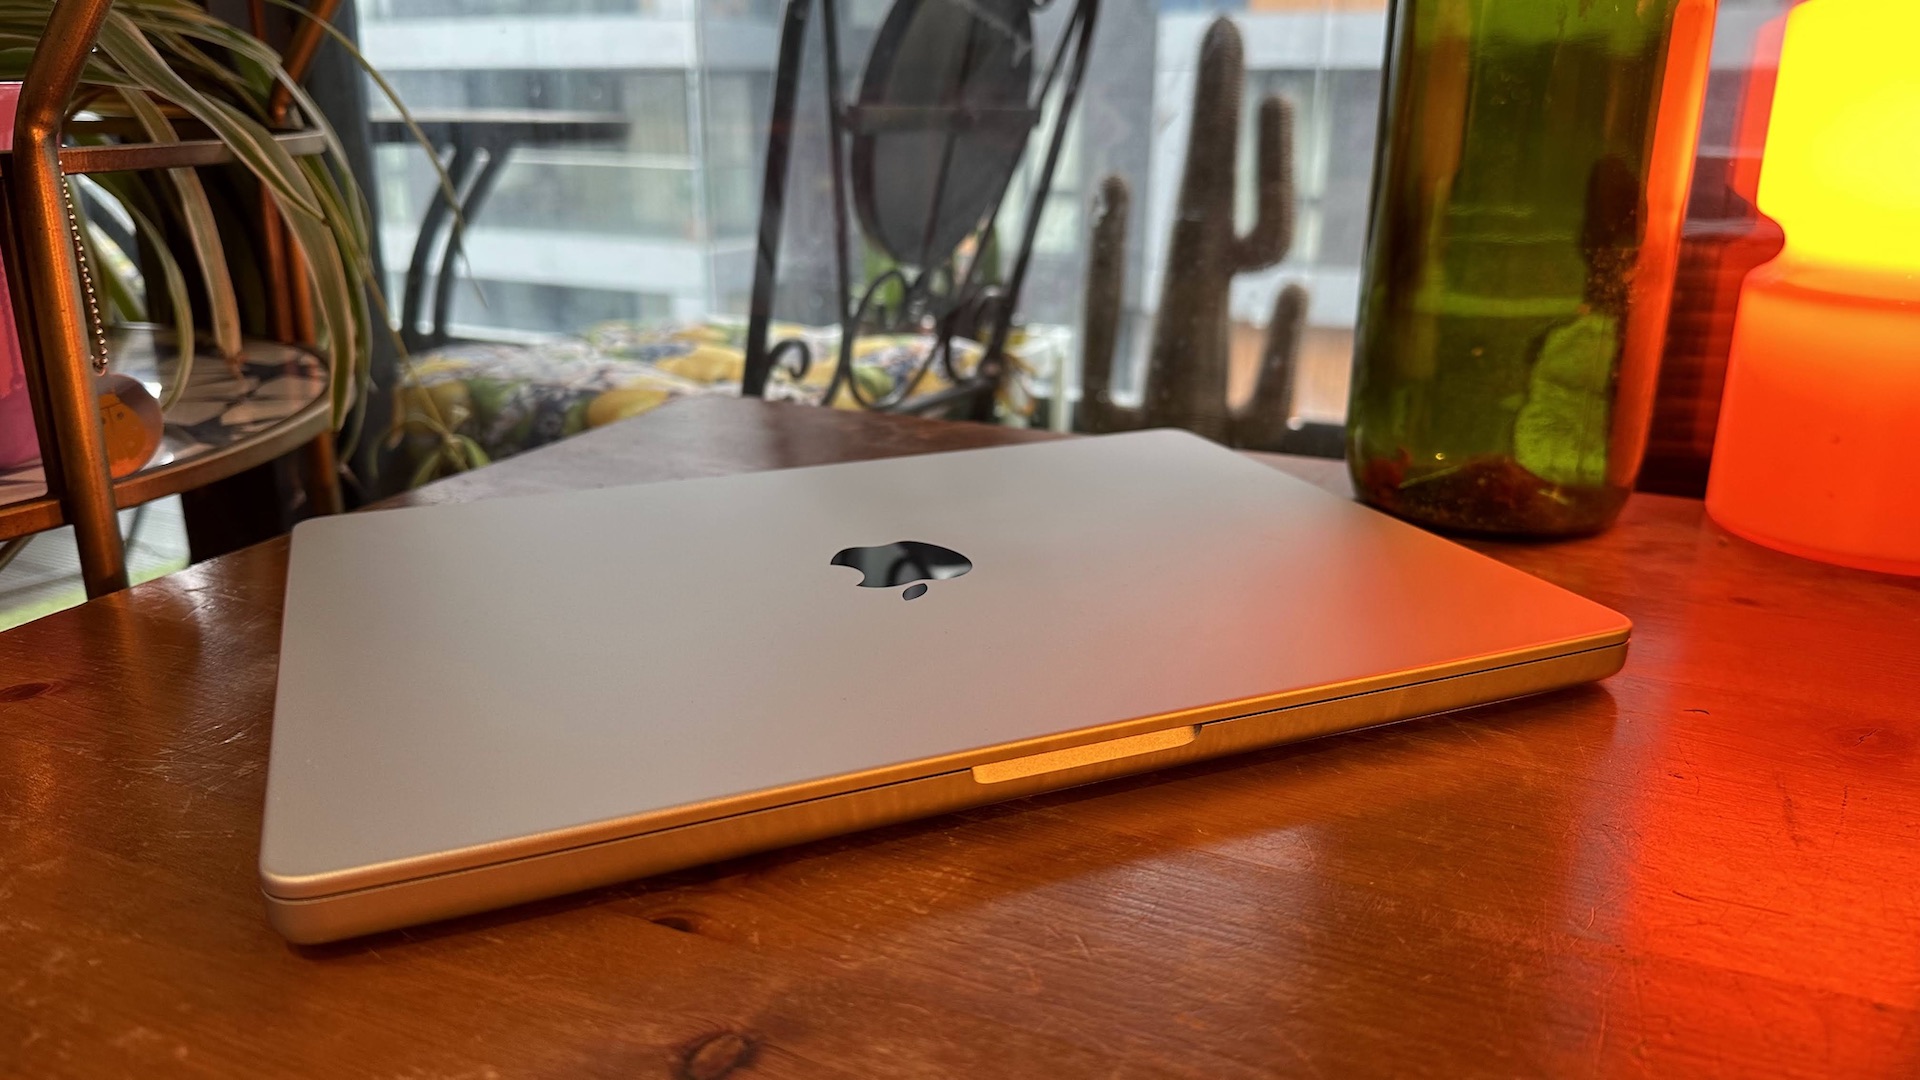
Things still not running smoothly on your Mac? As a last resort, we’d suggest resetting the PRAM. Resetting the PRAM is one of those mysterious things that your IT help desk at work is going to recommend you do when they have no idea what the problem is, and they’d quite like you to go away quickly. It might sound as useful as praying to the gods of IT to fix your Mac, but it actually resets some of the deep, deep settings inside your Mac in one easy step that doesn’t take too long and might just fix whatever problem you’re having.
PRAM stands for Parameter Random Access Memory, and stores key system preferences like time and date, volume, and startup disk selection (that’s one reason why it’s worth resetting the PRAM if your Mac won’t boot up, for instance). PRAM is non-volatile, so it doesn’t get forgotten whenever you turn off your computer. To reset it simply shut down your Mac, then restart it by pressing the power button. Then, quickly, hold down the [option] + [command] + [P] + [R] keys together. Keep holding them down until you hear the startup sound chime for the second time. Some newer Macs actually have NVRAM instead of PRAM, but the process for resetting it is identical.


