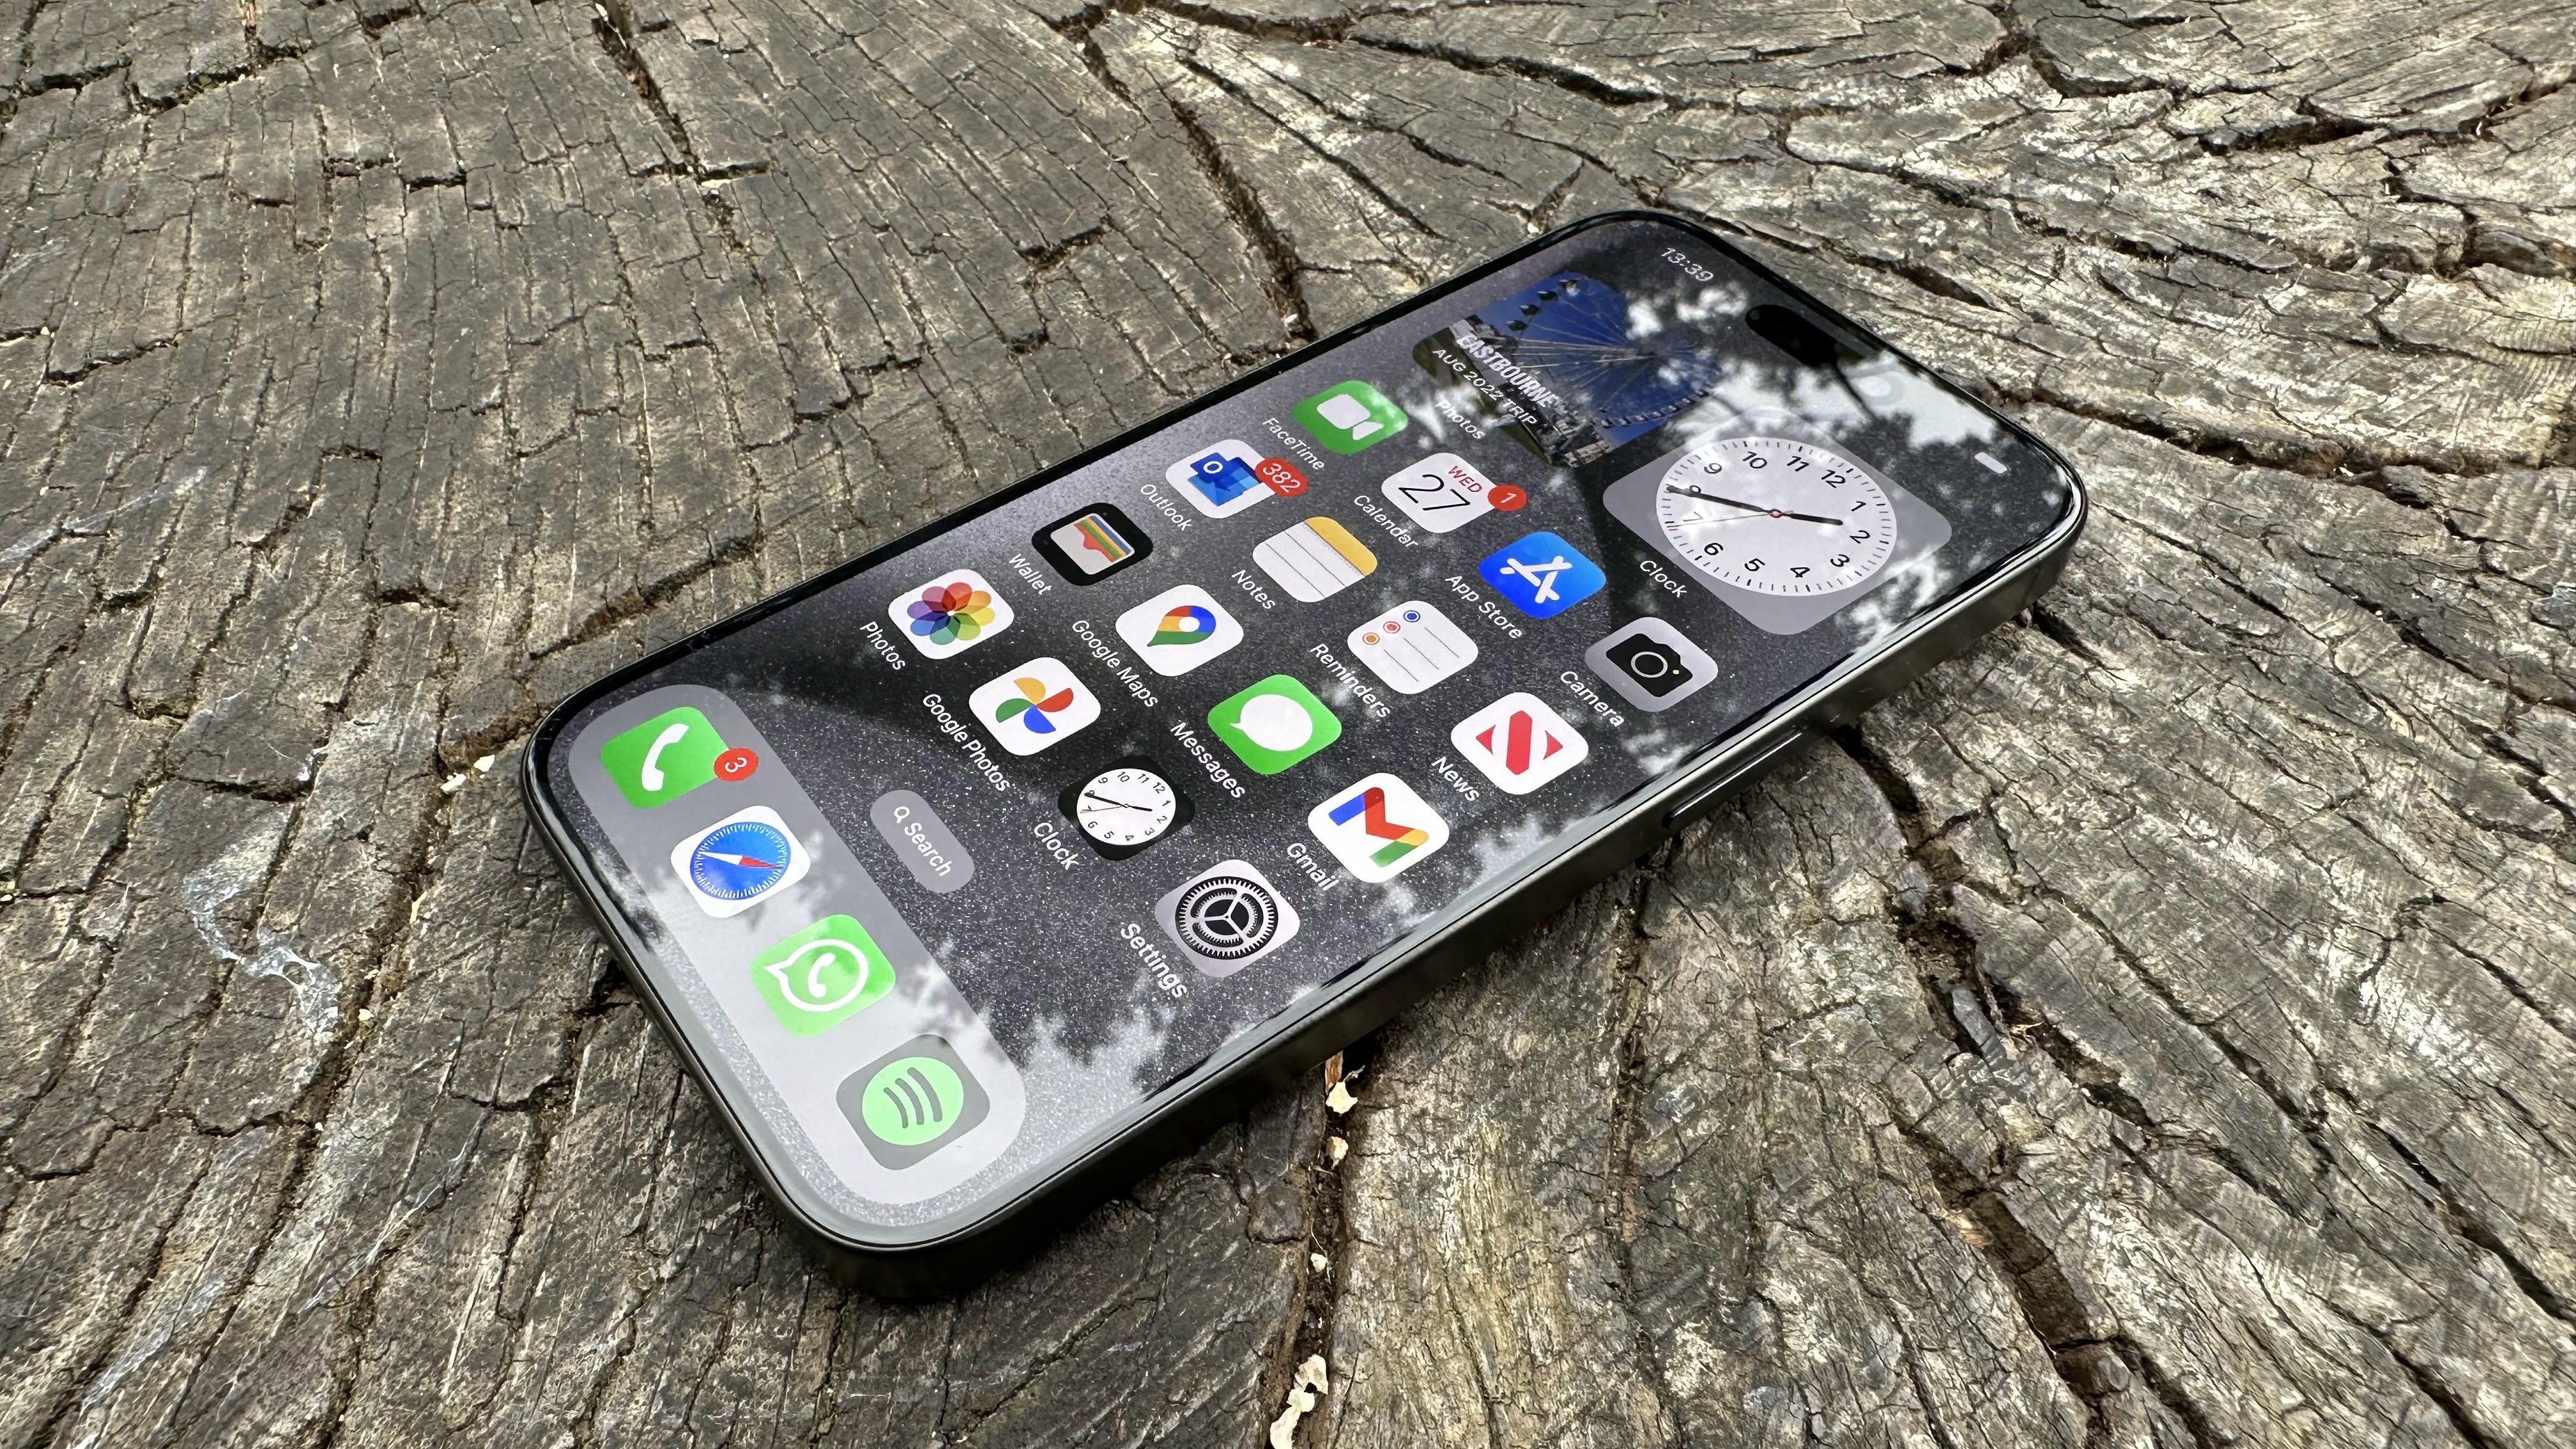
Congratulations! You and your iPhone have made it through your first Christmas together, or maybe it’s your first of many, but either way, 2023 has been a hell of a year, with highs, lows and everything in between. Now it’s time to take stock, take a long hard look in the mirror and face some hard truths: Your iPhone isn’t quite the sleek, factory-fresh, how-dare-you-even-look-at-me model that she used to be.
In fact, there might even be a bit of wear and tear in view around the corners, or (gasp!) a crack in the screen? Under the surface, things aren’t running as effortlessly and smoothly as they used to be either are they? We tend to install apps and take photos and videos, watch movies and listen to music and podcasts without a second thought about what it’s doing to the efficiency of our iPhones. The more you have downloaded and installed on your iPhone, the more it can feel like it needs a bit of a detox, so let’s give our slab of Apple wonder that new lease of life it so desperately needs with these 10 tips for you to try over the holiday season.
1. Get to know iPhone Storage
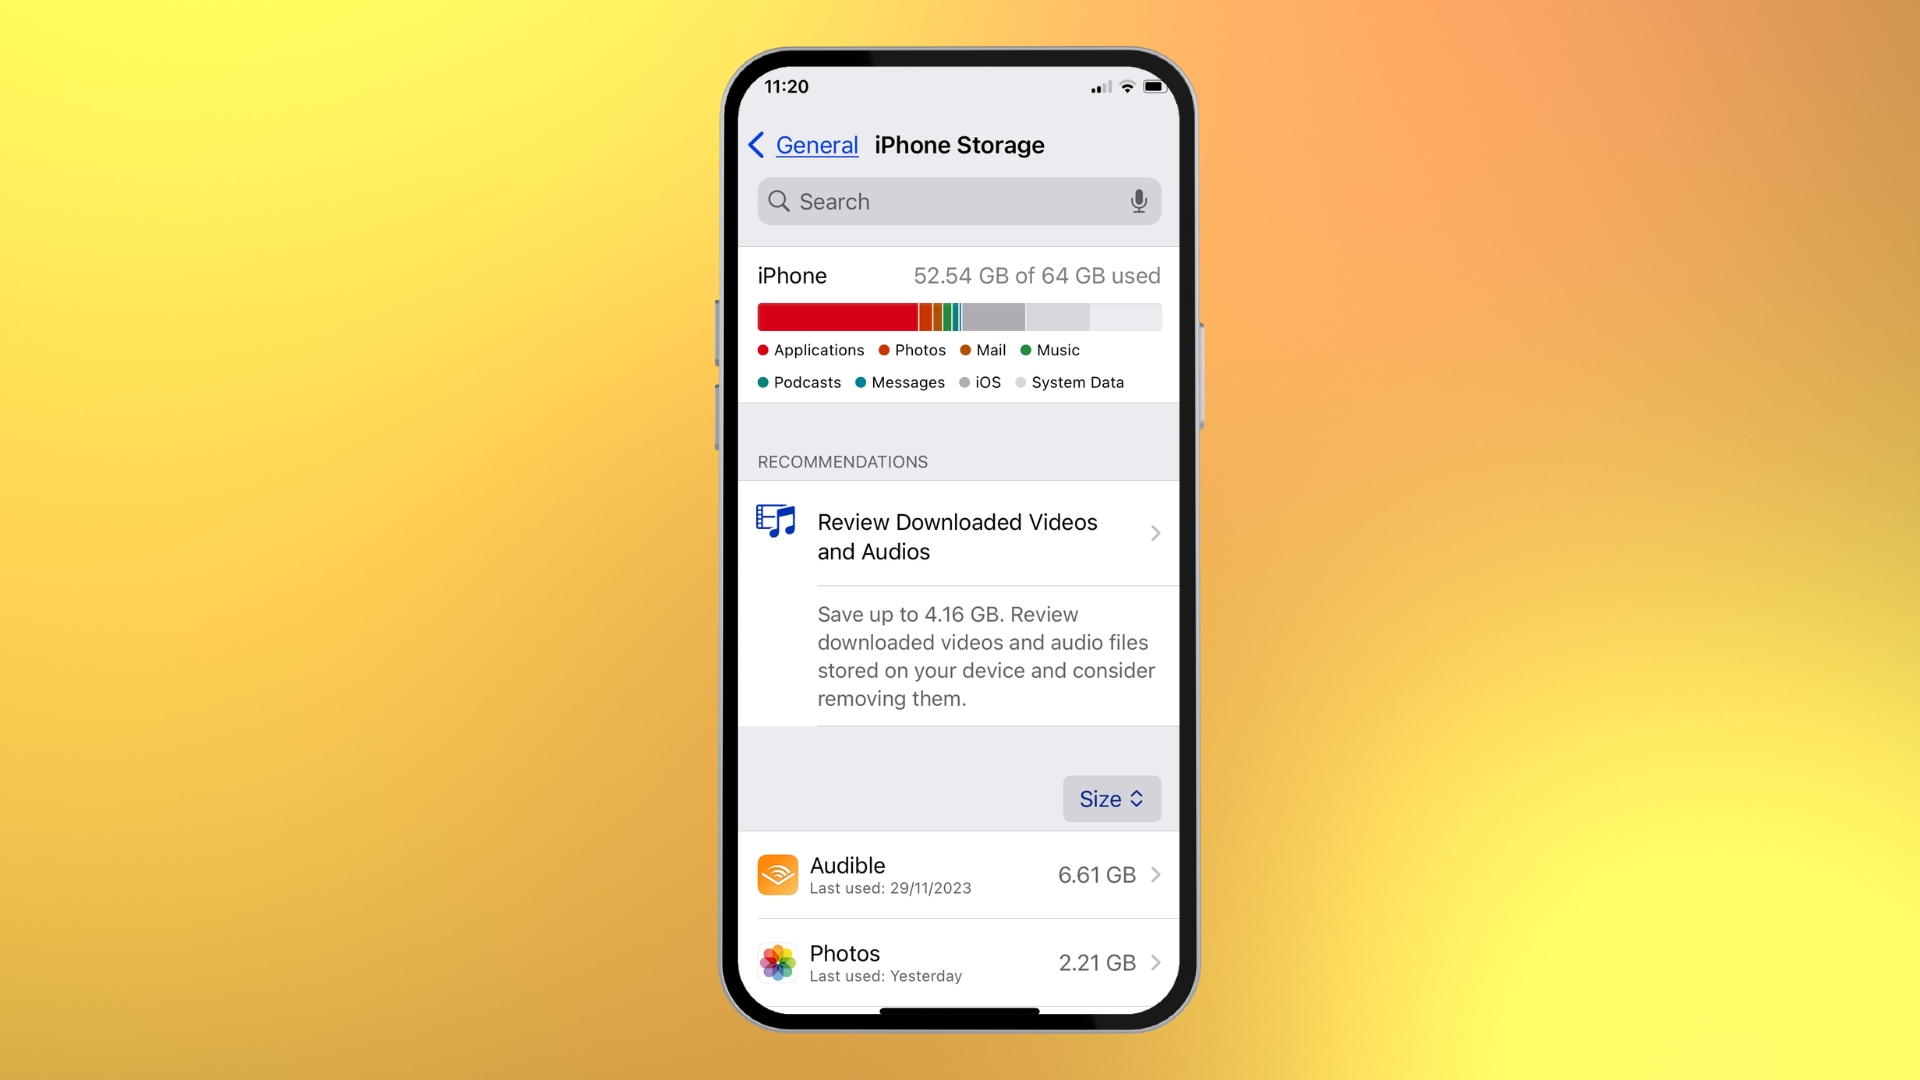
Before you run out of space on your iPhone (and it will happen at some point) you would be better off taking this time over the holidays to do a bit of housekeeping. Let’s start with getting familiar with your new best friend - the iPhone Storage page in Settings. It’s slightly hidden away, but you’ll find it in Settings > General > iPhone Storage. It contains a bar graph of how much space is being used on your device, showing you at a glance where your valuable memory is going.
Beneath the bar graph you’ll see a Recommendations section that gives you some easy access to what you could remove - usually these are videos and apps you’ve downloaded. For me, these are mainly audiobooks from Audible. Since these can be downloaded again if needed, removing them is a no-brainer. It used to be all those photos and videos I took that were the main culprit for taking up space, but these days I find that apps are giving them a run for their money. Below the recommendations section is a list of each app, and how much space it is using. Scroll through it at your leisure and delete any app you don’t actually use, or see the next tip for a better idea...
2. Offload unused apps
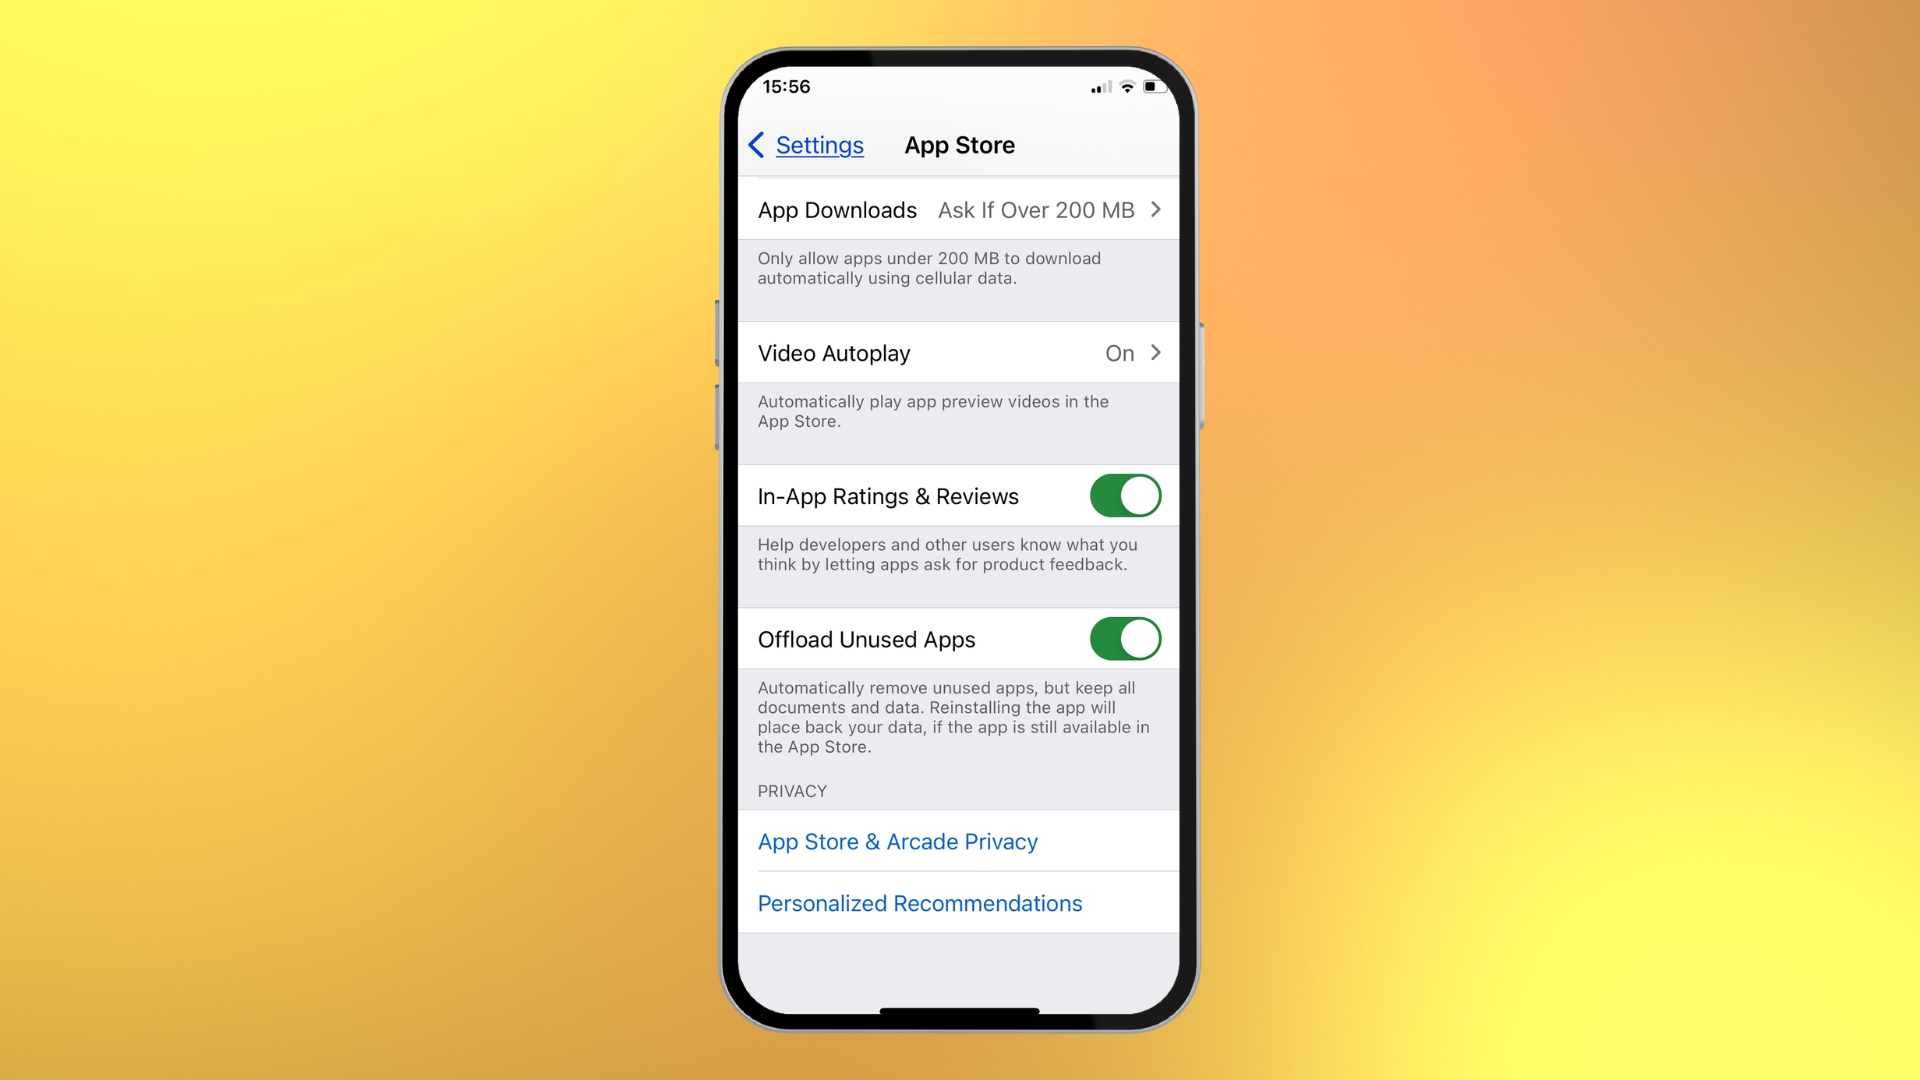
The ability to offload apps was added to iOS way back in iOS 11. It’s a sort of halfway house between keeping and deleting an app. When you offload an app you remove it from your phone but you keep all the data and settings, so you can pick it up right where you left off should you want to reinstall it.
It’s a safer way of getting rid of apps, just in case you need them again in the future. You can go through each app in the iPhone Storage section (see tip 1) and offload it manually, if you like, or you can turn on a setting to automatically offload any app you haven’t used for 12 days. To do this go to Settings > App Store and turn on Offload Unused Apps. 12 days might not seem very long, but since it only takes a few seconds to reinstall most apps, it’s a great way to keep your iPhone clutter free.
3. Install the updates
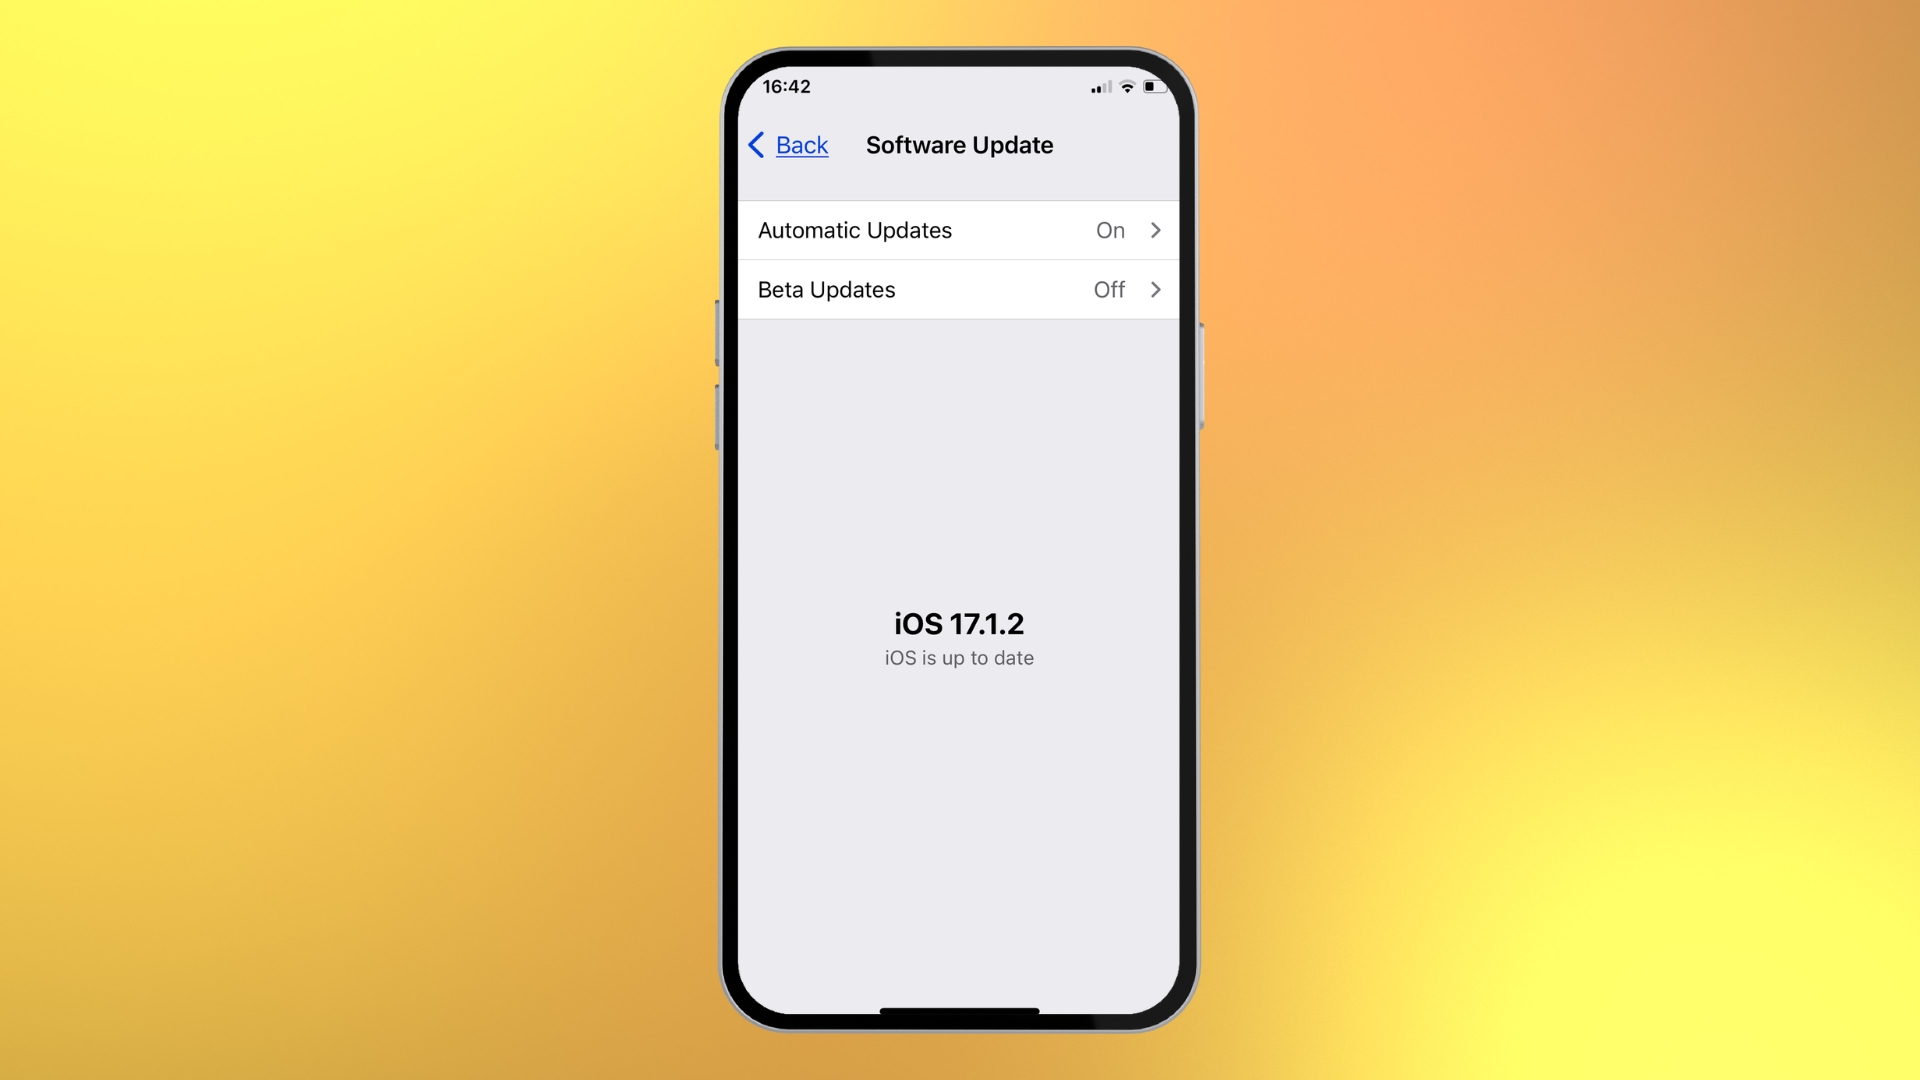
We all know that we should always install the latest updates to iOS from Apple, because it keeps your security up to date, but we tend to put it off, because, well, it’s a hassle, isn’t it? That time over the holidays is the perfect moment to install those updates you’ve been putting off. You might even have automatic updates turned on, but often these are scheduled for night time and an update won’t install overnight unless you have your iPhone charging, so we can miss them. Head over to Settings > General > Software Update and see if there’s an update waiting for you. If there is, install it.
4. Find your iPhone faster
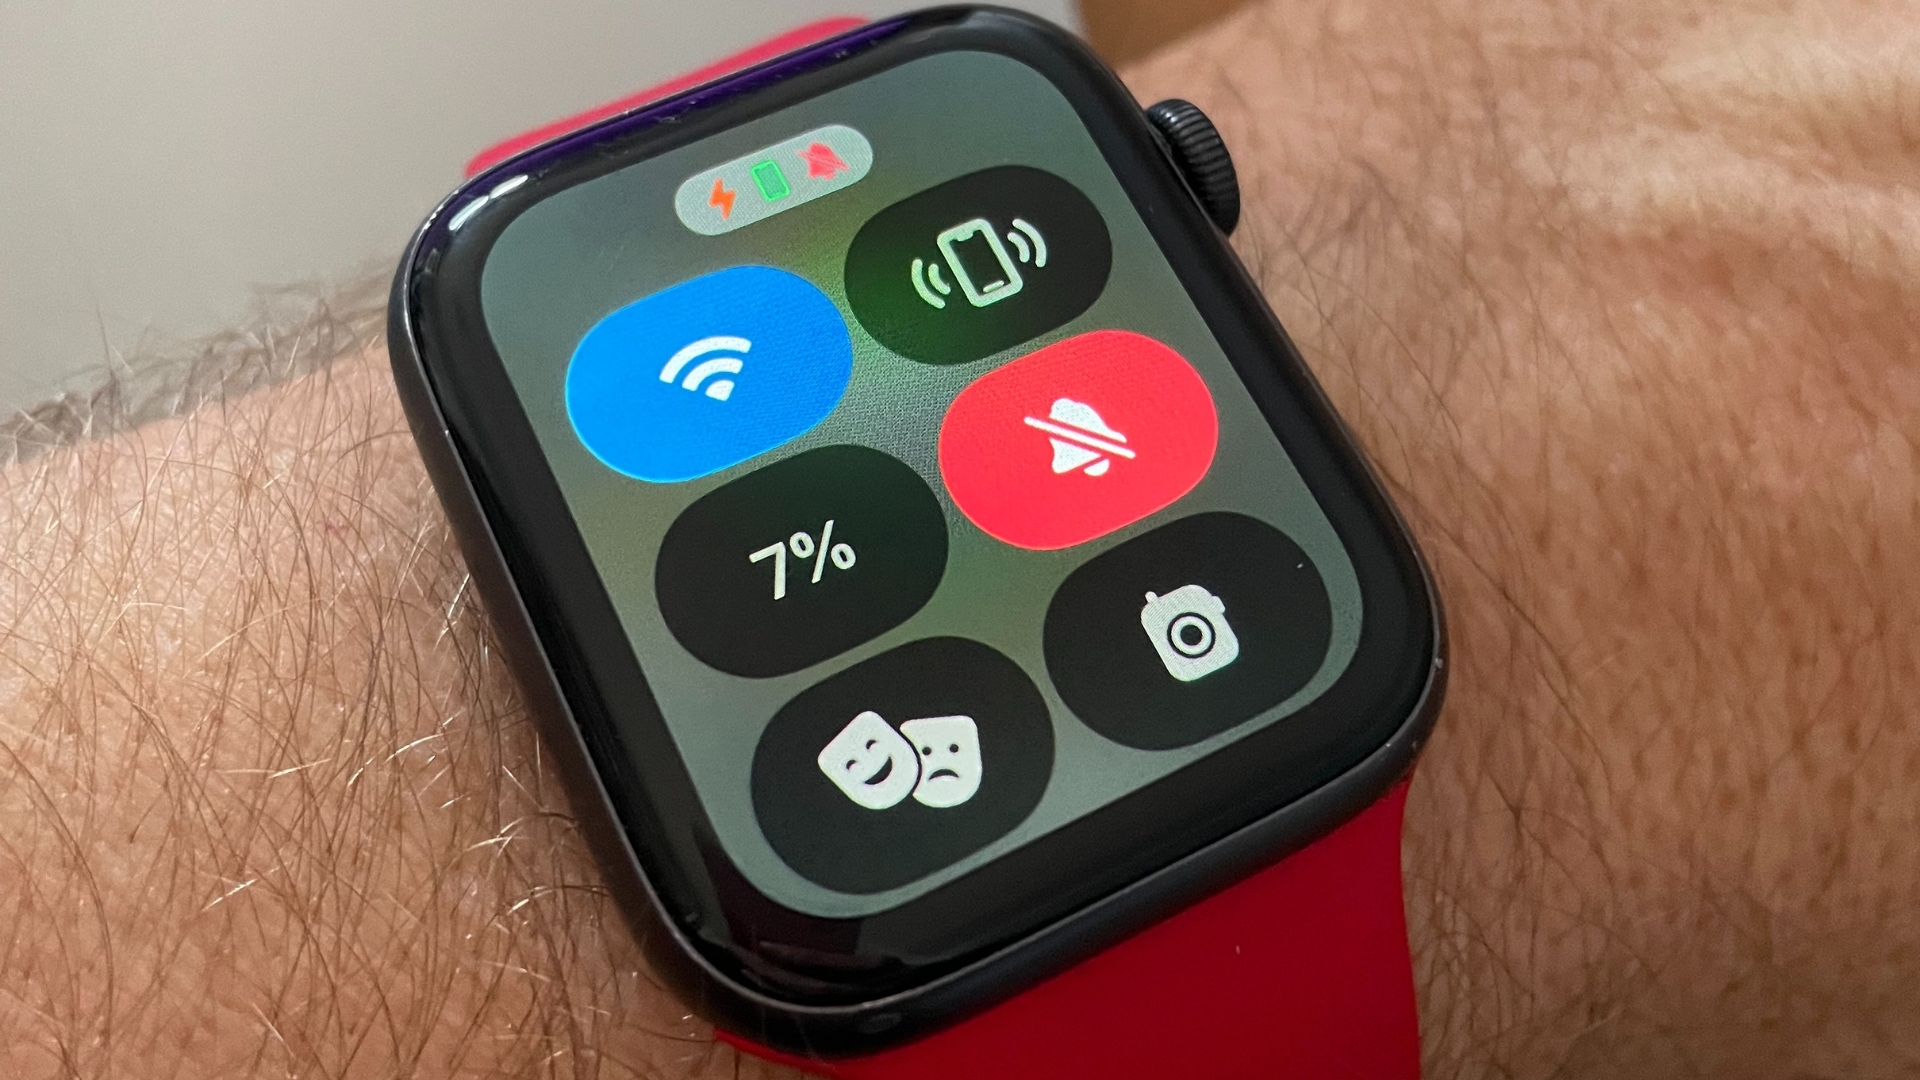
Here’s a great little productivity tip for Apple Watch owners who (like me) keep losing their iPhone. Losing your iPhone is one of the most frustrating things ever. It’s often just down the side of the sofa, but which sofa, and in which room? Most people are aware of the built-in iPhone app Find My, which, so long as you’ve set it up and turned on Location Sharing (Tap Settings then your name and Find My) can make your iPhone vibrate and play a sound so you can find it. However, you need to go to another device to run Find My, and if you own an Apple Watch there is an even quicker way to find your iPhone. Just press the side button on your Apple Watch and Control Centre pops up. The top right icon enables you to ping your personal iPhone, which makes it play a sound so you can easily locate it in your house. It’s so much quicker than Find My and a better way of discerning where you left your iPhone.
5. Tidy up your Home screen
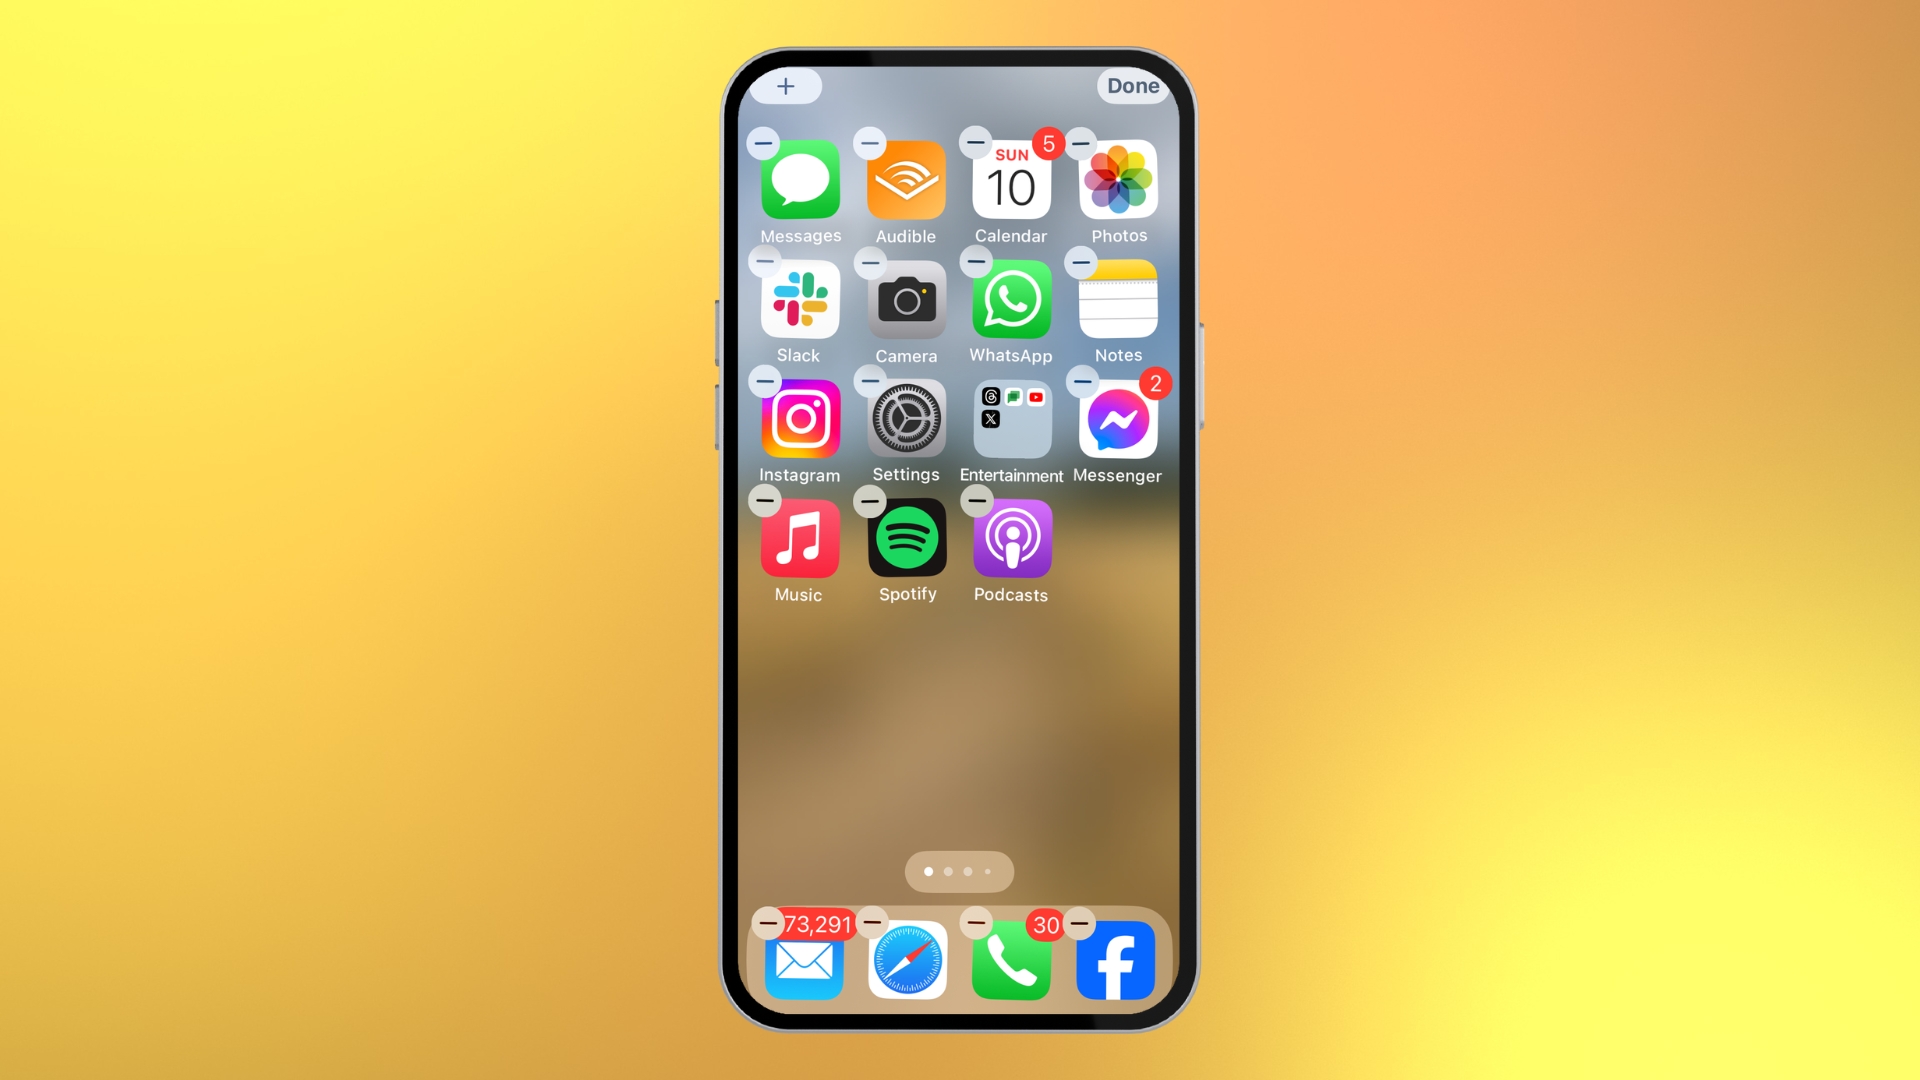
Do you find that there’s an app you use all the time that’s way back on page 2 or 3 of your iPhone Home screen? Using your downtime over the holiday season would be a good opportunity to finally organise your Home screen, so that the apps you use most often are on the first page of your Home screen. And don’t forget that menu bar at the bottom of the Home screen - the hallowed ground here has space for four icons and you don’t have to accept the ones Apple puts there by default.
To move things around just tap and hold on any icon you can see on screen. All the icons will start to jiggle, then you can move them around. Don’t forget that if you put them on top of each other they form folders, so you can group together similar apps. And yes, that screen shot is correct, I do have 73,291 unread messages. Please send help.
6. Stop using Apple Podcasts
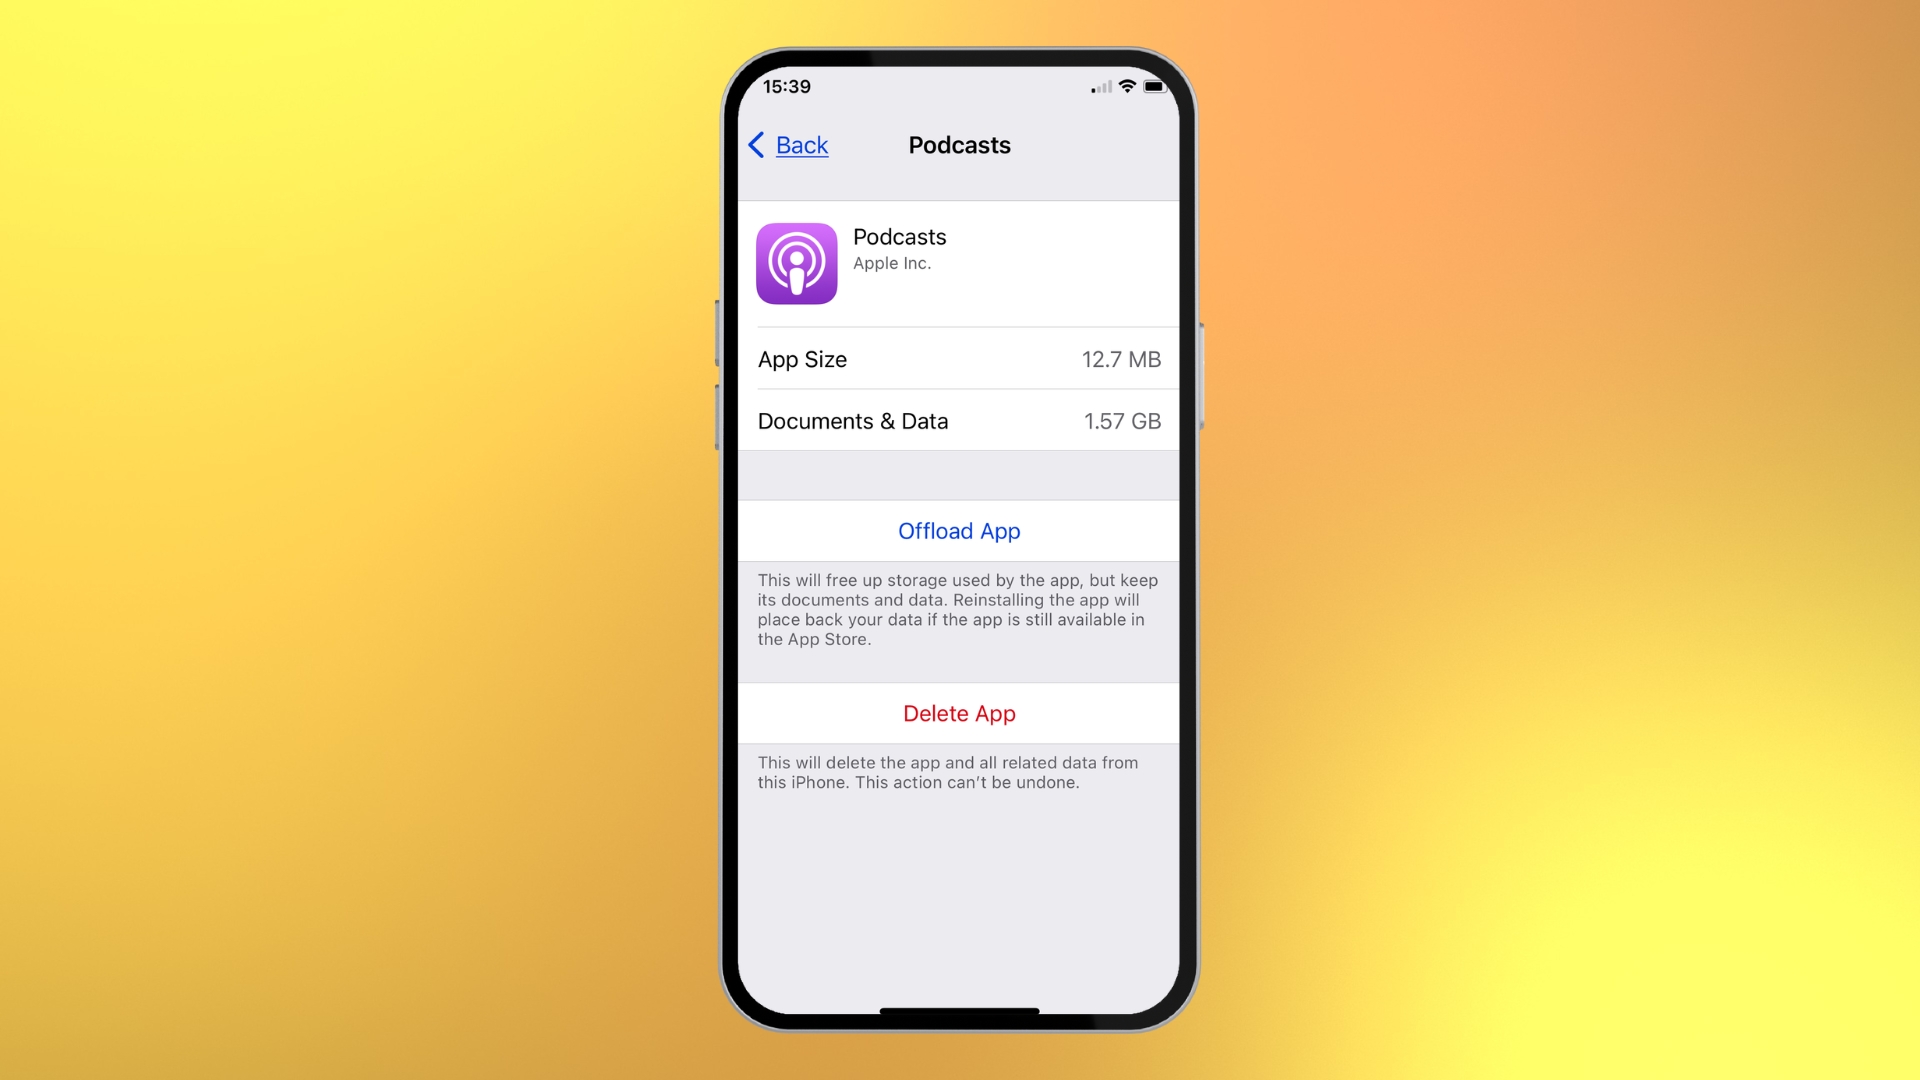
If you’re anything like me you listen to podcasts every day, particularly The iMore Show. The particular podcast app you prefer is definitely a matter of personal preference. However, if you're using the Podcasts app from Apple simply because it was installed on your iPhone by default, then you should check out the alternatives for one simple reason: Podcasts is a bit of a space hog.
Unless you need to listen to podcasts on a hike in the wilderness, well away from data signal, we’d recommend streaming podcasts rather than downloading them anyway since the amount of space they occupy builds up really quickly, but even with no podcasts downloaded, Apple’s Podcasts seems to want to occupy 1.5+GB of my iPhone storage whereas revivals Overcast and Spotify use much less space in comparison. Why not try them out?
7. Turn off Live Photos
Here’s another secret space hog on your phone - Live Photos. With a Live Photo your iPhone records what happens 1.5 seconds before and after you take your photo as a video. It’s so you can pick the perfect shot from that timespan and avoid things like people shutting their eyes at the key moments. That’s a great idea in theory, but it makes each of your photos take up to a whopping 7MB of space on your iPhone, which soon adds up. So, if you turn them off you’re going to save a lot of space over the course of a year.
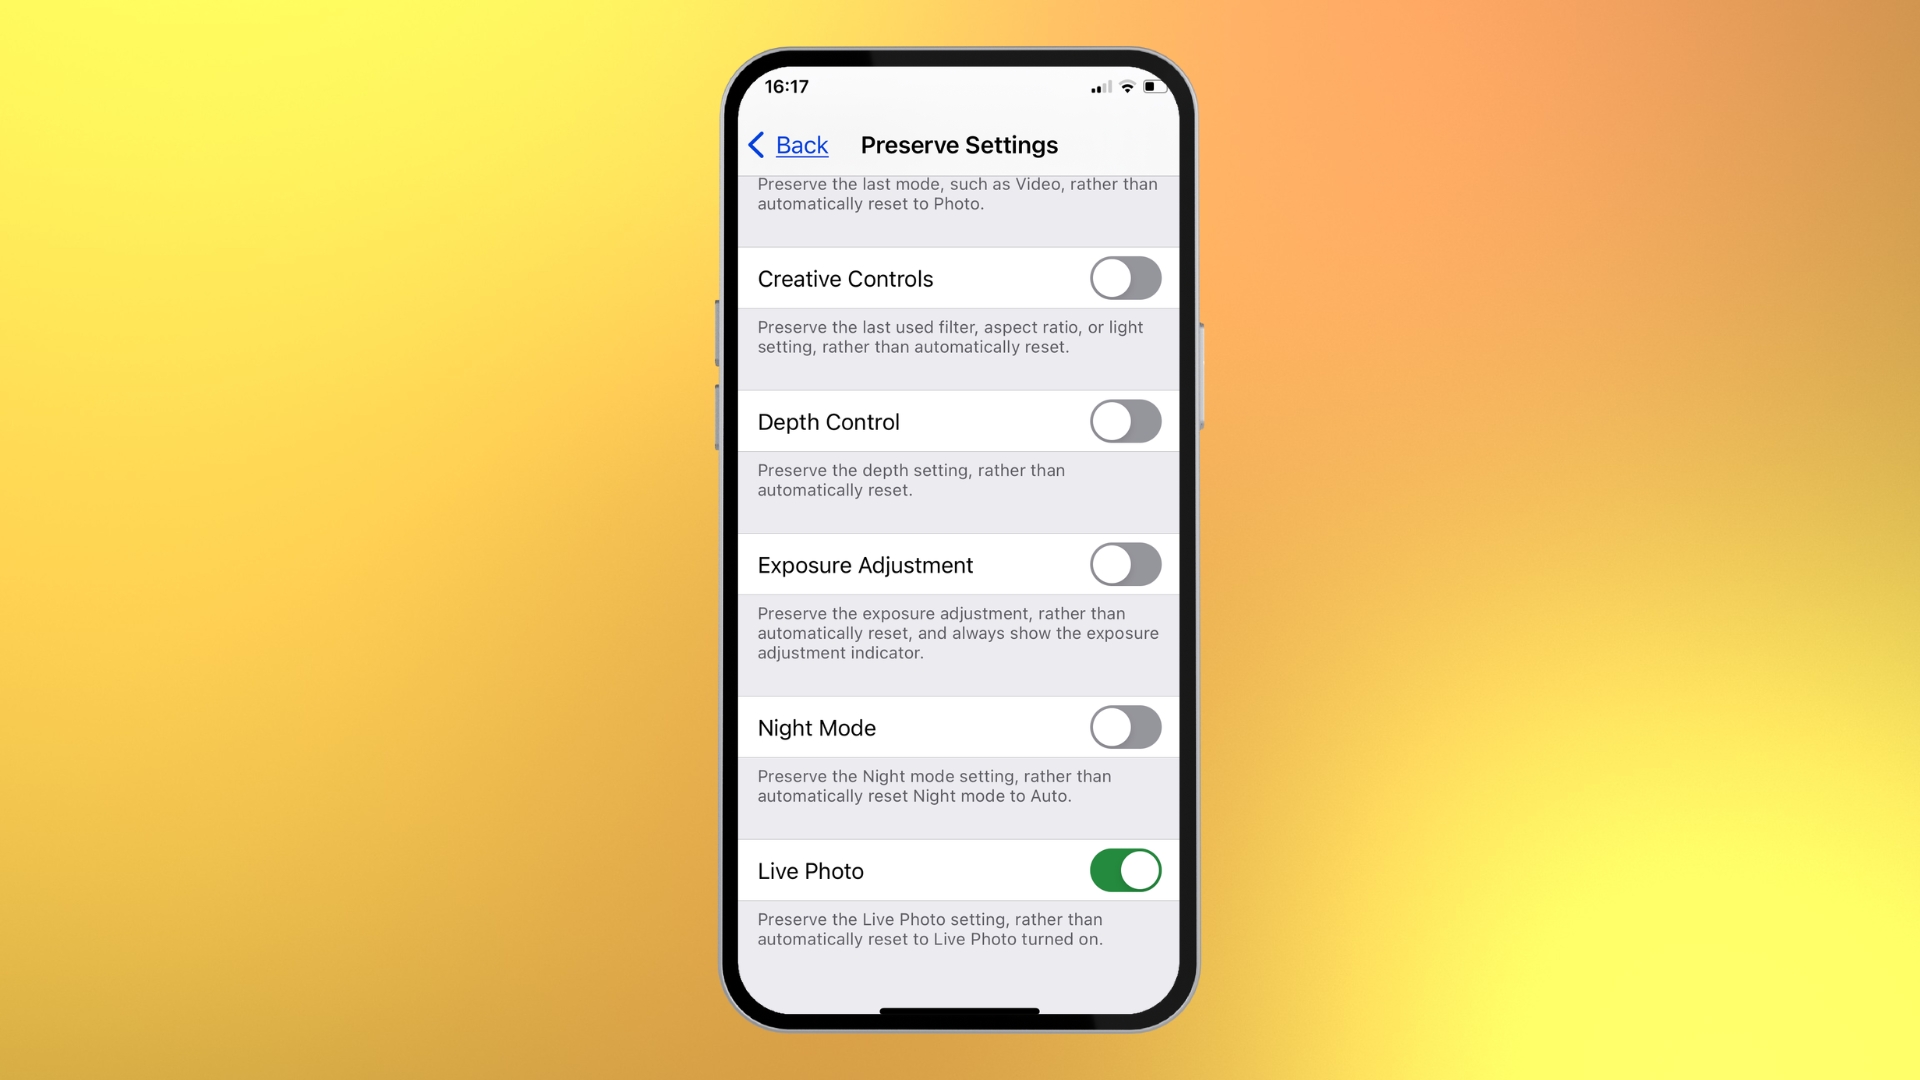
Live Photos are turned on by default. If you go to your Camera app now and select PHOTO look at the top right corner of the screen and if you see a round Live Photos button (it contains three concentric circles), then you have them turned on. Just tap the button to turn Live Photos off (the icon becomes struck-through). If you find that the Live Photo settings keep turning themselves back on then go to Settings > Camera > Preserve Settings and make sure Live Photo is turned on.
8. Customize Control Centre
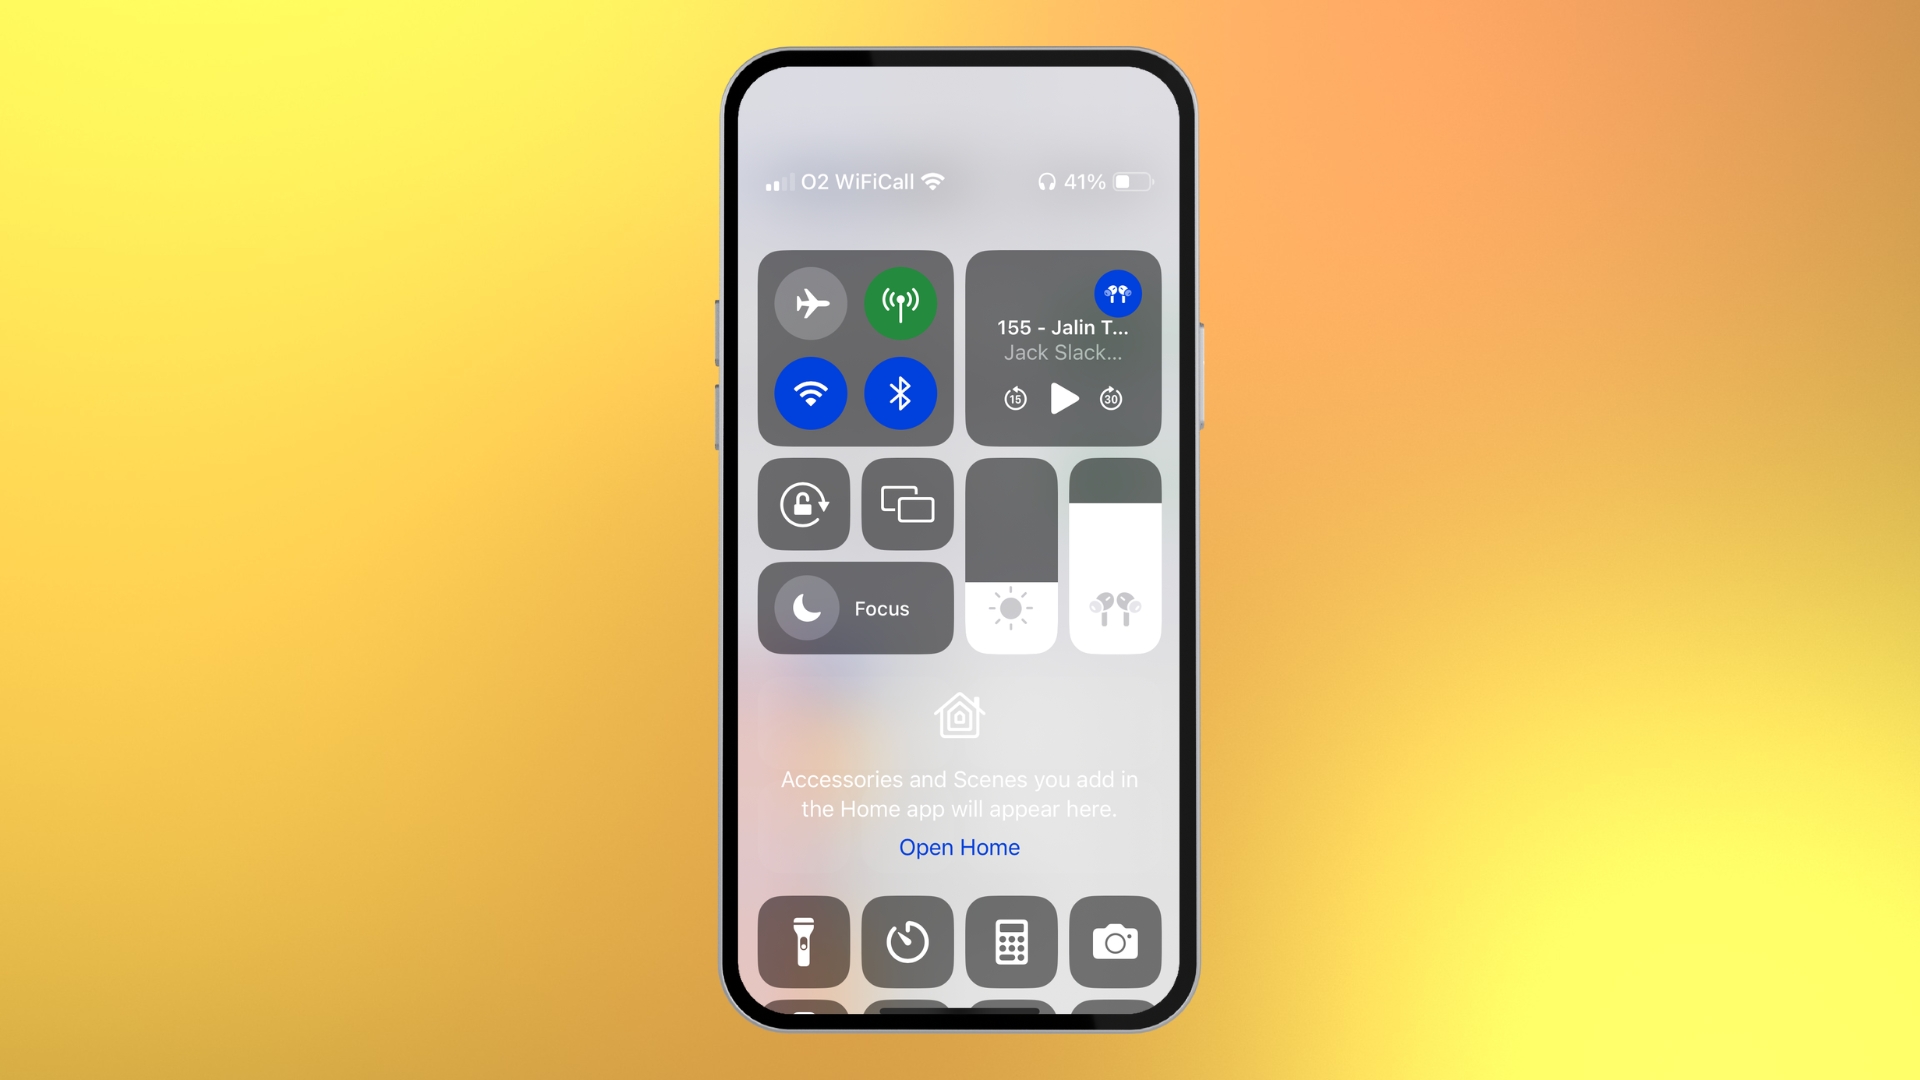
Control Center is one of the most underused parts of iOS, but it can be a real game changer if you learn how to harness its power because it can be a very fast way of getting straight to the settings you use most often. The way you access Control Center changed after iPhone X - before that you swiped up from the bottom of the screen, but if you’ve got an iPhone X or later then you need to swipe down from the top-right corner of the screen. To customize the Control Center go to Settings > Control Center.
The complete list of apps and settings you can add to Control Center is impressive, and we bet it will save you a lot of time if used wisely. For instance, there’s a QR code scanner, quick notes and Voice Memos. Don’t forget that pressing and holding on an app in Control Center often gives you more options. You’ll notice this particularly with the Camera app.
9. Restart problem apps
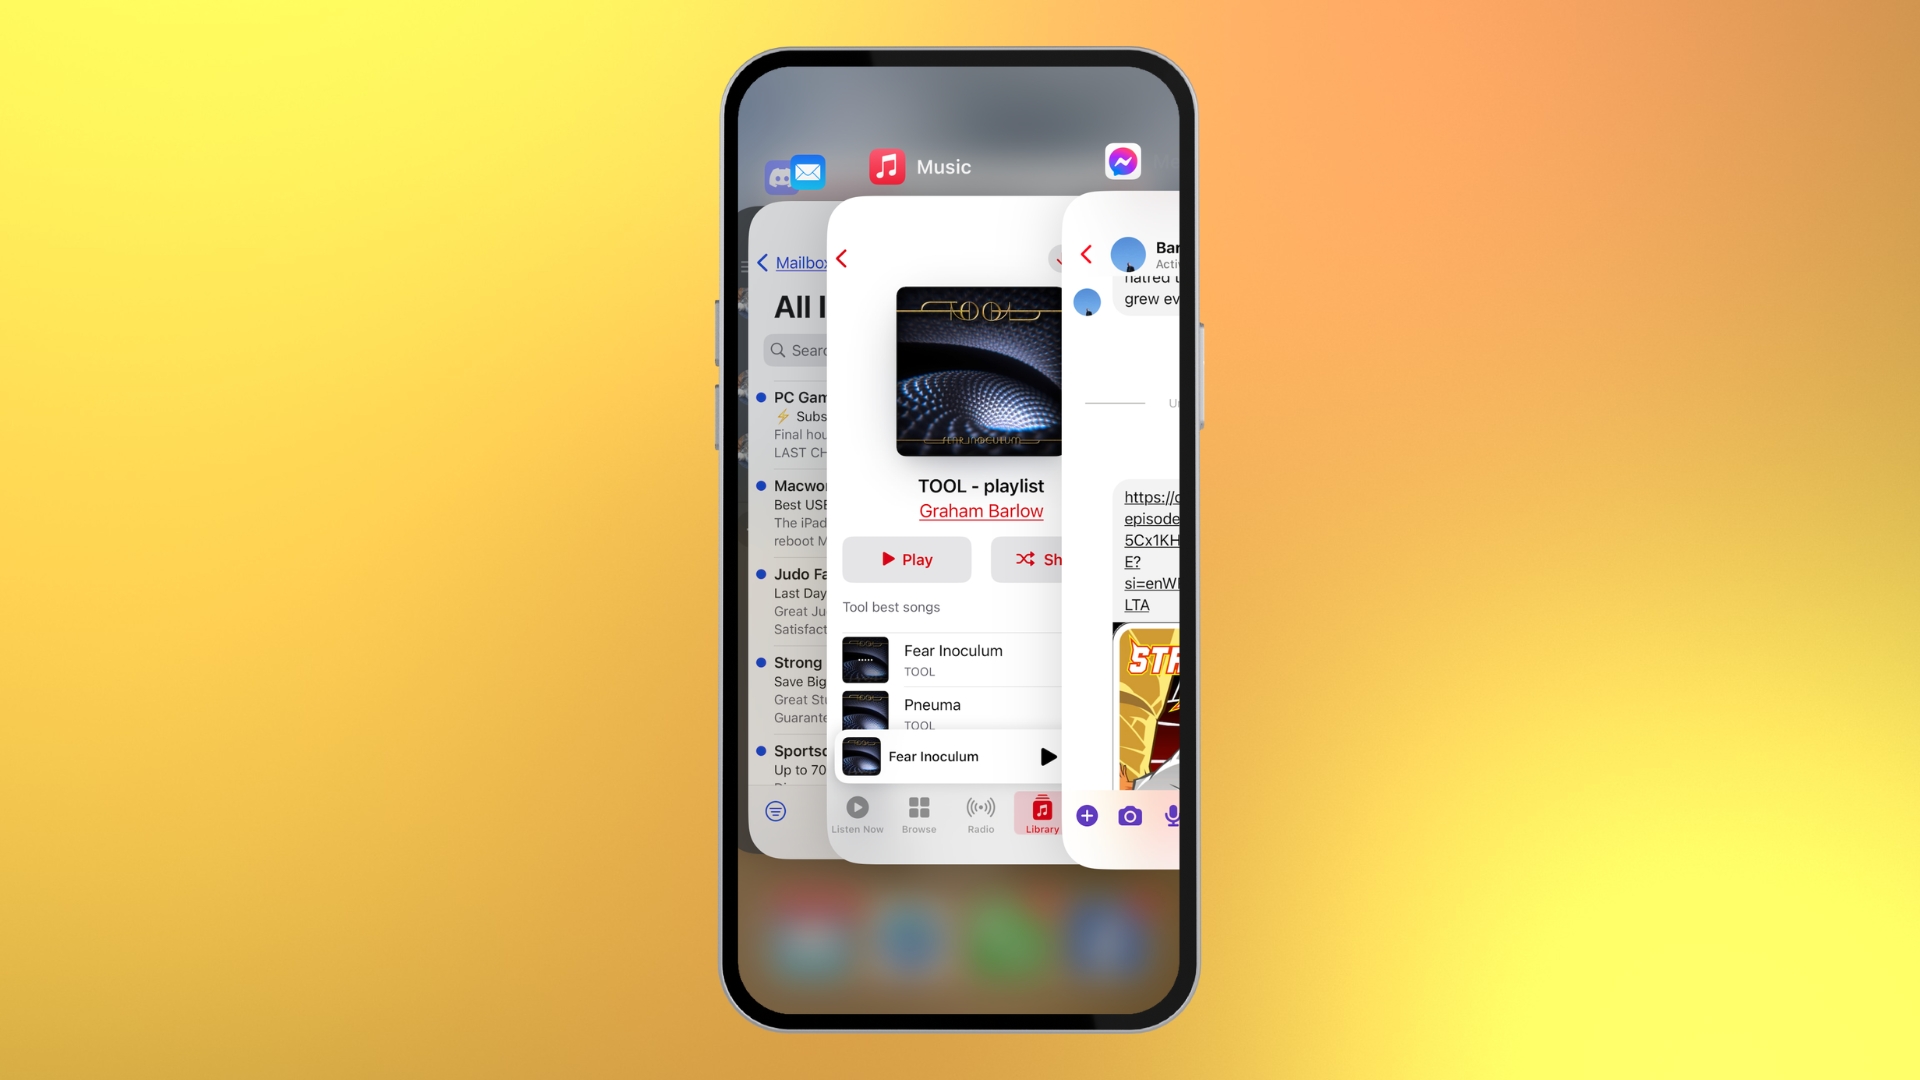
The idea that closing all the running apps on your iPhone will speed it up is a bit of a myth. It won’t. The collection of apps you see when you swipe up from the bottom of your iPhone screen aren’t really running in the background at all. Instead they’re frozen, much like that famous mosquito from Jurassic Park, waiting for you to notice them again, at which point they will come back to life and destroy the world, or at least perform some sort of useful function.
However, if you’re finding an app has stopped functioning properly, then locating it here and flicking it up and off the top of the screen will close the app’s current session, so that the next time you open it you get a fresh start, which quite often fixes whatever problem you were having with it. It’s easy to do, so it’s worth a try next time you’re having problems with an app.
10. Restart your iPhone
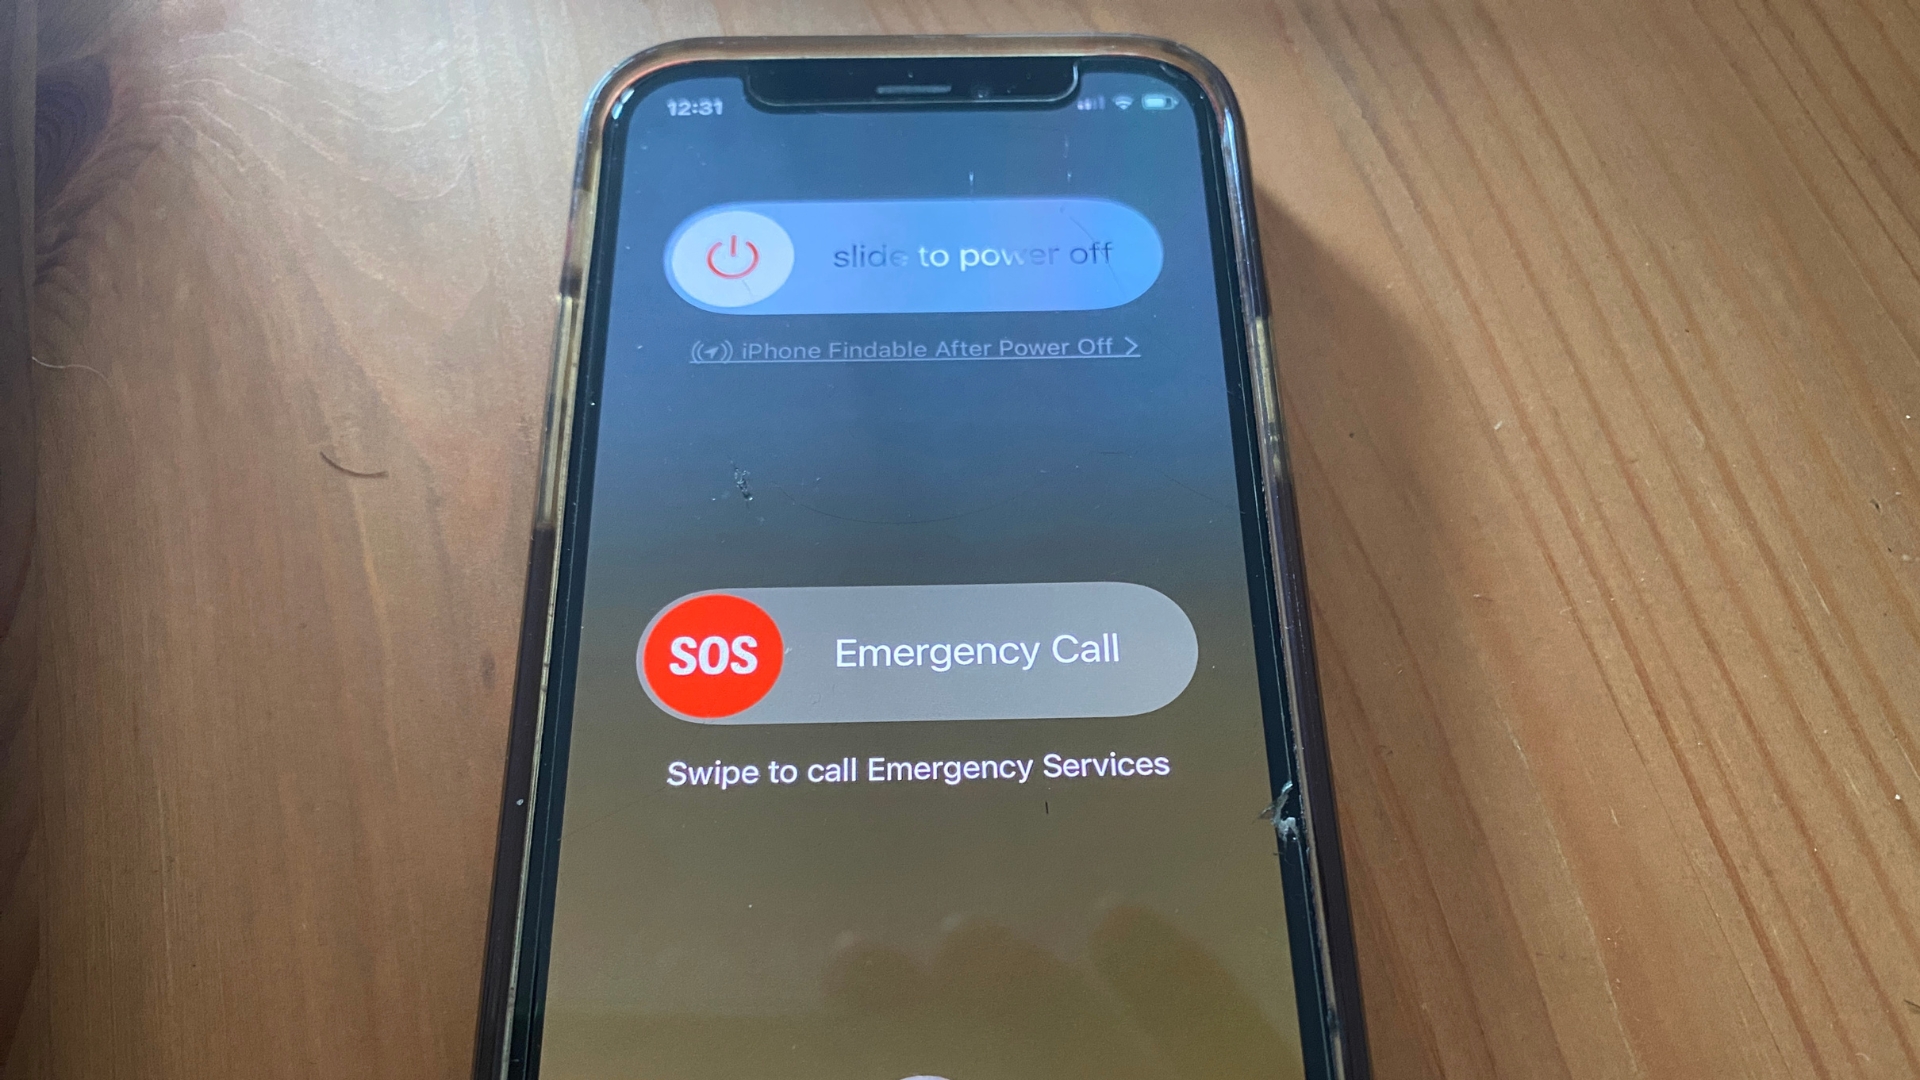
We saved the big one for last. We hate to say it, but sometimes your iPhone will go wrong. Maybe it will refuse to connect to cellular data, or the Wi-Fi will stop working. In these sorts of situations often the only thing that will fix it is a hard restart. We don’t recommend doing it often, but in certain situations it’s the only thing you can do to give your iPhone a new lease of life. Press and hold the side button and the upward volume button together for a few seconds and you’ll see a screen that gives you the option to ‘slide to power off’. If you take this option your iPhone will shut down completely. You then have to repeat the same combination of button presses to get it to restart.
The whole process is slow and could take a minute or so to perform, so only do this if you have no other choice. After you’ve restarted however you’ll find that whatever had stopped working before now works like a dream and your iPhone feels as good as new.


